Underwater adventure photography opens up a vibrant world filled with stunning visuals and unique experiences. If you’re a beginner, don’t worry! I’m here to help you dive in without breaking the bank. Read Interesting article: Essential Tips for Budget Underwater Adventure Photography
Understanding Underwater Adventure Photography
What is Underwater Photography?
Underwater photography is an exciting form of photography that involves capturing images beneath the surface of the water. Whether you’re in a pool, ocean, or a serene lake, the underwater world is full of vibrant life and beautiful scenery that simply cannot be found on land. I remember the first time I submerged my camera, the thrill of discovering a whole new environment was exhilarating. From colorful coral reefs to schools of fish, the underwater realm has its own unique beauty waiting to be captured. To further enhance your experience, check out Your Guide to Underwater Adventure Photography Locations.
Different Types of Underwater Photography
When it comes to underwater photography, there are various styles to explore. Here are a few that I find especially captivating:
- Marine Life Photography: This focuses on capturing the beauty of underwater creatures. I’ve spent hours watching fish dart around, and each photo tells a story of their underwater world.
- Underwater Landscape Photography: This style highlights the scenery, like reefs and underwater caves. The play of light and shadow, especially with sunlight filtering through water, creates stunning compositions.
- Wreck Photography: Many divers explore and photograph sunken ships or planes. I’ve found that these sites are often teeming with marine life, providing an eerie yet fascinating backdrop.
- Freediving and Snorkeling Photography: Perfect for those who want to capture the essence of the ocean without heavy gear. I started with snorkeling, and it allowed me to get comfortable in the water while snapping some beautiful shots.
Benefits of Underwater Photography
There are so many reasons to try underwater photography, and I can personally vouch for the benefits:
- Connection with Nature: Being underwater fosters a unique connection with marine life. It’s a peaceful escape from everyday life, allowing you to appreciate the beauty of nature.
- Creative Expression: Every underwater shot can be different, encouraging creativity. I often find myself experimenting with angles and lighting, which makes every dive an adventure.
- Encouragement for Conservation: Capturing the beauty of the underwater world can inspire others to protect it. I’ve seen my photos spark conversations about marine conservation, which is vital in today’s world.
- Physical Benefits: Diving and swimming provide an excellent workout. I’ve found that regularly participating in underwater photography keeps me active and healthy.
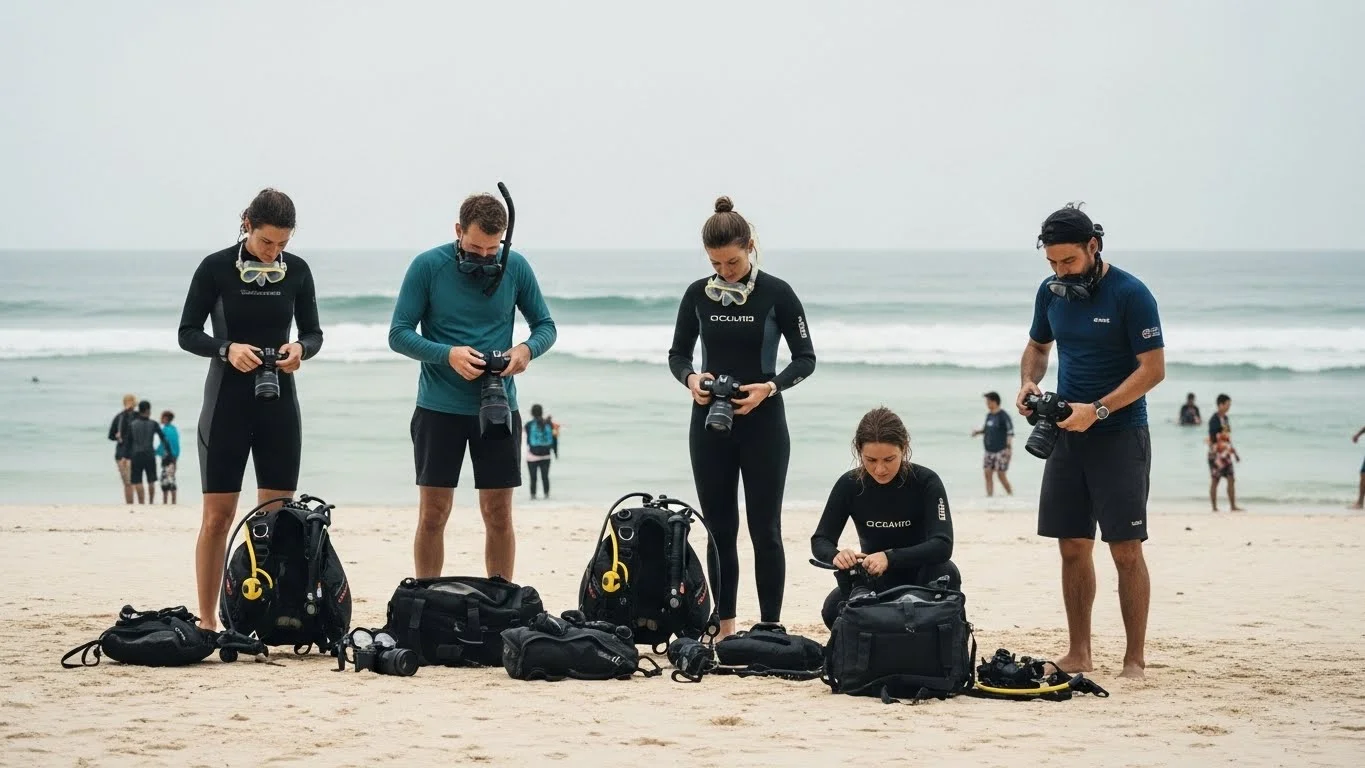
Essential Gear for Beginners
Underwater Cameras
When I first started underwater photography, I quickly learned that my regular camera just wouldn’t cut it. Investing in a good underwater camera is crucial. There are many affordable options that provide excellent quality. I recommend looking for cameras that are waterproof, have a good frame rate, and can handle low-light conditions effectively.
Waterproof Housing
If you already have a camera, consider buying waterproof housing. It allows you to take your existing gear underwater without risking damage. I remember the excitement of finding a compatible housing for my camera; it opened up so many new possibilities. Just make sure to check the depth rating to ensure it meets your diving needs.
Underwater Lenses
Having the right lens can significantly enhance your underwater photography experience. Wide-angle lenses are fantastic for capturing expansive underwater landscapes and schools of fish. Macro lenses are perfect for photographing small creatures and intricate details like coral or textures on fish. I’ve found that switching between lenses can bring a fresh perspective to my underwater shots.
Lighting Equipment
Underwater lighting can be tricky, but it’s essential for taking vibrant and colorful photos. Natural light can only penetrate water to a certain depth, so using external lights or strobes can make a big difference. I learned this the hard way after taking some dull photos without any extra light. Investing in a good lighting setup can elevate your images dramatically.
Stabilization Gear
Underwater currents and movements can make it hard to capture steady shots. Using a stabilizer or tripod can help keep your camera steady, ensuring clearer images. I initially struggled with blurriness in my photos, but once I started using stabilization gear, I noticed a significant improvement in my results.
Affordable Options for Underwater Photography Gear
Best Budget Underwater Cameras
When I began my journey into underwater photography, I quickly realized that I didn’t need to spend a fortune to get quality gear. There are plenty of budget-friendly underwater cameras that deliver fantastic results. For instance, I found the Olympus Tough TG-6 to be an excellent choice for beginners. It’s waterproof, durable, and packed with features like a fast autofocus and great macro capabilities. Another option is the Canon PowerShot D30, which is not only affordable but also offers good image quality in challenging underwater conditions. I remember being amazed at how well these cameras performed, even on a tight budget. If you’re looking for more insights, check out Capture Stunning Underwater Photos on a Budget Adventure.
Affordable Waterproof Housing Solutions
If you already own a camera and want to dive into underwater photography without breaking the bank, consider affordable waterproof housings. Brands like Sea Frogs and Meikon offer good-quality housing that won’t empty your wallet. I purchased a housing for my DSLR from Sea Frogs, and it fit perfectly while providing excellent protection. When shopping for waterproof housing, always check reviews and ensure it’s compatible with your camera model. I found that having the right housing transformed my photography experience, allowing me to use my trusted gear underwater.
Cost-Effective Underwater Lighting Options
Lighting can make or break underwater photos, but you don’t need to splurge to get great results. I started with simple, budget-friendly options like LED video lights. Brands like Neewer offer affordable underwater lights that provide excellent illumination without burning a hole in your pocket. I learned that the key is to experiment with the positioning of your light; sometimes just a slight adjustment can dramatically change the mood of a shot. If you’re on a tight budget, consider DIY solutions too, like using a flashlight with a diffusion filter, which can work wonders in dark conditions.
Inexpensive Accessories for Underwater Photography
Accessories can enhance your underwater photography without costing too much. For example, I invested in a simple floating strap to prevent my camera from sinking if I accidentally dropped it. It gave me peace of mind while I focused on capturing the underwater beauty around me. Additionally, consider getting a silicone sealant to maintain your gear and avoid leaks. I found that having a few extra batteries and memory cards handy was also essential; I didn’t want to miss any magical moments underwater because of a dead battery or full memory card.
Comparative Analysis of Popular Gear
Top Underwater Cameras Under $500
As I explored different underwater cameras, I often found myself drawn to options under $500 that performed well. For instance, the Fujifilm FinePix XP140 is a fantastic compact option that’s waterproof up to 82 feet, making it perfect for many diving adventures. I also discovered that the GoPro HERO9 Black is a popular choice, especially for those who enjoy action shots and video. It’s compact, versatile, and the image stabilization feature is a game changer for underwater shots. I loved how easy it was to carry around, and the quality of both photos and videos exceeded my expectations for the price point.
Comparison of Waterproof Housing Brands
Choosing the right waterproof housing can be overwhelming given the variety of brands available. I’ve compared several, and two brands that stood out to me were Aquatica and Ikelite. Aquatica housings tend to be robust and are often praised for their build quality and ease of use. On the other hand, Ikelite housings are typically more affordable and offer a great balance of performance and value. I remember the first time I used my Ikelite housing; it was easy to operate and allowed me to focus on capturing the moments rather than worrying about my gear.
Best Budget Lighting Kits
When it comes to lighting, there are several budget kits that impressed me. The YSD-2 underwater strobe light offers excellent performance for its price, providing enough power to illuminate even deeper dives. Another great option I found is the Underwater Kinetics Light Cannon, which is both effective and affordable. I learned that having at least one quality light source can make a significant difference in my photos, enhancing colors and details that might otherwise be lost in the water.
Getting Started with Underwater Photography
Basic Techniques for Beginners
When I first started out in underwater photography, I quickly realized that there are some basic techniques that can make a world of difference. One of the first things I learned was the importance of buoyancy control. It took me a bit of practice to get the hang of it, but mastering this skill can really help you maintain your position and avoid unwanted movement while shooting. I recommend using a buoyancy control device (BCD) to help manage your buoyancy, allowing you to focus on capturing stunning images rather than struggling to stay still.
Another technique I found invaluable was understanding how to compose my shots. I often think about the rule of thirds, where I mentally divide the frame into a grid, placing my subject at the intersections. This simple adjustment can create a more dynamic and balanced photo. I also learned to pay attention to the background; a clean, uncluttered background can make your subject pop. Sometimes, I would change my position slightly to avoid distractions that could take away from my main focus.
Lastly, don’t forget to experiment with angles! Shooting from above, below, or to the side can dramatically change the perspective of your images. I’ve found that getting low to the ground or even at eye level with your subject often results in more engaging and impactful photos.
Common Mistakes to Avoid
As I navigated the world of underwater photography, I made my share of mistakes. One of the biggest was not checking my gear before heading into the water. I learned the hard way that a small leak in my housing could ruin a dive and a day’s worth of potential photos. I recommend always doing a dry test before every dive to ensure everything is functioning correctly.
Another mistake I made was not paying attention to my settings. It can be easy to forget about adjusting white balance and ISO, especially in varying light conditions underwater. I found that using manual settings instead of automatic helped me control the exposure better. I also discovered that shooting in RAW format gives me more flexibility during editing, allowing me to recover details that might get lost in JPEG.
Lastly, I often rushed my shots, which led to blurry images. It’s easy to get excited and forget about stability. Taking a moment to steady my breathing and focus my camera helped me capture clearer photos. I learned that patience is key, and sometimes waiting for the right moment can result in breathtaking shots.
Tips for Shooting in Different Water Conditions
Throughout my underwater adventures, I’ve encountered a variety of water conditions, and each one requires a different approach. For instance, in clear water, I’ve found that I can use natural light effectively. However, I always try to get as close to my subject as possible to avoid losing details. I remember a dive in the Caribbean where the visibility was incredible, and I was able to capture vibrant colors and details I hadn’t seen before.
In contrast, shooting in murky or less clear water presents its own challenges. I quickly learned that using artificial lighting became essential in these conditions. A good strobe can help cut through the haze, bringing out the colors that may otherwise be washed out. I also started to pay more attention to my composition—adding elements like rocks or plants in the foreground can provide depth and context to my photos.
Another thing I noticed is that currents can dramatically affect my shooting experience. During my first dive with strong currents, I struggled to maintain position while trying to capture images. Now, I make it a priority to assess the current before diving and plan my shots to make the most of my time. Sometimes, I will find a spot where I can anchor myself against a rock or coral, allowing me to focus on taking photos without being swept away.
Post-Processing Tips for Underwater Photography
Best Software for Editing Underwater Photos
Once I started capturing images underwater, I quickly realized that post-processing is just as important as taking the photos. For editing, I found several software options that cater to different levels of expertise. Adobe Lightroom became my go-to choice because of its user-friendly interface and powerful tools. It allows me to make adjustments to exposure, contrast, and color balance, which are especially crucial in underwater photography. I’ve also experimented with Adobe Photoshop for more advanced edits, like removing distractions or fine-tuning specific details. For those new to editing, I recommend starting with GIMP, a free alternative that offers impressive capabilities without the cost.
Basic Editing Techniques
When it comes to basic editing techniques, I often start with cropping and straightening my images to ensure they’re visually balanced. I found that adjusting the exposure can significantly improve the clarity of underwater shots, especially if the lighting conditions were less than ideal. Additionally, tweaking the contrast helps to make colors pop, which is essential for capturing the vibrant marine life. I also learned the importance of sharpening my images slightly to highlight details that might get lost in the water.
Enhancing Colors and Details
One of the biggest challenges in underwater photography is the loss of color due to water absorption. To combat this, I often adjust the white balance to bring back the natural hues of the underwater world. I usually lean towards cooler tones to restore the blues and greens that can sometimes appear washed out. Another trick I’ve discovered is using saturation and vibrance sliders to enhance colors without overdoing it. This approach allows me to breathe life into my images while keeping them looking natural. I remember the first time I applied these techniques to a photo of a coral reef; the transformation was astonishing!
Resources for Further Learning
Online Courses and Tutorials
As I continued my journey in underwater photography, I found that learning from others was invaluable. I enrolled in several online courses that focused specifically on underwater techniques. Websites like Udemy and Skillshare offer courses that cater to various skill levels. These platforms not only provide structured learning but also allow you to learn at your own pace. I particularly enjoyed watching tutorials on YouTube, where many photographers share their experiences and tips.
Books on Underwater Photography
Books can also be a fantastic resource for deepening my understanding of underwater photography. I’ve read “Underwater Photography Guide” by Scott Gietler, which covers everything from gear to techniques. The insights and tips shared in these books have shaped my approach to photography significantly. I recommend checking out your local library or bookstore for titles that inspire you.
Photography Communities and Forums
Being part of a community can make a world of difference. I joined forums like Wetpixel and Underwater Photography Community, where I connect with fellow enthusiasts. These platforms are filled with advice, critiques, and support from others who share the same passion. Participating in discussions and sharing my work has helped me grow as a photographer, and I’ve appreciated the feedback I’ve received from more experienced individuals.
Final Thoughts
Underwater adventure photography has truly enriched my life in ways I never anticipated. It’s become more than just a hobby; it’s a way to connect with nature, express creativity, and even inspire others to appreciate the beauty beneath the waves. I encourage anyone interested in this field to dive in—literally! With the right mindset, gear, and a willingness to learn, you can create stunning images that tell the story of the underwater world. Remember, every shot is a chance to capture a moment, so embrace the adventure with an open heart and a curious mind.
Frequently Asked Questions
What is underwater photography?
Underwater photography is a form of photography that involves capturing images beneath the surface of the water, showcasing the vibrant life and beautiful scenery found in pools, oceans, or lakes.
What are some popular styles of underwater photography?
Some popular styles include Marine Life Photography, Underwater Landscape Photography, Wreck Photography, and Freediving and Snorkeling Photography.
What are the benefits of underwater photography?
Benefits include a unique connection with nature, opportunities for creative expression, encouragement for marine conservation, and physical fitness from diving and swimming.
What essential gear is needed for beginners in underwater photography?
Beginners should consider investing in an underwater camera, waterproof housing for existing cameras, appropriate underwater lenses, lighting equipment, and stabilization gear.
Can you recommend any budget-friendly underwater cameras?
Yes, the Olympus Tough TG-6 and Canon PowerShot D30 are excellent budget-friendly underwater cameras that deliver good quality results.
What should I look for in waterproof housing for my camera?
When choosing waterproof housing, ensure it is compatible with your camera model and check reviews for quality and depth rating to match your diving needs.
What are some common mistakes to avoid in underwater photography?
Common mistakes include not checking gear for leaks before diving, neglecting to adjust camera settings, and rushing shots which can lead to blurriness.
What editing software is recommended for underwater photos?
Adobe Lightroom is highly recommended for its user-friendly interface, while Adobe Photoshop can be used for more advanced editing. GIMP is a great free alternative for beginners.
How can I enhance colors and details in my underwater photos?
Adjust the white balance to restore natural hues, and use saturation and vibrance sliders to enhance colors without overdoing it. Experimenting with these settings can significantly improve your images.
Where can I find resources for further learning about underwater photography?
Online courses from platforms like Udemy and Skillshare, books on underwater photography, and photography communities and forums such as Wetpixel and Underwater Photography Community are great resources for learning.