Capturing breathtaking mountain landscapes doesn’t have to break the bank. With a little planning and creativity, we can create stunning images that reflect the beauty of nature without spending a fortune. For those interested in wildlife, consider exploring Budget-Friendly Wildlife Photography Tours You Can’t Miss to enhance your experience.
Understanding Mountain Landscape Photography
The Allure of Mountain Landscapes
There’s something magical about mountains that draws many of us in. I remember my first trip to the Rockies; the towering peaks took my breath away. It was the feeling of standing among giants, surrounded by vast landscapes that made me want to capture every moment. Mountains offer a unique blend of majesty, solitude, and adventure, which is why they are such a popular subject for photographers. Whether it’s the way sunlight dances on snow-capped peaks or how clouds swirl around rugged cliffs, the allure of mountain landscapes is undeniable.
Essential Photography Gear for Beginners
When I first started my journey in photography, I was overwhelmed by the array of gear available. However, I learned that you don’t need the fanciest equipment to get stunning shots. Here’s what I found essential for mountain photography: If you’re looking for more information on suitable cameras, check out Best Budget-Friendly Cameras for Travel Photography.
- Camera: A DSLR or mirrorless camera is ideal, but many smartphones today have excellent cameras too. I’ve captured some of my favorite mountain shots with my phone!
- Lens: A versatile lens, like a 18-55mm zoom lens, allows for a variety of shots, from sweeping landscapes to detailed close-ups.
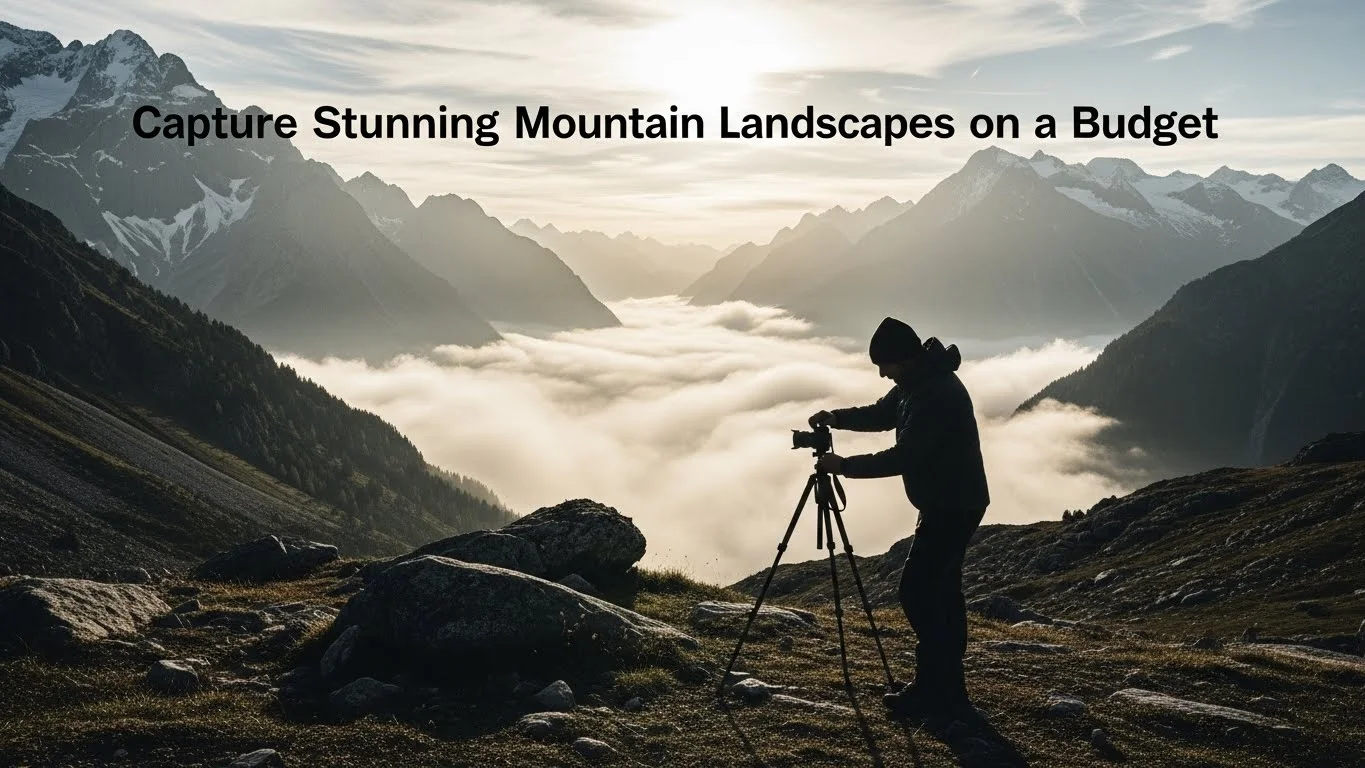
- Tripod: A sturdy tripod is invaluable, especially for long exposure shots during sunrise or sunset. It keeps your camera steady for crisp images.
- Filters: A polarizing filter can enhance colors and reduce glare, while neutral density filters can help you manage exposure during bright conditions.
How to Choose the Right Camera
If you’re just starting out, I recommend looking for a camera that combines ease of use with quality. I’ve had great success with entry-level DSLRs and mirrorless options that allow me to experiment without feeling overwhelmed. Consider what feels comfortable in your hands; a camera should be an extension of you. Try visiting a local camera store to test different models, if possible. Many stores are happy to let you hold the camera and fiddle with its settings before you buy.
Budget-Friendly Accessories
Beyond the basics, I discovered a few accessories that won’t break the bank but can enhance my photography experience:
- Lens Cleaning Kit: Mountains can be dusty or wet. Keeping my lens clean has been crucial for clear shots.
- Extra Batteries: Cold weather can drain batteries quickly, so having spares on hand is a lifesaver.
- Memory Cards: Always bring extra cards. You will want to capture every angle of those breathtaking vistas!
- Waterproof Bags: Weather can change unexpectedly in the mountains, and protecting my gear has been essential.
While it’s tempting to buy the latest and greatest gear, I learned that investing in these practical accessories can significantly impact my mountain photography experience without straining my budget.
Planning Your Mountain Photography Expedition
Once I had my gear sorted, I realized that planning my photography trips was just as important as the equipment I used. From selecting the right locations to understanding the best times to shoot, preparation has made a huge difference in my results.
Best Locations for Mountain Photography
Exploring different mountain ranges has been one of the highlights of my photography journey. I’ve discovered that each location offers a unique charm. National parks, such as Yellowstone and Rocky Mountain National Park, are fantastic for their stunning vistas and well-maintained trails. I also enjoyed the hidden gems of lesser-known mountain ranges, where I often found fewer crowds and pristine scenery. For more ideas on budget-friendly locations, you might want to check out Top Destinations for Nature Photography on a Budget.
Seasonal Considerations: When to Visit
Timing can make or break a shot. I’ve found that spring and fall are particularly beautiful seasons for mountain photography. In spring, you can capture blooming wildflowers against rugged backdrops, while fall offers vibrant foliage. I remember hiking in the fall, and the golden leaves against the gray mountains were simply breathtaking. Summer is great for clear skies and accessibility, but you might miss that dramatic lighting.
Weather Conditions and Their Impact
I quickly realized that weather can significantly influence my photos. I’ve experienced everything from stunning sunrises to unexpected rain while shooting. Overcast days can produce soft light, perfect for creating mood in landscapes. On the other hand, dramatic storm clouds can add intensity to my images. I always check weather forecasts and try to be flexible with my plans, so I can take advantage of changing conditions.
Accessibility: Getting to Your Chosen Location
Lastly, I learned that accessibility is crucial. Some breathtaking viewpoints require long hikes, while others are just a short drive away. I often research trail lengths and difficulty levels before embarking on a trip. I’ve found that a little preparation goes a long way in ensuring I reach those perfect spots without feeling exhausted.
Techniques for Capturing Stunning Shots
Understanding Composition in Landscape Photography
One of the biggest lessons I learned in mountain photography is the importance of composition. It’s all about how you frame your shot. I remember being in a stunning mountain valley and snapping photos without thinking much about it. When I reviewed the images, I realized they didn’t quite capture the magic I felt in that moment. That’s when I started to explore some composition techniques.
The rule of thirds is a fundamental concept that helped me. I began to visualize my frame as divided into a grid of nine squares. Placing points of interest along these lines or at their intersections can create a more dynamic image. For instance, when photographing a mountain peak, I try to position it off-center rather than smack dab in the middle. This slight adjustment can make all the difference in drawing the viewer’s eye into the scene.
Another technique I’ve found valuable is leading lines. I often look for paths, rivers, or trails that guide the viewer’s eye towards the mountains or other elements in the landscape. I remember a hike along a winding river where I positioned myself to capture the water leading directly to the majestic peaks in the background. It turned out to be one of my favorite shots!
Utilizing Natural Light: Golden Hour and Blue Hour
Light can transform a photograph, and I learned that timing is everything in mountain landscape photography. The golden hour, which is the hour after sunrise and before sunset, provides the soft, warm light that enhances any scene. I often wake up early, groggy but excited, to chase those magical moments. Watching the sun rise over the peaks while the sky bursts with color is an experience I wouldn’t trade for anything.
Then there’s the blue hour, the time just before sunrise or after sunset when the sky takes on a deep blue hue. I remember one evening when I captured a shot of a mountain lake reflecting the twilight sky. The cool tones of blue contrasted beautifully with the warm colors of the fading sunset, creating an ethereal quality that I still cherish. I think embracing these natural light opportunities can elevate our photos beyond the ordinary.
Long Exposure Techniques for Dramatic Effects
One technique that I’ve grown to love is long exposure photography. This method can create beautiful effects, especially with moving elements like water or clouds. I remember standing at a waterfall, watching the water cascade down, and I wanted to capture that silky flow. Setting my camera on a tripod and using a slow shutter speed allowed me to achieve that dreamy effect.
To make long exposures work, I usually find that a neutral density filter is essential. This filter reduces the amount of light entering the lens, allowing me to use slower shutter speeds even in bright daylight. I recall experimenting with various shutter speeds, watching how the water transformed from a choppy mess to a smooth, flowing ribbon in my images. It’s a technique that adds a touch of artistry to our mountain landscapes.
Incorporating Foreground Elements
When I started focusing on foreground elements in my shots, it opened up a new world of creativity. Adding interesting rocks, flowers, or trees in the foreground can create depth and give the viewer a sense of being in the scene. I remember hiking to a viewpoint where wildflowers were blooming at my feet. By including them in the foreground, I was able to lead the viewer’s eye into the vast mountain landscape behind them.
This technique has become a staple in my photography. I always look for ways to create layers in my images, making them feel more immersive. It’s as if I’m inviting others into my experience, allowing them to feel the same awe I felt being there. I encourage anyone to experiment with this; it can transform a flat landscape shot into something vibrant and engaging.
Using Filters to Enhance Your Shots
Filters have become my secret weapon in mountain photography. I’ve found that a polarizing filter can enhance colors and contrast, making blue skies pop and reducing glare from reflective surfaces like water or snow. I remember a day when I was shooting a high-altitude lake. Adding a polarizing filter made the colors of the surrounding mountains richer and more vivid, turning an ordinary shot into something spectacular.
Additionally, I’ve started using graduated neutral density (ND) filters, which help balance the exposure between a bright sky and a darker foreground. I recall a sunset shoot where the sky was ablaze with color, but the mountains were too dark. By using a graduated ND filter, I was able to preserve the details in both the sky and the landscape, resulting in a well-balanced image that truly captured the moment.
Incorporating these filters into my gear has been a game-changer, and I recommend giving them a try if you haven’t already. They can help us create images that reflect the beauty we see in our adventures.
Post-Processing Tips on a Budget
Free and Affordable Editing Software
Post-processing is a vital step that can elevate your mountain landscape photos from good to stunning. When I first began editing my images, I was overwhelmed by the expensive software options. But through my experience, I’ve discovered several free and affordable tools that can help us achieve professional results without breaking the bank.
One of the best free options is GIMP, which offers many powerful features similar to Photoshop. I remember diving into GIMP and feeling amazed by its capabilities—everything from color correction to retouching can be done here. Another great tool is Darktable, which is tailored for photographers and excellent for editing RAW files. For a more user-friendly experience, I recommend trying out Adobe Lightroom’s mobile app. It’s free, and while it has premium features, the basic functions are enough to get started with editing. I’ve used it to adjust exposure and colors on the go, and it’s been a lifesaver during my travels.
Basic Editing Techniques for Landscape Photos
Once I had my editing software set up, I started learning some basic techniques that made a huge difference in my photos. One of the first things I learned was about adjusting exposure. I often found that my shots, especially in challenging lighting conditions, needed a little tweak to look their best. I usually start by correcting exposure, contrast, and saturation. It’s a simple step, but it can bring my images to life.
Another technique I love is cropping. I often revisit my photos and find that a little cropping can drastically improve composition. I’ve learned that sometimes, removing distractions from the edges can help focus the viewer’s attention on the main subject—like those majestic mountains or vibrant wildflowers. Lastly, sharpening is crucial, especially for landscapes. I usually apply a subtle amount of sharpening to keep the details crisp without overdoing it.
How to Create Stunning HDR Images
High Dynamic Range (HDR) photography has become one of my favorite techniques for capturing the full range of light in mountain landscapes. It allows me to blend multiple exposures into one stunning image. I remember standing at the edge of a cliff during a breathtaking sunset, and while the sky was ablaze with color, the mountains below were shrouded in shadow. By using HDR, I was able to capture both the highlights and shadows beautifully.
To create an HDR image, I usually take three or more shots at different exposures—one for the highlights, one for the mid-tones, and one for the shadows. I then use software like Photomatix or even Lightroom’s HDR feature to merge them. The result is often a photo that truly reflects the experience I had that day in the mountains. It’s like giving my viewers a window into that moment, with all its beauty and drama.
Cost-Effective Ways to Enhance Your Photography Skills
Online Resources and Free Tutorials
In my journey as a photographer, I found that there’s a wealth of resources available online that can help us improve our skills without spending a dime. I often turn to platforms like YouTube, where many talented photographers share their tips and tricks. I remember stumbling upon a channel dedicated to landscape photography, and the tutorials on composition and lighting were invaluable to me.
Additionally, websites like Coursera and Skillshare offer free courses on photography basics. I signed up for a few of these courses and learned so much about camera settings and post-processing techniques. These resources have allowed me to grow as a photographer, and I encourage everyone to take advantage of them!
Joining Local Photography Clubs
Another great way to enhance my skills was by joining a local photography club. I attended meetups and workshops where I could connect with fellow photography enthusiasts. Sharing experiences and getting feedback from others helped me see my work from different perspectives. I remember one outing where we explored a nearby mountain trail together, and I learned so much just by observing how others composed their shots. Plus, it’s a fantastic way to meet new friends who share the same passion!
Participating in Photography Challenges
Participating in photography challenges has been a fun and motivating way to push my skills further. I often come across online challenges that focus on specific themes or techniques. For example, I once joined a month-long challenge where I had to capture one mountain photo each week, focusing on different aspects like color, composition, and lighting. It inspired me to think creatively and explore new locations. I found that by stepping out of my comfort zone, my photography improved significantly. Plus, sharing my work with others in the challenge fostered a sense of community and support that kept me motivated.
Sharing and Selling Your Mountain Landscapes
Creating an Online Portfolio
Building an online portfolio has been a game-changer for me. It’s a way to showcase my photography journey and share the breathtaking mountain landscapes I’ve captured. When I first started, I used platforms like Wix and Squarespace, which offer user-friendly templates that make it easy to display my work beautifully. I remember spending hours selecting my favorite images, each one representing a unique moment in nature. I made sure to include a variety of shots, from sweeping vistas to intimate details of wildflowers, to give visitors a sense of my style and perspective.
I also learned the importance of writing captions for each photo. Sharing the story behind the shot or the emotions I felt while capturing it helps connect with viewers on a deeper level. It’s like inviting them into my experience and allowing them to feel the same awe I felt standing there. Making my portfolio easy to navigate and visually appealing has encouraged many friends and family to appreciate my work and share it with others.
Best Platforms for Selling Your Photos
If you’re looking to take things a step further, selling your photos can be both rewarding and profitable. I found platforms like Etsy and Shutterstock to be great starting points for selling my mountain landscapes. Etsy allowed me to create a shop where I could offer prints and even digital downloads. I remember the thrill of making my first sale; it felt like a recognition of my passion and hard work!
Shutterstock, on the other hand, operates on a stock photo model, where you upload your images, and people can purchase licenses to use them. This opened up a new avenue for me to earn money from photos I had already taken. Each sale may not be a fortune, but it adds up over time, and it feels amazing knowing my art is being appreciated by others. As I continue to develop my portfolio, I explore various platforms and compare their commission rates to find the best fit for my work.
Using Social Media to Showcase Your Work
Social media has been another fantastic tool for sharing my mountain photography. I started with Instagram, where the visual nature of the platform allows me to share my images with a wider audience. I remember the excitement when I posted a stunning sunrise photo from a mountain top and received comments from people all over the world who were inspired by it. Hashtags play a vital role, too; they help reach people interested in landscape photography or outdoor adventures. I’ve also found that engaging with other photographers and participating in challenges or collaborations has expanded my network and enriched my learning experience.
Facebook groups dedicated to photography have also been incredibly helpful. I’ve received feedback on my work, participated in discussions, and even found local meetups to join. By sharing my progress and process, I’ve formed connections with others who share the same passion for capturing the beauty of nature. It’s heartening to be part of a community that celebrates the art of photography!
Additional Tips for Budget-Friendly Mountain Photography
Camping vs. Hotel Stays: Pros and Cons
When planning my mountain photography trips, I often weigh the pros and cons of camping versus hotel stays. Camping has allowed me to immerse myself in nature, waking up to stunning views right outside my tent. It’s budget-friendly and gives me the flexibility to shoot at sunrise or sunset without worrying about travel time. I remember one trip where I camped near a lake, and the stillness of the early morning provided the perfect backdrop for my shots.
On the flip side, hotels can offer comfort after a long day of hiking and shooting. They provide amenities like hot showers and a warm bed, which can be a treat after a chilly night outdoors. I recommend considering your priorities: if you’re looking for convenience and comfort, a hotel might be the way to go. But if you want to connect with nature and keep costs down, camping can be a rewarding experience.
Pack Smart: Essential Gear for Budget Travelers
Being a budget traveler, I learned that packing smart is essential for mountain photography trips. I always carry lightweight gear to minimize the burden on long hikes. A good camera backpack can make all the difference, allowing me to organize my equipment efficiently while keeping it safe from the elements. I also pack versatile clothing, ensuring I’m prepared for changing weather conditions. Layering is key; I’ve found that having a lightweight waterproof jacket can save the day if unexpected rain hits while I’m out shooting.
Finding Free or Low-Cost Activities Near Mountain Areas
Exploring the great outdoors doesn’t have to be costly. I often look for free or low-cost activities near mountain areas, such as hiking or visiting local parks. Many national and state parks offer trails that lead to breathtaking viewpoints, and the entry fees are often minimal. I remember discovering a hidden trail that led me to a stunning overlook without another soul in sight. The thrill of finding such gems is part of the adventure!
Additionally, I’ve found that local visitor centers often have information about free events or guided tours in the area. Engaging with locals can lead to discovering off-the-beaten-path spots that are perfect for photography. Embracing these budget-friendly activities has enriched my mountain photography experiences and deepened my appreciation for the beauty around us.
Final Thoughts
Embarking on a journey to capture mountain landscapes is about more than just the photos; it’s about the experiences we gather along the way. I’ve learned that with a little creativity and resourcefulness, we can create stunning imagery that reflects the beauty of nature without breaking the bank. Whether you’re a beginner or a seasoned photographer, I encourage you to explore your surroundings, experiment with different techniques, and connect with others who share your passion. Each shot is a story, a memory, and a reminder of the majestic landscapes we have the privilege to witness. Let’s embrace the adventure and capture the beauty around us!
Frequently Asked Questions
What type of camera is recommended for mountain landscape photography?
A DSLR or mirrorless camera is ideal for mountain landscape photography, but many smartphones today also have excellent cameras that can capture stunning shots.
What are some essential photography gear items for beginners?
Essential gear for beginners includes a camera (DSLR or mirrorless), a versatile lens (like an 18-55mm zoom lens), a sturdy tripod, and filters (such as polarizing and neutral density filters).
Which seasons are best for mountain photography?
Spring and fall are considered particularly beautiful seasons for mountain photography. Spring offers blooming wildflowers, while fall provides vibrant foliage. Summer is good for clear skies, but may lack dramatic lighting.
How can weather conditions affect mountain photography?
Weather significantly influences photos; overcast days can create soft light, while dramatic storm clouds can add intensity. Being flexible with plans and checking weather forecasts can help photographers take advantage of changing conditions.
What composition techniques can enhance mountain landscape photos?
Important composition techniques include the rule of thirds, where points of interest are placed off-center, and leading lines that guide the viewer’s eye towards the mountains or other elements in the landscape.
What is long exposure photography and how is it used in mountain landscapes?
Long exposure photography involves using a slow shutter speed to create beautiful effects with moving elements like water or clouds. A tripod and a neutral density filter are often necessary to achieve desired results.
What are some budget-friendly editing software options for landscape photography?
Free and affordable editing software options include GIMP, Darktable, and Adobe Lightroom’s mobile app, which allow photographers to edit their images without high costs.
How can photographers create stunning HDR images?
To create HDR images, photographers typically take multiple shots at different exposures and then merge them using software like Photomatix or Lightroom. This technique captures the full range of light in a scene.
What are some effective ways to share and sell mountain landscape photos?
Effective ways to share and sell mountain landscape photos include creating an online portfolio using platforms like Wix and Squarespace, selling through sites like Etsy and Shutterstock, and showcasing work on social media platforms like Instagram.
What are the pros and cons of camping versus hotel stays for photography trips?
Camping allows for immersion in nature and budget-friendly flexibility, while hotels offer comfort and amenities after a long day of shooting. The choice depends on personal priorities for convenience versus a deeper connection with nature.