Editing travel portraits can transform a simple snapshot into a stunning piece of art. Whether you’re capturing a bustling market in Marrakech or a serene sunset in Bali, I believe the editing process is where the magic truly happens. Read Interesting article: Enhance Your Travel Portraits with Simple Editing Tricks
Understanding Travel Portraits
What are Travel Portraits?
Travel portraits are more than just pictures of people in exotic locations; they tell a story. When I travel, I find myself seeking moments that capture the essence of a place and its people. These portraits can range from candid shots of locals going about their day to posed pictures of friends or family at iconic landmarks. What makes travel portraits special is their ability to convey emotions and experiences unique to each destination. Through the eyes of the subject, we glimpse a culture, an emotion, or a fleeting moment that might otherwise be lost.
The Importance of Portraits in Travel Photography
In my experience, portraits play a crucial role in travel photography. They add a human element that landscapes alone can’t provide. They allow viewers to connect with the narrative of the location, grounding it in realism. I once took a trip to Italy and captured a portrait of an elderly woman selling flowers in a small piazza. That image, more than any landscape shot I got, resonated with friends and family when I shared my travel album. It sparked conversations about her life and the stories she might have had. This connection is what makes travel portraits invaluable—they invite others into our experiences, evoking empathy and curiosity. I’ve learned that every face has a story, and capturing that story is what makes travel photography so rewarding.
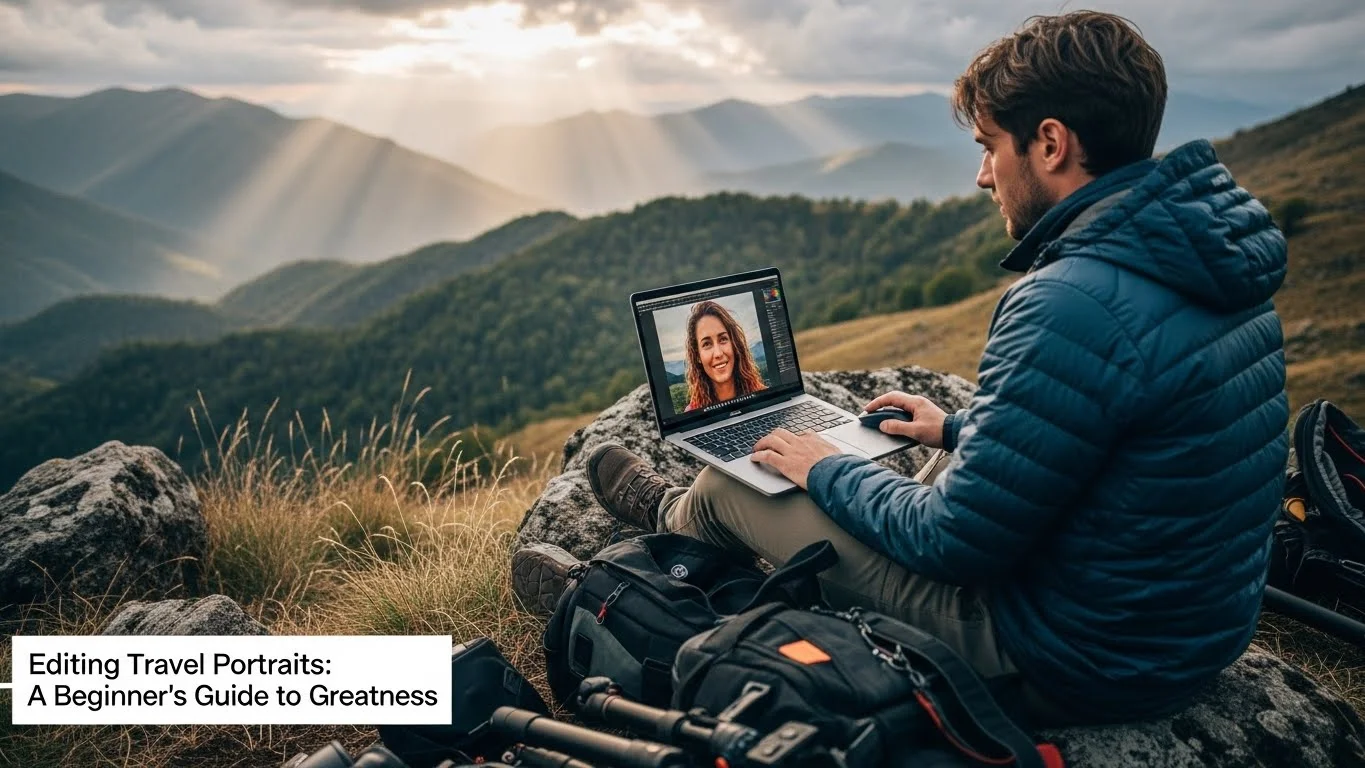
Essential Tools for Editing Travel Portraits
Software Options: Lightroom vs. Photoshop
When it comes to editing travel portraits, choosing the right software is essential. Personally, I started with Adobe Lightroom because it’s user-friendly and perfect for beginners. I appreciated how I could make bulk edits to multiple photos quickly, which is a lifesaver when you return from a trip with hundreds of images. Lightroom excels in organizing photos and offers powerful tools for adjusting exposure, contrast, and color. However, there are times when I find myself needing more advanced features, and that’s when I turn to Photoshop. Its layer-based editing allows for detailed work on specific areas of the image, which is fantastic for retouching skin or enhancing backgrounds. For anyone serious about portrait editing, I recommend getting familiar with both. They complement each other beautifully. Read Interesting article: Top Tips for Perfectly Editing Your Travel Portraits
Must-Have Plugins and Presets
Using plugins and presets can speed up your editing process and keep your images consistent. I often use presets in Lightroom to establish a particular mood for my travel portraits. There are countless free and paid options available, and I’ve found that experimenting with them can yield fantastic results. One of my favorites is a natural light preset that enhances skin tones without making them look overly processed. As for plugins, I swear by Portraiture for skin retouching in Photoshop, which allows for quick, seamless adjustments that keep the natural look intact. These tools have become staples in my editing workflow, and I believe they can elevate anyone’s portrait editing game.
Hardware Requirements: The Right Computer and Monitor
Having the right hardware is just as important as software. I remember the frustration of editing on my old laptop; it was slow and the screen wasn’t calibrated well, which made color correction a challenge. Investing in a good computer that can handle photo editing software is crucial. I recommend a machine with a strong processor and plenty of RAM, as this will significantly reduce lag during the editing process. Additionally, a high-quality monitor is essential for accurate color grading. I now use a calibrated monitor, which has made a world of difference. I no longer second-guess my color choices, and I can confidently share my images with others.
Basic Editing Techniques
Understanding Exposure and Contrast
Once I dive into editing, my first steps always involve exposure and contrast adjustments. I remember the first time I realized how much these elements could change a photo. I had a fantastic portrait taken at dusk, but it felt flat when I viewed it on my computer. By adjusting the exposure, I was able to brighten the image without losing the magical evening light that bathed everything in warmth. Increasing the contrast added depth and drama, making the subject pop against the background. I’ve learned that a little adjustment can go a long way in creating an impactful portrait.
Color Correction: White Balance and Saturation
Color correction is another critical step that I prioritize. I often find that the colors in my travel portraits can be a bit off due to varying lighting conditions. Adjusting the white balance can dramatically improve the overall tone of the image. For instance, in a portrait taken under harsh midday sun, the skin tones can look washed out or too yellow. I adjust the temperature slider to add warmth or coolness as needed. Additionally, I pay attention to saturation; too much can look unnatural, but a subtle boost can enhance the vibrancy of the scene. I believe striking the right balance is key to making the portrait feel alive.
Crop and Composition Adjustments
Finally, I often revisit the composition of my portraits during the editing phase. Cropping can help eliminate distractions and focus attention on the subject. I remember one travel portrait where I initially included too much background. Later, I cropped it down, and it transformed the image into a compelling close-up that really showcased the subject’s expression. I recommend using the rule of thirds as a guideline to position your subject within the frame for a more dynamic look. It’s a simple technique, but it can make a significant difference in how the portrait reads.
Advanced Editing Techniques
Using Layers and Masks in Photoshop
When I delved deeper into photo editing, I discovered the power of layers and masks in Photoshop. This technique opened up a whole new world of possibilities for my travel portraits. By using layers, I could apply adjustments without affecting the entire image, allowing for more targeted edits. For instance, I remember editing a portrait taken in a vibrant market in India. I wanted to enhance the colors of the background while keeping the subject’s skin tones natural. By creating a separate layer for the background and applying a color boost, I achieved the desired effect without compromising the integrity of the person in the foreground. Masks allowed me to blend adjustments seamlessly, revealing only the parts of the image I wanted to enhance. This technique has become one of my go-to methods for creating striking portraits that tell a story.
Creating Depth with Blurring Techniques
One of the most impactful techniques I’ve learned for adding depth to my travel portraits is the use of blur. I often find that a slight blur on the background can create an impressive depth-of-field effect, which draws attention to the subject. For example, during a visit to a colorful festival, I took a portrait of a dancer amidst the bustling crowd. The background was chaotic and vibrant, but it distracted from her expression. By applying a Gaussian blur to the background, I could maintain the festival’s essence while keeping the dancer the focal point of the image. It’s like adding a three-dimensional quality to my portraits that makes them more engaging. I recommend experimenting with different levels of blur until you find what works best for your style.
Enhancing Facial Features: Retouching Basics
Retouching is another advanced technique that can significantly enhance travel portraits. I used to be intimidated by the idea of retouching, fearing I would lose the natural look of my subjects. However, I learned that subtle adjustments can make a huge difference. For instance, I often use the healing brush to remove minor blemishes or distractions from a subject’s face without making them look overly polished. In a portrait I took in Thailand, I noticed a small blemish on a child’s cheek. A quick retouch made the image cleaner without compromising the child’s innocence. Additionally, I like to enhance the eyes slightly by brightening and sharpening them, which can bring a portrait to life. The key is to keep the edits minimal and natural, ensuring that the essence of the person shines through. Read Interesting article: Master Editing Travel Portraits for Stunning Memories
Styling Your Travel Portraits
Choosing the Right Color Palette
Color can dramatically change the mood of a portrait. I’ve discovered that selecting a cohesive color palette is crucial when editing my travel portraits. During a recent trip to Morocco, I was captivated by the rich blues and earthy tones of the markets. When editing those portraits, I decided to enhance those colors while muting others, creating a harmonious blend that felt true to the location. I often refer to color theory when I edit, ensuring that my portraits evoke the right emotion. For example, warm tones can create a sense of comfort and happiness, while cooler tones might evoke calmness or serenity. By being intentional about my color choices, I can ensure that my portraits reflect the atmosphere of the places I visit.
Applying Filters and Effects for Mood
Filters can be a fun way to stylize travel portraits, but I’ve learned to use them sparingly. There’s a fine line between enhancing an image and overpowering it with effects. I often start with subtle filters to add a hint of warmth or a vintage feel. I remember editing a portrait taken at a coastal village in Greece where the sun was setting. Applying a warm filter made the scene feel more inviting, capturing the essence of that magical hour. However, I always take the time to adjust the intensity of the filter to ensure it complements, rather than overwhelms, the portrait. It’s all about enhancing the narrative of the photo without distracting from the subject.
Consistent Editing Style for Travel Series
As I’ve continued to develop my photography skills, I’ve found that maintaining a consistent editing style across a series of portraits can elevate my work. When I create a photo album from a single trip, I aim for a cohesive look that ties the images together. This might involve using similar color palettes, effects, and even cropping styles. For instance, during my travels in Southeast Asia, I edited my portraits to have a light, airy feel, which matched the bright and lively atmosphere of the region. By keeping a consistent style, I not only create a better visual flow but also convey a stronger narrative about my journey. It’s something I now prioritize in my editing process, and it’s made my travel photography feel more professional and polished.
Common Mistakes to Avoid
Over-Editing: Finding the Balance
As I’ve spent more time editing my travel portraits, one of the biggest lessons I’ve learned is the importance of balance. It’s easy to get carried away with editing tools, especially when you’re trying to enhance an image. I remember one particular portrait where I adjusted the colors and contrast to the point where the subject looked almost cartoonish. While I was excited about my newfound editing skills, I quickly realized that over-editing can detract from the natural beauty of the subject. I recommend always stepping back and reviewing your edits with fresh eyes or asking a friend for their honest opinion. Finding that sweet spot where the portrait looks vibrant but still authentic is crucial in maintaining the integrity of the image.
Ignoring the Original Image Quality
Another mistake I’ve made in the past is ignoring the quality of the original image. I often felt that I could fix everything in post-processing, but that’s not always the case. For example, I once had a fantastic idea for a portrait, but the original photo was blurry due to camera shake. No amount of editing could salvage that image. This experience taught me that good editing starts with good photography. I’ve made it a point to focus on getting the best shot I can at the moment rather than relying solely on post-processing to fix issues. This means paying attention to my camera settings, composition, and lighting while shooting, ensuring that I have a solid base to work with when I get to the editing stage.
Neglecting to Back Up Your Edits
In the excitement of editing and sharing my travel portraits, I’ve made the mistake of neglecting to back up my edits. I once lost a whole series of portraits after a hard drive crash, including hours of painstaking edits that I had been proud of. It was a gut-wrenching experience, and I learned the hard way that data loss can happen to anyone. Now, I always make it a point to back up my files in multiple locations, whether it’s an external hard drive or a cloud storage service. I recommend creating a backup routine to ensure your original images and edited versions are safe. It’s a small step that can save a lot of heartache down the line.
Sharing and Showcasing Your Edited Portraits
Best Platforms for Displaying Travel Portraits
Once I’ve polished my travel portraits, I love sharing them with the world. Choosing the right platforms to showcase my work has been a journey in itself. I’ve experimented with various social media sites, and I’ve found that Instagram is a fantastic platform for photographers. Its visual nature allows my portraits to shine, and the community is incredibly supportive. I enjoy using relevant hashtags to reach a broader audience and connect with other photographers. Additionally, I’ve found that creating a dedicated Facebook album for my travels helps me share experiences with family and friends who might not be on Instagram. Each platform has its strengths, so I recommend finding the one that aligns best with your style and audience.
Creating a Portfolio Website
Having a personal portfolio website has been a game-changer for me in showcasing my travel portraits. I realized that social media can be fleeting, but a well-curated website gives my work a more permanent home. Setting up my website allowed me to create a cohesive narrative of my travels, presenting my best work in an organized manner. I used platforms like WordPress and Squarespace, which offer user-friendly templates specifically designed for photographers. I recommend including a blog section to share stories behind the portraits, as it adds a personal touch and engages visitors. A portfolio website not only showcases my work but also serves as a professional platform that potential clients can view. It’s an investment that has paid off in numerous ways.
Social Media Tips for Photographers
When it comes to social media, I’ve learned that engagement is key. Sharing my travel portraits is great, but I’ve found that interacting with my audience can make a big difference. I try to respond to comments and messages promptly, building a sense of community around my work. I also enjoy sharing behind-the-scenes shots, editing tips, or stories from my travels, as it invites followers into my creative process. I’ve noticed that my audience appreciates this authenticity, and it helps to create a loyal following. Another tip is to collaborate with other photographers or brands. This can introduce my work to new audiences and foster relationships within the photography community. Overall, being genuine and engaging helps me share my art more effectively.
Resources for Further Learning
Online Courses and Tutorials
To continue improving my photography and editing skills, I’ve turned to online courses and tutorials. Platforms like Skillshare and Udemy have a plethora of courses tailored to different skill levels. I remember taking a course on portrait editing that introduced me to new techniques I hadn’t considered before. I believe that ongoing education is essential for any photographer, as it keeps me inspired and informed about the latest trends. Additionally, YouTube is an excellent resource for finding free tutorials that can break down complex editing techniques. I often find myself getting lost in hours of video content, discovering tips that I can apply to my own work.
Books and Guides on Photography and Editing
Books have also been a fantastic resource in my photography journey. I’ve picked up several guides on travel photography and portrait editing that provide valuable insights and techniques. One book that really resonated with me was “Understanding Exposure” by Bryan Peterson. It completely changed my approach to capturing light and composition. I recommend finding books that resonate with your personal style and goals. They can offer perspectives and ideas that might not be covered in online courses.
Photography Communities and Forums
Finally, joining photography communities and forums has been incredibly beneficial for my growth as a photographer. I’ve found that connecting with like-minded individuals allows for the sharing of ideas, critiques, and encouragement. Websites like Flickr and various Facebook groups focused on travel photography have become invaluable resources for me. I enjoy participating in discussions and sharing my work for feedback. These communities often host challenges or contests that motivate me to push my creative boundaries. I believe that being part of a community can significantly enhance your skills and keep you inspired.
Frequently Asked Questions
What are travel portraits?
Travel portraits are images that capture the essence of a place and its people, telling a story through the subject’s emotions and experiences. They can include candid shots of locals or posed pictures of travelers at famous locations.
Why are portraits important in travel photography?
Portraits add a human element to travel photography that landscapes alone cannot provide. They help viewers connect with the narrative of a location and evoke empathy and curiosity about the subjects’ lives and stories.
What software is recommended for editing travel portraits?
Adobe Lightroom is recommended for beginners due to its user-friendly interface and bulk editing capabilities. Photoshop is also suggested for more advanced features like layer-based editing, which is useful for detailed adjustments.
What are some must-have plugins for editing travel portraits?
Presets in Lightroom can help establish a specific mood for portraits, while the Portraiture plugin in Photoshop is excellent for skin retouching, allowing for natural-looking adjustments.
What basic editing techniques should I know?
Basic techniques include adjusting exposure and contrast to enhance depth, correcting color balance using white balance and saturation adjustments, and cropping to improve composition and focus on the subject.
How can I create depth in my travel portraits?
Using blurring techniques, such as applying a Gaussian blur to the background, can create a depth-of-field effect that draws attention to the subject while maintaining the essence of the scene.
What common mistakes should I avoid when editing portraits?
Common mistakes include over-editing, which can detract from the subject’s natural beauty, ignoring the quality of the original image, and neglecting to back up edits to prevent data loss.
What are some effective platforms for showcasing travel portraits?
Instagram is an excellent platform for photographers due to its visual nature and supportive community. Creating a dedicated Facebook album can also help share experiences with friends and family.
How can I maintain a consistent editing style across a series of portraits?
To achieve a consistent editing style, aim for similar color palettes, effects, and cropping styles throughout a series. This approach creates a cohesive look and strengthens the narrative of your travel experiences.
Where can I find resources for further learning about photography and editing?
Online courses on platforms like Skillshare and Udemy, books on photography and editing, as well as joining photography communities and forums can provide valuable insights and inspiration for improving your skills.