Underwater adventure photography can be thrilling and beautiful, allowing us to capture the wonders of the aquatic world. With the right tips and gear, you can embark on this journey without breaking the bank. Read Interesting article: Explore Underwater Wildlife: Budget Backpacking Photography Guide
Understanding Underwater Adventure Photography
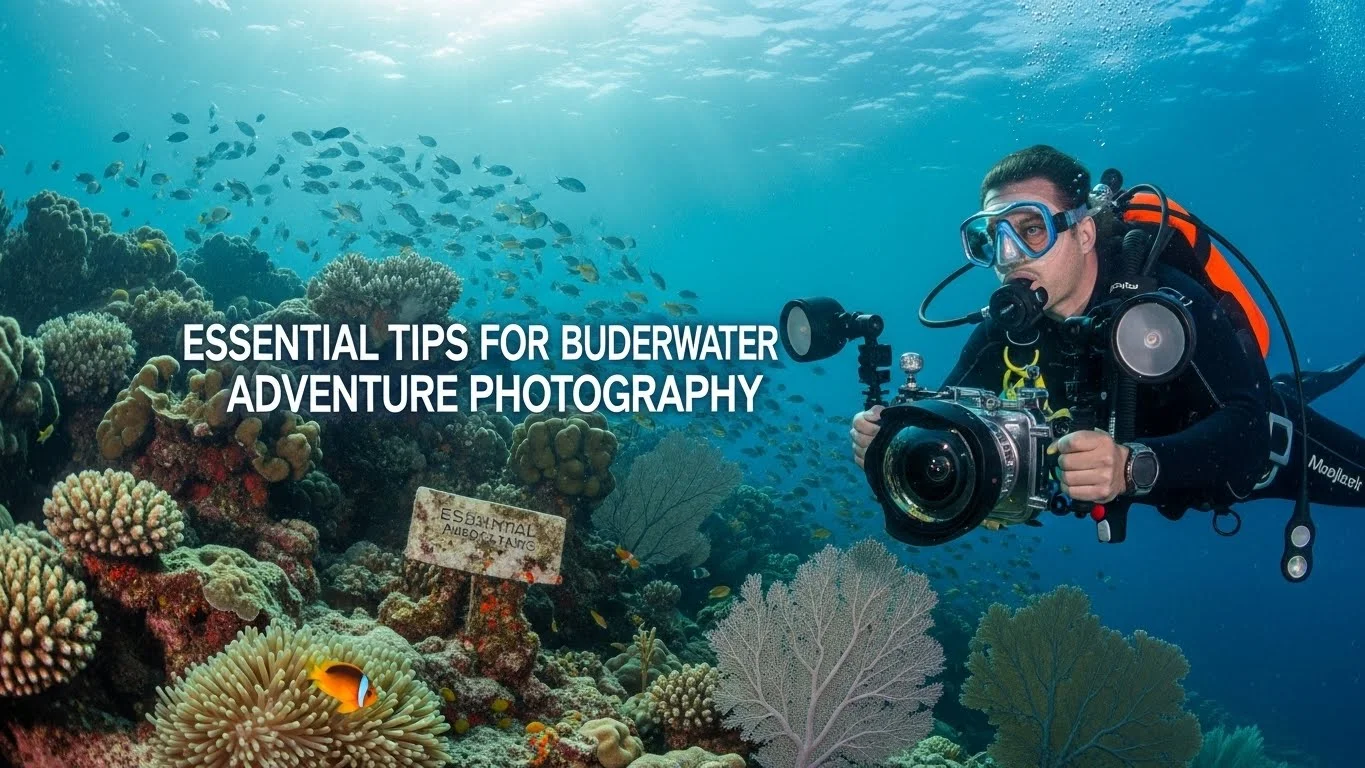
What is Underwater Photography?
Underwater photography is all about capturing images beneath the surface of the water. It can range from photographing marine life and colorful corals to beautiful underwater landscapes. I remember the first time I dipped my camera into the ocean. The feeling of excitement and a little nervousness washed over me as I entered a world filled with vibrant colors and strange creatures. It’s like stepping into another universe. The challenge lies not just in the artistry but also in overcoming the unique obstacles that come with shooting underwater, like managing light, water clarity, and buoyancy.
Types of Underwater Photography
There are several types of underwater photography, and each has its own charm. The most common types include:
- Macro Photography: This focuses on small subjects like tiny fish, corals, or even underwater textures. I found this especially rewarding because it reveals details we often miss.
- Wide-Angle Photography: This captures larger scenes, allowing you to show vast underwater landscapes or schools of fish. It’s exhilarating to capture the scale of the underwater world.
- Documentary Photography: This style aims to tell a story, often highlighting issues like ocean conservation. I believe this type of photography can inspire others to appreciate and protect our oceans.
Why Choose Adventure Photography?
Choosing adventure photography allows you to combine your love for exploration with artistry. It’s not just about taking pictures; it’s about experiencing the thrill of diving or snorkeling while capturing breathtaking moments. I often find that every dive offers something new, from unexpected encounters with marine life to the serenity of floating among corals. Experiencing this first-hand fuels my passion for photography even more. Plus, sharing these adventures can inspire others to appreciate the beauty of the underwater world. Read Interesting article: Capture Underwater Wonders: A Budget Guide to Wildlife Photography
Essential Gear for Budget Underwater Photography
Affordable Camera Options
When starting with underwater photography on a budget, you don’t need the most expensive gear. I personally began with a simple point-and-shoot camera that had a decent underwater housing. There are several affordable options out there, such as:
- GoPro Cameras: These are compact, durable, and waterproof right out of the box. They’re great for capturing action-packed underwater shots.
- Mirrorless Cameras: Models like the Sony Alpha series or Olympus OM-D are versatile and can often be found at reasonable prices. With the right housing, they can perform beautifully underwater.
- DSLR Cameras: While these can get pricier, you can find older models on sale. They offer fantastic image quality and versatility, especially for those looking to get a bit more serious.
Underwater Housing for Cameras
No matter what camera you choose, investing in a good underwater housing is crucial. This protective gear is designed to keep your camera safe from water damage. I made the mistake of using a cheap housing once, and it leaked, damaging my camera. Look for housings that fit your camera model and check user reviews. Many brands offer budget-friendly options that still provide solid protection and functionality.
Basic Accessories: Lights, Filters, and Lenses
Underwater conditions can be tricky due to light absorption and color loss. To enhance your photography, consider these accessories:
- Underwater Lights: These can make a huge difference in the quality of your photos, especially in darker waters. A simple video light can help bring out colors and details.
- Color Correction Filters: These filters help adjust the colors that are lost underwater. I remember using a red filter for deeper dives, and it turned my photos from dull to vibrant.
- Wide-Angle or Macro Lenses: Depending on your style, adding these lenses can allow for more creative shots, helping you capture stunning details or expansive scenes.
Protective Gear for Your Equipment
Keeping your gear safe is vital. Besides the underwater housing, I learned the importance of using a sturdy camera strap and a floaty device. I once dropped my camera while switching lenses, and it sank! Thankfully, I was able to retrieve it, but it was a harrowing experience. Look for padded cases and bags to protect your gear when traveling. A good quality dry bag can also keep everything organized and safe from water and sand.
Techniques for Capturing Stunning Underwater Images
Understanding Water Conditions and Lighting
Water conditions can vary greatly depending on where you’re diving, and understanding these can make a huge difference in your photography. I always check the weather and tides before heading out. For instance, I noticed that murky waters can significantly impact visibility and light absorption. When I first dove in cloudy waters, I struggled to get clear shots, and my excitement quickly turned into frustration. The best conditions are usually on calm days with clear visibility, so planning your dives accordingly is key. Additionally, the time of day matters too. I’ve found that diving in the early morning or late afternoon offers the most beautiful natural light, creating a soft glow that enhances colors and textures in your photos.
Composition Tips for Underwater Shots
Composition is just as important underwater as it is on land. One technique I always use is the rule of thirds. By placing the main subject off-center, I create a more dynamic image. I remember capturing a school of fish swimming gracefully through a coral reef; by positioning the reef on one side and the fish on the other, the photograph felt more engaging. Another tip is to pay attention to lines and shapes within the underwater environment. Leading lines can guide the viewer’s eye, drawing them into the scene. Experimenting with angles also helped me discover unique perspectives that tell a story about the underwater world. Sometimes, getting low to the ground or shooting from above can reveal stunning details that are often overlooked.
Using Natural Light Effectively
Natural light can be your best friend in underwater photography, but it can also be tricky. I’ve learned that light behaves differently underwater, with colors getting filtered out as depth increases. For instance, reds and oranges disappear quickly, which is why I always try to shoot in shallower waters when I want those vibrant colors. I also make an effort to position myself so that the sun is behind me, illuminating my subjects beautifully. Another trick I’ve employed is angling my camera slightly to capture sun rays streaming down; this adds a magical touch to my photos. If you’re diving deeper, using a flash or video light can help illuminate your subject, bringing back the colors that the water has absorbed.
Common Mistakes to Avoid
As I’ve dived into underwater photography, I’ve made my fair share of mistakes, and I want to share them so you can learn from my experiences. One common error is not checking your camera settings before entering the water. I’ve forgotten to adjust the white balance, leading to blue-tinted photos that didn’t match what I saw. Always take a moment to set your camera for the conditions you’ll be shooting in. Another mistake to avoid is getting too close to your subject. While it might be tempting to fill the frame with a vibrant fish, being too close can cause distortion or scare them away. I’ve learned to maintain a respectful distance, using zoom or cropping in post to get the shot I want. Lastly, don’t forget to practice buoyancy control. I’ve struggled with this, and it can lead to unwanted movement that blurs photos. Mastering buoyancy will not only improve your images but also enhance your overall diving experience.
Best Budget Locations for Underwater Photography
Top Dive Spots in the US
If you’re looking to explore underwater photography without draining your wallet, there are some fantastic locations in the U.S. that I’ve discovered. One of my favorites is the Florida Keys. The warm, clear waters are teeming with marine life, and there are many spots accessible for both beginners and experienced divers. I remember diving in John Pennekamp Coral Reef State Park; it was a vibrant underwater paradise that offered plenty of opportunities to practice my skills. Another great spot is the Channel Islands off the coast of California. The kelp forests and unique marine life create stunning backdrops for photography, and the dive sites can be reached without expensive charters by using local services. Read Interesting article: Capture Stunning Underwater Photos on a Budget Adventure
International Budget-Friendly Destinations
Traveling internationally for underwater photography can be done on a budget too! I had an incredible experience in Cozumel, Mexico. The dive sites are renowned for their clarity and vibrant coral reefs, and you can find affordable accommodations and dive packages. Plus, the local cuisine is delicious! Another place I’ve loved is the Red Sea in Egypt. While flights can be pricier, once you’re there, the diving costs are quite reasonable. The underwater visibility and rich marine life make every dive worth it. I’ve caught scenes that looked like they were straight out of a nature documentary.
Shallow Water vs. Deep Water Photography Locations
When choosing locations, consider the difference between shallow water and deep water photography. Shallow waters often provide better lighting conditions and vibrant colors, making them ideal for beginners. I enjoy shooting in shallow reefs where I can easily maneuver and explore without worrying about depth. On the other hand, deep water sites can offer unique subjects and stunning underwater landscapes, but they require more experience and specialized gear. My deep dives have often revealed dramatic underwater cliffs and larger marine life, but I always ensure I’m comfortable and prepared before heading to those depths.
Post-Processing Your Underwater Photos
Editing Software for Beginners
Once I started capturing underwater photos, I quickly realized that the magic didn’t end when I surfaced. Editing is a crucial part of the photography process, especially for underwater shots where lighting and color can often be tricky. For beginners, I recommend starting with user-friendly software like Adobe Lightroom or even free options like GIMP. I found that Lightroom’s intuitive interface helped me learn the basics of editing without getting overwhelmed. It’s great for adjusting exposure, contrast, and color balance, which can breathe life back into my photos. I also discovered that many smartphone apps, like Snapseed or Lightroom Mobile, offer robust editing capabilities as well, making it easy to tweak my photos on the go.
Basic Editing Techniques for Underwater Images
As I got more comfortable with editing, I learned a few techniques that helped elevate my underwater photos. One of the first things I do is adjust the white balance. This can make such a difference, especially if my photos came out with a blue or green tint. I usually slide the temperature slider to bring back the warmer tones that often get lost underwater. Cropping is another simple yet effective tool. I’ve found that sometimes just cropping to remove distractions or enhance the composition can transform an image. Lastly, I love using the clarity and sharpening tools to enhance details in fish scales or coral textures, making those images pop.
Color Correction and Enhancements
Color correction is a game changer in underwater photography. As I mentioned earlier, colors can diminish as you go deeper, so I often employ color correction filters during editing. In Lightroom, I use the HSL (Hue, Saturation, Luminance) panel to selectively enhance colors. For example, I’ll boost the saturation of blues and reds to bring back the vibrancy that the water has absorbed. I also learned to use the vibrance tool, which helps enhance muted colors without oversaturating the already vibrant ones. This balance is essential for creating images that capture the true beauty of the underwater world.
Sharing and Showcasing Your Underwater Photography
Best Platforms for Photographers
Sharing my underwater photography has been one of the most rewarding aspects of this journey. There are so many platforms available for photographers to showcase their work. I started with social media platforms like Instagram, where I could connect with other photographers and dive enthusiasts. Creating a dedicated account for my underwater images allowed me to engage with a community that shares my passion. I also discovered that platforms like 500px and Flickr are fantastic for reaching broader audiences and gaining feedback from fellow photographers. Each platform has its unique vibe, so I recommend exploring a few to see which resonates with you.
How to Build an Online Portfolio
Creating an online portfolio was a pivotal step for me. I found that having a website not only showcased my best work but also made it easier for potential clients or collaborators to find me. I used platforms like Wix and Squarespace, which offer templates specifically for photographers. I made sure to include a mix of my favorite underwater shots and categorized them by type, like macro and wide-angle, to show my versatility. Including a short bio and contact information helped potential clients get to know me and reach out for projects. It’s also essential to keep your portfolio updated with your latest and greatest work, so I set a reminder to refresh it every few months.
Engaging with the Underwater Photography Community
Engagement is key in the photography community. I’ve found that joining online forums and local photography clubs helped me connect with other underwater photographers. Platforms like Facebook and Reddit have groups dedicated to underwater photography where members share tips, critiques, and even organize dive trips. Attending workshops or meetups has also allowed me to learn from seasoned professionals and gain new perspectives. I remember my first workshop; I was nervous but ended up making lasting friendships and learning invaluable techniques that improved my skills. Engaging with the community not only fosters growth but also creates lasting connections.
Budgeting for Underwater Photography Adventures
Cost Breakdown of Gear and Expenses
Budgeting for underwater photography is something I’ve had to master over time. It’s easy to get swept up in the excitement and overspend. I think it’s important to create a breakdown of costs to see where my money is going. For me, the initial investment included my camera, underwater housing, and essential accessories. I also factor in expenses like travel, dive fees, and any necessary permits. I suggest prioritizing gear based on what you need most; for example, I first focused on getting a reliable camera and housing before moving on to lights and filters.
Tips for Saving Money on Trips
When planning trips for underwater photography, I always look for ways to save money. I’ve found that booking in advance can lead to better deals on flights and accommodations. Additionally, traveling during the off-peak season often results in lower rates. I also consider local dive shops for package deals, which can include gear rental and guided dives at a reasonable price. Sharing accommodations with fellow divers or friends can also cut costs significantly. I remember a trip where we rented a condo together, and it was not only budget-friendly but also a lot of fun!
Getting the Most Value Out of Your Investments
To maximize my investments in underwater photography, I’ve learned to be strategic. I focus on gear that offers versatility and longevity. For example, instead of buying multiple lenses, I invested in a high-quality zoom lens that could serve multiple purposes. I also make it a point to participate in local dive events or workshops, which often provide opportunities for practice and exposure without the hefty price tag. Finally, I keep an eye out for used gear or sales, allowing me to upgrade my equipment without breaking the bank. It’s all about making informed decisions that align with my photography goals while staying within budget.
Safety Tips for Underwater Photography
Essential Safety Gear
Safety should always be a priority when diving and photographing underwater. Over the years, I’ve learned to equip myself with essential safety gear. A reliable dive computer is a must-have for tracking my depth and time underwater. I also make sure to wear a wetsuit or drysuit, depending on the water temperature, to protect myself from cold and potential abrasions. A safety float is another important item. It not only keeps me visible to boaters but can also serve as a marker for my dive buddy if we get separated. It’s comforting to know I have these pieces of safety gear that allow me to focus on capturing those stunning underwater moments.
Understanding Marine Life and Environment
Being aware of the marine life and environment I’m diving into is crucial for my safety and the well-being of the creatures below. I always take time to research the area before I dive. Understanding the local species, their behaviors, and any potential hazards helps me navigate my dives more safely. I’ve had close encounters with jellyfish and spiny sea urchins, reminding me to respect the underwater ecosystem. It’s also important to follow local guidelines and regulations, ensuring that I minimize my impact on the environment while enjoying the beauty of the underwater world.
Emergency Procedures and Planning
Even with careful planning, emergencies can happen. I’ve learned to prepare for the unexpected by having a clear plan in place. Before each dive, I communicate my dive plan with my buddy, discussing our entry and exit points as well as our maximum depth and time. I always carry a whistle and a surface marker buoy, as they can be lifesavers if I need to signal for help. Additionally, I take the time to review emergency procedures, like how to respond to a decompression illness or how to safely assist a buddy in distress. I feel that being prepared not only boosts my confidence but also enhances the overall diving experience.
Frequently Asked Questions
What is underwater photography?
Underwater photography is the practice of capturing images beneath the surface of the water, including marine life, colorful corals, and underwater landscapes.
What are the common types of underwater photography?
The most common types of underwater photography include macro photography, which focuses on small subjects; wide-angle photography, which captures larger scenes; and documentary photography, which tells stories about ocean conservation.
What affordable camera options are recommended for underwater photography?
Affordable camera options for underwater photography include GoPro cameras, which are compact and waterproof; mirrorless cameras like the Sony Alpha series or Olympus OM-D; and older DSLR models that can often be found at reduced prices.
Why is underwater housing important for cameras?
Underwater housing is crucial as it protects the camera from water damage, ensuring that it remains safe while shooting underwater. It’s important to choose a housing that fits your camera model and has good user reviews.
What accessories can enhance underwater photography?
Essential accessories for underwater photography include underwater lights to improve visibility, color correction filters to adjust lost colors, and wide-angle or macro lenses to capture various perspectives and details.
What are some tips for capturing stunning underwater images?
Tips for capturing stunning underwater images include understanding water conditions and lighting, using composition techniques like the rule of thirds, and effectively using natural light to illuminate subjects.
What are some budget-friendly underwater photography locations in the US?
Budget-friendly underwater photography locations in the US include the Florida Keys, known for its vibrant marine life, and the Channel Islands in California, offering unique marine environments and accessible dive sites.
How can I edit my underwater photos effectively?
To edit underwater photos effectively, beginners can use software like Adobe Lightroom or GIMP. Key techniques include adjusting white balance, cropping for composition, and using clarity and sharpening tools to enhance details.
What safety gear is essential for underwater photography?
Essential safety gear for underwater photography includes a reliable dive computer to track depth and time, a wetsuit or drysuit for temperature protection, and a safety float for visibility and marking locations.
How can I engage with the underwater photography community?
Engaging with the underwater photography community can be done by joining online forums, participating in local photography clubs, and attending workshops or meetups to connect with other photographers and learn new techniques.