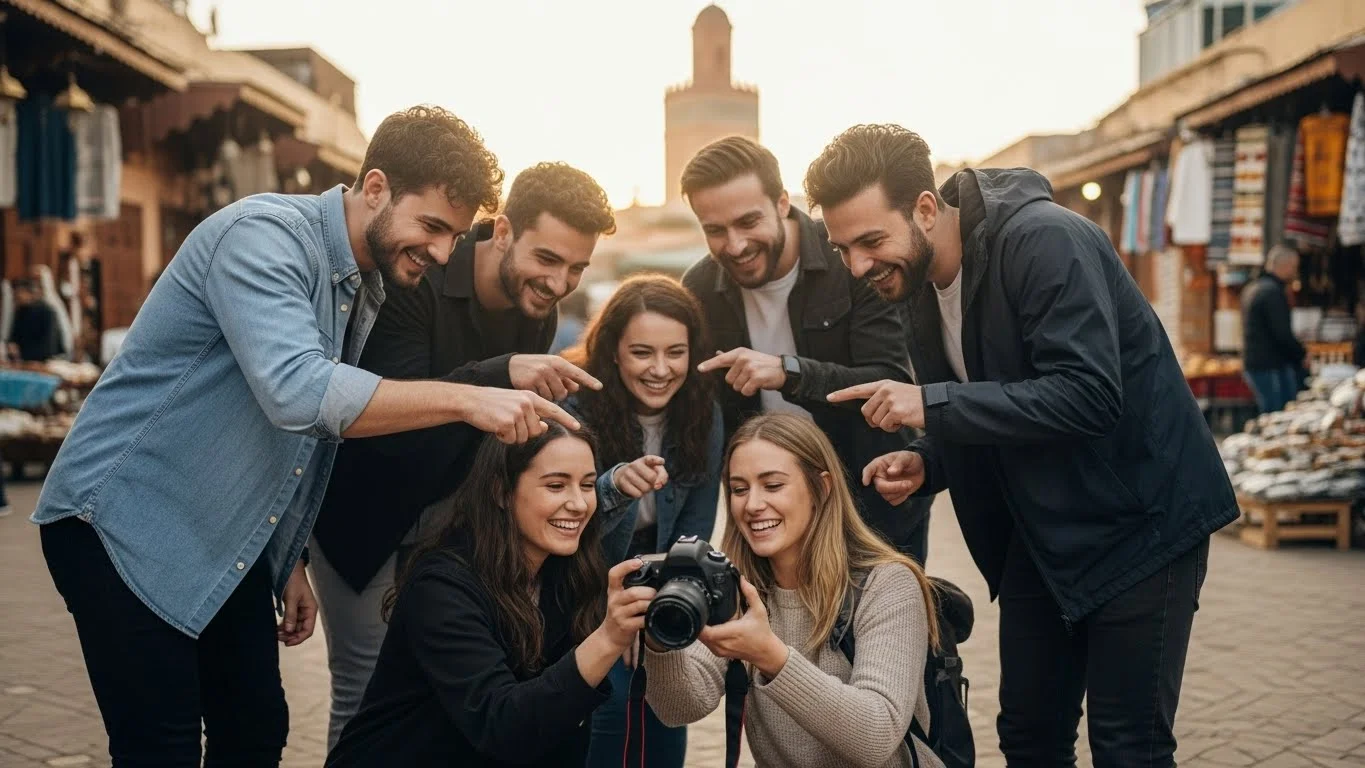
Editing travel portraits can transform simple snapshots into breathtaking memories. Let’s dive into the world of travel portrait photography and discover how to enhance those special moments we capture on our adventures.
Understanding Travel Portraits
What is a Travel Portrait?
When I think of travel portraits, I picture those moments where a person connects deeply with their surroundings. A travel portrait captures not just a face, but the essence of a location, its culture, and the emotions tied to that experience. It’s often set against a stunning backdrop – a bustling market, a serene beach, or an ancient monument – and it tells a story of adventure. I’ve found that these portraits, whether candid or posed, reveal a unique glimpse into the traveler’s journey. They become more than just pictures; they are visual narratives that encapsulate our experiences and feelings.
Importance of Travel Portraits in Capturing Memories
Every time I look back at my travel portraits, I’m transported back to those moments. They evoke the laughter, the excitement, and sometimes even the challenges I faced while exploring new places. I believe that travel portraits serve as a powerful reminder of the people we met, the cultures we immersed ourselves in, and the landscapes we marveled at. In my experience, these portraits are crucial, not just for preserving memories but also for sharing our stories with others. They express who we are in those fleeting moments of travel, capturing the joy and spontaneity that comes with exploring the world.
Essential Tools for Editing Travel Portraits
Recommended Software for Photo Editing
When it comes to editing travel portraits, having the right software can make a huge difference. Over the years, I’ve tried various tools and have settled on a few favorites that I think work wonders. Adobe Lightroom is my go-to for its user-friendly interface and powerful editing capabilities. It allows me to make quick adjustments with sliders and presets. For more intricate edits, I often turn to Adobe Photoshop. It offers precision editing tools that help me refine my portraits exactly as I envision them. Other great options include Capture One for its color grading features and GIMP for a free alternative. No matter which software you choose, I recommend exploring their tutorials to fully unlock their potential. If you’re also interested in the gear that can enhance your travel photography, check out the Ultimate Guide to Portrait Photography Gear for Backpackers.
Hardware Considerations: Monitors and Cameras
Equally important as software is the hardware we use. I’ve learned the hard way that a good monitor can greatly affect how I perceive colors and details in my images. I prefer IPS monitors because they offer better color accuracy and viewing angles, which is crucial for photo editing. Additionally, investing in a quality camera can significantly elevate the quality of your travel portraits. I’ve had great experiences with mirrorless cameras for their portability and image quality, allowing me to capture stunning shots on the go. Don’t forget to also consider lenses; a good prime lens can work wonders for portraiture, providing that pretty bokeh effect that brings the subject into focus.
Basic Editing Techniques for Stunning Portraits
Color Correction: Enhancing Vibrancy and Mood
One of the first things I do when editing my travel portraits is color correction. I love how adjusting the colors can instantly change the mood of a photo. For me, enhancing vibrancy often means bringing out the blues of the ocean or the warm hues of a sunset. I typically start with the white balance to ensure the colors feel natural. It’s amazing how small changes can evoke different feelings. I remember editing a portrait from my trip to Thailand, and when I adjusted the colors to reflect the vibrant markets, it felt like I was back there, surrounded by the energy and excitement of the place.
Lighting Adjustments: Natural vs. Artificial Light
Lighting can make or break a portrait. I’ve often found that natural light provides the best results, especially during the golden hour. However, I’ve also had to deal with harsh midday sun or indoor lighting that just doesn’t cut it. In these cases, I rely on editing techniques to correct exposure and contrast. Using tools like curves and levels allows me to brighten up shadows and tone down highlights. I remember a portrait I took in a dimly lit café; with some editing magic, I was able to bring out the warmth of the scene, making it feel inviting and cozy. For more insights on lighting techniques, see Travel Portrait Lighting: Essential Techniques for Backpackers.
Cropping and Framing for Impact
Cropping is another essential editing technique that I often use to enhance my travel portraits. When I’m editing, I take a moment to consider the composition. I’ve noticed that sometimes, simply cropping out distractions or adjusting the framing can create a much stronger image. I like to follow the rule of thirds, placing my subject along those lines to draw the viewer in. It’s fascinating how a little change in framing can shift the focus and tell a different story within the same photo. Each time I edit, I remind myself to ask, “What do I want the viewer to feel?”
Advanced Editing Techniques
Using Layers and Masks for Precision Editing
As I began to dive deeper into photo editing, I discovered the power of layers and masks. This feature has truly transformed how I approach my travel portraits. Layers allow you to work non-destructively, meaning you can make changes without permanently altering your original photo. I remember the first time I used layers; it felt like I was painting on a canvas, adjusting bits and pieces until the image matched my vision. With masks, I could selectively edit parts of my portrait, enhancing certain areas while leaving others untouched. For example, if I wanted to brighten the subject’s face but keep the background moody, I could easily mask out the background and make adjustments just to the subject. This level of control is something I really appreciate, especially when trying to capture the true essence of a moment.
Skin Retouching: Balancing Natural and Flawless
When it comes to skin retouching, I’ve learned that it’s all about finding that sweet spot between natural and flawless. I remember the first few times I edited skin; I went a bit overboard, smoothing everything out to the point where my subjects looked almost unreal. Now, I focus on subtle adjustments that enhance natural beauty. One technique I love is frequency separation, which allows me to smooth out skin texture while maintaining the natural tones and details. It’s important to remember that we all have imperfections, and those little details tell a story. I try to ensure that my edits enhance my subjects’ features without erasing their individuality. This approach resonates well with me because I believe that every travel portrait should reflect the true character of the person in the shot.
Creating Depth with Focus and Blur Effects
Creating a sense of depth in my portraits has become a go-to technique for making them pop. I often experiment with focus and blur effects to draw the viewer’s eye exactly where I want it. I’ve found that adding a soft blur to the background can really make my subject stand out. For instance, during a visit to a market in Marrakech, I captured a portrait of a vendor surrounded by vibrant spices. By applying a slight blur to the background, I was able to emphasize the vendor and the colors of the spices, making the image feel more dynamic. I also love using depth of field in-camera, but editing gives me even more flexibility to enhance that effect. A little bit of blurriness can transform a busy scene into a captivating story.
Styling Travel Portraits
Selecting Filters and Presets that Fit Your Travel Aesthetic
Filters and presets have been a game-changer for me when it comes to establishing a cohesive travel aesthetic. I can’t tell you how many times I’ve scrolled through my photos and felt overwhelmed by the choices. That’s when I discovered the joy of creating and using my own presets. I like to think of them as shortcuts that help convey the mood of a particular trip. For example, when I traveled to Iceland, I created a preset that emphasized cool tones and added a slight vignette to echo the dramatic landscapes. It helped unify my portfolio and made my editing process much quicker. I encourage you to experiment with creating your own presets; it’s a fun way to develop your style while saving time.
Color Grading Techniques for a Cohesive Look
Color grading has become an essential part of my editing process. I’ve learned that adjusting the color tones across my images not only enhances individual portraits but also creates a harmonious collection. I remember the first time I applied a consistent color grade across a series of photos from a trip to Italy. It completely transformed my images, making them feel like they belonged together, almost like a visual diary. Using tools such as HSL sliders in Lightroom, I can tweak individual color channels to create a certain mood—like leaning into warm golden hues for a sunset-themed series or cooler tones for a winter wonderland vibe. This technique allows me to tell a more compelling story through my travel portraits.
Incorporating Text and Graphics for Personalization
Adding text and graphics is another layer of creativity I’ve enjoyed exploring. It’s a fantastic way to personalize my travel portraits and share the story behind them. I often incorporate quotes from my travels or small graphics that represent the culture I experienced. For instance, after visiting Japan, I added some handwritten-style text overlaying a portrait of me in front of a cherry blossom tree. It added a personal touch and made the image feel more like a memory rather than just a photograph. I find that a well-placed quote can evoke emotions and engage viewers, inviting them to connect with my experiences on a deeper level.
Editing for Different Travel Scenarios
Urban Portraits: Capturing City Life
Urban settings present a unique opportunity for travel portraits. I’ve found that city life brings an energy and vibrancy that can really elevate a photo. When I’m in a bustling urban environment, I love to incorporate iconic landmarks or street art in my portraits. The background elements add depth and context, making the portrait more than just a face; it becomes a story woven into the fabric of the city. For instance, during my visit to New York City, I captured a portrait of a street performer in Central Park. The lively atmosphere was palpable, and through editing, I enhanced the colors of the cityscape behind him, making the entire scene pop. I recommend using a slight vignette to draw the viewer’s attention toward the subject while still enjoying the details of the surroundings.
Nature and Adventure: Highlighting Landscapes
When I venture into nature, I always aim to capture the breathtaking landscapes that surround my subjects. The beauty of the outdoors can complement a portrait beautifully. I remember hiking in the Swiss Alps and taking a portrait of a friend against a backdrop of towering mountains. In post-processing, I adjusted the contrast and saturation to emphasize the vivid greens of the grass and the blues of the sky, which made the portrait feel more immersive. Another technique I’ve employed is to use selective editing; I enhance the natural elements in the background while keeping the subject’s colors more subdued. This creates a harmonious balance, allowing the viewer to appreciate both the person and their stunning environment. I suggest experimenting with different angles to find the most captivating composition, as nature offers countless possibilities.
Cultural Experiences: Showcasing Local Traditions
One of the most rewarding aspects of travel portraits is capturing the essence of different cultures. I’ve had the chance to witness various traditions and festivals around the world, and editing these portraits helps convey the rich stories behind them. For example, during a festival in India, I took portraits of locals wearing traditional attire. The vibrant colors of their clothing were so striking that I focused on enhancing those hues in my edits while keeping the skin tones natural. I also love adding subtle texture to the backgrounds, which can reflect the cultural elements of the scene. Textures like fabric or patterns can hint at the stories behind the traditions being celebrated. This approach not only highlights the subject’s cultural significance but also invites viewers to learn about the vibrant traditions that enrich our world. I’ve found that when editing these portraits, it’s important to maintain respect for the culture being portrayed, ensuring that the final image feels authentic.
Common Mistakes to Avoid in Editing
Over-Editing: Finding the Right Balance
As I’ve delved deeper into editing, I quickly learned how easy it is to go overboard with adjustments. I remember a time when I was so excited about a new editing technique that I applied it to every portrait, resulting in unnatural colors and overly smooth skin. Over-editing can strip away the essence of a moment, making it feel less genuine. It’s crucial to step back and evaluate our edits. I’ve found it helpful to take breaks during the editing process, allowing my eyes to rest and return with a fresh perspective. A good rule of thumb is to ask myself, “Does this enhance the story I’m trying to tell?” If the answer is no, I dial it back. Embracing the beauty of imperfection often leads to more authentic portraits.
Neglecting Composition in Post-Processing
While editing can be incredibly powerful, I’ve realized that it’s not a substitute for good composition. Sometimes, I’ve gotten so caught up in perfecting an image that I overlooked its basic structure. For instance, a portrait that is slightly off-center or poorly framed can lose its impact, no matter how much I edit it. I’ve learned to go back to the rules of composition, such as the rule of thirds or leading lines, even in post-processing. Cropping can help, but it’s always preferable to start with a strong composition during the shoot. I recommend analyzing your images before diving into editing; this way, any adjustments you make will strengthen the overall impact of the portrait.
Ignoring the Story Behind the Image
Every portrait has a story, and it’s our job as editors to honor that narrative. I’ve sometimes found myself so focused on technical details that I lost sight of the emotions and experiences captured in the shot. For example, I took a portrait of a local artisan during my travels, and while I was tempted to enhance the background significantly, I realized that the subject’s expression and the rawness of the environment were what made the image special. I decided to keep the edits minimal, allowing the story to shine through. When editing, I always try to remember what I felt in that moment and aim to reflect that feeling in the final image. This approach makes each portrait not just a visual representation but also a heartfelt memory that resonates with anyone who views it.
Frequently Asked Questions
What is a travel portrait?
A travel portrait captures not just a person’s face but the essence of a location, its culture, and the emotions tied to the experience. It tells a story of adventure and reveals a unique glimpse into the traveler’s journey.
Why are travel portraits important for capturing memories?
Travel portraits serve as powerful reminders of the people we met, the cultures we immersed ourselves in, and the landscapes we marveled at. They express who we are in those fleeting moments of travel and help preserve and share our stories with others.
What software is recommended for editing travel portraits?
Adobe Lightroom is a popular choice for its user-friendly interface and powerful editing capabilities. For more intricate edits, Adobe Photoshop is recommended. Other options include Capture One for color grading features and GIMP as a free alternative.
What basic editing techniques can enhance travel portraits?
Basic editing techniques include color correction to enhance vibrancy and mood, lighting adjustments to correct exposure and contrast, and cropping and framing to improve composition and impact.
How can layers and masks be used in editing travel portraits?
Layers and masks allow for non-destructive editing, enabling you to make changes without permanently altering the original photo. This provides control to selectively enhance certain areas of a portrait while leaving others untouched.
What is skin retouching and how should it be approached?
Skin retouching involves enhancing natural beauty without making subjects look unrealistic. Techniques like frequency separation help smooth skin texture while maintaining natural tones and details, ensuring the individuality of the subject is preserved.
How can filters and presets contribute to a travel aesthetic?
Filters and presets help establish a cohesive travel aesthetic by providing shortcuts to convey the mood of a trip. Creating and using your own presets can unify your portfolio and streamline the editing process.
What are some common mistakes to avoid in editing travel portraits?
Common mistakes to avoid include over-editing, neglecting composition in post-processing, and ignoring the story behind the image. It’s important to find the right balance in edits and maintain a strong composition from the beginning.
How can one enhance urban portraits effectively?
In urban settings, incorporating iconic landmarks or street art can add depth and context to portraits. Using editing techniques to enhance the colors of the cityscape can make the scene more vibrant and engaging.
What techniques can highlight cultural experiences in travel portraits?
Highlighting cultural experiences can be achieved by enhancing vibrant colors of traditional attire while maintaining natural skin tones. Adding subtle textures to backgrounds can reflect cultural elements and enhance the storytelling aspect of the portraits.