Capturing stunning travel portraits is all about mastering the art of lighting. With the right techniques, you can transform ordinary shots into breathtaking memories that truly reflect the essence of your adventures. To enhance your skills, consider reading more about how to create memorable travel portraits.
Understanding Portrait Lighting Basics
What is Portrait Lighting?
When I first started delving into photography, I was amazed by how much lighting could change the mood and feel of a portrait. Portrait lighting refers to the way light interacts with the subject, highlighting their features and creating depth. It’s not just about brightness; it’s about how shadows and highlights shape the image. I quickly learned that understanding the nuances of portrait lighting can make a significant difference in the quality of my travel photos.
Importance of Lighting in Travel Photography
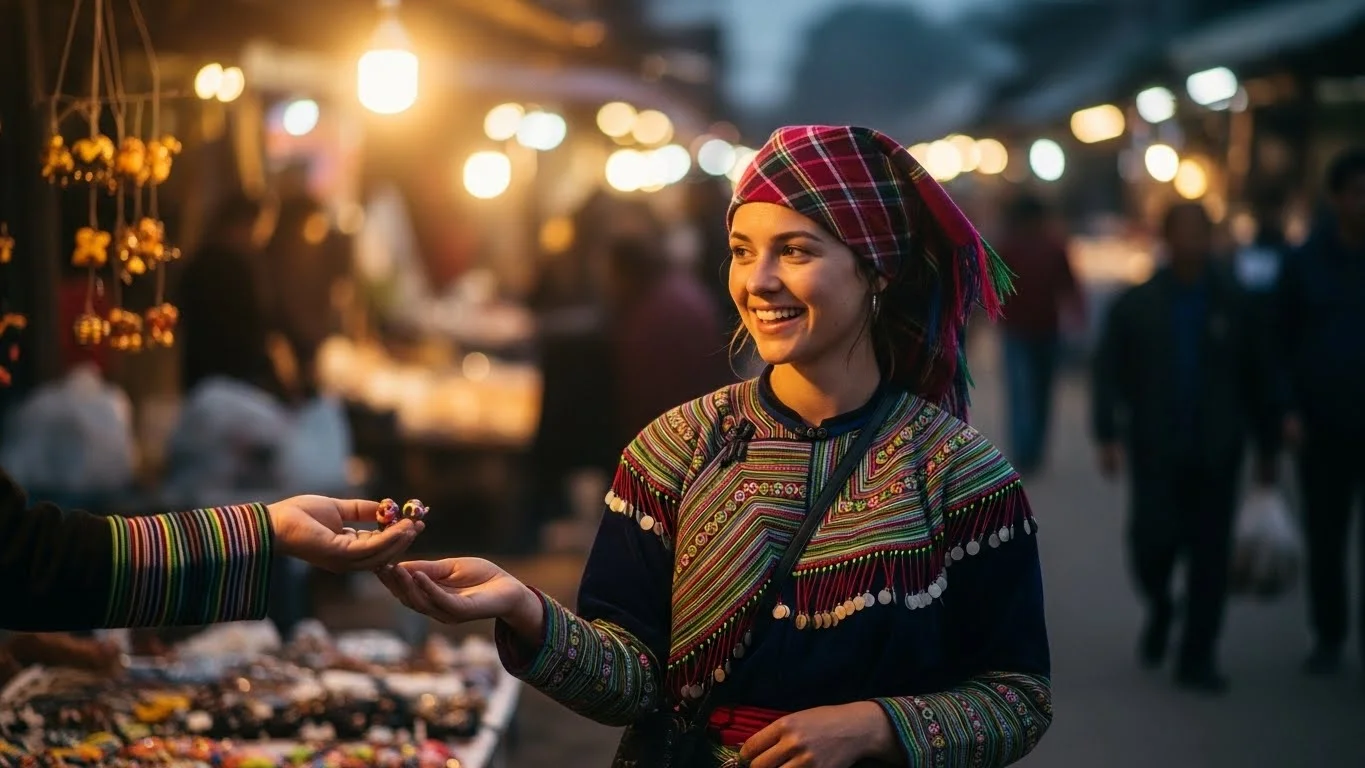
As I traveled to different locations, I realized that lighting plays a crucial role in telling a story through images. The right lighting can evoke emotions, set a mood, and even transport viewers to the moment captured in the photo. I remember wandering the streets of Marrakech, and it was the golden hour that brought the vibrant colors of the market to life. I felt like the light wrapped around my subjects, making them more inviting and dynamic. Lighting can either enhance or diminish the beauty of your shots, so it’s essential to pay attention to it. To learn more about the essentials of cultural portraits, check out The Art of Cultural Portraits: Travel Photography Essentials.
Types of Lighting Sources
When it comes to portrait lighting, there are two primary sources: natural and artificial. Each has its own unique advantages and can be used creatively to achieve stunning results.
Natural Light
I often find myself gravitating towards natural light, especially when I’m outdoors. It’s free, abundant, and can create beautiful effects. The sun can act as a natural spotlight, illuminating my subjects in ways that give life to the scene. I love how natural light shifts throughout the day, offering different tones and moods. I’ve learned to embrace it, whether it’s the soft morning glow or the dramatic rays of sunset.
Artificial Light
While natural light is fantastic, there are times when I need a little extra help. This is where artificial light comes in. I’ve experimented with flashes and continuous lighting setups, and each has its own charm. Flashes can be great for filling in shadows or adding a pop of light in darker environments. Continuous lighting, on the other hand, allows me to see how the light affects my subjects in real-time, which can be incredibly helpful when I’m trying to set the perfect mood.
Essential Portrait Lighting Techniques
Using Natural Light Effectively
Now that I have a better understanding of the types of lighting, I’ve developed some techniques to maximize natural light in my portraits. It’s not just about snapping a photo when the sun is shining; it’s about being intentional with how I use it.
Golden Hour Photography
One of my favorite times to shoot is during the golden hour—those magical moments just after sunrise or just before sunset. The warm, soft light creates a gorgeous glow that’s flattering for portraits. I remember standing on a beach in Bali, the sun dipping below the horizon. The light was golden, and I captured some of my favorite portraits of my friends set against that breathtaking backdrop. If you can time your shoots around these moments, I promise you’ll be amazed at the results. For more tips on travel portraits, read Travel Portraits 101: Embrace Cultures Through Your Lens.
Diffusing Harsh Sunlight
Sometimes, the midday sun can be too harsh, casting unflattering shadows on my subjects. In those situations, I’ve learned to diffuse the light. I often seek shaded areas, under trees or buildings, where the light becomes softer and more even. If I can’t find shade, I carry a simple reflector or even a white sheet to bounce light back onto my subjects. This technique has saved many shots from looking overly harsh and unappealing.
Manipulating Artificial Light
When natural light isn’t an option, I turn to artificial lighting techniques that can help elevate my portraits.
Using Flash for Portraits
At first, I was intimidated by flash photography, but over time I learned to harness its power. A flash can add a dynamic element to my portraits, especially in low-light situations. I discovered that bouncing the flash off a wall or ceiling can create a more natural look, avoiding that harsh direct flash effect. It’s all about experimenting and finding what works best in the moment.
Continuous Lighting Options
Continuous lights have been a game-changer for me, especially when shooting indoors or during nighttime. They allow me to see how the light falls on my subjects and adjust my setup accordingly. I remember a night shoot in Paris, using continuous lights to highlight the stunning architecture around my subject. It was a creative way to blend the urban environment with beautiful portrait lighting.
Understanding Light Direction and Quality
Front Lighting vs. Side Lighting
One of the biggest revelations I had in my photography journey was understanding how light direction affects portraits. When I use front lighting, it illuminates my subject evenly, making them appear bright and vibrant. This technique is great for showcasing details, like the texture of a subject’s skin or the colors in their outfit. I remember taking a portrait of a street performer in Barcelona, and the front lighting made his captivating smile pop against the vibrant graffiti behind him.
However, I’ve also found that side lighting can add depth and drama to my images. It creates shadows that enhance the facial features, giving a more three-dimensional look. One memorable shot was during a late afternoon in Rome when the sun was low, casting long, beautiful shadows on my subject’s face. The combination of light and shadow told a richer story, making the portrait feel more alive.
Backlighting Techniques
Backlighting is another technique I love to experiment with. This is when the light source is behind the subject, creating a halo effect that can be stunning. I remember a beautiful moment in Thailand, where I positioned my subject against the setting sun. The backlighting created a magical glow around her, and with a little adjustment in exposure, I was able to capture the scene beautifully without losing the details in her face. Backlighting can sometimes be tricky, but when done right, it adds a unique touch that elevates the photograph.
One tip I learned is to use a reflector to bounce some of that light back onto the subject’s face. This way, you can keep the ethereal quality of backlighting while ensuring your subject doesn’t end up in the dark.
Soft vs. Hard Light
The quality of light—whether it’s soft or hard—can make a huge difference in the mood of a portrait. Soft light comes from large light sources, like an overcast sky, and creates gentle shadows that flatter most subjects. I vividly recall a rainy day in Seattle when I was able to capture portraits of locals in a cozy café. The diffused light coming through the windows made everyone look warm and inviting, and the overall atmosphere was relaxed and pleasant.
On the other hand, hard light—like the midday sun—creates strong contrasts and defined shadows. It can be challenging but also rewarding if you know how to use it. I’ve shot portraits in bright sunlight where the hard light emphasized the textures in my subject’s clothing and the surrounding environment. It added a dynamic edge to the photos, making them feel vibrant and alive. This contrast can be an excellent way to highlight details, especially in travel photography where textures often tell a story of their own.
Recommended Tools for Travel Portrait Lighting
Reflectors
Reflectors became one of my favorite tools as I learned more about portrait lighting. They’re portable and can dramatically change the quality of light hitting my subject. I usually carry a collapsible reflector in my camera bag. I remember a stunning shoot in the mountains where I used a gold reflector to warm up the light on my friend’s face. The difference was astonishing; it added a warmth that complemented the surrounding nature beautifully.
Using reflectors is simple; I just position them to bounce sunlight onto my subject. They can fill in shadows and create a more balanced look, especially when the light is coming from one direction. I recommend experimenting with different colors—like silver for a cooler tone or gold for warmth—to see what works best for your style.
Diffusers
In addition to reflectors, I’ve found diffusers to be invaluable, especially in harsh lighting conditions. A diffuser softens the light, reducing the intensity and creating a more even illumination over my subject. I often use a simple fabric diffuser, which is lightweight and easy to set up. During one memorable shoot in an open park, I noticed that the bright sun was casting harsh shadows on my subject’s face. By placing a diffuser between them and the sun, I was able to soften those shadows and create a lovely, flattering light.
Diffusers can be particularly useful when I’m photographing people in direct sunlight. They help to maintain the natural beauty of the scene without the risk of overexposure. It’s all about maintaining that balance between light and shadow, and diffusers are a great way to achieve that.
Portable Lighting Kits
Lastly, I can’t emphasize enough the value of having a portable lighting kit. Whether I’m on a remote beach or in bustling city streets, having a lightweight kit allows me to adapt to any lighting situation. I invested in a small softbox and a battery-powered flash, making it easier to create professional-looking portraits anywhere. I remember shooting at a local festival where the natural light was fading fast. With my portable lighting kit, I was able to set up a quick and effective lighting solution that made my subjects stand out against the colorful background.
Portable lighting kits can offer flexibility and creativity, allowing me to experiment with different lighting setups. I encourage anyone serious about travel portrait photography to consider investing in one. The results can be transformative!
Choosing the Right Location for Portraits
Natural Settings vs. Urban Environments
Choosing the right location for my portraits has always been a delightful part of my photography journey. I find that natural settings, like beaches, parks, or mountains, offer a beautiful backdrop that enhances my subjects. I remember a shoot I did at a stunning waterfall in Costa Rica. The lush greenery and cascading water added a magical quality to my portraits, making them feel alive. The natural light filtered through the trees, creating a soft, diffused effect that perfectly complemented my subject’s expressions.
On the flip side, urban environments have their own charm. The textures of buildings, street art, and bustling city life can add layers to my portraits. I once captured a series of portraits in downtown Tokyo, where the neon lights and vibrant streets created a dynamic atmosphere. Each background element told a story, making the portraits feel more immersive. I’ve learned that both settings can be equally compelling; it really depends on the mood I want to convey.
Finding the Perfect Spot with Ideal Lighting
Once I decide on a location, the next step is to scout for the perfect spot with ideal lighting. This often involves a little exploration, which I genuinely enjoy. I look for areas where the light falls beautifully on my subject, whether it’s through trees, buildings, or even reflections from water. I remember wandering through a quaint village in Italy, and I stumbled upon a small alleyway where the light streamed down just right. I quickly set up my shot, and the results were stunning—my subject seemed to glow against the rustic backdrop.
It’s also essential to pay attention to how the light shifts throughout the day. I’ve found that a spot might look fantastic in the morning but become too harsh by midday. I often carry my camera and take test shots at different times to see how the light varies. This practice has not only improved my portraits but has also made me more aware of the beauty around me, turning every outing into a mini photoshoot!
How Weather Affects Portrait Lighting
Weather can be a game-changer when it comes to portrait lighting. I’ve learned to embrace different weather conditions instead of shying away from them. Overcast days, for instance, can be incredibly beneficial for soft, flattering portraits. I recall a cloudy day in London when I decided to venture out. The diffused light made the colors pop, and I was able to get some wonderful shots without worrying about harsh shadows. I actually prefer this kind of natural softbox effect the clouds create.
On the other hand, sunny days can bring about challenges, but they also present opportunities for creative lighting techniques. I’ve shot portraits in bright sunlight, and while it can be intense, it allows me to play with shadows and highlights. I once captured a portrait of a dancer during a sunny afternoon, using the strong light to emphasize her movements. The key is to adapt to the weather and use it to enhance my portraits rather than let it hinder me. I’ve learned to keep an eye on the forecast and be prepared, as the weather can turn on a dime!
Camera Settings for Optimal Portrait Lighting
Understanding ISO, Aperture, and Shutter Speed
Once I’ve set the scene, I turn my attention to the technical aspects of my camera settings. Understanding ISO, aperture, and shutter speed has been crucial in achieving the desired effect in my portraits. I typically start with a low ISO to minimize noise, especially in bright conditions. I remember a shoot in the early morning hours, where the soft light required a lower ISO setting to capture those delicate details without grain.
Aperture is another vital setting. I love using a wide aperture to create that beautiful depth of field effect, which keeps my subject sharp while softly blurring the background. This technique helps to isolate my subject and draw attention to their expressions. I often find myself at around f/2.8 to f/4, depending on how much of the background I want to include. It’s amazing how this simple adjustment can transform the overall feel of a portrait.
Shutter speed is equally important. I aim for a speed that allows me to freeze any motion, especially when capturing active subjects or during windy conditions. I usually stay above 1/200th of a second to ensure sharpness. It’s all about finding the right balance, and I’ve learned that practice makes perfect. I take test shots and make adjustments as needed until everything aligns perfectly.
Using Manual Mode for Better Control
Switching to manual mode was a game-changer for me. It allows me to take full control over my settings, adjusting them based on the lighting conditions at hand. At first, I felt intimidated, but it quickly became my preferred way to shoot. I remember a breathtaking sunset in Santorini, where I manually dialed in my settings to capture the vibrant colors without losing detail in the shadows. That experience taught me the importance of being adaptable and responsive to my surroundings.
Now, when I’m out shooting, I continuously assess the light conditions and adjust my settings accordingly. It’s liberating to know that I can craft the image I envision, regardless of the situation. For anyone just starting, I recommend gradually moving into manual mode; it’s an empowering step that will enhance your photography skills significantly!
White Balance Settings for Different Lighting Conditions
White balance is another critical aspect that can dramatically affect the mood of my portraits. I’ve learned to adjust my white balance based on the lighting conditions to ensure that my subjects’ skin tones look natural. For example, in indoor settings with warm lighting, I switch to a tungsten setting to balance the colors. Conversely, when shooting in open shade or under cloudy skies, I opt for a cooler white balance to maintain the vibrancy of the colors.
In my experience, shooting in RAW helps immensely because it gives me the flexibility to tweak the white balance during post-processing without losing quality. I recall a shoot at a local market where the lighting was all over the place, and using RAW saved the day. I was able to correct the colors in editing, ensuring that my portraits looked true to life.
Overall, mastering these camera settings has been an ongoing journey for me. Each shoot offers new challenges, but with practice, I’ve gained more confidence and control over my portrait lighting, allowing my creativity to shine through.
Frequently Asked Questions
What is portrait lighting?
Portrait lighting refers to the way light interacts with the subject, highlighting their features and creating depth. It involves understanding how shadows and highlights shape the image, significantly impacting the quality of travel photos.
Why is lighting important in travel photography?
Lighting plays a crucial role in telling a story through images, evoking emotions, and setting a mood. The right lighting can enhance the beauty of shots and transport viewers to the moment captured in the photo.
What are the two primary sources of portrait lighting?
The two primary sources of portrait lighting are natural light and artificial light. Each has unique advantages and can be used creatively to achieve stunning results.
What is golden hour photography?
Golden hour photography refers to taking photos during the magical moments just after sunrise or just before sunset. The warm, soft light during this time creates a flattering glow for portraits.
How can harsh sunlight be diffused in portrait photography?
Harsh sunlight can be diffused by seeking shaded areas or using reflectors or white sheets to bounce light back onto subjects, creating softer and more even illumination.
What are the benefits of using flash for portraits?
Using flash can add dynamic elements to portraits, especially in low-light situations. Bouncing the flash off walls or ceilings can create a more natural look and avoid harsh direct flash effects.
What is backlighting in portrait photography?
Backlighting occurs when the light source is behind the subject, creating a halo effect. This technique can add a unique touch to portraits, enhancing the ethereal quality of the image if managed correctly.
How does weather affect portrait lighting?
Weather can significantly influence portrait lighting. Overcast days can provide soft, flattering light, while sunny days can create challenges and opportunities for creative lighting techniques, allowing for the play of shadows and highlights.
What camera settings are crucial for optimal portrait lighting?
Key camera settings for optimal portrait lighting include ISO (typically kept low to minimize noise), aperture (wide for depth of field), and shutter speed (above 1/200th of a second to freeze motion).
What is the advantage of using manual mode in photography?
Using manual mode allows photographers to have full control over their settings, enabling them to adjust based on the lighting conditions and craft images as envisioned, leading to greater creativity and adaptability in photography.