Underwater photography is a mesmerizing blend of art and adventure. With the right editing techniques, you can turn your underwater shots into breathtaking images that capture the beauty of the ocean. If you’re looking for inspiration, check out The Best Affordable Locations for Underwater Photography Adventures.
Understanding Underwater Photography Basics
When I first dipped my toes into underwater photography, I quickly realized that having a strong grasp of the basics was essential. Understanding the unique environment of underwater shooting can make a world of difference in the quality of your photos. Let’s dive into some of the foundational aspects of underwater photography.
Essential Gear for Underwater Photography
Choosing the right gear is paramount. I learned this the hard way; the first time I used a regular camera underwater, I ended up with blurry images and some serious regrets. Investing in specialized equipment can elevate your underwater photography experience. Here’s what I consider essential:
- Underwater Camera: A camera built for underwater use is a must. There are many options, ranging from compact point-and-shoot models to advanced DSLRs with underwater housings.
- Waterproof Housing: If you have a DSLR or mirrorless camera, a good waterproof housing is crucial. It keeps your camera safe while allowing you to adjust settings easily.
- Underwater Strobe Lights: Natural light diminishes quickly underwater, so adding strobes can help illuminate your subjects and reduce shadows.
- Filters: Using color correction filters can enhance the colors of your subject and reduce the blue/green cast common in underwater shots.
- Buoyancy Control Device (BCD): Having good buoyancy control allows you to stabilize yourself while shooting, minimizing movement and blurriness.
This gear might seem like a lot at first, but I found that as I got used to it, it became second nature. Plus, each piece can greatly impact the quality of my photos.
Types of Underwater Cameras
When I started looking into cameras for underwater photography, I was amazed at the variety available. Here’s a summary of the main types that I found helpful:
- Compact Cameras: These are lightweight and easy to use, making them perfect for beginners. Many are waterproof, eliminating the need for a housing.
- DSLR Cameras: For those more serious about photography, DSLRs offer flexibility and superior image quality. The downside is they require more investment and bulkier equipment.
- Mirrorless Cameras: These have become increasingly popular among underwater photographers. They combine the benefits of DSLRs with a smaller form factor, allowing for easier handling underwater.
Finding the right camera was a journey for me, and I recommend considering what you want to achieve and your level of experience before making a choice.
Lighting Techniques for Underwater Shots
One of the most challenging aspects of underwater photography is dealing with lighting. The deeper you go, the less light there is, which can affect color and clarity. Through trial and error, I’ve developed some techniques that work well:
- Use Natural Light: When shooting close to the surface, take advantage of natural sunlight. The best times are during mid-morning or late afternoon when the sun is lower in the sky.
- Strobes and Flash: When diving deeper, using strobes or flash can help recapture colors that water absorbs. It’s essential to angle the light correctly to avoid backscatter.
- Diffusers: For softening the light from your strobes, I recommend using diffusers. They help spread the light evenly and reduce harsh shadows.
These lighting techniques have made a significant difference in my underwater shots, allowing me to capture vibrant colors and clear details, even in murky waters.
As I continue my journey in underwater photography, I realize that mastering the basics is just the first step. Understanding gear, camera types, and lighting techniques lays a solid foundation for creating stunning underwater images. Embracing these elements has transformed my experience and the beauty I can capture beneath the waves.
Common Challenges in Underwater Photography
As I continued my underwater photography journey, I quickly discovered that it’s not just about having the right gear or techniques; there are also some challenges that can really test your skills and patience. These challenges can be frustrating, but overcoming them can lead to some of your best work. Here are a few common hurdles I faced and how I tackled them.
Dealing with Color Loss and Water Absorption
One of the first challenges I encountered was the issue of color loss. I remember the first time I reviewed my underwater shots; they looked washed out and lacked the vibrant hues I had seen in person. This is due to the way water absorbs light—reds and yellows vanish quickly, leaving behind blues and greens. To combat this, I learned to use color correction filters while shooting, which helped bring back some of the warmth in my images.
Additionally, post-processing became my ally. I started experimenting with editing software to adjust the color balance and saturation. I found that even a slight increase in warmth could make a huge difference. I recommend taking the time to familiarize yourself with color correction tools in your editing software, as they can help you restore the true beauty of the underwater world. For those looking for inspiration, you might want to check out Explore Stunning Underwater Photography Spots on a Budget.
Managing Light and Visibility Issues
Another challenge I faced was managing light and visibility. I often found myself in murky waters, where the visibility was less than ideal. There were days when I couldn’t see my hand in front of my face! During these situations, I discovered the importance of positioning. I learned to get as close to my subject as possible to minimize the amount of water between me and the shot. This not only improved visibility but also added depth to my images.
Using strobes effectively was another game changer for me. I began to practice angling my strobes to avoid backscatter—a common issue when shooting in cloudy water. It took some trial and error, but I eventually found the right angles that illuminated my subjects without creating distracting particles in the frame. Understanding how light behaves underwater truly transformed my photography.
Avoiding Motion Blur and Distortion
Motion blur became a frequent companion during my underwater photography escapades. With currents and my own movements, it was easy to capture images that looked like abstract art rather than clear photographs. To address this, I made a conscious effort to stabilize myself while shooting. This involved controlling my buoyancy and finding solid points to grab onto when necessary. I remember the first time I got a crisp shot of a fish swimming by; it felt like a huge victory!
Another tip I picked up was using faster shutter speeds. This allowed me to freeze the action and avoid blur. When my subjects were darting around, I adjusted my settings to capture the moment better. Taking some time to understand the exposure triangle—shutter speed, aperture, and ISO—helped me make quick adjustments while underwater, leading to sharper images.
Each of these challenges taught me valuable lessons about patience, persistence, and creativity. I began to see underwater photography not just as a hobby, but as a complex art form that required both technical skill and a deep appreciation for the environment. With each dive, I felt like I was not only improving my photography skills but also gaining a deeper connection to the underwater world.
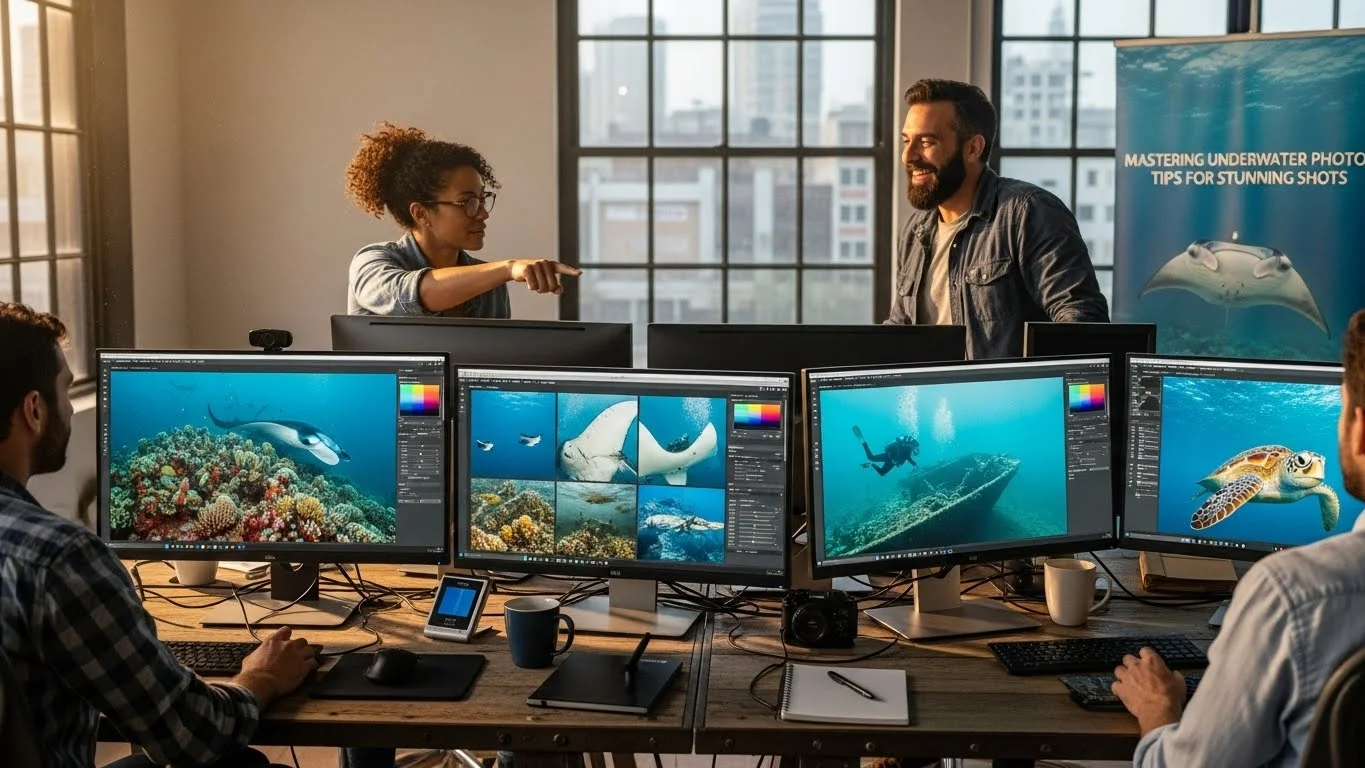
Fundamentals of Underwater Photo Editing
Once I started capturing better underwater images, I realized that the editing process was just as important as the shooting itself. Editing became my playground, allowing me to refine and enhance my photos to truly reflect the magic I experienced underwater. Here are some fundamentals I learned about underwater photo editing that I believe can help anyone looking to improve their images.
Choosing the Right Editing Software
Finding the right editing software was one of the first steps I took in my editing journey. I experimented with several programs, each with its own strengths and weaknesses. I found that Adobe Lightroom was a great starting point for its user-friendly interface and powerful editing tools. It allowed me to make global adjustments easily, like correcting exposure and white balance.
For more detailed work, I turned to Adobe Photoshop, which enabled me to dive deep into layer adjustments and fine-tuning. I recommend trying a couple of different programs to see what fits your style and needs best. Don’t be afraid to take advantage of free trials—they were invaluable for me!
Understanding RAW vs. JPEG for Underwater Images
Another key aspect of editing was understanding the difference between RAW and JPEG formats. Initially, I shot in JPEG because it allowed for quicker processing, but I soon realized that RAW files offered much more flexibility. They capture more detail and dynamic range, allowing for significant adjustments without compromising image quality. Switching to RAW made a noticeable difference in my images, giving me the ability to recover details in highlights and shadows that I had previously lost.
Basic Editing Techniques to Enhance Underwater Photos
As I delved into editing, I learned some basic techniques that could dramatically enhance my underwater photos. Adjusting exposure and contrast was often my first step, as it helped to bring out the vibrancy of colors. I also found that sharpening my images helped add detail, particularly in the textures of coral and the fins of fish.
Another technique I regularly applied was cropping to improve composition. Sometimes, the best shots needed just a little adjustment to focus on the subject. I often used the rule of thirds as a guide, placing my main subjects off-center to create a more dynamic image. These simple edits not only improved my photos but also made them more visually engaging.
As I explored underwater photography, I learned that every challenge was an opportunity for improvement. The more I practiced, the more I found joy in the process of capturing and editing my images. The underwater world is truly a magnificent place, and I feel lucky to share its beauty through my photography.
Advanced Editing Techniques for Stunning Underwater Shots
As I progressed in my underwater photography journey, I realized that editing was not just about fixing issues but also about enhancing the beauty of my images. Diving deeper into editing techniques opened up a new world of possibilities. Here are some advanced editing techniques that I found particularly helpful in creating stunning underwater shots.
Color Correction and Grading
Color correction became one of my favorite aspects of editing. I learned that achieving the right colors can completely transform an image. After shooting, I often noticed the blue and green hues overpowering the warmer tones. To address this, I started using color grading tools in my editing software. I would adjust the hues, saturation, and luminance of specific colors to restore the vibrancy I experienced underwater.
I often found myself playing with the color balance sliders to bring warmth back into the images without overdoing it. I remember one particular shot of a clownfish that initially appeared almost monochromatic. After a bit of tweaking, I was able to bring out the rich oranges and yellows, making the fish pop against the green anemone. Color grading not only enhanced individual images but also helped me develop a consistent style across my portfolio.
Adjusting Exposure and Contrast
Exposure and contrast adjustments were crucial in my editing toolbox. A well-exposed image can make all the difference, especially in the often dim underwater environments. I learned to carefully analyze the histogram of my photos to ensure I captured the right range of highlights and shadows.
In many cases, I found that adjusting exposure slightly higher brought out hidden details that were previously lost in the shadows. Conversely, lowering the exposure could help reduce any overexposed areas. Contrast adjustments allowed me to create depth in my images. By increasing contrast, I was able to make colors more vibrant and details more pronounced, enhancing the overall visual impact of my underwater shots.
Sharpening and Noise Reduction
Sharpness is vital in photography, and when it comes to underwater images, it can be the difference between a stunning shot and a blurry one. I discovered that applying sharpening techniques in post-processing could bring out the fine details of marine life, like the intricate patterns on a fish’s scales or the textures of coral. I preferred to use selective sharpening, focusing on the subject while keeping the background soft to maintain a natural look.
However, with sharpening often came noise, especially in low-light situations. I learned to use noise reduction tools to clean up my images without losing too much detail. Striking the right balance was key. I remember being particularly proud of a photo I took of a sea turtle; after careful sharpening and noise reduction, the details came to life without appearing overly processed.
Using Layers and Masks Effectively
The use of layers and masks became a game-changer in my editing workflow. I had initially found it intimidating, but once I wrapped my head around the concept, it opened up so many creative avenues. Layers allowed me to make non-destructive edits, meaning I could experiment without the risk of ruining my original image.
With masks, I could apply adjustments to specific areas of an image without affecting the whole photo. For instance, if I wanted to brighten just the subject while keeping the background darker, I could easily do this with a mask. I remember a particular instance where I captured a vibrant school of fish in a darker part of the reef. By brightening the fish and leaving the surrounding area untouched, I created a striking focal point that drew viewers’ eyes directly to the action.
These advanced editing techniques expanded my creativity and helped me refine my images beyond the basics. As I embraced these skills, I found my underwater photographs becoming more vibrant and telling compelling stories. They were not just images; they were reflections of the beauty I experienced beneath the waves.
Creative Enhancements for Underwater Photography
As I grew more comfortable with the basics of underwater photography and editing, I started exploring creative enhancements that could take my images to the next level. It’s amazing how a few thoughtful additions can transform a good photo into a great one. Here are some techniques I found particularly beneficial.
Applying Filters and Effects
One of the easiest ways to enhance my underwater photos was by experimenting with filters and effects. I discovered that using a subtle color filter could help bring back some of the warmth that often gets lost in underwater shots. For example, I often used a warming filter to infuse my images with a golden hue, which reminded me of the sun filtering through the water. This simple adjustment made a huge difference in the overall feel of my images.
Additionally, I experimented with vignette effects. Applying a slight vignette around the edges of my photos helped to draw the viewer’s eye toward the center, where the subject was usually located. I remember one particular shot of a diver exploring a coral reef. By adding a slight vignette, I felt that the image became more intimate, almost as if the viewer was right there with the diver.
Adding Textures and Overlays
Textures and overlays became another fun avenue for creativity. I experimented with adding textures like water ripples or bubbles to give my photos a more dynamic feel. Subtle overlays can provide depth and interest, especially when dealing with vast, open spaces in the ocean. I recall an image of a school of fish swimming through a sunlit patch of water; by adding a gentle bubble overlay, I was able to enhance the sense of movement and liveliness in the shot.
Another technique I found effective was using light leaks or lens flares to create an ethereal, dreamy quality. This worked especially well for images that featured sunbeams breaking through the water. I love how a little creativity can evoke emotions in my photography, making the viewer feel like they’re experiencing the magic of the underwater world firsthand.
Creating Composite Images from Multiple Shots
Creating composite images was a game-changer for me. I started combining multiple shots to tell a more comprehensive story or highlight different aspects of a scene. For instance, I would take several images of a single reef and blend them together to create a panoramic view that showcased the vibrant life and colors in that area. It was exciting to see how these composites could reveal details that a single image might miss.
Moreover, layering different images allowed me to experiment with various focal points. By blending close-up shots of marine life with sweeping views of the ocean floor, I created images that were visually rich and layered. This technique not only elevated my portfolio but also helped me develop a unique style that I felt proud of.
Specific Tips for Different Underwater Environments
As I continued my photography journey, I realized that different underwater environments call for specific editing strategies. Each environment presents unique challenges and opportunities. Here are some focused tips I learned while editing photos from various underwater settings.
Editing Coral Reef Photography
When editing coral reef photography, I found it essential to maintain the vibrancy of the colors. I often emphasized the reds, oranges, and yellows that make coral reefs come alive. Using color correction techniques to balance the blue cast that water introduces was key. I also focused on enhancing the details of the corals, adjusting sharpness to showcase their intricate textures.
Editing Marine Wildlife Shots
For marine wildlife shots, capturing the subject’s personality is vital. I made sure to highlight the unique features of each species. This often involved using selective adjustments to brighten the subject while keeping the background softer. I found that elevating the contrast on the wildlife could make them stand out against the ocean backdrop.
Editing Wreck Photography
When it came to wreck photography, mood was everything. I embraced a slightly cooler color palette to evoke a sense of mystery and history. I also applied some grain to mimic an old photograph, which added character. The nature of the wreck often called for a storytelling approach in editing; I aimed to capture the essence of decay and beauty in my images.
Best Practices for Exporting and Sharing Underwater Photos
After putting so much effort into capturing and editing my underwater images, I realized that how I shared them was equally important. Here are some best practices I adopted for exporting and sharing my photos.
Optimal File Formats for Online Sharing
For sharing online, I typically exported my images in JPEG format. This allowed for a good balance between quality and file size. I learned that keeping the resolution around 72 dpi was optimal for web use, ensuring my images loaded quickly while still looking sharp.
Preparing Images for Print
When it came to prints, I switched to TIFF or high-quality JPEG formats. I paid attention to the resolution, aiming for at least 300 dpi to ensure crisp details. I also made sure to adjust my color profiles, as prints can appear differently than on screens.
Social Media Best Practices for Underwater Photos
Sharing on social media became one of my favorite ways to showcase my work. I learned that hashtags could significantly increase my visibility, especially within photography communities. I also found that engaging with other photographers and participating in challenges was a great way to connect and inspire others. Additionally, you might want to read about how to Unlock the Secrets to Capturing Stunning Underwater Moments.
Final Thoughts
Through my journey in underwater photography, I’ve learned that it’s not just about capturing beautiful images but about sharing the stories of the underwater world. Every dive, every click, and every edit has deepened my appreciation for marine life and the environment. I believe that everyone can create stunning underwater photography with the right techniques and a little creativity. Whether you’re a beginner or looking to elevate your skills, I hope my experiences and tips inspire you to dive in and explore the beauty beneath the waves. Together, let’s celebrate the wonders of the ocean through our lenses and share them with the world.
Frequently Asked Questions
What is underwater photography?
Underwater photography is a captivating combination of art and adventure that involves capturing images beneath the ocean’s surface.
What essential gear is needed for underwater photography?
Essential gear includes an underwater camera, waterproof housing, underwater strobe lights, color correction filters, and a buoyancy control device (BCD).
What types of cameras are suitable for underwater photography?
There are three main types of cameras suitable for underwater photography: compact cameras, DSLR cameras, and mirrorless cameras.
How can I improve lighting in underwater photography?
To improve lighting, use natural light when close to the surface, employ strobes or flash when diving deeper, and use diffusers to soften the light from strobes.
What challenges might I face in underwater photography?
Common challenges include color loss due to water absorption, managing light and visibility issues, and avoiding motion blur and distortion.
How can I edit underwater photos effectively?
Effective editing involves choosing the right software, understanding RAW vs. JPEG formats, and applying basic techniques like adjusting exposure, contrast, and sharpness.
What are some advanced editing techniques for underwater photography?
Advanced techniques include color correction and grading, adjusting exposure and contrast, sharpening images, and using layers and masks for more precise edits.
What creative enhancements can I apply to my underwater photos?
Creative enhancements may include applying filters and effects, adding textures and overlays, and creating composite images from multiple shots.
What editing tips should I follow for different underwater environments?
For coral reef photography, emphasize vibrant colors; for marine wildlife shots, highlight unique features; and for wreck photography, focus on mood and storytelling.
What are the best practices for sharing underwater photos?
Best practices include exporting images in JPEG format for online sharing, using TIFF or high-quality JPEG for prints, and engaging with photography communities on social media.