Have you ever wandered the vibrant streets of a city at night, camera in hand, eager to capture its magic? Nighttime urban photography is an exhilarating adventure, blending creativity with exploration, especially for those of us traveling on a budget. To get started, check out our article on Essential Gear for Urban Night Photography on a Budget.
Understanding Urban Nighttime Photography
The Art of Night Photography
When I first dipped my toes into nighttime photography, I was captivated by how cities transformed once the sun dipped below the horizon. The way neon lights flicker and shadows stretch can create an entirely different atmosphere compared to daytime shots. I remember my first nighttime adventure in my hometown; the familiar streets felt new and alive, and it awakened my passion for capturing those fleeting moments. Urban nighttime photography isn’t just about snapping pictures; it’s about storytelling. Each photograph has the potential to evoke emotions, spark curiosity, and transport the viewer to that moment in time.
Equipment Essentials for Night Photography
Now, let’s talk gear. I know that as a budget traveler, the thought of investing in expensive equipment can feel daunting. But fear not! You don’t need a top-of-the-line camera to explore nighttime photography. Here’s what I’ve found to be essential:
- Camera: A DSLR or mirrorless camera is ideal, but even a good smartphone with a decent camera can work wonders. I’ve captured some of my best shots using my smartphone, especially when I’m out exploring without my DSLR.
- Tripod: Stability is key in low-light situations. I invested in a lightweight tripod that I can easily carry around. It’s been a game changer for long exposure shots.
- Lens: A fast lens (with a low aperture like f/2.8 or lower) can help a lot. It allows more light to hit the sensor, making it easier to capture stunning night shots.
- Remote Shutter Release: This little gadget is fantastic for eliminating camera shake during long exposures. If you don’t have one, you can often use the timer on your camera to achieve similar results.
These essentials don’t have to break the bank, and you can often find quality second-hand equipment that performs just as well as new. For more tips on gear, check out our article on Budget Backpacking: Mastering Urban Night Photography.
Camera Settings for Low Light Conditions
Now, let’s dive into the technical side of things. When I first started shooting at night, I was overwhelmed by all the settings, but I learned some basics that really helped me improve my shots. Here’s what I recommend:
- ISO: I usually start with an ISO setting between 800 and 3200, depending on the light available. Higher ISO values can introduce noise, so I adjust as needed to find a balance between brightness and clarity.
- Aperture: As I mentioned earlier, a wide aperture (like f/2.8) is beneficial because it lets in more light. This means you can capture sharper, brighter images without a flash.
- Shutter Speed: For night photography, I often use slow shutter speeds (like 1/10 to several seconds) to capture more light. It’s important, though, to use a tripod to avoid motion blur when using slower speeds. I remember my first attempts resulted in blurry images, but with practice, I got the hang of timing my shots.
Experiment with these settings; it’s all about finding what works best for you and the specific scene you’re trying to capture. I’ve found that the more I play around with my camera, the more comfortable and confident I become.
As I reflect on my journey into nighttime urban photography, I realize it’s about more than just capturing pretty pictures. It’s about exploring, experiencing, and expressing myself through the lens. Each city has its own unique vibe at night, and I can’t wait to share some of my favorite urban locations for nighttime adventures in the next sections. So, grab your gear, and let’s dive deeper into this exhilarating world of nighttime photography together!
Best Cities for Nighttime Urban Photography
New York City: The City That Never Sleeps
New York City holds a special place in my heart when it comes to nighttime photography. The energy is palpable, and the city truly lives up to its nickname, “The City That Never Sleeps.” I remember walking through Times Square for the first time at night, enveloped in a sea of neon lights and bustling crowds. The vibrancy of the billboards against the backdrop of towering skyscrapers creates an electrifying atmosphere that is perfect for capturing stunning images.
Beyond Times Square, there are gems like the Brooklyn Bridge, where the city skyline lights up the night sky. I found that the view from the bridge offers a breathtaking perspective of the city that is hard to resist. Additionally, neighborhoods like Greenwich Village and SoHo showcase charming streets and unique architecture, perfect for capturing the essence of NYC after dark.
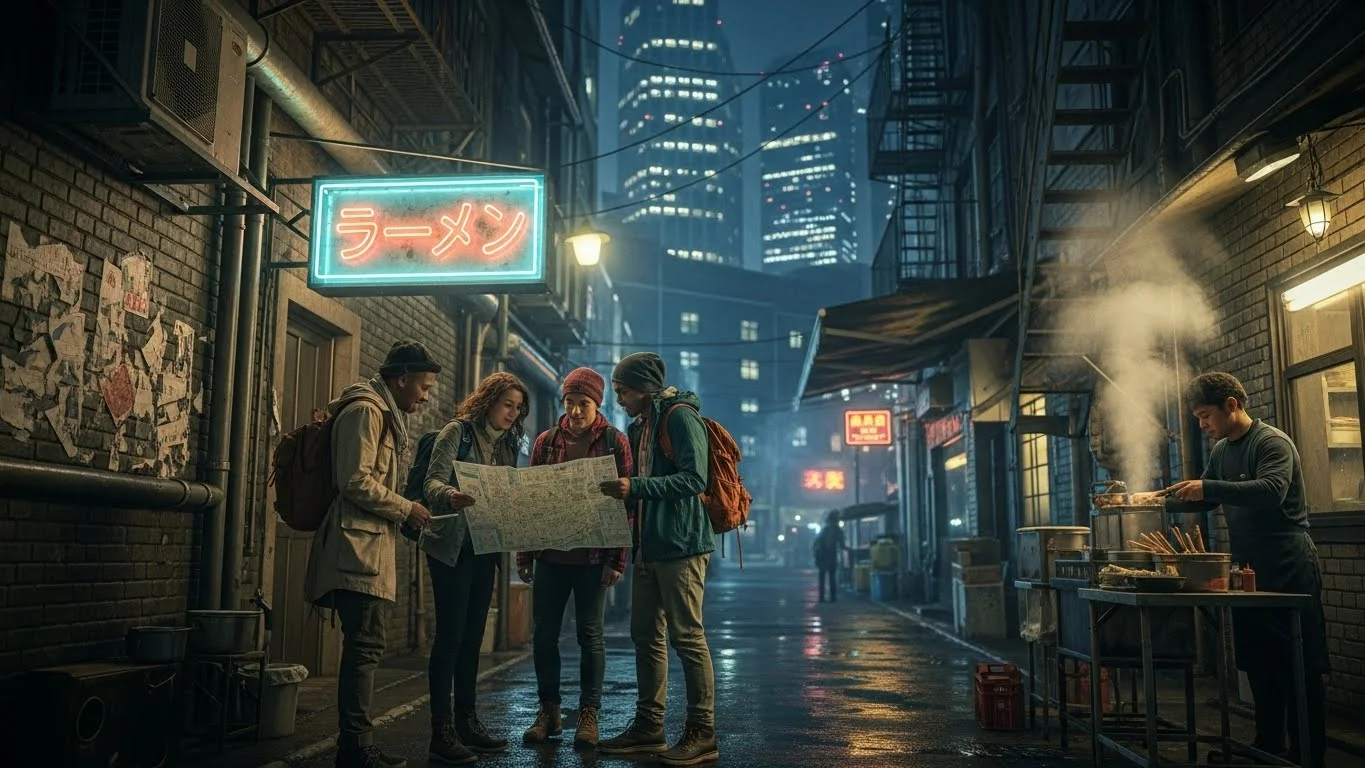
Tokyo: Neon Lights and Vibrant Streets
Tokyo is a city that dazzles with its neon lights and dynamic street scenes. My first nighttime stroll through Shinjuku felt like stepping into a futuristic film set. The blend of traditional and modern elements creates an atmosphere filled with contrasts, which I found fascinating to capture. The bright hues of the signs and the bustling atmosphere make it easy to lose track of time while shooting.
Don’t miss Akihabara, known for its electronics and otaku culture, where you can capture the unique vibe of the city. I found the streets alive with energy, and the eclectic mix of shops provided endless opportunities for interesting compositions. The cherry blossoms at night during sakura season add a magical touch to the cityscape, showcasing the beauty of Tokyo in a whole new light.
Paris: Romantic Nightscapes
Ah, Paris! The city of love is even more enchanting after sundown. I’ve walked along the Seine River under the soft glow of street lamps and the twinkling lights of the Eiffel Tower, which sparkles every hour on the hour. It’s a sight that never fails to inspire awe and creativity. I remember taking photos near the Trocadéro Gardens, where the view of the tower against the night sky is simply breathtaking.
Montmartre is another favorite spot of mine. The cobblestone streets and charming cafés create a romantic atmosphere that is perfect for capturing intimate moments. The Basilica of Sacré-Cœur, perched high on a hill, offers panoramic views of the city lights and is a fantastic location to photograph the Parisian skyline at night.
Barcelona: Architectural Wonders at Night
Barcelona is a beautiful tapestry woven with stunning architecture, and experiencing it at night is a treat. I was mesmerized by Antoni Gaudí’s masterpieces, especially the Sagrada Família, which is beautifully illuminated after dark. I found that visiting the Park Güell at sunset gives you that perfect golden hour light, transforming the colorful tiles into a magical scene.
Walking through the Gothic Quarter at night is like stepping back in time. The narrow, winding streets are filled with history and character, and I loved capturing the interplay of shadows and lights in this atmospheric neighborhood. I’ve discovered that the blend of modern and traditional architecture in Barcelona creates endless opportunities for captivating nighttime photography.
Berlin: A Blend of History and Modernity
Berlin has a unique charm that comes alive at night, blending its rich history with modern vibrancy. The Berlin Wall at night, lit with colorful lights, tells a powerful story of change and resilience. I felt a deep connection to the past as I wandered along the East Side Gallery, where vibrant murals adorn the remnants of the wall.
Additionally, the Brandenburg Gate is a must-see. When it’s illuminated at night, it takes on a majestic quality that’s hard to capture during the day. The lively atmosphere of neighborhoods like Kreuzberg and Friedrichshain, filled with street art and nightlife, offers a different side of Berlin that I found thrilling to photograph. Each corner reveals a new story, making it a photographer’s paradise.
These cities have enriched my nighttime photography journey, providing countless memories and stunning images. Each location has its own unique vibe and charm, encouraging creativity and exploration. As I think back on my experiences, I’m excited to share some budget-friendly tips for urban photography in the next section. Let’s make the most of our nighttime adventures without breaking the bank! For more city recommendations, check out our article on Top 10 Cities for Stunning Urban Night Photography.
Budget-Friendly Tips for Urban Photography
Choosing Affordable Photography Gear
When I first ventured into nighttime photography, the gear seemed intimidating, especially with the high price tags associated with many cameras and lenses. However, I quickly learned that there are plenty of budget-friendly options that can deliver stunning results. First and foremost, consider what you already have. If you own a smartphone with a good camera, you’re already set up to capture some amazing shots!
For those looking to invest in a camera, I recommend checking out entry-level DSLRs or mirrorless cameras. Brands like Canon, Nikon, and Sony offer models that won’t break the bank but provide excellent image quality. Also, don’t overlook the second-hand market; I’ve found some fantastic deals on used cameras and lenses that were still in great condition. Sometimes, local photography shops have great trade-in programs that can help make gear more affordable.
Finding Free or Low-Cost Locations
One of the best things about urban photography is that you don’t need to spend a fortune to find beautiful locations. I’ve discovered that many cities have public parks, waterfronts, and iconic landmarks that are free to access and offer stunning views at night. For example, in Barcelona, I often found myself wandering along the beach, where the city lights reflect beautifully off the water. It’s moments like these that make photography feel magical.
Local events can also be a goldmine for capturing unique scenes without any cost. I remember stumbling upon a night market in Berlin, full of vibrant lights and lively people. Festivals and public art installations can offer incredible backdrops, so keep an eye on community calendars while traveling. Exploring less touristy areas can lead to discovering hidden gems that are just waiting for your lens to capture them.
Utilizing Public Transportation
Using public transportation can save both time and money while providing fantastic opportunities for photography. During my time in Tokyo, I used the subway system to hop between districts, and it allowed me to capture the hustle and bustle of city life. The way the trains light up the platforms and the movement of people can create striking images.
Moreover, many cities have night buses or trams that can take you to popular spots for nighttime photography. I found that riding the double-decker buses in London at night offered a unique perspective of the illuminated landmarks. Just remember to keep your camera handy; you never know when a perfect shot will present itself!
Timing Your Visits for the Best Shots
Timing is everything in photography, especially at night. I often plan my outings for the “golden hour” right before sunset, which can provide a beautiful transition from daylight to nighttime. The soft glow of the setting sun against the cityscape can create stunning contrasts. After the sun sets, I usually give myself about 30 minutes to an hour for the sky to darken fully; this is when the city lights start to shine bright.
Another tip I’ve learned is to keep an eye on the weather. Clear nights can be excellent for starry skies, while overcast nights can create moody atmospheres. There’s something uniquely captivating about capturing a city under a blanket of clouds, with lights glowing through the mist. I remember one night in Paris when the clouds created a soft diffusion of light, making the Eiffel Tower seem ethereal. Don’t be afraid to adapt your schedule based on the conditions; it can lead to unexpected and beautiful results!
Applying these budget-friendly tips has transformed my urban photography experiences. I feel empowered to explore and create without the pressure of spending a lot of money. Each outing becomes an adventure, filled with opportunities to capture stunning nighttime scenes while making the most of my resources. As I continue my nighttime photography journey, I’m excited to dive into more advanced techniques for capturing stunning night photos. Let’s explore those next!
Techniques for Capturing Stunning Night Photos
Long Exposure Techniques
Long exposure photography is one of the most exciting techniques I’ve embraced in my nighttime adventures. It allows me to capture movement in a way that creates an ethereal quality, especially in urban environments filled with life. I remember my first attempt at this technique at a busy intersection. I set my camera on a tripod, adjusted my shutter speed to several seconds, and waited. The result? A breathtaking image where the cars appeared as streams of light, while the people seemed to vanish into the night. It was a reminder that sometimes, stillness captures the chaos around us beautifully.
When trying long exposures, I recommend using a low ISO and a small aperture to avoid overexposing the shot. It’s all about experimenting with different shutter speeds; I’ve found that anywhere from 2 to 30 seconds can yield mesmerizing results, depending on the scene. If you’re new to this, start with slightly longer exposures and then refine your timing as you gain confidence.
Using Tripods and Stabilization Tools
The importance of a sturdy tripod cannot be overstated when shooting at night. I can’t tell you how many blurry photos I’ve taken because of unsteady hands! Investing in a lightweight tripod has truly transformed my nighttime photography. Not only does it keep my camera stable for those long exposures, but it also allows me to frame my shots precisely without feeling rushed. I’ve even experimented with different angles, placing the camera low to the ground to capture reflections in puddles or shooting from above to include interesting perspectives of the streets below.
If you’re on the move and can’t carry a tripod, consider using stabilization tools like a Gorillapod or even placing your camera on a stable surface like a ledge or wall. I’ve found that with a little creativity, I can utilize my surroundings to achieve a solid base for my shots.
Playing with Light: Light Trails and Bokeh Effects
One of the joys of nighttime photography is playing with light. Capturing light trails from cars or trains can add a dynamic element to your images. I remember standing on a bridge, waiting for cars to zoom by, and with a little patience and the right settings, I finally got the shot! This effect brings energy to an otherwise static scene, making it come alive.
Additionally, experimenting with bokeh can create a dreamy feel in your photos. This is especially effective when there are plenty of light sources around. I’ve often found that focusing on a subject in the foreground while letting the background lights blur creates a beautiful contrast that elevates the overall composition. Just remember to use a wide aperture to really make those lights pop!
Street Photography at Night: Tips and Tricks
Street photography at night has its own magic. The way the light interacts with the people and the environment is exhilarating. When I stroll through the streets, I try to capture candid moments that tell a story. The soft glow of street lamps can create a beautiful mood, so I often look for scenes where the light hits just right. I remember one evening in Berlin, watching a couple share a quiet moment on a bench, illuminated by a nearby lamp. That image has become one of my favorites because it encapsulates the feeling of connection amidst the bustling city.
For street photography at night, I recommend keeping your camera settings flexible. Use a wide aperture for low-light conditions and don’t be afraid to increase your ISO if necessary. I’ve learned that sometimes, the best images come from quick snaps, so being ready to capture those fleeting moments is key. Blend in with the crowd, and let your curiosity guide you as you explore the streets; you might just find the perfect shot when you least expect it!
Editing Night Photography: Tools and Techniques
Best Software for Night Photo Editing
Editing is where I can really bring my nighttime photos to life. While I love the raw beauty of night shots, I often use software like Adobe Lightroom or Photoshop to enhance my images. These tools allow me to adjust exposure, contrast, and colors, making the photos even more striking. I remember the first time I edited a photo of the Eiffel Tower; it felt like I was unveiling a masterpiece as I adjusted the vibrancy to make those lights pop!
Enhancing Colors and Contrast
When editing nighttime photos, I find that playing with colors can change the whole mood of the image. Often, I’ll boost the saturation to bring out the vibrant hues from neon lights or cool down the temperature to create a more dramatic atmosphere. Adjusting the contrast can also help to define the light and shadow areas, which is essential for night shots. I’ve often found that a subtle contrast boost can add depth to an image, making it more visually appealing.
Noise Reduction Techniques
No one enjoys noise in their photos, especially in low-light conditions. I’ve had my fair share of shots marred by grain, but I’ve learned how to handle it through editing. Most editing software offers noise reduction tools that can significantly improve image quality. I usually apply a little noise reduction during the editing process, but I make sure to balance it out so that the details remain sharp. It’s all about finding that sweet spot where the photo retains its integrity without unwanted distractions.
Sharing Your Nighttime Photography
Best Platforms for Photographers
Sharing my nighttime photography has become one of the most rewarding parts of my journey. I love showcasing my work on platforms like Instagram and Flickr, where I can connect with other passionate photographers. Building a following has allowed me to receive feedback and inspire others to explore their nighttime photography adventures. Plus, it’s been a great way to discover new tips and techniques from fellow creatives.
Building an Online Portfolio
Having an online portfolio is essential for showcasing my work. I’ve created a website where I can display my favorite nighttime shots and tell the stories behind them. It’s a fantastic way to track my growth as a photographer and share my unique perspective with others. I recommend using platforms like WordPress or Squarespace, which offer easy-to-navigate templates that let my work shine.
Participating in Photography Communities
Joining photography communities has opened doors to new friendships and opportunities. I’ve found groups on social media platforms where I can share my work, receive constructive criticism, and participate in challenges. Engaging with fellow photographers motivates me to keep improving and experimenting in my craft. It’s a reminder that we’re all on this journey together, fueled by our love for capturing the beauty of the world around us.
Safety Tips for Nighttime Urban Photography
Staying Aware of Your Surroundings
Your safety is paramount when shooting at night. I always make it a point to stay aware of my surroundings. It’s easy to get lost in the moment, but I’ve learned to keep my head up, observe the people around me, and avoid isolated areas. Traveling with a buddy can add another layer of safety, especially in unfamiliar places.
Choosing Safe Locations
Before heading out, I research the areas I plan to shoot. I prefer well-lit streets and popular spots that are frequented by others. There’s a comfort in being around fellow night owls, and I’ve found that often leads to unexpected connections and conversations. I’ve even made friends while shooting in bustling markets or by iconic landmarks!
Travel Insurance for Photographers
Investing in travel insurance is something I now consider essential. Knowing my gear is covered gives me peace of mind, allowing me to focus on capturing the moment without worrying about what could happen. I’ve learned that accidents can occur, and being prepared ensures I can bounce back without financial strain.
Final Thoughts
As I reflect on my urban nighttime photography journey, it’s become clear that this art form is more than just capturing images; it’s about connecting with the world around us. Each city, each moment has its own story waiting to be told. I encourage anyone interested in this exhilarating pursuit to grab their gear, step into the night, and create. Remember, it’s about exploring, learning, and enjoying the process. So let’s keep our lenses focused on the magic that unfolds after dark!
Frequently Asked Questions
What is urban nighttime photography?
Urban nighttime photography is an exhilarating adventure that blends creativity with exploration, capturing the unique atmosphere of cities after dark. It involves storytelling through images that evoke emotions and transport viewers to specific moments in time.
What essential equipment do I need for nighttime photography?
You need a camera (DSLR, mirrorless, or even a good smartphone), a tripod for stability, a fast lens (with a low aperture like f/2.8 or lower), and a remote shutter release to eliminate camera shake during long exposures.
What camera settings should I use for low light conditions?
For low light conditions, start with an ISO setting between 800 and 3200, use a wide aperture (like f/2.8) to let in more light, and utilize slow shutter speeds (like 1/10 to several seconds) to capture more light while ensuring you use a tripod to avoid motion blur.
Which cities are recommended for nighttime urban photography?
Recommended cities include New York City for its vibrant energy, Tokyo for its neon lights, Paris for romantic nightscapes, Barcelona for architectural wonders, and Berlin for its blend of history and modernity.
What budget-friendly tips are there for urban photography?
Consider using affordable photography gear, finding free or low-cost locations, utilizing public transportation for access, and timing your visits to coincide with the “golden hour” and optimal lighting conditions.
What are long exposure techniques in nighttime photography?
Long exposure techniques involve using a tripod to capture movement over several seconds, creating ethereal images where moving elements, like cars or people, appear as streams of light, while stillness captures the chaos beautifully.
How can I enhance my nighttime photos during editing?
You can enhance nighttime photos by using software like Adobe Lightroom or Photoshop to adjust exposure, contrast, and colors. Boosting saturation and contrast can significantly improve the visual appeal of night shots.
What safety tips should I consider when photographing at night?
Stay aware of your surroundings, choose well-lit and populated locations, and consider traveling with a buddy. Additionally, investing in travel insurance for your gear can provide peace of mind while shooting at night.
How can I share and showcase my nighttime photography?
You can share your work on platforms like Instagram and Flickr, build an online portfolio using websites like WordPress or Squarespace, and participate in photography communities to connect with other photographers and receive feedback.
What are some tips for street photography at night?
For street photography at night, keep your camera settings flexible with a wide aperture, be ready to capture candid moments, and blend in with the crowd to find unique shots that tell a story. Lighting conditions can add a beautiful mood to your images.