Ready to capture breathtaking mountain landscapes without breaking the bank? Let’s explore the world of mountain photography tailored for budget backpackers, where stunning views and affordability go hand in hand! Read Interesting article: Adventure Photography on a Budget: Mountains Await You!
Understanding Mountain Photography
What is Mountain Photography?
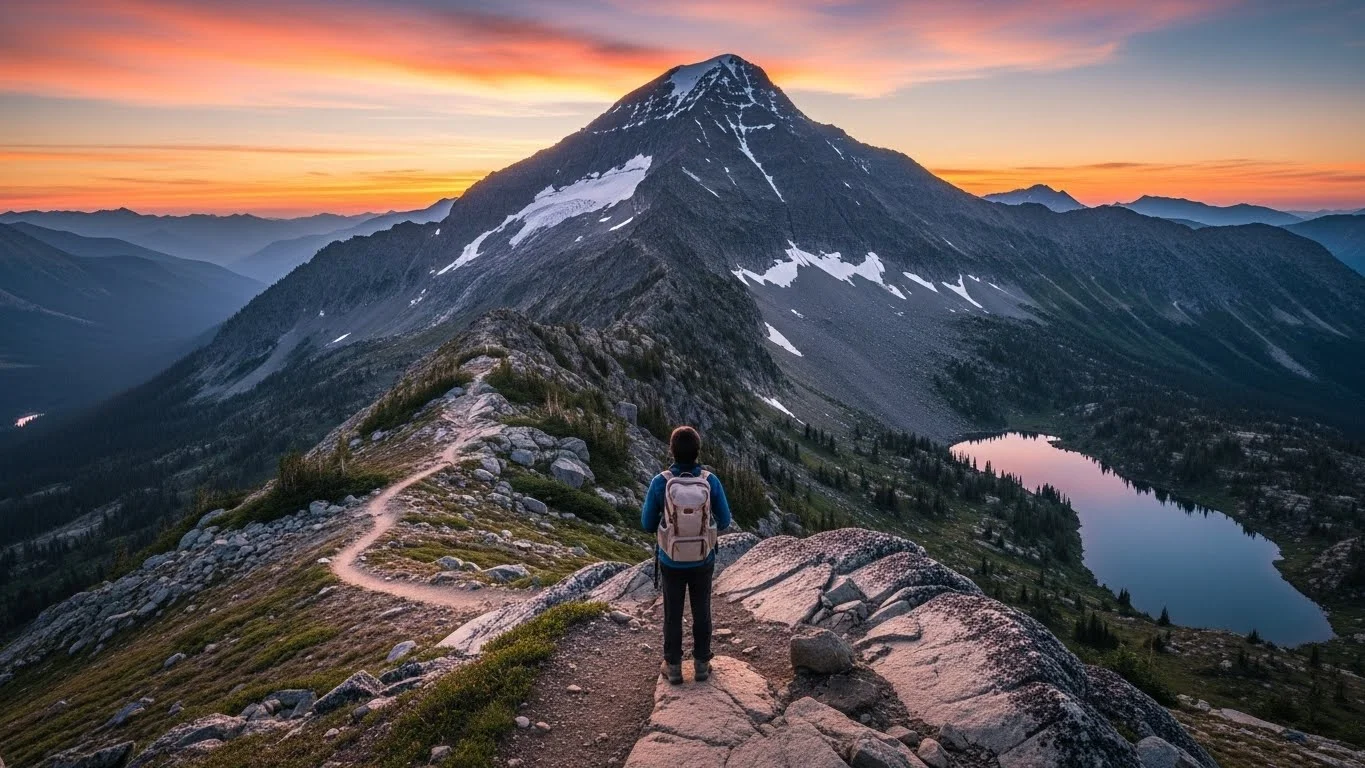
Mountain photography is more than just snapping pictures of towering peaks; it’s about capturing the essence of nature’s grandeur. I remember my first trip to the mountains, feeling overwhelmed by the beauty surrounding me. Every angle offered a new perspective, and I soon realized that each photograph tells a story. From vibrant sunrises to serene sunsets, mountain photography invites us to experience the raw beauty of nature, inviting viewers to feel the tranquility and awe we felt in those moments.
Essential Gear for Budget Backpackers
As a backpacker on a budget, I’ve learned to keep my gear lightweight yet effective. Here’s what I consider essential for mountain photography:
- Camera: I recommend a mirrorless camera or a DSLR with interchangeable lenses. They offer great image quality while remaining portable. If you’re just starting, a smartphone with a high-quality camera can also do wonders.
- Tripod: A lightweight tripod is vital, especially for long exposure shots during dawn or dusk. I found a compact one that folds down small enough to fit in my backpack without adding much weight.
- Lenses: A versatile zoom lens is a must-have. I usually carry a wide-angle lens for sweeping landscapes and a telephoto lens for capturing distant details.
- Filters: Polarizing filters can enhance colors and reduce glare, making them perfect for bright mountain scenes. I often use a neutral density filter for long exposures of waterfalls or streams.
- Extra Batteries and Memory Cards: I’ve had trips where I ran out of battery too soon. Bringing extras ensures I can keep shooting without worrying about running out of power.
It’s all about finding what works best for you while keeping your pack light. I’ve learned that each item should serve a purpose, so I avoid overpacking gear I won’t use.
Tips for Capturing Stunning Mountain Landscapes
Over time, I’ve picked up several tips that help me capture the beauty of mountain landscapes. Here are some of my favorites:
- Know Your Lighting: The magic hour—just after sunrise and before sunset—offers the best lighting. I love waking up early to catch the first light hitting the peaks. The colors are softer and more vibrant during these times.
- Composition Matters: Use the rule of thirds to create more dynamic images. Placing the horizon line in the top or bottom third can lead to more engaging photographs. I often look for leading lines, like trails or rivers, to draw the viewer’s eye into the scene.
- Be Patient: Nature doesn’t always cooperate. I’ve spent hours waiting for the right moment, whether it’s a perfect cloud formation or the ideal light. Patience pays off, and often, those moments yield the most breathtaking shots.
- Explore Different Perspectives: Don’t just shoot from the same height. Get low to the ground or find a higher vantage point. Changing your perspective can completely transform your images. I love climbing a little higher to capture the scene from above.
- Embrace the Elements: Weather can change quickly in the mountains. Instead of being frustrated by rain or fog, I’ve learned to embrace it. These conditions can add a dramatic flair to my photos that clear skies simply can’t provide.
Ultimately, photography is about capturing your unique view of the world. Experimenting with different techniques has helped me discover my style, and I encourage you to do the same. Read Interesting article: Capture Stunning Mountain Moments: Budget Photography Tips
Top Mountain Photography Locations
1. Rocky Mountain National Park, Colorado
Best Time to Visit
When planning a trip to Rocky Mountain National Park, I found that late spring through early fall is the sweet spot for photographers. Specifically, June to September is ideal because the wildflowers bloom, and the weather is generally more predictable. I remember hiking through the meadows filled with vibrant colors, making every shot pop with life.
Must-Visit Spots for Photographers
There are so many breathtaking locations in Rocky Mountain National Park, but a few stand out. For me, Bear Lake is a must. The reflections of the peaks in the lake during early morning create a magical scene. Then there’s Alpine Visitor Center, where the panoramic views are simply stunning. Don’t forget Trail Ridge Road, which provides access to high-altitude photography options that are hard to beat. Each spot has its charm, and I’ve spent countless hours capturing the changing light.
Budget Accommodation Options
For budget stays, Estes Park is a great choice. I found several affordable motels and campgrounds that fit my backpacker budget. Staying at Lake Estes Campground was a highlight for me; waking up to the sounds of nature made the experience even more special. Plus, the short drive to the park entrance made it convenient for early morning shoots.
2. Glacier National Park, Montana
Best Time to Visit
From my experience, the best time to visit Glacier National Park is from late June to mid-September. The Going-to-the-Sun Road usually opens around this time, and the lush landscapes are in full bloom. I remember driving along this road, surrounded by towering peaks, and I couldn’t help but feel inspired by every twist and turn.
Must-Visit Spots for Photographers
For breathtaking shots, don’t miss Lake McDonald, especially at sunrise when the water is mirror-like. Many Glacier offers stunning vistas and incredible wildlife photography opportunities. I’ve seen bears and mountain goats, which added a whole new dimension to my gallery. And, of course, Grinnell Glacier is a hike worth taking for its dramatic landscapes!
Budget Accommodation Options
If you’re looking to save money, consider camping at one of the park’s campgrounds. Apgar Campground is affordable and located right near Lake McDonald, giving you quick access to stunning views. I loved roasting marshmallows by the campfire, reminiscing about the day’s adventures.
3. Banff National Park, Canada
Best Time to Visit
Banff is spectacular year-round, but I personally think that late spring and early fall present the best conditions for photography. The crowds are smaller, and the colors during these seasons are breathtaking. I was lucky enough to visit during the fall, where the golden larches against the blue lakes were something I’ll never forget.
Must-Visit Spots for Photographers
In Banff, you can’t miss Moraine Lake, which is like stepping into a postcard. The vibrant blue water against the surrounding peaks is a sight to behold. Lake Louise is another iconic spot, particularly stunning at sunrise. I also recommend hiking to Peyto Lake for a unique perspective that looks like a wolf’s head from above. Each location offers something different, and I found myself constantly amazed.
Budget Accommodation Options
Affordable lodging options can be found in Canmore, just a short drive from Banff. I stayed at a cozy hostel that offered both comfort and a chance to meet fellow travelers. It’s a great base for exploring the park without spending a fortune.
4. Mount Rainier National Park, Washington
Best Time to Visit
For capturing the best shots at Mount Rainier, I recommend visiting from July to mid-August. This is when the wildflowers are in full bloom, and the weather is generally mild. I can still recall the vibrant meadows covered in color, which made each photo feel alive.
Must-Visit Spots for Photographers
Paradise is a must for its stunning views and wildflower fields. The Reflection Lakes provide an incredible opportunity to capture the mountain’s reflection in the water. I also enjoyed the views from Sunrise Visitor Center, where the sunrise over the mountain is an unforgettable experience. Don’t forget to explore the numerous trails that offer unique angles and perspectives.
Budget Accommodation Options
For budget-friendly accommodations, consider camping in the park. Cougar Rock Campground is a fantastic option, where you can fall asleep under the stars. I loved being surrounded by nature and waking up ready to capture the day’s beauty.
5. Zion National Park, Utah
Best Time to Visit
For Zion, I believe the best time to visit is in the spring and fall. The temperatures are comfortable, and the light creates stunning contrasts on the red rock formations. I remember hiking the trails during this time and feeling like I had the park almost to myself.
Must-Visit Spots for Photographers
The Narrows is a breathtaking spot, where you can capture towering canyon walls reflected in the water. Angels Landing offers some of the most dramatic views in the park—though I recommend visiting early in the morning to avoid the crowds. Observation Point is another incredible location, providing a panoramic view that makes the effort to hike there well worth it.
Budget Accommodation Options
Zion has several campgrounds, and I stayed at Watchman Campground, which provided easy access to trails and stunning views. Camping in Zion is a great way to save money while immersing yourself in the park’s beauty.
Planning Your Trip
How to Get to These Locations on a Budget
When it comes to getting to these stunning mountain locations, I’ve learned that planning is key to keeping costs down. If you’re traveling from afar, consider booking flights to major airports nearby, and then use budget airlines or train services to reach your destination. For instance, flying into Denver for Rocky Mountain National Park or Calgary for Banff often has cheaper fares compared to smaller regional airports. I once snagged a great deal by booking my flight three months in advance—definitely something I’d recommend!
Once you’re in the area, look into public transportation options or rideshare services. I’ve found that many national parks offer shuttles that are budget-friendly and can help you avoid the hassle of parking. For a more adventurous option, consider carpooling with fellow travelers I’ve met along the way. Sharing gas costs not only saves money but often leads to great conversations and new friendships.
Transportation Options in the Mountains
Once you arrive at the park, having reliable transportation is crucial for exploring its beauty. I’ve discovered that renting a bike can be a fantastic way to get around, especially in places like Zion and Banff, where trails are accessible and stunning. There’s something exhilarating about cycling through these breathtaking landscapes, and it also allows for spontaneous stops to capture those unexpected photo opportunities.
If biking isn’t your thing, look for local shuttle services. Many parks have free or low-cost shuttles that can take you to popular trailheads and viewpoints. I remember hopping on a shuttle in Glacier National Park and being dropped off at different trailheads without worrying about parking. Plus, it’s a great way to meet fellow nature lovers!
Of course, if you’re comfortable driving, having a car gives you the freedom to explore at your own pace. Just be mindful of road conditions, as they can change rapidly in mountainous areas. I make it a habit to check local weather reports and park alerts before heading out for the day.
Best Hiking Trails for Photography
Hiking is often the best way to reach those breathtaking photography spots. I’ve hiked countless trails, and here are some of my favorites that are not only stunning but also accessible for photographers:
- Emerald Lake Trail (Rocky Mountain National Park): This easy hike offers breathtaking views and options to capture the lake’s vibrant colors surrounded by mountains. I found the reflections in the water especially mesmerizing at sunrise.
- Highline Trail (Glacier National Park): This iconic trail provides jaw-dropping views along the way, with opportunities to photograph sweeping vistas and wildlife. I encountered mountain goats, and it was a highlight of my trip!
- Lake Agnes Trail (Banff National Park): A moderate hike that leads to a beautiful lake with a historic tea house. The views from the top are worth every step, and I remember capturing the iconic teahouse against the backdrop of rugged peaks.
- Sunrise Trail (Mount Rainier National Park): This is a must for those looking to photograph the dawn light hitting the mountain. I started early, and the experience of watching the sun rise over the snow-capped peaks was simply unforgettable.
- Angels Landing Trail (Zion National Park): A challenging hike, but the views from the top are worth it. Standing on the edge, I was able to capture some of the most dramatic landscapes I’ve ever seen.
Always remember to carry enough water and snacks, as hiking can be tiring. I usually pack light snacks like trail mix and energy bars to keep me fueled on longer hikes. And don’t forget your camera—there’s no telling when you’ll stumble upon that perfect shot!
Safety and Environmental Considerations
Staying Safe While Exploring
When venturing into the mountains for photography, safety should always be a top priority. I’ve learned this the hard way, with a few close calls. One of the most important tips I can offer is to pay attention to the weather. Conditions can change rapidly, and I’ve been caught in sudden storms that transformed a beautiful day into a challenging situation. Always check the forecast before heading out and be prepared with the right gear, including extra layers and rain protection.
Another crucial aspect is to let someone know your plans before you set out. I often share my itinerary with a friend or family member, just in case something goes awry. It gives me peace of mind knowing someone is aware of where I am. Also, carry a map and a compass or a GPS device—relying solely on your phone can be risky if service is spotty or you run out of battery.
Lastly, be aware of your surroundings. Wildlife encounters can be stunning, but keep a safe distance. I’ve had some incredible moments watching animals but always respected their space and never approached them. Staying safe is about making wise choices while still enjoying the beauty around us.
Leave No Trace Principles for Photographers
As photographers, we have a responsibility to protect the breathtaking landscapes we love to capture. I’ve embraced the Leave No Trace principles, and they have become second nature to my adventures. This means planning ahead, sticking to marked trails, and avoiding trampling sensitive vegetation. I always carry out whatever I bring in, from food wrappers to other small items—every little bit helps maintain the beauty of our natural spaces.
When photographing, I try to minimize my impact by using existing paths instead of creating new ones. I’ve found that some of the best angles can be captured while remaining on the trails. I also make it a point to respect wildlife and other visitors by keeping noise levels down and not disturbing the natural environment.
We should all strive to leave the mountains just as stunning as we found them, if not more so. By following these principles, we ensure that future generations can enjoy the same breathtaking photography opportunities we do today. Read Interesting article: Top Destinations for Extreme Sports Photography Adventures
Budget Tips for Backpackers
How to Save on Food and Supplies
Food can be a significant expense while traveling, especially in remote areas. I’ve found that meal planning and packing my own supplies can make a huge difference. I usually prepare simple meals like pasta, rice, or dehydrated meals that are lightweight and easy to cook. Bringing snacks like trail mix or energy bars helps keep my energy up on long hikes without breaking the bank.
When I can, I also take advantage of local grocery stores or farmer’s markets. I remember finding a great little market near Glacier National Park where I stocked up on fresh fruits and vegetables. Cooking my own meals not only saves money but also adds to the experience of camping and enjoying nature. Plus, it’s a great way to meet other travelers who might be doing the same.
Free or Low-Cost Activities in the Mountains
One of the best parts about exploring the mountains is that many activities are either free or low-cost. Hiking, of course, is at the top of my list. There’s nothing quite like hitting the trails, and many national parks offer stunning paths that lead to breathtaking views. I’ve also enjoyed activities like birdwatching, nature journaling, or simply soaking in the scenery—no cost involved!
Some parks may even host ranger-led programs or workshops that are free of charge. I’ve attended several that have enriched my experience and provided me with valuable insights into the local ecosystem. Be sure to check out the park’s schedule before your visit; it might surprise you to find activities that pique your interest.
Final Thoughts
Mountain photography has been an incredible journey for me, filled with awe-inspiring moments and unforgettable experiences. I feel that anyone can capture the beauty of these landscapes, even on a budget. By understanding your gear, planning carefully, and respecting the environment, you can create stunning images while making the most of your adventures. I encourage you to get out there, explore, and find your unique perspective on the world. Every mountain has a story, and through our photography, we get to share those stories with others. Happy shooting, and may your adventures be filled with beauty and inspiration!
Frequently Asked Questions
What is mountain photography?
Mountain photography involves capturing the essence of nature’s grandeur, focusing on the beauty of mountainous landscapes. It aims to tell a story through images, showcasing vibrant sunrises, serene sunsets, and the tranquility of nature.
What essential gear do budget backpackers need for mountain photography?
Budget backpackers should consider a mirrorless camera or DSLR with interchangeable lenses, a lightweight tripod, a versatile zoom lens, polarizing filters, extra batteries, and memory cards. A high-quality smartphone camera can also be effective for beginners.
When is the best time to visit Rocky Mountain National Park for photography?
The best time to visit Rocky Mountain National Park for photography is from late spring through early fall, specifically June to September, when wildflowers bloom and the weather is more predictable.
What are some must-visit spots for photographers in Glacier National Park?
Photographers should not miss Lake McDonald, Many Glacier, and Grinnell Glacier in Glacier National Park. Each location offers breathtaking vistas and opportunities for wildlife photography.
How can I save money on food while traveling in the mountains?
To save on food, consider meal planning and packing lightweight supplies, such as dehydrated meals and snacks like trail mix. Utilizing local grocery stores or farmer’s markets can also help in managing food costs.
What are some tips for capturing stunning mountain landscapes?
To capture stunning mountain landscapes, know your lighting, focus on composition, be patient, explore different perspectives, and embrace weather conditions. Each of these elements can enhance the quality of your photographs.
What are the Leave No Trace principles important for photographers?
Leave No Trace principles encourage photographers to protect natural landscapes by planning ahead, sticking to marked trails, minimizing impact, and respecting wildlife and other visitors, ensuring the environment remains beautiful for future generations.
What budget accommodation options are available near Banff National Park?
In Banff National Park, affordable lodging options can be found in Canmore, which is a short drive from the park. Hostels and budget motels are great choices for backpackers looking to save money.
How can I explore mountain parks on a budget?
To explore mountain parks on a budget, consider using public transportation, renting bikes, or taking advantage of local shuttle services. Carpooling with fellow travelers can also help reduce costs while allowing for shared experiences.
What are some recommended hiking trails for photography in the mountains?
Some recommended hiking trails for photography include Emerald Lake Trail in Rocky Mountain National Park, Highline Trail in Glacier National Park, Lake Agnes Trail in Banff, Sunrise Trail in Mount Rainier, and Angels Landing Trail in Zion National Park.