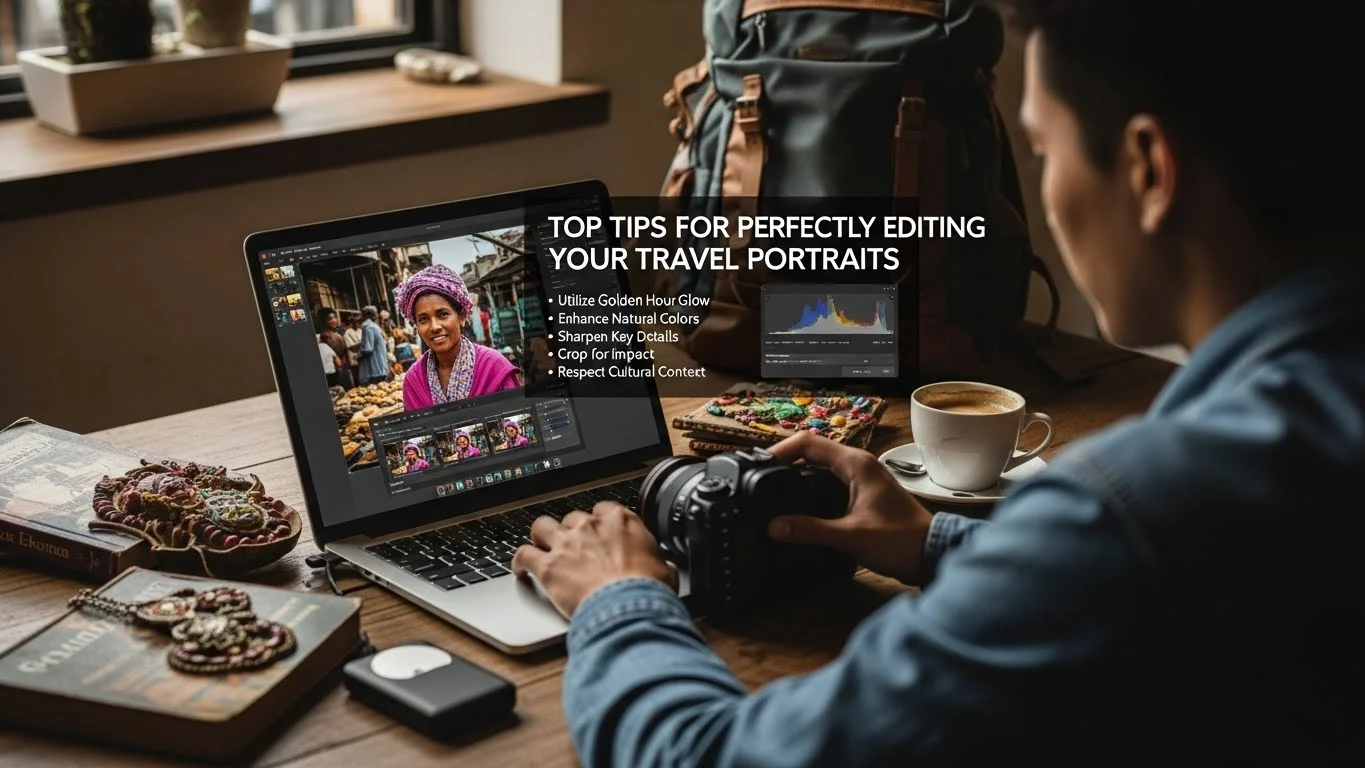
Editing travel portraits can transform a good photo into a stunning one. With the right tools and techniques, we can bring our memories to life, showcasing the beauty of each destination in a unique way. Read Interesting article: Master Editing Travel Portraits for Stunning Memories
Understanding Travel Portraits
What is a Travel Portrait?
Travel portraits are more than just pictures; they capture the essence of our journeys and the stories behind them. I remember my trip to Italy, where I stood in front of the Colosseum, and a friend snapped a photo. That image didn’t just show me in a beautiful location; it conveyed excitement, awe, and adventure. Travel portraits often include people, iconic landmarks, or local culture, making them rich in context and emotion. They reflect our experiences and the places we’ve visited, allowing us to relive those moments every time we look at them.
Importance of Editing in Travel Portraits
Editings in travel portraits is crucial for several reasons. When I first started taking travel photos, I thought snapping the picture was enough. However, I quickly learned that editing can enhance details, make colors pop, and draw attention to the subject. It’s like putting a frame around a beautiful painting; it highlights the artwork and makes it stand out. Editing allows us to correct any exposure issues or enhance the overall feel of the image. For instance, adjusting the brightness can help bring out facial features that might have been lost in shadow, while color corrections can make a sunset look even more vibrant. The right edits can evoke emotions, making the viewer feel as if they were there with us.
Essential Editing Tools and Software
Popular Photo Editing Software
When it comes to editing travel portraits, choosing the right software can make all the difference. I’ve experimented with a few options, and I found that Adobe Lightroom and Photoshop are among my favorites. Lightroom is fantastic for making batch edits and adjusting overall images quickly, while Photoshop is perfect for more detailed work, like retouching or composite images. If you’re looking for something more user-friendly, I’d recommend trying out Capture One; it offers powerful tools without being overwhelmingly complex. Each of these programs has its strengths, and it really depends on what you’re looking to achieve with your photos. Additionally, for those interested in gear, check out the Ultimate Guide to Portrait Photography Gear for Backpackers.
Mobile Apps for On-the-Go Editing
Let’s face it, not every travel adventure allows us to sit down at a computer for hours of editing. I’ve found my mobile phone to be an incredible companion for quick edits. Apps like Snapseed and VSCO are fantastic for on-the-go editing. Snapseed has a wide range of tools, from basic adjustments to advanced filters, which I often use when I want to enhance a photo taken in less-than-ideal lighting. VSCO, on the other hand, has some beautiful presets that can give your photos a consistent look, making them feel cohesive when shared on social media. I remember sitting in a café in Paris, sipping coffee while editing my travel portraits right on my phone. It’s super convenient and allows me to share memories almost instantly.
Key Editing Techniques for Travel Portraits
Adjusting Exposure and Contrast
One of the first things I focus on when editing my travel portraits is exposure. Sometimes, a photo can come out too dark or too bright due to various lighting conditions. I usually adjust the exposure slider in Lightroom until the image looks balanced. Then, I play with the contrast to add depth. A little contrast can help make the colors pop and bring out details that might otherwise go unnoticed. I recall a time when I edited a photo from my trip to Japan. The colors were muted because of the cloudy weather, but with a bit of exposure adjustment and contrast, the image transformed into a vibrant memory.
Color Correction and Enhancement
After I’ve adjusted exposure and contrast, I often move on to color correction. I feel that the colors in my travel portraits should reflect the true essence of the location. Sometimes, the colors can be too warm or cool, depending on the lighting. I usually use the HSL (Hue, Saturation, Luminance) panel in Lightroom to fine-tune colors. I remember editing a beach photo where the sand looked too gray. With a few sliders, I was able to bring back the golden hues that made the scene feel alive. Color enhancement can really make your photos vibrant and appealing to the eye.
Cropping for Composition
Cropping might seem like a simple step, but it can significantly improve the composition of a photo. I often analyze the framing of my shots, asking myself if the subject is where I want it. I’ve learned to follow the rule of thirds, which helps me create a more dynamic image. I once captured a stunning portrait of a local artist at a market, but the composition felt off. After cropping, the focus shifted perfectly to the artist, and it transformed the photo entirely. Cropping can help us tell a story, emphasizing what’s important in the image.
Retouching Skin and Features
When it comes to portraits, retouching is essential, but I always strive for a natural look. I remember my first attempts at retouching, where I went overboard and ended up with an unrealistic appearance. Now, I use tools like the healing brush in Photoshop to subtly remove blemishes or distractions without making the subject look overly edited. It’s important to enhance features, but maintaining authenticity is key. I want the people in my portraits to look like themselves, just at their best.
Sharpening and Noise Reduction
Finally, I tackle sharpening and noise reduction. Sometimes, travel photos can come out a bit soft, especially if taken in low light. I apply a bit of sharpening to enhance details without making the image look unnatural. Additionally, if I notice any noise, especially in night shots, I use noise reduction tools in Lightroom. I’ve learned that this step is essential for ensuring my travel portraits look crisp and professional. It’s amazing how these final touches can elevate the overall quality of the portraits, ensuring they look stunning when shared with friends and family.
Creating a Consistent Style
Establishing a Color Palette
Creating a consistent style is something I’ve learned to value in my travel portraits. One of the first steps in achieving this is establishing a color palette. I like to think of a color palette as a visual signature that ties my images together. When I edit my photos, I focus on a few key colors that represent the spirit of the locations I’ve visited. For instance, when I traveled to Greece, I was inspired by the vibrant blues and whites of the buildings and the crystal-clear waters. I made a point to enhance those colors in my portraits, which not only made the images pop but also conveyed the essence of the place. I feel that when we stick to a color palette, our work becomes more recognizable and can create a striking visual story across our travel memories.
Using Presets for Cohesion
Another tool I love for maintaining a consistent style is the use of presets. I remember when I first discovered presets; it was like finding a treasure chest of editing shortcuts! They can save time and help achieve a cohesive look across a series of photos. I often create my own presets based on my preferred color palette and editing style. For example, after a trip to the lush landscapes of New Zealand, I developed a preset that enhances the greens and adds a bit of warmth to the images. This way, whether I’m sharing photos of the stunning fjords or the vibrant local markets, they all have a similar feel. I recommend experimenting with presets to find what resonates with you and your style. It’s exciting to see how your unique touch can shine through in your travel portraits.
Special Effects and Filters
When to Use Filters
Filters can be a fantastic way to add a creative edge to our travel portraits, but I’ve learned that moderation is key. There was a time when I went a bit filter-crazy, thinking that every photo needed a dramatic effect. Over time, I’ve come to appreciate the subtlety of filters. For instance, a soft vintage filter can evoke nostalgia without overpowering the original image. I find that using filters sparingly can enhance the mood of a photo. On my last trip to the mountains, I applied a light filter that brought out the golden hour glow without detracting from the natural beauty of the landscape. It’s all about complementing the image rather than overshadowing it. I suggest trying different filters but always keeping an eye on how they affect the overall vibe.
Creative Effects for Travel Portraits
In addition to filters, there are several creative effects that can elevate our travel portraits. I love experimenting with techniques like double exposure or adding light leaks for a dreamy effect. I remember trying double exposure for the first time during a sunset shoot in Bali. I layered an image of a stunning silhouette with the vibrant sunset backdrop, and the result was magical. It brought a unique storytelling element to the portrait, reflecting both the person and the beautiful surroundings. However, while it’s fun to play with these effects, I always strive to ensure that the essence of the travel experience remains intact. For me, the goal is to enhance the story behind the image, not distract from it.
Optimizing Your Portraits for Sharing
Best Formats and Sizes for Social Media
Sharing our travel portraits on social media can be a great way to connect with friends and fellow travelers. However, optimizing those images for sharing is essential. I’ve learned that different platforms have specific requirements for image sizes and formats. For example, Instagram favors square images, while Facebook works best with landscape-oriented photos. I often resize my portraits based on where I plan to share them. It’s frustrating when a beautifully composed photo gets cropped awkwardly or loses quality. By being mindful of the format, we can ensure that our images look their best and showcase our travels effectively.
Using Metadata and Tags for SEO
Another aspect I find important when sharing my travel portraits is incorporating metadata and tags. I’ve realized that using relevant keywords in the titles and descriptions can help others find my photos more easily. For instance, when I post a portrait from my trip to Barcelona, I include tags like “Barcelona travel” or “Spanish architecture.” This not only helps my images reach a wider audience but also connects me with others who share similar travel interests. Taking the time to add proper metadata has been a game-changer in how my work is discovered online, and I believe it can help you too! Also, consider learning about Travel Portrait Lighting: Essential Techniques for Backpackers for better results.
Common Mistakes to Avoid
Over-Editing vs. Natural Look
As I’ve shared my journey into editing travel portraits, I’ve also noticed some common pitfalls that many of us might fall into. One of the biggest mistakes is over-editing. Early on, I found myself getting carried away with filters and effects, thinking it would make my images stand out. Instead, I often ended up with portraits that looked unnatural. I learned that while it’s exciting to enhance photographs, keeping a natural look is essential. The best edits are those that bring out the beauty of the moment without taking away from the authenticity of the scene. I recommend stepping back and asking yourself if the image still feels true to the experience.
Ignoring Background Elements
Another mistake I’ve made—and I know I’m not alone—is neglecting the background elements in my portraits. I’ve taken stunning pictures where the subject was perfect, only to realize later that the background was distracting or cluttered. It’s crucial to pay attention to what’s happening behind our subjects. I now make it a habit to scan the entire frame before hitting the shutter button. If the background isn’t adding to the story, I try to find a better angle or even adjust my composition in post-editing. Being aware of background elements can dramatically improve the overall quality of our travel portraits.
Resources for Further Learning
Online Courses and Tutorials
As I’ve immersed myself in the world of travel portrait editing, I realized that there’s always more to learn, no matter how experienced we feel. Online courses have been a treasure trove of knowledge for me. Platforms like Skillshare and Udemy offer various courses specifically tailored to photography and editing techniques. I took a fantastic course on Lightroom that not only covered the basics but also delved into advanced techniques like local adjustments and color grading. It was eye-opening to see how professionals approach their edits, and I’ve been able to incorporate several of those tips into my workflow. I recommend looking for courses that fit your skill level—there’s no rush, and learning at your own pace helps solidify those new skills.
YouTube has also been an invaluable resource for me. There are countless tutorials that break down complex editing processes into bite-sized steps. I love watching editing sessions where creators share their screen and talk through their thought process. It’s almost like getting a personal lesson from a mentor. I remember stumbling upon a video about creative cropping techniques that changed how I approach framing my photos. Plus, it’s free, which is always a bonus!
Photography Blogs and Communities
Aside from formal courses, I’ve found that engaging with photography blogs can ignite inspiration and enhance my editing skills. There are amazing blogs dedicated to travel photography that often share tips, tricks, and personal experiences. One of my favorites is “The Wandering Lens,” which provides insights on everything from shooting techniques to editing workflows tailored for travel photographers. Reading about others’ journeys and challenges makes me feel connected to a larger community of like-minded individuals.
Communities, too, can be incredibly helpful. I joined a few photography groups on social media platforms like Facebook and Reddit. These groups are filled with passionate photographers who share their work, seek feedback, and offer advice. I remember posting one of my travel portraits for critique and received constructive feedback that helped me improve my editing style significantly. It’s reassuring to know that we’re not alone in our journeys, and being part of a supportive community can boost our confidence and skills.
For those who prefer a more visual approach, Instagram can also be a source of inspiration. I follow several photographers who specialize in portraits and travel photography. Seeing their work not only sparks ideas for my editing but also provides insights into how they create their unique styles. Engaging with their posts often leads to discovering new techniques, presets, and challenges to try out in my own work.
Lastly, I can’t stress enough the importance of practice. The more I edit, the more I discover what works for me and what doesn’t. It’s a journey of experimentation, and every portrait edited is a step towards honing my style. So, don’t hesitate to dive into those resources. Whether it’s a course, a tutorial, or a community, there’s a wealth of knowledge waiting to be tapped into!
Frequently Asked Questions
What is a travel portrait?
A travel portrait captures the essence of journeys and the stories behind them, often including people, iconic landmarks, or local culture, allowing us to relive those moments.
Why is editing important in travel portraits?
Editing enhances details, makes colors pop, and draws attention to the subject, correcting exposure issues and evoking emotions that make viewers feel as if they were present during the moment.
What are some popular photo editing software options for travel portraits?
Adobe Lightroom and Photoshop are popular choices, with Lightroom being great for batch edits and quick adjustments, while Photoshop is suited for detailed work like retouching. Capture One is also recommended for its user-friendly interface.
Which mobile apps are useful for on-the-go editing?
Snapseed and VSCO are excellent mobile apps for quick edits, offering a range of tools and presets that make it convenient to enhance photos while traveling.
What key techniques can improve travel portrait editing?
Key techniques include adjusting exposure and contrast, color correction and enhancement, cropping for composition, retouching skin and features, and applying sharpening and noise reduction.
How can I create a consistent style in my travel portraits?
Establishing a color palette and using presets can help create a consistent style, allowing your images to have a visual signature and cohesive look across various photos.
When should filters be used in travel portrait editing?
Filters should be used sparingly to add a creative edge without overpowering the original image. A subtle filter can enhance the mood of a photo while preserving its natural beauty.
What are the best formats and sizes for sharing travel portraits on social media?
Different platforms have specific requirements; for example, Instagram favors square images, while Facebook works best with landscape-oriented photos. Resizing portraits appropriately can ensure they look their best online.
How can metadata and tags improve the sharing of travel portraits?
Incorporating relevant keywords in titles and descriptions helps others find your photos more easily, increasing their reach and connecting you with like-minded individuals interested in similar travel experiences.
What common mistakes should be avoided when editing travel portraits?
Common mistakes include over-editing, which can result in unnatural images, and neglecting background elements that may distract from the subject, both of which can diminish the overall quality of the portrait.