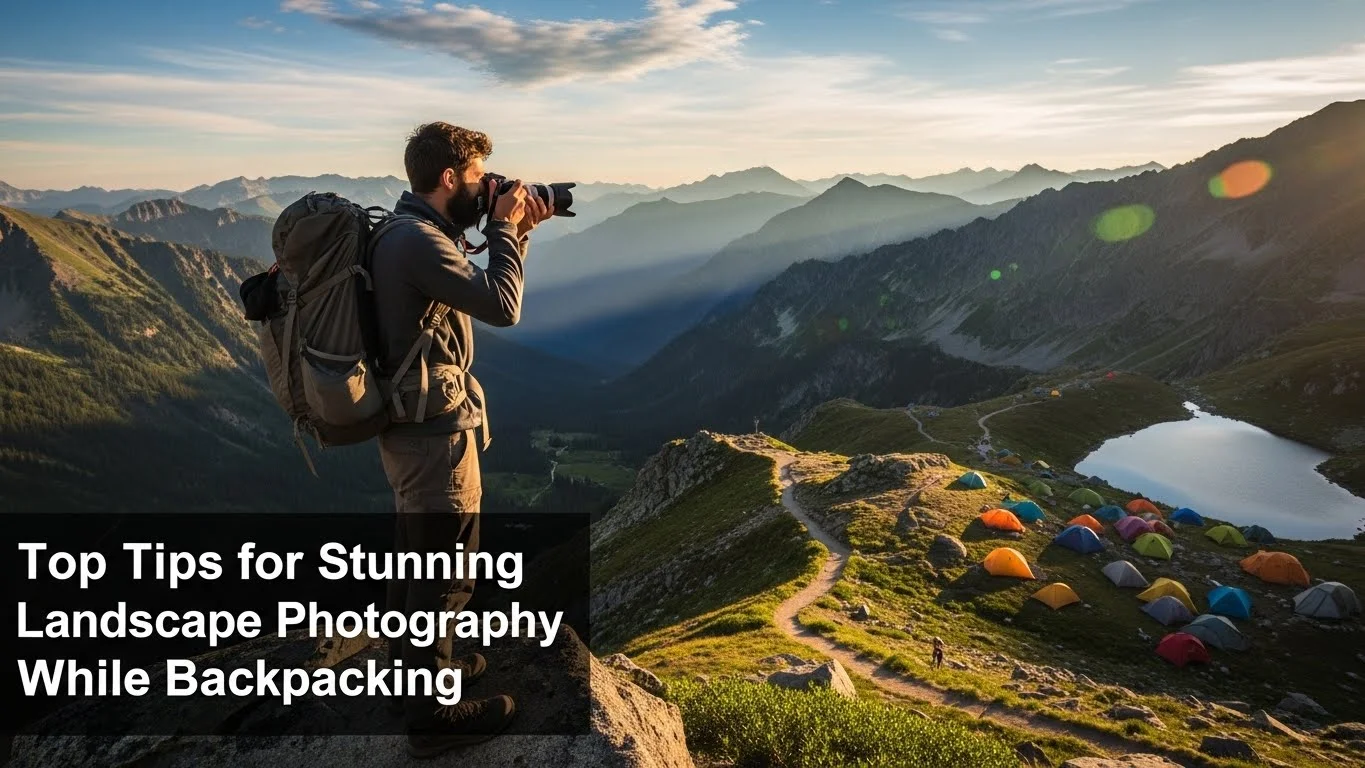
Backpacking through breathtaking landscapes is a dream for many photographers. I’ve found that capturing those stunning views requires more than just pointing and shooting. Let’s dive into some essential tips to elevate your landscape photography while on the trail!
Understanding Landscape Photography
What is Landscape Photography?
Landscape photography is about capturing the beauty of nature in all its forms. It goes beyond just taking pictures of mountains or sunsets; it’s about telling a story through the environment around us. I remember my first trip to the mountains, where I was captivated by the vibrant colors of the sunrise reflecting off the peaks. That moment made me realize how powerful landscape photography could be in conveying emotions and experiences. We often strive to capture not just what we see but how it makes us feel.
The Importance of Composition
Good composition is essential for stunning landscape photographs. I learned early on that just having a pretty view isn’t enough; how we frame that view can make all the difference. The rule of thirds is a fantastic starting point. Imagine dividing your frame into a 3×3 grid and placing key elements along those lines or intersections. I’ve found that this simple adjustment often leads to more dynamic and engaging shots.
Another technique that has helped me tremendously is understanding leading lines. These can be natural elements like rivers or paths that guide the viewer’s eye through the image. When I first started incorporating these lines, I noticed that my photos became more inviting and immersive. It’s like giving your audience a pathway to follow right into the landscape. For more about incorporating wildlife into your photography, check out Top Tips for Wildlife Photography in Scenic Landscapes.
Types of Landscape Photography
There are various styles of landscape photography, and exploring these can enhance your skill set. From sweeping vistas to intimate details of nature, each type offers its unique challenges and rewards. For instance, I find myself drawn to both grand landscapes, where I can capture the vastness of a mountain range, and close-ups of a blooming flower or textured rock. Each approach teaches me to appreciate different aspects of the environment.
Another exciting type is astrophotography, which involves capturing the night sky. I remember my first attempt at photographing the Milky Way. I spent hours planning for the right location, ensuring minimal light pollution and clear skies. The result was a breathtaking image that reminded me of how vast and beautiful our universe is. By experimenting with different types of landscape photography, I’ve gained a deeper understanding of light, composition, and the world around me.
Essential Gear for Backpacking Photographers
Cameras: DSLR vs. Mirrorless
When it comes to choosing a camera for backpacking, it often boils down to personal preference. I’ve used both DSLRs and mirrorless systems, and I’ve found that each has its strengths. DSLRs are typically more robust and have a longer battery life, which is crucial on long hikes. However, I’ve fallen in love with the lightweight design and quiet operation of mirrorless cameras, making them perfect for capturing wildlife without disturbing the scene.
Ultimately, I recommend picking a camera that you feel comfortable with and that fits your photography style. If you’re a beginner, it might be worth renting a camera or borrowing one to see what feels right for you before making a purchase.
Lenses: Wide-Angle and Telephoto Options
Choosing the right lenses is equally important. For landscape photography, wide-angle lenses are my go-to. They allow me to capture expansive scenes and fit more of the landscape into the frame. I remember being in the Grand Canyon with my wide-angle lens, and it felt like I could almost reach out and touch the distant cliffs. However, having a telephoto lens in my backpack for those distant details or wildlife shots can also be beneficial. It broadens my perspective as a photographer.
Tripods: Choosing the Right One for Backpacking
A sturdy tripod is essential for landscape photography, especially in low-light situations or when using slower shutter speeds. I’ve made the mistake of skimping on a tripod in the past, and it led to blurry shots. Now, I opt for a lightweight, compact tripod that fits easily in my backpack without weighing me down. It’s been a game-changer, allowing me to set up quickly and capture those perfect moments.
Accessories: Filters, Extra Batteries, and Memory Cards
Don’t forget about accessories! A polarizing filter can help reduce glare and enhance colors, making landscapes pop. I always pack extra batteries and memory cards since I never know when inspiration will strike. There’s nothing worse than running out of space or power just when you’re about to capture that stunning sunset. I’ve learned to plan ahead, ensuring I’m always ready for whatever the trail throws my way.
Planning Your Backpacking Trip for Photography
Choosing the Right Destination
When I think about planning a backpacking trip for photography, the first step is always choosing the right destination. It’s exciting to explore places that inspire creativity and offer breathtaking views. I remember my trip to the Pacific Northwest; the lush forests and coastal cliffs were a photographer’s dream. I suggest considering not just the landscapes but also what type of photography you want to focus on. Are you drawn to mountains, deserts, or perhaps coastal scenes? Finding a destination that aligns with your vision can make all the difference in capturing compelling images. For those interested in urban photography, check out Top Tips for Budget Urban Landscape Photography.
Best Times of Year for Landscape Photography
The timing of your trip can be crucial for capturing stunning landscapes. I’ve learned that each season offers unique opportunities. For example, spring brings vibrant wildflowers, while autumn showcases beautiful fall foliage. I found that summer can be great for high-altitude hikes, where the views are often unobstructed. However, I also love winter for its serene beauty, with snow blanketing the landscape. Planning your trip according to these seasonal changes can really elevate your photography game.
Researching Scenic Locations and Trails
Before setting out, I always spend some time researching scenic locations and hiking trails. Online resources like photography blogs, hiking websites, and social media platforms can be incredibly helpful. I often check out sites like Instagram and Pinterest for inspiration, looking for places that resonate with me. I remember finding a hidden waterfall on a hiking app that led to one of my favorite photographs. Taking the time to research can reveal those hidden gems that might not be on the typical tourist path.
Weather Considerations and Safety
Understanding the weather is a key part of planning any trip. I cannot stress enough how important it is to check forecasts before heading out. I’ve had experiences where I underestimated the weather, thinking a sunny day would last, only to be caught in sudden rain. I recommend bringing appropriate gear for varying conditions, including a rain cover for your camera and sturdy waterproof clothing for yourself. Safety is paramount; knowing the terrain and potential hazards helps me feel more secure while capturing the beauty of nature.
Techniques for Capturing Stunning Landscapes
Mastering the Rule of Thirds
While I mentioned the rule of thirds earlier, mastering it can take time and practice. I still remember how shifting my focal point to one of the grid lines transformed my photos. Instead of placing my subject in the center, I began to position it off-center, which created a more dynamic and engaging composition. It’s amazing how such a simple concept can dramatically change the feeling of a photo. I encourage you to experiment with this rule, as it can lead to some of your most captivating shots.
Utilizing Leading Lines
Incorporating leading lines into my landscape photography has been one of my favorite techniques. These can be paths, rivers, or even fences that draw the viewer’s eye through the photo. I remember a particular day at a national park, where a winding trail led directly to a stunning mountain backdrop. By framing my shot to include that path, I created a sense of depth and perspective that made the image feel more inviting. It’s like inviting viewers to join me in the adventure and experience the beauty firsthand.
Incorporating Foreground Interest
Adding foreground elements can provide context and depth to your images. I’ve started looking for interesting rocks, flowers, or even a fallen tree to include in my shots. This not only adds layers to the composition but also helps to lead the viewer’s eye into the scene. I remember capturing a sunset at a lake, where I used some mossy rocks in the foreground. Those details created a sense of scale and made the photo more compelling. Don’t be afraid to get low to the ground and experiment with different angles!
Long Exposure Techniques for Water and Sky
Long exposure photography has opened up a whole new world for my landscape images. I love how it can soften water and create that dreamy effect, especially during sunrise or sunset. I recommend using a tripod to keep your camera steady. One of my favorite moments was capturing a waterfall with a long exposure; the water seemed to flow like silk. Learning to adjust your shutter speed and using ND filters can enhance this technique. It takes a bit of practice, but the results are often breathtaking.
Using Natural Light: Golden Hour vs. Blue Hour
One of the most magical times for landscape photography is during the golden hour, right after sunrise or before sunset. The warm light can transform a scene, adding depth and richness to colors. Conversely, I’ve also fallen in love with blue hour, that magical moment when the sky turns deep blue just before nightfall. Both times have their unique charm and can dramatically impact your photos. I always try to plan my shoots around these times, as the lighting can make or break a photograph.
Post-Processing Tips for Landscape Photography
Choosing the Right Editing Software
Post-processing is an essential part of landscape photography that can dramatically enhance my images. I’ve tried several editing software options, and each has its own strengths. Adobe Lightroom is one of my favorites because of its user-friendly interface and powerful tools tailored for photographers. It allows me to adjust exposure, contrast, and color balance easily. I also enjoy using Photoshop when I want to dive deeper into editing, especially for tasks like retouching or creating composites. For anyone just starting out, I recommend experimenting with free software like GIMP or even mobile apps like Snapseed, which can be surprisingly effective for on-the-go edits.
Basic Adjustments: Exposure, Contrast, and Color Correction
One of the first things I do when I import my photos into my editing software is to make basic adjustments. I’ve learned that small tweaks to exposure and contrast can breathe new life into a photo. If the image seems too dark or washed out, adjusting the exposure can help bring out the details I want to highlight. I often use the contrast slider to add depth to my images, making the colors pop. Color correction is another crucial step; I’ve noticed that correcting the white balance can make a huge difference in how natural the colors look. I find that taking the time to make these basic adjustments sets a strong foundation for the rest of my editing process.
Advanced Techniques: HDR and Panoramas
As I’ve progressed in my photography journey, I started exploring more advanced techniques like High Dynamic Range (HDR) and panoramas. HDR photography has allowed me to capture scenes with a broad range of light, ensuring that both shadows and highlights are well-exposed. I remember my first HDR attempt at a sunset; by merging multiple exposures, I was able to create a striking image that retained detail in both the bright sky and the dark foreground. For panoramic shots, I love capturing sweeping vistas that showcase the beauty of a location. By stitching together multiple images, I can create a sense of scale that a single shot sometimes lacks. Just make sure to use a tripod and keep consistent settings for the best results!
Common Mistakes to Avoid in Landscape Photography
Ignoring the Weather Conditions
Weather can make or break my landscape photos. I learned this lesson the hard way during a trip to a national park when I neglected to check the forecast. What started as a promising day turned into a gloomy downpour, leaving me with a handful of dull, overcast shots. Now, I always pay close attention to weather conditions before venturing out. Sometimes, the most dramatic skies can lead to the most stunning images, but I’ve found that preparation is key. If rain is on the horizon, I pack a weatherproof cover for my camera and consider how that weather might impact my shots.
Overlooking Composition Elements
In my early days of photography, I often overlooked the importance of composition elements. I would get so caught up in the beauty of the scene that I’d forget to think about how I framed it. I found that taking a moment to step back and analyze the composition can drastically improve my images. I’ve learned to look for distractions in the frame and to consider how elements interact within the scene. By consciously focusing on composition, I can create more compelling and balanced photographs.
Not Paying Attention to the Horizon Line
The horizon line can be a subtle but essential element in landscape photography. I remember a few instances where I didn’t pay enough attention to it, resulting in tilted horizons that distracted from the beauty of the scene. I always make it a point to check my horizon line before pressing the shutter. Using my camera’s grid overlay feature has helped me immensely in ensuring that the horizon is level, which creates a more polished and professional look for my images.
Failing to Scout Locations in Advance
One of the most valuable lessons I’ve learned is the importance of scouting locations in advance. I used to head out without a plan, hoping to stumble upon the perfect shot. However, I quickly realized that taking the time to research potential spots pays off. I often use apps and websites to find popular locations and even read reviews from fellow photographers. I also recommend visiting the site beforehand, if possible, to get a feel for the landscape and to identify the best angles. This preparation can save time and ensure I’m ready to capture the moment when I arrive.
Sharing and Showcasing Your Work
Best Platforms for Photography Sharing
Once I’ve edited my landscape photos, I love sharing them with the world. There are so many platforms available, but I’ve found that Instagram is one of the best for photographers. Its visual nature allows my work to shine, and I enjoy connecting with other photography enthusiasts. I also share my images on photography-specific sites like 500px and Flickr, which cater to a community that appreciates the art. Each platform has its unique audience, so I recommend experimenting to see where your work resonates best.
Building an Online Portfolio
Creating an online portfolio has been a game-changer for me. It’s a great way to showcase my best work and track my progress as a photographer. I use platforms like Squarespace and Wix to create a professional-looking site without needing extensive tech skills. Having my portfolio online has also made it easier to share my work with potential clients or collaborators. I suggest curating my best images to ensure my portfolio reflects my style and skills effectively.
Engaging with the Photography Community
Engaging with the photography community has not only inspired me but also helped me grow as a photographer. I often participate in photography forums and social media groups where I can share my work and get feedback. I’ve learned so much from others’ experiences and have even made some great friends along the way. Attending workshops and local meetups has also been a fantastic way to connect with like-minded individuals. I encourage anyone interested in photography to get involved — it’s a rewarding part of the journey!
Frequently Asked Questions
What is landscape photography?
Landscape photography is about capturing the beauty of nature in all its forms. It aims to tell a story through the environment and convey emotions and experiences, rather than just taking pictures of scenic views.
Why is composition important in landscape photography?
Good composition is essential because it enhances the visual appeal of landscape photographs. Techniques like the rule of thirds and leading lines help frame the view in a more dynamic and engaging way, guiding the viewer’s eye through the image.
What types of landscape photography can I explore?
There are various styles of landscape photography, including sweeping vistas, intimate details of nature, and astrophotography. Each type offers unique challenges and can help photographers appreciate different aspects of the environment.
What camera type is recommended for backpacking photographers?
Both DSLRs and mirrorless cameras have their strengths for backpacking photography. DSLRs are more robust with longer battery life, while mirrorless cameras are lightweight and quiet, making them ideal for capturing wildlife without disturbing the scene.
What essential gear should a backpacking photographer bring?
Essential gear for backpacking photographers includes a reliable camera, wide-angle and telephoto lenses, a sturdy yet lightweight tripod, and accessories like filters, extra batteries, and memory cards to ensure readiness for any photography opportunity.
How can I choose the right destination for a photography trip?
Choosing the right destination involves exploring places that inspire creativity and offer breathtaking views. Consider the type of landscapes you want to capture, such as mountains, deserts, or coastal scenes, to align with your vision.
What are the best times of year for landscape photography?
Each season offers unique opportunities for landscape photography. Spring features vibrant wildflowers, autumn showcases beautiful fall foliage, summer is great for unobstructed high-altitude views, and winter provides serene beauty with snow-covered landscapes.
What are some techniques for capturing stunning landscapes?
Key techniques include mastering the rule of thirds, utilizing leading lines, incorporating foreground interest, experimenting with long exposure for water and sky, and using natural light during the golden and blue hours for dramatic effects.
How do I enhance my landscape photos in post-processing?
Post-processing can dramatically enhance images. Basic adjustments like exposure, contrast, and color correction are essential. Advanced techniques like HDR and panoramas can also help capture a broader range of light and create a sense of scale.
What are common mistakes to avoid in landscape photography?
Common mistakes include ignoring weather conditions, overlooking composition elements, not paying attention to the horizon line, and failing to scout locations in advance. Preparation and awareness significantly improve the quality of landscape photographs.