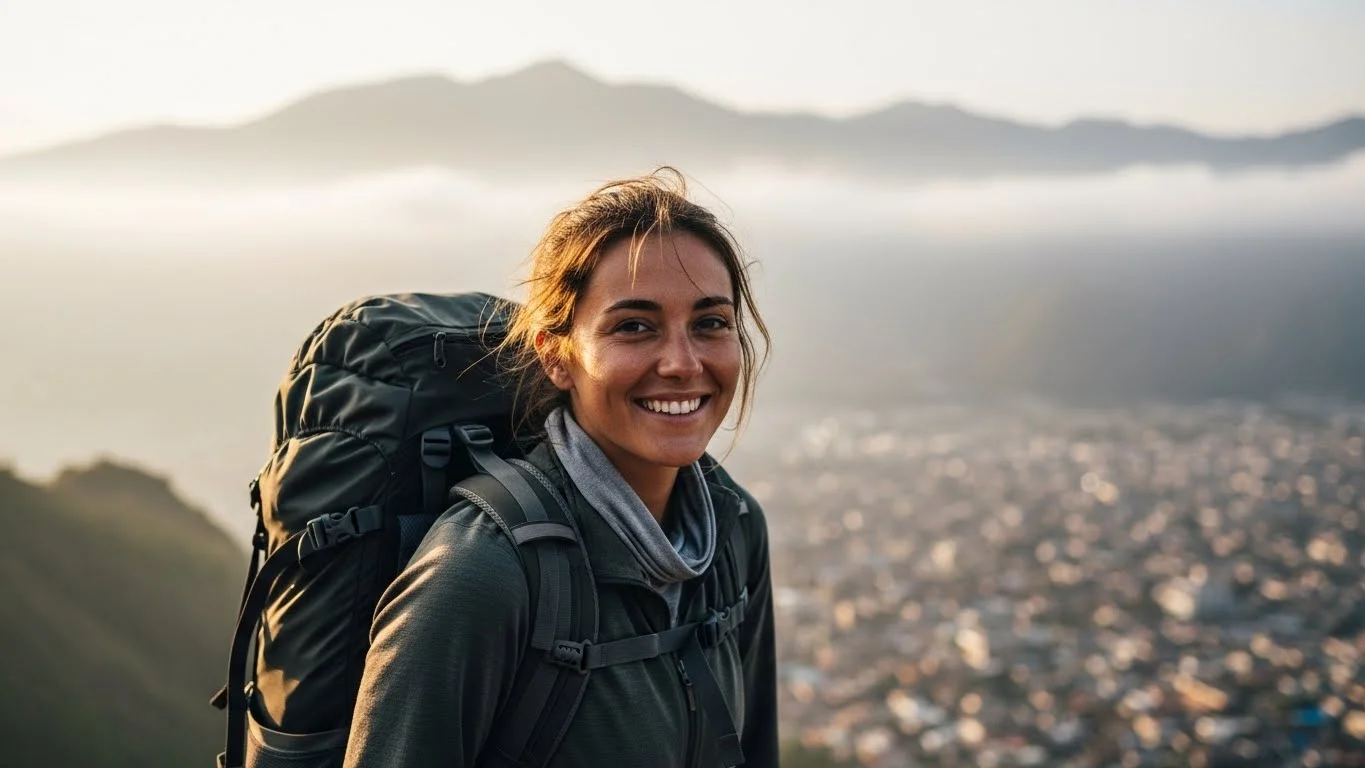
Capturing stunning travel portraits is an adventure in itself, and lighting plays a crucial role in making those images memorable. Whether you’re hiking up a mountain or wandering through a bustling city, knowing how to harness the light around you can elevate your photography. To learn more about mastering this art, check out Master Travel Portrait Lighting: Tips for Stunning Shots.
Understanding Travel Portrait Lighting Basics
What is Travel Portrait Lighting?
When I think about travel portrait lighting, I envision the way light interacts with my subjects in diverse environments. It’s not just about having the right equipment; it’s about understanding how different lighting conditions can dramatically change the mood and quality of a photo. Travel portrait lighting combines the essentials of portrait photography with the unique challenges and opportunities that arise while exploring new places. It’s about using the environment to enhance your subject, creating a connection between them and the backdrop of their travels.
Importance of Lighting in Portrait Photography
In my experience, lighting can make or break a portrait. I remember a time when I was photographing a friend against a stunning sunset backdrop. The golden hues wrapped around them perfectly, capturing the essence of the moment. Without the right light, that shot would have fallen flat. Lighting shapes how we perceive the subject, emphasizing details or casting shadows that tell a story. It influences the emotions we feel when we view a photograph, which is why learning to manipulate it is essential for any backpacker wanting to improve their travel portraits. For more insights, read Unlock Perfect Travel Portraits with Lighting Techniques.
Types of Lighting: Natural vs. Artificial
As a backpacker, my gear is often limited, which is why I tend to rely heavily on natural light. There’s something inherently beautiful about the way sunlight interacts with our surroundings. Natural light provides a soft, flattering quality that’s hard to replicate. However, I’ve also found that having some artificial lighting options can be beneficial, especially during overcast days or in low-light situations. Understanding the difference between these two lighting types has helped me adapt to various conditions while on the road.
Essential Techniques for Using Natural Light
Golden Hour: The Best Time for Portraits
For me, the golden hour is like magic for portrait photography. This occurs during the first hour after sunrise and the last hour before sunset. The sunlight during this time is softer and warmer, casting a beautiful glow on my subjects. I make it a point to plan my shoots around this time whenever possible. One evening, while in a small village in Italy, I captured a portrait of an elderly woman sitting on her porch as the sun dipped below the horizon. The warm light created a stunning halo effect around her, making the moment unforgettable. If you’re traveling, definitely keep an eye on the sunrise and sunset times to take full advantage of this incredible natural lighting.
Finding Shade: Avoiding Harsh Shadows
One lesson I learned early on was to avoid direct sunlight, especially during midday. The harsh light creates unflattering shadows that can distort facial features. I often seek shade under trees or awnings when the sun is high. I remember a day in Greece when I was photographing a friend at the beach. The sun was blazing, and without shade, the shadows on their face were too stark. We moved under a nearby palm tree, and the diffused light created a softer and more flattering portrait. So, don’t hesitate to find that perfect shaded spot—it can make a huge difference.
Backlighting: Creating Dramatic Effects
Backlighting is another technique I’ve come to love. This involves positioning the light source—usually the sun—behind your subject. It creates a beautiful halo effect and adds depth to your images. I remember taking a portrait of my partner in the mountains at sunset. The sun was setting just behind her, and it illuminated her hair, giving it a golden glow. I was so thrilled with the result! Backlighting can be tricky, but with practice, you can create some stunning, ethereal portraits that capture the essence of your travels.
Reflectors: Enhancing Natural Light
While I often rely on natural light, I’ve found that using reflectors can help improve those shots significantly. A simple reflector can bounce light back onto your subject, filling in shadows and adding a little sparkle to their eyes. I’ve used everything from a white sheet to a collapsible reflector that fits easily in my backpack. On one occasion, while exploring a market in Thailand, I used a nearby wall to bounce some light onto a friend’s face, and it transformed the photo. Investing in a lightweight reflector can really elevate your portraits without adding much bulk to your gear.
Using Artificial Light for Portraits
Portable Lighting Options for Backpackers
As much as I love natural light, sometimes it just doesn’t cooperate. Whether it’s a cloudy day or I’m in a dimly lit indoor space, having portable lighting options can make a world of difference. I’ve learned to keep a compact LED light in my backpack, which can be a lifesaver in tricky situations. One time in a Moroccan bazaar, the shop was so dark that I could barely see my friend’s face. I quickly pulled out my LED light and aimed it at her, instantly brightening the scene. It transformed what could have been an underwhelming photograph into something vibrant and full of life. Portable lights are easy to pack and can really enhance your portraits when natural light is lacking.
LED Lights: Advantages and Setup
LED lights have become my go-to choice for artificial lighting. They are lightweight, energy-efficient, and offer adjustable brightness levels. I remember setting up a small LED panel while shooting at a local festival in Japan. The evening was starting to set in, and the ambient light was diminishing quickly. I positioned the LED light about three feet from my subject, angling it slightly to create a soft glow. The result was stunning! The colors popped, and my subject looked vibrant against the festive background. Plus, they don’t get hot like traditional lights, making them safe to use in close proximity. If you’re backpacking, I highly recommend investing in a good LED light. It can help you capture those special moments, even when the sun sets.
Using Flash: Tips for Better Portraits
Flash photography often gets a bad rap for being too harsh or unflattering, but I believe it can be a powerful tool when used correctly. I used to shy away from using a flash, thinking it would ruin my images. However, with some practice, I found that it could add depth and dimension to my portraits. One technique I often use is bouncing the flash off a nearby surface, like a wall or ceiling. This diffuses the light and creates a softer effect. I remember a time in a colorful alley in Mexico City: I used my flash bounced off a white wall to illuminate my friend’s face. The colors around her were vibrant, but the flash offered just enough light to keep her from disappearing into the shadows. Don’t be afraid to experiment with your flash settings; it can completely change the mood of your portraits.
Choosing the Right Locations for Portrait Lighting
Urban vs. Rural Settings: Light Considerations
Choosing the right location is crucial for capturing stunning portraits. Urban settings often present unique lighting challenges and opportunities. I’ve found that the reflections from buildings can create interesting effects, especially during golden hour. In contrast, rural settings provide a more open landscape that can enhance natural light. I remember a shoot in a sunflower field where the sunlight poured in beautifully, illuminating my subject perfectly. However, cities can surprise you, too! I once took portraits in a bustling market, and the interplay of shadows from awnings and streetlights added depth to my images. When scouting for locations, pay attention to how light interacts with your surroundings; it can lead to unexpected and beautiful results.
Iconic Backdrops: Landmarks and Natural Wonders
Traveling offers a plethora of iconic backdrops, and I’ve learned to use them to my advantage. Whether it’s the Eiffel Tower in Paris or a serene beach in the Maldives, these landmarks provide a stunning context for portraits. I remember snapping a portrait of my friend in front of the Colosseum in Rome. The late afternoon light cast a warm glow, and the ancient stones created a dramatic backdrop. It’s essential to be mindful of the time of day and how it affects the lighting on these landmarks. I suggest visiting these locations at different times to see how the light transforms them. You’ll discover that each moment offers a new perspective.
Indoor Locations: Utilizing Available Light
Sometimes, the best portraits can be captured indoors, especially when natural light streams through large windows. I often look for cafes or galleries that have good lighting. One of my favorite indoor portraits was taken in a tiny coffee shop in Vienna. The sunlight streamed in through the front window, creating a natural spotlight on my friend as she enjoyed her coffee. I always advise looking for interesting backdrops indoors, like painted walls or unique furniture. These elements can enhance your portrait, making it more engaging. Plus, if it’s raining outside, you don’t have to worry about getting wet!
Camera Settings for Optimal Portrait Lighting
Understanding Exposure: ISO, Aperture, and Shutter Speed
Getting the right exposure is crucial for capturing stunning portraits, and I’ve found that understanding ISO, aperture, and shutter speed can make a huge difference. To put it simply, ISO controls the sensitivity of your camera’s sensor to light. I usually keep my ISO as low as possible to avoid graininess, especially in bright conditions. For example, when I was shooting in the vibrant streets of Havana, I kept my ISO at 100 to capture the rich colors without any noise.
Aperture, on the other hand, affects the depth of field and how much light enters the camera. A lower f-stop like f/1.8 creates a nice blurry background, helping my subject stand out. I remember experimenting with this when photographing a dancer in front of a colorful mural; the slight blur of the background added a lovely artistic touch. Lastly, shutter speed plays a role in freezing motion. I typically set it to at least 1/250th of a second to avoid any motion blur, particularly if my subject is moving or if I’m shooting in lower light. Balancing these settings often feels like a dance, but with practice, I’ve become more confident in my choices.
Using Manual Mode for Better Control
Switching to manual mode was a game-changer for my photography. At first, it felt intimidating, but I realized that it allowed me to have complete control over my images. I remember a particularly bright day in Santorini when I decided to challenge myself. Instead of relying on auto settings, I adjusted my ISO, shutter speed, and aperture to get the perfect exposure for my subject against the bright white buildings. Taking control meant I could capture the details of their face and the vibrant colors in the background without losing quality. I recommend taking some time to practice in different lighting conditions. The more familiar you become with manual mode, the easier it will be to adapt on the go.
White Balance: Achieving Accurate Colors
White balance is another critical aspect that I’ve learned to pay attention to while capturing portraits. The way light hits your subject can alter colors dramatically, and I want my portraits to reflect the true essence of the scene. I often find myself adjusting the white balance based on the natural light conditions. For example, shooting indoors with warm tungsten light can give my portraits a yellowish tint, so I switch to the tungsten setting to keep colors true to life. When I was photographing a wedding in a lush garden, I set the white balance to cloudy, which enhanced the greens and created a warm feel. If you’re unsure, shooting in RAW format allows for adjustments in post-processing, but I still recommend getting it right in-camera for the best results.
Common Mistakes in Travel Portrait Lighting
Overexposure and Underexposure Issues
One of the most common mistakes I’ve made is overexposing or underexposing my images. It’s easy to get caught up in the excitement of a moment and forget to check your settings. I remember a bright afternoon in Thailand where I snapped a photo of a street vendor without adjusting my exposure. The bright sun washed out the details, and the photo lost its charm. To avoid this, I’ve learned to keep an eye on my camera’s histogram. If I see the graph pushed too far to the right, I know it’s time to dial down my exposure. Similarly, underexposure can darken the shadows too much, losing details I wanted to capture. Adjusting my settings on the fly has saved many portraits from being thrown out!
Ignoring Background Lighting
Another mistake I’ve made is focusing solely on my subject while neglecting the background lighting. The background plays a significant role in the overall composition. While shooting in a busy market in Marrakech, I was so focused on capturing the vibrant colors of my friend’s dress that I failed to notice the harsh shadows behind her. The result was a beautiful subject with a distracting background. I’ve learned to consider how the light interacts with the background as well. Sometimes, I’ll shoot from different angles to see if I can eliminate distractions or find a more interesting light source. Taking a moment to assess your surroundings can elevate your portraits tremendously.
Neglecting Subject Positioning
Positioning my subject correctly in relation to the light source has been something I’ve had to consciously work on. I used to think that as long as I had good lighting, I could shoot from any angle. But I quickly discovered that the right positioning can significantly affect the mood of the shot. I remember a time in the streets of Lisbon when I had my friend pose in direct sunlight, and their features looked flat. After repositioning them to a spot where the light framed their face perfectly, the difference was astounding. Always consider how your subject’s position in relation to the light can enhance your portraits. It’s all about creating that beautiful interaction between light and subject.
Post-Processing Techniques for Portraits
Editing Software: Recommended Tools
Once I’ve captured my portraits, the next exciting step is post-processing. I’ve experimented with various editing software and found a couple that I particularly love. Adobe Lightroom is my go-to for batch editing and adjustments. Its intuitive interface allows me to fine-tune exposure, contrast, and colors effortlessly. I also enjoy using Photoshop for more detailed edits, like retouching and creating composites. On my last trip, I took several portraits in a colorful market in India, and with a few adjustments in Lightroom, I was able to make the colors pop while retaining the natural feel of the scene. I recommend exploring different editing programs to find what works best for your style!
Adjusting Brightness and Contrast
One of the first things I do in post-processing is adjusting brightness and contrast. Brightness affects how light or dark the image appears, while contrast helps to define the relationship between the light and dark areas. I remember editing a portrait taken during a cloudy day in Scotland where the mood was quite subdued. By slightly increasing the brightness and contrast, I managed to bring out the details in my subject’s face while still keeping the moody atmosphere intact. A little adjustment can go a long way, so don’t hesitate to play around with these settings to see how they can enhance your portraits.
Enhancing Colors and Skin Tones
Finally, I always pay attention to color enhancement, especially for skin tones. It’s essential to maintain natural-looking colors while making your portraits pop. I like to use the HSL (Hue, Saturation, Luminance) panel in Lightroom to fine-tune specific colors. For example, if my subject’s skin looks too pale, I might increase the saturation slightly or adjust the luminance to give it a healthy glow. I remember a portrait I took in a bustling bazaar in Turkey, where the vibrancy of my friend’s dress was competing with the background. By enhancing her skin tone subtly, I ensured she stood out without losing the rich context of the scene. Finding that balance can create beautiful, authentic portraits that truly reflect the moment.
Practical Tips for Backpackers
Essential Gear for Travel Portrait Lighting
When it comes to travel portrait lighting, having the right gear is essential, and I’ve learned to keep my kit as compact as possible. A lightweight camera is a must, and I often opt for a versatile lens that allows for both wide-angle shots and close-ups. I love using a 50mm f/1.8 lens for its ability to create beautiful bokeh while keeping my setup light. Additionally, carrying a small tripod helps stabilize my shots, especially in low-light conditions. I also recommend bringing a portable reflector; it’s a small investment that can yield significant improvements in your portraits. Lastly, if you’re venturing into unpredictable weather, having a lens cloth handy to wipe off any moisture can save your shots!
Packing Light: What to Take
Packing light is an art form in itself, and I’ve become quite skilled at it over the years. I usually prioritize essentials and avoid bringing anything that I might not use. My typical packing list includes my camera, one or two lenses, a compact LED light, a reflector, and extra batteries. I also include a small notebook to jot down thoughts or ideas for future shoots. When I was hiking the Inca Trail in Peru, my backpack felt manageable because I’d carefully chosen what to carry, and it allowed me to focus on capturing incredible moments without feeling weighed down. Remember, less is often more when you’re on the move!
Documenting Your Journey: Capturing Memories
Ultimately, the goal of travel photography is to document your journey and create lasting memories. I’ve found that storytelling through portraits allows me to connect with the places I visit on a deeper level. Whether it’s capturing the laughter of a child in a remote village or the serene expression of a local artist, each portrait tells a story. I often take a moment to engage with my subjects, asking questions about their lives and sharing a bit about mine. This connection not only enriches the portraits but also makes the experience more meaningful. I encourage everyone to approach travel photography with an open heart and mind; you’ll find that the best portraits come from genuine interactions and shared moments. For more tips on this topic, explore Explore Cultures: How to Create Memorable Travel Portraits.
Frequently Asked Questions
What is travel portrait lighting?
Travel portrait lighting refers to how light interacts with subjects in diverse environments while capturing portraits. It combines essential portrait photography techniques with the unique challenges and opportunities present in various travel settings.
Why is lighting important in portrait photography?
Lighting can make or break a portrait, influencing how we perceive the subject and the emotions we feel when viewing a photograph. Proper lighting emphasizes details and shapes the overall mood of the image.
What are the differences between natural and artificial lighting?
Natural light is typically soft and flattering, providing a beautiful quality that is hard to replicate. Artificial lighting, while beneficial in low-light situations, can be used to enhance portraits when natural light is inadequate.
What is the golden hour and why is it important for portraits?
The golden hour occurs during the first hour after sunrise and the last hour before sunset, providing soft, warm sunlight that enhances the beauty of portrait photography. It creates a stunning glow around subjects, making for unforgettable images.
How can I avoid harsh shadows in my portraits?
Avoid direct sunlight during midday to prevent unflattering shadows. Instead, seek shade under trees or awnings to create a softer, more flattering light on your subjects.
What is backlighting and how can it be used in portraits?
Backlighting involves positioning the light source behind the subject, creating a halo effect and adding depth to the image. This technique can produce stunning and ethereal portraits when done correctly.
What are some portable lighting options for backpackers?
Backpackers can benefit from compact LED lights, which are lightweight, energy-efficient, and easy to pack. These lights can be utilized in low-light situations to enhance portrait quality.
What camera settings are essential for capturing optimal portrait lighting?
Understanding ISO, aperture, and shutter speed is crucial for exposure. Keeping ISO low to avoid graininess, using a lower f-stop for depth of field, and setting a fast shutter speed can help capture stunning portraits.
What common mistakes should I avoid in travel portrait lighting?
Common mistakes include overexposing or underexposing images, neglecting background lighting, and positioning subjects incorrectly relative to the light source. Each of these can impact the quality and mood of your portraits.
What essential gear should I pack for travel portrait lighting?
A lightweight camera, versatile lenses, a small tripod, and a portable reflector are essential for travel portrait lighting. Keeping the gear compact allows for easier movement and better focus on capturing moments.