Aerial photography opens up a breathtaking world of perspectives, capturing the beauty of our planet from above. Whether you’re a seasoned pro or just starting out, exploring the best hotspots can elevate your photography game. For those interested in adventure photography, check out Top Destinations for Affordable Wildlife Adventure Photography.
Understanding Aerial Photography
What is Aerial Photography?
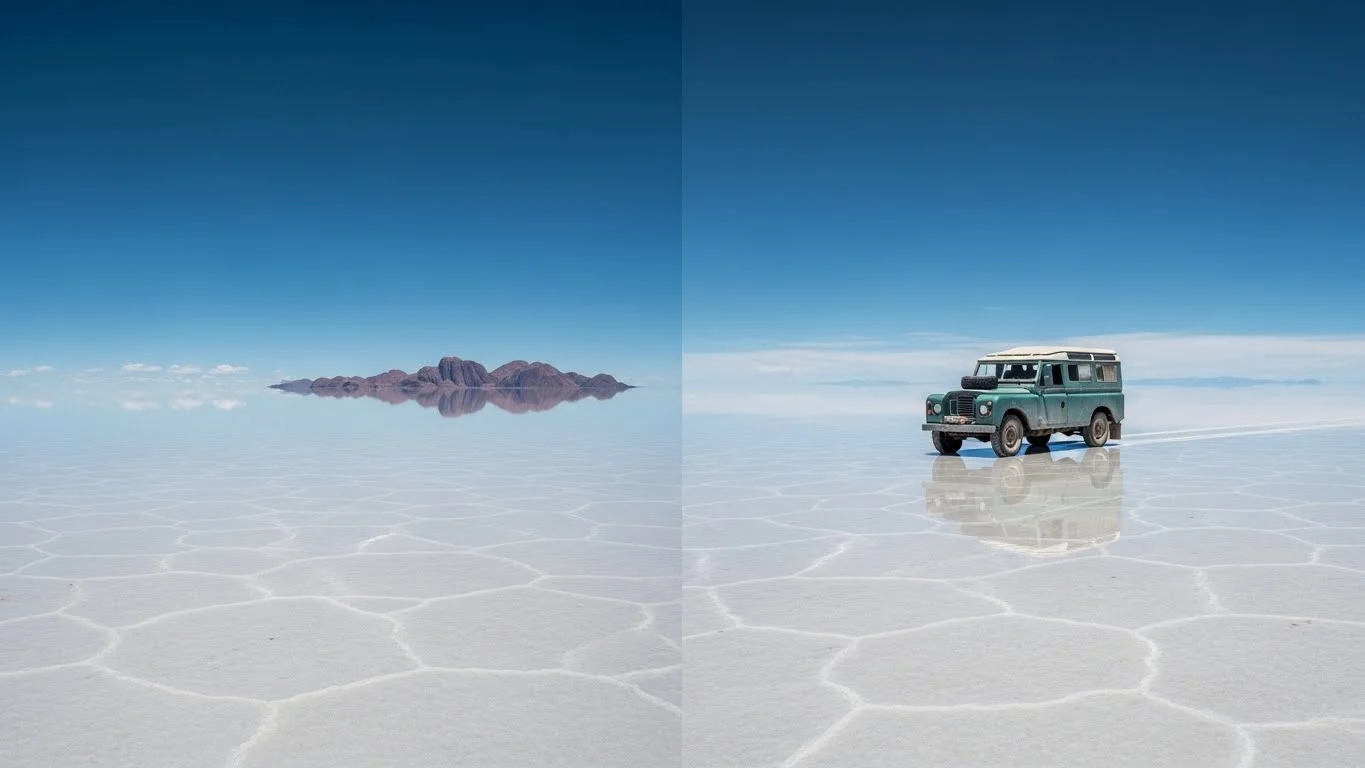
Aerial photography is the art of taking pictures from an elevated position, typically from an aircraft, drone, or even a tall building. I remember the first time I experienced aerial photography; it felt like seeing the world from a fresh angle. Instead of being limited by the ground, I was able to capture sweeping landscapes, intricate patterns of cities, and the stunning expanse of nature. This unique viewpoint reveals details that often go unnoticed when viewed from the ground. With advancements in technology, especially drones, it’s more accessible than ever to get started with aerial photography.
Types of Aerial Photography
There are various types of aerial photography, each with its unique charm and purpose. In my experience, the two main categories are:
- Vertical Aerial Photography: This type captures images directly below the camera, providing a bird’s-eye view. It’s perfect for mapping, surveying, or real estate photography, showcasing properties in their entirety.
- Oblique Aerial Photography: This captures images at an angle, offering a three-dimensional perspective. This style is often used for artistic purposes, where the scenery can tell a story with depth and context.
Understanding these types helps us choose the right approach depending on what we want to convey in our photographs. I’ve learned that each has its strengths, and experimenting with both can help refine my skills.
Equipment Needed for Aerial Photography
Getting started with aerial photography requires some essential equipment. While I’ve seen people get creative with what they use, having the right gear can make a significant difference in the quality of your shots. Here’s a list of what I recommend:
- Camera: A DSLR or mirrorless camera is ideal, as they allow for interchangeable lenses and manual settings. I personally prefer a camera that shoots in RAW format, giving me flexibility during editing.
- Drone: If you’re leaning towards drone photography, look for a model with a decent camera. Drones like the DJI Mavic series have become my go-to for their ease of use and quality. Just remember to learn how to fly it safely before taking it to the skies!
- Stability Equipment: A gimbal stabilizer can help reduce shaky footage and improve the quality of your shots. I’ve found using one can significantly enhance my video quality.
- Lenses: Wide-angle lenses are fantastic for capturing expansive landscapes, while zoom lenses can help focus on specific details from a distance. I often carry a variety to adapt to different shooting situations.
- Editing Software: Post-processing is where the magic happens. I use Adobe Lightroom and Photoshop for editing my aerial shots, allowing me to enhance colors, contrast, and clarity.
As I gathered my gear, I quickly realized that investing in quality equipment can really pay off. It’s not just about having the latest tech; the right tools can help me express my creative vision effectively. If you’re also interested in cultural heritage photography, consider checking out Top 10 Affordable Cultural Heritage Sites to Visit This Year.
Best Aerial Photography Hotspots Around the World
Iconic Landmarks
Now that we have a grasp on what aerial photography is and the equipment needed, let’s dive into some of the best hotspots around the world that I believe every aerial photographer should consider visiting.
The Grand Canyon, USA
The Grand Canyon is a dream for aerial photographers. The vastness and the layers of colors in the rock formations are simply mesmerizing from above. I remember hovering over the canyon during sunrise, watching the light dance across the ridges. It’s an experience I’ll never forget, and the resulting photos were stunning.
The Great Wall of China
Spanning thousands of miles, the Great Wall offers breathtaking visuals. Flying above it gives you a unique perspective on its winding path through the mountains. I found that capturing the wall amidst the lush greenery created a stunning contrast that really brought my photos to life.
Stonehenge, England
Stonehenge is another iconic site that looks incredible from the air. The arrangement of the stones against the surrounding landscape tells a story of ancient history. When I visited, I was struck by how the aerial view showcased the monument’s alignment with the landscape, something I hadn’t appreciated before.
Natural Wonders
Nature presents some of the most awe-inspiring scenes for aerial photography. Here are a few natural wonders that have left a lasting impression on me:
Banff National Park, Canada
Banff National Park is a treasure trove of stunning vistas. The turquoise lakes, majestic mountains, and dense forests create a stunning palette from above. One of my favorite moments was capturing Lake Louise with its vibrant blue water, framed by the snow-capped peaks. It felt like a postcard come to life.
Great Barrier Reef, Australia
Seeing the Great Barrier Reef from the air is like witnessing a real-life watercolor painting. The vibrant coral formations and the contrast of the deep blue ocean are breathtaking. I remember being in awe as I flew over the reef, capturing its beauty and the myriad of colors that made it so special.
Mount Kilimanjaro, Tanzania
Mount Kilimanjaro offers a unique opportunity for aerial photography. As you ascend, the diverse ecosystems become visible, from lush forests to desert landscapes. I was captivated by the varying terrains and how they looked from above, capturing the mountain’s majesty in a way that portraits just can’t convey.
Urban Landscapes
Urban settings provide a different kind of beauty, showcasing human creativity and architecture. Here are a few cities to consider:
Dubai Skyline, UAE
Dubai’s skyline is a masterpiece of modern architecture. The juxtaposition of the futuristic buildings against the desert landscape is striking. I loved capturing the Burj Khalifa from above and the way it towers over the city, especially during sunset when the sky turned golden.
New York City, USA
New York City is iconic, and capturing its skyline from the air creates a sense of scale that’s hard to replicate. I found that the grid-like structure of the city made for compelling compositions, especially with landmarks like the Statue of Liberty and Central Park visible.
Tokyo, Japan
Tokyo’s blend of tradition and modernity is fascinating from above. The contrast between ancient temples and bustling skyscrapers creates a vibrant tapestry. I remember flying over Shibuya Crossing, watching the chaos below while capturing the organized beauty of the city layout.
When to Visit Aerial Photography Hotspots
Best Seasons for Aerial Photography
Timing can make all the difference in aerial photography. Through my travels, I’ve noticed that each season brings its own charm and challenges. For instance, spring is often ideal for capturing lush landscapes and blooming flowers. I remember photographing the tulip fields in the Netherlands; the vibrant colors were breathtaking from above. Summer is great for capturing beaches and coastal areas, with clear blue skies enhancing colors. However, autumn is my personal favorite—those rich oranges, yellows, and reds create a stunning palette that’s hard to resist. I’ve found that shooting during fall can transform ordinary scenes into something magical.
Winter, while more challenging due to colder weather and limited daylight, offers its own beauty, especially with snow-capped mountains and frozen lakes. I once flew over a forest after a fresh snowfall, and it felt like I was gliding over a winter wonderland. The contrast of the white snow against the deep green of the evergreens was simply striking. I think it’s essential to consider what each season has to offer when planning your aerial photography trips.
Weather Considerations
Weather plays a crucial role in aerial photography. Overcast days can be a double-edged sword; while they often reduce harsh shadows, the lack of sunlight can also make colors appear dull. I’ve had days where I waited for the clouds to part just to capture a scene bathed in sunlight, and it was worth the wait. On the other hand, clear blue skies can enhance the vibrancy of colors, especially in landscapes. However, I’ve also learned that early mornings or late afternoons, when the sun is lower, can create beautiful golden hour lighting that adds warmth to my photos.
Wind is another factor to consider, especially if you’re using a drone. High winds can affect stability and make flying challenging. I’ve had times when I had to abort a shoot because the wind picked up unexpectedly. Checking the weather forecast beforehand and being flexible with your plans can save a lot of frustration. I recommend using apps that provide real-time updates on wind conditions to help you make informed decisions before heading out.
Time of Day for Optimal Lighting
The time of day can dramatically influence the quality of your photos. From my experience, the golden hours—just after sunrise and just before sunset—provide the most flattering light. I remember capturing a sunrise over a mountain range once; the warm hues painted the landscape, creating a serene atmosphere that was simply unforgettable. The shadows during these times add depth and texture, making my images pop.
Midday light can be harsh, leading to unflattering shadows and overexposed highlights. However, I’ve found that certain subjects, like urban landscapes or colorful markets, can still shine under bright conditions if you’re strategic with your angles. High vantage points offer unique perspectives during this time, allowing me to capture the city’s buzz against the stark backdrop of the sky.
I often plan my shoots around these golden hours, ensuring I’m in the right spot at the right time. It’s all about patience and planning, but the payoff in terms of stunning visuals is well worth it.
Planning Your Aerial Photography Trip
Choosing the Right Destination
Choosing a destination for aerial photography is more than just picking a pretty location; it’s about finding a place that resonates with your vision and style. I’ve learned to think about what I want to capture—whether it’s vast landscapes, urban settings, or unique natural formations. For instance, if you’re drawn to coastal photography, places like the Amalfi Coast in Italy offer dramatic cliffs and vibrant waters that can make for spectacular shots. On the other hand, if you’re interested in urban landscapes, cities like Barcelona or San Francisco offer a rich blend of architecture and natural beauty.
Researching locations ahead of time has been invaluable for me. I often look for places with diverse elements that can provide a variety of compositions. Websites, travel blogs, and photography forums can be great resources for discovering lesser-known spots that might not be on the typical tourist trail. I also recommend keeping a list of places you’d love to shoot someday—this can help guide your travel plans!
Budgeting for Your Trip
Budgeting for an aerial photography trip can feel overwhelming, but I’ve found that planning ahead makes it manageable. First, consider the costs of travel and accommodation. I’ve learned that booking flights and hotels in advance not only helps save money but also gives me peace of mind. Setting a daily budget for meals and transportation is also helpful. I usually keep my budget in mind while choosing local cuisine, as food experiences can enrich my travels and inspire my photography.
Don’t forget to account for any entrance fees at national parks or other attractions. Sometimes, a small fee can grant access to some of the best aerial views. And if you’re using a drone, check for any drone usage fees in specific areas. After a few trips, I became more adept at estimating costs and setting aside a little extra for unforeseen expenses, which has made my trips less stressful. If you’re planning a budget-friendly adventure, consider reading about Budget Safari Planning: Create Your Ultimate Adventure Guide.
Travel and Accommodation Tips
When it comes to travel and accommodation for aerial photography, I’ve learned a few tricks along the way. I prefer staying in locations that offer easy access to shooting spots, so I can maximize my time in the air rather than commuting. Vacation rentals or local hostels can often provide a cozy place to rest while being budget-friendly. I love using apps that let me filter for places near my desired photography locations.
Additionally, I always check local regulations regarding drone flying. Some areas require permits or have restrictions on where you can fly, which can change depending on the time of year or specific events. It’s best to research these details before your trip to avoid any surprises. I’ve found that connecting with local photographers through social media platforms can be a fantastic way to get insider tips about the area, including the best spots to shoot and any potential hurdles to avoid.
Techniques for Capturing Stunning Aerial Shots
Camera Settings for Aerial Photography
Getting the right camera settings can make a huge difference in the quality of aerial shots. I’ve gone through a lot of trial and error to discover what works best for me. Here are some settings I often adjust before taking off:
- Shutter Speed: A fast shutter speed is essential for capturing sharp images, especially when you’re in motion. I typically aim for at least 1/2000 of a second to freeze the action and minimize blur. When I’m shooting landscapes, I might use a slower shutter speed, but I make sure my drone is stable to avoid any motion blur.
- Aperture: The aperture affects the depth of field in your photos. For landscapes, I usually set my aperture between f/8 and f/11 to ensure that both the foreground and background are in focus. I remember shooting a mountain range and adjusting my aperture to capture the entire scene crisply; it really made a difference.
- ISO: Keeping the ISO as low as possible reduces noise in your images. In bright conditions, I often set it to 100 or 200. However, as the light changes, I adjust it accordingly. I’ve learned to keep an eye on my histogram to ensure I’m not losing details in the highlights or shadows.
Experimenting with these settings has been a game-changer for me. I suggest doing some test runs in various conditions to see how different settings impact your shots.
Composition Tips for Aerial Shots
Composition is key in photography, and aerial shots are no different. Over time, I’ve picked up some techniques that help me create striking images from the sky:
- Rule of Thirds: I love using the rule of thirds to create balanced images. By placing points of interest off-center, I can create a more dynamic composition. When I captured a sprawling cityscape, I positioned the skyline along one of the grid lines, which added depth to the image.
- Leading Lines: Utilizing natural lines in the landscape, like rivers or roads, can draw the viewer’s eye into the frame. I’ve found that these lines guide the viewer through the photograph, making it more engaging. Flying over winding roads in the countryside has often led to some of my favorite shots.
- Framing: Incorporating elements in the foreground can help frame your subject and add depth. I remember flying over a forest where I included the treetops at the bottom of the frame, which made the distant mountains stand out even more.
- Symmetry: Aerial photography often lends itself to symmetrical compositions. I’ve captured stunning images of bridges or architectural landmarks where symmetry played a crucial role. The balance created a sense of harmony that I found visually appealing.
These techniques have helped me think differently about aerial shots, and I encourage you to try them out. You might find that they change the way you see the world from above.
Editing Aerial Photographs
Once I’ve captured my aerial shots, the next exciting step is editing. I believe this is where I can truly enhance the images and express my creativity. Here are some editing tips that have worked for me:
- Start with RAW Files: Shooting in RAW format gives me more flexibility in editing. I can adjust exposure, contrast, and colors without losing quality. I always begin by correcting any exposure issues I might have encountered.
- Enhance Colors: Aerial photos often benefit from vibrant colors. I typically adjust saturation and vibrancy to make the colors pop, especially in landscapes. However, I’ve learned to be careful not to overdo it, as it can make the photo look unnatural.
- Sharpening: Adding a little sharpening can bring out details, especially in textures like clouds or rocky formations. I usually apply subtle sharpening selectively to avoid artifacts, which can detract from the overall image quality.
- Crop for Impact: Sometimes, cropping can dramatically improve the composition. I often take a moment to reassess my framing during editing; this has led to some of my best work. By removing distracting elements, I can focus the viewer’s attention on the main subject.
- Use Presets: I’ve created a few editing presets that reflect my style, making it easier to maintain consistency across my portfolio. While I tweak them to fit each image, having a base to work from saves me a lot of time.
Editing can be a rewarding process, and I encourage you to explore different styles and techniques to find what resonates with you. Over time, I’ve developed a workflow that feels natural, and it enhances my vision for each aerial photograph.
Frequently Asked Questions
What is aerial photography?
Aerial photography is the art of taking pictures from an elevated position, typically from an aircraft, drone, or a tall building. It allows photographers to capture sweeping landscapes, intricate patterns of cities, and the beauty of nature from a unique viewpoint.
What are the main types of aerial photography?
The two main types of aerial photography are vertical aerial photography, which captures images directly below the camera and is perfect for mapping and surveying, and oblique aerial photography, which captures images at an angle for a three-dimensional perspective, often used for artistic purposes.
What equipment is recommended for aerial photography?
Essential equipment for aerial photography includes a DSLR or mirrorless camera, a drone with a decent camera, stability equipment like a gimbal stabilizer, various lenses (wide-angle and zoom), and editing software such as Adobe Lightroom and Photoshop.
What are some iconic landmarks for aerial photography?
Some iconic landmarks for aerial photography include the Grand Canyon in the USA, the Great Wall of China, and Stonehenge in England. These sites offer breathtaking visuals and unique perspectives from above.
When is the best season for aerial photography?
The best seasons for aerial photography vary; spring is ideal for lush landscapes, summer for beaches, autumn for vibrant colors, and winter for snow-capped scenes. Each season presents unique opportunities and challenges for photographers.
How does weather impact aerial photography?
Weather plays a crucial role in aerial photography. Overcast days can reduce harsh shadows but may dull colors, while clear skies enhance vibrancy. Wind can affect drone stability, so checking weather conditions is essential before a shoot.
What time of day is best for aerial photography?
The golden hours—just after sunrise and just before sunset—provide the most flattering light for aerial photography, creating warm hues and adding depth to images. Midday light can be harsh, but with strategic angles, great shots can still be captured.
How should I choose a destination for aerial photography?
Choosing a destination involves considering what you want to capture, such as landscapes or urban settings. Researching locations ahead of time and looking for diverse elements can help find unique spots that resonate with your vision.
What camera settings are important for aerial photography?
Key camera settings for aerial photography include a fast shutter speed (at least 1/2000 of a second), an aperture between f/8 and f/11 for landscapes, and a low ISO to reduce noise. Experimenting with these settings can improve image quality.
What are some editing tips for aerial photographs?
Editing tips for aerial photographs include starting with RAW files for flexibility, enhancing colors carefully, sharpening selectively, cropping for impactful composition, and using presets for consistency across images.