For those passionate about macro wildlife photography, exploring the great outdoors on a budget can be thrilling. Imagine capturing the intricate details of tiny creatures while embracing nature’s beauty—all without breaking the bank! Read Interesting article: Explore Underwater Wildlife: Budget Backpacking Photography Guide
Understanding Macro Wildlife Photography
What is Macro Photography?
When I first dove into macro photography, I was both amazed and intimidated. Macro photography is the art of capturing stunning close-up images of small subjects, often revealing details that the naked eye simply cannot see. Think of the delicate textures of a butterfly’s wings or the captivating patterns on a beetle’s shell. This type of photography enables you to tell a story about nature’s smallest wonders. I remember my first macro shot of a ladybug; it felt like I was peeking into a hidden world where every little detail mattered.
The Appeal of Wildlife Photography
Wildlife photography has always held a special place in my heart. It combines adventure, patience, and artistry. The thrill of waiting for the perfect moment—when a hummingbird hovers near a flower or a frog leaps into view—is unmatched. For many of us, it isn’t just about capturing images; it’s about connecting with nature and experiencing the wild in a way that few others can. I feel a sense of peace and fulfillment when I’m out in nature, camera in hand, observing the life that surrounds me.
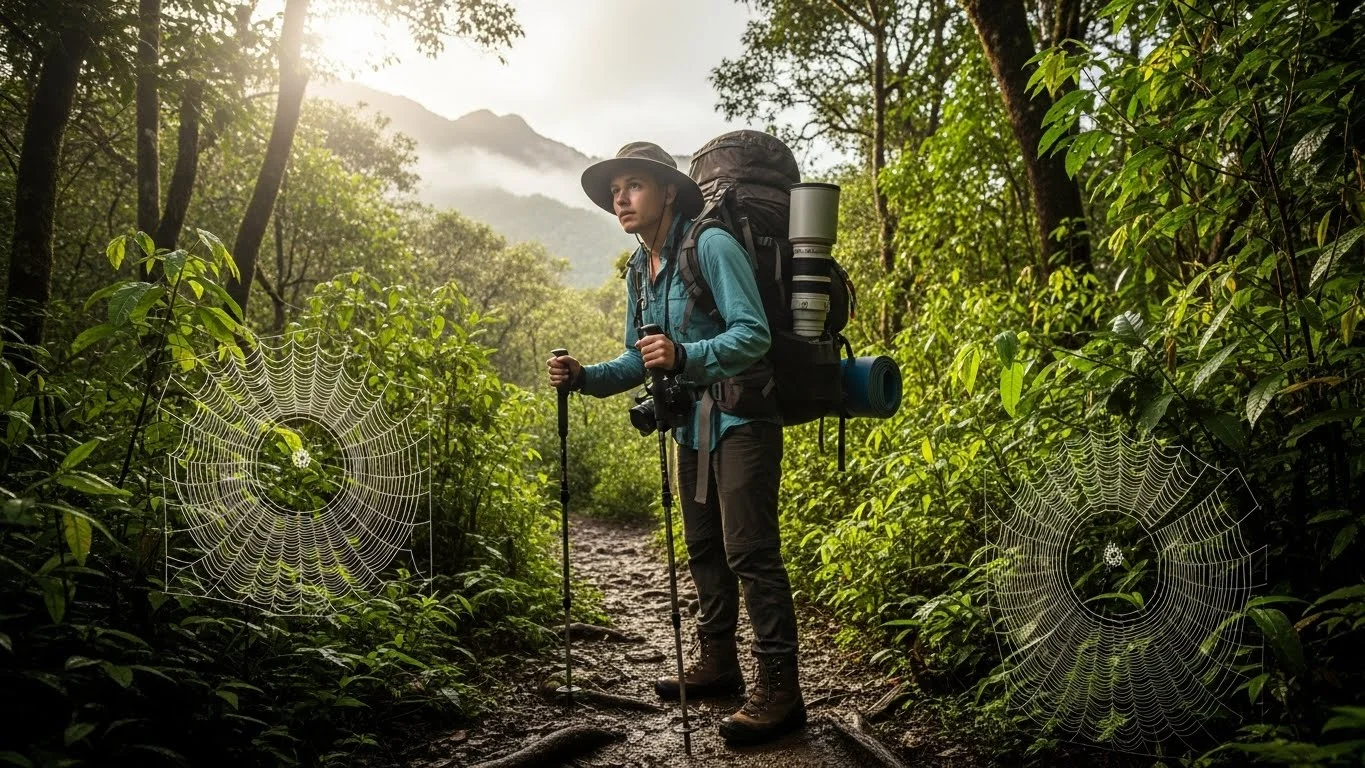
Essential Gear for Macro Wildlife Photography
When it comes to macro wildlife photography, having the right gear can make a world of difference. I quickly learned that I didn’t need to invest in the most expensive equipment to get great shots. Here’s what I found essential:
- Camera: A DSLR or mirrorless camera with a macro lens is ideal. However, I’ve also had great success using compact cameras with macro capabilities.
- Macro Lens: A dedicated macro lens allows for extreme close-ups. I love using a 100mm macro lens—it gives me the flexibility to shoot from a distance without scaring the wildlife.
- Tripod: Stability is key for macro photography. A lightweight tripod makes it easier to capture sharp images, especially in low light.
- Lighting: Natural light is fantastic, but I often carry a small flash or LED light for those darker environments.
- Reflectors: These can help bounce light onto your subject, enhancing those intricate details I love to capture.
As I explored more, I realized that investing in a good lens can elevate your photography game without needing every piece of high-end gear on the market.
Budget Backpacking Essentials
Choosing Affordable Destinations for Wildlife Photography
Finding the right destination is crucial for budget backpacking. I’ve discovered that some of the best spots for macro wildlife photography are often in less touristy areas. National parks, wildlife reserves, and even local nature trails can provide endless opportunities. Places like the Great Smoky Mountains or the Florida Everglades have diverse ecosystems teeming with life—and they don’t require an extravagant budget. I remember hiking through a local park and stumbling upon a vibrant patch of wildflowers, where I was able to capture the most stunning shots of bees and butterflies. Sometimes the best places are right in our own backyards! Top Tips for Backpacking to Seasonal Landscape Wonders
Backpacking Gear on a Budget
When packing for a backpacking trip focused on wildlife photography, I always aim to keep my gear light and affordable. Here are some tips I’ve learned along the way:
- Camera Bag: Invest in a good camera bag that fits your gear comfortably. I found a budget-friendly, lightweight backpack that accommodates my camera and essentials.
- Clothing: Wear durable, weather-appropriate clothing. I often layer my clothes so I can adapt to changing weather conditions without carrying extra items.
- Food and Water: Bringing snacks and a refillable water bottle saves money. I always pack energy bars and nuts, which are light and nutritious.
Tips for Packing Light
Overpacking is something I’ve struggled with, but I learned to streamline my packing list over time. Here are my go-to tips for keeping my backpack light:
- Stick to the essentials: Only take the gear you know you will use.
- Use multi-purpose tools: A lens cleaning kit often doubles as a small tripod for stabilization.
- Plan your outfits: Bring clothes that can be mixed and matched, reducing the number of items needed.
By being thoughtful about what I carry, I can focus more on capturing incredible moments in nature rather than lugging around unnecessary weight. There’s something freeing about being light on my feet, especially when I’m chasing that perfect shot!
Best Locations for Macro Wildlife Photography on a Budget
National Parks and Reserves
National parks are like the holy grail for macro wildlife photography, and the best part is that many of them are quite affordable to visit. I’ve had some of my most memorable experiences in places like Yellowstone and Yosemite, where nature is at its finest. The diverse ecosystems offer a range of subjects, from tiny insects to beautiful flowers. I remember one day in Yosemite, I came across a patch of wildflowers with bees buzzing all around. With my macro lens, I was able to capture the delicate wings and the pollen-covered bodies of those little creatures. It was a joy to be so close to a vibrant part of nature.
Also, many national parks offer discounted entry fees during certain seasons or free days throughout the year. I’ve made it a point to check their websites before planning my trips, ensuring I can enjoy all that beauty without spending a fortune.
Affordable Wildlife Sanctuaries
Wildlife sanctuaries are another fantastic option for budget-friendly macro photography. Places like these are often less crowded than national parks, which gives you a better chance to capture the perfect shot without distractions. I visited a local wildlife sanctuary recently, and I was blown away by the variety of insects and small animals I found. The staff there was knowledgeable and shared tips on where to find the most interesting subjects. They even offered guided tours that were budget-friendly, allowing me to learn while shooting.
Many sanctuaries also run programs that might cost a little but offer a wealth of benefits, like workshops and photography classes. Even if you don’t want to spend much, just being in these safe habitats can yield incredible macro photography opportunities. Ultimate Guide to Budget Safaris: Experience Wildlife Cheap
Urban Areas with Rich Biodiversity
It might surprise you, but urban areas can be goldmines for macro wildlife photography! I’ve discovered that city parks, gardens, and even the edges of urban neighborhoods often host a surprising variety of wildlife. On a recent stroll through my city’s botanical garden, I found an abundance of butterflies, dragonflies, and unique plants. I spent hours getting shots that felt like they belonged in a nature documentary.
It’s also worth noting that urban areas often have community gardens or green spaces that attract wildlife. I remember setting up my tripod near a patch of blooming flowers and capturing a stunning close-up of a ladybug crawling on a petal. The urban environment can provide unique opportunities to see how nature adapts and thrives, even in bustling cities. Don’t underestimate the beauty of what’s around you!
Planning Your Trip
When to Go: Seasonal Considerations
Timing is everything when it comes to macro wildlife photography. I’ve learned that different seasons can dramatically change what you might see in nature. Spring is typically my favorite time to go. It’s when flowers bloom, and insects come out of hibernation. I remember one spring trip where I was able to capture the emergence of caterpillars and butterflies that were just waking up after a long winter. It felt like witnessing a beautiful transformation right before my eyes.
Summer can also be great, but it sometimes brings harsher sunlight. I’ve found that early mornings or late afternoons are the best times to shoot, as the light is softer, and many creatures are more active during these cooler times. Fall offers unique colors and the chance to capture different species preparing for winter. I think every season has its charm, and being adaptable can lead to some unique and stunning shots.
Finding Affordable Accommodations
When I’m planning a trip, accommodation can be one of the biggest expenses. I’ve found that searching for budget-friendly options like hostels, campgrounds, or even local Airbnb rentals can significantly lower costs. Camping, in particular, has been a game changer for me. It allows me to stay close to nature, and I often set up my tent near excellent shooting spots.
Another tip I’ve found useful is to check for lodging deals or last-minute discounts. Websites often run promotions during off-peak seasons that can save you a bundle. Plus, if you’re traveling with friends or fellow photographers, sharing a space can cut costs even further while making the trip more fun!
Budget-Friendly Transportation Options
Getting to your destination shouldn’t be a financial burden. I’ve learned that planning my transportation early can lead to significant savings. For instance, I often use public transportation when available, as it can be much cheaper than renting a car. If I’m venturing into the wilderness, I usually consider carpooling with fellow photographers or friends to share the costs.
Additionally, using apps to compare travel costs can help find the best deals. On my last trip, I was able to snag a great deal on a bus ticket to a nearby national park, which left me with more funds for food and photography gear. Traveling on a budget is all about being resourceful, and I love the thrill of finding new ways to save money while still exploring the great outdoors!
Capturing Stunning Macro Wildlife Photos
Techniques for Macro Photography
As I ventured deeper into the world of macro photography, I quickly realized that technique plays a vital role in capturing stunning images. One technique that has significantly improved my shots is focusing on the eyes of my subjects. Whether it’s an insect or a flower, sharp eyes create a connection with the viewer that can be captivating. I remember a moment when I was photographing a dragonfly, and as I focused on its multifaceted eyes, the image transformed. It felt like I was capturing not just a bug but a character with its own story.
Another technique I’ve found useful is practicing patience. In macro photography, the perfect moment can often be fleeting. I’ve spent hours in the same spot, waiting for a butterfly to land just right or a bee to hover in a sunbeam. Breathing deeply and immersing myself in the experience has often resulted in some of my best shots. I learned to embrace the stillness and let nature unfold, trusting that the perfect moment would eventually present itself.
Finally, experimenting with different angles has become one of my favorite ways to add depth to my photographs. I enjoy getting low to the ground or positioning my camera from above to capture unique perspectives. I recall a time when I shot a close-up of dew on a spider web from below, and the resulting image was a mesmerizing play of light and texture. The more angles you explore, the more opportunities you find to tell a story through your lens.
Lighting and Composition Tips
Lighting can make or break a macro shot, and I’ve learned to work with natural light to my advantage. Early mornings and late afternoons are my go-to times. The soft golden hour light creates a warm glow that enhances the details of my subjects. I remember a morning in the garden, where the dew glistened on petals, and the light perfectly illuminated a cluster of tiny insects. The colors popped, and the intricate textures were beautifully defined.
For composition, I often refer to the rule of thirds. I believe it brings balance and interest to my photos. When I frame a subject off-center, it tends to create a more dynamic image. I’ve also learned to include surrounding elements, like leaves or flowers, to add context to my shots. For example, when photographing a bee, I often include the flower it’s visiting to give a sense of place and action. These thoughtful compositions can elevate a simple close-up into a storytelling photograph that resonates with viewers.
Lastly, don’t be afraid to break the rules! Some of my favorite images have come from spontaneous moments where I focused on what felt right rather than what I thought I should do. Allowing myself that freedom has led to creative discoveries and unique shots I might have missed otherwise.
Post-Processing on a Budget
After the excitement of snapping photos, I find that post-processing is where the magic continues. However, I don’t believe you need to spend a fortune on software to enhance your images. I’ve had great success with free or low-cost editing tools like GIMP and Lightroom Mobile. These platforms offer sufficient features for basic adjustments, and I’ve found them user-friendly enough for someone just starting.
One of the first things I do when editing my macro photos is to adjust the exposure and contrast to make the colors pop more vibrantly. I remember editing a photo of a butterfly, and a small tweak in brightness brought out details in the wings that were previously hidden. Cropping is also essential; I often trim away distractions from the edges of my images to focus on the subject, which can dramatically improve the overall composition.
I also like to experiment with sharpening tools to enhance the intricate details of my subjects. A little bit can go a long way, and I’ve learned to apply sharpening selectively, focusing on the eyes and other critical areas to draw attention. Finally, I often play with color balance to ensure that my images reflect the true beauty I experienced in the field. These small adjustments can transform a good shot into something truly striking!
Connecting with Other Photographers
Online Communities and Forums
Connecting with fellow photographers has been an incredibly rewarding experience for me, especially in the macro wildlife photography realm. I’ve discovered that online communities and forums, such as Facebook groups and photography websites, are treasure troves of inspiration and support. I remember joining a macro photography group where members shared tips, critiques, and their stunning images. It felt like being part of a family that understands the excitement of capturing the minute details of nature.
One of the best things about these online platforms is the ability to learn from others’ experiences. I’ve seen posts about techniques, gear recommendations, and even travel tips that have helped me refine my skills. Plus, participating in challenges or themed photo contests can push me out of my comfort zone and encourage creativity. Just the other day, I joined a “bug of the week” challenge, which motivated me to explore different areas and look for unique insects.
Local Photography Groups and Workshops
Beyond the digital realm, I’ve found local photography groups and workshops to be invaluable. Meeting other photographers in person not only enhances my skills but also builds friendships. I remember attending a macro photography workshop at a nearby nature reserve. It was an eye-opening experience where I learned new techniques and received hands-on guidance from an experienced photographer. The camaraderie was uplifting, and sharing our experiences while shooting together made the day unforgettable.
Many communities host regular meetups where photographers of all skill levels can gather, share tips, and explore new locations together. I’ve made some great friends this way, and having a buddy to shoot with makes those long waits for the perfect shot feel much shorter. Plus, the exchange of ideas and constructive feedback is always beneficial for growth. Whether I’m at a local park or a distant wilderness, knowing I have a support network makes my photography journey all the more enjoyable.
Frequently Asked Questions
What is macro photography?
Macro photography is the art of capturing stunning close-up images of small subjects, revealing details that the naked eye cannot see. It allows photographers to tell a story about nature’s smallest wonders.
What essential gear is needed for macro wildlife photography?
Essential gear for macro wildlife photography includes a DSLR or mirrorless camera with a macro lens, a tripod for stability, lighting options like a small flash, and reflectors to enhance light on subjects.
Where are some affordable destinations for wildlife photography?
Affordable destinations for wildlife photography include national parks like Yellowstone and Yosemite, wildlife reserves, and local nature trails, which often provide diverse ecosystems without high costs.
What tips are there for packing light for a photography backpacking trip?
To pack light, stick to essential gear, use multi-purpose tools like a lens cleaning kit that doubles as a small tripod, and plan outfits that can be mixed and matched to reduce the number of clothing items needed.
When is the best time to go for macro wildlife photography?
Spring is often the best time for macro wildlife photography as flowers bloom and insects emerge. Early mornings and late afternoons are ideal for softer light, while fall offers unique colors and opportunities for different species.
How can one find budget-friendly accommodations while traveling for photography?
Budget-friendly accommodations can be found by searching for hostels, campgrounds, or local Airbnb rentals. Camping can be particularly advantageous as it allows photographers to stay close to nature.
What transportation options can help save money on photography trips?
Using public transportation can be cheaper than renting a car, and carpooling with fellow photographers can help share costs. Comparing travel costs with apps can also lead to significant savings.
What techniques can improve macro photography shots?
Focusing on the eyes of subjects, practicing patience while waiting for the perfect moment, and experimenting with different angles can significantly enhance macro photography shots.
What are some post-processing tips for macro photography?
Post-processing tips include using free or low-cost editing tools for basic adjustments, enhancing exposure and contrast, cropping distractions from images, and selectively sharpening details to draw attention to key areas.
How can photographers connect with others in the macro photography community?
Photographers can connect with others through online communities and forums, as well as local photography groups and workshops, which offer opportunities for skill enhancement and friendship-building.