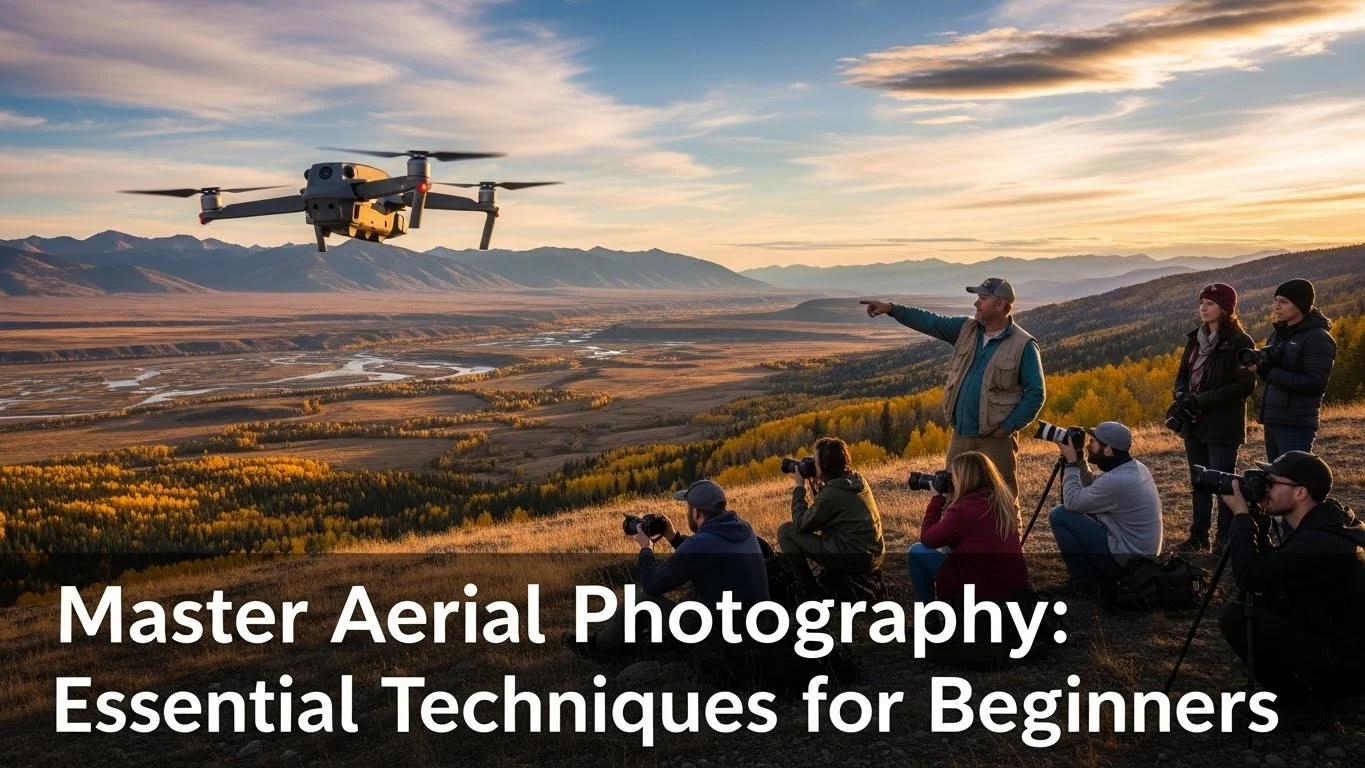
Have you ever looked at stunning aerial photographs and thought, “I want to create images like that”? Aerial photography opens up a whole new world of perspective, and I’m here to help you master it! If you’re considering investing in a drone, check out the Best Compact Drones for Stunning Aerial Travel Shots to find the perfect model for your needs.
Understanding Aerial Photography
What is Aerial Photography?
Aerial photography is the art of capturing images from above, typically using drones, helicopters, or airplanes. I remember the first time I took my drone out for a spin; the feeling of seeing the world from such a different angle was exhilarating! It’s not just about flying high; it’s about telling stories through unique perspectives. This type of photography allows us to capture landscapes, architecture, and events from a viewpoint we usually don’t get to see. Each shot can evoke emotions and curiosity, making your audience feel as though they’re a part of something larger.
History and Evolution of Aerial Photography
The roots of aerial photography stretch back to the mid-19th century, when photographers began using balloons to capture images from above. It’s fascinating to think about how far we’ve come since then! I often reflect on the evolution from those early efforts to today’s technology, where drones can capture high-resolution images with incredible ease. The introduction of aerial photography changed the way we see and understand our world. During wars, aerial photography was crucial for reconnaissance, and now it serves various purposes, from real estate to environmental monitoring. Understanding this history gives me a deeper appreciation for the craft and its impact on society.
Types of Aerial Photography
When diving into aerial photography, it’s essential to know the different types you can explore. I’ve experimented with several methods, and each has its unique charm. Here are a few to consider:
- Vertical Aerial Photography: This type captures images directly from above, often used in mapping and surveying.
- Oblique Aerial Photography: Captured at an angle, these images offer a more dynamic view of the landscape. I love how this perspective can add depth and context to a photo.
- Drone Photography: This is perhaps the most popular today, allowing for creative freedom and versatility. Drones can reach heights and angles that traditional aircraft simply can’t. If you’re looking for guidance, the Ultimate Guide to Affordable Drones for Backpacking is a great resource.
- Infrared Aerial Photography: This technique captures images using infrared light, revealing details not visible to the naked eye. It’s amazing for landscape analysis and can even show plant health!
Each type serves different purposes and can help you develop your style. I find that experimenting with all these methods can really expand your creativity and skill set.
Essential Equipment for Aerial Photography
Choosing the Right Drone
When I first started with aerial photography, choosing the right drone was a daunting task. There are so many options! I recommend looking for a drone that offers a good balance between price, quality, and ease of use. Features like a stable gimbal, decent camera resolution, and good battery life are crucial. I started with a beginner-friendly model that didn’t break the bank, and it allowed me to learn the ropes without overwhelming me. As you gain experience, you can upgrade to more advanced models that offer greater control and features.
Camera Specifications
While the drone itself is essential, the camera specifications play a huge role in the quality of your images. I always check for a camera with at least 12 megapixels and the ability to shoot in RAW format, as this gives you more flexibility in post-processing. Additionally, features like a wide aperture and adjustable shutter speeds allow for better performance in diverse lighting conditions. I remember my excitement when I upgraded to a drone with a better camera—it completely transformed the quality of my aerial shots!
Additional Gear: Filters, Gimbals, and Batteries
Beyond the drone and camera, having the right accessories can enhance your aerial photography experience. I can’t stress enough how useful ND filters are; they help reduce glare and allow for longer exposures without overexposing your images. Gimbals, which stabilize the camera during flight, are also crucial for achieving smooth, cinematic shots. And don’t forget about extra batteries! I learned the hard way that running out of battery mid-flight can cut a great shoot short. Always have some backups ready to go!
Fundamental Techniques
Understanding Composition in Aerial Photography
When I first began my journey into aerial photography, I was surprised by how crucial composition is from the sky. It’s not just about getting the right angle; it’s about how you frame your subject within that vast landscape. I learned that the rule of thirds can still apply beautifully here. By imagining a grid of nine squares over my frame, I could position key elements along those lines or at their intersections to create a more balanced image. I remember my first successful shot where I applied this technique, capturing a stunning sunset over a lake, with the horizon perfectly aligning with the top third of the frame. It made the photo feel dynamic and engaging!
Another technique that has served me well is leading lines. These natural or man-made lines guide the viewer’s eye through the photo. I once shot a winding road from above, and framing it within the scene led the viewer’s gaze right into the heart of the landscape. I feel that utilizing these compositional techniques not only enhances the beauty of each shot but also tells a more compelling story.
Mastering Camera Settings for Aerial Shots
Getting comfortable with camera settings can feel overwhelming, but it’s essential for capturing the best aerial images. I remember feeling anxious about adjusting my settings in real-time while flying, but through practice, I learned the importance of understanding exposure, ISO, and shutter speed. For aerial photography, I often start with a higher shutter speed to avoid motion blur from the drone’s movement. I typically aim for at least 1/2000th of a second, especially if I’m shooting fast-moving subjects or during windy conditions.
ISO is another critical setting. I usually keep it as low as possible to reduce noise, particularly in low-light situations. Balancing these settings while keeping an eye on changing light conditions can be tricky, but it becomes easier with time. I’ve found that shooting in manual mode gives me the control I need to adjust settings on the fly and achieve the desired results. Practice is key, and I suggest going out on clear days to experiment with different settings without the pressure of getting the perfect shot right away.
Utilizing Natural Light and Weather Conditions
Natural light can transform aerial photography into something magical. I believe that the time of day and weather can entirely change the mood of your images. Early mornings and late afternoons often provide the soft, golden light that enhances colors and textures. I’ve captured some of my favorite shots during the golden hour, where the light casts long shadows and creates a warm glow over the landscape. The lighting conditions can also help define the subject’s features, especially in landscapes where shadows add dimension.
Weather, too, plays a significant role in how your photos turn out. I remember one time I went out to shoot thinking it would be a clear day, only to find the sky overcast. At first, I was disappointed, but then I discovered that the diffused light from the clouds created stunningly even lighting. This was perfect for capturing the details of a lush forest. So, I encourage you to embrace different weather conditions rather than avoid them! Each offers unique opportunities for creativity. Use that overcast sky to your advantage or even seek out dramatic storms for intense imagery.
Planning Your Aerial Shoot
Choosing the Right Location
Finding the perfect location for aerial photography can often feel like a treasure hunt. I remember when I was scouting for spots to shoot, I’d take long drives just to see what landscapes caught my eye. Urban settings, coastlines, mountains, and fields all provide different vibes and stories to tell. I recommend using tools like Google Earth to explore potential locations beforehand. It helped me visualize how different perspectives would look before even getting my drone into the air.
Some of my favorite spots have been unexpected ones—like the abandoned buildings on the outskirts of town. I found that these unique locations often yield striking images. Plus, they can tell fascinating stories when captured from above. Make a list of places you want to explore, and don’t be afraid to venture off the beaten path! If you’re interested in wildlife photography as well, check out the Top Destinations for Affordable Wildlife Adventure Photography for inspiration.
Scouting and Pre-Flight Checklists
Before I head out for a shoot, I’ve learned the importance of having a solid plan. I developed a pre-flight checklist to ensure I’m prepared and to avoid any mishaps. This checklist usually includes checking the weather conditions, ensuring my drone is fully charged, and confirming that I have enough memory cards and batteries. I also make it a point to scout the area physically if possible. Walking around the location allows me to better understand the landscape and find the most interesting angles.
Additionally, I take a moment to visualize the shots I want to capture. This mental preparation often helps me focus on the story I want to tell through my images. It’s so rewarding when everything comes together and I can create the images I envisioned!
Understanding Local Regulations and Permissions
One crucial aspect I’ve learned in aerial photography is respecting local regulations. Every place has its own set of rules regarding drone usage, and I can’t stress enough how important it is to know them. I always check for no-fly zones and any necessary permits before heading out. In some cases, I’ve had to get special permissions, especially when shooting in national parks or urban areas. It can be a bit of a hassle, but it’s always worth it to ensure a smooth shoot without any interruptions.
Whenever I’m unsure about the regulations, I’ve found that reaching out to local drone communities or forums can be incredibly helpful. They often share advice and experiences that can guide you in navigating these rules. Following these guidelines not only keeps us safe but also helps maintain a good relationship with the places we love to photograph.
Post-Processing Your Aerial Images
Essential Editing Software for Beginners
After capturing stunning aerial shots, the next step in my creative process is post-processing. This is where the magic happens! I remember feeling a bit overwhelmed by the options available, but I quickly learned that choosing the right editing software can make a huge difference. For beginners, I recommend starting with user-friendly tools like Adobe Lightroom or Canva. They offer great features without being too complex. I’ve used Lightroom extensively to enhance my aerial photos, and its intuitive interface made it easy for me to adjust exposure, contrast, and colors without feeling lost.
If you’re looking for free alternatives, programs like GIMP or Pixlr can be great starting points as well. They may not have all the bells and whistles of paid software, but they’re effective for basic edits. I suggest spending some time experimenting with different software to find what works best for you. The more comfortable you become with the tools, the more you can focus on bringing your creative vision to life.
Basic Editing Techniques for Aerial Photos
Once I’ve settled on my editing software, I dive into the basic editing techniques that can significantly enhance the quality of my aerial images. One of the first things I do is crop the image to improve composition. I often revisit the rule of thirds here, ensuring that key elements are placed in a way that draws the viewer’s eye.
Next, I adjust the brightness and contrast to make the colors pop. I’ve found that increasing contrast can help to define the details in the landscape, making the image more vibrant and engaging. Don’t be afraid to experiment with the saturation levels, too; sometimes, a little boost can make the colors sing without looking unnatural.
White balance is another critical adjustment. I usually check the warmth of my images, especially those taken during golden hour, and make slight tweaks to enhance the overall mood. It’s amazing how a simple adjustment can transform a flat image into something captivating!
Advanced Editing Tips for Stunning Results
As I’ve gained more experience, I’ve discovered some advanced editing techniques that can really take aerial photography to the next level. One of my favorites is using graduated filters in Lightroom. These filters allow me to darken the sky while keeping the landscape well-lit, creating a more dramatic effect. I love how this technique can help emphasize the contrast between the earth and the sky.
Another technique I enjoy is sharpening my images selectively. I usually apply sharpening to the subject of the photo while gently reducing it in other areas to keep the focus where I want it. This can really make details stand out without overwhelming the viewer. I also like to play with clarity and texture to enhance the details in the landscape. Just remember: moderation is key. Too much clarity can lead to unnatural results.
Lastly, I’ve started exploring the world of photo composites, where I combine multiple images to create a final piece that tells a story. I once merged several shots of a coastline, stitching them together to capture the full expanse of the waves crashing against the rocks. This approach adds a unique touch to my portfolio and allows for creativity that goes beyond traditional aerial shots.
Common Challenges and Solutions
Dealing with Weather and Environmental Factors
Weather can be both a friend and a foe in aerial photography. I recall one shoot where the forecast promised clear skies, but I ended up facing unexpected gusts of wind. It was frustrating, but I learned to adapt quickly. One solution I’ve found is to always check the weather conditions beforehand and plan for the unexpected. If it’s too windy, I’ll either wait for calmer days or shoot in locations that provide some natural shelter.
Another challenge I often encounter is dealing with changing light conditions. I remember a time when the sun peeked out from behind clouds, creating stark contrasts that were tricky to capture. In situations like this, I’ve learned to embrace the variations. I’ll shoot multiple images as the light shifts, which gives me options to choose from during the editing process. Sometimes, it’s those unexpected changes that lead to the most stunning photographs!
Avoiding Common Aerial Photography Mistakes
Like any skill, aerial photography has its pitfalls, and I’ve had my fair share of mistakes along the way! One of the most common blunders I’ve made is forgetting to check my camera settings before takeoff. I can’t tell you how many times I’ve flown my drone only to realize I was shooting in the wrong mode. To avoid this, I’ve created a checklist that includes a quick review of all my settings before launching.
Another mistake that I’ve learned to overcome is not paying enough attention to the background. In aerial shots, backgrounds can make or break an image. I’ve occasionally found myself focused solely on the subject, only to notice later that the background was distracting. Now, I consciously evaluate the entire scene to ensure that everything complements the main subject.
How to Handle Motion Blur and Focus Issues
Motion blur can be a tricky issue in aerial photography, especially when flying in windy conditions. I’ve dealt with blurry shots before, and it can be disheartening. To counter this, I always use a higher shutter speed, as I mentioned earlier. I’ve also learned to practice smooth, controlled movements when piloting my drone. Keeping a steady hand while adjusting angles can help maintain sharpness in the image.
If I do end up with a blurry image, I’ve found that sharpening tools in editing software can help salvage the shot to some extent. However, it’s always better to prevent motion blur in the first place. Ensuring that my drone is properly calibrated for the conditions can make a world of difference.
Focus issues can also arise, especially when capturing landscapes at varying distances. I tend to use autofocus for most of my shots, but I double-check that my focal point is set on the subject. If I’m shooting in manual mode, I’ve found that using a larger aperture can help keep more of the scene in focus, adding depth to my images.
Frequently Asked Questions
What is aerial photography?
Aerial photography is the art of capturing images from above, typically using drones, helicopters, or airplanes. It allows photographers to tell stories through unique perspectives, capturing landscapes, architecture, and events from viewpoints that are usually not accessible.
What are the main types of aerial photography?
The main types of aerial photography include vertical aerial photography, oblique aerial photography, drone photography, and infrared aerial photography. Each type serves different purposes and offers unique perspectives and creative opportunities.
What should I consider when choosing a drone for aerial photography?
When choosing a drone, look for a balance between price, quality, and ease of use. Key features to consider include a stable gimbal, decent camera resolution, and good battery life. Beginner-friendly models can help you learn without overwhelming you.
What camera specifications are important for aerial photography?
For aerial photography, it’s important to have a camera with at least 12 megapixels and the ability to shoot in RAW format for better post-processing flexibility. Additional features like a wide aperture and adjustable shutter speeds improve performance in varying lighting conditions.
What are some fundamental techniques for aerial photography composition?
Fundamental techniques for composition in aerial photography include applying the rule of thirds to frame subjects within the landscape and using leading lines to guide the viewer’s eye through the photo. These techniques can enhance the beauty of the shot and tell a more compelling story.
How can natural light and weather conditions affect aerial photography?
Natural light can greatly enhance aerial photography, with early mornings and late afternoons providing soft, golden light that enhances colors and textures. Weather conditions can also impact the mood of images; overcast skies can create even lighting, while dramatic storms can offer intense imagery.
What should I include in a pre-flight checklist for aerial photography?
A solid pre-flight checklist should include checking the weather conditions, ensuring your drone is fully charged, confirming you have enough memory cards and batteries, and scouting the area if possible to visualize your shots. Mental preparation is also beneficial for focusing on the story you want to tell.
What editing software is recommended for beginners in aerial photography?
Beginners are recommended to start with user-friendly editing software like Adobe Lightroom or Canva, which offer great features without complexity. Free alternatives like GIMP or Pixlr can also be effective for basic edits.
What are some common challenges in aerial photography and their solutions?
Common challenges include dealing with unpredictable weather, motion blur, and focus issues. Solutions involve checking weather conditions beforehand, using higher shutter speeds to prevent motion blur, and ensuring proper focus settings, especially when capturing landscapes at varying distances.
How can I improve the quality of my aerial images during post-processing?
To enhance aerial images during post-processing, you can crop for better composition, adjust brightness and contrast, and tweak white balance to enhance mood. Experimenting with advanced techniques like graduated filters and selective sharpening can also elevate the quality of your images.