Travel photography can be an exhilarating way to capture the essence of your adventures without breaking the bank. Here, I’ll share some techniques that helped me elevate my travel photos while sticking to a budget. Read Interesting article: Master Travel Photography: Budget Tips for Capturing Culture
Understanding Travel Photography Basics
When I first started my journey into travel photography, I quickly discovered that there’s more to it than just pointing and shooting. Understanding a few basic principles can make a significant difference in the quality of your photos. Whether you’re trekking through the mountains or exploring bustling city streets, a solid foundation in photography can enhance your experience and help you capture the spirit of your travels.
The Importance of Composition
One of the first things I learned about photography is the importance of composition. It’s like the backbone of every great photo. I remember taking a scenic shot of a sunset over a lake, but it didn’t quite capture what I had envisioned. That’s when I realized that placing the horizon line too centered made the image feel flat. Since then, I’ve focused on various compositional techniques.
For instance, the Rule of Thirds is a game-changer. I typically imagine a grid dividing my frame into nine equal sections. By placing key elements along these lines or at their intersections, my photos tend to have more balance and interest. I’ve also experimented with leading lines that draw the viewer’s eye into the picture, whether it’s a winding path leading to a majestic mountain or a street bustling with life.
Mastering Lighting Conditions
Lighting can make or break a photograph. I remember one particular morning in Barcelona, where the soft, golden light of the early sunrise illuminated the cobblestone streets beautifully. I realized that the best light for photography often occurs during the golden hours—shortly after sunrise or before sunset. I make it a point to plan my shooting schedule around these times whenever possible.
Overcast days can also provide excellent diffused lighting, which helps in reducing harsh shadows. I’ve captured some of my favorite portraits on cloudy days, where the subjects look soft and vibrant. Keep an eye on the weather forecast, and don’t shy away from taking photos when the sun isn’t shining. Your images can still be stunning!
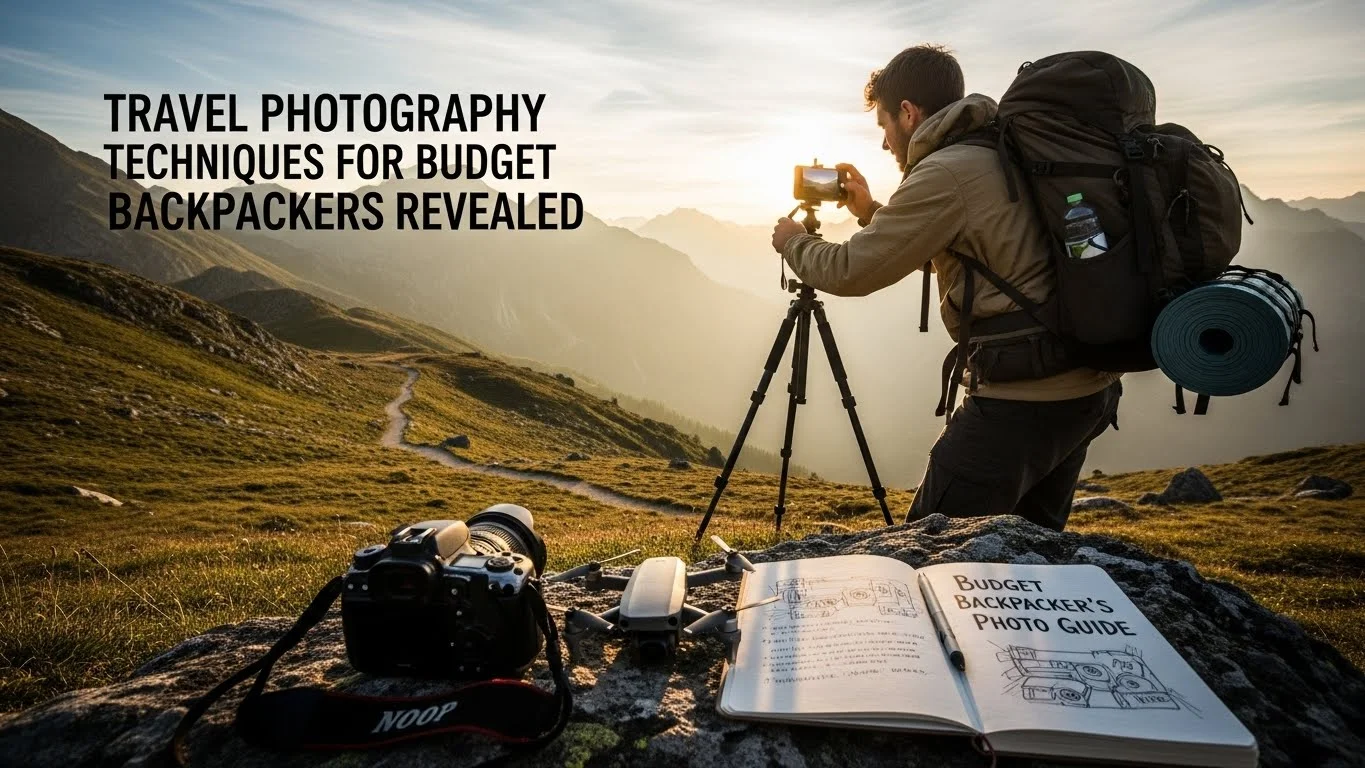
Choosing the Right Camera Gear on a Budget
As a budget backpacker, I know how tempting it can be to splurge on high-end gear. However, I’ve learned that you don’t need the latest and greatest camera to take great photos. My first camera was a basic DSLR, and it served me well. I recommend starting with what you have and upgrading only if you feel limited by your current gear.
For those on a tight budget, consider looking for used or refurbished cameras. I found my current model through a reputable online marketplace at a fraction of the original price, and it’s been a fantastic investment. If you’re more into lightweight options, a mirrorless camera could be a great fit, offering excellent image quality without the bulk.
Also, think about lenses. A versatile zoom lens can cover a range of situations, but I’ve often used a prime lens that was more affordable and light. I discovered that the sharpness and clarity in my images improved significantly with a good prime lens, even if I had to move around more to frame my shots.
Lastly, don’t forget about your smartphone! With advancements in mobile photography, I’ve found that my phone can capture amazing images, especially in well-lit conditions. With some thoughtful composition and the right apps, I’ve taken shots that rival those from my DSLR.
Incorporating these basics into my travel photography has not only improved the quality of my images but also deepened my appreciation for the art itself. With time, patience, and a willingness to learn, I’ve noticed a world of difference in both my skills and my enjoyment of capturing memories on the go. Whether you’re just starting or looking to polish your technique, these foundational aspects of travel photography will serve you well on your adventures.
Essential Travel Photography Techniques
Rule of Thirds and Framing
I can’t stress enough the impact of the Rule of Thirds on my photography. When I learned to apply this concept, I noticed an immediate improvement in my images. By imagining my frame divided into nine equal parts, I began placing the main subjects along those lines or at the intersections. This simple shift added depth and interest to my compositions. One memorable instance was during a visit to a bustling market in Marrakech. I framed the vibrant stalls at the lower third of the image, while the intricate architecture of the market loomed in the background. There’s something about off-center compositions that feels more dynamic. I recommend experimenting with this technique; you might find that it changes the way you see your surroundings. Framing is another technique that has transformed my approach. I’ve often looked for natural frames within my environment—like archways, branches, or even people—to draw attention to my main subject. When I snapped a photo of a street performer through a decorative window, it created a sense of context and intimacy. This added layer made the image feel more engaging, and I believe it helps viewers connect with the story behind the shot. Read Interesting article: Mastering Street Photography: Essential Techniques for TravelersUsing Natural Light for Stunning Shots
Natural light is a treasure in travel photography, and I’ve learned to harness it to my advantage. I remember a day in Santorini when the sun was setting, casting the town in warm hues. I positioned myself to capture the golden light hitting the iconic white buildings, and the result was breathtaking. I’ve found that being mindful of the time of day can elevate my photos dramatically. When you’re out and about, try to position yourself in a way that utilizes backlighting or side lighting. I’ve discovered that backlighting can create a beautiful halo effect around subjects, especially when photographing people. One time, I caught a local fisherman silhouetted against the sunset; the ethereal quality of that image is one of my favorites. Even on cloudy days, don’t be discouraged. The diffused light can produce soft shadows, which works wonders for portraits. I remember wandering through a quaint village in Italy and capturing candid moments of locals. The overcast sky added an element of tranquility to my shots, making them feel timeless.Long Exposure Techniques for Night Photography
Night photography opened up a whole new world for me. I remember standing on a bridge in Prague, where the city lights danced across the river. I decided to try long exposure photography, and it was a game-changer. Using a tripod, I set my camera to a slower shutter speed, allowing more light to enter. The result? A stunning image with glowing lights and silky water. I learned that the key to successful long exposure shots is stability. A sturdy tripod is essential to avoid blurriness, and I often carry a remote shutter release to prevent any shake when I press the button. During my travels, I’ve captured everything from star trails to bustling street scenes with this technique. It requires patience and practice, but the results can be incredibly rewarding. If you’re new to long exposure, I recommend starting with a few test shots at dusk. Gradually adjust your settings until you get that perfect balance of light and motion. Trust me, once you start experimenting with this technique, you’ll want to capture every night scene you encounter!Capturing Movement and Action
Capturing movement can bring your travel photography to life in a way that static images can’t. I remember watching a local dance performance in Bali; the energy was palpable, and I knew I had to get it right. To freeze the action, I increased my shutter speed. This helped me capture the dancers mid-leap, showcasing their grace and vitality. I’ve also enjoyed experimenting with panning—a technique where you move your camera along with a moving subject. By using a slower shutter speed while following the action, I could create a blur in the background, making my subject pop. I tried this while photographing cyclists in Amsterdam, and the image conveyed the thrill of speed beautifully. To capture action effectively, I’ve found that continuous shooting mode is incredibly helpful. It allows me to snap multiple frames in quick succession. I’ve often had success with this at festivals or sporting events, where the excitement is contagious. Just remember to focus on your subject and anticipate the moment—they often happen in the blink of an eye! Incorporating these essential techniques into my travel photography has been a fulfilling journey. Each method adds a layer of creativity and expression that enhances my visual storytelling. As I explore new places, I’m continually inspired to experiment and improve. Whether it’s through composition, light, or movement, I encourage you to find your style and have fun with it!Photo Editing Tips for Backpackers
Free and Budget-Friendly Editing Software
Editing is where the magic often happens in photography. I can’t tell you how many times I’ve taken a photo that looked decent straight out of the camera but transformed into something stunning with just a few tweaks. Fortunately, there are plenty of free and budget-friendly editing programs available that can help you enhance your travel photos without spending a dime. One of my go-to options is GIMP. It’s an open-source software that offers a variety of features similar to Photoshop. I remember when I first discovered GIMP; I was amazed at the capabilities it had for something that cost me nothing. I played around with layers, color correction, and even some advanced filters, and my images started to pop in ways I never thought possible. Another tool I love is Lightroom Mobile. It’s free to use and offers a variety of presets that can quickly elevate your photos. I often find myself reaching for it to adjust exposure, contrast, and saturation, especially when I’m on the go. The user-friendly interface makes it easy to navigate, even for those who are just starting out. Additionally, Snapseed is an app I recommend for quick edits on my phone. I remember taking a fantastic shot of a sunset in Mexico and realizing that I needed just a little more punch in the colors. With Snapseed, I easily adjusted the saturation and shadows, and voila! It became one of my favorite travel photos.Basic Editing Techniques to Enhance Photos
Editing doesn’t have to be complicated. I’ve found that a few basic techniques can significantly enhance my photos. First, I always start with cropping. Sometimes, an image that seems unremarkable can become a masterpiece simply by removing distractions from the edges. Just last summer, I had a photo of a beautiful beach scene, but there were some cluttered elements on the side. Cropping it down focused attention on the waves and sunset, making the composition much stronger. Next, I often adjust the exposure and contrast. I remember an early morning shot of the Eiffel Tower that ended up looking dull until I boosted the contrast a bit. Suddenly, the details in the shadows popped, and the structure looked more three-dimensional. Finding that perfect balance is key; I always try to remember to use these adjustments subtly, as over-editing can lead to unnatural results. Color correction is another technique I swear by. I typically adjust the white balance to ensure the colors appear true to life. If you’ve ever looked back at a photo and noticed a strange tint, you know how important this step is. I learned that a cooler white balance works wonders for sunset photos, while warmer tones suit beach shots perfectly. Lastly, I love experimenting with sharpening. A little bit of sharpening can make details stand out, especially if you’re working with images that may have lost some clarity during the shoot. I remember enhancing a portrait of a local artisan in Bali by sharpening the details in their facial features and the texture of their handmade crafts, making the image even more engaging.Using Mobile Apps for Quick Edits
When I’m traveling, I might not always have the luxury of sitting down with my laptop for extensive edits. That’s where mobile apps come into play. Using my phone for quick edits has become a part of my routine, and I’ve found that the right apps can turn a simple snapshot into something worthy of sharing. One app that’s been a game-changer for me is VSCO. It offers a wide range of filters that can give my photos a unique look. I remember using it on a series of street shots from Tokyo; the presets helped to create a cohesive aesthetic that made my Instagram feed pop. I love how easy it is to apply and adjust different filters until I find the perfect vibe. Another favorite is Adobe Photoshop Express. It’s a more compact version of the full program, and I appreciate its straightforward interface for making quick adjustments. Features like spot healing and one-touch enhancements save me time when I just need to fix small blemishes or enhance a specific area in my image. When I’m feeling creative, I like to experiment with editing apps like PicsArt, which allows me to overlay text or create collages. This is especially fun when I want to share my travel stories visually. I once created a collage of my favorite food experiences in Thailand, combining images of street vendors and delicious dishes, which received a lot of positive feedback from friends. Getting familiar with these editing tools has truly transformed how I approach my travel photography. I believe that a little effort in post-processing can go a long way in making our memories visually stunning. As we continue to explore the world, let’s not forget the power of editing in telling our unique stories through images.Best Locations for Travel Photography on a Budget
Iconic Landmarks vs. Hidden Gems
When it comes to finding the perfect location for travel photography, I’ve often debated between iconic landmarks and hidden gems. Iconic landmarks, like the Eiffel Tower or the Colosseum, are undeniably breathtaking and offer amazing photo opportunities. I remember standing before the Taj Mahal at sunrise, and the beauty of that moment was surreal. However, what I’ve come to realize is that while these famous spots are often crowded, they also provide a sense of connection with the history and culture of a place. On the other hand, hidden gems can be just as rewarding, if not more so. During a trip to Portugal, I stumbled upon a quaint little village called Sintra, filled with colorful houses and lush gardens. I spent hours wandering the cobblestone streets, capturing candid moments of locals and unique architectural details. There’s something magical about discovering a spot that feels untouched by the typical tourist path. I highly recommend keeping an eye out for local recommendations, as you might find that the most memorable shots come from these hidden treasures. Read Interesting article: Cultural Photography on a Budget: Techniques for TravelersNatural Landscapes and National Parks
For any nature lover, national parks are a goldmine for stunning travel photography. I’ve visited several parks, and each one has its own distinct charm. In Zion National Park, I was blown away by the towering red cliffs and winding canyons. I made it a point to rise early to capture the sunrise illuminating the rocks. The colors were so vibrant that my heart raced with excitement as I pressed the shutter. In contrast, Yosemite National Park took my breath away with its majestic waterfalls and serene meadows. I’ve learned that visiting during the off-peak seasons, like early spring or late fall, can not only give you more room to shoot but also help you capture the landscapes in a different light. The changing seasons offer unique opportunities for photography, so don’t hesitate to explore these natural wonders.Street Photography in Urban Areas
Urban areas often provide a rich tapestry of life, making them perfect for street photography. I’ve always enjoyed wandering through cities with my camera in hand, looking for those candid moments that tell a story. On a trip to Tokyo, the mix of traditional and modern elements captivated me. I remember capturing an elderly man in a kimono juxtaposed against a glowing neon backdrop. This contrast highlighted the cultural depth of the city and made the photo resonate with viewers. When photographing in urban areas, I recommend being respectful of people’s privacy and always ask for permission if you’re taking close-up shots of individuals. I’ve found that a friendly smile and a simple request can lead to some incredible portraits and interactions with locals.Gear Recommendations for Budget Backpackers
Compact Cameras vs. DSLR vs. Mirrorless
As a budget backpacker, I’ve explored various camera types and have my favorites. Compact cameras are a fantastic choice if you want something lightweight and easy to carry. I used a compact camera on a hiking trip through the Swiss Alps and appreciated how it fit perfectly in my pocket while still delivering great quality images. However, for those who want more control over their shots, DSLRs and mirrorless cameras are excellent options. I personally shifted to a mirrorless camera for its compact size without sacrificing image quality. It makes a world of difference, especially when traveling. It’s essential to consider how you want to use your camera. If you’re looking for versatility and high-quality images, investing in a mirrorless or DSLR might be worthwhile. But if you’re just starting, a good compact camera can still yield stunning results.Essential Accessories: Tripods, Filters, and Bags
Investing in the right accessories can elevate your travel photography game. A sturdy tripod is one of my must-haves, especially for capturing long exposure shots or low-light scenes. I’ve used lightweight tripods that fold up compactly, making them perfect for slipping into my backpack. Polarizing filters are another great accessory I recommend. They help reduce glare and enhance colors, especially when shooting landscapes. I remember using a polarizer while photographing the turquoise waters of the Caribbean; the colors became so vibrant, and the images felt alive. Lastly, having a reliable camera bag can make a huge difference in protecting your gear. I’ve gone through a few bags, but finding one that’s comfortable and offers good organization is essential. A bag with good padding and weather resistance can ensure your equipment stays safe during your travels.Smartphone Photography: Tips and Tricks
Don’t underestimate the power of smartphone photography! I’ve often found myself without my DSLR, only to capture stunning moments with my phone. One trick I’ve learned is to utilize natural light as much as possible. My phone’s camera shines when I’m in well-lit environments. I also make sure to explore different angles and perspectives; sometimes, a shot from low down or up high can create a unique composition. Another tip is to experiment with different editing apps right on your phone. I often use editing apps to enhance my images before sharing them. Small adjustments can turn a good photo into a great one. In my experience, a good smartphone can be an excellent backup for your travel photography. Its portability allows you to capture spontaneous moments that you might otherwise miss.Capturing Cultural Moments and Local Life
Respectful Photography Practices
When capturing cultural moments, I’ve learned that respect is key. Engaging with local customs and traditions can add depth to your photos, but it’s crucial to approach with sensitivity. I remember attending a traditional dance in Bali; I was in awe of the vibrant costumes and the energy of the performers. Before taking photos, I made sure to ask permission, and I felt a stronger connection because of it. Understanding cultural differences is also vital. In some places, photography may not be allowed, or people may prefer not to be photographed. I always try to observe the environment and follow local guidelines. It’s important to honor the culture and the people who call it home.Engaging with Locals for Authentic Shots
One of the best parts of travel photography is the opportunity to connect with locals. I often find that engaging with people can lead to some of my most authentic shots. During my travels in Morocco, I struck up conversations with market vendors, and they welcomed me to take their portraits. Their smiles and stories became part of my photography journey, making those images even more meaningful. I always carry a small notebook to jot down details and stories behind the images I capture. This helps me remember the context of each photo and adds a personal touch to my portfolio.Documenting Festivals and Local Events
Festivals are another wonderful way to experience and document local culture. I’ve had the chance to attend various celebrations, from the vibrant Holi festival in India to the colorful Carnival in Brazil. The energy is infectious, and the visuals are breathtaking. I make sure to prepare in advance by researching the events and understanding what to expect. Capturing the emotions and excitement of these moments has taught me that timing is everything. I’ve learned to anticipate movements and interactions, which allows me to capture the essence of the festivities in real-time. These cultural snapshots turn into treasured memories I can revisit and share.Building a Travel Photography Portfolio
Choosing Your Best Work
As I’ve honed my skills, I realized the importance of curating a strong portfolio. I’ve found that choosing my best work requires a discerning eye. I often revisit my collection and ask myself what stories each photo tells. The images that evoke emotion or transport viewers to a specific moment tend to stand out. I recommend setting aside time to review and edit your best shots periodically. It’s fascinating to see how my perspective has changed over time, and some images that didn’t resonate before may now hold a new significance.Creating an Online Presence
In today’s digital age, having an online presence is essential for sharing your work. I started a personal website to showcase my photography journey. It allows me to share not just my images but also the stories behind them. I’ve also enjoyed using social media platforms to reach a wider audience. Instagram has become a favorite of mine for its visual focus, and I find it a fantastic space to connect with other photographers and travelers. Engaging with an online community has provided me with valuable feedback and inspiration. I encourage you to explore ways to share your work, whether through blogs, social media, or photography forums.Sharing on Social Media Platforms
Social media offers an incredible platform to share your travel photography and connect with like-minded individuals. I’ve built a network of fellow travelers and photographers who share tips and support each other’s work. When posting on platforms like Instagram, I pay attention to captions that tell the story behind each shot, making it more engaging for viewers. Using hashtags effectively can also help increase visibility. I often research which tags resonate within the travel photography community. It’s exciting to see how my images can connect with people from all over the world, sparking conversations and friendships based on shared interests.Travel Photography Safety Tips
Protecting Your Gear While Traveling
As much as I love exploring new places, I always remain mindful of protecting my gear. I’ve learned that keeping my camera bag close and secure is crucial, especially in crowded areas. I also recommend using a discreet bag that doesn’t scream “camera gear” to avoid attracting unwanted attention. Additionally, I’ve invested in weather-sealed gear to give me peace of mind when shooting in unpredictable conditions. A simple rain cover for my camera can save me from potential disasters, allowing me to focus on capturing the moment.Staying Aware of Your Surroundings
Staying aware of my surroundings is something I prioritize while traveling. I’ve noticed that when I’m engrossed in taking photos, it’s easy to lose track of my environment. I make it a habit to scan my surroundings periodically, ensuring I’m in a safe location and aware of any potential hazards. Being conscious of local customs and practices also plays a role in my safety. I always try to blend in and be respectful of the culture, which helps me feel more secure while exploring.Insurance Options for Travelers
Lastly, I’ve found that investing in insurance for my gear is a wise decision. Accidents happen, and I’d rather be safe than sorry. I researched various insurance options that cover my camera equipment while traveling, providing me with peace of mind as I embark on my adventures. I encourage fellow travelers to consider similar options. It’s worth the investment to protect our beloved gear, ensuring we can capture memories for years to come.Final Thoughts
Travel photography has shaped my adventures in countless ways. Through this journey, I’ve learned to appreciate not only the beauty of the world around me but also the stories and experiences that come with each image. It’s about more than just capturing a moment; it’s about connecting with cultures, people, and places. I hope that by sharing my experiences and tips, you’ll feel inspired to explore your own photography journey. Embrace the challenges and the learning moments, and don’t shy away from sharing your unique perspective with the world. Remember, every click of the shutter is a step towards telling your story, and I can’t wait to see where your lens takes you.Frequently Asked Questions
What are some basic principles to improve travel photography?
Understanding basic principles such as composition, lighting, and camera settings can significantly enhance the quality of your travel photos. Techniques like the Rule of Thirds and experimenting with leading lines can create more balanced and interesting compositions.
How important is lighting in travel photography?
Lighting is crucial in photography, as it can make or break an image. The best light often occurs during the golden hours, shortly after sunrise or before sunset. Overcast days can also provide excellent diffused lighting for portraits.
What camera gear is recommended for budget backpackers?
Budget backpackers can start with a basic DSLR or a mirrorless camera. It’s advisable to look for used or refurbished options to save money. A versatile zoom lens or an affordable prime lens can also be great choices for improving image quality.
What techniques can be used to capture movement in photography?
To capture movement, you can increase your shutter speed to freeze action or use panning techniques with a slower shutter speed to create a motion blur in the background. Continuous shooting mode is also helpful for capturing multiple frames quickly.
What are some effective editing tools for travel photography?
Free and budget-friendly editing software like GIMP, Lightroom Mobile, and Snapseed can enhance travel photos significantly. Basic editing techniques such as cropping, adjusting exposure, contrast, and color correction can improve image quality.
What is the importance of composition in photography?
Composition is fundamental in photography as it determines how elements are arranged within the frame. Techniques like the Rule of Thirds and framing can add depth and interest, making images more engaging for viewers.
How can smartphone photography be effective while traveling?
Smartphone photography can be effective when utilizing natural light and exploring different angles. Editing apps on smartphones can also enhance images quickly, making it easy to capture spontaneous moments on the go.
What are some recommended practices for respectful photography?
When capturing cultural moments, it’s essential to engage respectfully with locals and seek permission before taking photos. Understanding cultural differences and following local guidelines can lead to more authentic and meaningful photography experiences.
What safety tips should travelers keep in mind for their photography gear?
Travelers should protect their gear by keeping camera bags secure and using discreet bags to avoid attracting attention. Investing in weather-sealed gear and staying aware of surroundings are also important for safety while photographing.
How can I build a travel photography portfolio?
Building a travel photography portfolio involves curating your best work and sharing it online through a personal website or social media. Engaging with an online community can provide feedback and inspiration for your photography journey.