Web Analytics

Recent Posts

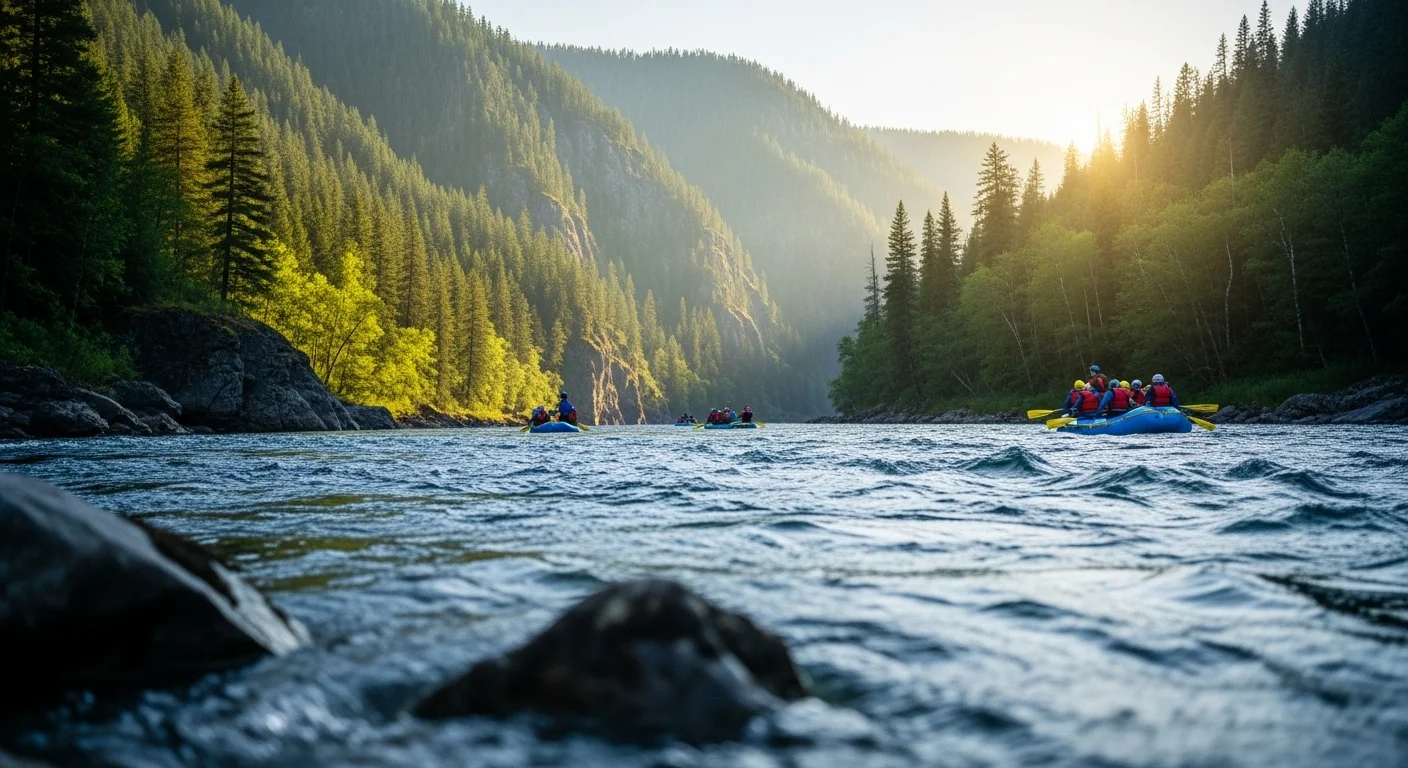
Experience Thrills: Best White Water Rafting for Backpackers

Imagine the rush of cold water splashing against your face as you navigate through stunning canyons and roaring rapids. White water rafting is an adventure that every backpacker should experience. Let’s dive into what makes this thrilling sport so special.
Experience Thrills: Best White Water Rafting for Backpackers

Understanding White Water Rafting

What is White Water Rafting?

White water rafting is an exhilarating outdoor activity that involves navigating through turbulent river waters in an inflatable raft. I remember my first rafting trip vividly; the excitement of paddling through the roaring rapids and the camaraderie with my fellow adventurers created an unforgettable experience. It combines teamwork, strategy, and a healthy dose of adrenaline, making it a perfect fit for backpackers seeking thrills. For those looking to save, check out the Ultimate Guide to Affordable White Water Rafting Adventures.

Rafting can be enjoyed by people of all skill levels, from beginners to seasoned pros. I’ve found that each trip offers something unique, whether it’s the stunning scenery, the challenge of the rapids, or the opportunity to connect with nature and others. The thrill of mastering the rapids is what keeps me coming back for more.

Types of Rapids: Class I to Class VI

Understanding the different classes of rapids is crucial for any rafting adventure. Rapids are categorized from Class I, which are gentle and easy for beginners, to Class VI, which are extremely dangerous and only suitable for expert paddlers. Here’s a quick breakdown:

  • Class I: Easy, with small waves and few obstacles. Perfect for first-timers.
  • Class II: Moderate rapids with larger waves, requiring some basic paddling skills.
  • Class III: Intermediate rapids with more challenging waves and potential hazards. Good for adventurous beginners.
  • Class IV: Advanced rapids that demand strong paddling and teamwork. Not for the faint of heart!
  • Class V: Expert-level rapids with significant hazards and strong currents. A thrilling challenge!
  • Class VI: Unrunnable and dangerous rapids. Only attempted by the most skilled rafters.

On my last trip, we tackled a Class IV river, and let me tell you, the adrenaline was pumping! The rush of navigating through those challenging waters was both terrifying and exhilarating, and I loved every second of it.

Essential Equipment for Rafting

Having the right equipment can make or break your white water rafting experience. I’ve learned this firsthand, especially after a trip where I skimped on gear. Here’s a checklist of essential items you shouldn’t forget:

  • Raft: Your trusty vessel, usually provided by your rafting company. Ensure it’s suitable for the rapids you’ll be facing.
  • Paddles: Most companies provide paddles, but I recommend checking their quality before heading out.
  • Life Jacket: A must-have for safety. Make sure it fits snugly and is comfortable.
  • Helmet: Protects your head from potential impacts with rocks or other obstacles.
  • Wet Suit: Depending on the temperature, a wet suit can keep you warm and protected from the cold water.
  • Footwear: Wear sturdy shoes that can get wet. I’ve found that water sandals or old sneakers work best.
  • Dry Bags: Keep your belongings safe and dry during the adventure. Trust me, you’ll want to avoid soggy snacks!

When I first went rafting, I didn’t invest in a good life jacket. I quickly realized how crucial it was to feel secure in the water. Now, I never hit the river without my trusty gear.

Ultimately, white water rafting is an adventure that combines the thrill of nature with the joy of camaraderie. Whether you’re an experienced rafter or just starting out, there’s something about the roar of the river and the rush of navigating its currents that hooks you and keeps you coming back for more.

Top Destinations for White Water Rafting

Colorado River, Arizona

The Colorado River is often synonymous with white water rafting, and for good reason. Stretching through the breathtaking Grand Canyon, it offers a unique combination of stunning landscapes and exhilarating rapids. I remember the first time I laid eyes on the canyon walls; they were majestic and seemed to reach for the sky. The river features sections ranging from Class I to Class V, making it suitable for everyone from beginners to seasoned adventurers. One of my favorite moments was navigating through the famous Lava Falls, where the excitement surged as we plunged through the rapids. It was a rush I’ll never forget!

Salmon River, Idaho

If you’re looking for a blend of adventure and scenic beauty, the Salmon River in Idaho is a must-visit. Known as the “River of No Return,” it offers some of the best white water rafting experiences in the country. I had the chance to raft this river last summer, and the crystal-clear waters were like something out of a postcard. The Salmon River boasts a variety of rapids, with Class III to Class V sections, making it an excellent choice for those seeking both thrills and a chance to marvel at nature. Plus, the surrounding wilderness is perfect for spotting wildlife, which was a delightful bonus during our trip.

Ocoee River, Tennessee

The Ocoee River is another fantastic destination for white water rafting enthusiasts. Located in Tennessee, this river is famous for its fast-paced rapids and beautiful scenery. I still recall the laughter and cheers from my group as we navigated the intense Class III and Class IV rapids. The river hosts several annual events, including the Ocoee River Raft Race, which adds an exciting twist to the experience. What I loved most about the Ocoee was the way the lush, green forests hugged the banks, creating a serene backdrop for the exhilarating action on the water.

Rogue River, Oregon

The Rogue River in Oregon is a gem for those who love both adventure and the great outdoors. With its diverse range of rapids, from Class II to Class IV, it’s perfect for families and groups of friends. I remember my trip there vividly – the beauty of the surrounding landscape and the thrill of the rapids made it an unforgettable experience. The Rogue also offers opportunities for hiking and fishing along the way, which is great for those who want to explore more than just the water. A highlight for me was stopping at one of the riverside campsites to enjoy a hearty meal with my fellow rafters under the stars.

Futaleufu River, Chile

If you’re feeling adventurous and want to take your rafting experience international, the Futaleufu River in Chile should be on your radar. This river is famed for its stunning turquoise waters and challenging rapids, ranging from Class III to Class V. I had the chance to raft here last year, and it was like stepping into another world. The backdrop of the Andes mountains and the unique wildlife made the trip feel like a true expedition. Rafting on the Futaleufu was not just about the thrill; it was also about immersing myself in a completely different culture and environment. I can honestly say it was one of the best experiences of my life!

Best Times to Go White Water Rafting

Seasonal Considerations

Timing your rafting trip can significantly impact your experience. Generally, the best time for white water rafting is during the spring and early summer when snowmelt feeds the rivers, creating thrilling rapids. I’ve noticed that planning a trip around this time often brings the most challenging conditions, which is perfect for adrenaline junkies like myself. However, late summer and fall can also offer calmer waters, making it a great option for families or those looking to enjoy a more leisurely float.

Weather Impact on Rafting Conditions

The weather can change rapidly, and this influences river conditions greatly. I’ve experienced sunny days turn into sudden storms, which made the rapids more intense. It’s essential to check the weather forecast before heading out. I recommend keeping an eye on local conditions, as heavy rain can lead to increased water levels and, therefore, more challenging rapids. The thrill of rafting during changing weather can be exhilarating, but safety should always come first!

Local Festivals and Events

Attending local festivals or events can enhance your rafting experience. Many river communities celebrate their rivers with festivals featuring live music, food, and rafting competitions. I had the pleasure of attending a river festival during my rafting trip on the Ocoee, and it was a fantastic way to connect with locals and fellow adventurers. These events often provide additional activities such as guided tours, workshops, and even equipment rentals, making them a great addition to your rafting adventure. For more ideas on affordable destinations, check out the Top 10 Budget-Friendly White Water Rafting Destinations.

Planning Your Rafting Trip

How to Choose a Rafting Company

Choosing the right rafting company can make a huge difference in your experience. I remember when I first started out; I was overwhelmed by the options available. After some research and chatting with friends who had gone before me, I learned a few key things to look for. First, check if the company has good reviews and ratings. Websites like Yelp or TripAdvisor can be super helpful. I found that reading about other people’s experiences gave me a clearer picture of what to expect.

Another important aspect is safety. Make sure the company follows strict safety guidelines and has certified guides. I’ve rafted with companies that provide detailed briefings on what to expect and how to handle different scenarios on the river. This made me feel more at ease and ready for the adventure ahead. Don’t hesitate to ask questions when you contact them—it’s a great way to gauge their expertise and customer service!

Guided Tours vs. Self-Guided Adventures

When planning your trip, you’ll need to decide between a guided tour or a self-guided adventure. I’ve done both, and each has its perks. Guided tours are fantastic for beginners or those who want a hassle-free experience. The guides know the river like the back of their hand and can offer insights about local wildlife, history, and safety tips. I remember how much I enjoyed hearing stories from our guide while navigating the rapids—it really added depth to our journey.

On the other hand, self-guided adventures can be thrilling for more experienced rafters who want to take charge of their experience. However, it requires more planning. You’ll need to understand the river’s conditions, have the right gear, and be prepared for emergencies. I’ve learned that having a solid map and a good sense of the river’s layout can make this option exciting and rewarding.

Permits and Regulations

Before you hit the river, it’s crucial to understand the permits and regulations that might apply. Some popular rafting destinations require permits, especially during peak season. I remember when I attempted to paddle on a river that needed a permit, and it turned into a bit of a scramble to find an alternative route. Always check the local regulations before planning your trip. Websites for national parks or local rafting associations usually have the most up-to-date information.

Additionally, being aware of seasonal restrictions is essential. For example, certain rivers might have specific periods when they are open for rafting based on water levels or weather conditions. I’ve found that planning ahead and securing permits well in advance can save you a lot of stress later on. It allows you to focus on the fun parts—like packing and getting excited for the adventure ahead!

Backpacking Essentials for Rafting

What to Pack for a Rafting Trip

Packing for a rafting trip can be a bit of an art, and over the years, I’ve honed my list to ensure I’m well-prepared. First and foremost, you need to think about clothing. Quick-drying clothes are a must, as you’ll likely get wet. I usually wear moisture-wicking shirts and board shorts. A lightweight, waterproof jacket is also essential to protect against splashes and unexpected weather changes.

Don’t forget about personal items. A good pair of polarized sunglasses can protect your eyes from the sun and glare off the water. I lost a pair of shades on my second rafting trip, and I can’t tell you how much I regretted it! Also, packing a hat can shield your face from the sun. Lastly, be sure to carry a good sunscreen. I learned the hard way that sunburn can ruin a fantastic day on the water.

Food and Water Considerations

Staying fueled during a rafting trip is incredibly important. I’ve always packed high-energy snacks like trail mix, granola bars, and jerky. These bite-sized goodies are easy to munch on while paddling and provide a quick energy boost. If you’re camping overnight or planning a longer excursion, consider packing a portable stove or grill for hot meals. Cooking together by the river can be an enjoyable way to unwind after a day of adventure.

Water is another crucial element. I always bring a refillable water bottle or hydration pack. Staying hydrated while paddling is essential, and having easy access to water makes it more convenient. I remember feeling drained midway through a trip because I wasn’t drinking enough. Now, I make it a point to take sips regularly, even when I’m in the thick of it!

Safety Gear and First Aid Kits

No rafting adventure is complete without the proper safety gear. Aside from the essential life jacket and helmet, I always carry a first aid kit. I once had a minor scrape that turned into a nuisance because I didn’t have any supplies to clean it up. A well-stocked first aid kit should include band-aids, antiseptic wipes, and pain relievers. It’s better to be prepared and not need it than to find yourself wishing you had.

Additionally, having a whistle can be a lifesaver in emergencies. I’ve seen how quickly things can change on the river, and having a way to signal for help can provide peace of mind. Remember to check your gear before heading out; it’s a good habit that can prevent issues during your trip.

Safety Tips for White Water Rafting

Understanding Safety Briefings

Before hitting the water, safety briefings are crucial for a successful rafting trip. I can’t stress enough how much I’ve appreciated these sessions in the past. They provide valuable information about the river, the equipment, and what to expect while on the water. During my first briefing, I learned about how to paddle effectively, what to do in case someone falls overboard, and the importance of communicating with my fellow rafters. I remember feeling more confident after that initial briefing, knowing that I was prepared for whatever the river might throw my way.

Guides often use these sessions to emphasize safety protocols. They explain the significance of wearing your life jacket at all times and how to properly position yourself in the raft. I’ve learned that taking these briefings seriously can completely transform your experience, ensuring you stay safe while enjoying the thrills of the rapids.

Common Injuries and How to Prevent Them

Even though rafting is incredibly fun, it does come with risks. I’ve seen a few common injuries that can occur, such as scrapes, bruises, or even more serious falls. To prevent these, I’ve found that wearing appropriate gear is of utmost importance. A well-fitting life jacket and helmet can make all the difference. I remember one rafting trip where someone took a tumble and ended up with a nasty scrape. Thankfully, they had a helmet, which saved them from a more serious injury.

But beyond gear, being aware of your surroundings can help too. I recall my guide reminding us to always keep our eyes on the water and to communicate with each other. If you’re facing particularly tumultuous rapids, not panicking and sticking together as a team can prevent a lot of mishaps. I’ve learned that staying calm and focused can help you navigate tricky situations more effectively.

Hydration and Sun Protection

Staying hydrated while rafting is essential, yet it’s something I often forget in the excitement of the adventure. I always bring along a refillable water bottle; having easy access to water keeps me from feeling drained halfway through the day. One time, I didn’t drink enough water and ended up with a headache that really took away from the fun. Now, I make it a point to sip water regularly—I even set reminders for myself during long stretches of paddling!

Sun protection is another aspect that can’t be overlooked. The sun’s rays bounce off the water, making it easy to get sunburned even on cloudy days. I’ve learned to apply a good sunscreen before getting on the water, and I keep a small bottle in my dry bag for reapplication. A wide-brimmed hat and polarized sunglasses are also part of my essential rafting gear now. Protecting myself from the sun has made my rafting trips much more enjoyable!

Post-Rafting Activities

Camping and Lodging Options

After an exhilarating day on the water, finding a cozy place to unwind is important. I’ve had some amazing camping experiences right by the river, where we set up tents and shared stories around a campfire. There’s something magical about listening to the sound of the water while falling asleep under the stars. Many rafting companies offer camping packages that include meals and guided activities, which can enhance the whole experience. I remember my group bonding over shared meals and laughter, which made our adventure even more memorable.

If camping isn’t your style, there are plenty of lodging options nearby as well. I often look for local motels or lodges that cater to outdoor enthusiasts. Staying close to the river allows for quick access for early morning adventures or a leisurely float the next day. I’ve found that a good night’s sleep after a day of rafting can really make a difference in how much I enjoy the next day!

Local Attractions and Activities

Exploring the local area after rafting can add even more fun to the trip. I always try to check out local attractions, whether it’s hiking trails or scenic overlooks. For instance, near the Salmon River, I discovered some fantastic hiking paths that offered breathtaking views of the surrounding landscape. It was a great way to stretch my legs after the physical exertion of rafting.

Many regions also have cultural sites or historical landmarks worth visiting. I’ve enjoyed visiting local museums or historical towns where I could learn more about the area’s history. Incorporating these activities into my trip has enriched my overall experience and given me a deeper appreciation for the regions I visit.

Dining Recommendations

After a long day of adventure, finding a great place to eat is always a treat. I love exploring local dining options, especially those that offer hearty meals perfect for refueling after a day on the river. I’ve found that some of the best meals come from local diners or small restaurants that source ingredients from nearby farms. If you can, try asking locals for recommendations—they often know where to find hidden gems!

During a trip to the Ocoee River, my group dined at a small barbecue joint that served the most delicious pulled pork I’ve ever tasted. The atmosphere was friendly and welcoming, and it was the perfect way to cap off a day of rafting. I always leave room for dessert, too—there’s nothing like a sweet treat after a day filled with adventure!

Budgeting for Your Rafting Adventure

Average Costs: Rafting Tours and Rentals

When planning a rafting trip, budgeting is essential. The costs can vary widely depending on the location and the type of trip you choose. From my experience, guided tours typically range from $50 to $150 per person for a day trip, which often includes equipment and safety gear. I’ve found that splurging a little on a reputable company pays off in terms of safety and enjoyment.

If you’re considering a self-guided adventure, renting a raft can cost between $50 to $100 per day, plus any additional gear you might need. I recommend checking rental prices in advance, as they can fluctuate based on the season and demand. Planning ahead can help you stick to your budget while ensuring you have an amazing time on the water! For more budget-friendly tips, you can Plan Your Next Budget Whitewater Rafting Expedition Here!

Transportation Expenses

Transportation to your rafting destination should also be factored into your budget. Whether you’re driving or flying, I’ve learned it’s best to plan these logistics early. If you’re flying, consider renting a car to get to the river. I once booked a last-minute flight and ended up scrambling for transportation, which added unnecessary stress to my trip.

If you’re driving, factor in gas costs and any potential lodging along the way. I often enjoy making the journey part of the adventure, stopping at interesting sites or local eateries along the route. It’s a great way to explore the area before even hitting the water!

Saving Tips for Backpackers

As a backpacker, I’m always on the lookout for ways to save money. One of my go-to strategies is booking early to get the best rates on both tours and accommodations. Off-peak seasons can also offer significant savings—just be mindful of the river conditions during those times!

I’ve also found that joining a group can lead to discounts on tours and rentals. Sharing costs can make rafting adventures more affordable, and it’s a fantastic way to make memories with friends or fellow travelers. I remember a trip where we formed a group of six and managed to get a great deal on our guided tour, making the experience even sweeter!

Personal Experiences and Testimonials

Stories from Experienced Rafting Enthusiasts

Hearing stories from other rafting enthusiasts can inspire and motivate newcomers. I once met a couple during a rafting trip who shared their incredible journey of rafting in multiple countries. They told tales of navigating through the rapids of the Futaleufu River in Chile, emphasizing how each trip brought new challenges and unforgettable memories. Listening to their stories reminded me of the vast adventures that await us on the water.

Another time, I met a family who had just completed a multi-day rafting trip on the Colorado River. They spoke about how it strengthened their bond and provided them with a unique experience they would cherish forever. It was heartwarming to see how rafting can bring people together and create lasting connections.

Lessons Learned from Rafting Adventures

Every rafting trip teaches us something new. For me, it’s about embracing the unexpected. I remember a trip where we faced an unexpected storm, and instead of panicking, we adapted and made the most of it. We took shelter and ended up bonding with our guides over stories and laughter. That day taught me that sometimes the best memories come from the unplanned moments.

Another lesson I’ve learned is the importance of teamwork. Rafting is not just about navigating the water; it’s about working together with your group. I’ve seen how communication and collaboration can lead to a more enjoyable experience. On one trip, we faced a particularly challenging rapid, and by coordinating our paddling, we made it through as a unified team. It was such a rewarding feeling!

Final Thoughts

White water rafting is more than just an adventure; it’s a way to connect with nature, build relationships, and challenge yourself. Every trip I’ve taken has left me with unforgettable memories and lessons that extend beyond the river. Whether you’re navigating the roaring rapids of the Colorado River or enjoying the tranquil beauty of the Rogue River, there’s a world of excitement waiting for you. I hope this inspires you to grab your gear, gather your friends, and embark on your own rafting adventure. The thrill of the water and the joy of camaraderie will make it an experience you’ll treasure forever!

Frequently Asked Questions

What is white water rafting?

White water rafting is an exhilarating outdoor activity that involves navigating through turbulent river waters in an inflatable raft. It requires teamwork, strategy, and provides a healthy dose of adrenaline, making it a thrilling experience for backpackers of all skill levels.

What are the different classes of rapids?

Rapids are categorized from Class I to Class VI: Class I being easy and perfect for beginners, while Class VI are extremely dangerous and suitable only for expert paddlers. The classes range from gentle waves (Class I) to expert-level rapids with significant hazards (Class V) and unrunnable rapids (Class VI).

What essential equipment do I need for white water rafting?

Essential equipment for white water rafting includes a raft, paddles, a life jacket, a helmet, a wet suit, sturdy footwear, and dry bags to keep belongings safe and dry during the adventure.

Where are some top destinations for white water rafting?

Top destinations for white water rafting include the Colorado River in Arizona, the Salmon River in Idaho, the Ocoee River in Tennessee, the Rogue River in Oregon, and the Futaleufu River in Chile, each offering unique experiences and varying rapids.

When is the best time to go white water rafting?

The best time for white water rafting is generally during the spring and early summer when snowmelt feeds the rivers, creating thrilling rapids. Late summer and fall can also offer calmer waters for a more leisurely experience.

Should I choose a guided tour or a self-guided adventure?

Choosing between a guided tour and a self-guided adventure depends on your experience level. Guided tours are great for beginners and offer a hassle-free experience, while self-guided adventures can be thrilling for experienced rafters who want more control over their journey.

What should I pack for a rafting trip?

When packing for a rafting trip, consider quick-drying clothing, polarized sunglasses, a waterproof jacket, a hat, sunscreen, high-energy snacks, and a refillable water bottle. A first aid kit and safety gear are also crucial to ensure a safe experience.

What safety tips should I keep in mind while rafting?

Safety tips for rafting include attending safety briefings, wearing appropriate gear like life jackets and helmets, being aware of your surroundings, staying hydrated, and applying sunscreen to protect against sunburn while on the water.

What post-rafting activities can I enjoy?

Post-rafting activities can include camping near the river, exploring local attractions like hiking trails or cultural sites, and dining at local restaurants. These activities can enrich your overall experience after a day on the water.

How can I budget for my rafting adventure?

Budgeting for a rafting adventure involves considering costs for guided tours (typically $50 to $150 per person) or raft rentals, transportation expenses, and planning logistics early. Joining a group can also lead to discounts on tours and rentals.
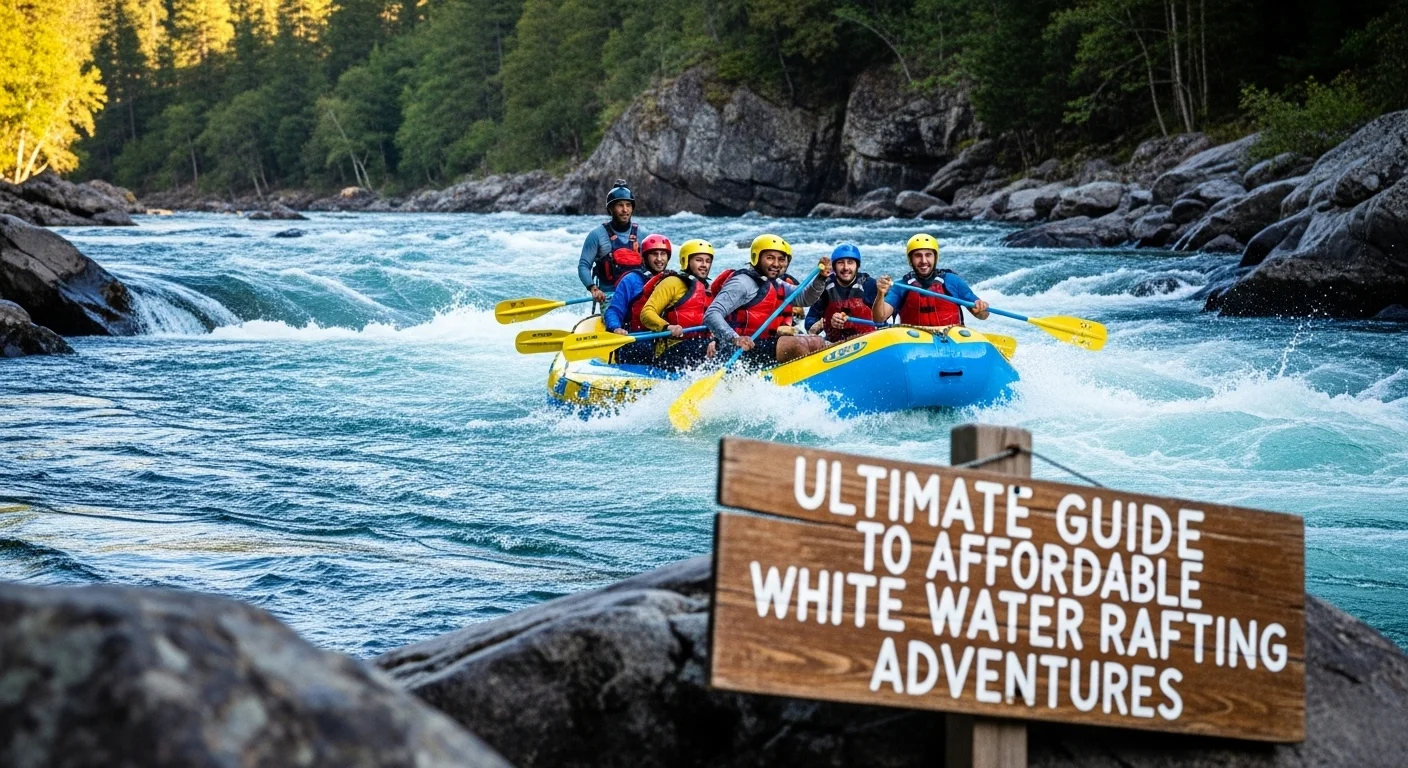
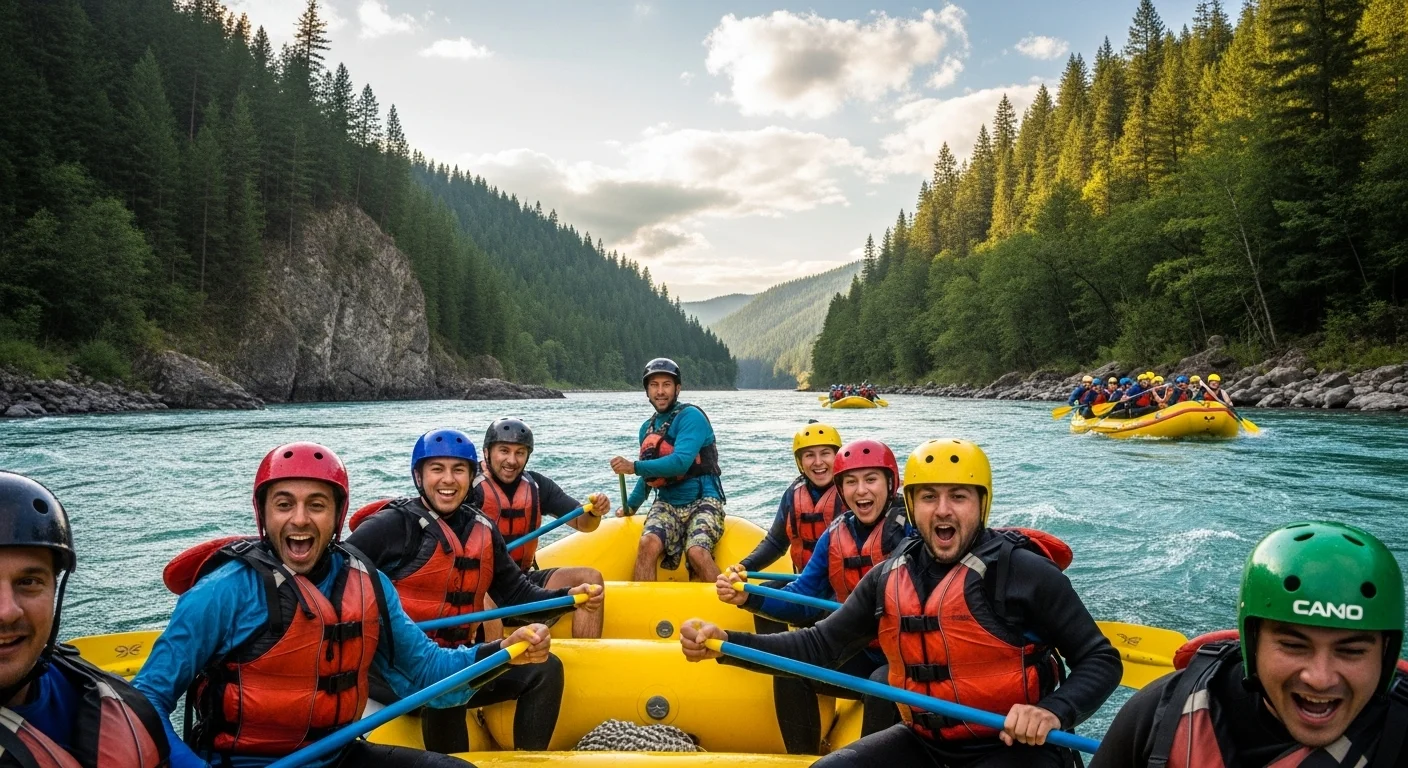
Ultimate Guide to Affordable White Water Rafting Adventures

If you’re looking for an adrenaline rush combined with the thrill of nature, affordable white water rafting adventures are calling your name. Let’s dive into everything you need to know to make the most of this exhilarating experience. Read Interesting article: Ultimate Guide to Affordable Whitewater Rafting Adventures

Ultimate Guide to Affordable White Water Rafting Adventures

Understanding White Water Rafting

What is White Water Rafting?

White water rafting is one of those experiences that gets your heart racing and your adrenaline pumping. Picture this: you’re in an inflatable raft, navigating through rushing waters, surrounded by stunning landscapes. I remember my first rafting trip vividly. The moment I hit the first rapid, I felt a rush unlike anything I had ever experienced before. It’s not just about the thrill; it’s about being one with nature, feeling the cool spray of the river, and hearing the roar of the water. It’s a blend of excitement, teamwork, and pure joy.

Types of White Water Rafting

There are various types of white water rafting experiences, catering to different skill levels and preferences. I’ve tried a few of them, and here’s what I found:

  • Guided Rafting: This is great for beginners. You’re accompanied by experienced guides who navigate the waters for you. They often share insights about the area, making it educational as well as fun.
  • Self-Guided Rafting: For those who have a bit more experience, self-guided trips give you the freedom to navigate on your own. Just be sure to know the river well!
  • Expedition Rafting: These are longer trips that can last several days. I’ve always found that spending more time on the river allows you to connect with nature on a deeper level.
  • Family Rafting: Many companies offer family-friendly trips designed for all ages. It’s a fantastic way to bond with loved ones while enjoying some adventure.

White Water Rafting Classifications

To understand what you’re getting into, it’s essential to know how rivers are classified. This classification affects the kind of trip you’ll experience. I learned this the hard way when I thought I was ready for a Class IV rapid and realized I should have stuck with Class II!

  • Class I: Easy, moving water with small waves. Perfect for beginners.
  • Class II: Slightly more challenging, with straightforward rapids. Still a good choice for families.
  • Class III: Moderate rapids, requiring some maneuvering. A bit more intense and exciting!
  • Class IV: Advanced rapids with turbulent water. This is where the real thrill begins.
  • Class V: Extremely challenging and dangerous, meant for experienced rafters. I’ve seen seasoned rafters tackle these, and it’s a sight to behold!

Benefits of White Water Rafting

Physical Fitness and Health Benefits

One of the biggest surprises for me was how physically demanding rafting can be. It’s a full-body workout! Paddling through rapids engages your core, arms, and legs. I remember a trip where I felt like I had completed a gym session afterward. Not only does it build muscle, but it also improves your cardiovascular fitness. Plus, being outdoors in fresh air beats a treadmill any day!

Mental Health and Stress Relief

There’s something incredibly therapeutic about being on the water. The sounds of rushing water and the beauty of nature can melt away stress. I often find that when I’m out on a river, my mind clears, and I feel rejuvenated. It’s a perfect escape from the hustle and bustle of daily life. Nature has a way of grounding us, doesn’t it?

Team Building and Social Interaction

Rafting is inherently a team sport. I’ve shared some unforgettable moments with friends and family while paddling downriver together. You learn to communicate, strategize, and support each other through the challenges of the rapids. It’s a bonding experience that creates lasting memories. I still reminisce about that epic trip when we all worked together to navigate a particularly tricky rapid—it brought us closer and gave us a shared story to tell.

Best Locations for Affordable White Water Rafting

Top Rivers for Budget Rafting Adventures

When it comes to affordable white water rafting, the location can make all the difference. I’ve explored a few rivers that stood out for their thrilling rapids and budget-friendly options. Here are my top picks:

  • Arkansas River, Colorado: This river is famous for its breathtaking scenery and variety of rapids. The clear waters and stunning mountain views make it a perfect spot for a day trip or a longer adventure. Plus, many companies offer packages that won’t break the bank.
  • Gauley River, West Virginia: Known for its challenging Class V rapids, the Gauley offers budget-friendly rafting during its fall release season. I’ll never forget the rush I felt navigating through these wild waters, and the prices here are surprisingly reasonable.
  • Deschutes River, Oregon: If you’re looking for a mix of fun rapids and gorgeous landscapes, the Deschutes is a great choice. The river has a range of rapids, and many local outfitters provide affordable trips that include gear and guides. Read Interesting article: Top 10 Budget-Friendly White Water Rafting Destinations
  • Chattooga River, South Carolina: This river is a must-visit for those seeking adventure on a budget. It boasts a range of rapids suitable for different skill levels, and the scenery is absolutely stunning. I found some great deals on guided trips here that made my experience even better.

Regional Highlights: East vs. West Coast

As I traveled and rafted across the country, I noticed distinct differences between the East and West Coast rafting experiences. Each region offers its unique charm and challenges.

  • East Coast: The East offers more lush, forested surroundings and rivers like the New River and the Gauley. These rivers can get fairly busy during peak season but often have better rates and packages for families. I appreciated the variety of trips available, from half-day excursions to multi-day adventures.
  • West Coast: In contrast, the West Coast features stunning canyons and more rugged landscapes. Rivers like the American River and Kern River provide thrilling rapids and beautiful views. Though some trips can be pricier, I found that many outfitters offer discounts during the shoulder seasons, making them more affordable.

International Destinations for Affordable Rafting

If you’re willing to venture outside the U.S., there are some fantastic international destinations for affordable white water rafting. I’ve always dreamed of exploring rivers in different countries, and these places are high on my list:

  • Rio Pacuare, Costa Rica: This river is consistently rated as one of the top rafting destinations in the world. The lush rainforest and diverse wildlife create a breathtaking backdrop. I’ve heard that many local companies offer affordable packages, including transportation and meals.
  • The Zambezi River, Zambia: Known for its thrilling Class V rapids, the Zambezi is an unforgettable experience. While some tours can be pricey, I discovered that booking in advance or during the rainy season can lead to significant savings.
  • The Tully River, Australia: This river offers an incredible mix of rapids in a tropical setting. There are various affordable rafting operators, and the scenery is out of this world. I’ve seen pictures of the vibrant rainforest surrounding the river, and it makes me want to visit even more!
  • The Futaleufú River, Chile: If you’re seeking adventure on a budget, the Futaleufú is a hidden gem. The river features some of the most stunning blue waters I’ve ever seen, and many local companies provide great deals for multi-day trips that include meals and lodging. Read Interesting article: Plan Your Next Budget Whitewater Rafting Expedition Here!

When to Go White Water Rafting

Seasonal Considerations

One of the first things I learned about white water rafting is that timing can really make or break your experience. Each river has its own peak season, which usually corresponds to the melting snow or rainy seasons. For example, I discovered that the best time to hit the Arkansas River is in late spring and early summer when the snow from the mountains starts to melt. The rapids are thrilling, and the scenery is absolutely gorgeous with lush greenery everywhere. On the other hand, if you hit the river in late summer, you might find yourself paddling through lower water levels, which can be less exciting, especially if you’re after those heart-pounding rapids.

Weather Impact on Rafting Conditions

Weather can also play a big role in your rafting adventure. I remember one trip where we had a sudden downpour the night before, and it completely transformed the river! The rapids became faster and more challenging, which was thrilling but also a bit daunting for some on my team. Generally, sunny days are ideal for a rafting trip, but you should keep an eye on the weather forecast. Rain can change river conditions, leading to either better rapids or potential hazards like debris in the water. Make sure to check in with your rafting company—they’re usually well-informed about current conditions and can guide you on what to expect.

Peak vs. Off-Peak Seasons for Savings

If you’re like me and looking to save a few bucks, consider going during the off-peak season. I’ve found that many companies offer discounts to fill seats on less busy days. For instance, if you go rafting in early spring or late fall, you might find great deals. Just keep in mind that while you’ll save money, the rapids might be different from peak season, and some outfitters might not operate at all during these times. I’ve had trips where I shared the river with only a handful of other rafters, which was such a unique experience! It felt like we had the whole river to ourselves.

Choosing the Right Rafting Company

Factors to Consider When Selecting a Guide

Choosing the right rafting company is just as important as picking the right river. From my experience, I always look for a company that has experienced guides. These folks know the river inside and out—they can keep you safe while ensuring you have the time of your life. I’ve rafted with companies that have guides who not only navigate well but also create a fun atmosphere, cracking jokes and sharing stories along the way. It really enhances the experience when your guide is passionate about what they do.

Comparison of Costs Among Local Outfitters

I’ve learned that prices can vary significantly from one outfitter to another. It’s always a good idea to shop around a bit. When I was planning a trip on the Gauley River, I noticed that some companies offered similar packages but with different price points. I found that some places included extras like meals and gear rental in their prices, while others charged separately for those items. Doing a bit of research beforehand can help you find a great deal without sacrificing quality.

Reading Reviews and Recommendations

Nothing beats hearing from people who have been there before. I often check online reviews and ask friends for recommendations. Websites like Yelp and TripAdvisor can be a treasure trove of information. I remember when I was looking for a good outfitter for my trip on the Deschutes River; I found a company with glowing reviews about their safety record and customer service. Those insights helped me feel more confident in my choice, and I ended up having an incredible time! Don’t hesitate to reach out to past guests; their experiences can give you a real sense of what to expect.

What to Expect on Your Rafting Adventure

Safety Briefing and Equipment Overview

Before you hit the water, you’ll typically undergo a safety briefing. I’ve found this to be one of the most important parts of the trip. Guides will explain how to paddle, what to do in case you fall overboard, and the best techniques for navigating the rapids. They’ll also go over the gear, including life jackets and helmets. I remember feeling a mix of excitement and nerves during these briefings, but it always reassured me to know that we were prepared for what lay ahead.

Rafting Techniques for Beginners

If you’re new to rafting, don’t worry! Guides will introduce you to some basic techniques. I remember my first guide saying, “It’s all about teamwork!” Paddling in sync with your group can make such a difference when maneuvering through rapids. I learned about forward paddling, back paddling, and how to lean into the turns. It was such a thrill to feel the raft respond to our efforts, and I felt a real sense of accomplishment when we successfully navigated our first rapid together.

Typical Itinerary of a Rafting Trip

Most rafting trips follow a similar itinerary. After the safety briefing, you’ll usually start by getting suited up and loading your gear onto the rafts. Then, it’s off to the river! I’ve had trips where we spent hours on the water, taking breaks to swim, enjoy lunch, and soak in the scenery. Each trip has its unique flow, and I always appreciated those moments where we could relax and take in the beauty around us. It’s a lovely mix of action and relaxation, making for a well-rounded adventure.

Essential Gear and Packing List

Clothing Recommendations

When it comes to what to wear on your rafting adventure, comfort and functionality are key. I’ve learned through experience that wearing quick-drying clothes is essential. I usually opt for a synthetic swimsuit or shorts paired with a moisture-wicking shirt. On cooler days, a lightweight, long-sleeve shirt can provide sun protection and keep you warm when you emerge from the water. I also recommend wearing sturdy water shoes or sandals with straps. I made the mistake of wearing flip-flops once, and let me tell you, it was a slippery situation! In cooler weather, layering is your friend; consider a wetsuit or drysuit based on the conditions. And don’t forget a hat and sunglasses to protect yourself from the sun!</p>

Safety Gear and Equipment

Most rafting companies will provide essential safety gear, but it’s good to know what to expect. Life jackets, helmets, and paddles are standard equipment, and I’ve never felt safer than when I was strapped into my life jacket, ready for the rapids. I also recommend checking if they offer wetsuits; they can be a lifesaver in cold waters. During my last trip, I was relieved to have a wetsuit on a chilly morning, as it kept me warm and comfortable throughout the day.</p>

Personal Items to Bring Along

Aside from clothing and safety gear, there are a few personal items I never leave behind. A dry bag is a must for keeping valuables like your phone, camera, and snacks safe and dry. I’ve seen too many phones take a dive into the river! Sunscreen is also crucial; I always reapply throughout the trip since the sun reflects off the water. Additionally, a small first-aid kit can be handy for minor scrapes or bruises. Lastly, don’t forget a reusable water bottle to stay hydrated. I learned the hard way that being well-hydrated makes a world of difference during an active day on the water.</p>

Cost Breakdown: Planning Your Budget

Average Costs of Rafting Trips

Planning a rafting trip can be a bit daunting when it comes to budgeting. I’ve noticed that prices can vary widely depending on the location, trip length, and season. Typically, a half-day trip can range from $50 to $100 per person, while full-day excursions often fall between $100 to $200. For multi-day adventures, prices can go up considerably. I’ve found that checking for package deals or group discounts can save a significant amount of money. It’s always worth asking about any current promotions!

Hidden Fees and Additional Expenses

While planning your budget, it’s essential to consider any additional costs that may arise. I’ve made the mistake of not accounting for these in the past. Some companies might charge for gear rental, like wetsuits or shoes, so be sure to clarify what’s included in the base price. Additionally, if you plan on getting photos or videos from your trip, those can come with an extra charge. Don’t forget to factor in transportation costs to and from the river, as well as food expenses if meals aren’t provided. I’ve learned to always carry a little extra cash for tips, too, especially when I’ve had a fantastic guide!

Tips for Saving Money on Rafting Trips

If you’re like me and always looking for ways to save, I have a few tips up my sleeve. First, consider rafting during the shoulder season when prices tend to drop. I’ve had some incredible experiences during these times with fewer crowds! Another way to save is to look for local outfitters rather than larger companies; they often offer more competitive prices. Lastly, if you can, gather a group of friends or family to book a trip together. Many companies provide group discounts, which can make a big difference in the overall cost. Trust me, a little planning can go a long way!

Safety Tips for White Water Rafting

Understanding the Risks Involved

Every adventure comes with its risks, and rafting is no exception. I’ve always made it a point to educate myself about the potential dangers before hitting the water. Understanding the river’s class and conditions helps you prepare for what lies ahead. It’s crucial to recognize your limits and those of your group. I’ve seen firsthand how important it is to communicate openly about comfort levels, especially when navigating more challenging rapids.

Essential Safety Gear

As I mentioned before, wearing a life jacket and helmet is non-negotiable. Additionally, some companies may provide other safety gear like river shoes or wetsuits. I’ve also noticed that many guides carry safety ropes, throw bags, and first-aid kits on board. I always feel reassured knowing that my guide is prepared, and it’s a good idea to familiarize yourself with the safety gear before you go out on the river.

What to Do in an Emergency

Emergencies can happen, so knowing what to do is crucial. If someone falls out of the raft, the guide will typically instruct you on how to assist them. I’ve practiced the “swim to shore” technique with my team, which is incredibly helpful. Staying calm is key; I remember feeling panic during my first rapid, but after training and listening to my guide, I knew what to do. If you’re ever in doubt, follow the guide’s instructions and remember that they have your safety in mind.

Post-Rafting Activities and Local Attractions

Exploring Nearby Attractions

After an exciting day on the river, you might want to unwind and explore the area. I’ve always enjoyed discovering local attractions, whether it’s hiking trails, waterfalls, or charming towns. Many rafting locations are near stunning national parks or scenic views, making it a perfect opportunity for a little adventure after the rapids. Last summer, after a thrilling trip on the Deschutes River, we explored the nearby hiking trails, which were breathtaking.

Dining Options and Local Cuisine

After all that paddling, you’ll likely be hungry! I love trying local cuisine after a day of rafting. Depending on where you are, you might find cozy diners, food trucks, or even fine dining options. I fondly remember a riverside restaurant where we enjoyed fresh, local fish after a day on the water. It’s a great way to celebrate the day’s adventures and bond with your rafting companions!

Accommodations: Where to Stay

Finding a cozy place to rest after your rafting trip can enhance your experience. I’ve camped near rivers, stayed in cabins, and even booked hotels in nearby towns. Depending on your budget, there are usually plenty of options available. I personally enjoy staying close to the river whenever possible; there’s something magical about falling asleep to the sounds of rushing water. Plus, it makes for a quick morning coffee before hitting the water again!

Final Thoughts

White water rafting is an adventure that I believe everyone should experience at least once in their life. The thrill of navigating through rapids, the beauty of nature, and the camaraderie with friends or family make for an unforgettable journey. From planning your trip to ensuring you have the right gear and understanding the safety precautions, every aspect adds to the excitement. I hope my experiences and insights inspire you to embark on your own rafting adventure and create memories that will last a lifetime. So grab your gear, gather your friends, and get ready for an adventure that will have you smiling long after the last rapid!

Frequently Asked Questions

“`html

What is white water rafting?

White water rafting is an exhilarating experience where participants navigate through rushing waters in an inflatable raft, surrounded by stunning landscapes. It’s a blend of excitement, teamwork, and joy, offering both an adrenaline rush and a connection with nature.

What are the different types of white water rafting experiences?

There are several types of white water rafting experiences, including guided rafting for beginners, self-guided rafting for those with more experience, expedition rafting for longer trips, and family rafting designed for all ages.

How are rivers classified in white water rafting?

Rivers are classified based on their difficulty: Class I (easy), Class II (slightly more challenging), Class III (moderate rapids), Class IV (advanced rapids), and Class V (extremely challenging and dangerous, meant for experienced rafters).

What are some health benefits of white water rafting?

White water rafting provides a full-body workout, engaging core, arms, and legs, which builds muscle and improves cardiovascular fitness. Additionally, it offers mental health benefits by providing stress relief and a therapeutic escape into nature.

What are some top rivers for affordable white water rafting?

Some top rivers for budget rafting adventures include the Arkansas River in Colorado, Gauley River in West Virginia, Deschutes River in Oregon, and Chattooga River in South Carolina, all offering thrilling rapids and budget-friendly options.

When is the best time to go white water rafting?

The best time to go white water rafting depends on the river’s peak season, usually during snowmelt in late spring and early summer. Off-peak seasons can offer discounts, but rapids may be less exciting.

What should I consider when choosing a rafting company?

When selecting a rafting company, consider the experience of the guides, compare costs among local outfitters, and read reviews and recommendations from past guests to ensure a safe and enjoyable experience.

What should I expect on my rafting adventure?

You can expect a safety briefing before hitting the water, learning basic rafting techniques, and following a typical itinerary that includes time on the water, breaks for swimming and lunch, and enjoying the scenery.

What essential gear should I pack for white water rafting?

Essential gear includes quick-drying clothing, safety equipment like life jackets and helmets (usually provided by companies), a dry bag for valuables, sunscreen, and a reusable water bottle for hydration.

How can I save money on rafting trips?

To save money on rafting trips, consider rafting during the shoulder season for better rates, look for local outfitters with competitive prices, and gather a group to take advantage of discounts offered for larger parties.

“`

Top 10 Budget-Friendly White Water Rafting Destinations

White water rafting is an exhilarating adventure that combines thrill, nature, and camaraderie. If you’re looking for budget-friendly options to experience this excitement, you’re in the right place! Plan Your Next Budget Whitewater Rafting Expedition Here!

Top 10 Budget-Friendly White Water Rafting Destinations

Overview of White Water Rafting

What is White Water Rafting?

White water rafting is all about navigating rivers filled with rapids and waves using an inflatable raft. It’s a team sport, where you and your friends or family paddle together, following the guide’s directions as you tackle various obstacles in the water. I’ve always found it to be a fantastic way to bond with my loved ones and enjoy the great outdoors. The thrill of the rush, the splashes of cold water, and the stunning landscapes are just some of the highlights that make rafting a unique experience.

Benefits of White Water Rafting

There’s something magical about being on the water. While the adrenaline rush is fantastic, there are other benefits too! For me, rafting is a great way to disconnect from the everyday hustle. The rhythmic paddling feels meditative, and being surrounded by nature provides a refreshing escape. Additionally, rafting offers a full-body workout. You engage various muscle groups while paddling, balancing, and maneuvering the raft. Plus, there’s an undeniable sense of accomplishment when you conquer a tough rapid. It’s a reminder that sometimes, pushing ourselves out of our comfort zones leads to unforgettable memories.

Types of Rapids and Difficulty Levels

If you’re new to rafting, understanding the various types of rapids can help you choose the right adventure. Rapids are classified into six categories, ranging from Class I (easy) to Class VI (extremely dangerous). I remember my first trip, which was on a Class II river; it had enough excitement to get my heart racing while being safe enough for beginners. Here’s a quick rundown of the classes:

  • Class I: Easy, flat water with minimal obstructions. Perfect for beginners.
  • Class II: Slightly more challenging, with small waves and some maneuvering needed.
  • Class III: Moderate rapids that require quick decision-making and teamwork.
  • Class IV: Advanced, with large waves and hazards. Best suited for experienced rafters.
  • Class V: Extremely difficult, with intense rapids that can pose serious risks.
  • Class VI: Unnavigable, reserved for expert kayakers and seasoned adventurers.

Choosing the right class for your skill level will ensure you have a fun and safe experience. I always recommend starting with something manageable and then gradually increasing the challenge as you gain confidence. Top 7 Budget-Friendly Whitewater Rafting Trips can help you find the perfect fit!

Top 10 Budget-Friendly White Water Rafting Destinations

1. Colorado River, Arizona

Overview of the Colorado River

The Colorado River is iconic, flowing through the Grand Canyon and offering breathtaking views along with thrilling rapids. I was captivated by the stunning cliffs and vibrant colors of the canyon walls during my trip. The river offers a range of rapids, making it suitable for both beginners and experienced rafters.

Best Time to Visit

The best time to visit is from April to October. I went in July, and while it was warm, the water was refreshing. Just be prepared for busier crowds if you go during peak season!

Cost of Rafting Trips

Rafting trips on the Colorado River can vary in price, but I found options starting around $100 per person for a half-day trip. Some companies offer multi-day adventures that include camping, which can be a fun way to explore more of the canyon.

2. Salmon River, Idaho

Overview of the Salmon River

The Salmon River is known for its wild beauty and thrilling rapids. It’s a place I’ve always wanted to explore! The river offers various sections, catering to different skill levels, and the scenery is simply breathtaking, with towering mountains and lush forests.

Best Time to Visit

I recommend visiting between June and September when the water levels are optimal for rafting. I’ve heard that rafting during the early season can be more exhilarating due to higher water flow.

Cost of Rafting Trips

Rafting trips typically start around $90 per person for a full day. I’ve seen packages that include meals, which can save money and enhance the experience!

3. Gauley River, West Virginia

Overview of the Gauley River

The Gauley River is famous for its challenging rapids, especially during the fall. I’ve heard stories from friends who tackled this river and had the time of their lives. It’s a hotspot for thrill-seekers and offers some of the most exciting white water in the country.

Best Time to Visit

The prime season is in September and October when the water is released from the Summersville Dam. I’ve been told that experiencing the Gauley during this time is unforgettable!

Cost of Rafting Trips

Prices range from about $100 to $150 per person, depending on the trip length and inclusions. I’ve seen discounts for groups, making it a great option for family outings or friends’ adventures.

4. Rogue River, Oregon

Overview of the Rogue River

The Rogue River is a gem of the Pacific Northwest. I remember feeling enchanted by its pristine waters and stunning scenery. The river features great rapids and calm stretches, perfect for those new to rafting.

Best Time to Visit

The best time for rafting is from May to October. I went in late spring when the snowmelt made the river exciting, but I’ve also enjoyed calm summer floats.

Cost of Rafting Trips

Rogue River trips start around $100 for a day trip, with options for multi-day adventures, which can be a fantastic way to dive deep into the area.

5. Nantahala River, North Carolina

Overview of the Nantahala River

The Nantahala River is one of my personal favorites. It’s incredibly scenic, and the rapids are fun yet manageable, making it a great spot for families. The river flows through a picturesque gorge that adds to the adventure.

Best Time to Visit

Rafting is best from March to November, and I’ve enjoyed trips during the summer when the weather is warm and the river is lively.

Cost of Rafting Trips

Day trips on the Nantahala River usually cost around $30 to $75 per person, making it one of the more affordable options on this list.

6. Arkansas River, Colorado

Overview of the Arkansas River

The Arkansas River offers a wide range of rapids and stunning mountain scenery. I was amazed by the diversity of the landscape and the thrill of the river. It’s a fantastic place for both beginners and experienced rafters.

Best Time to Visit

Late spring to early summer is ideal due to snowmelt, which brings the river to life. I’ve had some of my best rafting experiences during this time!

Cost of Rafting Trips

Prices start around $50 for a half-day trip, making it a budget-friendly choice. I’ve seen deals that include meals or gear rental, which can help cut down on costs.

7. New River, West Virginia

Overview of the New River

The New River is another top spot for white water rafting in West Virginia. It offers beautiful scenery and exciting rapids. I’ve heard it’s an excellent place for both beginners and experienced paddlers.

Best Time to Visit

Late spring through summer is the prime season. I’ve been told that you can experience different levels of excitement depending on the water levels!

Cost of Rafting Trips

Rafting trips on the New River start at around $90 per person for a full day’s adventure.

8. Chattooga River, South Carolina

Overview of the Chattooga River

The Chattooga River, famous for its role in the movie “Deliverance,” offers beautiful scenery and challenging rapids. I was enchanted by the serene beauty of the surroundings and the thrill of the ride. It’s a great spot for adventure seekers!

Best Time to Visit

Visit from April to October for the best conditions. I’ve had amazing experiences in the fall when the foliage adds an extra touch of beauty to the trip.

Cost of Rafting Trips

Prices generally range from $75 to $120 per person, depending on the length of the trip and the company.

9. White Salmon River, Washington

Overview of the White Salmon River

The White Salmon River is known for its stunning beauty and thrilling rapids. I’ve always been drawn to the lush forests and views of Mount Hood nearby. This river offers an unforgettable experience for rafters.

Best Time to Visit

The ideal time for rafting is from May to September when the river flows are at their peak due to snowmelt.

Cost of Rafting Trips

Rafting trips typically start around $90 per person for a half-day adventure. I’ve found that many companies offer discounts for group bookings.

10. Kern River, California

Overview of the Kern River

The Kern River is famous for its exhilarating rapids and beautiful scenery. I remember feeling a rush of excitement as I navigated the river, surrounded by towering mountains and lush vegetation. It’s a fantastic destination for rafting enthusiasts!

Best Time to Visit

The best time to visit is from late spring to early summer when the snowmelt creates the ideal conditions for thrilling rapids.

Cost of Rafting Trips

Rafting prices typically start around $75 per person for a day trip, making it another budget-friendly choice for adventure seekers.

Planning Your White Water Rafting Trip

When to Go: Seasonal Considerations

Timing can make or break your white water rafting experience, and I’ve learned this firsthand. Different seasons offer varying river conditions, which can affect the difficulty and the scenery. For instance, I’ve gone rafting in spring when the snowmelt makes the rivers rush with excitement. It’s thrilling, but that can also mean higher water levels and more challenging rapids, which isn’t ideal for beginners. I remember one trip in early June when the river was roaring, and while it was incredible, I definitely felt the adrenaline pumping as we navigated the tougher sections.

Summer, on the other hand, is a popular time for families and beginners. The water levels are usually lower, making for a more manageable ride. I’ve enjoyed lazy summer floats, where we could take our time and just soak in the beautiful vistas. Fall is another great option, especially if you want to witness stunning foliage while paddling down the river. Just keep in mind that as the weather cools, so does the water, so layering up is key!

What to Pack for Your Rafting Adventure

When I first went rafting, I wasn’t sure what to bring. Over the years, I’ve figured out a solid packing list that works well for me. Here’s what I recommend:

  • Clothing: Wear quick-drying clothes and a swimsuit underneath. Water shoes or sandals with straps are a must – I’ve lost flip-flops on the river before!
  • Sun Protection: Bring a wide-brimmed hat, sunglasses with a strap, and plenty of sunscreen. I can’t stress enough how important this is; the sun reflects off the water, and you can get burned easily.
  • Waterproof Gear: A dry bag to keep your essentials (like a phone or camera) safe is essential. I always pack my snacks and a water bottle in one too.
  • Layers: Depending on the season, I might pack a lightweight jacket or a fleece. Even on sunny days, the rivers can be breezy!

Having the right gear makes all the difference in ensuring a fun and comfortable day on the water. I’ve seen people struggle because they weren’t prepared, and I learned early on that it’s best to pack wisely!

Choosing the Right Rafting Company

Finding the right rafting company can enhance your experience significantly. I remember feeling overwhelmed with choices when I first started. Here are a few tips that helped me narrow it down:

  • Research: Look for companies with good reviews and safety records. I usually check online forums or ask friends who have been rafting before.
  • Experience Levels: Ensure the company offers trips that suit your skill level. If you’re a beginner, going with a company that specializes in family-friendly options can make a huge difference.
  • Guides: I always appreciate knowledgeable and friendly guides who can make the trip enjoyable while ensuring safety. I’ve had guides who added fun stories and facts about the area, which made the experience richer.
  • Group Size: Smaller groups can mean more attention from the guide and a more personalized experience. I like to check how many people will be on the trip, as it can affect the overall enjoyment.

In my experience, taking the time to choose the right company is worth it. It sets the tone for the whole adventure!

Safety Tips for White Water Rafting

While I love the thrill of white water rafting, safety is always my top priority. I’ve learned some essential tips along the way that have kept me and my friends safe on the water:

  • Listen to Your Guide: This might seem obvious, but I can’t stress this enough. Your guide has experience and knows the river well. Pay attention to their instructions and advice!
  • Wear Your Gear: Always wear your life jacket and helmet. I’ve seen people who thought they didn’t need one, and it’s just not worth the risk.
  • Stay Inside the Raft: If you do end up in the water, try to stay calm and float on your back, feet first. I remember my first spill; it was terrifying at first, but I quickly remembered my training!
  • Know Your Limits: Don’t push yourself too hard, especially if you’re a beginner. I always recommend starting with easier rapids before challenging yourself with more difficult ones.

By keeping these safety tips in mind, I’ve been able to enjoy many incredible adventures without worry. Preparing for the unexpected can help you have a great time while staying safe!

Local Amenities and Attractions

Accommodations Near Rafting Destinations

When planning a white water rafting trip, finding a good place to stay can enhance the overall experience. I’ve learned that the right accommodation can set the tone for the adventure, offering a cozy place to unwind after a day on the water. Many rafting destinations feature a variety of lodging options, from rustic cabins to hotels and campgrounds. For instance, near the Colorado River, I found charming lodges that provided breathtaking views of the canyon and were just minutes away from the launch site. I remember waking up to the sound of the river flowing, which was the perfect start to a day of excitement.

In Idaho, I discovered that many rafting companies offer packages that include lodging. This is a great way to simplify the planning process. Whether you prefer a tent under the stars or a comfortable bed, there’s usually something for everyone. I like to look for places that boast local charm, as it adds to the experience of being in a new area. Plus, staying close to the river means less travel time to the water, giving you more time to enjoy the adventure!

Local Dining Options

After a day of paddling and splashing in the river, good food is essential. I’ve always enjoyed exploring local dining options when I’m on a rafting trip. Each area has its own unique flavors, and I love discovering hidden gems. For example, in West Virginia, I stumbled upon a local diner that served the best burgers and fries. We ate outside, sharing stories about our day, and it felt like a perfect way to wrap up an adventurous outing.

In addition to diners, many rafting destinations have restaurants that focus on farm-to-table experiences. I remember dining at a spot near the Rogue River where the menu featured fresh, local ingredients. It felt great to support local businesses while enjoying delicious meals. If you are camping, don’t forget to bring some snacks or easy-to-cook meals for the evenings by the campfire.

Other Outdoor Activities in the Area

White water rafting is just one of the many outdoor activities you can enjoy in these beautiful locations. I’ve often found that combining rafting with other adventures makes for a well-rounded trip. For instance, after spending a day on the Salmon River, we decided to hike some of the nearby trails. The vistas were stunning, and it gave us a chance to stretch our legs and enjoy the natural beauty from a different perspective.

Many rafting destinations also offer opportunities for kayaking, paddleboarding, or even fishing. I remember taking advantage of some downtime after our rafting trip on the Arkansas River to try my hand at fishing. It was a nice way to relax and soak in the scenery while waiting for a bite. Additionally, some areas have zip-lining, rock climbing, or mountain biking trails that can add a little extra thrill to your adventure. I believe it’s all about making the most of your time outdoors and exploring everything the area has to offer.

In my experience, planning downtime in your itinerary is just as important as scheduling your rafting trips. It allows you to soak in the surroundings, bond with your friends or family, and create lasting memories that go beyond just the rapids. So don’t be afraid to venture beyond the river; you might just find your next favorite activity!

Budgeting for Your Rafting Adventure

Average Costs Breakdown

Budgeting for a white water rafting trip can be a bit daunting, but I’ve found that breaking down the costs makes it much easier. First, consider the cost of the rafting trip itself. Depending on the river and the duration of the trip, prices can range from around $30 for a half-day excursion to $150 for a full-day adventure. I’ve learned that multi-day trips, while pricier, often provide meals and camping gear, which can be worthwhile investments.

In addition to the rafting costs, you’ll want to factor in accommodations. Depending on where you stay, a night in a hotel or cabin can vary significantly in price. Camping is often the most budget-friendly option, and I’ve enjoyed many nights under the stars after a day on the river.

Don’t forget about food! I typically allocate around $30 to $50 per day for meals, but this can vary based on whether you’re dining out or cooking at a campsite. Lastly, consider transportation costs—gas prices and any rental vehicles should be included in your budget. By planning ahead and understanding the costs, I’ve been able to enjoy my adventures without financial stress!

Tips for Saving Money on Rafting Trips

Over the years, I’ve picked up several tips to help save money on rafting trips. First, I recommend booking your trip early. Many rafting companies offer early bird discounts, and securing your spot in advance can sometimes lead to substantial savings. I remember booking a trip a few months ahead of time and saving about 15% off the regular price.

Traveling in groups is another fantastic way to reduce costs. Many companies offer group discounts, which can make a big difference, especially if you’re planning a family outing or a fun getaway with friends. Additionally, I’ve found that some companies offer package deals, which can include meals and activities along with your rafting trip. This has often helped me budget more effectively while enjoying a complete experience.

Lastly, consider visiting during the shoulder season, which is typically the time just before or after peak season. I’ve enjoyed less crowded rivers and often found better deals on accommodations and rafting trips during these times. It’s a win-win situation!

Potential Discounts and Packages

Many rafting companies understand the importance of making adventure accessible, especially for families and groups. I’ve come across numerous discounts and packages that make rafting more affordable. Some companies offer seasonal promotions or last-minute deals, which can be a great way to save if your schedule allows for flexibility.

Additionally, keep an eye out for loyalty programs. I’ve signed up for newsletters from my favorite rafting companies, and this has often led to exclusive offers and discounts. Some companies even provide discounts for returning customers, which is a nice incentive to keep coming back!

Lastly, don’t hesitate to inquire directly with the rafting company about any discounts they might offer. A simple call or email can sometimes lead to unexpected savings. From my experience, being proactive in asking about deals has paid off! Experience Thrills: Best Whitewater Rafting on a Budget

Frequently Asked Questions

What is white water rafting?

White water rafting involves navigating rivers filled with rapids and waves using an inflatable raft. It is a team sport where participants paddle together, following the guide’s directions as they tackle various obstacles in the water.

What are the benefits of white water rafting?

Rafting provides an adrenaline rush and a way to disconnect from everyday life. It offers a meditative experience through rhythmic paddling, a full-body workout, and a sense of accomplishment when conquering challenges.

What are the different classes of rapids?

Rapids are classified into six categories: Class I (easy), Class II (slightly challenging), Class III (moderate), Class IV (advanced), Class V (extremely difficult), and Class VI (unnavigable). Beginners are encouraged to start with easier classes.

What are some budget-friendly rafting destinations?

Some budget-friendly rafting destinations include the Colorado River, Salmon River, Gauley River, Rogue River, Nantahala River, Arkansas River, New River, Chattooga River, White Salmon River, and Kern River.

When is the best time to visit the Colorado River for rafting?

The best time to visit the Colorado River for rafting is from April to October, with July being particularly warm and refreshing, though it may be busier during peak season.

How much do rafting trips generally cost?

Rafting trip costs can vary widely, starting around $30 for half-day trips to $150 for full-day adventures. Multi-day trips often include meals and camping gear, which can be worth the extra expense.

What should I pack for a white water rafting trip?

Pack quick-drying clothes, a swimsuit, water shoes or sandals, sun protection (hat, sunglasses, sunscreen), a dry bag for essentials, and layers for changing weather conditions.

What safety tips should I keep in mind while rafting?

Listen to your guide, wear your life jacket and helmet, stay inside the raft, and know your limits. It’s important to be prepared and aware of safety protocols to ensure a fun experience.

How can I save money on rafting trips?

To save money on rafting trips, book early for discounts, travel in groups for group rates, look for package deals that include meals, and consider visiting during the shoulder season for better deals.

Are there local amenities near rafting destinations?

Yes, many rafting destinations offer various accommodations, local dining options, and other outdoor activities such as hiking, kayaking, or fishing, enhancing the overall experience of your trip.

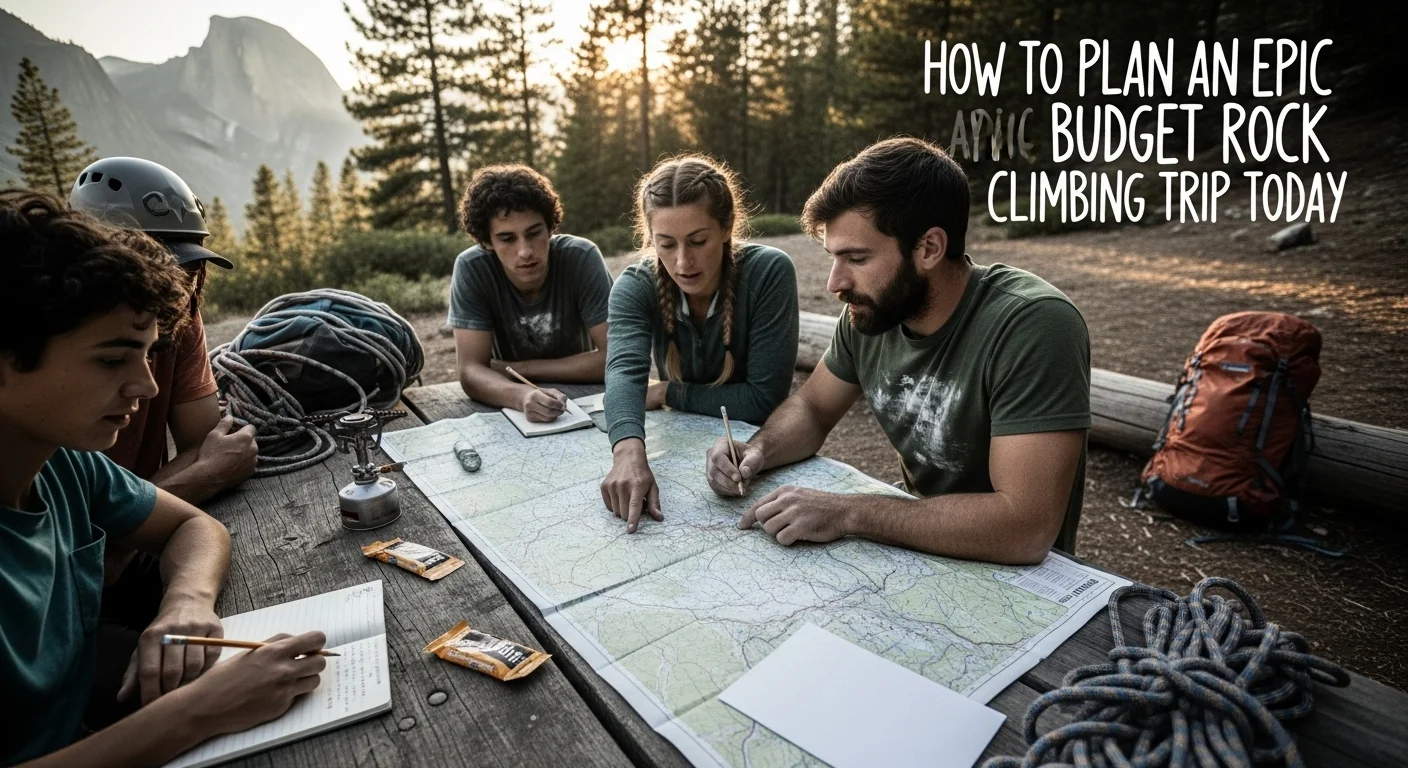
How to Plan an Epic Budget Rock Climbing Trip Today

Embarking on a budget rock climbing trip is an adventure filled with excitement and challenge. With careful planning, we can explore breathtaking locations without breaking the bank. For those looking to maximize their experience, it’s essential to know about essential gear for budget rock climbing adventures abroad.

How to Plan an Epic Budget Rock Climbing Trip Today

Understanding Budget Rock Climbing Trips

What is a Budget Rock Climbing Trip?

A budget rock climbing trip is all about getting the most thrilling climbing experiences at a fraction of the cost. You don’t need to spend a fortune on fancy equipment or high-end accommodations to enjoy the climb. When I first started planning my budget trips, I realized that the essence of the adventure lies in the experience itself, not in how much money I spent. This type of trip often involves staying in campgrounds, sharing gear, and making the most of what nature offers. It’s about connecting with the environment, embracing the raw challenges of climbing, and sharing moments with fellow climbers while keeping our expenses low.

Benefits of Rock Climbing on a Budget

There are numerous benefits to planning a budget rock climbing trip. First and foremost, saving money means we can climb more frequently! I remember when I was trying to figure out how to balance my love for climbing with my student budget. Every dollar saved on one trip could go toward another. Additionally, budget trips often encourage us to be resourceful and creative. We learn to find hidden gems in nature, explore less crowded routes, and maybe even discover a new favorite climbing spot. Plus, there’s something incredibly rewarding about making the most of what we have and connecting with fellow climbers who share the same passion for adventure.

Choosing Your Destination

Top Affordable Rock Climbing Locations

Choosing the right destination can make or break your budget rock climbing trip. Luckily, there are many stunning locations that cater to climbers on a budget. Here are a few of my favorite places:

Joshua Tree National Park

Joshua Tree is famous for its unique rock formations and diverse climbing routes. I love this park for its breathtaking desert landscapes and the sense of adventure that fills the air. The campgrounds are affordable, and there are plenty of free climbing areas. Just remember to bring plenty of water, especially during the warmer months!

Red River Gorge

This haven for climbers in Kentucky offers a mix of sport and traditional climbing routes. When I visited, I was amazed by the sandstone cliffs and the vibrant community of climbers. The area is surrounded by beautiful hiking trails, and camping options are plentiful and budget-friendly. You can find more about great climbing spots in our article on unforgettable rock climbing spots that won’t break the bank.

Yosemite National Park

While it may seem like a splurge, Yosemite can be done on a budget, especially if you camp. The stunning granite walls and iconic views are worth it. I found that many climbers shared gear and tips, making it even more budget-friendly. Just be sure to plan ahead, as campsites can fill up quickly.

Smith Rock State Park

Smith Rock in Oregon is known as the birthplace of American sport climbing. With its breathtaking scenery and diverse routes, it’s a dream for climbers. I love the affordability of the campgrounds nearby, which allows us to spend extra on some delicious local food after a long day of climbing!

Factors to Consider When Choosing a Destination

When planning your budget rock climbing trip, several factors come into play for selecting the perfect destination:

Accessibility

How far is the location from where you live? I’ve learned that sometimes a shorter drive can save a lot of money on gas and time. It also allows me to spend more time climbing.

Weather Conditions

Check the climate before choosing a destination. I remember planning a trip to a beautiful location only to find out it would be raining the whole time! Researching the best times to visit can make a huge difference in your experience.

Climbing Difficulty Levels

Make sure the destination has routes that match your skill level. I always check if there are beginner-friendly options so that all my friends can join. It’s all about having fun and pushing our limits together!

As I planned my first budget rock climbing trip, these considerations helped shape my journey. The thrill of climbing is amplified when we get to share it with others in beautiful, affordable locations. With a bit of research and creativity, we can enjoy epic adventures without overspending. Next, let’s dive into how to plan our itinerary to make the most of our climbing experience!

Planning Your Itinerary

Duration of Your Trip

Deciding how long to spend on a budget rock climbing trip is crucial. I’ve found that even a weekend can be packed with adventure, but a full week allows for more exploration and relaxation. When I first started planning my trips, I usually aimed for three to four days to make the most of my time. This way, I could tackle different climbing routes and still have downtime to enjoy the scenery or make new friends. Assessing your schedule and determining how much time you can realistically take off work or other commitments is key. Also, don’t forget to factor in travel time to and from your climbing destination!

Key Activities Besides Climbing

Climbing is exhilarating, but there’s a whole world of activities to enjoy while you’re on a budget trip. I always make sure to plan some time for other outdoor adventures that can complement my climbing experience.

Hiking Trails

Exploring the local hiking trails is one of my favorite ways to wind down after a day of climbing. Many climbing destinations are surrounded by stunning landscapes, and hiking can provide a new perspective on the beauty of the area. For instance, at Red River Gorge, I found several trails that led to breathtaking viewpoints overlooking the cliffs. Hiking not only keeps us active but also gives us a chance to appreciate nature even more. Plus, it’s a great way to bond with fellow climbers or camping buddies!

Camping and Accommodations

Choosing where to stay is another part of the planning process that I always take seriously. I’ve found that camping is often the most budget-friendly option, and it adds to the whole outdoor experience. Being surrounded by nature at night while sharing stories around a campfire is hard to beat. Besides, many climbing locations have campgrounds that are close to climbing areas, saving us travel time in the morning. If camping isn’t your style, I recommend checking out local hostels or cabins that can accommodate a group. Splitting costs with friends can make these options more affordable.

Local Attractions and Landmarks

Every climbing destination has its unique attractions that can add a little extra flavor to your trip. I’ve learned that exploring these local gems can turn an ordinary climbing trip into a memorable experience. For example, during my trip to Yosemite, I took a day off from climbing to visit the iconic El Capitan and hike to Glacier Point for some breathtaking views. It was an unforgettable experience that helped me understand the park’s significance and beauty beyond just the climbing routes.

Similarly, in Joshua Tree, I spent a day visiting the park’s otherworldly Joshua trees and rock formations. I couldn’t help but take photos and appreciate the unique landscape. Look for local events, markets, or festivals too! They can provide a fun way to immerse ourselves in the local culture while keeping our budget in check.

Budgeting Your Trip

Estimating Costs

Budgeting for your trip is like creating a roadmap for adventure. I’ve learned that having a clear idea of potential costs can prevent surprises down the road. Start by breaking down the expenses into categories that matter most.

Travel Expenses

Consider how you’ll get to your climbing destination. For me, driving often ends up being the most economical choice, especially if I’m going with friends. We split the gas expenses, which can help lower the costs significantly. Another option is to look for carpooling opportunities with other climbers, which can be both fun and budget-friendly.

Accommodation Costs

Next, factor in accommodation costs. If you’re camping, the fees are generally low, but if you decide on a cozy cabin or hostel, check for group rates. I’ve found that booking ahead can sometimes lead to discounts and ensure we have a place to stay, especially during peak climbing seasons.

Food and Supplies

Food can be another area where we can save money. I often pack meals and snacks to minimize dining costs. Cooking meals at the campsite is not only economical but also brings everyone together. I remember a trip where we had a big pasta night, and it became one of the highlights of our adventure! Sharing recipes and cooking together can create lasting memories.

How to Save Money on Your Trip

With a little creativity, we can make our budget stretch further without sacrificing fun.

Camping vs. Hotels

As I mentioned earlier, camping is often the best option for budget-conscious climbers. It connects us with nature while keeping costs low. However, if you prefer hotels, consider looking for deals on booking sites or checking out local motels that might offer affordable rates. Sometimes, last-minute deals can work in our favor!

Group Discounts

If you’re traveling with a group, take advantage of group discounts for campsites or even climbing gear rentals. I’ve been part of groups that have saved significantly just by inquiring about these deals. It’s always worth asking!

Gear Rentals vs. Purchases

Finally, consider whether to rent or buy gear. If you’re just starting or don’t climb frequently, renting can save a lot of money. I’ve rented gear at local climbing shops and found it to be reliable and affordable. Plus, the staff often shares useful tips about the area and climbing routes!

Essential Gear for Rock Climbing

Must-Have Equipment

When planning a budget rock climbing trip, having the right gear is essential, not only for safety but also for enhancing the overall experience. I remember the first time I went climbing—I was so excited but overwhelmed by the gear choices. Over time, I’ve learned what equipment is truly necessary and which items I can do without.

Climbing Shoes

Climbing shoes are perhaps the most important piece of gear. They provide the grip and support you need on various surfaces. I’ve tried many brands, but I always recommend finding a pair that fits snugly without being painfully tight. I’ve seen climbers make the mistake of choosing comfort over fit, and it can really affect their performance. If you’re on a budget, consider buying a gently used pair or borrowing from a friend. You can often find great deals during sales or at local climbing shops.

Harness and Rope

A good harness is crucial for safety. I’ve used both budget and high-end harnesses, and while comfort varies, I’ve found that a solid mid-range harness can do the job just as well. Look for one that has adjustable leg loops and is easy to put on. As for the rope, it’s often best to rent a climbing rope, especially for beginners. I’ve noticed that many climbing gyms offer affordable rentals, and it saves the hassle of transporting a heavy rope.

Safety Gear

Don’t skimp on safety gear! Chalk bags, helmets, and carabiners should be on your checklist. I remember a trip where I forgot my helmet, and it made me anxious every time I climbed. Helmets are a small investment for peace of mind. You can often find used safety gear in good condition at local shops or through climbing communities. Always prioritize safety, even when trying to save money.

Where to Rent or Buy Gear

Finding the right place to rent or buy gear can make a significant difference. I’ve discovered some fantastic options over the years that cater to budget-conscious climbers.

Local Shops

Local climbing shops are often the best places to start. I love supporting small businesses, and they usually have knowledgeable staff who can help you find what you need. Many shops offer rental programs, which can be incredibly affordable, especially for gear you might not use frequently. I’ve also found that some shops host swap events, where climbers can buy, sell, or trade gear. It’s a great way to score some quality items at a lower price!

Online Retailers

If you prefer shopping online, there are numerous retailers that have excellent deals on climbing gear. Websites like REI, Backcountry, and even Amazon often have sales on climbing equipment. I make it a habit to check for return policies and warranties before making a purchase. I’ve learned the hard way that it’s worth it to pay a bit more for quality gear that will last longer. For more tips on budget-friendly climbing destinations, check out our article on top 10 budget destinations for rock climbing enthusiasts.

Preparing for Your Climbing Experience

Physical Conditioning and Training

Getting in shape for a climbing trip is essential, and it doesn’t have to be intimidating. I remember when I first got serious about climbing; I thought I needed to hit the gym every day. Instead, I found that a balanced approach worked best for me. I focused on strength, endurance, and flexibility to prepare myself for the climbs ahead.

Incorporating exercises like pull-ups, core workouts, and leg strength training into my routine made a noticeable difference in my climbing performance. I also recommend trying yoga or stretching to improve flexibility, which is crucial for reaching those tricky holds. Even a few sessions a week can set you up for success on the rock.

Understanding Climbing Techniques

Before heading out, it’s helpful to brush up on climbing techniques. I’ve found that watching instructional videos or attending climbing clinics can provide valuable insights. Learning about foot placement, body positioning, and proper belaying techniques has made my climbs smoother and more enjoyable. I remember my first outdoor climb; I struggled with footwork, but after some practice and guidance, I improved significantly.

Safety Protocols and Best Practices

Safety is paramount, and I can’t stress enough the importance of understanding climbing protocols. Before every climb, I make it a point to check my gear, ensure my harness is secure, and double-check knots. Additionally, I always communicate clearly with my climbing partner about our plan and any safety measures we’ll follow. I’ve learned that a few minutes spent discussing safety can prevent accidents and ensure we both have an enjoyable experience.

Staying aware of our surroundings is also vital. Whether it’s being mindful of other climbers or checking the weather, these small actions can make a huge difference. I’ve had trips where poor weather caught us off guard, but by planning and keeping an eye on forecasts, we managed to adjust our itinerary and still have a great time.

Connecting with the Climbing Community

Finding Climbing Partners

One of the best parts of rock climbing is the community. I’ve met some of my closest friends through climbing, and it all started with finding partners who share the same passion. A good climbing partner can make a world of difference, and I recommend reaching out to local climbing gyms or communities to meet others. I’ve had great luck finding climbing partners through social media groups or online forums dedicated to climbers in my area.

Joining Local Climbing Groups

Getting involved in local climbing groups can not only help you find partners but also provide a wealth of knowledge. I’ve participated in group climbs organized by these communities, and they have been some of the most rewarding experiences. Climbing with others allows us to learn from each other, share tips, and explore new routes together. Plus, it adds an extra layer of fun to the adventure!

Online Forums and Resources

Online forums and resources can be incredibly helpful for climbers of all levels. I often turn to websites like Mountain Project or Reddit’s climbing forums for advice, gear recommendations, and even trip planning. I’ve found that connecting with experienced climbers online has opened doors to new climbing destinations and hidden gems I might not have discovered otherwise. It’s an amazing way to learn, share experiences, and seek advice from those who’ve been there before.

Frequently Asked Questions

What is a budget rock climbing trip?

A budget rock climbing trip focuses on maximizing thrilling climbing experiences while minimizing costs. It often involves staying in campgrounds, sharing gear, and enjoying the natural environment without high expenses.

What are the benefits of planning a budget rock climbing trip?

Planning a budget rock climbing trip allows climbers to save money, which means they can climb more frequently. It encourages resourcefulness, creativity, and the discovery of less crowded routes or hidden gems in nature.

What are some top affordable rock climbing locations?

Some top affordable rock climbing locations include Joshua Tree National Park, Red River Gorge, Yosemite National Park, and Smith Rock State Park, each offering stunning scenery and budget-friendly camping options.

What factors should I consider when choosing a climbing destination?

When choosing a climbing destination, consider accessibility, weather conditions, and climbing difficulty levels to ensure the location matches your skill level and allows for a fulfilling experience.

How long should I plan for a budget rock climbing trip?

The duration of your trip can vary; even a weekend can be packed with adventure, but a full week allows for more exploration. Three to four days is often ideal for tackling different climbing routes and enjoying downtime.

What activities can complement my climbing experience on a budget trip?

Besides climbing, you can enjoy hiking local trails, exploring local attractions, and participating in outdoor adventures that enhance your experience while keeping costs low.

How can I estimate costs for my budget rock climbing trip?

To estimate costs, break down expenses into categories such as travel, accommodation, food, and supplies. This detailed budgeting helps prevent surprises and ensures you stay within your budget.

What are some ways to save money on a climbing trip?

To save money on your trip, consider camping instead of hotels, looking for group discounts, and opting for gear rentals rather than purchases, especially if you’re a beginner or don’t climb frequently.

What essential gear do I need for rock climbing?

Essential gear includes climbing shoes, a harness, a rope, and safety equipment like chalk bags and helmets. Prioritize quality and safety, and consider renting gear if you’re on a budget.

How can I connect with the climbing community?

You can connect with the climbing community by finding climbing partners through local gyms, joining local climbing groups, and participating in online forums or resources dedicated to climbing.

Unforgettable Rock Climbing Spots That Won’t Break the Bank

Rock climbing doesn’t have to cost a fortune. With so many breathtaking spots around, we can explore thrilling climbs without emptying our wallets. Here’s a look at affordable rock climbing destinations that promise unforgettable experiences.

Unforgettable Rock Climbing Spots That Won't Break the Bank

Understanding Budget Rock Climbing

What Defines Budget-Friendly Climbing?

When I think about budget-friendly rock climbing, I imagine places that offer stunning views and challenging routes without the hefty price tag. Budget climbing spots are often accessible, meaning they don’t require an expensive permit or entry fee. They can also be found in regions where camping is cheap or even free, allowing us to save on lodging. These places often have a vibrant climbing community, which enhances our experience while keeping costs low. Read Interesting article: Top 10 Budget Destinations for Rock Climbing Enthusiasts

For me, budget-friendly climbing is about finding those hidden gems that provide everything from thrilling boulders to multi-pitch climbs without breaking the bank. This also means seeking out lesser-known destinations where the crowds are smaller, and the costs are lower. I’ve found that local climbing areas often have the best deals, sometimes even offering free climbing days or discounted gear rentals.

Benefits of Affordable Climbing Destinations

Choosing budget climbing destinations has benefits beyond just saving money. For one, we often discover unique climbing spots that aren’t overrun with tourists. This can enhance our adventure significantly. I remember visiting a little-known crag in West Virginia, where I could hear the birds and feel the breeze rather than the hustle and bustle of a crowded area. The serenity allowed me to focus on climbing and truly connect with nature.

Another advantage is the opportunity to meet other climbers who share similar values about the sport. At budget destinations, I’ve found a welcoming community eager to share tips and climbing routes. Often, these climbers are more than happy to let you in on local secrets, such as the best times to climb or where to find the most scenic routes. It creates a sense of camaraderie that I’ve found immensely rewarding.

Additionally, budget climbing can help us develop our skills. With fewer climbers around, we have the chance to take our time on the rock, experiment with new techniques, and push our limits without the pressure of a crowded climbing gym or popular crag. This environment allows us to gain confidence and experience, which is vital for anyone looking to advance in their climbing journey.

Lastly, a budget-friendly climbing trip often involves more than just the climb itself. It can be an opportunity for exploration—hiking, biking, or even visiting local attractions that don’t require a huge expenditure. I’ve found that combining climbing with other outdoor activities enriches the entire experience, making it more than just a trip to scale rocks.

Top Affordable Rock Climbing Destinations in the U.S.

Red River Gorge, Kentucky

The Red River Gorge, or simply the Red, is a place I hold dear to my heart. Known for its stunning sandstone cliffs and unique rock formations, it offers a wide range of climbing options for all skill levels. What I love most about the Red is that camping is quite affordable, and there are plenty of free options to set up your tent or park your van.

The climbing routes here are varied, from sport to trad, and the views are nothing short of breathtaking. I remember spending hours exploring the different routes, each one more beautiful than the last. Plus, the local climbing community is incredibly friendly, often organizing events and meet-ups that make it easy for newcomers to feel at home.

Joshua Tree National Park, California

Joshua Tree is iconic, and I think it’s often underrated as a budget climbing destination. While it has some entrance fees, the park’s vastness means you can find plenty of routes that feel remote and untouched. The unique rock formations provide endless climbing opportunities, from bouldering to traditional climbing.

What I appreciated was the ability to camp directly in the park, where the night sky lights up with stars, creating an unforgettable experience after a long day of climbing. I’ve spent many nights around a campfire, sharing stories and laughter with fellow climbers, which truly enhances the adventure. Read Interesting article: Essential Gear for Budget Rock Climbing Adventures Abroad

Smith Rock State Park, Oregon

Smith Rock is another gem that’s definitely worth a visit. Known as the birthplace of American sport climbing, it boasts stunning views and a variety of routes. The entrance fee is reasonable, and the park has several camping areas that are affordable and scenic.

I was amazed by the sheer beauty of the area when I first arrived. The rock faces and the Crooked River create a picturesque backdrop that makes every climb feel like an adventure in paradise. The climbing community here is vibrant, and I found myself quickly making friends who were eager to share their favorite climbs and tips.

New River Gorge, West Virginia

New River Gorge offers some of the best climbing in the eastern U.S. and is surprisingly affordable. The park is home to a wide range of climbing styles, from sport to trad, with plenty of routes that challenge climbers of all levels. I found the atmosphere here to be welcoming, with climbers of all ages enjoying the routes.

Camping options abound, from free sites to paid campgrounds, allowing us to choose what fits our budget best. The stunning scenery and the sound of the river below make it a perfect spot to unwind after a day of climbing.

Indian Creek, Utah

Indian Creek is a must-visit for crack climbing enthusiasts. While getting there can involve some travel expenses, the climbing itself is worth every penny. The breathtaking desert landscape and the unique climbing routes provide an experience that’s hard to beat.

Camping in the area is generally affordable, and the local climbing community is close-knit, making it easy to meet like-minded adventurers. I remember my first visit—spending the day climbing, then relaxing under a starry sky, feeling completely in tune with nature.

Devil’s Lake State Park, Wisconsin

Devil’s Lake is a fantastic option for climbers looking for a budget-friendly experience in the Midwest. The park is known for its diverse climbing routes and stunning views. Entry fees are minimal, and there are plenty of campsites available at very reasonable rates. I’ve spent many weekends here, enjoying the thrill of climbing followed by evenings spent with friends around the campfire.

The combination of beautiful sandstone cliffs and a vibrant community makes it an ideal spot for both new and experienced climbers alike. Whether you’re looking to push your limits or just enjoy a relaxing day on the rock, Devil’s Lake has something for everyone.

International Budget Climbing Locations

El Chorro, Spain

El Chorro, nestled in the stunning Andalusian mountains, is one of my favorite international climbing spots. It’s a hidden treasure that offers a perfect blend of breathtaking scenery and incredible climbing opportunities, all without breaking the bank. One of the things I love about El Chorro is the accessibility—it’s just a short train ride from Malaga, making it easy to get to without spending a fortune on travel.

The climbing here is fantastic, with routes suitable for both beginners and experienced climbers. I remember my first climb at El Chorro; the views from the cliffs overlooking the gorge were simply mesmerizing. Plus, there are plenty of affordable accommodations available, from guesthouses to campsites, allowing you to choose what fits your budget. Sharing stories with fellow climbers over tapas in the local restaurants was an experience I’ll never forget.

Kalymnos, Greece

Kalymnos is often referred to as the climbers’ paradise, and for a good reason. This small island in the Aegean Sea is known for its limestone cliffs and incredible routes. What I found especially appealing was the combination of climbing and relaxing by the sea. After a long day on the rock, I loved cooling off in the crystal-clear waters. The cost of living here is reasonable, making it a great destination for budget-conscious climbers.

Camping is an option, but I also discovered some budget-friendly guesthouses that offered a comfortable stay with fantastic views of the sea. The climbing community on the island is vibrant, and I enjoyed meeting climbers from all around the world, sharing tips and routes. The laid-back vibe of Kalymnos really adds to the experience, making it a trip to remember.

Squamish, Canada

Squamish is a must-visit for rock climbers and outdoor enthusiasts alike. Known for its impressive granite walls and breathtaking landscapes, this Canadian gem offers a bit of everything. I was pleasantly surprised to find that despite its popularity, there are many ways to keep costs low. Camping options abound, and the local community is incredibly welcoming, often organizing events that bring climbers together.

When I climbed at the Chief, I felt a rush like no other. The views from the top were absolutely stunning, and I often found myself stopping to take it all in. There’s also plenty of hiking and exploring to do in the area, so even on rest days, there’s no shortage of adventure. Plus, the fresh air and beautiful surroundings make every moment feel worthwhile.

Fontainebleau, France

Fontainebleau is a unique destination, especially for bouldering enthusiasts. This forest, located just outside of Paris, is famous for its sandstone boulders and beautiful landscapes. I found the atmosphere here to be quite different from typical climbing areas, as it’s more focused on bouldering than traditional routes. The accessibility to public transport from Paris made it easy and affordable to reach.

The best part? The climbing is free! There are no permits or fees required to access the boulders, which means you can spend all day testing your skills without worrying about costs. I remember spending hours exploring the various bouldering problems, ranging from beginner to advanced levels. The community is friendly and supportive, making it a great place to connect with other climbers and share experiences.

Vancouver Island, Canada

Vancouver Island might not be the first place that comes to mind when thinking of budget climbing, but it has some fantastic spots that won’t drain your wallet. With its stunning coastal views and diverse climbing options, this island is a hidden gem for those willing to explore. The local climbing areas, like Mount Arrowsmith and the popular bouldering spots near Nanaimo, offer an incredible variety of routes.

What I loved about Vancouver Island was the mix of climbing and outdoor activities. Whether it was hiking through the lush forests or relaxing on the beach after a day of climbing, there was always something to do. Camping on the island is quite affordable, and I discovered many sites with breathtaking views of the ocean. Overall, it was a memorable trip that allowed me to enjoy both climbing and the natural beauty of the area.

Things to Consider When Choosing a Climbing Spot

Travel Costs and Accessibility

When planning a budget rock climbing trip, travel costs are often a major consideration. I’ve learned to weigh the costs of getting to a destination against the experiences it offers. For instance, driving to a nearby climbing spot can save money compared to flying across the country. I remember one trip where my friends and I loaded up the car and headed to a local crag instead of splurging on airfare. We enjoyed the journey as much as the climbing itself, stopping along the way to explore hidden gems we hadn’t expected to find.

Accessibility is another factor I take into account. Some destinations are easy to reach with public transport, while others might require a car rental or even some hiking to get to the climbing area. I often check public transport options and the distance from the nearest town or city to the climbing spots. This can make a big difference in our overall budget. For example, I discovered that some parks have shuttle services that help climbers reach remote areas without the hassle of driving.

Local Climbing Regulations and Permits

Before heading out, I always check the local climbing regulations and whether a permit is required. Some areas, like national parks, might have specific rules that could affect our climbing plans. I once found myself in a situation where I assumed I could climb anywhere in a national park, only to learn that certain routes were off-limits without a permit. This taught me the importance of being informed beforehand.

In my experience, many budget-friendly climbing spots don’t require permits, allowing for a more spontaneous adventure. However, it’s always best to do a little research to avoid any surprises. I often visit climbing forums or websites that provide up-to-date information about regulations and any seasonal closures that might be in effect.

Weather Conditions and Best Seasons

Weather can greatly impact our climbing experience, and I’ve learned to plan my trips around the best seasons for each destination. For instance, climbing in places like Joshua Tree can be difficult during the scorching summer months, while spring and fall offer beautiful weather and fewer crowds. I remember standing atop a route during a crisp autumn day, surrounded by vibrant foliage, feeling grateful for the perfect conditions.

Before I head out, I usually check the weather forecast and consider how it might affect our climbing plans. I’ve also come to appreciate the beauty of climbing in different seasons, as each brings its own charm. However, understanding the risks associated with certain weather conditions, like rain or extreme heat, is crucial to ensuring a safe and enjoyable experience.

Safety and Risk Management

Safety should always be a top priority when climbing, especially in budget-friendly destinations where resources may be limited. I’ve experienced firsthand the importance of being prepared. For every trip, I make sure to pack not only my climbing gear but also a basic first aid kit and some emergency supplies. It’s surprising how many climbers overlook this aspect, but I find that being prepared gives me peace of mind.

Additionally, I often review safety protocols for the specific climbing area I’m visiting. Understanding the risks associated with different routes and being aware of the terrain can help us avoid accidents. I encourage climbers to communicate clearly about their experience levels and comfort zones before tackling a route together. This way, we can ensure that everyone feels safe and supported during our climbs.

Lastly, I make it a point to familiarize myself with the nearest emergency services. Knowing where to find help in case of an accident is something I take seriously. It’s not just about being cautious; it’s about enjoying our climbing adventure with the confidence that we’re prepared for anything that might come our way.

Budget-Friendly Tips for Rock Climbers

Choosing Affordable Gear

When it comes to rock climbing, gear can be one of the biggest expenses. I’ve learned that choosing affordable gear doesn’t mean compromising on safety or quality. One of my favorite strategies is to look for sales at local climbing shops or online retailers. I remember the thrill of finding a great deal on a harness that was both safe and stylish—talk about a win-win!

Another option is to explore second-hand gear. Many climbing shops have consignment sections where you can find gently used equipment. I stumbled upon a pair of climbing shoes that were practically new, and the price was a fraction of what I would have paid for new ones. Just make sure to check the gear thoroughly, as safety should always be our top priority.

Additionally, I think it’s wise to invest in a few versatile pieces that can be used across different types of climbing. For example, a good quality climbing rope is essential, but I’ve also found that a reliable pair of approach shoes can serve multiple purposes, from hiking to climbing. This way, I’m not only saving money but also minimizing the amount of gear I need to carry.

Finding Free or Low-Cost Campsites

Camping is a great way to keep costs down during climbing trips, and I’ve found some fantastic spots that won’t break the bank. I often use apps like Campendium or iOverlander, which help identify free or low-cost campsites near climbing areas. I remember discovering an off-the-beaten-path campsite that was not only free but also offered stunning views. Waking up to a sunrise over the mountains made that trip unforgettable.

National forests and BLM land are also excellent places to find dispersed camping options. Often, you can camp for free or for a small fee, and these sites can be more secluded than traditional campgrounds. Just be sure to follow Leave No Trace principles, as the beauty of these places depends on all of us doing our part to protect them.

Meal Planning on a Budget

Food can add up quickly when we’re on the road, but I’ve found that planning meals ahead of time can make a significant difference. Before I head out, I usually create a meal plan that includes easy-to-make meals with minimal ingredients. Pasta dishes are often a staple in my climbing meal toolkit—quick to prepare and satisfying after a long day on the rock.

Snacks are also crucial. I like to pack energy bars, nuts, and dried fruits that are easy to carry and provide the necessary fuel for climbing. I remember one trip where we cooked a big meal together at the campsite, sharing food and stories. Not only did it save us money, but it also brought everyone closer together. Plus, there’s something special about enjoying a meal outdoors after a day of climbing.

Joining Climbing Communities for Discounts

Being part of a climbing community can provide amazing opportunities for savings. Many local climbing gyms or outdoor shops offer membership discounts or group deals for gear rental and classes. I joined a local climbing club, which not only connected me with awesome climbing partners but also provided access to discounted gear and trips.

Online communities, such as Facebook groups or forums dedicated to climbing, can also be a valuable resource. I’ve seen posts from fellow climbers sharing deals on gear or organizing group outings, which can help cut costs. Plus, it’s a great way to meet other climbers who share the same passion.

Rock Climbing Resources and Guides

Online Forums and Community Groups

One of the greatest assets I’ve discovered in my climbing journey is the wealth of information available through online forums and community groups. Websites like Mountain Project or Reddit’s climbing community are treasure troves of advice, route information, and personal experiences. I’ve often found myself scrolling through these platforms, learning about new climbing routes or tips from seasoned climbers that I wouldn’t have thought to ask about.

Guidebooks and Climbing Apps

Having the right resources can make all the difference when climbing in a new area. I usually carry a guidebook specific to the region I’m exploring, which provides valuable insights into climbing routes, difficulty levels, and safety considerations. I’ve also found several climbing apps incredibly helpful—many of them offer offline maps and route descriptions, which are essential when climbing in areas with limited cell service.

Local Climbing Schools and Workshops

Participating in workshops or classes hosted by local climbing schools can be a fantastic way to improve skills without spending a lot. I took a few clinics focused on technique and safety, and I found them to be worth every penny. Not only did I enhance my climbing abilities, but I also connected with other climbers in the area, which enriched my experience even more.

Safety and Preparedness for Budget Climbers

Essential Safety Gear to Bring

No matter the budget, safety should be non-negotiable. I’ve learned to pack essential safety gear, including a helmet, first aid kit, and proper climbing hardware. It’s surprising how many climbers overlook these basics. I remember a trip where a buddy forgot his helmet, and while we were lucky nothing happened, it served as a crucial reminder to always double-check our gear.

Understanding Climbing Grades and Routes

Before tackling any route, it’s vital to understand climbing grades and what they mean. I used to jump into climbs above my skill level, thinking I could handle it, but I quickly learned that knowing my limits was key to staying safe. I recommend reviewing guidebooks or apps that provide detailed descriptions of routes, including difficulty ratings and any specific challenges.

Emergency Contacts and Local Services

Finally, having a list of emergency contacts and knowing the location of local services can save precious time in an emergency. I make it a habit to familiarize myself with the nearest hospital or rescue services when I arrive at a new climbing destination. I often store these contacts in my phone, just in case. Being prepared allows us to focus on climbing and enjoying the adventure without unnecessary worry.

Personal Stories: Budget Climbing Adventures

Interview with Budget Climbers

Recently, I had the pleasure of speaking with fellow climbers who have taken budget-friendly trips around the world. Their stories were inspiring and reminded me of how much we can explore without spending a fortune. One climber shared their experience of traveling through South America, climbing in places known for their affordability and stunning landscapes. It was fascinating to hear how they navigated their journey and made connections along the way.

Success Stories from Affordable Locations

In my own experience, I’ve had countless successful climbs at budget-friendly locations. I remember one particularly memorable trip to the New River Gorge, where not only did I conquer a challenging route, but I also formed lifelong friendships with fellow climbers. Those stories are what make climbing so special; it’s not merely about the physical challenge but the journey and the people we meet along the way.

Final Thoughts

Rock climbing on a budget can be an incredibly rewarding experience. Through my journeys, I’ve learned that with a little planning, creativity, and a sense of community, we can explore breathtaking locations without breaking the bank. Whether it’s finding affordable gear, connecting with fellow climbers, or discovering hidden gems, the world of budget climbing is full of possibilities. Remember, it’s not about how much we spend but the experiences we create and the memories we forge. So grab your gear, gather some friends, and let’s hit the road for our next climbing adventure!

Frequently Asked Questions

What defines budget-friendly rock climbing?

Budget-friendly rock climbing refers to locations that offer stunning views and challenging routes without expensive permits or entry fees. These spots are often accessible and may have affordable or free camping options, enhancing the overall experience while keeping costs low.

What are the benefits of choosing affordable climbing destinations?

Choosing budget climbing destinations allows climbers to discover unique spots that are less crowded, enhancing the adventure. It also provides opportunities to connect with a welcoming community, develop climbing skills in a relaxed environment, and combine climbing with other outdoor activities for a richer experience.

Can you name some affordable rock climbing destinations in the U.S.?

Some affordable rock climbing destinations in the U.S. include Red River Gorge in Kentucky, Joshua Tree National Park in California, Smith Rock State Park in Oregon, New River Gorge in West Virginia, Indian Creek in Utah, and Devil’s Lake State Park in Wisconsin.

What is El Chorro known for?

El Chorro, located in Spain, is known for its breathtaking scenery and incredible climbing opportunities. It’s easily accessible via a short train ride from Malaga and offers routes suitable for both beginners and experienced climbers.

How can I keep travel costs down when planning a climbing trip?

To keep travel costs down, consider driving to nearby climbing spots instead of flying, and check public transport options for accessibility. Weighing the costs of travel against the experiences offered at the destination can significantly impact the overall budget.

What should I consider regarding local climbing regulations?

Before heading out, it’s essential to check local climbing regulations and whether permits are required. Many budget-friendly spots do not require permits, but being informed can help avoid unexpected restrictions and ensure a smooth climbing experience.

What are some budget-friendly tips for rock climbers?

Some budget-friendly tips include choosing affordable gear through sales or second-hand options, finding free or low-cost campsites, planning meals ahead of time to save on food costs, and joining climbing communities for potential discounts on gear and outings.

What resources are available for climbers looking for information?

Climbers can access valuable information through online forums like Mountain Project or Reddit, guidebooks specific to climbing regions, and climbing apps that offer offline maps and route descriptions. Local climbing schools and workshops can also enhance skills at a reasonable cost.

How important is safety when climbing on a budget?

Safety is crucial when climbing, regardless of budget. Essential safety gear like helmets and first aid kits should always be packed, and climbers should familiarize themselves with climbing grades and local emergency services to ensure a safe and enjoyable experience.

What personal experiences can inspire budget climbers?

Personal experiences shared by fellow climbers can be inspiring. Stories of successful climbs at budget-friendly locations, like forming friendships at the New River Gorge or exploring affordable climbing spots around the world, highlight the rewarding nature of budget climbing adventures.

Essential Gear for Budget Rock Climbing Adventures Abroad

Rock climbing is an exhilarating way to explore the great outdoors while pushing your physical limits. If you’re planning a budget-friendly adventure abroad, having the right gear is essential for a safe and fun experience. You might also want to check out Top 10 Budget Destinations for Rock Climbing Enthusiasts for some great location ideas.

Essential Gear for Budget Rock Climbing Adventures Abroad

Understanding Rock Climbing Basics

Before we dive into the gear itself, it’s important to grasp the basics of rock climbing. I remember when I first started climbing; I had so many questions about the different types and what skills I needed. Let’s unravel these foundational aspects together.

Types of Rock Climbing

Rock climbing isn’t just one thing; it comes in various forms, each with its unique appeal. I’ve explored a few types, and here’s what I’ve learned:

  • Sport Climbing: This style involves climbing routes that are equipped with fixed anchors. I find it thrilling because it allows for challenging climbs without the need for extensive gear.
  • Traditional (Trad) Climbing: This is where you place your own gear during the climb. It requires a bit more skill and knowledge about protection placement, but I love the feeling of being self-reliant on the rock.
  • Bouldering: This is climbing at lower heights without ropes. It’s great for practicing technique and strength, and I often enjoy bouldering sessions in local gyms or outdoor boulders.
  • Top Rope Climbing: In this style, a rope is anchored at the top of the route. It’s excellent for beginners since it offers a safety net while you build confidence.

Understanding these types helps in choosing the gear you’ll need for your trip. Each type demands different skills and equipment, and knowing what you want to do can save you time and money.

Essential Skills for Climbers

As I progressed in my climbing journey, I realized that mastering some essential skills is just as important as having the right gear. Here are a few that I believe every climber should focus on:

  • Technique: Learning proper footwork and body positioning can drastically improve your climbing efficiency. I took the time to practice foot placements, and it made a world of difference.
  • Safety Awareness: Understanding how to use your gear correctly is crucial. I’ve seen new climbers struggle simply because they didn’t know how to tie knots or properly use their harnesses.
  • Route Reading: Being able to read a route before you climb it can save you energy and frustration. I often take a moment to visualize my route, planning out the moves before I start.
  • Communication: Clear communication with your climbing partner is vital, especially when belaying. I learned to establish a system of signals early on, which has kept us safe on more than one occasion.

These skills not only enhance safety but also boost your confidence as you tackle more challenging climbs. They’re well worth the investment of your time and effort.

Budgeting for Your Climbing Adventure

Now that we have a grasp on the basics, let’s talk about budgeting. I’ve always found that planning ahead makes a huge difference when it comes to expenses. Here’s what I’ve learned about estimating costs and where to find affordable climbing options.

Estimating Costs for Gear and Travel

Budgeting can feel overwhelming, but breaking it down into categories has helped me tremendously. I typically consider the following:

  • Gear Costs: Depending on what you already have, you might need to buy or rent gear. I recommend looking into second-hand options or borrowing from friends, which is what I did when starting out.
  • Travel Expenses: This includes flights, transportation, and accommodation. I’ve found that booking in advance and being flexible with dates can lead to significant savings.
  • Food and Activities: Don’t forget to budget for meals and any guided tours or entry fees, especially if you’re climbing in national parks. I often cook my own meals when camping to save money. You can find more tips on this in the article Budget-Friendly Mountain Biking Trails You Must Try!.

By estimating these costs upfront, I’ve been able to plan more effectively and avoid any surprises along the way.

Finding Affordable Climbing Destinations

One of the most exciting parts of planning a climbing adventure is finding the right destination. I’ve discovered some amazing places that won’t break the bank. Here are a few tips for finding budget-friendly climbing spots:

  • Research Local Climbing Areas: Websites and forums dedicated to climbing often have sections for budget destinations. I’ve stumbled upon some incredible hidden gems through these resources.
  • Consider Off-Peak Seasons: Traveling during the shoulder season can lead to lower prices on everything from flights to accommodations. I’ve enjoyed less crowded crags and better deals by going off-peak.
  • Explore Lesser-Known Locations: While popular destinations are great, don’t overlook smaller, less-known climbing spots. They often offer fantastic climbing experiences at a fraction of the cost. My best experiences have come from these hidden treasures. If you’re interested in more budget options, check out Explore Stunning Mountain Biking Trails on a Budget.

Finding affordable destinations is all about doing a bit of research and being open to new experiences. Every climber has their favorite spots, and discovering yours can be half the fun!

Must-Have Climbing Gear

Now that we have a solid understanding of budgeting and how to plan our climbing adventures, let’s dive into the essential gear we’ll need to make those climbs safe and enjoyable. I still remember the excitement (and anxiety) I felt as I gathered my first set of climbing gear. Knowing what to invest in can make a big difference, so here’s my take on the must-have climbing gear.

Climbing Shoes

Your climbing shoes are arguably the most important piece of gear you’ll own. I made the mistake of using old sneakers during my first climb, and let me tell you, that was a painful experience! Climbing shoes provide the support and grip you need to tackle those tricky holds. When choosing shoes, I recommend looking for a snug fit without being painfully tight. I’ve found that trying on several pairs to see how they feel is essential. Some brands even offer rentals, so you can find the right fit without a hefty investment upfront.

Harnesses

A good harness is another crucial piece of equipment. It’s what keeps you safe while you’re scaling those heights. I remember feeling a bit intimidated when I first had to put one on, but it became second nature quickly. Look for a harness that feels comfortable and fits well, with adjustable leg loops for the best experience. I’ve tried both full-body and sit harnesses, and for climbing, a sit harness is usually the way to go. Be sure to check the weight limits and read reviews to find one that suits your climbing style.

Climbing Ropes

When it comes to climbing ropes, knowing the difference between dynamic and static ropes is vital. Dynamic ropes stretch to absorb the impact of a fall, which is what you want for climbing. I’ve learned the hard way that using a static rope for climbing is a definite no-no. When selecting a rope, I recommend considering the length and diameter based on your climbing style. A good rule of thumb is to go for a rope that’s around 60 to 70 meters long, which is versatile for most routes.

Carabiners and Quickdraws

Carabiners are the unsung heroes of climbing gear. They connect everything, from your harness to your rope to your gear. I often carry a mix of locking and non-locking carabiners, as each has its specific use. Quickdraws, which consist of two carabiners connected by a sling, are essential for sport climbing. I remember my first time using them — it felt like I was learning a whole new language! Always ensure you have a few extra in your bag, as you never know when you might need them.

Climbing Helmets

Safety should always come first, and wearing a climbing helmet is a no-brainer for me. I’ve had a few close calls with falling rocks, and I can’t stress enough how important it is to protect your head. A helmet should fit securely and comfortably, and it’s essential to check for certifications to ensure it meets safety standards. Today, I never hit the crag without mine; it’s just part of my climbing routine.

Chalk and Chalk Bags

Chalk is a game-changer when it comes to grip. I can’t remember how many times I slipped off a hold before I started using chalk. It absorbs moisture and helps keep your grip secure, especially on warm days. I recommend getting a chalk bag that’s easy to access while climbing. I’ve tried various styles, and I personally prefer one with a drawstring closure to keep the chalk from spilling everywhere when I’m not using it.

Climbing Crash Pads

If you’re getting into bouldering, a crash pad is a must-have. It provides cushioning for falls, which is a comforting thought when you’re attempting challenging problems. I remember my first bouldering session; I was so nervous about falling! Investing in a good crash pad has made me feel much safer as I push my limits. Look for one that’s easy to carry but also has good coverage to protect against falls from various angles.

With the right gear, you can tackle climbing with confidence, knowing you have the tools to keep you safe and comfortable. I’ve learned the hard way that having quality equipment makes a world of difference, so invest in what you can, and always keep safety as your top priority.

Clothing and Accessories for Climbers

Aside from gear, the right clothing and accessories can enhance your climbing experience significantly. I’ve had my share of uncomfortable climbing days due to poor clothing choices, so let’s explore what to wear for those climbs.

Appropriate Clothing for Different Climates

Choosing the right clothing for the climate can make or break your climbing trip. I’ve learned the hard way that wearing the wrong materials can lead to discomfort, whether it’s too hot or too cold. For warm weather climbing, lightweight, breathable fabrics are your best bet. I usually opt for moisture-wicking shirts and shorts that allow for freedom of movement. When I first climbed in the summer, I wore heavy cotton, and I ended up feeling sticky and restricted by the end of the day.

In cooler conditions, layering is key. I like to start with a moisture-wicking base layer to keep sweat away from my skin. Then I add an insulating layer, like a fleece, that keeps me warm without adding too much bulk. Finally, I top it off with a windbreaker or soft shell jacket that protects me from the elements. I remember one chilly day when I neglected to wear a proper jacket—it made the climb much less enjoyable!

Layering Techniques for Temperature Control

Speaking of layering, I cannot stress enough how important it is to understand how to layer effectively. I’ve noticed that managing my body temperature while climbing can be tricky, especially as conditions change. The key is to dress in layers that can be easily added or removed based on how you feel during your climb. I usually stick to three layers: a base layer, an insulating layer, and an outer shell. This combination has served me well on various climbs.

For the base layer, I prefer synthetic or merino wool materials for their moisture-wicking properties. They keep me dry and comfortable. As for the insulating layer, I often choose fleece or down jackets, depending on the temperature. And finally, the outer shell should be windproof and, ideally, water-resistant, especially if you’re climbing in a place known for sudden weather changes. I had a day of climbing unexpectedly interrupted by rain when I didn’t check the forecast, and it was a learning moment to always have the right outer layer handy!

Essential Accessories (Gloves, Sunglasses, etc.)

Accessories can significantly impact your comfort and performance while climbing. I’ve found that a good pair of climbing gloves can provide much-needed grip and protect my hands from rough rock surfaces. When I first started climbing, I didn’t think gloves were necessary, but after a few climbs, I quickly changed my mind. They help prevent blisters and keep my hands warm in colder weather.

Sunglasses are another must-have for me. I remember a bright day when I forgot mine, and I ended up squinting the entire time. A good pair of polarized sunglasses cuts down on glare, which is incredibly helpful when you’re scaling sunlit rock faces. I also recommend a sturdy hat to shield your face from the sun, especially if you’ll be climbing for extended periods.

Finally, a good climbing pack is essential. I learned the hard way that having a pack that fits well and can hold all my gear without being cumbersome makes a huge difference. Look for one with a comfortable harness system and enough compartments to keep your items organized, especially when you’re out on longer climbs where you’ll need to access food, water, or extra gear quickly.

Rental vs. Buying Gear

As I explored different climbing destinations, I often faced the question of whether to rent gear or buy my own. Each option has its pros and cons, and in my experience, the decision largely depends on your climbing frequency and budget.

Pros and Cons of Renting Climbing Gear

Renting climbing gear can be a great option, especially when traveling. I remember my first trip abroad; I didn’t want to lug my entire gear set with me. Renting allowed me to save space in my luggage and gave me the flexibility to try different types of gear without the commitment. Most climbing gyms and outdoor shops offer a decent selection of rental equipment, and it’s often well-maintained.

However, there are downsides to consider. Rental gear might not always fit perfectly or be in the best condition. I’ve had experiences where the shoes didn’t quite fit right, which impacted my climbing performance. Plus, if you’re planning a lot of trips, the cost of renting over time can add up quickly.

Where to Rent Climbing Gear Abroad

When it comes to finding rental options abroad, I’ve had success searching online for local climbing shops or gyms. Websites like Mountain Project or the climbing section of Trip Advisor often have recommendations. Additionally, I’ve found that asking fellow climbers once I arrive at my destination can lead to great local tips. They often know the best places to rent gear at reasonable prices.

When to Invest in Personal Gear

After a few climbing trips, I decided it was time to invest in my own gear. If you find yourself climbing frequently or developing a passion for the sport, having your own equipment can enhance your experience. I feel a sense of comfort and reliability with my gear because I know its history and quality. Plus, personal gear is often tailored to fit me perfectly, which is crucial for performance.

Investing in key pieces like climbing shoes, a harness, and a helmet can be a game changer. Once I had my own gear, I felt more confident and prepared for any climbing challenges. If you’re considering buying gear, I recommend trying out different brands and styles before making a purchase. It’s worth the time to ensure you’re getting what works best for you.

In summary, whether you choose to rent or buy will depend on your climbing habits and budget. Each option has its benefits, and I’ve learned to weigh those against my own climbing needs.

Frequently Asked Questions

What are the different types of rock climbing?

The different types of rock climbing include Sport Climbing, Traditional (Trad) Climbing, Bouldering, and Top Rope Climbing. Each type has its unique appeal and requires different skills and equipment.

What are some essential skills every climber should focus on?

Essential skills for climbers include technique, safety awareness, route reading, and communication. Mastering these skills enhances safety and boosts confidence during climbs.

How can I budget for my climbing adventure?

To budget effectively, consider gear costs, travel expenses, and food and activities. Breaking these down into categories can help you estimate costs and avoid surprises.

What should I look for in climbing shoes?

When choosing climbing shoes, look for a snug fit that provides support and grip. It’s essential to try on several pairs to find the best fit, and some brands offer rentals for a trial before buying.

Why is a climbing helmet important?

A climbing helmet is crucial for safety as it protects your head from falling rocks and impacts. It should fit securely and comfortably, and you should ensure it meets safety certifications.

What are the benefits of using chalk while climbing?

Chalk absorbs moisture and improves grip, especially on warm days. Using chalk can significantly enhance your climbing performance by preventing slips off holds.

Should I rent or buy climbing gear?

The choice to rent or buy climbing gear depends on your climbing frequency and budget. Renting can save space and allow you to try different gear, while buying offers reliability and a perfect fit.

What are some tips for finding affordable climbing destinations?

To find budget-friendly climbing spots, research local climbing areas, consider traveling during off-peak seasons, and explore lesser-known locations that offer great experiences at lower costs.

What layering techniques should I use for climbing in different climates?

When climbing in different climates, dress in layers: a moisture-wicking base layer, an insulating layer like fleece, and an outer shell for protection against elements. This allows for temperature control during climbs.

What accessories should I have for climbing?

Essential accessories for climbing include gloves for grip and hand protection, polarized sunglasses to reduce glare, a hat for sun protection, and a climbing pack to carry and organize your gear effectively.