Web Analytics

Recent Posts

Ultimate Guide to Affordable Mountain Biking Adventures

Ready to hit the trails without breaking the bank? Mountain biking can be an exhilarating adventure that fits any budget if you know where to look. Let’s dive into everything you need to make your mountain biking dreams a reality!

Ultimate Guide to Affordable Mountain Biking Adventures

Understanding Mountain Biking

What is Mountain Biking?

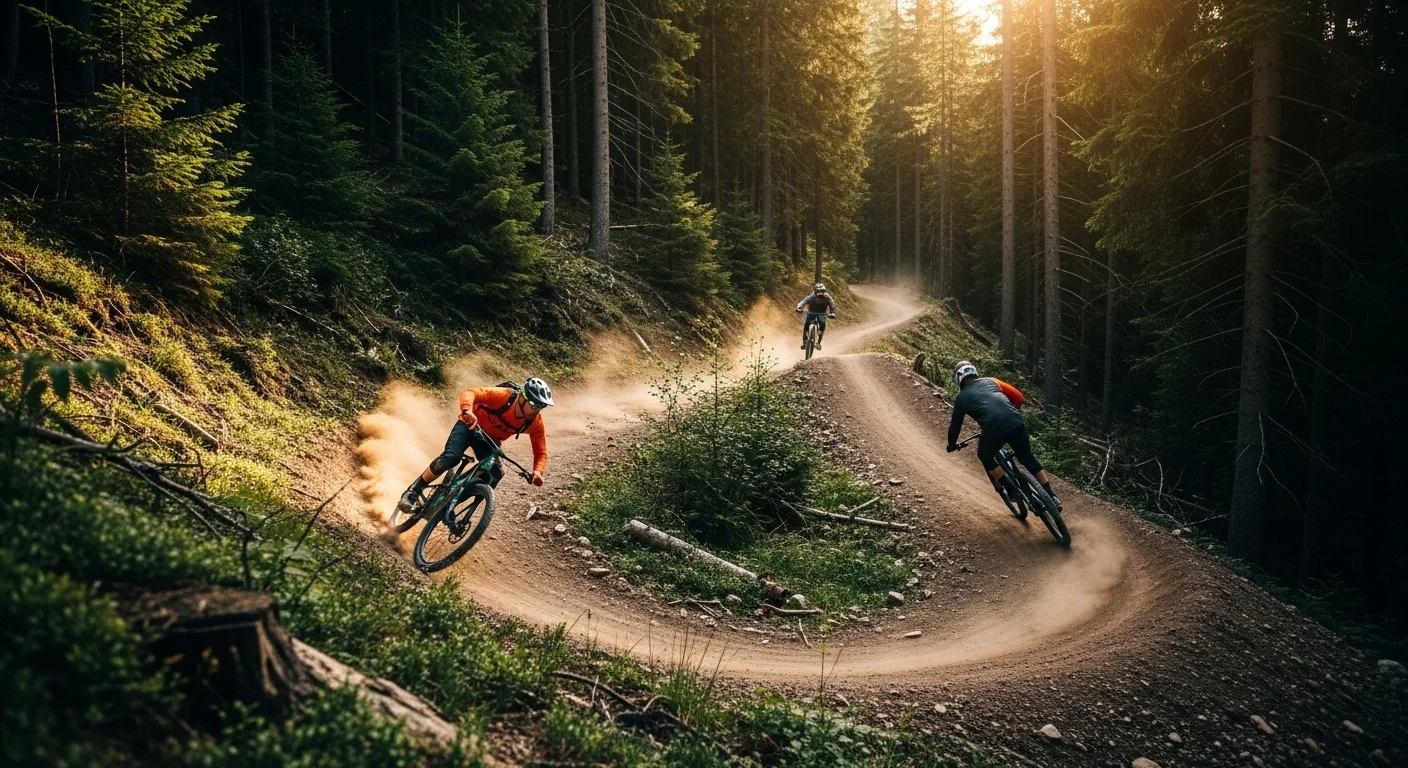
Mountain biking is more than just riding a bike on a dirt path; it’s about embracing nature and seeking adventure. I remember the first time I hopped on a mountain bike, the thrill coursing through me as I navigated rocky terrains and steep descents. Unlike road cycling, mountain biking takes you off the beaten path and into the heart of nature, where every twist and turn presents a new challenge. It’s a sport that encourages exploration, fitness, and connection with the environment. For a deeper understanding, check out the Ultimate Guide to Affordable Mountain Biking Adventures.

Types of Mountain Biking

Mountain biking comes in various styles, each offering a unique experience. Here’s a quick rundown of the main types I’ve come to appreciate:

  • Cross-Country (XC): This style focuses on endurance and speed over varied terrain. XC biking is often my go-to for long rides that test my stamina.
  • Trail Riding: A blend of XC and downhill, trail riding is about enjoying the scenery while tackling moderate challenges. The balance makes it perfect for a casual weekend ride with friends.
  • All-Mountain/Enduro: This type emphasizes downhill riding but requires climbing too. I find it thrilling to race down steep trails, knowing that I have to earn my descent.
  • Downhill: If you love speed and adrenaline, downhill biking is for you. It’s all about descending steep and rugged trails at high speeds. I remember my first downhill ride; my heart raced, and the wind rushed past me as I flew down the mountain.
  • Dirt Jumping: For those who love air tricks, dirt jumping involves riding on specially made jumps. I’ve seen some incredible stunts, and while I’m not quite there yet, I admire those who can catch some serious air!

Essential Gear for Mountain Biking

Having the right gear can make your mountain biking experience enjoyable and safe. Here’s what I consider essential:

  • Mountain Bike: It all starts with the bike. Depending on the terrain, I prefer a hardtail for cross-country rides or a full-suspension bike for more rugged trails.
  • Helmet: Safety first! I never ride without my helmet. It’s a must for protecting your head in case of falls.
  • Gloves: They provide grip and protect my hands from blisters, especially on long rides.
  • Clothing: Breathable, moisture-wicking clothing is ideal. I always opt for padded shorts for comfort on longer rides.
  • Hydration Pack: Staying hydrated is crucial. I like to have water easily accessible without stopping too much.
  • Repair Kit: Flats happen, and I learned the hard way to always have a basic repair kit on hand. It includes a pump, tire levers, and patches.

Investing in quality gear might cost a bit upfront, but trust me, it pays off in comfort and safety. I’ve made the mistake of skimping on gear before, and it’s not an experience I’d like to repeat! As I gear up for my next adventure, I remind myself that the right equipment lets me focus on the ride rather than worrying about my safety.

Choosing the Right Destination

Top Budget-Friendly Mountain Biking Locations

As I’ve explored various trails, I’m always on the lookout for budget-friendly destinations that offer thrilling rides without emptying my wallet. Here are some favorites:

Appalachian Trails

The Appalachian Mountains offer a mix of stunning landscapes and diverse trails. I love the accessibility of this region, and many trails are free to use. Whether you’re a beginner or a seasoned rider, you’ll find something that suits your skill level.

Moab, Utah

Moab is iconic for mountain biking, with countless trails and breathtaking views. While some areas can be pricey, I discovered that there are plenty of free trails, especially if you venture a bit off the beaten path. For more options, you can Explore the Best Mountain Biking Trails on a Budget.

Whistler, Canada

Whistler isn’t just for winter sports; it’s a mountain biking paradise in the summer! Though it can be a bit more expensive, many trails are free, and the scenery is absolutely worth it. I’ve made lasting memories there, zipping through the woods with friends.

North Shore, British Columbia

This area is famous for its technical trails and breathtaking views. While some parts can be challenging, I’ve found that many trails cater to varying skill levels. Plus, the community vibe is welcoming and encourages newcomers.

Factors to Consider When Choosing a Destination

When planning a mountain biking trip, a few factors play a crucial role in ensuring a great experience:

Trail Difficulty Levels

Knowing your skill level and matching it to the trails is essential. I’ve learned to check the ratings before heading out to avoid biting off more than I can chew!

Accessibility and Travel Costs

Some trails might be stunning, but if they’re hard to get to, it can become a hassle. I prefer locations that are easy to access, as it saves time and money.

Local Amenities and Services

Having bike shops, restaurants, and places to stay nearby can make your trip smoother. I always check what’s available in the area before booking my adventure.

With these insights, I hope you’re feeling inspired to embark on your own mountain biking adventure! Understanding what mountain biking is all about, the types of biking, essential gear to have, and how to choose the right destination can transform your experience from ordinary to extraordinary. Ready for the next steps? Let’s dive deeper into planning your adventure!

Planning Your Adventure

Best Times of Year for Mountain Biking

One of the things I’ve learned about mountain biking is that timing can make a huge difference in your experience. Different seasons offer unique challenges and scenery. For me, the best time to hit the trails really depends on where I am and what I’m looking for.

  • Spring: This is when I often feel the most excited to get back on my bike. The weather is mild, and the trails are often less crowded. I love seeing nature come alive with blooming flowers and lush greenery. Just be prepared for some muddy trails after the winter thaw!
  • Summer: Summer can be great for long rides, especially in cooler regions. However, I’ve found that some trails can get really busy. Early mornings or late afternoons are the best times to avoid crowds and enjoy the warm sunlight. Just make sure to stay hydrated!
  • Fall: Fall is truly magical for mountain biking. The changing colors of the leaves create stunning backdrops. I personally enjoy riding during this season because the trails are usually drier and more manageable. Plus, the cooler temperatures make for a comfortable ride.
  • Winter: While I don’t go mountain biking in the snow, some riders love fat biking on snowy trails. If you’re adventurous, that could be a fun way to enjoy the season, but it’s definitely a different experience than summer riding.

Budgeting for Your Trip

Budgeting is key to a successful mountain biking adventure without breaking the bank. I’ve learned to plan ahead and allocate funds for different expenses to avoid any surprises.

Travel Costs

Travel costs can vary greatly depending on how far you’re going. I usually compare different transportation options like driving versus flying. If I’m going somewhere local, I often opt for a road trip, which can be a fun way to explore along the way. For longer trips, I look for flight deals and rent a car once I arrive. I always check for local bike transport options as well, which can save some hassle.

Lodging Options

For accommodations, I’ve found that camping can be a fantastic, budget-friendly choice. There’s nothing quite like waking up in nature! If camping isn’t your thing, consider looking for affordable lodges or hostels nearby. I’ve also used rental services like Airbnb to find cozy places that fit my budget. Just remember to book early, especially during peak biking seasons.

Food and Supplies

Food can add up quickly, so I usually pack snacks and simple meals. I love preparing a hearty breakfast before hitting the trails. Plus, having energy bars and fruits on hand keeps my energy up during rides. When I do eat out, I try to find local diners or food trucks that offer delicious, affordable meals. I’ve discovered some hidden gems this way!

Finding Affordable Rentals and Tours

If you don’t own a bike or are traveling far from home, renting is a great option. I always check local shops or bike rental services at my destination. Sometimes, I’ve found incredible deals on multi-day rentals. If you’re part of a biking community or club, ask for recommendations! They often know the best places to go for quality bikes at reasonable prices.

Another option is to look into guided tours, especially if you’re new to an area. While tours can be pricier, they often include bike rentals and provide local knowledge. I’ve taken tours that introduced me to trails I would have never found on my own. Plus, it’s a great way to meet fellow biking enthusiasts!

Trail and Route Recommendations

Beginner-Friendly Trails

If you’re just starting out, finding the right trail can make all the difference. Some trails are specifically designed for beginners, offering smooth rides and gentle slopes. I remember my first experience on a beginner trail; it was a confidence booster! I recommend checking out local parks or nature reserves, which often have well-marked beginner routes.

Intermediate Trail Recommendations

Once you’re comfortable, you might want to step up your game. Intermediate trails typically feature more challenging features like roots, rocks, and climbs. I’ve enjoyed tackling these types of trails because they push my skills and keep things exciting. Always check online reviews or local biking forums to find trails that suit your growing abilities!

Advanced Trails for Experienced Bikers

For those who crave a challenge, advanced trails can really test your skills. These routes often include steep descents, technical sections, and rugged terrain. I’ve had some exhilarating rides on these trails, but they require experience and confidence. Always ride within your limits and practice on less challenging trails before attempting these!

Safety Considerations for Mountain Biking

Essential Safety Gear

When it comes to mountain biking, safety is non-negotiable. I’ve had my share of spills, and each time, I’ve learned the importance of being well-prepared. The right safety gear can significantly reduce the risk of injury and enhance your overall riding experience. Here are the essentials I always make sure to have:

  • Helmet: This is the first and most important piece of gear. I can’t stress enough how crucial it is to wear a properly fitting helmet. It saved me from a nasty head injury during a fall, and I’m grateful every time I put it on.
  • Gloves: I like wearing gloves not only for grip but also for protection against scrapes and blisters. A good pair of padded gloves makes a world of difference, especially during long rides.
  • Protective Pads: Depending on the type of biking I’m doing, I might wear knee and elbow pads. They add a layer of safety, particularly on technical or downhill trails where falls can happen more frequently.
  • Eye Protection: Sunglasses or goggles are essential for protecting my eyes from debris, sun, and other environmental factors. I’ve had moments where I’ve been grateful for this extra layer of protection.
  • Proper Footwear: I prefer shoes designed for mountain biking, which provide better traction and support. They help me feel more connected to the bike, which is key for control.

Understanding Trail Etiquette

Mountain biking isn’t just about the ride; it’s also about sharing the trails with fellow bikers and hikers. I’ve learned that understanding trail etiquette can help everyone enjoy the experience more. Here are a few guidelines I try to follow:

  • Yield Appropriately: When I’m on a bike, I always yield to pedestrians and those on horseback. It’s important to respect others on the trail.
  • Stay on Designated Trails: To protect the environment, I stick to established trails. This helps prevent erosion and preserves the natural beauty of the area.
  • Announce My Presence: If I’m approaching other riders or hikers, I make sure to announce myself. A friendly “on your left” or “hello” goes a long way in maintaining safety and courtesy.
  • Be Mindful of Speed: I try to be aware of my speed, especially in crowded areas. Riding at a safe speed helps prevent accidents and keeps the experience enjoyable for everyone.
  • Pack Out What You Pack In: I always carry out any trash I bring with me, plus anything I might find along the way. Keeping the trails clean is a responsibility we all share.

First Aid Tips and Emergency Preparedness

No one likes to think about accidents, but being prepared can make all the difference. I’ve learned to carry a basic first aid kit on every ride, and I recommend everyone do the same. Here are some essentials to include:

  • Adhesive Bandages: Great for small cuts and scrapes. I always keep a few in my kit.
  • Antiseptic Wipes: These help clean wounds and prevent infections, which is especially important when I’m out in nature.
  • Gauze and Medical Tape: For larger injuries, having gauze can help control bleeding. I’ve found it invaluable in more serious situations.
  • Pain Relievers: I like to keep some over-the-counter pain medication on hand just in case I feel sore after a long ride.
  • Emergency Contact Information: I always write down important contacts, so if something happens, others can easily reach my loved ones or emergency services.

In addition to carrying gear, I’ve also learned to be aware of my surroundings. Before heading out, I take a moment to familiarize myself with the area and let someone know my route. Having a charged phone is essential too, as it can help in emergencies.

Community and Events

Local Mountain Biking Clubs and Groups

One of the best ways to enhance your mountain biking experience is by connecting with others who share your passion. Joining a local mountain biking club can introduce you to new trails, tips, and friends. I’ve discovered some of my favorite spots through group rides organized by clubs in my area. They often host events and workshops that cater to all skill levels, which is great for learning and improving.

Mountain Biking Events and Competitions

If you’re looking to elevate your biking experience, participating in events or competitions can be a thrilling way to do it. I’ve entered a few friendly races, and while the competition can be intense, the camaraderie among riders is what truly stands out. These events often have categories for different skill levels, so everyone can find their place. Plus, they’re an excellent way to meet fellow biking enthusiasts and share experiences.

Online Resources and Forums for Bikers

In today’s digital age, we have a wealth of information at our fingertips. Online forums and social media groups dedicated to mountain biking are fantastic resources. I often visit these platforms to ask questions, share my experiences, and get tips from seasoned riders. Websites like Reddit and specialized biking forums have communities that are more than willing to help newbies and veterans alike. Whether you’re looking for trail recommendations, gear advice, or just someone to share a ride with, these online spaces can be incredibly helpful.

Frequently Asked Questions

What is mountain biking?

Mountain biking is a sport that goes beyond riding a bike on dirt paths; it involves embracing nature and seeking adventure. It encourages exploration, fitness, and connection with the environment.

What are the main types of mountain biking?

The main types of mountain biking include Cross-Country (XC), Trail Riding, All-Mountain/Enduro, Downhill, and Dirt Jumping, each offering unique experiences and challenges.

What essential gear do I need for mountain biking?

Essential gear for mountain biking includes a mountain bike, helmet, gloves, breathable clothing, hydration pack, and a repair kit. This gear enhances safety and comfort during rides.

What are some budget-friendly mountain biking locations?

Some budget-friendly mountain biking locations include Appalachian Trails, Moab in Utah, Whistler in Canada, and North Shore in British Columbia, which offer varied trails at minimal or no cost. For the ultimate thrill, check out the Top 10 Budget Mountain Biking Trails for Thrill Seekers.

What factors should I consider when choosing a mountain biking destination?

Factors to consider include trail difficulty levels, accessibility and travel costs, and local amenities and services, which can enhance your overall experience.

When is the best time of year for mountain biking?

The best times for mountain biking can vary, but spring offers mild weather and blooming nature, summer is great for long rides, fall provides stunning scenery, and winter can be suitable for fat biking in snowy conditions.

How can I budget for a mountain biking trip?

Budgeting for a mountain biking trip involves planning for travel costs, lodging options, and food and supplies. Consider tactics like camping for accommodations and packing snacks to save money.

What safety gear is essential for mountain biking?

Essential safety gear includes a helmet, gloves, protective pads, eye protection, and proper footwear, all of which help reduce the risk of injury and enhance the riding experience.

What are some important trail etiquette tips for mountain bikers?

Important trail etiquette tips include yielding to pedestrians, staying on designated trails, announcing your presence to others, being mindful of speed, and packing out what you pack in to keep trails clean.

How can I connect with other mountain bikers?

You can connect with other mountain bikers by joining local clubs, participating in events and competitions, and utilizing online resources and forums dedicated to mountain biking.

Explore the Best Mountain Biking Trails on a Budget

Mountain biking is an exhilarating way to experience the great outdoors, and it doesn’t have to drain your wallet. Let’s dive into how you can explore thrilling trails while keeping your budget intact.

Explore the Best Mountain Biking Trails on a Budget

Understanding Mountain Biking on a Budget

When I first discovered mountain biking, I was immediately hooked. The rush of riding through rugged trails and stunning landscapes was intoxicating. However, I quickly learned that the sport can get expensive, with costs piling up from gear, transport, and trail fees. But here’s the thing: you can enjoy mountain biking without spending a fortune. Understanding budget mountain biking is the first crucial step. It’s not just about saving money; it’s about making smart choices that don’t compromise your experience.

The Benefits of Budget Mountain Biking

One of the first things I noticed when I started biking more on a budget was the sense of freedom it offered. I didn’t feel pressured to keep up with the latest gear or ride at expensive resorts. Instead, I focused on finding local trails and enjoying the ride. Budget mountain biking encourages creativity. It pushed me to explore trails I might have otherwise overlooked, leading to some of my most memorable adventures.

Moreover, riding on a budget fosters a sense of community. I connected with other bikers who shared tips and locations for affordable trails. This camaraderie enriched my biking experience, reminding me that the joy of riding comes from the journey, not the price tag. Plus, choosing budget-friendly options often means discovering hidden gems in nature that are free or low-cost, which is an adventure in itself.

Essential Gear for Budget-Friendly Biking

When it comes to gear, I learned that it isn’t necessary to have top-of-the-line equipment to enjoy mountain biking. Start with the essentials and build your kit over time. Here’s what I found essential for budget-friendly biking:

  • Bike: First and foremost, you need a reliable bike. You don’t need a brand-new, high-end model. Look for used bikes or entry-level options. I found a great deal on a used mountain bike that worked perfectly for my needs.
  • Helmet: Safety is a priority. Investing in a good helmet is essential. I found that you can often pick up quality helmets at sporting goods stores or online at discounted prices.
  • Clothing: Comfort is key, so wear moisture-wicking clothes. You don’t have to buy expensive biking gear; many regular athletic clothes work just fine.
  • Hydration System: I quickly learned the importance of staying hydrated. A simple water bottle or a hydration pack can make a big difference during long rides.
  • Repair Kit: Having a basic repair kit with tire levers, a pump, and a multi-tool can save you from a day-ending breakdown.

Through my experience, I realized that many local bike shops offer rental services. If you’re just starting, consider renting gear before making a purchase. This way, you can test different bikes and equipment to see what you like best, without the upfront costs.

Another tip is to keep an eye out for sales, especially during off-seasons. I’ve found that many sporting goods stores run discounts during the winter, which can be a perfect time to snag essential gear at a lower price.

Ultimately, the true spirit of mountain biking lies in the adventure and exploration. Whether you’re cruising through a scenic path or navigating a rocky descent, your experience on the trails is what matters most. Budget mountain biking invites us to embrace the thrill without the financial stress, making it all the more rewarding.

Top Budget Mountain Biking Trails in the United States

When I think about the best experiences I’ve had mountain biking, I can’t help but recall the stunning trails scattered across the United States. Exploring these trails doesn’t have to cost a fortune, and many of them offer breathtaking views and thrilling rides without hefty fees. Here are some of my favorite budget-friendly mountain biking trails that I believe every biker should check out.

Best Trails in the West

Moab Mountain Biking Trails, Utah

Moab is a gem for mountain bikers. While it might seem like a hotspot for pricey outdoor adventures, there are plenty of trails that won’t break the bank. The Slickrock Trail is iconic, offering a challenging but rewarding ride over unique rock formations. I remember the first time I tackled this trail; the views of the surrounding desert and the thrill of navigating the terrain left me breathless. Plus, many local shops offer affordable rentals if you don’t have your own bike.

Mount Lowe Railway, California

Another great trail in the West is the Mount Lowe Railway. This trail combines history and beautiful scenery, making it a unique ride. The trail, which follows the remnants of an old railway, offers a moderate challenge with stunning views of the San Gabriel Mountains. I’ve spent hours here, soaking in the fresh air and enjoying the peace of nature. Best of all, it’s free to access, making it a perfect option for budget-conscious bikers.

Best Trails in the East

Kingdom Trails, Vermont

Vermont is known for its lush landscapes, and the Kingdom Trails are no exception. This network of trails offers something for everyone, from beginners to seasoned riders. While there is a small fee to access the trails, it’s totally worth it for the well-maintained paths and beautiful surroundings. I’ve met so many friendly riders here who shared their favorite routes, adding to the sense of community that I love about biking.

Tsali Recreation Area, North Carolina

If you find yourself in North Carolina, don’t miss the Tsali Recreation Area. The trails here wind through stunning forests and along the shores of Fontana Lake, providing a picturesque backdrop for your ride. The trails are free to access and have varying difficulty levels, so you can choose what suits your comfort level. I felt a sense of adventure every time I rode here, and the quiet of the forest made it a peaceful escape from daily life.

Best Trails in the Midwest

Levis Mound, Wisconsin

Levis Mound is a hidden treasure in Wisconsin. With a mix of challenging hills and scenic views, this trail system is perfect for those looking to push their limits while enjoying nature. I remember the first time I reached the top of one of the mounds—the view was absolutely worth the effort! Access is free, and the trails are well-maintained, making it easy for anyone to enjoy.

Brown County State Park, Indiana

Brown County State Park is another fantastic option in the Midwest. Known for its beautiful rolling hills and vibrant foliage, this park offers trails that are fun for all skill levels. The entrance fee is minimal, and I’ve spent entire days riding and exploring without feeling rushed. There’s just something about being surrounded by nature that makes every ride special.

Best Trails in the South

Lake Norman State Park, North Carolina

Lake Norman State Park is a fantastic spot for bikers in the South. The park features miles of trails that hug the shoreline, offering stunning views of the lake. The trails are well-marked and vary in difficulty, so there’s something for everyone. I have fond memories of biking here with friends, enjoying a picnic by the water after a great ride. It’s a perfect day out without a hefty price tag.

Red River Gorge, Kentucky

The Red River Gorge is an absolute must-visit for mountain bikers looking for adventure. The trails here are not only beautiful but also provide a thrilling ride as they wind through stunning rock formations and lush forests. Best of all, access to the trails is free, which means you can spend a whole day riding without worrying about costs. I often found myself stopping to take in the breathtaking views along the way, making every ride a memorable one.

No matter where you find yourself in the United States, there’s likely a beautiful trail nearby that won’t cost you an arm and a leg. I encourage you to explore these trails and discover the joy of mountain biking without breaking your budget. Each ride is an opportunity for adventure, and the memories created along the way are priceless.

Tips for Finding Affordable Trails

Finding budget-friendly trails can sometimes feel like searching for a needle in a haystack, but I’ve discovered several effective strategies that can make the process much easier. Over the years, I’ve developed a keen sense of where to look and how to tap into local resources to find those hidden gems. Here are some tips that have worked for me and might help you too.

Utilizing Local Resources and Community Groups

One of the best ways to uncover affordable trails is by engaging with local biking communities. I can’t emphasize enough how much I’ve learned from fellow bikers. Many towns and cities have local mountain biking clubs or online forums where riders share their favorite spots. Participating in these groups not only gives you access to insider knowledge but also connects you with passionate individuals who often organize rides and events. For instance, I joined a local Facebook group that regularly posts about upcoming trail clean-ups and group rides. Through this community, I discovered several trails that weren’t on my radar before.

Local bike shops can also be treasure troves of information. I often stop by my favorite shop to chat with the staff, who are usually avid bikers themselves. They can provide recommendations on trails that are free or have minimal fees, and they often know of special events where you can ride with experienced guides who know the area well.

Seasonal Discounts and Promotions

Another tactic I’ve found effective is to keep an eye out for seasonal discounts. Many parks and recreation areas offer reduced fees during certain times of the year, especially during the off-peak seasons. For example, I discovered that some state parks in my area have free entrance days during the spring and fall. I make it a point to check the websites of parks I want to visit, as they often post special promotions and events that can save you money.

Additionally, some organizations host events that combine biking with fundraising. Participating in these events can sometimes grant you access to otherwise fee-based trails for a donation that is often less than the standard entrance fee. It’s a win-win situation; I get to ride on amazing trails and support a good cause at the same time!

Free Trails and Parks Near You

While it’s easy to get caught up in the excitement of traveling to popular biking destinations, I’ve found that many incredible trails are located close to home. I encourage you to explore local parks and nature reserves where biking is permitted. Often, these spots are overlooked, and you may be surprised at the quality of the trails you can find nearby. I remember a weekend when I decided to explore a local state park that I had driven past countless times. I ended up discovering a network of trails that offered everything from gentle rides to thrilling descents, all without spending a dime.

There are also websites and apps dedicated to listing free trails and parks for bikers. I’ve used platforms like Trailforks and MTB Project to search for routes near me. These resources provide detailed information about the trails, including difficulty levels, conditions, and user reviews. It’s a convenient way to find trails that fit my skill level and interests—all while staying within my budget.

Planning Your Mountain Biking Trip on a Budget

Once you’ve found some great trails, the next step is planning your trip. This is where being budget-conscious can really pay off. I’ve learned that with a little preparation, it’s entirely possible to have an amazing mountain biking adventure without overspending.

How to Choose the Right Destination

Choosing the right destination is crucial for enjoying your ride without breaking the bank. I often consider factors like trail accessibility, potential entrance fees, and accommodation costs before making a decision. I look for areas with multiple trail systems nearby, as this allows for more riding options without needing to travel far between them. For example, I planned a trip to a region in Colorado that had several trail systems within a short drive of each other, maximizing my riding time while minimizing travel costs.

Additionally, I focus on destinations that are known for their bike-friendly amenities. Towns that are welcoming to cyclists often have affordable lodging options, bike shops, and restaurants that cater to bikers’ needs. This way, I can save money while ensuring I have everything I need for a successful trip.

Budgeting for Travel and Accommodations

When it comes to travel and accommodations, I recommend being strategic. If I’m driving, I often pack my own meals and snacks to avoid costly roadside stops. I’ve found that packing a cooler with sandwiches, fruits, and drinks not only saves money but also ensures I have healthy options on hand. For accommodations, I frequently look for camping options or budget-friendly motels. Camping not only saves money but also allows me to immerse myself in nature, adding to the overall experience of my biking trip.

Finding Affordable Bike Rentals and Services

If you don’t have your own bike, renting can be a great option. I suggest checking local bike shops for rental deals or looking for multi-day rental options, which often come at a discount. I’ve also found that some shops offer loyalty programs, allowing me to earn discounts for future rentals after a few visits. Before renting, I always read reviews and compare prices at different shops to ensure I’m getting the best deal possible.

In addition to rentals, I recommend looking for shops that provide maintenance services at reasonable prices. I learned the hard way that keeping my bike in good condition is essential for an enjoyable ride, so I now schedule regular tune-ups, especially before longer trips. This proactive approach saves me money in the long run and ensures that I can focus on having fun on the trails.

Safety and Maintenance on a Budget

Basic Bike Maintenance Tips

Keeping your bike in good shape doesn’t have to be expensive. I learned that a little maintenance goes a long way in ensuring a smoother ride and prolonging the life of my bike. One of the first things I started doing was regularly checking my tire pressure. I found that properly inflated tires not only make for a safer ride but also enhance performance. Most gas stations have air pumps, and I usually just keep a small pressure gauge in my toolkit for convenience.

I also discovered the importance of cleaning my bike after rides, especially if I’ve been on muddy trails. A simple wash with water and a soft brush can prevent dirt and grime from damaging the components. I remember the first time I neglected this; my gears started to slip, and I had to take my bike to a shop for repairs that could have been avoided with just a little care.

Another tip is to lubricate the chain regularly. I invest in a good quality bike chain lubricant, which isn’t too pricey and helps keep the bike running smoothly. I’ve found that doing these small maintenance tasks myself not only saves money but also gives me a better understanding of how my bike works.

Staying Safe While Riding

Safety is paramount when it comes to mountain biking, and I’ve learned a few key practices that help keep me secure on the trails. First and foremost, wearing my helmet is non-negotiable. I also make it a habit to wear bright, visible clothing, especially on busy trails. It’s amazing how much more aware I feel when others can see me clearly.

Additionally, I think it’s vital to always inform someone of my riding plans. If I’m heading out solo, I’ll text a friend or family member with details about where I’m going and when I expect to return. This small step adds a layer of safety that can be incredibly reassuring.

Finally, I stay aware of my surroundings while riding. I always keep an eye out for other bikers, hikers, and any potential hazards on the trail. Learning to ride defensively has helped me avoid accidents and enjoy my rides even more. There’s something freeing about the trails, and by staying safe, I can focus on the adventure.

Enhancing Your Mountain Biking Experience

Joining Local Biking Groups

One of the most rewarding aspects of mountain biking has been connecting with others who share the same passion. I’ve joined local biking groups that not only introduce me to new trails but also create a sense of camaraderie among riders. Riding with a group is not only more fun, but it also enhances safety. When I ride with others, I feel more confident tackling challenging trails and have experienced some of the most exhilarating rides with fellow enthusiasts.

These groups often organize events, which allows me to explore new areas and meet like-minded individuals. I remember a group ride I participated in—everyone was so encouraging, and I ended up pushing myself further than I thought I could. Plus, the shared experiences make for great stories and friendships that extend beyond the trails.

Participating in Budget-Friendly Events and Races

Another way to enhance my mountain biking experience without overspending is by participating in budget-friendly events and races. Many communities host local races that have low entry fees. Not only do these events challenge me, but they also provide a great opportunity to meet other riders and learn from them. I signed up for a local race last year, and while I didn’t place in the top spots, the thrill of competing and the support from the community was worth every penny.

Moreover, some events focus on fundraising for local trails or charities. I’ve found that participating in these events often means you get to ride on some fantastic trails while contributing to a good cause. It’s a wonderful feeling to combine my love for biking with giving back to the community.

Final Thoughts

Mountain biking is truly a remarkable way to connect with nature and challenge ourselves physically and mentally. For me, the journey doesn’t have to come with a hefty price tag. By being smart about my choices, focusing on maintenance, and engaging with the biking community, I’ve been able to enjoy incredible rides without breaking the bank. I encourage you to take the plunge into budget mountain biking, explore local trails, and foster connections with fellow riders. Each adventure on the trails is a chance to create lasting memories, make new friends, and discover the beauty that surrounds us—all while keeping our wallets happy.

Frequently Asked Questions

“`html

What is budget mountain biking?

Budget mountain biking is a way to enjoy the sport without spending a fortune. It involves making smart choices regarding gear, trail access, and overall expenses, emphasizing the experience rather than the costs involved.

What are the essential gear items for budget mountain biking?

Essential gear includes a reliable bike (preferably used or entry-level), a good helmet for safety, moisture-wicking clothing, a hydration system, and a basic repair kit with tire levers, a pump, and a multi-tool.

Can I rent mountain biking gear instead of buying it?

Yes, many local bike shops offer rental services. Renting allows beginners to test different bikes and equipment without the upfront costs of purchasing new gear.

What are some budget-friendly mountain biking trails in the United States?

Some budget-friendly trails include Moab Mountain Biking Trails in Utah, Mount Lowe Railway in California, Kingdom Trails in Vermont, Tsali Recreation Area in North Carolina, Levis Mound in Wisconsin, and Red River Gorge in Kentucky.

How can I find affordable mountain biking trails?

You can find affordable trails by engaging with local biking communities, checking with local bike shops, looking for seasonal discounts, and utilizing websites and apps dedicated to listing free trails.

What should I consider when planning a mountain biking trip on a budget?

Consider trail accessibility, potential entrance fees, accommodation costs, and look for areas with multiple trail systems nearby to maximize your riding options without incurring high travel costs.

What are some basic bike maintenance tips for budget mountain biking?

Basic maintenance tips include regularly checking tire pressure, cleaning your bike after rides, and lubricating the chain to ensure a smoother ride and prolong the bike’s lifespan.

How can I stay safe while mountain biking?

To stay safe, always wear a helmet and bright clothing, inform someone of your riding plans, and stay aware of your surroundings while on the trail to avoid accidents.

Why is joining local biking groups beneficial?

Joining local biking groups can enhance your experience by introducing you to new trails, providing camaraderie among riders, and increasing safety while tackling challenging trails.

Are there budget-friendly events for mountain bikers?

Yes, many communities host local races and events with low entry fees that not only provide a challenge but also offer a chance to meet other riders and support local trails or charities.

“`

Top 10 Budget Mountain Biking Trails for Thrill Seekers

If you’re a thrill-seeker looking to hit the trails without breaking the bank, budget mountain biking might just be your ticket to adventure. Let’s dive into the world of budget-friendly biking and discover trails that deliver excitement without the hefty price tag.

Top 10 Budget Mountain Biking Trails for Thrill Seekers

Understanding Budget Mountain Biking

What is Mountain Biking?

Mountain biking is more than just a sport; it’s a way to connect with nature while getting your adrenaline fix. Picture this: riding a sturdy bike over challenging terrains, steep hills, and winding paths that take you deep into the heart of the wilderness. From my own experience, I find that each trail offers a unique set of challenges and rewards. Whether you’re navigating rocky descents or cruising through forested paths, mountain biking is about embracing the outdoors and pushing your limits.

Benefits of Mountain Biking

There are so many reasons to love mountain biking! First off, it’s an incredible workout. I remember the first time I hit the trails; I was surprised at how much strength and agility I needed. Not only does it improve cardiovascular fitness, but it also builds muscles, particularly in the legs and core. Beyond physical benefits, I’ve found that mountain biking is a great way to relieve stress. There’s something cathartic about pedaling hard and feeling the wind rush past as you tackle a challenging slope. Plus, let’s not forget the stunning views that come with these trails; it’s hard not to feel a sense of awe while cruising through nature’s beauty.

Why Choose Budget Trails?

Budget trails are a game-changer for thrill-seekers like us. They offer the same excitement and opportunity for adventure without the steep fees that come with many popular biking destinations. I’ve always been a fan of exploring lesser-known trails because they often surprise you with their beauty and challenge. Plus, by choosing budget-friendly options, we can enjoy more rides and put our saved money toward gear or travel. It’s all about maximizing our experiences while keeping our wallets happy! Discover more about budget-friendly trails that can enhance your biking experience.

Essential Gear for Budget Mountain Biking

Mountain Bikes: Choosing the Right One

When it comes to mountain biking, the right bike makes all the difference. I remember sifting through options at local shops and online, trying to find the perfect balance between quality and price. There are many types of mountain bikes, such as hardtails and full-suspension bikes, but I found that a well-maintained hardtail can tackle most trails and is often more affordable. Before purchasing, I recommend test-riding a few to see which feels right. Remember, you want something that can handle rugged terrain while still being comfortable enough for longer rides.

Protective Gear: Helmets and Pads

No matter how experienced you are, safety should always come first. Investing in a good helmet is non-negotiable; it’s saved me from potential injuries more than once. I also suggest knee and elbow pads, especially if you’re tackling more technical trails. These pieces of gear provide peace of mind, allowing you to focus on the ride rather than worrying about falls. I learned this the hard way after a tumble that left me sore for days! Protective gear may seem like an added expense, but in reality, it’s an investment in your safety and comfort.

Budget-Friendly Accessories

Accessories can really enhance your riding experience without costing a fortune. When I first started, I picked up a basic hydration pack, which has been a lifesaver on longer rides. Staying hydrated is key, especially when you’re pushing yourself on more demanding trails. I also suggest getting a quality multi-tool. It might not seem like much, but being able to make on-the-spot adjustments can save a ride from turning into a long walk back. There are plenty of budget-friendly options for these accessories; it just takes a bit of research and comparison.

Top 10 Budget Mountain Biking Trails

1. Moab Brand Trails: Moab, Utah

Moab is often known for its stunning landscapes and challenging terrains, but what many don’t realize is that it has some great budget-friendly trails! The Moab Brand Trails offer a variety of options for all skill levels. I remember my first ride there—it was the perfect mix of fun and challenge! The trails are well-marked, and you can easily spend a whole day exploring without spending a dime. The views of the red rock formations are truly breathtaking, making every pedal worth the effort.

2. Great Divide Trail: Montana

If you’re looking for a serene ride surrounded by nature, the Great Divide Trail in Montana is a must-visit. This trail stretches for miles and showcases the beauty of the Montana wilderness. I found it perfect for a leisurely ride, allowing me to take in the sights while also getting a good workout. Plus, there’s no entry fee, which makes it a fantastic choice for budget-conscious bikers like us!

3. Cuyuna Lakes Mountain Bike Trails: Minnesota

Cuyuna Lakes has quickly become one of my favorite spots for budget mountain biking. The trails here are well-maintained and offer various difficulties, ensuring that everyone can find a ride that suits them. The unique feature of this location is the stunning turquoise lakes that dot the landscape. I’ve spent countless hours riding through the pine forests, and I always leave feeling refreshed and satisfied.

4. Downieville Downhill: California

For those who crave a bit more adrenaline, the Downieville Downhill trail in California is an epic choice. It’s a free ride that spans approximately 15 miles, starting high in the Sierra Nevada Mountains and descending through beautiful forests. I remember feeling exhilarated as I flew down the mountain, embracing the thrill of the ride. The scenery is just as rewarding as the ride itself, making it a perfect budget destination!

5. Kingdom Trails: Vermont

Kingdom Trails is a hidden gem in Vermont, perfect for mountain biking enthusiasts. While there is a nominal fee for access, it’s very reasonable, especially considering the quality of the trails. I loved how diverse the trails were, accommodating both beginners and seasoned riders. Each turn brought something new, which kept the ride exciting. Plus, the local community is super welcoming, and there’s a great vibe throughout.

6. Pisgah National Forest: North Carolina

Pisgah National Forest is a vast area with countless trails to explore, and the best part is that most of them are free! I spent an entire weekend wandering through the dense forests and rocky paths, and I felt truly in touch with nature. Some trails are more challenging, but there are plenty of easier options for those just starting out. The fresh mountain air and the sounds of nature make for an unforgettable experience.

7. Mount Lowe Railway: California

The Mount Lowe Railway trail offers an incredible blend of history and adventure. This trail takes you through remnants of the old railway, providing a unique ride that feels like stepping back in time. I loved the combination of technical sections and scenic views of the San Gabriel Mountains. Plus, it’s free to access, making it perfect for anyone wanting to combine budget biking with a touch of history.

8. Syllamo’s Revenge Trail: Arkansas

Syllamo’s Revenge is one of those trails that challenged me in the best way possible. It’s located in the Ozark National Forest and offers beautiful scenery along with various technical features. The best part? Access to the trails is completely free! I came away from my ride feeling accomplished and eager to tackle it again. It’s a fantastic spot for those who love to test their skills without spending much money.

9. Buffalo Creek Trail System: Colorado

The Buffalo Creek Trail System in Colorado is a fantastic choice for budget mountain biking. With multiple loops and varying levels of difficulty, this trail system has something for everyone. I’ve spent hours riding here, and I love how the trails intertwine with the natural landscape. The best part is that it’s free to ride, allowing us to enjoy the majestic views without worrying about expenses.

10. Aliso and Wood Canyons: California

Last but not least, Aliso and Wood Canyons offer a beautiful escape in Southern California. This trail system has a mix of challenging hills and smooth paths, suitable for all levels. I found the flora and fauna captivating, and riding through the canyons made me appreciate the beauty of the area even more. Plus, there’s no fee to access the trails, so it’s a great option for those of us on a budget! Explore stunning mountain biking trails that won’t break the bank.

Trail Features and Difficulty Levels

Overview of Trail Ratings

Understanding trail ratings is crucial for any mountain biker, especially when you’re choosing budget-friendly trails. I remember my first few rides, feeling a mix of excitement and anxiety as I embarked on trails with varying ratings. Trails are typically categorized from easy to difficult, which helps you find the right challenge for your skill level. Easy trails generally have gentle slopes and wide paths, while difficult trails can include steep climbs, technical descents, and obstacles. By familiarizing ourselves with these ratings, we can choose trails that match our experience and fitness levels, ensuring an enjoyable ride.

Beginner Trails vs. Advanced Trails

As someone who started as a beginner, I know how important it is to find the right trails that match our skill level. Beginners should look for trails that are labeled as easy or moderate. These trails often feature smooth paths and gentle gradients, making it easier to build confidence. I recall my early days on a beginner trail where I could focus on mastering basic skills without feeling overwhelmed. On the other hand, advanced trails are meant for seasoned riders. They usually have steeper inclines, narrow paths, and technical features like rocks and roots. For me, transitioning from beginner to advanced trails was thrilling, but I always made sure I was prepared for what lay ahead.

Terrain Types: What to Expect

One of the aspects I find most exciting about mountain biking is the variety of terrains we can encounter. Each type of terrain brings a unique riding experience. For example, smooth, dirt paths are fantastic for beginners or those looking for a more leisurely ride. In contrast, rocky or root-laden trails can provide that adrenaline rush we all crave, challenging our skills and balance. When I ride on a rocky trail, I notice how it tests my bike handling and forces me to think on my feet. Additionally, some trails wind through forests, offering shade and beautiful scenery, while others might open up to breathtaking vistas. Being aware of these terrain types helps us choose trails that not only match our skill levels but also our preferences for adventure.

When to Ride: Best Seasons for Mountain Biking

Spring Riding: Benefits and Considerations

Spring is one of my favorite seasons for mountain biking. The trails are often less crowded after the winter months, and the fresh blooms create a vibrant backdrop. I love how the air feels crisp, and the wildlife begins to re-emerge. However, it’s essential to consider the conditions. Some trails may still be muddy or wet from the melting snow, so it’s wise to check local reports before heading out. I’ve learned the hard way that riding on wet trails can lead to damage, both to the trails and my bike!

Summer Thrills: Pros and Cons

Summer offers long days and plenty of sunshine, making it perfect for extended rides. I find that I can easily spend an entire day on the trails, exploring new routes and soaking up the sun. However, heat can be a challenge, especially during midday. I’ve learned to start early in the morning or ride later in the evening to avoid the harsh sun. Staying hydrated is crucial during this season, too! Summer can also bring more people to popular trails, so it’s good to arrive early to snag a parking spot.

Fall Adventures: Scenic Views and Weather

Fall is truly magical for mountain biking. The changing leaves create stunning scenery that I can’t get enough of. The cooler temperatures make for comfortable rides, and the trails are often less crowded as many people focus on other activities. I’ve found that some trails may start to get muddy with the autumn rains, so I keep an eye on the weather. It’s also a fantastic time to explore new trails, as the vibrant colors add an extra thrill to each ride!

Winter Riding: Trails Open Year-Round

Winter biking can be a completely different experience, and I’ll admit, it took some getting used to! Some trails remain open year-round, especially in milder climates. I’ve discovered the joy of fat biking, which allows you to ride on snow-covered trails. It’s a unique challenge that can be incredibly rewarding. However, it’s essential to dress in layers and have the right gear to keep warm. Riding in winter can be peaceful, with fewer people on the trails, allowing for a serene connection to nature.

Safety Tips for Budget Mountain Biking

Essential Safety Gear

Before heading out on any trail, safety gear is a must. I can’t emphasize enough how important it is to have a well-fitted helmet. I’ve had my fair share of spills, and my helmet has saved me countless times. Beyond helmets, I recommend wearing gloves to protect your hands and improve grip, as well as padded shorts for added comfort during longer rides. Investing in quality safety gear is something I consider non-negotiable; it allows me to ride with confidence.

Trail Etiquette and Awareness

When riding on shared trails, being mindful of other trail users is essential. I’ve learned the hard way that not everyone follows the unwritten rules of trail etiquette. Yielding to hikers and slower bikers, adhering to trail signs, and keeping noise levels down can create a positive experience for everyone. I also try to stay aware of my surroundings, especially on busy trails. It’s about respecting nature and the community we’re a part of.

Dealing with Injuries and Emergencies

Accidents can happen, no matter how careful we are. I always make sure to carry a basic first aid kit on longer rides, just in case. It’s also a good idea to let someone know your planned route and expected return time. If you’re heading out alone, having a charged phone and knowing where the nearest help is located can be a lifesaver. I’ve had a few minor injuries during rides, and being prepared made all the difference in how I handled them.

Budgeting for Your Mountain Biking Adventure

Cost Breakdown: Gear, Trails, and Travel

Before heading out on a mountain biking adventure, I found it essential to have a clear understanding of the potential costs involved. When I first started, I didn’t realize how much my gear, trail fees, and travel could add up. For gear, a good helmet can range from $50 to $150, while gloves and padded shorts can cost between $20 to $70. Mountain bikes can vary widely based on quality, but I found that a decent entry-level bike can start at around $300. It’s worth investing in something reliable that will last, but it’s also possible to find solid used bikes for less.

Trail fees also play a part in budgeting. While many trails are free, some, like Kingdom Trails in Vermont, charge a modest fee (usually around $10 to $20). I always factor this into my budget, along with travel expenses. If I’m driving a few hours to a destination, I consider fuel costs and any potential lodging if I plan to stay overnight. In my experience, keeping a detailed spreadsheet of these costs helps me stay on track and make the most of my adventures.

Finding Free or Low-Cost Trails

One of the best parts about budget mountain biking is the abundance of free trails available. I’ve discovered that local parks often have well-maintained bike paths that are perfect for a day out without breaking the bank. Websites and apps like Trailforks and MTB Project are fantastic resources for finding trails near you, including reviews and difficulty ratings. I’ve spent hours exploring new paths I found online, and it’s rewarding to uncover hidden gems that don’t cost a dime. Local biking groups are another great way to learn about free rides and community events that can get us out on the trails together.

Tips for Saving on Gear and Accessories

When I first started mountain biking, I was overwhelmed by the variety of gear and accessories available. To save some money, I recommend shopping during off-seasons or sales at local bike shops. I’ve scored some great deals this way, especially on last season’s models. Additionally, online marketplaces like Craigslist or Facebook Marketplace can be gold mines for used gear. I’ve found everything from bikes to accessories at a fraction of the retail price. Another tip is to consider renting gear for a trip if it’s more cost-effective than purchasing. Local bike shops often offer rental services, and this way, I can try out different gear before making a larger investment.

Local Amenities and Accommodations

Camping vs. Hotels: Pros and Cons

When planning a mountain biking trip, choosing where to stay can significantly impact your budget. I’ve had experiences with both camping and hotel stays, and each has its pros and cons. Camping is often the more budget-friendly option, allowing me to connect with nature right where I ride. Many parks have campgrounds with reasonable fees, and I love the camaraderie that comes from sharing a campsite with fellow bikers. However, it does require a bit more gear and preparation.

On the other hand, hotels can provide a comfortable place to rest after a long day on the trails. While they tend to be pricier, I’ve found deals online or packages that include bike storage or breakfast, making them worthwhile for some trips. It all depends on the experience I’m looking for and how much I’m willing to spend.

Nearby Restaurants and Local Cuisine

No biking adventure is complete without refueling at a local eatery! I always make it a point to explore the culinary scene wherever I go. It’s often an affordable way to experience the local culture. I love finding small diners or food trucks near the trails; they offer delicious meals without breaking the bank. After a long ride, there’s nothing better than a hearty burger or a refreshing smoothie to recharge. Plus, many areas have local breweries, and enjoying a cold beer after a ride is a relaxing treat.

Transportation Options to Trails

Getting to the trails is another part of the budget equation. I’ve found that some locations have good public transit options, which can save on parking fees and gas. If I’m traveling with friends, carpooling is also a great way to share costs and make the trip more enjoyable. I always check if there’s a bike rack on the bus or train, as that makes getting to the trails so much easier. For those venturing further afield, renting a vehicle can be cost-effective, especially if splitting the cost among friends. The more we can save on transport, the more I can spend on the adventure itself!

Community and Events

Joining Local Mountain Biking Groups

One of the best parts of mountain biking is the community that surrounds it. I’ve found that joining local biking groups can enhance my experience immensely. Not only do they often organize group rides (which can be a lot of fun), but they also provide invaluable insights into trails that I might not find on my own. I’ve made some great friends through these groups, and sharing the trails with others adds a whole new layer of enjoyment to the sport.

Participating in Budget-Friendly Events

Throughout the year, various biking events and festivals provide opportunities to ride with others while celebrating the sport. These events often have low entry fees and can include everything from casual group rides to races. I’ve participated in a few local events that were not only affordable but also introduced me to new trails and fellow riders. Plus, they often have vendors showcasing gear and accessories, sometimes with discounts available, which is a bonus!

Online Resources and Forums for Thrill Seekers

In this digital age, I’ve found that online resources and forums are fantastic for connecting with other biking enthusiasts. Websites dedicated to mountain biking often have forums for sharing tips, trail recommendations, and even group ride information. I’ve learned so much from others’ experiences, and it’s a great way to find new trails and events. Social media groups focused on mountain biking can also provide real-time information about trail conditions and local meetups, keeping us plugged into the community.

Final Thoughts

Mountain biking on a budget has opened up a world of adventure for me. By being mindful of costs and making smart choices about gear and trails, I’ve been able to explore so many beautiful landscapes without draining my wallet. Whether it’s discovering new trails, connecting with other riders, or simply enjoying the thrill of the ride, the experiences have been priceless. I encourage anyone looking to dive into mountain biking to embrace the adventure, explore budget-friendly options, and most importantly, have fun on the trails. Happy biking!

Frequently Asked Questions

What is mountain biking?

Mountain biking is a sport that involves riding a sturdy bike over challenging terrains, steep hills, and winding paths. It allows riders to connect with nature while getting an adrenaline fix and offers a unique set of challenges and rewards on each trail.

What are the benefits of mountain biking?

Mountain biking provides an incredible workout that improves cardiovascular fitness and builds muscle, particularly in the legs and core. It also serves as a great stress reliever and allows riders to enjoy stunning views while embracing the outdoors.

Why should I choose budget trails for mountain biking?

Budget trails offer the same excitement and adventure as popular biking destinations without the steep fees. Exploring lesser-known trails can lead to beautiful surprises and allows riders to save money for more rides or gear.

What essential gear do I need for budget mountain biking?

Essential gear includes a well-maintained mountain bike, a good helmet, knee and elbow pads for protection, and budget-friendly accessories like hydration packs and multi-tools to enhance the riding experience.

Can you recommend some budget mountain biking trails?

Some recommended budget mountain biking trails include Moab Brand Trails in Utah, Great Divide Trail in Montana, Cuyuna Lakes Mountain Bike Trails in Minnesota, and Downieville Downhill in California, among others.

What should I know about trail ratings?

Trail ratings help mountain bikers choose trails that match their skill levels, with trails categorized from easy to difficult. Beginners should look for easy or moderate trails, while advanced riders can tackle more challenging paths with steep climbs and technical features.

What are the best seasons for mountain biking?

Each season has its benefits: spring offers fewer crowds and vibrant blooms, summer provides long days for extensive rides, fall showcases stunning foliage, and winter offers unique experiences like fat biking on snow-covered trails.

What safety tips should I follow while mountain biking?

Essential safety tips include wearing a well-fitted helmet, being mindful of trail etiquette, and carrying a basic first aid kit. It’s also wise to inform someone about your planned route and be aware of your surroundings on busy trails.

How can I budget for my mountain biking adventure?

Budgeting involves understanding costs for gear, trail fees, and travel. Consider investing in quality gear, factoring in potential trail fees, and keeping a detailed record of expenses to manage your budget effectively.

How can I connect with other mountain bikers?

Joining local mountain biking groups, participating in budget-friendly events, and utilizing online resources and forums can enhance your biking experience and help you connect with fellow enthusiasts.

Top Destinations for Thrilling Bungee Jumping on a Budget

If you’re seeking an adrenaline rush without breaking the bank, bungee jumping is the ultimate thrill. Join me as we explore the top destinations for budget-friendly bungee jumping, where you can leap into adventure without emptying your wallet. For more tips on saving money while enjoying thrilling activities, check out the Ultimate Guide to Budget Bungee Jumping Adventures.

Top Destinations for Thrilling Bungee Jumping on a Budget

Understanding Bungee Jumping

What is Bungee Jumping?

Bungee jumping is one of those experiences that leaves you breathless, both literally and figuratively. It involves jumping from a high structure while connected to a large elastic cord. The thrill comes as you free-fall for a brief moment before the cord stretches and pulls you back up. I remember my first jump vividly; the rush of the wind, the sheer drop, and that moment of weightlessness felt surreal. It’s like flying, but with a heart-pounding twist!

The Thrill and Experience of Bungee Jumping

The excitement of bungee jumping isn’t just about the fall. It’s about the entire experience leading up to it. Standing on the edge, looking down at the ground far below, my heart raced in anticipation. The nerves, the excitement, and the fear all mixed into one powerful cocktail of emotions. Once I took that leap, it felt like time stood still. Everything below me became a blur, and all I could focus on was the exhilaration of defying gravity. For many, including myself, it’s a rite of passage – a way to conquer fears and embrace life’s wild side.

Safety Considerations and Regulations

While the thrill is undeniable, safety is paramount when it comes to bungee jumping. I learned that it’s crucial to jump with reputable operators who adhere to strict safety standards. Each jump should be guided by trained professionals, using well-maintained equipment. Regulations vary by country, so it’s always a good idea to do some research before you leap. I once jumped at a location that had thorough safety checks, and it made all the difference in my comfort level. Knowing that I was in good hands allowed me to enjoy the jump without fear.

Top Budget-Friendly Bungee Jumping Destinations

New Zealand

Queenstown

Queenstown, often dubbed the adventure capital of the world, is a must-visit for any bungee enthusiast. I remember standing on the iconic Kawarau Bridge, the first commercial bungee jumping site. The views are breathtaking, and the adrenaline rush is unbeatable. If you’re in Queenstown, you can’t miss this experience!

Price Range and Packages

Prices for bungee jumping in Queenstown typically range from $200 to $300 NZD. Many operators offer packages that include photos and videos of your jump, which is something I highly recommend. It’s a great way to relive the experience later and share it with friends. For more information on budget-friendly adventures, check out the Top 7 Budget-Friendly Skydiving Destinations Worldwide.

South Africa

Bloukrans Bridge

Next on our list is Bloukrans Bridge in South Africa, home to the highest commercial bungee jump in the world. Standing at 216 meters, I can assure you that it’s not for the faint-hearted! However, the experience is exhilarating and the views of the surrounding landscape are phenomenal.

Price Range and Packages

The cost for a jump at Bloukrans can range from $1,000 to $1,500 ZAR. They often have combo packages that include additional activities, so make sure to ask about those when booking your jump. I found that bundling activities really helped manage costs while maximizing adventure!

Australia

Cairns

Cairns is another fantastic location for bungee jumping, especially if you want to combine it with a visit to the Great Barrier Reef. I loved the laid-back vibe of Cairns, and jumping from the AJ Hackett bungee tower offers a unique perspective of the lush rainforest below.

Price Range and Packages

Prices in Cairns generally fall between $200 and $300 AUD. They often provide discounts for group bookings, so if you’re traveling with friends, it’s worth checking out! I jumped with a group, and sharing that moment made it even more special.

United States

Las Vegas

Las Vegas may be known for its casinos, but it also offers some thrilling bungee jumping experiences. The Stratosphere Tower has a jump option that lets you leap off the edge of the building, giving you breathtaking views of the city. I found it to be an incredible way to combine adrenaline and sightseeing!

Price Range and Packages

Jumping at the Stratosphere usually costs around $100 to $150 USD. I suggest checking their website for special deals, especially during the off-peak season when prices can drop significantly.

Thailand

Chiang Mai

Chiang Mai is a hidden gem for bungee jumping enthusiasts. The setting is stunning, surrounded by lush hills and vibrant culture. I remember feeling completely immersed in the atmosphere as I prepared for my jump. It made the experience all the more memorable.

Price Range and Packages

In Chiang Mai, you can expect to pay around 3,000 to 4,000 THB for a jump. Many places offer package deals that include transportation, which can save you some money. Plus, it’s a great way to meet fellow adventurers!

Europe

Interlaken, Switzerland

Interlaken is famed for its breathtaking scenery and adventure sports, including bungee jumping. I was captivated by the stunning views of the Alps as I prepared to jump from the Stockhorn Mountain Gondola. The combination of natural beauty and the thrill of the jump is something I’ll never forget.

Price Range and Packages

Bungee jumping in Interlaken generally costs between 200 and 300 CHF. There are often options to bundle your jump with other activities like paragliding, which I found to be an exciting way to experience the area.

Edinburgh, Scotland

If you’re looking for a bungee jump with a historical backdrop, Edinburgh offers a unique experience. Jumping from the iconic Titan Crane provides stunning views of the Firth of Forth. I loved the combination of history and adventure!

Price Range and Packages

The price for bungee jumping in Edinburgh ranges from £70 to £100. Group discounts are available, which can significantly lower the price if you’re traveling with friends.

Tips for Saving Money on Bungee Jumping

Look for Package Deals and Discounts

When I started planning my bungee jumping adventures, I quickly realized that looking for package deals could save a significant amount of money. Many operators offer enticing packages that bundle the jump with additional perks like photos, videos, or even other activities. For example, when I jumped in Queenstown, I found a package that included a scenic bus ride to the jump site, along with a video of my leap. It made the experience even more memorable and allowed me to share the thrill with friends and family later on. Always keep an eye out for these deals on their websites or social media pages; they can often provide the best savings!

Off-Peak Season Bungee Jumping

If you’re flexible with your travel dates, consider jumping during the off-peak season. I learned firsthand how pricing can fluctuate dramatically based on the time of year. For instance, I visited Cairns during the shoulder season, and I found that prices were significantly lower than during the busy summer months. Not only did I save money, but I also enjoyed shorter lines and a more personalized experience. It’s a win-win! Do a little research on the best times to visit each destination, and plan your jump accordingly to maximize savings.

Group Discounts and Promotions

One of my favorite ways to save money on bungee jumping is to go with a group. Many locations offer discounts for larger groups, which can be a great way to cut costs while creating unforgettable memories with friends. On my trip to South Africa, I coordinated with a few fellow adventurers I met during my travels. We ended up getting a great deal at Bloukrans Bridge by booking as a group. Plus, having friends to share the adrenaline rush made the experience even more thrilling. I recommend checking with the operators about group rates before you book; you might be surprised at how much you can save!

What to Expect on Your Bungee Jumping Adventure

The Booking Process

The booking process for bungee jumping can vary depending on the location, but I found it to be pretty straightforward. Most companies have user-friendly websites where you can easily choose your jump date and time. I remember feeling excited yet anxious when I filled out my details for my first jump. Often, you’ll need to sign a waiver, acknowledging the risks involved, which is totally normal. I recommend reading reviews and checking the company’s safety protocols before hitting that “confirm” button. Once your booking is secured, you’ll receive confirmation, and then the countdown to the thrill begins!

What to Wear and Bring

When it comes to what to wear for your bungee jump, comfort is key. I always opt for athletic clothing that allows for easy movement and a pair of sturdy shoes that I don’t mind getting a bit dirty. Many jump sites have specific requirements, like avoiding loose items (think dangling jewelry or hats) that could fly off during your jump. I suggest wearing snug clothing and securing anything you don’t want to lose. Additionally, don’t forget to bring your camera or phone if the operator allows it; capturing those moments before and after the jump can be priceless!

The Jumping Experience: Step-by-Step

The moment of the jump is something I’ll never forget. Typically, after checking in and going through a safety briefing, you’ll be harnessed up and taken to the jump platform. I remember standing on the edge, my heart racing, with the staff encouraging me to take a deep breath and enjoy the moment. They have a unique way of calming nerves, which helped me a lot! Once you take that leap, the world below disappears quickly, and the rush of free-falling is unlike anything I’ve ever experienced. After the rebound, they’ll guide you back safely to the ground, and trust me, the adrenaline high will keep you buzzing long after you land!

Safety and Regulations in Bungee Jumping

Understanding Safety Standards

Safety in bungee jumping is paramount, and I’ve seen firsthand how strict regulations can make a difference. Each location I jumped at had its own set of safety standards, often dictated by local laws. I was always impressed by how operators would go through their safety checks diligently before each jump. I learned that the equipment, including the bungee cords and harnesses, should be regularly inspected and maintained. As a jumper, knowing that these protocols are in place helped ease my anxiety. Always ask about the safety measures they have in place before your jump; it’s essential for your peace of mind.

Choosing Reputable Operators

Choosing a reputable operator is something I can’t stress enough. I’ve heard stories of less scrupulous operators cutting corners, which is a terrifying thought! Before booking my jumps, I always researched the company’s history, read reviews, and looked for any certifications they might hold. If your gut feeling tells you something is off, don’t hesitate to look for another provider. I remember feeling much more at ease when I jumped with companies that had a solid reputation and positive testimonials. Trust your instincts—it’s your safety at stake!

Health Considerations Before Jumping

Before diving into the bungee experience, it’s essential to consider your health. I’ve had friends who were eager to jump but had underlying health issues like high blood pressure or heart conditions. Consulting with a doctor beforehand is a smart move, especially if you have any doubts. Most operators will have guidelines regarding health conditions, and it’s crucial to adhere to those for your safety. I always felt reassured knowing that I was physically ready for the jump, which allowed me to fully embrace the excitement!

Personal Stories and Experiences

Stories from Budget Jumpers

Bungee jumping is filled with unforgettable stories, and I’ve been fortunate enough to meet many fellow jumpers who shared their experiences. One story that stands out to me is from a traveler I met in Queenstown. She was on a solo trip and decided to jump as a way to overcome her fears. Before jumping, she confided in me that she had always been afraid of heights. But after taking the leap, she felt a surge of empowerment. The thrill transformed her perspective on fear; instead of letting it control her, she learned how to face it head-on. It was inspiring to see how bungee jumping not only gave her an adrenaline rush but also a newfound confidence in herself.

Another memorable encounter was with a group of friends who traveled to Bloukrans Bridge. They had organized a small reunion and chose bungee jumping as their highlight adventure. As they stood atop the bridge, they recounted childhood stories, which helped ease their nerves. I watched as they jumped together, their shouts of excitement echoing through the valley. Afterward, they told me how the experience brought them closer together, creating memories that would last a lifetime. It reminded me that bungee jumping is not just about the individual thrill; it can be a bonding experience that fosters friendships and connections.

Comparisons of Different Destinations

Having jumped in multiple locations, I often find myself reflecting on how each destination offers its own unique flavor to the experience. For instance, in Queenstown, the stunning backdrop of the mountains and the Kawarau River makes the jump feel like a scene from an action movie. The combination of natural beauty and adrenaline creates a feeling unlike any other. I remember how the exhilaration of the jump was amplified by the breathtaking scenery surrounding me.

On the other hand, the Bloukrans Bridge jump felt more like a grand adventure. Standing at the highest commercial bungee jump in the world, I felt a mix of anticipation and awe. The sheer height was intimidating, but the views of the lush forests and the river below were simply breathtaking. I found it fascinating how each jump had its own character; from the vibrant culture in Chiang Mai to the thrilling urban landscape in Las Vegas, every destination left a lasting impression on me.

In Thailand, jumping in Chiang Mai offered a different vibe altogether. The lush hills and rich culture made the experience feel more serene, almost like a celebration of nature. I remember chatting with locals who would come to watch jumpers, and their warm smiles added a delightful touch to the experience. In contrast, jumping in Edinburgh was steeped in history, with the stunning Firth of Forth as my backdrop. It was like leaping into a postcard, and I felt a unique connection to the place as I took my leap.

Each destination taught me something new about myself and the thrill-seeking community. I realized that while the adrenaline rush of jumping is a common thread, the stories and connections we make along the way are what truly enrich the experience. Through these diverse environments, I learned that bungee jumping isn’t just a solo sport; it’s an adventure that brings people together, creating a tapestry of stories that we carry with us.

Resources for Planning Your Bungee Jumping Trip

Online Communities and Forums

When planning my bungee jumping trips, I found online communities and forums incredibly helpful. Platforms like Reddit and various adventure sports sites have dedicated groups where enthusiasts share their experiences, tips, and recommendations. I remember posting a question about the best bungee jumping spots in New Zealand and received a flood of responses, each with personal insights that helped shape my itinerary. These communities often provide not just practical advice but also a sense of camaraderie among fellow thrill-seekers.

Additionally, social media platforms can be a treasure trove of information. Following adventure travel Instagram accounts or Facebook groups allows you to see stunning visuals of jumps and read firsthand accounts from other jumpers. I often found inspiration for my next destination by scrolling through photos and stories shared by fellow adventurers.

Guides and Blogs on Bungee Jumping

Reading blogs and travel guides has been a game-changer in my planning process. There are countless blogs dedicated to adventure sports that offer in-depth reviews of different bungee jumping locations, along with safety tips and personal stories. One blog I stumbled upon had a comprehensive list of budget-friendly jumps around the world, which helped me discover some hidden gems I hadn’t considered before. I felt reassured reading about someone else’s experiences and insights, which made me more confident in my choices.

Moreover, many of these guides often include practical information on things like transportation options to jump sites, equipment requirements, and local attractions to explore afterward. I always recommend checking out a few reputable blogs before making any decisions; you never know what invaluable tips you might find!

Travel Insurance for Adventure Sports

One aspect I learned to prioritize was travel insurance, especially when participating in adrenaline-pumping activities like bungee jumping. I remember my first trip, I didn’t think much about it and ended up regretting it. After doing some research, I found that certain insurance providers offer plans specifically covering adventure sports. This became a non-negotiable for me. Having that peace of mind allowed me to fully immerse myself in the experience, knowing I was protected in case of unexpected events.

I recommend looking for insurance that covers not just bungee jumping but also other adventure sports you might want to try during your travels. It’s worth the investment to ensure that you can focus on enjoying the thrill without worrying about the what-ifs. Plus, many travel insurance providers have customer service teams that can advise you on the best options for your specific activities.

Frequently Asked Questions

What is bungee jumping?

Bungee jumping involves jumping from a high structure while connected to a large elastic cord. The thrill comes from the free-fall moment before the cord stretches and pulls you back up.

What are the top budget-friendly destinations for bungee jumping?

The top budget-friendly destinations for bungee jumping include Queenstown in New Zealand, Bloukrans Bridge in South Africa, Cairns in Australia, Las Vegas in the United States, Chiang Mai in Thailand, and Interlaken in Switzerland.

How much does bungee jumping cost in Queenstown, New Zealand?

Prices for bungee jumping in Queenstown typically range from $200 to $300 NZD, with many operators offering packages that include photos and videos of your jump.

What is the price range for bungee jumping at Bloukrans Bridge in South Africa?

The cost for a jump at Bloukrans Bridge can range from $1,000 to $1,500 ZAR, and they often have combo packages that include additional activities.

What should I wear for a bungee jump?

For a bungee jump, it’s best to wear comfortable athletic clothing that allows for easy movement and sturdy shoes. Avoid loose items like dangling jewelry or hats that could fly off during the jump.

What safety considerations should I keep in mind before bungee jumping?

Safety is paramount in bungee jumping. Always jump with reputable operators who adhere to strict safety standards, and check that the equipment is well-maintained. Consult with a doctor if you have any health concerns before jumping.

How can I save money on bungee jumping?

You can save money on bungee jumping by looking for package deals, jumping during the off-peak season, and taking advantage of group discounts offered by many operators.

What is the typical booking process for bungee jumping?

The booking process usually involves visiting the operator’s website to choose your jump date and time, filling out your details, and signing a waiver acknowledging the risks involved.

What is the price range for bungee jumping in Las Vegas?

Jumping at the Stratosphere Tower in Las Vegas usually costs around $100 to $150 USD, with special deals often available during the off-peak season.

What online resources can help me plan my bungee jumping trip?

Online communities and forums, as well as blogs and travel guides dedicated to adventure sports, can provide valuable insights, tips, and recommendations for planning your bungee jumping trip.

Ultimate Guide to Budget Bungee Jumping Adventures

Are you ready to take the plunge and experience the exhilarating rush of bungee jumping without breaking the bank? Join me as we dive into the ultimate guide for budget-friendly bungee jumping adventures!

Ultimate Guide to Budget Bungee Jumping Adventures

Understanding Bungee Jumping

What is Bungee Jumping?

Bungee jumping is one of those thrilling activities that makes your heart race like nothing else. Imagine standing on the edge of a high platform, with your feet secured in a bungee harness, ready to leap into the void below. It’s not just about the jump; it’s about the freedom, the adrenaline, and the unforgettable experience that comes with it. When I first tried bungee jumping, I felt a mix of excitement and fear. The moment I dove off, all my worries melted away as I soared through the air, feeling weightless. For many, it’s a rite of passage, a bucket-list item, or simply a chance to face their fears head-on. Read Interesting article: Extreme Sports on a Budget: Best Skydiving Trips to Take

History of Bungee Jumping

Bungee jumping, as we know it today, has roots that stretch back centuries. The concept of jumping from heights while tied to a flexible cord has its origins in the ancient practice of land diving on the Pentecost Islands in Vanuatu. The local men would leap from tall wooden towers with vines tied around their ankles as a rite of passage. Fast forward to the 1980s, and bungee jumping emerged as a commercial activity, thanks to pioneers like A.J. Hackett, who successfully popularized the sport in New Zealand. His thrilling jumps off the Kawarau Bridge made headlines and sparked a bungee-jumping craze that continues to this day.

How Bungee Jumping Works

Understanding the mechanics behind bungee jumping gives you a greater appreciation for the thrill and the safety involved. When you jump, gravity pulls you down, and the bungee cord stretches to its limit, eventually pulling you back up. The cord is designed to stretch and then rebound, creating a safe and exhilarating experience. I remember watching fellow jumpers scream with excitement as they bounced back up, the thrill of the free fall followed by the elastic rebound making every moment worth it. The key is in the engineering of the bungee cord, which is made from high-quality materials to ensure safety while providing maximum thrill. Read Interesting article: Top 7 Budget-Friendly Skydiving Destinations Worldwide

Choosing the Right Location for Budget Bungee Jumping

Top Affordable Bungee Jumping Spots in the USA

When it comes to finding budget-friendly bungee jumping spots, the USA has some fantastic options. I’ve had my share of experiences at various locations, and I can tell you that each place offers its unique flavor of adventure. One of my favorites is the New River Gorge in West Virginia. It’s not just affordable; the scenery is breathtaking! Another great spot is the Stratosphere in Las Vegas, where you can jump from the tallest building in the U.S. It’s a bit more of a splurge, but the view is absolutely worth it. For those near the East Coast, the Orlando area also has reliable and cheaper options that cater to thrill-seekers.

International Budget Bungee Jumping Destinations

If you’re feeling adventurous and looking to travel, consider international destinations that offer budget bungee jumping. Countries like New Zealand and Australia have stunning landscapes and reputable bungee companies. I fondly remember my jump at the Nevis Bungy in New Zealand, which is one of the highest in the world. It was exhilarating, and the price was quite reasonable compared to the experience. In Thailand, there are also affordable options, especially in tourist hotspots where bungee jumping is part of the adventure package. Read Interesting article: Discover Affordable Skydiving Spots for Your Next Adventure

Factors to Consider When Choosing a Location

Choosing the right location for your bungee jump isn’t just about price; there are several factors to consider. First, think about the height and type of jump. Some locations offer unique experiences, like jumping from bridges or platforms over water. Safety ratings and reviews are also crucial. I always check online reviews and ask fellow jumpers about their experiences. Additionally, consider the amenities available, such as transportation and accommodations, especially if you’re traveling far. Lastly, keep an eye on the weather, as conditions can impact jump schedules.

With so many options out there, finding a budget-friendly bungee jumping adventure is entirely possible. I hope my experiences and insights help you on your journey to take that thrilling leap into the unknown!

Cost Breakdown of Bungee Jumping

Average Costs of Bungee Jumping

When I first started researching bungee jumping, I was surprised by how varied the costs could be. On average, a bungee jump can range anywhere from $100 to $300, depending on the location and the company. Some places, especially popular tourist destinations, might charge a bit more. For instance, my jump at the Stratosphere in Las Vegas was around $250, but every penny was worth it for the incredible view and the thrill of jumping from such a height! I found that regional differences also play a role; jumps in less commercial areas tend to be more affordable.

Additional Fees and Costs to Anticipate

It’s important to keep in mind that the base price of your jump may not cover everything. I remember being a bit shocked when I learned about the additional fees that can crop up. For example, many companies charge extra for video and photo packages to capture your jump. These can add anywhere from $30 to $100 to your total cost, but I think they’re worth it. Having that memory to look back on is priceless! Other potential costs can include transportation to the jump site or, if you’re traveling, accommodation expenses. I always try to factor these into my budget ahead of time to avoid any surprises.

Tips for Finding Discounts and Deals

Finding a good deal on bungee jumping can feel like a treasure hunt, but I’ve picked up a few tricks along the way. One of my favorite methods is to check for package deals or group discounts. If you’re planning to jump with friends, some locations offer lower rates for groups. I’ve also found that many bungee companies have promotional deals during the offseason or on weekdays, which can save you quite a bit. Online platforms like Groupon often have deals for local adventures, including bungee jumping. I once scored a fantastic deal through a local adventure website, which made my jump even sweeter! Signing up for newsletters from bungee companies can also keep you informed about upcoming promotions and special offers.

Safety Considerations for Bungee Jumping

Understanding Safety Protocols

As thrilling as bungee jumping is, safety should always be at the forefront of your mind. I can’t stress enough how crucial it is to understand the safety protocols in place at the location you choose. Each company should have clear safety measures and protocols to protect jumpers. When I arrived at my jump site, I was reassured to see that they performed thorough equipment checks and had well-trained staff guiding the process. Before jumping, they went over safety instructions, which helped calm my nerves. I made sure to ask questions about the equipment’s history and the company’s safety record, which gave me peace of mind.

Choosing a Reputable Bungee Jumping Company

Not all bungee jumping companies are created equal. I’ve learned the hard way that doing your research before booking is essential. Look for companies that are certified and have positive reviews from previous jumpers. Websites like TripAdvisor and Yelp can be goldmines for honest feedback. I remember feeling much more confident about my experience after reading about others’ jumps. I also recommend checking if the company is a member of any professional bungee jumping associations—this often means they adhere to higher safety standards.

Personal Safety Gear and Requirements

Before I took my leap, I was pleasantly surprised by how focused the staff was on personal safety gear. Most companies provide harnesses and cords that meet strict safety standards, but they also require jumpers to wear appropriate clothing. I wore comfortable clothes that allowed for movement, avoiding anything too loose. Some locations even have weight limits, so I made sure to check mine before booking. Listening to the staff’s instructions and being aware of any health restrictions is vital. I appreciated how the team took the time to explain why certain precautions were necessary, which helped build my confidence before the jump.

Preparing for Your Bungee Jumping Adventure

What to Wear and Bring

As I prepared for my bungee jumping adventure, I realized that what I wore played a significant role in my overall experience. I opted for athletic wear that was snug but comfortable. I recommend avoiding loose clothing, as it can get caught in equipment. A good pair of sneakers is essential, too. Many companies have rules about footwear, so check ahead to ensure you’re compliant. Also, don’t forget to leave valuables behind! I learned this the hard way when I almost took my phone on my first jump. Instead, I left my belongings in a secure spot, which made me feel much more at ease.

Mental Preparation and Overcoming Fear

One of the biggest hurdles I faced was the mental aspect of bungee jumping. I remember standing on that platform, my heart racing, and my mind racing even faster. To overcome my fears, I practiced positive visualization techniques. I imagined myself soaring through the air, feeling the rush of the wind and the joy of the jump. I also found that talking to fellow jumpers helped calm my nerves. Sharing experiences with others who had jumped before made me feel included in a community and reassured me that I was about to embark on something incredible.

Health Considerations and Restrictions

Your physical health can impact your ability to bungee jump, so it’s essential to be aware of any restrictions. Most companies have guidelines regarding medical conditions like heart issues or pregnancy. I remember seeing a few signs about weight limits and health checks at the site. If you’re unsure about your eligibility, it’s always a good idea to consult your doctor beforehand. I felt reassured knowing that I had considered my health before jumping, which helped me fully enjoy the experience without any lingering doubts.

What to Expect on the Day of Your Jump

The Check-In Process

On the day of my bungee jump, I remember walking into the check-in area and feeling a mix of anticipation and nerves. The check-in process was straightforward, but it was one of the first steps that helped me get into the right mindset. I had to fill out a waiver, which is standard practice to ensure everyone understands the risks involved. It felt a bit daunting at first, but I appreciated the seriousness with which the company approached safety. After checking in, I received a wristband, which made me feel like part of a special club of thrill-seekers. I found it helpful to arrive early to soak in the atmosphere and get comfortable with my surroundings.

Pre-Jump Briefing

After check-in, the pre-jump briefing was one of the most important moments of the day for me. The staff gathered everyone and went over the safety protocols and jump procedures. I remember taking notes in my mind as they discussed the harness fitting and what to expect during the jump. They encouraged us to ask any questions, which made me feel more at ease. I also took this time to observe other jumpers’ faces—some looked excited, while others were clearly nervous. It was comforting to know that I wasn’t alone in my feelings. The instructors were enthusiastic and reassuring, sharing tips that would help me during the jump. They emphasized how important it was to follow instructions, and I felt that their confidence boosted my own.

The Jump Experience: What Happens

As the moment of the jump drew closer, I could feel my heart racing. I had watched others jump before me, their screams turning to laughter in mid-air, and it gave me a mix of excitement and anxiety. When it was finally my turn, I climbed the platform, and the view took my breath away. Standing at the edge, I felt a rush of adrenaline, and everything else faded away. I remember the instructor securing my harness and giving me a final pep talk. The countdown began, and I felt like time had slowed down. Then, I jumped!

The free fall was exhilarating, and I can’t even describe the feeling of flying through the air. For those few seconds, it was just me and the wind, a sense of liberation that I had never experienced before. The bungee cord kicked in, pulling me back up after what felt like an eternity of free fall. As I bounced in the air, I couldn’t help but laugh out loud—what a thrill! When the experience finally came to a gentle stop, I felt a rush of joy and accomplishment wash over me. I had faced my fears, and it was one of the most liberating feelings ever.

Post-Jump Experience

Receiving Your Jump Video and Photos

After landing, one of the most exciting parts was receiving my jump video and photos. Most companies offer packages to capture your experience, and I wholeheartedly recommend it! I opted for the video package, and it turned out to be one of the best decisions. Watching myself jump and hearing my own screams of excitement brought back all the adrenaline I felt. I loved sharing the video with friends and family, showing them that I had taken this leap of faith. It’s a memory I cherish, and I still watch it from time to time to relive that exhilarating moment.

Celebrating Your Accomplishment

Once the adrenaline had settled, I took a moment to celebrate my accomplishment. I felt a surge of pride for pushing my boundaries and trying something new. Many jumpers gathered in a common area afterward, sharing their experiences and high-fiving each other. It felt like a mini celebration, and I realized how empowering it is to conquer fears together. I treated myself to a little souvenir from the gift shop—a memento of my adventure. It’s amazing how a single jump can lead to such a strong sense of community and connection with others who share that thrill-seeking spirit.

Sharing Your Experience on Social Media

In today’s world, sharing experiences on social media has become a big part of our adventures. I took to my Instagram to post about my bungee jump, sharing photos and the video. The reactions from my friends were overwhelming! Many were inspired to try it themselves, while others simply cheered me on. It felt great to share my adventure and connect with others who might be thinking about taking the plunge. Plus, it’s an opportunity to encourage others to face their fears, just like I did. I learned that sometimes, sharing these moments can inspire someone else to try something they’ve always wanted to do.

Community and Events

Joining Bungee Jumping Groups and Forums

One of the most rewarding aspects of my bungee jumping experience was discovering the community surrounding the sport. After my jump, I started looking into joining bungee jumping groups and forums online. It’s fascinating how many people come together to share their experiences, tips, and advice. I joined a couple of Facebook groups dedicated to bungee jumping, and it was amazing to see photos and stories from fellow jumpers around the world. Engaging with this community has not only fueled my passion for the sport but also provided an opportunity to connect with like-minded individuals who understand the thrill of the jump.

Participating in Bungee Jumping Events and Competitions

As I delved deeper into the community, I learned about various bungee jumping events and competitions. I remember being excited to find out that some locations host annual bungee jumping festivals, where jumpers come together to celebrate their love for the sport. Participating in these events can be a thrilling experience, offering the chance to jump alongside some of the best in the industry. I can’t wait to try it for myself! It’s not just about jumping but also about camaraderie, sharing stories, and even learning new techniques from experienced jumpers.

Networking with Other Jumpers

Networking with other jumpers has been one of the highlights of my journey. I’ve met some incredible people who have traveled far and wide for their bungee jumping adventures. Hearing their stories has inspired me to explore more locations and try different types of jumps, like canyon jumps and bridge jumps. I’ve also learned about safety practices and tips that I wouldn’t have considered otherwise. This sense of community has made my bungee jumping experiences more enriching and meaningful, proving that it’s not just about the jump but the connections we make along the way.

Frequently Asked Questions

What is bungee jumping?

Bungee jumping is a thrilling activity where a person jumps from a high platform with their feet secured in a bungee harness. It’s about the freedom, adrenaline, and unforgettable experiences that come with the jump.

What are the historical origins of bungee jumping?

Bungee jumping has roots in the ancient practice of land diving on the Pentecost Islands in Vanuatu, where men would leap from tall towers with vines tied around their ankles. It became a commercial activity in the 1980s, popularized by A.J. Hackett in New Zealand.

How does bungee jumping work?

During a bungee jump, gravity pulls the jumper down, and the bungee cord stretches to its limit before pulling the jumper back up. The cord is designed to provide a safe and exhilarating experience by stretching and rebounding.

What are some budget-friendly bungee jumping locations in the USA?

Some budget-friendly bungee jumping spots in the USA include the New River Gorge in West Virginia, the Stratosphere in Las Vegas, and various locations in the Orlando area that cater to thrill-seekers.

Are there international destinations for budget bungee jumping?

Yes, countries like New Zealand and Australia have stunning landscapes and reputable bungee companies offering budget-friendly options. Thailand also has affordable bungee jumping, especially in tourist hotspots.

What should I consider when choosing a bungee jumping location?

When choosing a location, consider the height and type of jump, safety ratings, reviews, available amenities, and weather conditions, as these factors can impact your experience and safety.

What are the average costs of bungee jumping?

On average, bungee jumps can range from $100 to $300, depending on the location and company. Popular tourist destinations might charge more, while less commercial areas tend to be more affordable.

What additional fees should I anticipate when bungee jumping?

Many companies charge extra for video and photo packages, which can add $30 to $100 to your total cost. Other potential costs include transportation to the jump site and accommodation if traveling.

What safety considerations should I keep in mind for bungee jumping?

It’s crucial to understand the safety protocols of the company you choose, ensure they are certified, and be aware of personal safety gear requirements. Additionally, check for any health restrictions that may affect your ability to jump.

What should I expect on the day of my bungee jump?

On the day of your jump, you will go through a check-in process, a pre-jump briefing where safety protocols are explained, and then the actual jump experience, which includes a free fall followed by the bungee cord’s rebound.

Experience Thrills: Best White Water Rafting for Backpackers

Imagine the rush of cold water splashing against your face as you navigate through stunning canyons and roaring rapids. White water rafting is an adventure that every backpacker should experience. Let’s dive into what makes this thrilling sport so special.

Experience Thrills: Best White Water Rafting for Backpackers

Understanding White Water Rafting

What is White Water Rafting?

White water rafting is an exhilarating outdoor activity that involves navigating through turbulent river waters in an inflatable raft. I remember my first rafting trip vividly; the excitement of paddling through the roaring rapids and the camaraderie with my fellow adventurers created an unforgettable experience. It combines teamwork, strategy, and a healthy dose of adrenaline, making it a perfect fit for backpackers seeking thrills. For those looking to save, check out the Ultimate Guide to Affordable White Water Rafting Adventures.

Rafting can be enjoyed by people of all skill levels, from beginners to seasoned pros. I’ve found that each trip offers something unique, whether it’s the stunning scenery, the challenge of the rapids, or the opportunity to connect with nature and others. The thrill of mastering the rapids is what keeps me coming back for more.

Types of Rapids: Class I to Class VI

Understanding the different classes of rapids is crucial for any rafting adventure. Rapids are categorized from Class I, which are gentle and easy for beginners, to Class VI, which are extremely dangerous and only suitable for expert paddlers. Here’s a quick breakdown:

  • Class I: Easy, with small waves and few obstacles. Perfect for first-timers.
  • Class II: Moderate rapids with larger waves, requiring some basic paddling skills.
  • Class III: Intermediate rapids with more challenging waves and potential hazards. Good for adventurous beginners.
  • Class IV: Advanced rapids that demand strong paddling and teamwork. Not for the faint of heart!
  • Class V: Expert-level rapids with significant hazards and strong currents. A thrilling challenge!
  • Class VI: Unrunnable and dangerous rapids. Only attempted by the most skilled rafters.

On my last trip, we tackled a Class IV river, and let me tell you, the adrenaline was pumping! The rush of navigating through those challenging waters was both terrifying and exhilarating, and I loved every second of it.

Essential Equipment for Rafting

Having the right equipment can make or break your white water rafting experience. I’ve learned this firsthand, especially after a trip where I skimped on gear. Here’s a checklist of essential items you shouldn’t forget:

  • Raft: Your trusty vessel, usually provided by your rafting company. Ensure it’s suitable for the rapids you’ll be facing.
  • Paddles: Most companies provide paddles, but I recommend checking their quality before heading out.
  • Life Jacket: A must-have for safety. Make sure it fits snugly and is comfortable.
  • Helmet: Protects your head from potential impacts with rocks or other obstacles.
  • Wet Suit: Depending on the temperature, a wet suit can keep you warm and protected from the cold water.
  • Footwear: Wear sturdy shoes that can get wet. I’ve found that water sandals or old sneakers work best.
  • Dry Bags: Keep your belongings safe and dry during the adventure. Trust me, you’ll want to avoid soggy snacks!

When I first went rafting, I didn’t invest in a good life jacket. I quickly realized how crucial it was to feel secure in the water. Now, I never hit the river without my trusty gear.

Ultimately, white water rafting is an adventure that combines the thrill of nature with the joy of camaraderie. Whether you’re an experienced rafter or just starting out, there’s something about the roar of the river and the rush of navigating its currents that hooks you and keeps you coming back for more.

Top Destinations for White Water Rafting

Colorado River, Arizona

The Colorado River is often synonymous with white water rafting, and for good reason. Stretching through the breathtaking Grand Canyon, it offers a unique combination of stunning landscapes and exhilarating rapids. I remember the first time I laid eyes on the canyon walls; they were majestic and seemed to reach for the sky. The river features sections ranging from Class I to Class V, making it suitable for everyone from beginners to seasoned adventurers. One of my favorite moments was navigating through the famous Lava Falls, where the excitement surged as we plunged through the rapids. It was a rush I’ll never forget!

Salmon River, Idaho

If you’re looking for a blend of adventure and scenic beauty, the Salmon River in Idaho is a must-visit. Known as the “River of No Return,” it offers some of the best white water rafting experiences in the country. I had the chance to raft this river last summer, and the crystal-clear waters were like something out of a postcard. The Salmon River boasts a variety of rapids, with Class III to Class V sections, making it an excellent choice for those seeking both thrills and a chance to marvel at nature. Plus, the surrounding wilderness is perfect for spotting wildlife, which was a delightful bonus during our trip.

Ocoee River, Tennessee

The Ocoee River is another fantastic destination for white water rafting enthusiasts. Located in Tennessee, this river is famous for its fast-paced rapids and beautiful scenery. I still recall the laughter and cheers from my group as we navigated the intense Class III and Class IV rapids. The river hosts several annual events, including the Ocoee River Raft Race, which adds an exciting twist to the experience. What I loved most about the Ocoee was the way the lush, green forests hugged the banks, creating a serene backdrop for the exhilarating action on the water.

Rogue River, Oregon

The Rogue River in Oregon is a gem for those who love both adventure and the great outdoors. With its diverse range of rapids, from Class II to Class IV, it’s perfect for families and groups of friends. I remember my trip there vividly – the beauty of the surrounding landscape and the thrill of the rapids made it an unforgettable experience. The Rogue also offers opportunities for hiking and fishing along the way, which is great for those who want to explore more than just the water. A highlight for me was stopping at one of the riverside campsites to enjoy a hearty meal with my fellow rafters under the stars.

Futaleufu River, Chile

If you’re feeling adventurous and want to take your rafting experience international, the Futaleufu River in Chile should be on your radar. This river is famed for its stunning turquoise waters and challenging rapids, ranging from Class III to Class V. I had the chance to raft here last year, and it was like stepping into another world. The backdrop of the Andes mountains and the unique wildlife made the trip feel like a true expedition. Rafting on the Futaleufu was not just about the thrill; it was also about immersing myself in a completely different culture and environment. I can honestly say it was one of the best experiences of my life!

Best Times to Go White Water Rafting

Seasonal Considerations

Timing your rafting trip can significantly impact your experience. Generally, the best time for white water rafting is during the spring and early summer when snowmelt feeds the rivers, creating thrilling rapids. I’ve noticed that planning a trip around this time often brings the most challenging conditions, which is perfect for adrenaline junkies like myself. However, late summer and fall can also offer calmer waters, making it a great option for families or those looking to enjoy a more leisurely float.

Weather Impact on Rafting Conditions

The weather can change rapidly, and this influences river conditions greatly. I’ve experienced sunny days turn into sudden storms, which made the rapids more intense. It’s essential to check the weather forecast before heading out. I recommend keeping an eye on local conditions, as heavy rain can lead to increased water levels and, therefore, more challenging rapids. The thrill of rafting during changing weather can be exhilarating, but safety should always come first!

Local Festivals and Events

Attending local festivals or events can enhance your rafting experience. Many river communities celebrate their rivers with festivals featuring live music, food, and rafting competitions. I had the pleasure of attending a river festival during my rafting trip on the Ocoee, and it was a fantastic way to connect with locals and fellow adventurers. These events often provide additional activities such as guided tours, workshops, and even equipment rentals, making them a great addition to your rafting adventure. For more ideas on affordable destinations, check out the Top 10 Budget-Friendly White Water Rafting Destinations.

Planning Your Rafting Trip

How to Choose a Rafting Company

Choosing the right rafting company can make a huge difference in your experience. I remember when I first started out; I was overwhelmed by the options available. After some research and chatting with friends who had gone before me, I learned a few key things to look for. First, check if the company has good reviews and ratings. Websites like Yelp or TripAdvisor can be super helpful. I found that reading about other people’s experiences gave me a clearer picture of what to expect.

Another important aspect is safety. Make sure the company follows strict safety guidelines and has certified guides. I’ve rafted with companies that provide detailed briefings on what to expect and how to handle different scenarios on the river. This made me feel more at ease and ready for the adventure ahead. Don’t hesitate to ask questions when you contact them—it’s a great way to gauge their expertise and customer service!

Guided Tours vs. Self-Guided Adventures

When planning your trip, you’ll need to decide between a guided tour or a self-guided adventure. I’ve done both, and each has its perks. Guided tours are fantastic for beginners or those who want a hassle-free experience. The guides know the river like the back of their hand and can offer insights about local wildlife, history, and safety tips. I remember how much I enjoyed hearing stories from our guide while navigating the rapids—it really added depth to our journey.

On the other hand, self-guided adventures can be thrilling for more experienced rafters who want to take charge of their experience. However, it requires more planning. You’ll need to understand the river’s conditions, have the right gear, and be prepared for emergencies. I’ve learned that having a solid map and a good sense of the river’s layout can make this option exciting and rewarding.

Permits and Regulations

Before you hit the river, it’s crucial to understand the permits and regulations that might apply. Some popular rafting destinations require permits, especially during peak season. I remember when I attempted to paddle on a river that needed a permit, and it turned into a bit of a scramble to find an alternative route. Always check the local regulations before planning your trip. Websites for national parks or local rafting associations usually have the most up-to-date information.

Additionally, being aware of seasonal restrictions is essential. For example, certain rivers might have specific periods when they are open for rafting based on water levels or weather conditions. I’ve found that planning ahead and securing permits well in advance can save you a lot of stress later on. It allows you to focus on the fun parts—like packing and getting excited for the adventure ahead!

Backpacking Essentials for Rafting

What to Pack for a Rafting Trip

Packing for a rafting trip can be a bit of an art, and over the years, I’ve honed my list to ensure I’m well-prepared. First and foremost, you need to think about clothing. Quick-drying clothes are a must, as you’ll likely get wet. I usually wear moisture-wicking shirts and board shorts. A lightweight, waterproof jacket is also essential to protect against splashes and unexpected weather changes.

Don’t forget about personal items. A good pair of polarized sunglasses can protect your eyes from the sun and glare off the water. I lost a pair of shades on my second rafting trip, and I can’t tell you how much I regretted it! Also, packing a hat can shield your face from the sun. Lastly, be sure to carry a good sunscreen. I learned the hard way that sunburn can ruin a fantastic day on the water.

Food and Water Considerations

Staying fueled during a rafting trip is incredibly important. I’ve always packed high-energy snacks like trail mix, granola bars, and jerky. These bite-sized goodies are easy to munch on while paddling and provide a quick energy boost. If you’re camping overnight or planning a longer excursion, consider packing a portable stove or grill for hot meals. Cooking together by the river can be an enjoyable way to unwind after a day of adventure.

Water is another crucial element. I always bring a refillable water bottle or hydration pack. Staying hydrated while paddling is essential, and having easy access to water makes it more convenient. I remember feeling drained midway through a trip because I wasn’t drinking enough. Now, I make it a point to take sips regularly, even when I’m in the thick of it!

Safety Gear and First Aid Kits

No rafting adventure is complete without the proper safety gear. Aside from the essential life jacket and helmet, I always carry a first aid kit. I once had a minor scrape that turned into a nuisance because I didn’t have any supplies to clean it up. A well-stocked first aid kit should include band-aids, antiseptic wipes, and pain relievers. It’s better to be prepared and not need it than to find yourself wishing you had.

Additionally, having a whistle can be a lifesaver in emergencies. I’ve seen how quickly things can change on the river, and having a way to signal for help can provide peace of mind. Remember to check your gear before heading out; it’s a good habit that can prevent issues during your trip.

Safety Tips for White Water Rafting

Understanding Safety Briefings

Before hitting the water, safety briefings are crucial for a successful rafting trip. I can’t stress enough how much I’ve appreciated these sessions in the past. They provide valuable information about the river, the equipment, and what to expect while on the water. During my first briefing, I learned about how to paddle effectively, what to do in case someone falls overboard, and the importance of communicating with my fellow rafters. I remember feeling more confident after that initial briefing, knowing that I was prepared for whatever the river might throw my way.

Guides often use these sessions to emphasize safety protocols. They explain the significance of wearing your life jacket at all times and how to properly position yourself in the raft. I’ve learned that taking these briefings seriously can completely transform your experience, ensuring you stay safe while enjoying the thrills of the rapids.

Common Injuries and How to Prevent Them

Even though rafting is incredibly fun, it does come with risks. I’ve seen a few common injuries that can occur, such as scrapes, bruises, or even more serious falls. To prevent these, I’ve found that wearing appropriate gear is of utmost importance. A well-fitting life jacket and helmet can make all the difference. I remember one rafting trip where someone took a tumble and ended up with a nasty scrape. Thankfully, they had a helmet, which saved them from a more serious injury.

But beyond gear, being aware of your surroundings can help too. I recall my guide reminding us to always keep our eyes on the water and to communicate with each other. If you’re facing particularly tumultuous rapids, not panicking and sticking together as a team can prevent a lot of mishaps. I’ve learned that staying calm and focused can help you navigate tricky situations more effectively.

Hydration and Sun Protection

Staying hydrated while rafting is essential, yet it’s something I often forget in the excitement of the adventure. I always bring along a refillable water bottle; having easy access to water keeps me from feeling drained halfway through the day. One time, I didn’t drink enough water and ended up with a headache that really took away from the fun. Now, I make it a point to sip water regularly—I even set reminders for myself during long stretches of paddling!

Sun protection is another aspect that can’t be overlooked. The sun’s rays bounce off the water, making it easy to get sunburned even on cloudy days. I’ve learned to apply a good sunscreen before getting on the water, and I keep a small bottle in my dry bag for reapplication. A wide-brimmed hat and polarized sunglasses are also part of my essential rafting gear now. Protecting myself from the sun has made my rafting trips much more enjoyable!

Post-Rafting Activities

Camping and Lodging Options

After an exhilarating day on the water, finding a cozy place to unwind is important. I’ve had some amazing camping experiences right by the river, where we set up tents and shared stories around a campfire. There’s something magical about listening to the sound of the water while falling asleep under the stars. Many rafting companies offer camping packages that include meals and guided activities, which can enhance the whole experience. I remember my group bonding over shared meals and laughter, which made our adventure even more memorable.

If camping isn’t your style, there are plenty of lodging options nearby as well. I often look for local motels or lodges that cater to outdoor enthusiasts. Staying close to the river allows for quick access for early morning adventures or a leisurely float the next day. I’ve found that a good night’s sleep after a day of rafting can really make a difference in how much I enjoy the next day!

Local Attractions and Activities

Exploring the local area after rafting can add even more fun to the trip. I always try to check out local attractions, whether it’s hiking trails or scenic overlooks. For instance, near the Salmon River, I discovered some fantastic hiking paths that offered breathtaking views of the surrounding landscape. It was a great way to stretch my legs after the physical exertion of rafting.

Many regions also have cultural sites or historical landmarks worth visiting. I’ve enjoyed visiting local museums or historical towns where I could learn more about the area’s history. Incorporating these activities into my trip has enriched my overall experience and given me a deeper appreciation for the regions I visit.

Dining Recommendations

After a long day of adventure, finding a great place to eat is always a treat. I love exploring local dining options, especially those that offer hearty meals perfect for refueling after a day on the river. I’ve found that some of the best meals come from local diners or small restaurants that source ingredients from nearby farms. If you can, try asking locals for recommendations—they often know where to find hidden gems!

During a trip to the Ocoee River, my group dined at a small barbecue joint that served the most delicious pulled pork I’ve ever tasted. The atmosphere was friendly and welcoming, and it was the perfect way to cap off a day of rafting. I always leave room for dessert, too—there’s nothing like a sweet treat after a day filled with adventure!

Budgeting for Your Rafting Adventure

Average Costs: Rafting Tours and Rentals

When planning a rafting trip, budgeting is essential. The costs can vary widely depending on the location and the type of trip you choose. From my experience, guided tours typically range from $50 to $150 per person for a day trip, which often includes equipment and safety gear. I’ve found that splurging a little on a reputable company pays off in terms of safety and enjoyment.

If you’re considering a self-guided adventure, renting a raft can cost between $50 to $100 per day, plus any additional gear you might need. I recommend checking rental prices in advance, as they can fluctuate based on the season and demand. Planning ahead can help you stick to your budget while ensuring you have an amazing time on the water! For more budget-friendly tips, you can Plan Your Next Budget Whitewater Rafting Expedition Here!

Transportation Expenses

Transportation to your rafting destination should also be factored into your budget. Whether you’re driving or flying, I’ve learned it’s best to plan these logistics early. If you’re flying, consider renting a car to get to the river. I once booked a last-minute flight and ended up scrambling for transportation, which added unnecessary stress to my trip.

If you’re driving, factor in gas costs and any potential lodging along the way. I often enjoy making the journey part of the adventure, stopping at interesting sites or local eateries along the route. It’s a great way to explore the area before even hitting the water!

Saving Tips for Backpackers

As a backpacker, I’m always on the lookout for ways to save money. One of my go-to strategies is booking early to get the best rates on both tours and accommodations. Off-peak seasons can also offer significant savings—just be mindful of the river conditions during those times!

I’ve also found that joining a group can lead to discounts on tours and rentals. Sharing costs can make rafting adventures more affordable, and it’s a fantastic way to make memories with friends or fellow travelers. I remember a trip where we formed a group of six and managed to get a great deal on our guided tour, making the experience even sweeter!

Personal Experiences and Testimonials

Stories from Experienced Rafting Enthusiasts

Hearing stories from other rafting enthusiasts can inspire and motivate newcomers. I once met a couple during a rafting trip who shared their incredible journey of rafting in multiple countries. They told tales of navigating through the rapids of the Futaleufu River in Chile, emphasizing how each trip brought new challenges and unforgettable memories. Listening to their stories reminded me of the vast adventures that await us on the water.

Another time, I met a family who had just completed a multi-day rafting trip on the Colorado River. They spoke about how it strengthened their bond and provided them with a unique experience they would cherish forever. It was heartwarming to see how rafting can bring people together and create lasting connections.

Lessons Learned from Rafting Adventures

Every rafting trip teaches us something new. For me, it’s about embracing the unexpected. I remember a trip where we faced an unexpected storm, and instead of panicking, we adapted and made the most of it. We took shelter and ended up bonding with our guides over stories and laughter. That day taught me that sometimes the best memories come from the unplanned moments.

Another lesson I’ve learned is the importance of teamwork. Rafting is not just about navigating the water; it’s about working together with your group. I’ve seen how communication and collaboration can lead to a more enjoyable experience. On one trip, we faced a particularly challenging rapid, and by coordinating our paddling, we made it through as a unified team. It was such a rewarding feeling!

Final Thoughts

White water rafting is more than just an adventure; it’s a way to connect with nature, build relationships, and challenge yourself. Every trip I’ve taken has left me with unforgettable memories and lessons that extend beyond the river. Whether you’re navigating the roaring rapids of the Colorado River or enjoying the tranquil beauty of the Rogue River, there’s a world of excitement waiting for you. I hope this inspires you to grab your gear, gather your friends, and embark on your own rafting adventure. The thrill of the water and the joy of camaraderie will make it an experience you’ll treasure forever!

Frequently Asked Questions

What is white water rafting?

White water rafting is an exhilarating outdoor activity that involves navigating through turbulent river waters in an inflatable raft. It requires teamwork, strategy, and provides a healthy dose of adrenaline, making it a thrilling experience for backpackers of all skill levels.

What are the different classes of rapids?

Rapids are categorized from Class I to Class VI: Class I being easy and perfect for beginners, while Class VI are extremely dangerous and suitable only for expert paddlers. The classes range from gentle waves (Class I) to expert-level rapids with significant hazards (Class V) and unrunnable rapids (Class VI).

What essential equipment do I need for white water rafting?

Essential equipment for white water rafting includes a raft, paddles, a life jacket, a helmet, a wet suit, sturdy footwear, and dry bags to keep belongings safe and dry during the adventure.

Where are some top destinations for white water rafting?

Top destinations for white water rafting include the Colorado River in Arizona, the Salmon River in Idaho, the Ocoee River in Tennessee, the Rogue River in Oregon, and the Futaleufu River in Chile, each offering unique experiences and varying rapids.

When is the best time to go white water rafting?

The best time for white water rafting is generally during the spring and early summer when snowmelt feeds the rivers, creating thrilling rapids. Late summer and fall can also offer calmer waters for a more leisurely experience.

Should I choose a guided tour or a self-guided adventure?

Choosing between a guided tour and a self-guided adventure depends on your experience level. Guided tours are great for beginners and offer a hassle-free experience, while self-guided adventures can be thrilling for experienced rafters who want more control over their journey.

What should I pack for a rafting trip?

When packing for a rafting trip, consider quick-drying clothing, polarized sunglasses, a waterproof jacket, a hat, sunscreen, high-energy snacks, and a refillable water bottle. A first aid kit and safety gear are also crucial to ensure a safe experience.

What safety tips should I keep in mind while rafting?

Safety tips for rafting include attending safety briefings, wearing appropriate gear like life jackets and helmets, being aware of your surroundings, staying hydrated, and applying sunscreen to protect against sunburn while on the water.

What post-rafting activities can I enjoy?

Post-rafting activities can include camping near the river, exploring local attractions like hiking trails or cultural sites, and dining at local restaurants. These activities can enrich your overall experience after a day on the water.

How can I budget for my rafting adventure?

Budgeting for a rafting adventure involves considering costs for guided tours (typically $50 to $150 per person) or raft rentals, transportation expenses, and planning logistics early. Joining a group can also lead to discounts on tours and rentals.