Web Analytics

Recent Posts

Discover the Best Hiking Trails: A Backpacker’s Guide

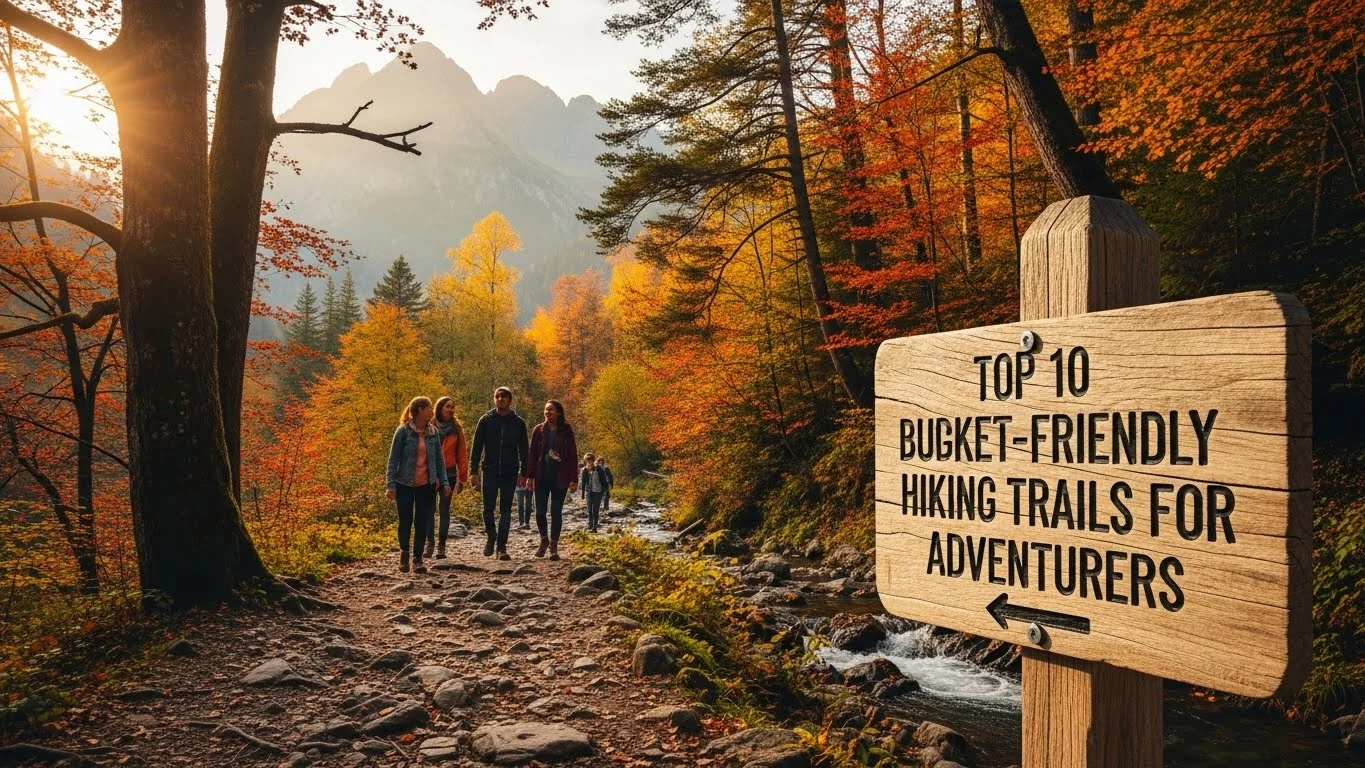
Hiking is more than just a hobby; it’s a way to connect with nature and discover breathtaking landscapes. Whether you’re a seasoned backpacker or a beginner, there’s a trail waiting for you. If you’re looking for budget-friendly options, explore the best sustainable hiking trails on a budget to make the most of your outdoor adventures.

Discover the Best Hiking Trails: A Backpacker's Guide

Understanding Hiking Trails

When I first started hiking, I was overwhelmed by the sheer number of trails out there. Each one seemed to promise a unique experience, but I had no idea how to choose the right one. I quickly realized that understanding hiking trails is essential for planning a successful trip. From the types of trails to the difficulty levels and essential terminology, knowing this can make all the difference in our hiking experience.

The Different Types of Hiking Trails

Hiking trails can be categorized into different types based on their features and what they offer. Here are some common types I’ve encountered on my adventures:

  • Loop Trails: These trails start and end at the same point, making for a convenient hike without retracing your steps. I love loop trails because they often showcase diverse scenery.
  • Out-and-Back Trails: This classic type involves hiking to a destination and then returning the same way. I remember hiking a beautiful out-and-back trail to a stunning waterfall, and the scenery felt fresh both ways.
  • Point-to-Point Trails: These require transportation at both ends, as you hike from one point to another. While they can be a bit trickier to plan, the sense of adventure makes them worthwhile.
  • Urban Trails: Often found in city parks, these trails allow us to connect with nature without venturing far from urban life. I’ve enjoyed many peaceful walks on urban trails, where I can unwind after a busy day.
  • Backcountry Trails: These are less developed and can lead to stunning, remote areas. I find these trails truly rewarding, as they often lead to solitude and spectacular views.

Trail Difficulty Levels: Easy, Moderate, and Hard

Understanding trail difficulty levels is crucial when planning your hike. I’ve learned through experience that picking the right difficulty can make or break our journey.

  • Easy Trails: These are perfect for beginners or families. They typically have gentle slopes and well-maintained paths. I often recommend easy trails for those just starting out, as they build confidence and familiarity with the outdoors.
  • Moderate Trails: These trails may include some elevation gain or rough terrain. They challenge us while still being accessible. I remember my first moderate trail; it felt like a significant achievement to tackle the inclines!
  • Hard Trails: These are intended for experienced hikers. They often involve steep climbs, rocky paths, and potentially unpredictable weather. I’ve tackled a few hard trails, and while they push my limits, the views at the top are always worth it.

Essential Hiking Terminology

As I’ve hiked more, I’ve come across terminology that initially puzzled me. Knowing these terms can enhance our understanding and make our hiking experience smoother:

  • Elevation Gain: This refers to the total vertical distance you’ll climb during the hike. It’s an important factor to consider, especially for challenging trails.
  • Waypoints: These are specific locations along a trail that can help with navigation. I often use waypoints to break my hike into manageable segments.
  • Trailhead: The starting point of the trail. I’ve stood at many trailheads, filled with anticipation for the adventure ahead.
  • Switchbacks: These are zigzag paths that help manage steep terrain. They can be tiring, but they also offer breathtaking views as you ascend.
  • Backpacking: This refers to hiking with all your gear, usually for multiple days. It’s a great way to immerse ourselves in nature, but I’ve learned to pack wisely!

Understanding these basics has helped me choose the right trails and prepare for the challenges that come with hiking. We’ve all had experiences where the right amount of knowledge made the journey more enjoyable, and I believe that’s what makes hiking so special. As we dive deeper into the world of hiking, we’ll explore incredible destinations and share tips for planning the perfect hiking trip.

Top Hiking Destinations in the US

When I think about hiking, I can’t help but dream of the incredible destinations across the United States. Each place has its unique charm and breathtaking views. I’ve had the pleasure of visiting some amazing spots, and I want to share them with you. Whether you’re looking for majestic mountains, stunning coastlines, or peaceful forests, here are some top hiking destinations you should consider.

National Parks

National parks are the crown jewels of hiking in the US. They offer diverse landscapes, abundant wildlife, and well-maintained trails. I’ve found that visiting these parks is like stepping into a different world.

Yosemite National Park

Yosemite holds a special place in my heart. The towering granite cliffs, like El Capitan and Half Dome, are awe-inspiring. I remember hiking the Mist Trail, where I was greeted by the roar of waterfalls, especially in the spring. The scenery in Yosemite is breathtaking throughout the year, but I feel spring and fall are particularly magical.

Grand Canyon National Park

The Grand Canyon is another must-see destination. Standing on the rim and gazing down into the vast canyon is a humbling experience. I attempted the hike down to the Colorado River on the Bright Angel Trail, and let me tell you, it was one of the most challenging yet rewarding hikes I’ve ever done. The colors of the rock formations change throughout the day, creating a beautiful palette that I could admire for hours.

Yellowstone National Park

Yellowstone is the first national park in the world, and it’s packed with geothermal wonders and wildlife. I’ve had some incredible encounters with bison and elk while hiking the trails here. The Fairy Falls Trail, leading to one of the tallest waterfalls in the park, was a highlight of my visit. The fascinating geothermal features, like Old Faithful and the colorful Grand Prismatic Spring, make this park truly unique.

State Parks

If you’re looking for great hiking options without the crowds, state parks can be just as rewarding. I’ve discovered some hidden gems that deserve more attention.

Acadia State Park

Located in Maine, Acadia State Park offers stunning coastal views and a variety of trails. I loved hiking the Precipice Trail, which features iron rungs and ladders leading to breathtaking vistas of the Atlantic Ocean. The views from the top are simply unparalleled, especially at sunrise. Plus, the park’s charming rocky beaches are perfect for a post-hike rest.

Redwood State Park

There’s something magical about walking among the towering redwoods. I remember feeling tiny as I wandered through the ancient trees at Redwood State Park in California. The Tall Trees Grove trail is a must for anyone wanting to see these majestic giants up close. The air is fresh and cool, and the serene atmosphere makes it an unforgettable experience.

Great Smoky Mountains National Park

The Great Smoky Mountains offer a diverse landscape filled with lush forests, waterfalls, and diverse wildlife. One of my favorite hikes was the Alum Cave Trail, leading to the summit of Mount LeConte. The views along the way are stunning, and reaching the top feels like a significant achievement. Plus, the park is known for its rich history and vibrant fall colors, making it a great destination year-round. If you’re interested in budget-friendly options, check out the top 10 budget-friendly hiking trails for adventurers.

Hidden Gems: Lesser-Known Trails

While the popular destinations are amazing, I’ve also stumbled upon some lesser-known trails that are equally rewarding.

Angels Landing, Zion National Park

Angels Landing might be famous, but it’s still a gem worth mentioning. The hike is not for the faint-hearted, but the views from the top are out of this world. I remember gripping the chains while navigating the narrow ridges, my heart racing with every step. The sense of accomplishment upon reaching the summit is unforgettable.

Mount Si Trail, Washington

Mount Si is a favorite among locals, and for good reason. The hike is challenging but manageable, and it rewards you with panoramic views of the Snoqualmie Valley and the surrounding mountains. I found the trail to be a great way to push my limits while being surrounded by beautiful Washington scenery. The vibrant wildflowers in the spring added an extra touch of beauty to my hike. If you’re hiking solo, consider checking out best budget-friendly solo hiking trails to explore for more inspiration.

Exploring these hiking destinations has opened my eyes to the beauty and diversity of nature in the US. Each trail brings a new adventure and a chance to connect with the great outdoors. As we move forward, let’s talk about how to plan your hiking trip, ensuring you have the best experience possible.

Planning Your Hiking Trip

Planning a hiking trip can feel a bit daunting at first, especially with so many factors to consider. But I’ve learned that with a little preparation, we can ensure a fantastic adventure. I want to share some insights that have helped me along the way, from choosing the right time to hike to what gear to pack.

When to Go: Seasonal Considerations

The time of year we choose to hike can dramatically affect our experience. I’ve found that each season has its unique beauty and challenges, and understanding these can help us decide the best time for our adventures.

  • Spring: This time of year often brings blooming wildflowers and refreshing weather. I remember hiking in the spring when the air was crisp, and the landscapes were bursting with color. However, it’s essential to watch for lingering snow at higher elevations.
  • Summer: Summer is the most popular hiking season, with long days and warm temperatures. I love hitting the trails during this time, but I’ve also had to plan around the heat. Early morning hikes are my go-to to avoid the midday sun.
  • Fall: Autumn is magical, with vibrant foliage painting the trails. I’ve experienced some of my best hikes during this season, but I always check the weather, as temperatures can drop quickly. Plus, the trails tend to be less crowded!
  • Winter: Winter hiking offers a serene beauty that’s hard to beat. I’ve tried snowshoeing and found it to be an exhilarating way to explore winter landscapes. Just be sure to pack extra layers and check trail conditions before heading out.

Choosing the Right Trail for Your Skill Level

It’s essential to pick a trail that matches our abilities and comfort level. I remember when I first started hiking, I was eager to tackle challenging trails but quickly learned that it’s better to start slow and build up my confidence. Here’s what I consider when choosing a trail:

  • Assess Your Fitness Level: Be honest about your physical condition. I’ve found that even a short, easy trail can be a great workout if you’re not used to hiking regularly.
  • Research the Trail: I always read reviews and descriptions before heading out. Knowing the trail’s features and difficulty can help me prepare mentally and physically.
  • Consider Your Group: If you’re hiking with others, it’s crucial to choose a trail everyone can enjoy. I’ve had to adjust my plans when hiking with friends who were less experienced, and those easier hikes turned into memorable experiences.

Essential Gear and Packing List

Having the right gear can make a huge difference in our hiking experience. I’ve learned the hard way that being underprepared can lead to discomfort or safety risks. Here’s a packing list that I swear by:

Backpacks and Hydration Systems

A good backpack is my best friend on the trail. I usually opt for a lightweight option that fits snugly. Hydration is crucial, so I always bring a water bottle or a hydration reservoir. I remember a hike where I didn’t drink enough water, and it left me feeling sluggish. Now, I make it a point to stay hydrated throughout the journey.

Clothing Layers for Different Weather

Weather can change quickly in the mountains, so layering is vital. I start with a moisture-wicking base layer, add an insulating layer, and finish with a waterproof jacket. I’ve experienced both sweltering heat and unexpected rain, and being prepared with the right clothing has saved me on many hikes.

Navigation Tools: Maps and GPS

Even if I’m familiar with a trail, I still carry a map and a GPS device, just in case. I’ve had moments where my sense of direction faltered, and having these tools made all the difference. I also like to download trail maps on my phone, so I can access them offline.

Planning our hiking trip doesn’t have to be overwhelming. By considering these factors and being prepared, we can create unforgettable experiences on the trail. Whether we’re soaking in the breathtaking views or enjoying the quiet of nature, every hike is an opportunity to connect with the world around us. Next, I’ll share some safety tips that are crucial for keeping us safe while we’re out exploring.

Safety Tips for Backpackers

Understanding Weather Conditions

Weather can change on a dime when you’re out in the wilderness, and I learned this lesson the hard way on one of my hikes. As I was ascending a mountain, the sun was shining brightly. I felt confident in my decision to leave my rain jacket behind. However, just an hour later, dark clouds rolled in, and I found myself caught in a downpour. Since then, I always check the weather forecast before I hit the trail. I pay attention to temperature changes, wind conditions, and potential storms. It’s also wise to understand that weather can vary dramatically at different elevations, so I’ve taken to dressing in layers to be prepared for anything nature might throw my way.

Wildlife Awareness and Precautions

One of the joys of hiking is encountering wildlife, but it also comes with its own set of precautions. I remember hiking in Yellowstone when I spotted a bison grazing a short distance away. It was breathtaking, but it also reminded me to maintain a safe distance. I’ve read that the best way to avoid confrontations with wildlife is to be aware of their habits and respect their space. I carry bear spray in certain areas and always make noise while hiking to alert animals to my presence. Understanding wildlife behavior has kept my adventures safe and enjoyable.

First Aid Kit Essentials

No one wants to think about injuries while hiking, but having a well-stocked first aid kit has come in handy more times than I’d like to admit. I always include essentials such as adhesive bandages, antiseptic wipes, gauze, and pain relievers. I’ve used my first aid kit for everything from blisters to minor cuts. It’s also a good idea to add any personal medications you may need, as well as a small emergency blanket. Knowing I have these supplies gives me peace of mind while exploring the great outdoors.

Staying Hydrated and Nutrition on the Trail

Staying hydrated is crucial, especially on long hikes. I’ve been guilty of underestimating how much water I need and have felt sluggish because of it. I aim to drink water regularly, even if I don’t feel thirsty. Along with hydration, I’ve learned the importance of proper nutrition while hiking. I pack energy-rich snacks like nuts, trail mix, and energy bars. On one particularly strenuous hike, I sat down to enjoy a peanut butter and jelly sandwich, and it was more satisfying than I could have imagined. Fueling our bodies helps maintain our energy levels and keeps us focused on the trail.

Trail Etiquette and Leave No Trace Principles

Respecting Nature and Wildlife

As we enjoy the beauty of the trails, it’s essential to respect the environment and the creatures that inhabit it. I make it a point to stay on marked trails to avoid damaging native plants. I’ve seen firsthand how trampling can ruin delicate ecosystems. Observing wildlife from a distance is part of this respect; I never approach animals for a closer look. Instead, I take photos and appreciate them from afar, knowing that we’re all part of this natural world.

Sharing the Trail with Others

Hiking is often a social experience, and sharing the trail with others can enhance our enjoyment. I always remember to yield to those going uphill and step aside to let faster hikers pass. It’s a simple courtesy that fosters a friendly atmosphere on the trails. I’ve met some wonderful people during my hikes, and chatting with fellow hikers has led to great recommendations for future adventures.

Waste Disposal and Environmentally Friendly Practices

One principle I live by is to leave no trace. I always pack out whatever I bring in, including food wrappers and other trash. I’ve even picked up litter left by others when I come across it on the trail. It’s a small effort that contributes to preserving the beauty of the wilderness for everyone. I also make it a point to use biodegradable products whenever possible and follow proper disposal methods for human waste when hiking in remote areas.

Resources for Hikers

Best Hiking Apps and Websites

In today’s digital age, technology can be a great ally when planning hikes. I use apps like AllTrails and Gaia GPS to find trails, read reviews, and check maps. These tools have made it easier for me to discover new places and navigate unfamiliar trails. I recommend giving them a try; they can enhance your hiking experience significantly.

Books and Guides for Trail Information

If you prefer a more traditional approach, there are plenty of books and guidebooks available. I’ve found that having a physical guidebook can be beneficial, especially when traveling to new areas. These books often provide detailed trail descriptions, maps, and insights into the flora and fauna you might encounter along the way.

Local Hiking Clubs and Communities

Joining a local hiking club can be a great way to meet like-minded individuals and discover new trails. I’ve participated in group hikes that introduced me to hidden gems I wouldn’t have found on my own. Plus, hiking with others can enhance safety and create lasting friendships. I encourage everyone to look for hiking groups in their area; you might be surprised at the connections you can make.

Final Thoughts

Hiking is much more than just walking on a trail; it’s about embracing the beauty of nature, challenging ourselves, and creating unforgettable memories. I’ve learned that with the right preparation, respect for the environment, and a sense of adventure, our hiking experiences can be rewarding and enriching. Whether we’re exploring popular national parks or discovering hidden trails, every step we take brings us closer to the wonders of the great outdoors. So, lace up those hiking boots, grab your gear, and let’s hit the trails together!

Frequently Asked Questions

What are the different types of hiking trails?

Hiking trails can be categorized into several types, including Loop Trails, Out-and-Back Trails, Point-to-Point Trails, Urban Trails, and Backcountry Trails. Each type offers unique experiences and features.

How can I determine the difficulty level of a hiking trail?

Trail difficulty levels are generally categorized as Easy, Moderate, and Hard. Easy trails are suitable for beginners, moderate trails may include some elevation gain, and hard trails are for experienced hikers with steep climbs and potentially challenging conditions.

What is elevation gain in hiking?

Elevation gain refers to the total vertical distance you will climb during a hike. It is an important factor to consider, especially for challenging trails.

When is the best time to go hiking?

The best time to hike depends on the season. Spring offers blooming wildflowers, summer is popular for long days, fall provides vibrant foliage, and winter offers a serene landscape, though conditions can vary significantly.

What essential gear should I pack for a hiking trip?

Essential gear includes a lightweight backpack, hydration systems, clothing layers for changing weather, navigation tools like maps and GPS, and a well-stocked first aid kit. Proper preparation can enhance your hiking experience.

What safety precautions should I take while hiking?

Important safety precautions include checking weather conditions before your hike, being aware of wildlife and maintaining a safe distance, carrying a first aid kit, and staying hydrated and well-nourished during your hike.

What are Leave No Trace principles?

Leave No Trace principles involve respecting nature, sharing the trail courteously, and ensuring proper waste disposal. This means packing out what you bring in and minimizing your impact on the environment.

How can technology assist in planning a hiking trip?

Technology can aid in hiking through apps like AllTrails and Gaia GPS, which help find trails, read reviews, and check maps. These tools make discovering new places and navigating trails easier.

What are some recommended hiking destinations in the US?

Top hiking destinations in the US include National Parks such as Yosemite, Grand Canyon, and Yellowstone, as well as State Parks like Acadia and Redwood State Parks, and hidden gems like Angels Landing and Mount Si Trail.

How can I find a local hiking community?

Joining a local hiking club is a great way to meet like-minded individuals and discover new trails. Participating in group hikes can enhance safety and help you find hidden gems while building friendships.

Top 10 Budget-Friendly Hiking Trails for Adventurers

Hiking doesn’t have to break the bank! Join me as we explore incredible budget-friendly trails that let you embrace nature without spending a fortune. Adventure awaits just around the corner!

Top 10 Budget-Friendly Hiking Trails for Adventurers

Understanding Budget-Friendly Hiking Trails

What Defines a Budget-Friendly Hiking Trail?

When I think of budget-friendly hiking trails, my mind wanders to those amazing places where I can experience nature without worrying about the cost. Essentially, a budget-friendly hiking trail is one that offers a rich outdoor experience with minimal or no fees. These trails are often located in national parks, state parks, or local nature reserves where entrance fees are either low or non-existent. They provide a chance to connect with the outdoors, enjoy scenic views, and challenge ourselves physically—all while keeping our wallets happy. Read Interesting article: Top 10 Budget-Friendly Hiking Trails for Eco-Travelers

For many of us, the joy of hiking is not just about reaching a destination; it’s about the journey, the breathtaking views, and the peace that nature brings. Budget-friendly trails allow us to explore these experiences without the burden of expensive park fees, guided tours, or costly accommodations. I’ve found that some of my favorite hikes have been on trails that cost little to nothing, reminding me that adventure can be accessible to everyone.

Benefits of Hiking on a Budget

Hiking on a budget offers numerous benefits that extend beyond financial savings. My experience in budget hiking has taught me valuable life lessons and introduced me to a deeper appreciation for the environment. Here are some key benefits I’ve noticed:

  • Physical Health: Hiking is an excellent way to stay fit and enjoy the great outdoors. It offers cardiovascular benefits, builds muscle, and improves flexibility. Doing this without spending much feels even better!
  • Mental Well-Being: There’s something about being in nature that soothes my soul. Budget hiking allows me to escape the hustle and bustle of life without the added stress of spending money. The fresh air and peaceful surroundings always clear my mind.
  • Connection to Community: Budget-friendly trails often attract fellow hikers who share the same passion for nature. I’ve made friends on budget hikes, shared stories, and bonded over our love for the outdoors, creating a sense of community.
  • Environmental Awareness: Hiking on budget trails also fosters a connection to nature. I’ve learned to appreciate the beauty of our environment and the importance of preserving it. It’s a reminder that we need to care for these spaces, especially since they offer so much joy without costing us much.

Ultimately, budget hiking is about enjoying nature, staying physically active, and forming connections with both the environment and fellow adventurers. I’ve found that some of my most memorable experiences in nature came without a hefty price tag attached.

Top 10 Budget-Friendly Hiking Trails

1. Appalachian Trail (Various States)

The Appalachian Trail is a classic choice for hikers looking to experience stunning landscapes while sticking to a budget. Stretching over 2,200 miles from Georgia to Maine, it has numerous access points, making it easy to find a free or low-cost section to hike. I remember stepping onto the trail for the first time, overwhelmed by the lush green foliage and the camaraderie of fellow hikers. Whether you hike a short segment or a longer stretch, this trail offers something for everyone!

2. Pacific Crest Trail (California, Oregon, Washington)

The Pacific Crest Trail is another iconic trail that beckons adventurers without requiring a fortune. Covering over 2,650 miles from Mexico to Canada, it traverses diverse landscapes, from desert to mountain peaks. I felt invigorated during my hike in the Sierra Nevada section, where breathtaking views greeted me at every turn. With several entry points and a range of trail lengths, there are options for every budget.

3. Grand Canyon Rim Trail (Arizona)

This trail offers some of the most stunning views you can imagine, and the best part? There’s no fee to hike along the rim! I vividly remember standing at the viewpoints, taking in the vastness of the canyon, feeling small yet exhilarated. The Rim Trail is relatively flat and accessible, making it perfect for families and casual hikers alike. It’s a must-hike that won’t cost you a dime.

4. Zion National Park (Utah)

Zion National Park is a treasure trove of natural beauty, and while there is an entrance fee, it’s minimal compared to the experiences you’ll gain. I found myself mesmerized by the dramatic landscapes and unique rock formations. The park offers various trails for all skill levels, including the famous Angels Landing and the more moderate Riverside Walk. Trust me, the views are worth every step!

5. Mount Rainier National Park (Washington)

Mount Rainier National Park offers a stunning backdrop for budget hikers. The park has numerous free trails that showcase the beauty of the Pacific Northwest. I once hiked the Skyline Trail, and the wildflower display was captivating. The park’s natural beauty, combined with its budget-friendly options, makes it a perfect destination for adventurers.

6. Glacier National Park (Montana)

With its breathtaking landscapes and diverse wildlife, Glacier National Park is a gem for budget-conscious hikers. There are free or low-cost trails that offer incredible views and experiences. I remember hiking the Hidden Lake Trail, surrounded by towering peaks and pristine nature. It’s an unforgettable experience that doesn’t have to come with a hefty price tag.

7. Shenandoah National Park (Virginia)

Shenandoah National Park is a fantastic option for budget hikers, with its scenic Skyline Drive and numerous trails to explore. I loved hiking the Old Rag Mountain Trail, where the challenge was well worth it for the panoramic views from the summit. With affordable entrance fees and plenty of options, this park is perfect for a weekend getaway.

8. Great Smoky Mountains National Park (Tennessee, North Carolina)

As the most visited national park in the U.S., Great Smoky Mountains National Park offers free admission, making it a top choice for budget hikers. The park is filled with a variety of trails, from easy walks to challenging hikes. I had a blast exploring the trails and soaking in the stunning views, all without spending a dime on entry.

9. Cuyahoga Valley National Park (Ohio)

This lesser-known park offers beautiful trails and rich history, all while being budget-friendly. The Cuyahoga Valley is a hidden gem I discovered while seeking new adventures. The Ohio & Erie Canal Towpath Trail was a highlight, allowing me to blend nature with a bit of history as I walked along the canal.

10. White Mountain National Forest (New Hampshire)

The White Mountain National Forest is a paradise for hikers, with its stunning peaks and numerous trails. I loved hiking the Franconia Ridge Loop, which provided breathtaking views of the surrounding mountains. Many trails in the forest are free to access, making it an excellent option for budget-conscious adventurers.

When to Visit These Trails

Best Seasons for Hiking

Choosing the right season for hiking can greatly enhance your experience. I remember my first hike in the spring when the flowers were blooming, and the air was filled with the sweet scent of nature waking up after winter. Spring is often considered one of the best times to hit the trails, especially since the temperatures are usually mild. I’ve enjoyed watching the landscape come alive with vibrant colors and lively animals emerging from their winter slumber.

Summer brings a different kind of charm, though. Longer days mean more time to explore, and I love how the warmth encourages me to adventure deeper into the wilderness. Just remember to start early to beat the heat and stay hydrated! Fall is another favorite of mine, as the changing colors create breathtaking views. The crisp air and fewer bugs make for a perfect hiking experience. Of course, winter hiking can be magical, too, especially if you’re prepared for the cold. I’ve had some of my most serene moments surrounded by a blanket of fresh snow—it feels like stepping into a winter wonderland!

Ultimately, I think the best season for hiking depends on what you’re looking to experience. Each season has its own beauty, and I’ve found joy in the unique offerings of every time of year. For me, the key is to plan ahead based on the seasonal conditions to make the most of my hiking adventures. Read Interesting article: Best Budget-Friendly Solo Hiking Trails to Explore

Weather Considerations

Weather is a crucial factor to keep in mind when planning a hike. I’ve learned this the hard way a couple of times! Checking the forecast before heading out has saved me from unexpected downpours or extreme heat. I always make it a point to wear layers, especially in the mountains, where the weather can change rapidly. I remember one hike where I started off in a tank top and ended up pulling on a fleece as the temperature dropped and the winds picked up. Being prepared is key!

Rain can be a delight or a disaster, depending on how you’re equipped. I’ve hiked in the rain, and while it was a bit of a challenge, it also brought a refreshing twist to the experience. I recommend investing in a good waterproof jacket and deciding on whether you want to embrace the rain or seek cover, depending on the intensity. Just be careful on slippery trails!

Also, I always keep an eye on the humidity levels. High humidity can make a otherwise pleasant hike feel exhausting, and I’ve had my fair share of sweaty treks because I didn’t pay attention to it. On the flip side, hiking during cooler, drier seasons can be invigorating and refreshing. Just remember to stay hydrated and listen to your body!

How to Prepare for Budget Hiking

Essential Gear on a Budget

Preparing for a hike on a budget doesn’t mean skimping on safety or comfort. I’ve learned that investing in a few essential items can make all the difference. When I started hiking, I focused on gathering gear that was practical yet affordable. A sturdy pair of hiking shoes is a must. I remember getting a pair on sale that served me well for years! Comfort is crucial, especially on longer hikes, and having the right shoes can prevent blisters and keep your feet happy.

Another item I find useful is a lightweight backpack. I’ve tried various styles, and I believe having one that fits well and distributes weight evenly makes hiking much more enjoyable. Also, don’t forget to pack a reusable water bottle. Staying hydrated is essential, and it’s a simple way to stay eco-friendly while saving money! Read Interesting article: Essential Gear for Budget-Friendly Winter Hiking Trips

Clothing is equally important. I’ve learned to layer my clothing, which allows me to adjust based on the temperature. I look for moisture-wicking fabrics, which help keep me comfortable while hiking. I often check thrift stores for outdoor clothing as well; you can find some great deals on quality items that’ll last. Overall, I think it’s about finding that balance between quality and budget, and I’ve discovered that with a little research, it’s entirely possible!

Food and Water Tips

Food and hydration are two areas where I believe planning ahead truly pays off. I’ve found that bringing my own snacks can not only save money but also enhance my hiking experience. I love packing trail mix with nuts, dried fruits, and a bit of chocolate for an energy boost. I also prepare sandwiches or wraps with my favorite fillings; they’re easy to eat on the go! I remember one hike where I treated myself to a homemade peanut butter and banana wrap at the summit, and it tasted divine!

When it comes to water, I strongly recommend carrying enough for the whole hike, especially if you’re going somewhere remote. I often use a hydration bladder, which makes sipping on water super convenient while I’m on the move. I’ve learned the hard way that running out of water can turn a beautiful hike into a stressful situation, so I always err on the side of caution. In areas where water sources are available, I carry a water filter or purification tablets, which allows me to refill without worry.

Maps and Trail Apps

Having a good navigation plan can make a world of difference when hiking on a budget. I’ve found that using free trail apps or websites helps me discover new trails and track my routes. Apps like AllTrails or Hiking Project have become my go-to tools for finding detailed maps, directions, and trail reviews. I love being able to see photos from previous hikers and read their insights before I set out.

However, I still believe in the classic method of carrying a physical map. I usually keep a printed version of the trail map in my backpack just in case I lose cell service. It’s a good backup for navigation, and it also gives me a sense of adventure. I remember one hike where my phone died, and having that map saved the day! Exploring new trails can be a thrill, but it’s important to be prepared and know where you’re going.

Safety Tips for Budget Hikers

Staying Safe on the Trails

When I first started hiking, I quickly learned that safety should always be a top priority. While exploring the outdoors can be exhilarating, it’s essential to be prepared for any challenges that may arise. One of the best pieces of advice I received was to always tell someone my hiking plans before I hit the trail. I’ve found that sharing my itinerary with a friend or family member ensures that someone knows where I am, just in case of an emergency.

I also make it a habit to carry a first aid kit that’s lightweight and compact. I remember one hike when I tripped and scraped my knee; having a small first aid kit made it easy to clean and bandage the wound right there on the trail. It’s a little extra weight in my backpack, but it’s a lifesaver for minor injuries. I recommend including items like adhesive bandages, antiseptic wipes, and pain relievers. You never know when you might need them!

Before heading out, I always check the trail conditions and any potential hazards. Websites that provide updates on trail status can be incredibly helpful. I’ve encountered fallen trees and flooding on trails that were otherwise marked as accessible, so staying informed can prevent unexpected surprises. Also, don’t forget to carry a whistle! It’s a lightweight item that could be crucial in case you find yourself in a tricky situation.

Wildlife Awareness

One of the joys of hiking is encountering wildlife, but it’s important to approach these moments with caution and respect. I’ve had some incredible experiences observing animals in their natural habitats, but I’ve also learned the importance of keeping a safe distance. Bears, snakes, and other wildlife can be unpredictable, and I always remind myself to appreciate them from afar. I remember one hike where I spotted a deer just off the trail. It was magical to watch, but I stayed quiet and moved away slowly to avoid startling it.

When hiking in areas known for wildlife, I make it a point to educate myself about the animals I might encounter. Knowing what to do if I come across a bear or a moose has helped me feel more confident on the trails. I’ve found that carrying bear spray when hiking in bear country is a good precaution. It’s important to know how to use it properly, and it gives me peace of mind.

Additionally, I always keep my food in sealed containers and avoid feeding animals. I once saw a hiker feeding a squirrel, and while it seemed harmless, it can lead to dangerous situations for both the animal and the hiker. It’s best to enjoy wildlife from a distance and leave them to their natural behavior.

Local Attractions Near Hiking Trails

Camping Options

If you’re looking to extend your hiking adventure, consider camping nearby! I’ve found that camping not only saves money on lodging but also immerses you in nature even more. Many budget-friendly trails are close to campgrounds, allowing hikers to enjoy both hiking and the great outdoors overnight. I remember camping at a site near the Great Smoky Mountains National Park, and waking up to the sunrise over the mountains was an experience I’ll never forget.

When selecting a campground, I look for amenities like restrooms, water sources, and fire pits, which can make my stay more comfortable. Some campgrounds operate on a first-come, first-served basis, so I’ve learned to arrive early to secure a good spot. Additionally, I always check if there are any camping fees, but many national parks offer affordable options that won’t break the bank.

If you’re new to camping, I recommend starting with campgrounds that offer basic facilities. This way, you can ease into the experience without feeling overwhelmed. It’s a fantastic way to enhance a hiking trip while staying budget-friendly!

Nearby Towns and Amenities

Exploring nearby towns can add an exciting element to your hiking adventure. I’ve discovered charming little towns close to popular trails, often filled with local shops and restaurants that offer a taste of the region. One of my favorite experiences was wandering through a quaint town near the Appalachian Trail, where I found an adorable café serving homemade pastries. It felt like the perfect reward after a long day of hiking!

Before heading out, I like to do a bit of research on the towns near my hiking destinations. This way, I can plan to stop by for a meal or to stock up on supplies. I often look for local markets that sell fresh produce or trail-friendly snacks. Supporting these small businesses not only enhances my experience but also contributes to the local economy.

In some cases, I’ve even found towns that host events or festivals during certain times of the year, providing an extra layer of enjoyment to my trip. I’ve attended local fairs where I could learn about the culture and history of the area, which made my hiking experience even richer.

Frequently Asked Questions

What defines a budget-friendly hiking trail?

A budget-friendly hiking trail is one that offers a rich outdoor experience with minimal or no fees. These trails are typically located in national parks, state parks, or local nature reserves where entrance fees are low or non-existent, allowing for an affordable way to connect with nature.

What are the benefits of hiking on a budget?

Hiking on a budget offers benefits such as improved physical health, enhanced mental well-being, a sense of community with fellow hikers, and increased environmental awareness. It allows individuals to enjoy nature without financial stress and fosters appreciation for the outdoors.

Which are some top budget-friendly hiking trails?

Some top budget-friendly hiking trails include the Appalachian Trail, Pacific Crest Trail, Grand Canyon Rim Trail, Zion National Park, Mount Rainier National Park, Glacier National Park, Shenandoah National Park, Great Smoky Mountains National Park, Cuyahoga Valley National Park, and White Mountain National Forest.

What is the best season for hiking?

The best season for hiking varies based on personal preference. Spring is often ideal due to mild temperatures and blooming flowers, while summer offers longer days. Fall provides breathtaking views with changing colors, and winter can be magical with snow, provided hikers are prepared for cold conditions.

What should I bring for a budget hike?

Essential gear for a budget hike includes sturdy hiking shoes, a lightweight backpack, a reusable water bottle, and layered clothing made from moisture-wicking fabrics. It’s important to balance quality and affordability while ensuring safety and comfort.

How can I save money on food while hiking?

To save money on food while hiking, plan ahead by bringing your own snacks like trail mix and sandwiches. Preparing meals at home and packing them for the hike can enhance your experience and save costs on food purchases during the trip.

What navigation tools should I use for hiking?

Using free trail apps or websites like AllTrails or Hiking Project can help discover new trails and track routes. It’s also wise to carry a physical map as a backup in case of lost cell service, ensuring you can navigate effectively.

What safety tips should I follow while hiking?

Safety tips for hiking include informing someone about your hiking plans, carrying a lightweight first aid kit, checking trail conditions beforehand, and bringing a whistle for emergencies. Staying informed and prepared can help manage unexpected challenges on the trail.

How can I enjoy wildlife while hiking safely?

To enjoy wildlife safely, maintain a safe distance and avoid feeding animals. Educate yourself about the wildlife in the area and carry bear spray when hiking in bear country to ensure your safety and the well-being of the animals.

Are there camping options near budget-friendly hiking trails?

Yes, many budget-friendly hiking trails are near campgrounds, allowing hikers to extend their adventure. Camping saves money on lodging and enhances the outdoor experience, with various facilities available to make stays comfortable.

Discovering Hidden Gems: Cheap Mountain Climbing Locations

Mountain climbing offers an exhilarating escape into nature, and the thrill of reaching a summit is unmatched. But did you know you don’t need to break the bank to experience this adventure? Let’s explore some budget-friendly mountain climbing locations that are absolute hidden gems. Read Interesting article: Ultimate Guide to Cheap Mountain Climbing Adventures

Discovering Hidden Gems: Cheap Mountain Climbing Locations

Overview of Mountain Climbing

What is Mountain Climbing?

Mountain climbing, to me, is more than just a physical challenge; it’s a journey into the heart of nature. I’ve always felt that each mountain has its own story to tell, waiting for those brave enough to listen. Essentially, mountain climbing involves scaling natural formations, which can range from simple hikes to technical ascents on rugged terrains. Whether you’re a beginner or a seasoned climber, there’s a mountain out there for everyone, and I believe it’s about finding the right one for your skill level and ambition.

Benefits of Mountain Climbing

When I first started climbing, I was drawn to the physical challenge, but I quickly discovered that there’s so much more to it. The benefits of mountain climbing extend beyond just getting in shape. For one, it’s a fantastic way to clear your mind and escape the hustle and bustle of everyday life. I often find that being surrounded by towering peaks and breathtaking vistas offers a sense of peace that’s hard to find elsewhere. Climbing also strengthens not just your body but your mental resilience. Each ascent teaches you to push through discomfort and fear, which has helped me in many life situations.

Additionally, mountain climbing fosters a sense of community. I’ve met some of my closest friends on trails and at climbing events. There’s something about sharing the experience of conquering a mountain that brings people together. Plus, the physical health benefits—improved cardiovascular fitness, enhanced strength, and increased endurance—are definitely a bonus!

Why Choose Budget-Friendly Locations?

Cost-Effective Travel Tips

Choosing less popular climbing locations can be a game-changer for your wallet. I remember my first solo trip to a budget-friendly mountain. Not only was the climbing experience incredible, but the cost savings allowed me to extend my trip and explore more. There are several ways to make your climbing adventures more affordable. For starters, consider traveling during the off-peak seasons. I’ve found that climbing during the shoulder seasons often means fewer crowds and lower prices for accommodations and permits.

Another tip I’ve learned is to look for local climbing clubs or groups. They often organize trips that can save you money on guides and transportation. Plus, this is a great way to meet fellow climbers and share tips and tricks. I’ve had some unforgettable experiences joining local groups where everyone was more than willing to help out, share gear, and even offer a few climbing lessons along the way. Read Interesting article: Explore the Best Mountain Climbing Spots on a Budget

Benefits of Climbing in Less Popular Areas

Climbing in less popular areas brings its own unique set of benefits. I’ll never forget my experience at a lesser-known mountain. The solitude was refreshing, and I felt a deep connection with the environment around me. Fewer climbers mean that you can truly enjoy the landscape without the noise and distractions common at more famous climbing sites. Plus, you’re likely to find that the local wildlife is more abundant, and the scenery is just as breathtaking as the more popular spots.

Additionally, climbing in these hidden gems often allows for greater exploration. I’ve stumbled upon trails and routes that aren’t well-documented in guidebooks, leading to unexpected adventures. There’s something thrilling about discovering a path less traveled, and every once in a while, I find a stunning view that feels like it was just meant for me. These experiences are often the most memorable parts of my climbing journeys.

Lastly, opting for budget-friendly locations can also promote sustainable tourism. When we choose to climb in lesser-known areas, we contribute to preserving the beauty of popular destinations by reducing overcrowding. I believe it’s important to enjoy nature responsibly, and supporting these hidden gems helps maintain the pristine environments we love.

In short, climbing in budget-friendly locations not only saves you money but enhances the overall experience. The peace, the connection to nature, and the friendships you make along the way are often more valuable than the views from the crowded summits. I’m excited to share some of my favorite affordable climbing locations with you in the following sections, so let’s get started! Read Interesting article: Ultimate Guide to Affordable Mountain Climbing Adventures

Top Cheap Mountain Climbing Locations in the US

1. Mount Hood, Oregon

When I think of Mount Hood, I can’t help but feel a sense of excitement. This iconic peak is not only a stunning sight but also offers budget-friendly climbing options. It’s one of the more accessible mountains in the Pacific Northwest, making it perfect for both beginners and experienced climbers. The trail to the summit, known as the Timberline Trail, offers incredible views without breaking the bank. I remember hiking it during the spring; the wildflowers were in full bloom, and the scenery was simply breathtaking. Plus, the cost of permits is quite reasonable, making it a great choice for a wallet-friendly adventure.

2. Mount Washington, New Hampshire

Mount Washington holds a special place in my heart. It’s known for its unpredictable weather, but that’s part of the thrill! The Tuckerman Ravine Trail is a popular option that provides a challenging yet rewarding climb. I’ll never forget the moment I reached the summit and stood in awe of the panoramic views. The best part? The Mt. Washington Observatory offers free educational tours, so you can learn about the mountain’s unique weather while enjoying the beauty around you. The cost of camping nearby is also very affordable, making it easy to stretch your budget.

3. Grand Teton, Wyoming

Grand Teton National Park is a stunning location that often gets overshadowed by its more famous neighbor, Yellowstone. I discovered this gem while seeking an adventure that wouldn’t break the bank. The views of the jagged Teton range are mesmerizing. The trails around Jenny Lake are a fantastic option, offering a mix of challenging climbs and scenic hikes. I remember camping under the stars with friends, surrounded by the breathtaking beauty of the mountains. The park does charge an entrance fee, but it’s worth every penny for the experience you’ll gain.

4. Mount Shasta, California

Mount Shasta is one of those mountains that feels magical. I had the pleasure of climbing it during a summer trip, and I was amazed by the diverse ecosystems along the trail. The Avalanche Gulch route is a popular choice for climbers, and it’s relatively inexpensive to access. I loved the camaraderie I felt with fellow climbers on the way up. The views of the surrounding landscape are absolutely stunning, and once you reach the summit, it feels like you’re on top of the world. Plus, the cost of camping in the area is quite affordable, allowing you to fully immerse yourself in the adventure.

5. Mount Rainier, Washington

Mount Rainier is one of my favorite spots when it comes to budget-friendly climbing. While it’s a prominent peak and can be challenging, the beauty of the landscape makes it worth it. I remember climbing the Disappointment Cleaver route, which is accessible for those who have some experience. The gorgeous vistas and the chance to spot wildlife make every step enjoyable. The park has several campsites where you can stay for a reasonable fee, and the park’s entrance fee is also quite low compared to other national parks. I recommend taking the time to explore the surrounding trails as well; they offer breathtaking views without the need for a serious climb.

International Hidden Gems for Mountain Climbing

1. Aconcagua, Argentina

Aconcagua is known as the highest mountain in South America, and climbing it is an adventure like no other. I’ve heard from fellow climbers that the experience is both challenging and rewarding. While the mountain does require a permit, the overall cost of the trip can be quite reasonable, especially if you plan ahead and book flights during off-peak seasons. The views from the summit are said to be breathtaking, and the cultural experience of climbing in Argentina adds an extra layer of excitement to the journey.

2. Mount Elbrus, Russia

Mount Elbrus is another incredible destination for climbers looking for adventure on a budget. I’ve read about its unique blend of history and natural beauty. Climbing Elbrus can be an affordable option, especially if you’re willing to camp along the route. The journey offers stunning views, and I’ve seen photos of climbers enjoying the breathtaking landscapes. The local culture and food are also an enticing part of the experience, making it a trip worth considering for any climbing enthusiast.

3. Rysy, Poland

Rysy, standing at the border of Poland and Slovakia, is often overlooked but offers an amazing climbing experience. I’ve come across many travelers who rave about the picturesque views and the less crowded trails. The routes to the summit are beautifully maintained, making it accessible for those who may not have extensive climbing experience. The cost of accommodations in nearby towns is quite affordable, allowing climbers to enjoy a rich cultural experience without draining their wallets.

4. Mount Kilimanjaro, Tanzania

Kilimanjaro is a bucket-list destination for many climbers, but it doesn’t have to be expensive. I’ve learned from friends who trekked there that planning ahead can save you a lot. There are budget-friendly trekking companies that offer packages that include guides, meals, and accommodations. The experience of climbing Africa’s highest peak is unforgettable, and the diverse landscapes you encounter along the way make every moment worthwhile. I’ve seen stunning photos of the sunrise from the summit, and I can only imagine how magical it must feel in person.

5. Huascarán, Peru

Huascarán is a hidden treasure in the Peruvian Andes and is often less crowded than some of the other famous peaks. I’ve heard from fellow adventurers that the remote beauty of the area is simply breathtaking. The climbing routes vary in difficulty, making it suitable for climbers of various skill levels. The costs associated with permits and local guides are often lower compared to more popular climbing destinations. Plus, the chance to experience local culture and cuisine while in Peru is something I truly cherish in my travels.

When to Visit These Locations

Seasonal Considerations

Choosing the right time to visit a climbing destination can make all the difference in your overall experience. I’ve learned through my adventures that each mountain has its unique seasonal patterns that can significantly affect climbing conditions. For example, I remember my trip to Mount Rainier, where I went during late spring. The weather was perfect for climbing, but I noticed that some trails were still covered in snow, which added a layer of challenge. It was an excellent reminder that timing is everything.

Generally, summer is the most popular climbing season, especially for mountains in the U.S. and Europe. However, I’ve found that early autumn can also be an ideal time to visit. The temperatures are cooler, the crowds have thinned, and the fall foliage adds a stunning backdrop to the landscape. In contrast, winter can bring its own adventure, especially for those of us who enjoy ice climbing. I’ve tackled a few winter ascents, and while they require different skills, the peace and beauty of a snow-covered mountain are unforgettable.

For international trips, like climbing Aconcagua in Argentina, I learned that the best time to go is during the summer months of December to February. Planning ahead is crucial since permits can be limited, and weather conditions can vary widely. I’ve found that researching the specific mountain’s typical weather patterns is a worthwhile investment of time, allowing me to better prepare for the conditions I might face.

Weather Patterns and Safety

Weather can be unpredictable in the mountains. I remember one hike where sunny skies turned into an unexpected snowstorm within minutes. It taught me the importance of staying informed. Checking the forecast before and during your trip is a must. I always pack a lightweight weather radio or download an app that provides updates on local conditions. This way, I’m ready for anything, whether it’s a sudden temperature drop or an afternoon thunderstorm.

When climbing, I recommend keeping an eye on the signs of weather changes. If I notice dark clouds rolling in, I tend to reassess my plans. It’s always better to err on the side of caution. I’ve had to turn back on a few occasions, but I’ve learned that safety comes first, and there will always be another opportunity to climb. Understanding how altitude affects weather is also important. Higher elevations can lead to quicker changes, and being prepared for these shifts can make your adventure safer and more enjoyable.

Additionally, I’ve found that each mountain has its own set of guidelines regarding weather and climbing conditions. Familiarizing myself with these before my trip has saved me from potential hazards. Many park websites offer up-to-date information on trail conditions and weather forecasts, which I always check before heading out. The key takeaway here is to respect the power of nature and plan accordingly.

Planning Your Climbing Trip

Essential Gear for Budget Climbers

When it comes to mountain climbing, having the right gear is essential, but it doesn’t have to cost a fortune. I’ve spent hours researching and compiling a list of essential equipment that balances quality and affordability. One of my favorite tips is to invest in a good pair of climbing shoes; they can truly enhance your experience without breaking the bank. I remember when I upgraded my shoes before a trip, and it made a world of difference in my grip and comfort on the rocks.

Layering is another critical aspect of gear selection. I usually pack moisture-wicking base layers, an insulating mid-layer, and a waterproof outer layer. This way, I can adjust to changing temperatures easily. I’ve found that thrift stores or online marketplaces can be fantastic for finding high-quality second-hand gear. I once scored a fantastic fleece jacket that became my go-to for many climbs.

Don’t forget about the small essentials, like a reliable backpack, hydration system, and first aid kit. I’ve learned the hard way that neglecting these can lead to uncomfortable situations. I always carry a lightweight emergency blanket and a few snacks. They seem small, but they can make a big difference in a pinch. Plus, I’ve made it a habit to check my gear before every trip to ensure everything is in good condition.

Finding Affordable Accommodations

Finding a place to stay can sometimes be the most challenging aspect of planning a climbing trip, especially on a budget. I’ve discovered that camping is often the most cost-effective option, allowing me to immerse myself in nature while saving money. Many climbing areas have designated campgrounds that are affordable and offer a great community atmosphere. I remember one night camping near Mount Shasta; I shared stories and s’mores with fellow climbers under a sky full of stars.

If camping isn’t your style, consider looking for hostels or budget inns in nearby towns. Websites and apps like Airbnb can also yield some hidden gems for affordable lodging. I’ve found some fantastic cabins that offered a cozy retreat after a long day on the mountain. Just remember to book early, especially during peak climbing seasons, as accommodations can fill up quickly.

Transportation Options

Getting to your climbing destination can also impact your budget. I typically prefer driving when possible, as it allows for flexibility and can save on transportation costs. Road trips can also add an extra layer of adventure, as I often discover beautiful sights along the way. Alternatively, if you’re flying, consider booking flights in advance and using budget airlines to keep costs low.

For those without a car, I’ve found that public transportation can be a hidden treasure. Many national parks have shuttle services that connect to popular trailheads. I once took a bus to a trailhead in Grand Teton National Park, and not only was it economical, but it also allowed me to meet fellow climbers who were just as excited about the adventure ahead.

Frequently Asked Questions

What is mountain climbing?

Mountain climbing involves scaling natural formations, ranging from simple hikes to technical ascents on rugged terrains. It’s a journey into the heart of nature that can be enjoyed by beginners and seasoned climbers alike.

What are the benefits of mountain climbing?

Mountain climbing offers physical fitness benefits, mental resilience, a sense of peace, and fosters community among climbers. It helps improve cardiovascular fitness, strength, and endurance while providing a break from everyday life.

Why should I choose budget-friendly climbing locations?

Budget-friendly climbing locations save you money, enhance your overall experience, and promote sustainable tourism by reducing overcrowding in popular destinations. They also offer unique adventures and a deeper connection with nature.

What are some tips for cost-effective travel when mountain climbing?

Travel during off-peak seasons, look for local climbing clubs that organize trips, and share costs for guides and transportation. These strategies can significantly reduce expenses while enhancing your climbing adventures.

What are some recommended budget-friendly mountain climbing locations in the US?

Some budget-friendly climbing locations include Mount Hood (Oregon), Mount Washington (New Hampshire), Grand Teton (Wyoming), Mount Shasta (California), and Mount Rainier (Washington). Each offers unique experiences and affordable access.

What international climbing destinations are considered hidden gems?

International hidden gems for climbing include Aconcagua (Argentina), Mount Elbrus (Russia), Rysy (Poland), Mount Kilimanjaro (Tanzania), and Huascarán (Peru). These locations provide stunning views and rich cultural experiences at a lower cost.

When is the best time to visit mountain climbing locations?

The best time to climb varies by location; generally, summer is popular, but early autumn can also be ideal due to cooler temperatures and fewer crowds. For international climbs like Aconcagua, summer months (December to February) are recommended.

What should I consider regarding weather patterns when climbing?

Weather can change rapidly in the mountains, so it’s important to check forecasts before and during your trip. Being aware of signs of changing weather and respecting nature’s power is crucial for safety during climbs.

What essential gear do I need for budget mountain climbing?

Essential gear includes a good pair of climbing shoes, moisture-wicking layers, a waterproof outer layer, a reliable backpack, hydration system, and a first aid kit. Investing in quality gear can enhance your climbing experience without breaking the bank.

How can I find affordable accommodations for climbing trips?

Camping is often the most cost-effective option. If camping isn’t suitable, consider hostels, budget inns, or cabins through platforms like Airbnb. Booking early is important, especially during peak seasons, to secure affordable lodging.

Ultimate Guide to Affordable Mountain Climbing Adventures

Mountain climbing is more than just reaching the peak; it’s about the journey, the thrill, and the breathtaking views. If you’re eager to explore the heights without breaking the bank, you’re in the right place! Read Interesting article: Explore These 7 Affordable Mountain Climbing Spots

Ultimate Guide to Affordable Mountain Climbing Adventures

Understanding Mountain Climbing

What is Mountain Climbing?

Mountain climbing, in my experience, is a thrilling adventure that combines physical exertion with breathtaking natural beauty. It involves ascending mountains or rock formations, often using a mix of climbing techniques, gear, and sometimes the help of guides. It’s more than just a sport; it’s a way to connect with nature, challenge yourself, and discover new limits. I remember my first climb vividly; the adrenaline rush as I reached the summit was like nothing I had ever felt before. Every step felt like a personal victory, and the stunning views at the top made all the effort worthwhile.

Different Types of Mountain Climbing

There are several types of mountain climbing, each offering a unique experience. I’ve dabbled in a few, and here’s what I’ve learned:

  • Rock Climbing: This is often done on natural rock formations or artificial rock walls. It’s all about technique, strength, and problem-solving. I was surprised at how much mental focus it required!
  • Alpine Climbing: This combines rock climbing with ice climbing. It’s typically done on snow-covered mountains and requires more gear and skills. I found the challenge exhilarating, especially when traversing icy paths.
  • Mountaineering: This refers to the ascent of high peaks, often involving various terrains and weather conditions. It’s a journey that can take days, which is something I learned the hard way on my first multi-day trek!
  • Ice Climbing: As the name suggests, this is climbing on ice formations, such as frozen waterfalls. I tried this once, and let me tell you, it was both thrilling and a bit terrifying!

Essential Gear for Mountain Climbing

Having the right gear is crucial for any climbing adventure. It can make the difference between a successful climb and a miserable experience. Here’s a list of essentials I never go without:

  • Climbing Shoes: These are specially designed to provide support and grip on the rocks. Investing in a good pair is a game-changer. I remember when I finally got my first pair; they felt like a second skin!
  • Harness: If you’re doing any kind of technical climbing, a harness is a must-have for safety. It’s comforting to know I’m secured while tackling steep sections.
  • Helmet: Protecting your noggin is paramount. I once saw a rock fall near a climber, and that reinforced just how important it is to wear a helmet!
  • Climbing Rope: This is essential for safety, particularly in technical climbs. It’s something I’ve learned to trust completely as it has saved me from potential falls.
  • Backpack: A good backpack helps carry everything you need without weighing you down. I always ensure mine is lightweight yet spacious enough for my gear and snacks!

Beyond these basics, I’ve found that weather-appropriate clothing, first aid kits, and navigation tools are also incredibly useful. It’s all about being prepared for whatever the mountain throws at you.

Mountain climbing can be an accessible pursuit for many of us, especially when we understand its essence, the types we can choose from, and the equipment we need to succeed. I can’t wait to share more about choosing affordable destinations and planning a climbing adventure next!

Choosing Affordable Destinations

Top Budget-Friendly Mountain Climbing Locations

When I started mountain climbing, I quickly realized that the location can make or break the experience, especially when you’re watching your wallet. I’ve discovered some fantastic budget-friendly climbing destinations that not only offer exhilarating climbs but also breathtaking scenery without emptying your pockets. Here are a few of my favorites:

  • Red River Gorge, Kentucky: This place is a gem for rock climbers of all levels. With hundreds of climbing routes, you can easily spend a week here. The entry fees to the parks are minimal, and the stunning sandstone cliffs are just incredible!
  • Joshua Tree National Park, California: This iconic destination is known for its unique rock formations. While the park does have an entry fee, the low-cost camping options make it a budget-friendly choice. Plus, the stargazing at night is simply unforgettable.
  • Mount Hood, Oregon: For those looking for a classic mountaineering experience, Mount Hood offers affordable access to stunning terrain. The surrounding areas have plenty of free camping spots, making it easy to enjoy a climbing trip without breaking the bank.

National Parks with Affordable Climbing Options

National parks can be a great way to experience climbing without a hefty price tag. They often have established climbing routes and facilities that make it easier for climbers. Here are a few national parks that I think are worth considering:

  • Yosemite National Park, California: While some might see Yosemite as a pricey destination, I found that with a little planning, it can be quite affordable. You can camp in the park for a reasonable fee and access world-famous climbing routes like El Capitan and Half Dome.
  • Rocky Mountain National Park, Colorado: This park features stunning alpine climbing opportunities. The entry fee is quite reasonable, and there are numerous free camping areas nearby. I loved the variety of climbs available, from bouldering to serious ascents.
  • Acadia National Park, Maine: Acadia is often overlooked, but it offers some excellent climbing opportunities on granite cliffs. The park’s entrance fee is modest, and you can find affordable accommodations in nearby towns.

International Destinations for Budget Climbers

If you’re feeling adventurous and want to explore climbing locations beyond the U.S., there are numerous international destinations that are surprisingly affordable. I’ve had some great experiences abroad, and here are a few budget-friendly spots worth checking out:

  • Costa Blanca, Spain: Known for its beautiful cliffs and sunny weather, Costa Blanca is a climbing paradise. The cost of living is low, and you can find cheap accommodations and food. I loved spending days climbing and evenings relaxing by the beach!
  • Thailand: With places like Krabi and Railay Beach, Thailand is an excellent destination for climbers. The limestone cliffs are breathtaking, and the food and lodging are incredibly affordable. It’s hard to beat a day of climbing followed by a sunset on the beach.
  • Morocco: If you’re looking for a unique climbing experience, Morocco’s Todra Gorge offers stunning rock climbing at budget-friendly prices. The local culture is vibrant, and the cost of food and lodging is very reasonable. I found myself enchanted by the local markets after a long day of climbing!

Choosing affordable climbing destinations has opened up so many opportunities for me. I’ve learned that with a little research and flexibility, we can experience some of the world’s best climbing spots without breaking the bank. Next up, let’s dive into planning your climbing adventure, focusing on the best times to climb and how to budget effectively!

Planning Your Climbing Adventure

Best Time to Climb: Seasonal Considerations

When I first started planning my climbing trips, I quickly realized that timing is everything. The weather can make a significant difference in our experience, and different seasons can offer unique challenges and rewards. For me, spring and fall have often been the best times to climb. The temperatures are usually mild, making it comfortable for long days on the rock. I remember one stunning autumn morning when the leaves were turning golden hues, and the air was crisp; it made the whole experience feel magical.

In summer, while many popular climbing spots can be crowded, I’ve discovered that early mornings or later afternoons can still offer a great chance to enjoy climbs in more solitude. However, I learned the hard way that some areas can be sweltering during midday, so I always try to plan my climbs around the coolest times of day.

Winter climbing is a different beast altogether. It can be beautiful, but it requires a whole new set of skills and gear. I’ve ventured out in winter conditions, and while the snowy landscapes are breathtaking, I’ve also faced some intense challenges that made me appreciate the warmth of spring all the more! So, depending on your skills and preferences, think carefully about the season that aligns with your climbing goals.

Creating a Budget for Your Adventure

Budgeting for a climbing adventure can feel overwhelming at first, especially if you want to experience everything a destination has to offer. I’ve found it helpful to break down my expenses into categories to keep things organized. Here’s what I typically consider:

  • Travel Costs: This includes transportation to and from the climbing destination. I often look for deals on flights or consider road trips with friends, which can make it more affordable.
  • Park Entrance Fees: Some places charge to enter, so I factor this into my budget. I’ve noticed that many national parks offer annual passes, which can be a great investment if you plan to visit multiple times.
  • Accommodation: I usually look for budget-friendly options, like campgrounds or hostels. Sometimes, I’ll even split costs with climbing partners, which makes a significant difference in overall expenses.
  • Food and Supplies: Packing meals or snacks can save a lot of money compared to eating out. I enjoy cooking at camp; it becomes part of the adventure. I remember sharing hearty meals around the fire after a long day of climbing—those moments are priceless.
  • Gear Rentals: If you’re new to climbing or trying a different discipline, renting gear is often more economical than buying everything. I’ve rented gear in several places, and it allows me to test out new equipment without committing.

By planning ahead and being mindful of my expenses, I’ve been able to enjoy climbing trips without the stress of overspending. It’s all about finding a balance that works for you!

Finding Affordable Accommodation Near Climbing Areas

Finding a place to stay doesn’t have to break the bank. In my experience, there are plenty of options that cater to climbers looking for budget-friendly accommodations. Here are some of my go-to strategies:

  • Campsites: Many climbing areas have campgrounds nearby, and I often choose to camp for both the cost savings and the experience of being closer to nature. Waking up to the sound of birds and the smell of fresh pine is unbeatable!
  • Hostels: I’ve stayed in hostels that cater specifically to outdoor enthusiasts. They often have communal areas perfect for meeting fellow climbers and sharing tips, which adds to the overall experience.
  • Vacation Rentals: If I’m traveling with friends, I’ll explore renting a cabin or apartment. Splitting the cost makes it much more affordable, and it’s nice to have a little home base to return to after a long day.
  • Local Recommendations: I always ask locals or fellow climbers for suggestions on where to stay. Often, they’ll know about hidden gems that aren’t listed online. I remember stumbling upon a quaint little inn that offered discounts for climbers!

By being flexible and adventurous with my accommodation choices, I’ve saved money and created some amazing memories along the way. The journey is just as important as the climb, and where we stay can enhance that experience.

Preparation and Training

Physical Training for Mountain Climbing

When I first started climbing, I thought it was all about the gear and the location. But, I quickly learned that physical training is just as crucial. Climbing demands strength, endurance, and flexibility. I remember kicking off my training by incorporating a mix of cardio, strength, and flexibility exercises into my routine.

Running and hiking have helped me build cardiovascular endurance, which is essential for those long days on the mountain. I also turned to weightlifting to strengthen my legs, core, and arms. My favorite exercises included squats, deadlifts, and pull-ups. I found that these not only improved my climbing skills but also boosted my overall confidence. Additionally, I made sure to incorporate stretching and yoga to enhance my flexibility. I can’t tell you how many times I’ve been thankful for increased flexibility when navigating tricky climbing routes!

Another aspect I focused on was climbing-specific training. I joined a local climbing gym, which allowed me to practice my techniques and meet other climbers. I found that bouldering sessions helped me improve my problem-solving skills and build upper body strength. If you’re just starting, I highly recommend finding a climbing gym to get familiar with the sport and meet others who share your passion.

Essential Skills for Beginners

As I ventured further into climbing, I realized that having the right skills is just as important as physical preparation. I started by learning the basics, such as knot tying and belaying. I remember my first belaying lesson vividly; I was so nervous, but my climbing partner reassured me, and I slowly gained confidence.

Understanding climbing techniques is also vital. I learned about foot placement, body positioning, and how to read rock features. I often practiced these skills at the climbing gym before tackling outdoor routes. There’s something incredibly satisfying about finding the right grip and making it to the top, knowing that I employed my skills to do so!

Another essential skill is navigation. I’ve been in situations where I had to rely on my maps and compass to find the best routes. Familiarizing myself with trail maps and practicing navigation techniques has saved me from getting lost many times. It’s a skill I value greatly, especially when exploring new territories.

Safety Precautions and Risk Management

When it comes to mountain climbing, safety should always be a top priority. I’ve had my share of close calls, which taught me valuable lessons. I can’t stress enough how important it is to do proper risk assessments before each climb. I always check the weather, assess my climbing partner’s skill level, and ensure that our gear is in good condition.

Another essential safety measure is to let someone know my climbing plans. I’ve always made it a habit to share my itinerary with a friend or family member. This way, if something goes wrong, someone knows where to look for us. I also learned the importance of carrying a first aid kit. On one of my climbs, a minor scrape turned into a bigger issue, and having basic medical supplies on hand made a world of difference.

Lastly, I’ve practiced climbing with a helmet and harness from day one. I know it can feel bulky, but it’s a small price to pay for the protection they offer. Safety never takes a holiday, and I’ve learned that the best climbs are the ones where everyone returns home unscathed.

Guided vs. Independent Climbing

Pros and Cons of Guided Climbing Tours

When I first started climbing, I considered whether I wanted to go with a guided tour or venture out on my own. Guided climbing tours can be a fantastic way to learn, especially for beginners. I remember my first guided climb; the instructor not only taught us the ropes but also shared invaluable insights about the area and climbing techniques.

The benefits of guided tours include safety and local knowledge. I felt reassured knowing that an experienced guide was leading the way. However, they can be pricier than independent climbs, which is something to consider if you’re on a tight budget. I also noticed that sometimes, it felt rushed. There were moments when I just wanted to soak in the views, but the group had to keep moving. It’s important to weigh these factors when deciding if a guided tour is right for you.

How to Plan an Independent Climb

For those who prefer independence, planning your climb can be incredibly rewarding. I’ve had many adventures exploring different routes on my own or with friends. The key is thorough research. I spend time studying maps, reading climbing blogs, and connecting with other climbers to gather insights about the area. It’s all about preparation!

Another thing I learned is to ensure that I have the right permits if required. Some climbing areas have regulations that need to be followed, and I always make sure I comply with those. This not only keeps me legal but also helps in preserving the beautiful environments we love to explore.

Finding Affordable Guides and Resources

If you decide to go the guided route, I’ve found that many companies offer discounts for groups or off-peak times. Research is key here—I’ve discovered hidden gems by checking reviews online and reaching out to local climbing communities. Many climbers are more than willing to share their experiences and recommendations.

Additionally, I’ve come across online platforms that connect climbers with local guides. This often leads to more personalized experiences at a fraction of the cost of larger companies. Don’t hesitate to ask about your guide’s experience and certifications; it’s important to feel secure in their abilities!

Local Culture and Experience

Engaging with Local Communities

One of the most rewarding aspects of climbing is connecting with local communities. I always make an effort to engage with the people I meet along the way. Whether it’s sharing stories with fellow climbers at a campsite or chatting with locals at a coffee shop, these interactions enrich my climbing experiences. I’ve picked up tips about the best routes, hidden gems, and even local traditions.

Traditional Foods to Try While Climbing

Food plays a big part in my climbing adventures. I love trying local cuisine, and I often seek out traditional dishes when I’m in new areas. For example, I once had an incredible meal of tagine in Morocco after a day of climbing, and it was the perfect fuel for my body. Each region has its specialties, and enjoying local foods has become a delightful aspect of my travels.

Respecting Nature and Local Regulations

As we chase our climbing dreams, it’s crucial to respect nature and the local regulations. I’ve seen firsthand how our actions can impact the environments we love. I always follow Leave No Trace principles, ensuring that I pack out what I pack in and minimize our footprint. It’s about preserving these stunning landscapes for future climbers, and it’s something I feel passionately about.

Post-Climb Activities and Attractions

Exploring Nearby Attractions and Activities

After an exhilarating climb, I often like to unwind and explore the surroundings. Many climbing areas boast beautiful parks, hiking trails, or cultural landmarks. I remember one trip where, after a long day of climbing, I visited a local museum showcasing the area’s history. It added another layer to my experience, connecting me to the place beyond just the climb.

Rest and Recovery Options

Rest and recovery are just as essential as the climb itself. I’ve discovered that taking time to relax after a climb helps prevent injuries and keeps my energy up for future adventures. Whether it’s soaking in a hot tub, enjoying a massage, or simply lounging at the campsite, I make it a priority to take care of my body after challenging climbs.

Sharing Your Climbing Experience: Tips for Blogging and Social Media

After every climbing adventure, I find myself eager to share my experiences, whether through social media or blogging. Capturing the breathtaking views and writing about the journey allows me to relive those moments. I recommend telling stories that resonate with your audience—sharing the challenges, triumphs, and the beauty of nature. I love when fellow climbers connect through my posts, and it’s a great way to inspire others to explore the mountains!

Final Thoughts

Mountain climbing has transformed my life in so many ways. Each climb is an opportunity for adventure, growth, and connection—both with nature and with fellow climbers. I’ve learned to embrace the journey, prepare diligently, and respect the environments we explore. I hope my experiences inspire you to embark on your own climbing adventures. Remember, it’s not just about reaching the summit; it’s about the memories you create along the way. Here’s to our next adventure!

Frequently Asked Questions

What is mountain climbing?

Mountain climbing is a thrilling adventure that combines physical exertion with breathtaking natural beauty. It involves ascending mountains or rock formations using various climbing techniques, gear, and sometimes the help of guides. It’s a way to connect with nature and challenge oneself.

What are the different types of mountain climbing?

The main types of mountain climbing include rock climbing, alpine climbing, mountaineering, and ice climbing. Each type offers a unique experience, from technical rock climbing to traversing icy paths and ascending high peaks.

What essential gear do I need for mountain climbing?

Essential gear for mountain climbing includes climbing shoes, a harness, a helmet, climbing rope, and a good backpack. Weather-appropriate clothing, first aid kits, and navigation tools are also important for a successful climb.

What are some budget-friendly mountain climbing locations?

Some budget-friendly climbing locations include Red River Gorge in Kentucky, Joshua Tree National Park in California, and Mount Hood in Oregon. These places offer exciting climbs and stunning scenery without high costs. Read Interesting article: Explore the Best Mountain Climbing Spots on a Budget

How can I plan my climbing adventure effectively?

Planning a climbing adventure involves considering the best time to climb based on seasonal weather, creating a budget that includes travel costs, park entrance fees, accommodations, food, and gear rentals, and finding affordable places to stay near climbing areas.

What are some physical training tips for mountain climbing?

Physical training for mountain climbing should include a mix of cardio, strength, and flexibility exercises. Activities like running, hiking, weightlifting, and yoga can help build the necessary endurance and strength for climbing.

What safety precautions should I take while climbing?

Safety precautions include conducting risk assessments before climbs, letting someone know your climbing plans, carrying a first aid kit, and always using a helmet and harness. Being aware of weather conditions and ensuring gear is in good condition is also vital.

What are the pros and cons of guided climbing tours?

Guided climbing tours offer safety and local knowledge, which can be beneficial for beginners. However, they can be more expensive and may feel rushed at times, making it important to weigh these factors when considering a guided tour.

How can I engage with local communities while climbing?

Engaging with local communities can enhance your climbing experience. This can be done by sharing stories with fellow climbers, trying traditional foods from the area, and respecting local regulations and nature.

What should I do for rest and recovery after a climb?

Rest and recovery options after a climb include soaking in a hot tub, enjoying a massage, or simply relaxing at the campsite. Taking time to care for your body is essential to prevent injuries and prepare for future adventures.

Explore the Best Mountain Climbing Spots on a Budget

If you’re itching to scale new heights without breaking the bank, you’re in the right place! Let’s embark on an adventure to explore budget-friendly mountain climbing spots that won’t empty your wallet.

Explore the Best Mountain Climbing Spots on a Budget

Understanding Mountain Climbing on a Budget

Mountain climbing can seem like an expensive hobby, but I’ve learned that with a little planning and creativity, we can experience the thrill of the climb without draining our bank accounts. Whether you’re a seasoned climber or just starting, it’s possible to enjoy breathtaking views and exhilarating challenges while keeping costs in check. I’ve found that understanding the terrain, timing, and local resources can make a world of difference in our climbing adventures.

Benefits of Budget Mountain Climbing

One of the greatest benefits I’ve discovered about budget mountain climbing is the opportunity it provides to connect with nature and ourselves. When I first started climbing, I was surprised to find how fulfilling it felt to reach the summit without spending a fortune. Climbing on a budget often leads to discovering hidden gems and lesser-known trails that offer just as much beauty and challenge as the more popular spots. Not only do we save money, but we also often avoid the crowds, allowing for a more personal experience.

Additionally, budget climbing encourages creativity. I learned to find alternative routes, utilize public transportation, and camp instead of staying in hotels. This approach has led me to some of the most memorable experiences, discovering local cultures and meeting fellow adventurers who share my passion. Exploring top budget-friendly mountain climbing destinations can also enhance our adventures.

Planning Your Budget: Key Considerations

When planning a budget-friendly climbing trip, I always take a few key factors into account. First, I consider the destination. Some regions are naturally more affordable than others, depending on the cost of living, access fees, and accommodation options. I’ve often found that national parks or lesser-known mountain ranges offer great climbing opportunities at a lower cost.

Next, I focus on timing. Climbing during off-peak seasons not only saves money on lodging but also allows us to enjoy better weather conditions and fewer crowds. For example, I’ve climbed in the Rockies during late spring and fall, where the weather can still be pleasant and the trails less crowded.

Transportation is another crucial factor. I usually research the best ways to get to my climbing destination, whether it’s by carpooling with friends, taking public transit, or booking budget flights when necessary. It’s amazing how much we can save by planning our journey smartly. Lastly, I always budget for food and gear. Packing meals and snacks can drastically cut costs, and I often borrow or rent climbing gear instead of purchasing everything outright. For more insights on gear, check out Best Budget Mountain Climbing Gear: Climb Smart & Save Big.

Top Budget-Friendly Mountain Climbing Destinations

1. The Rocky Mountains, USA

Best Trails for Beginners

The Rocky Mountains have long been one of my favorite climbing spots, especially because they offer a variety of trails that cater to all skill levels. For beginners, I recommend starting with the Grays and Torreys peaks. These two 14ers provide stunning views without being overly technical. The trails are well-marked, making them accessible even for those new to climbing.

Cost of Access and Accommodation

Access to the Rocky Mountain National Park is quite reasonable, especially if you purchase an annual pass that covers multiple visits. There are also plenty of budget-friendly accommodations, like campgrounds and hostels, which can be found nearby. I’ve often opted for camping in designated areas, which not only saves money but also provides a unique experience of waking up surrounded by nature.

2. The Andes, South America

Popular Climbing Routes

The Andes offer some incredible budget climbing options, particularly in countries like Peru. I found the Inca Trail leading to Machu Picchu to be an unforgettable experience. There are affordable guided tours available, or if you’re feeling adventurous, you can trek independently to save even more.

Local Transportation Options

Getting around in South America can be quite affordable. I’ve used local buses, which are not only cheap but also give a glimpse into daily life in the region. Plus, I’ve met fellow travelers who shared tips and routes, making the journey even more enjoyable.

3. The Alps, Europe

Affordable Climbing Packages

The Alps might seem intimidating when it comes to budget, but there are several affordable climbing packages, especially in countries like Slovenia and Austria. I was surprised to find guided tours at reasonable prices that included accommodation and meals. It’s a great way to explore the region without financial stress.

Seasonal Considerations for Budget Travelers

Timing is key in the Alps. I noticed that climbing costs dip in the shoulder seasons, like late spring or early fall. This not only means fewer tourists but also lower prices for lodging and gear rentals.

4. The Cascades, USA

Scenic Trails and Their Costs

The Cascade Range in Washington State is another fantastic option for budget climbers. I loved the trails around Mount Rainier, especially the Skyline Trail, which is accessible and offers breathtaking views. The park entrance fee is quite reasonable, and the scenery is worth every penny.

Camping vs. Lodging Expenses

Camping in the Cascades is an affordable option that allows us to fully immerse ourselves in nature. I usually bring my tent and gear, which saves a lot compared to hotel stays. Plus, there’s something magical about spending the night under the stars after a long day of climbing.

5. The Dolomites, Italy

Best Time to Visit for Savings

The Dolomites are stunning, and visiting during the late summer or early fall can yield significant savings. I found that accommodations drop in price once the tourist rush subsides.

Guided Tours vs. Solo Climbing

While I enjoy solo climbing, I’ve also found that joining a guided tour can be economical in the Dolomites. Many local guides offer group rates that make climbing more accessible, and they often know the best routes to take, which can enhance the experience.

Essential Gear for Budget Mountain Climbing

Must-Have Equipment

When it comes to mountain climbing, I’ve learned that having the right gear is crucial, but it doesn’t have to come with a hefty price tag. For me, the essentials include a sturdy pair of climbing shoes, a good harness, and a reliable helmet. I remember when I first started, I was overwhelmed by the vast array of gear available. However, focusing on the basics helped me stay within budget. I also recommend investing in a quality backpack that can hold all your essentials while being comfortable to wear for long hikes.

Other important items include a water bottle to stay hydrated, a first-aid kit for safety, and weather-appropriate clothing. I’ve found that layering is key when climbing in unpredictable conditions; it allows me to adjust my clothing as the temperature changes. Additionally, a good pair of trekking poles can provide stability and reduce strain on my knees during descents.

Where to Buy or Rent Gear Affordably

One of the best ways to save money on gear is to buy second-hand or rent equipment. I’ve had great luck finding gently used climbing shoes and gear at local outdoor shops or online marketplaces. Websites like Craigslist or Facebook Marketplace can also be goldmines for budget-conscious climbers. I once found a high-quality climbing harness for half the retail price!

If I need gear for a specific trip, renting can be a smart option. Many outdoor retailers offer rental programs, which often include everything from climbing harnesses to sleeping bags. This way, I can try different brands and types of gear without making a long-term commitment. Plus, I usually return the gear in the same condition it was rented, which is a win-win for my wallet and the environment.

DIY Gear Tips for Cost Savings

I love a good DIY project, especially when it saves me money. For instance, I’ve made my own chalk bag using some fabric scraps and a drawstring. It worked perfectly and gave me a sense of accomplishment. I’ve also seen climbers create their own climbing holds for practice at home, which is a fantastic way to improve skills without spending a fortune on gym memberships.

Another cost-saving tip is to repurpose items for climbing. An old backpack can be transformed into a climbing gear bag with a little creativity, and spare carabiners can serve various purposes beyond climbing, like securing gear while traveling. I’ve always felt that DIY projects not only save money but also enhance my connection to the climbing community by sharing ideas and techniques with fellow climbers.

Planning Your Climbing Trip

Best Times of Year to Climb on a Budget

Understanding the seasons is vital for budget climbing. I’ve found that climbing during shoulder seasons—like late spring or early fall—often yields the best experiences at a lower cost. For example, when I climbed in the Rockies, I noticed that accommodations were cheaper, gear rentals were discounted, and the trails were refreshingly less crowded. I often check local weather trends to pinpoint the perfect window for climbing, and this has led me to some of my favorite experiences.

How to Save on Travel Costs

Traveling doesn’t have to break the bank if we plan wisely. I usually compare flights and train prices, and I often find that booking in advance can save a bundle. Carpooling with friends or fellow climbers is another effective strategy I’ve used. Not only do we split the costs, but it also turns the journey into a fun part of the trip. I remember one adventure where we turned a long drive into a mini road trip, stopping at various sights along the way, which made the entire experience even more memorable.

Additionally, I always look for deals on travel websites and consider alternatives like camping close to my climbing destination instead of booking hotels. This not only saves money but also allows us to embrace the great outdoors fully.

Finding Cheap Accommodations Near Climbing Spots

Finding affordable places to stay can be a challenge, but I’ve discovered some great strategies over the years. First, I check out hostels, which often offer budget-friendly options and the chance to meet fellow adventurers. I’ve made some lifelong friends while staying in shared accommodations! Camping is another favorite option of mine; it’s often significantly cheaper than hotels and provides an immersive nature experience.

Another tip is to look for rental cabins or lodges that provide kitchen facilities. Cooking my meals has saved me a lot, and it’s a fun way to experiment with local ingredients. I’ve cooked some of my best meals alongside fellow climbers after a long day on the mountain. By staying resourceful, I’ve managed to keep my climbing adventures both affordable and enjoyable.

Safety Tips for Budget Climbers

Understanding Weather Conditions

One of the most important aspects of climbing is understanding the weather, and I can’t stress enough how this knowledge can keep us safe and enhance our experience. I’ve learned that checking the weather forecast ahead of time is crucial, but I also pay attention to local patterns. For instance, I remember one climb where I was caught off guard by sudden storms; since then, I make it a habit to pack my gear with the potential for changing weather in mind. It’s wise to bring layers, even on sunny days, as temperatures can drop quickly as we ascend.

Another tip is to familiarize ourselves with storm systems that can move through mountainous areas. I’ve found that higher elevations often experience weather changes faster than lower ones. I always keep an eye on clouds and wind patterns while climbing; if it starts to feel ominous, I don’t hesitate to turn back. Listening to our instincts is crucial, and it’s okay to go down when conditions aren’t ideal. Safety should always come first!

Essential Safety Equipment to Invest In

Having the right safety equipment is key to a successful and enjoyable climbing experience. I’ve invested in a few essential items that I believe every budget climber should consider. A reliable climbing helmet is a must for protecting our heads from falling debris or mishaps. I remember my first helmet felt bulky and uncomfortable, but I learned it’s worth finding one that fits well and provides comfort during long climbs.

In addition to a helmet, a good harness is essential. I always make sure mine has ample padding and fits snugly. It’s amazing how much more confident I feel when I know I’m secure. I also recommend having a quality first-aid kit on hand, complete with items like band-aids, antiseptic wipes, and pain relief medication. Accidents can happen, and having these supplies can make a big difference in an emergency.

Lastly, I always carry a whistle and a headlamp. The whistle is especially handy if I find myself in a tricky situation and need to signal for help. The headlamp is invaluable during early morning or late evening climbs, making sure I can navigate safely even when the sun goes down.

Staying Informed About Trail Conditions

Staying informed about trail conditions is another safety tip I picked up over the years. I’ve learned that checking local climbing forums, park websites, or even social media groups can provide valuable information about the trails I plan to tackle. I often come across recent weather updates, trail closures, or even tips from fellow climbers who’ve been there recently. This has saved me from potential hazards and helped me avoid busy trails.

Before heading out, I also make it a habit to talk to rangers or local climbers at trailheads. They often have firsthand knowledge about current conditions and can offer advice that you might not find online. I remember a time when a ranger informed me about a washout on a trail I intended to take; that conversation led me to discover a safer, alternative route that ended up being one of the highlights of my trip!

Lastly, I always make sure someone knows my climbing plans, including where I’ll be and when I expect to return. This simple step can make a huge difference in case something goes wrong. Keeping safety in mind doesn’t mean we can’t have fun; it just helps us enjoy our climbing adventures to the fullest!

Local Food and Culture: Budget-Friendly Options

Eating on a Budget While Climbing

Food is another area where I’ve learned to save money while still enjoying great meals on my climbing trips. I usually pack all my own snacks and meals; this not only saves money but also helps me eat healthier. I love preparing my own energy bars or trail mix, combining nuts, dried fruit, and a sprinkle of chocolate. I’ve found that these snacks keep my energy levels up without the high price tags of buying food on the go.

When planning meals, I try to include quick and easy options. Instant oatmeal, rice packs, and canned soup are staples in my climbing backpack. They’re lightweight, nutritious, and easy to prepare at a campsite. I’ve enjoyed many meals overlooking breathtaking views after a long day of climbing, and there’s something incredibly satisfying about cooking outdoors.

For those times when I do want to treat myself, I look for local eateries that offer affordable options, especially places frequented by residents instead of tourists. I remember a little diner in a mountain town where I had the best homemade chili for just a few bucks! Exploring local cuisine can be part of the adventure, and it often leads to discovering hidden gems that we wouldn’t find in tourist brochures.

Cultural Experiences to Enhance Your Trip

Embracing local culture during our climbing trips adds a whole new layer of depth to the experience. I always make an effort to learn about the region’s history, customs, and traditions. Visiting local markets is one of my favorite activities; not only can I find fresh produce and snacks, but I also enjoy interacting with local vendors. Their stories often provide insights into the area that guidebooks can’t capture.

Participating in community events or festivals is another great way to immerse myself in the culture. I’ve stumbled upon local celebrations while climbing, and joining in has led to unforgettable experiences, like learning traditional dances or tasting regional delicacies. Plus, it’s a wonderful opportunity to meet locals and fellow travelers who share similar interests.

Overall, I believe that integrating cultural experiences into our climbing trips makes for a richer adventure. It’s about more than just the summit; it’s also about the journey, the people we meet, and the memories we create along the way.

Frequently Asked Questions

What are some budget-friendly mountain climbing destinations?

Some budget-friendly mountain climbing destinations include the Rocky Mountains in the USA, the Andes in South America, the Alps in Europe, the Cascades in the USA, and the Dolomites in Italy.

How can I save money while planning a climbing trip?

You can save money by considering affordable destinations, climbing during off-peak seasons, using public transportation, and budgeting for food and gear by packing meals and borrowing or renting equipment.

What are the benefits of budget mountain climbing?

Budget mountain climbing allows you to connect with nature, discover hidden gems, avoid crowds, save money, and meet fellow adventurers. It also encourages creativity in finding alternative routes and solutions for transportation and accommodation.

What essential gear should I have for budget mountain climbing?

Essential gear for budget mountain climbing includes a sturdy pair of climbing shoes, a good harness, a reliable helmet, a quality backpack, a water bottle, a first-aid kit, weather-appropriate clothing, and trekking poles.

How can I find affordable accommodations near climbing spots?

You can find affordable accommodations by checking hostels, camping, looking for rental cabins with kitchen facilities, and cooking your own meals to save money.

What safety tips should budget climbers keep in mind?

Budget climbers should understand weather conditions, invest in essential safety equipment like a helmet and first-aid kit, stay informed about trail conditions, and ensure someone knows their climbing plans for safety.

What local food options are available for budget climbers?

Budget climbers can save money on food by packing their own snacks and meals, such as energy bars and instant oatmeal, and seeking out local eateries that offer affordable options frequented by residents.

When is the best time to climb on a budget?

The best times to climb on a budget are during shoulder seasons, such as late spring or early fall, when accommodations and gear rentals tend to be cheaper and trails less crowded.

How can I save on travel costs when planning a climbing trip?

You can save on travel costs by comparing prices for flights and trains, booking in advance, carpooling with friends, and considering alternatives like camping close to your climbing destination.

What are some DIY tips for cost savings in mountain climbing?

You can save costs by making your own climbing gear, like a chalk bag, repurposing items for climbing, and sharing ideas and techniques with fellow climbers through DIY projects.

Top 10 Budget-Friendly Mountain Climbing Destinations

Mountain climbing can be an exhilarating adventure, but it doesn’t have to break the bank. Discovering budget-friendly destinations allows us to experience the thrill of the climb without the hefty price tag. For those interested in saving while gearing up, check out our guide on Best Budget Mountain Climbing Gear: Climb Smart & Save Big.

Top 10 Budget-Friendly Mountain Climbing Destinations

Overview of Budget-Friendly Mountain Climbing

What is Mountain Climbing?

Mountain climbing, or mountaineering as some call it, is a thrilling outdoor activity that involves ascending mountains. Whether it’s a day hike up a gentle slope or a technical climb on a rugged peak, mountain climbing can offer breathtaking views and a genuine sense of accomplishment. I remember my first climb; it was a mix of exhaustion and exhilaration. The feeling of reaching the summit was simply unforgettable. It’s more than just reaching the top; it’s about the journey, the challenges we face, and the beauty we witness along the way.

Why Choose Budget-Friendly Destinations?

Choosing budget-friendly mountain climbing destinations doesn’t mean compromising on the adventure; instead, it opens up a world of opportunities. I’ve found that some of the best experiences come from exploring lesser-known trails and mountains that don’t have the big price tags attached to them. These destinations often provide just as much beauty and challenge as their pricier counterparts. Plus, saving money can allow us to invest in better gear or additional trips. From my experience, budget climbing is about making the most of our resources while enjoying nature’s wonders. Read Interesting article: Top 10 Budget-Friendly Mountain Climbing Destinations

Top 10 Budget-Friendly Mountain Climbing Destinations

1. Mount Hood, Oregon

Overview and Accessibility

Mount Hood is a stunning peak that stands majestically at 11,240 feet, making it one of the most iconic climbs in Oregon. I remember driving along the scenic roads, with the mountain looming in the distance. The best part? It’s easily accessible from Portland, just about an hour and a half away. The routes available cater to different skill levels, making it a perfect spot for both beginners and seasoned climbers alike.

Best Time to Visit

The best time to visit Mount Hood is from late spring to early summer, typically between May and July. During these months, the weather is usually cooperative, and the snow conditions are ideal for climbing. I’ve hiked up there during the summer, and the wildflowers in bloom added a magical touch to the landscape.

Cost Breakdown

Climbing Mount Hood can be quite affordable. The climbing fee is around $30 for a permit, which is valid for a season. If you need gear, renting can cost about $20-50 depending on what you need. Gas and food can add to the expenses, but if you pack your meals, you can keep costs low. Overall, you can enjoy a thrilling climb for under $100.

2. Mount Rainier, Washington

Overview and Accessibility

Mount Rainier, towering at 14,411 feet, is a majestic sight that calls climbers from all over. I’ve been awe-inspired by its glaciers and rugged terrain. The park is just a couple of hours from Seattle, making it a convenient option for those looking to escape the city. There are several routes to take, and I found the Paradise area to be especially beautiful.

Best Time to Visit

The ideal time for climbing Mount Rainier is from late June to early September when the weather is more stable. I’ve always noticed more climbers during this period, and the views are absolutely stunning, with clear skies and lush surroundings.

Cost Breakdown

A climbing permit costs about $50, and you can expect to spend around $20 for parking. If you need to rent gear, prices can vary, but budgeting around $30-60 is reasonable. With some planning, you can enjoy a memorable experience for around $150.

3. Rocky Mountain National Park, Colorado

Overview and Accessibility

Rocky Mountain National Park is a gem that boasts over 300 miles of trails. I’ve spent countless weekends exploring its breathtaking scenery. The park is easily accessible from Estes Park and offers various routes for all levels of climbers. Standing at 14,259 feet, Longs Peak is the main attraction and presents a challenge even for experienced climbers.

Best Time to Visit

The best time to tackle these mountains is from late June to early September when the weather is generally stable. I recall climbing in mid-August when the wildflowers were in full bloom, adding vibrant colors to the rugged landscape.

Cost Breakdown

Entrance fees to the park are about $30 for a week’s pass, which can be split among friends. If you need gear, plan for rentals around $40. With some careful planning, you can experience this stunning park for under $100.

4. Grand Teton National Park, Wyoming

Overview and Accessibility

Grand Teton National Park is home to some of the most striking mountain scenery in the U.S. I remember standing in front of the Teton Range and being completely awestruck. Just a few hours from Jackson Hole, it’s relatively easy to get to. The park offers climbs for various skill levels, making it a great option for everyone.

Best Time to Visit

The best time to climb is from late June to early September. I’ve hiked there in early fall, and the changing colors of the leaves made for a breathtaking backdrop.

Cost Breakdown

The entrance fee is around $35 for a vehicle, good for seven days. Gear rentals can be about $30-50, depending on what you need. You can easily enjoy a climbing trip here for around $120.

5. Shenandoah National Park, Virginia

Overview and Accessibility

This park is a favorite of mine for its lush forests and diverse wildlife. It’s also very accessible, just a short drive from Washington, D.C. With more than 200,000 acres, there are plenty of trails to explore. I’ve often chosen to hike in the lesser-known areas, which provide a more peaceful experience.

Best Time to Visit

The best time to visit is in the spring or fall. I’ve enjoyed the park during both seasons, and the variety of colors and blooms are simply stunning.

Cost Breakdown

Entrance fees are $30 per vehicle, and if you need gear, plan for around $20-40 for rentals. It’s possible to have a fantastic experience for under $100.

6. Catskill Mountains, New York

Overview and Accessibility

The Catskill Mountains hold a special place in my heart. With its stunning landscapes and rich history, this range offers some amazing climbing opportunities. I love that it’s just a couple of hours from New York City, making it an ideal weekend getaway. There are numerous trails, and summiting peaks like Slide Mountain, which reaches 4,180 feet, is both rewarding and accessible for climbers of all levels. I remember my first hike here; the variety of trails kept things interesting, and the views from the top were just breathtaking.

Best Time to Visit

The best time to explore the Catskills is during the fall when the foliage bursts into vibrant colors. I’ve trekked through those woods during this season, and it was like walking through a painting. Spring is also lovely, especially when the flowers begin to bloom, adding a splash of color to the green.

Cost Breakdown

Accessing the Catskills is budget-friendly. There’s no entrance fee for the trails, which is a huge plus. If you plan to rent any gear, expect to pay around $30-50. Plus, packing a lunch can help keep your overall costs to around $50 for a fantastic day of climbing.

7. Mount Adams, Washington

Overview and Accessibility

Mount Adams is one of those hidden gems that I believe every climber should experience. Standing tall at 12,281 feet, it’s the second-highest peak in Washington. What I love about Mount Adams is that it’s less crowded than other major peaks in the area, which allows for a more peaceful climbing experience. The trailheads are accessible from the Columbia River Gorge, making it a manageable trip for those around Portland or Seattle.

Best Time to Visit

The ideal climbing season for Mount Adams is from late June to early September. I’ve climbed during this time and found the weather to be perfect. The melting snow reveals beautiful views, and the terrain is generally stable. I remember feeling grateful for the clear skies that day!

Cost Breakdown

A permit for climbing costs about $20, and parking fees are around $10. If you need to rent gear, you can expect to spend around $30-60. Overall, you can have an amazing adventure for about $100, which is a steal for such an incredible experience.

8. White Mountains, New Hampshire

Overview and Accessibility

The White Mountains are a must-visit for anyone looking to experience the beauty of New England. I’ve spent many weekends exploring this area, and I can’t emphasize enough how stunning the scenery is. With peaks like Mount Washington, which is the highest in the northeastern U.S. at 6,288 feet, there are plenty of climbing options. The area is also known for its well-maintained trails, making it easy to navigate.

Best Time to Visit

The best time to climb in the White Mountains is from late spring to early fall. I’ve climbed Mount Washington in August, and the lush greenery and wildflowers made the experience truly magical. However, be prepared for unpredictable weather; it can change in an instant!

Cost Breakdown

Entrance to the Mount Washington State Park costs about $5 per person, and if you need gear, budget around $40. With some planning and packing your food, a trip here can be enjoyed for under $100, which makes it a fantastic budget option.

9. Black Hills, South Dakota

Overview and Accessibility

The Black Hills are often overlooked, but they offer some amazing climbing experiences. I remember being surprised by the rugged beauty of this area. With mountains like Harney Peak, the highest point in South Dakota at 7,242 feet, there’s plenty to explore. The trails are well-marked, and the scenery is truly unique, combining forest and rock formations that make for a memorable climb.

Best Time to Visit

The best time to visit the Black Hills is during the summer months. I’ve hiked here in both summer and early fall, and each season brought its own charm. Summer provides the warmest weather, making climbs comfortable and enjoyable.

Cost Breakdown

There’s no entrance fee for many trails in the Black Hills, which is a fantastic perk. If you need gear, you can rent it for about $30-50. With some careful planning, a memorable experience can be had for around $75.

10. Cascade Mountains, Washington

Overview and Accessibility

The Cascade Mountains are famed for their stunning beauty and diverse climbing options. I’ve often found myself drawn to this range, with peaks like Mount Baker offering amazing challenges. The Cascades are easily accessible from Seattle, making them a popular choice for both day trips and longer excursions. The variety of routes means there’s something for everyone, from beginners to experienced climbers.

Best Time to Visit

The climbing season here generally runs from late June to early September. I’ve had some incredible climbs during this time, with the snow melted enough to reveal beautiful trails and stunning views.

Cost Breakdown

While some trailheads may require parking fees of around $10-20, many areas are free. If you need to rent gear, expect to spend about $30-60. Overall, a trip to the Cascades can be enjoyed for under $100, making it another fantastic budget-friendly option.

Essential Tips for Budget Mountain Climbing

Gear and Equipment

When it comes to mountain climbing, having the right gear is essential, but it doesn’t have to be expensive. I’ve learned that investing in a few key items can make all the difference. For starters, I recommend focusing on a good pair of hiking boots. These can range from $60 to $200, but finding a pair that fits well and offers support is crucial. I remember when I skimped on boots; my feet were sore by the end of the day!

Also, consider borrowing or renting equipment like climbing harnesses, carabiners, and ropes from local outdoor shops. Many places offer discounts for renting multiple items, which can save us some money. Another great tip is to check out second-hand gear stores or online marketplaces where we can find quality gear at a fraction of the price. I’ve scored some fantastic deals this way, and it feels good to save while still preparing for an adventure. If you’re interested in eco-friendly options, read more in our guide on Eco-Friendly Mountain Climbing: A Guide for Budget Backpackers.

Transportation Options

Getting to the mountains can sometimes be one of the most significant expenses. From my experience, carpooling with friends or fellow climbers can lower travel costs considerably. Not only does it save money on gas, but it also makes the trip more enjoyable with good company! I remember one trip to a climbing destination where the drive was almost as much fun as the climb itself.

If you’re traveling alone or just with one other person, consider using public transportation if available. Some parks have shuttle services that can take you directly to trailheads. It’s both a budget-friendly and eco-friendly option that allows us to relax and enjoy the scenery without the stress of driving.

Where to Stay

Finding affordable accommodations can be tricky, but there are plenty of options if you’re willing to get a bit creative. I’ve often camped in designated areas near climbing spots, which not only saves money but also enhances the whole experience. Waking up to the sound of nature and stepping out of the tent to a mountain view is something I cherish.

For those who prefer a roof over their heads, check for budget motels or hostels in nearby towns. Many of these options can be found for under $100 a night. I once stayed in a charming little hostel that was filled with fellow climbers, making it easy to connect and share tips. Plus, cooking our meals in a communal kitchen helped keep costs down.

Food and Nutrition on a Budget

Nutrition is vital, especially when we’re pushing our bodies on a climb. I’ve learned that planning meals ahead of time helps save money and keeps energy levels high. Packing simple, nutritious foods like trail mix, energy bars, and sandwiches can keep us fueled without breaking the bank. I often make a batch of homemade energy bars before a trip, and they’re both delicious and cost-effective.

When possible, I try to shop at local grocery stores instead of convenience stores near climbing areas, as prices can be significantly lower. And let’s not forget about the power of sharing meals with friends. Cooking together not only makes food more enjoyable but also reduces costs. I have fond memories of sitting around a campfire sharing stories and meals after a long day of climbing.

Safety Considerations for Budget Climbers

Understanding Weather Conditions

One of the most important aspects of mountain climbing is being aware of the weather. I can’t stress enough how vital it is to check forecasts before heading out. Conditions can change rapidly in the mountains, and being prepared can make all the difference. I remember a time when I misjudged the weather on a climb, and it turned a beautiful day into a challenging experience. Carrying layers, even when it seems warm, can help us adapt to changing conditions.

Additionally, I always recommend having a reliable weather app on my phone, which can provide real-time updates while we’re out on the trail. Being informed can help us avoid dangerous situations, ensuring that we stay safe and enjoy our adventures.

Health and Fitness Preparation

Preparing our bodies for the physical demands of climbing is just as important as having the right gear. I’ve found that a mix of strength training, cardiovascular workouts, and flexibility exercises can enhance performance on the mountain. Leading up to a big climb, I try to incorporate hikes into my routine, which not only builds stamina but also helps me acclimate to the elevation changes.

Staying hydrated is another crucial aspect. I always make sure to carry enough water, and I often bring a water purification system or tablets, especially for longer hikes. It’s amazing how much difference proper hydration can make in our energy levels and overall enjoyment.

Emergency Preparedness

No matter how well we plan, there’s always a chance that something unexpected could happen. I’ve learned to prepare for emergencies by carrying a small first aid kit, a map, and a compass. While we often rely on our phones for navigation, having a physical map can be a lifesaver if we lose service. I remember one hike where my phone died, and I was grateful I had printed maps to guide me back.

It’s also wise to let someone know our climbing plans and estimated return times. This simple step can make a huge difference if we run into trouble. I always feel a bit more at ease knowing that someone is aware of where I am and when to expect me back.

Frequently Asked Questions

What is mountain climbing?

Mountain climbing, or mountaineering, is an outdoor activity that involves ascending mountains. It can range from day hikes up gentle slopes to technical climbs on rugged peaks, offering breathtaking views and a sense of accomplishment.

Why should I choose budget-friendly mountain climbing destinations?

Choosing budget-friendly mountain climbing destinations allows climbers to experience adventure without high costs. These locations often provide just as much beauty and challenge as pricier options and can help save money for better gear or additional trips.

What is the best time to visit Mount Hood?

The best time to visit Mount Hood is from late spring to early summer, typically between May and July, when the weather is cooperative, and snow conditions are ideal for climbing.

How much does it cost to climb Mount Rainier?

A climbing permit for Mount Rainier costs about $50, plus around $20 for parking, and gear rentals can vary from $30 to $60. With planning, you can enjoy a memorable experience for around $150.

What can I expect from the Rocky Mountain National Park?

Rocky Mountain National Park offers over 300 miles of trails, with Longs Peak being the main attraction. The park is easily accessible from Estes Park and provides routes for all levels of climbers.

What is the cost breakdown for climbing in Shenandoah National Park?

The entrance fee for Shenandoah National Park is $30 per vehicle, and gear rentals can cost around $20-40. Overall, a fantastic experience can be had for under $100.

Are there any fees to access the Catskill Mountains?

No entrance fee is required for the trails in the Catskill Mountains, making it an affordable option. If you rent gear, expect to pay around $30-50.

What are some essential tips for budget mountain climbing?

Essential tips include investing in key gear like good hiking boots, carpooling to reduce transportation costs, finding affordable accommodations like camping or budget motels, and planning meals to save on food expenses.

How can I prepare for weather conditions while climbing?

It’s vital to check weather forecasts before climbing, as conditions can change rapidly. Carrying layers and having a reliable weather app can help climbers adapt to changing conditions and stay safe.

What emergency preparations should I consider for mountain climbing?

Preparing for emergencies involves carrying a first aid kit, a map, and a compass. It’s also advisable to inform someone of your climbing plans and estimated return times for safety.