Web Analytics

Recent Posts

Enhance Your Travel Portraits with Simple Editing Tricks

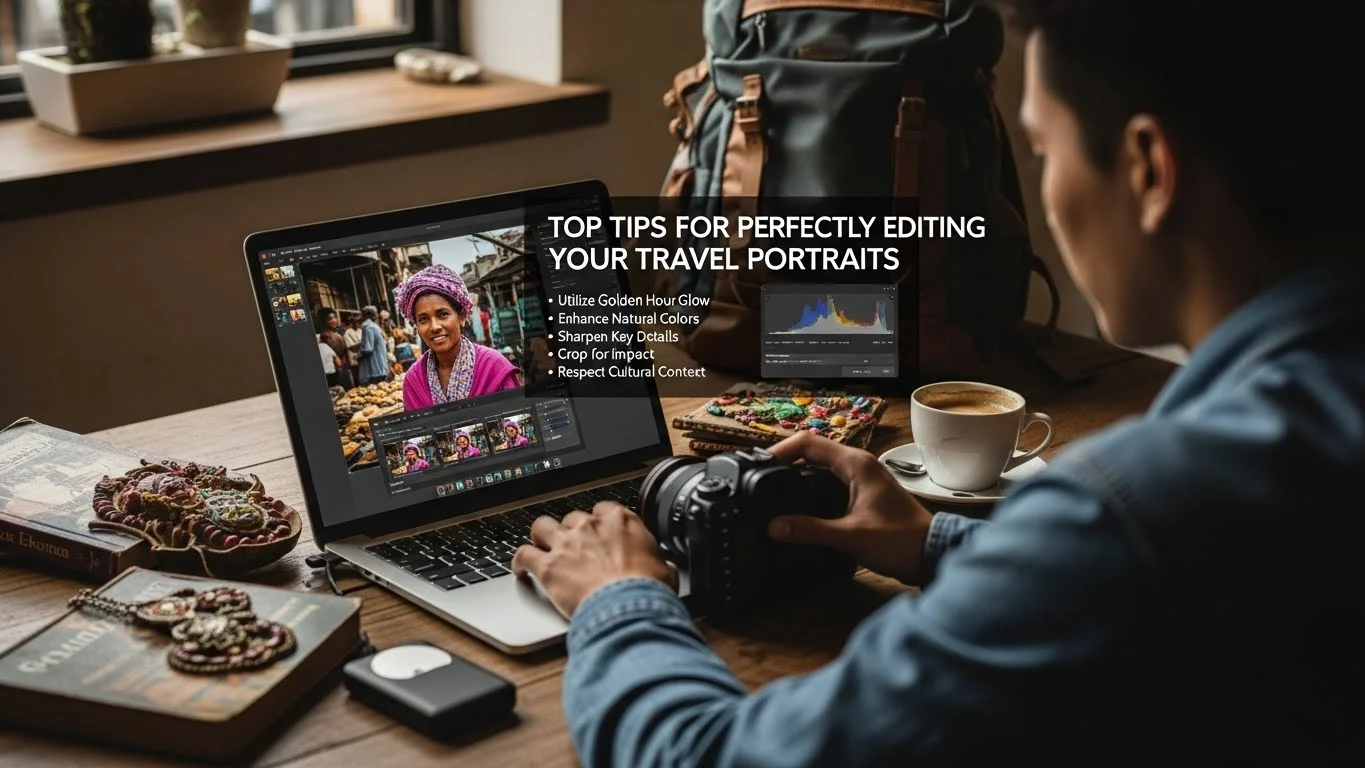
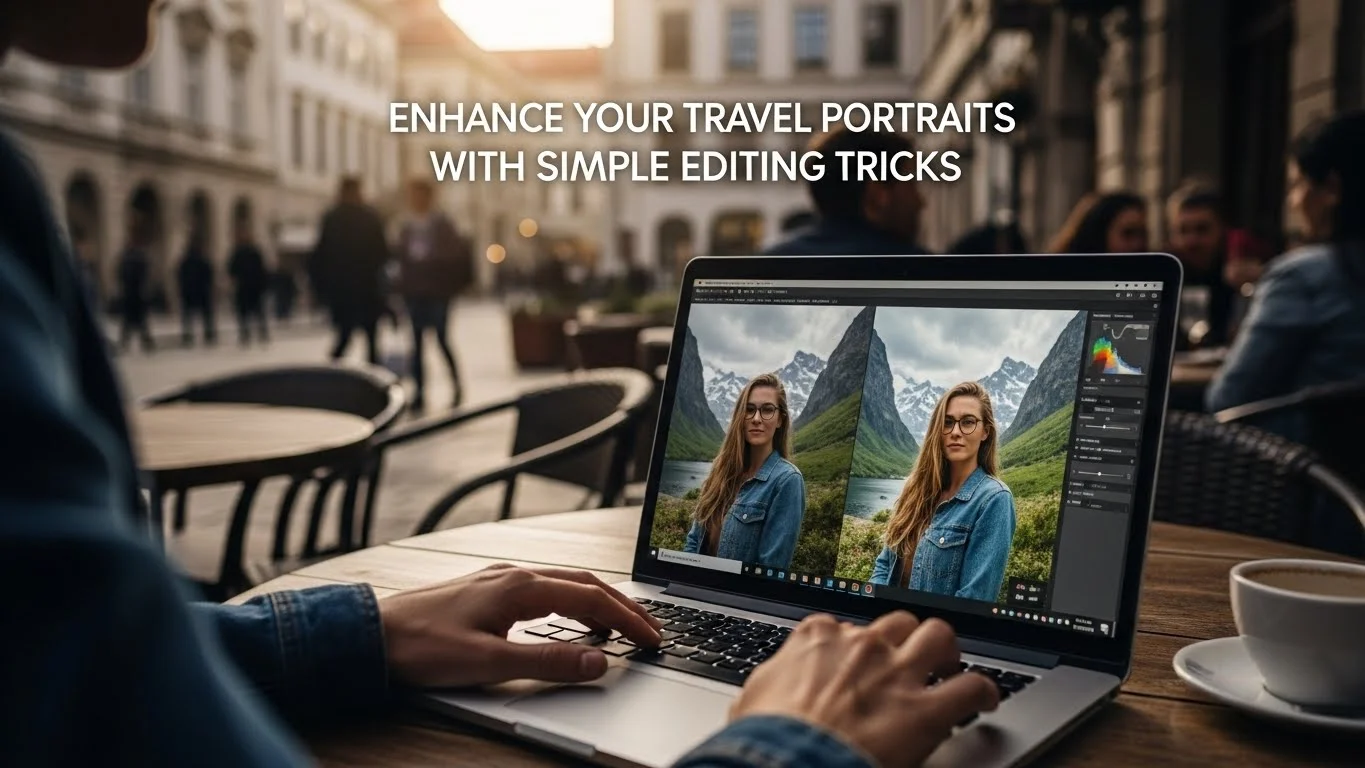
Capturing stunning travel portraits is only half the journey; the real magic often happens in editing. With a few simple tweaks, I’ve transformed my travel photos from ordinary to extraordinary, and I can’t wait to share these editing tricks with you! Read Interesting article: Top Tips for Perfectly Editing Your Travel Portraits

Enhance Your Travel Portraits with Simple Editing Tricks

Understanding Travel Portrait Photography

The Importance of Portrait Photography in Travel

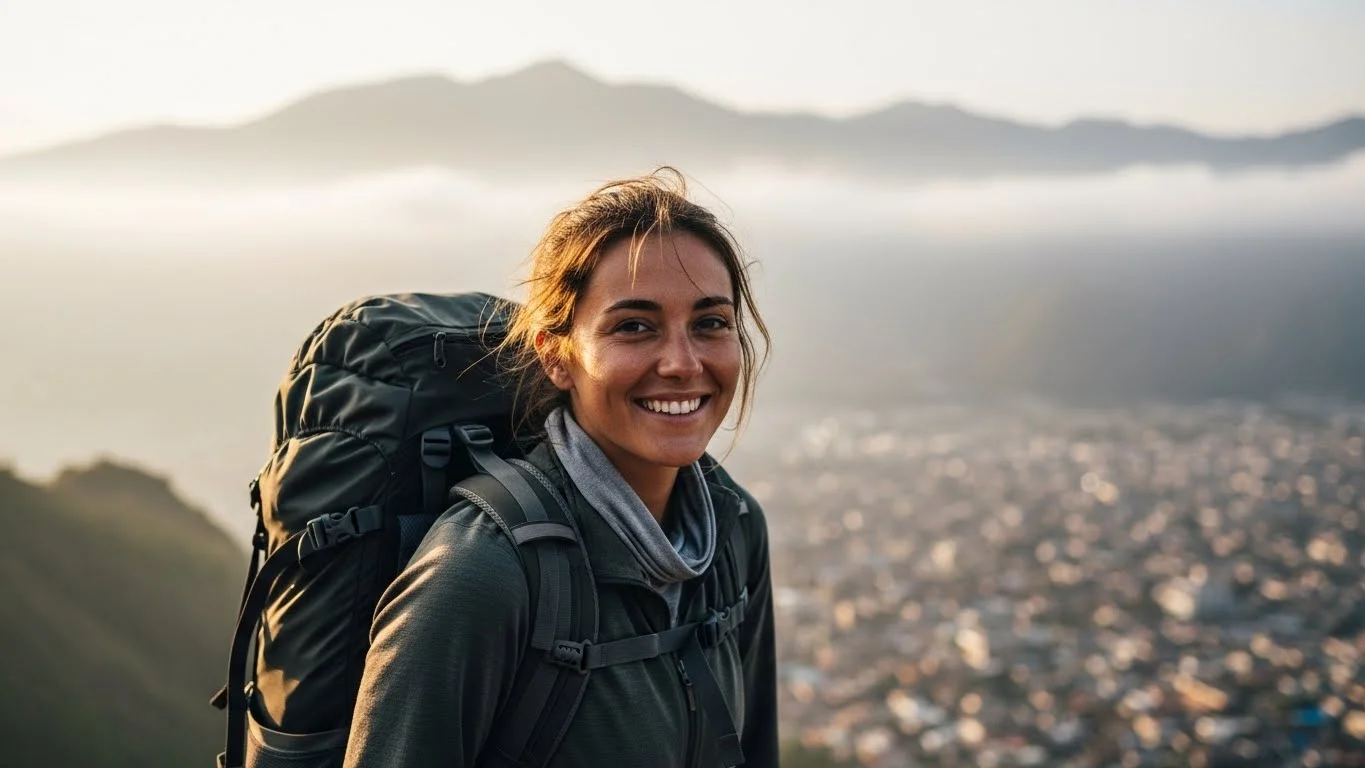
When I travel, I love capturing the essence of the places I visit, and portraits play a huge role in that. Travel portrait photography is not just about snapping a quick picture of people; it tells a story. It encapsulates the culture, emotions, and experiences I encounter. I remember one trip to a small village in Italy, where I took a portrait of an elderly woman weaving baskets. That photo didn’t just capture her image; it conveyed her dedication and the rich tradition she represented. For me, that’s the power of portrait photography in travel.

Different Types of Travel Portraits

Travel portraits come in various styles, each offering a unique perspective. I’ve experimented with several types over the years, and here’s what I’ve found:

  • Candid Portraits: These are unposed moments, often capturing genuine expressions. I love these because they feel authentic. Once, I captured a candid shot of a child playing on the beach, and it instantly brought back memories of carefree childhood days.
  • Posed Portraits: While they may seem less spontaneous, posed portraits allow for creativity in composition and lighting. During a trip to Japan, I set up a portrait of my friend in front of a cherry blossom tree, perfectly framing the beauty of the blossoms.
  • Cultural Portraits: These portraits celebrate the people and their traditions. I remember photographing a musician in New Orleans, where the vibrant colors of his attire told the story of the culture.
  • Environmental Portraits: These combine the subject with their surroundings, giving context. I took a portrait of a fisherman on a dock, with the ocean and boats in the background, which perfectly showcased his lifestyle.

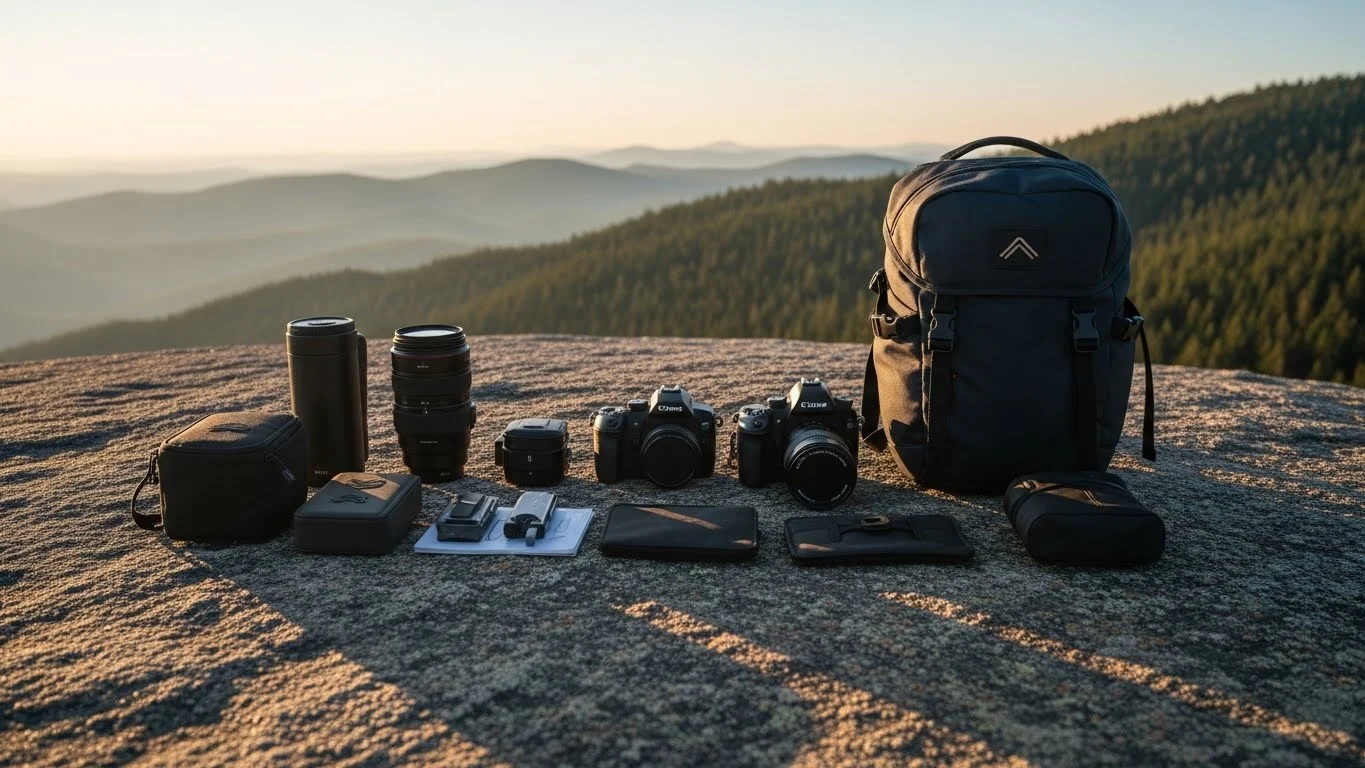
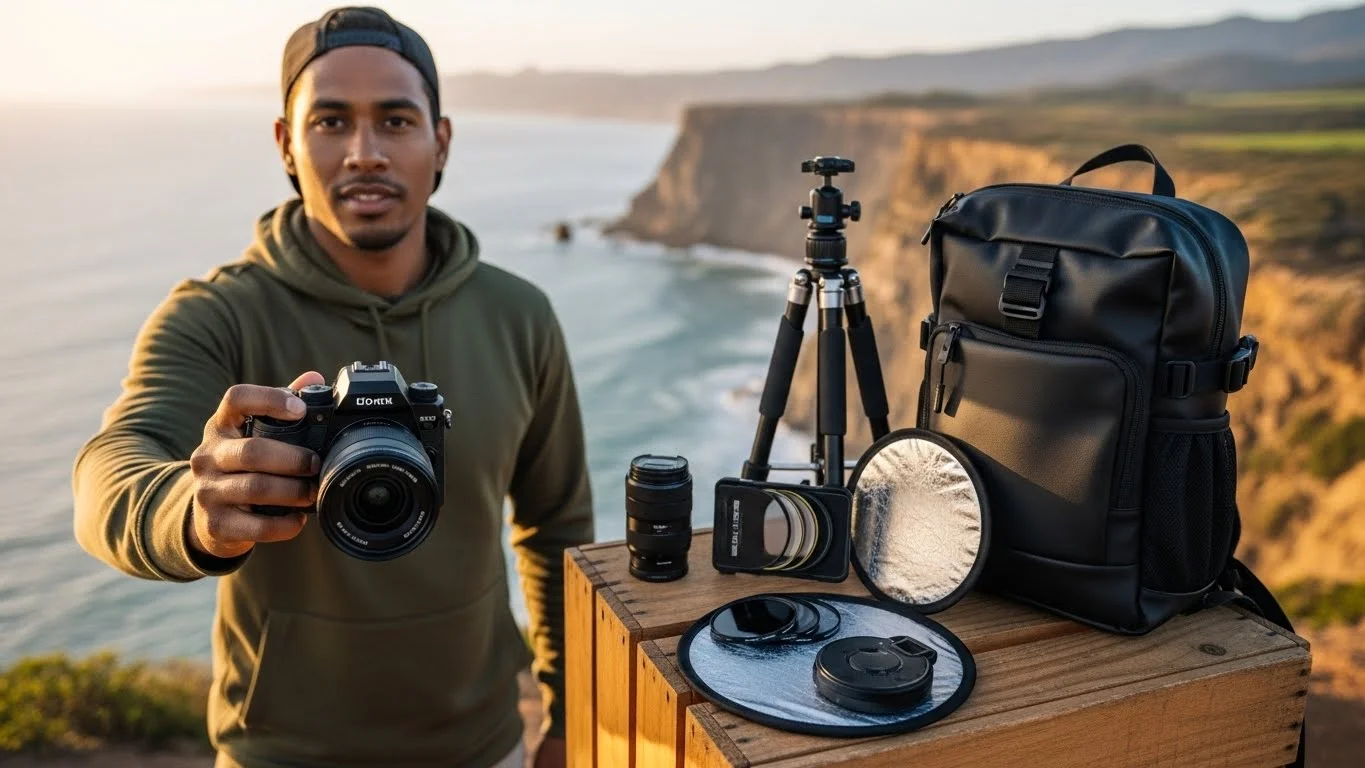
Essential Photography Gear for Travel Portraits

Having the right gear can make a huge difference in capturing great portraits. I’ve learned the hard way to invest in quality equipment. Here’s what I recommend:

  • Camera: A DSLR or a mirrorless camera is ideal for portrait photography. I shoot with a mirrorless camera because it’s lightweight and versatile, perfect for travel.
  • Lenses: A good portrait lens, like a 50mm or an 85mm, can do wonders. These lenses create beautiful bokeh, making the subject stand out. When I switched to a 50mm lens, the depth in my portraits improved significantly.
  • Tripod: It’s not always necessary, especially if you’re moving around a lot, but having a lightweight tripod can help in low-light situations.
  • External Flash: I sometimes use an external flash to add light in darker environments, which can really enhance the mood of a portrait.
  • Reflectors: These are helpful for bouncing light onto your subject, especially in harsh sunlight. I’ve used reflectors to soften shadows on my subjects’ faces, and the results were worth the extra effort.

Basic Editing Tools for Travel Portraits

Overview of Editing Software Options

Once I capture those unforgettable travel portraits, the next step is editing. There are countless software options available, but I’ve narrowed it down to a few that I find invaluable. Adobe Lightroom is my go-to for its user-friendly interface and powerful features. I also appreciate Photoshop for more detailed edits. For quick fixes, I often turn to mobile apps like Snapseed or VSCO, which allow me to edit on the go. Read Interesting article: Master Editing Travel Portraits for Stunning Memories

Mobile Apps for Quick Edits

When I’m traveling, I often don’t have the luxury of a laptop. That’s where mobile apps come to the rescue. Snapseed is one of my favorites because it offers a range of tools, from basic adjustments to more advanced features like selective editing. I remember sitting in a café in Paris, editing a portrait of a street artist using Snapseed, and it was so satisfying to see the transformation right on my phone.

Desktop Software for Detailed Editing

For more intricate editing, I turn to desktop software. Adobe Lightroom, with its extensive cataloging system, is perfect for organizing my travel photos. I can make bulk edits and fine-tune each portrait. Plus, the ability to create presets means I can maintain a consistent look across my travel portfolio. When I finally edit my portraits in Lightroom, it feels like piecing together a puzzle, and I love seeing the final image come to life.

Simple Editing Tricks to Enhance Your Travel Portraits

Adjusting Exposure and Contrast

One of the first things I always do when editing my travel portraits is adjust the exposure and contrast. I’ve found that even a slight adjustment can bring life back into an otherwise dull photo. For instance, while editing a portrait I took in a bustling market in Marrakech, I noticed that the natural light had washed out some of the colors. By slightly increasing the exposure and contrast, the vibrant colors of the spices and fabrics really popped, making the portrait more engaging. I recommend experimenting with the sliders until you find the right balance; it’s all about enhancing what’s already there without going overboard.

Color Correction Techniques

Color correction is another essential step in my editing process. I can’t tell you how many times I’ve had to correct colors that didn’t quite match what I saw in person. Sometimes, awkward lighting can create strange color casts. For example, while photographing a sunset portrait in Santorini, the warm golden hues didn’t translate well in the picture. I used the color balance tool to shift the colors slightly towards warmer tones, which helped to bring back that stunning sunset effect. I love how a little tweaking can make the portrait feel more true to life, evoking the same emotions I felt at that moment.

Using Filters and Presets

Filters and presets are like magic wands for my photos. I often create my own presets in Lightroom, tailored to the moods and colors of different locations I’ve visited. For instance, I made a preset inspired by the deep blues and vibrant greens I saw while hiking in the Swiss Alps. Applying that preset to my portraits from the trip helps maintain a consistent feel across my portfolio. While I love using presets, I also remind myself to tweak them a bit for each photo, ensuring I keep the unique aspects of every subject intact. This way, we can still capture the atmosphere of the location while enhancing the overall look of the portrait.

Cropping and Framing Your Portraits

Cropping can dramatically change the focus of a portrait. I often find myself experimenting with different crop ratios after editing the image. For example, I captured a portrait of a dancer performing in front of a colorful mural in Rio de Janeiro. Initially, I included too much background, which distracted from the dancer’s movements. By cropping the image tighter, I was able to emphasize her expressions and the vivid colors of her costume against the mural, creating a more impactful portrait. I think it’s crucial to consider what elements you want to highlight in your image, and cropping can help direct the viewer’s attention accordingly.

Enhancing Details with Sharpness and Clarity

After I’ve made the basic adjustments, I focus on enhancing the details in my portraits. Increasing sharpness and clarity can make a significant difference, especially in the subject’s eyes and facial features. I remember editing a portrait of a street vendor in Bangkok, and after sharpening the image a bit, her joyful expression and the intricate details of her handmade goods really stood out. However, I always approach sharpening with caution; too much can lead to an unnatural look. I’ve learned that subtlety is key—just enough to enhance the details while preserving a natural feeling is what I aim for.

Removing Unwanted Elements from Backgrounds

Sometimes, despite our best efforts, distracting elements find their way into our portraits. I’ve had my share of unwanted tourists or power lines sneaking into the background of my shots. Luckily, photo editing software provides tools to remove these distractions. I vividly recall editing a portrait I took at a busy festival in India; there were a few random bystanders in the background that took away from the main subject. Using the clone stamp and healing tools in Photoshop, I was able to clean up the image, keeping the focus on the vibrant colors and expressions that truly mattered. Removing these elements helped elevate the portrait, allowing the viewer to connect more with the subject.

Advanced Editing Techniques for Stunning Travel Portraits

Skin Retouching Tips

One of the areas I’ve come to appreciate in portrait editing is skin retouching. As someone who loves capturing people, I want my subjects to look their best while still appearing natural. I remember editing a stunning portrait of a young woman against a backdrop of ancient ruins in Greece. Although her smile was beautiful, there were a few blemishes that caught my eye. Using tools like the healing brush and frequency separation in Photoshop, I was able to smooth out her skin without losing the texture that gives it life. I always aim for a balance—enough to give a polished look, but not so much that it feels artificial. It’s all about enhancing the natural beauty that shines through in each portrait.

Creating Composite Images

Composite images offer an exciting opportunity to tell a more dynamic story. I’ve dabbled in this technique, especially when I want to showcase multiple aspects of a location or event. For instance, during a vibrant festival in Mexico, I took several portraits of different participants. Later, I decided to create a composite image that highlighted the energy of the festival by combining those portraits into one vibrant scene. Layering them in Photoshop allowed me to maintain the focus on each individual while showing the collective spirit of the celebration. It’s like creating a visual narrative that draws the viewer into the experience.

Utilizing Layers and Masks in Editing Software

Layers and masks are game-changers in the editing world. They give me so much flexibility when editing my portraits. I vividly remember working on a portrait of a musician in a dimly lit bar in Nashville. I wanted to brighten the subject’s face while keeping the moody atmosphere of the background. By using layers, I could selectively adjust the brightness of the musician’s face without affecting the rest of the image. Masks allowed me to paint over the areas I wanted to enhance, giving me complete control. This technique has become essential for me, allowing creativity and precision in my edits.

Adding Creative Effects and Overlays

Sometimes, I like to get a little creative with my portraits by adding effects or overlays. It can elevate the mood of a photo and give it a unique twist. For example, I was editing a portrait taken during a sunset in Bali, and I felt it needed a bit more magic. I decided to overlay some light flares that I had captured in another shot. Blending them in with the right opacity created a dreamy atmosphere that complemented the original image perfectly. I’ve learned that these effects should enhance, not overwhelm, the subject. Finding that sweet spot can turn a good portrait into something truly memorable.

Common Mistakes to Avoid When Editing Travel Portraits

Over-editing vs. Natural Look

One of the biggest pitfalls in portrait editing is the temptation to over-edit. Trust me, I’ve been there! Initially, I would go overboard with saturation and sharpness, thinking it would make my subjects look more vibrant. I quickly learned that less is often more. For example, after editing a portrait of a local artist in a bustling market, I realized I had made the colors too intense, making the image look unnatural. Now, I strive to enhance the photo while maintaining authenticity. I remind myself that the goal is to capture the essence of the moment, not to create a digital painting.

Ignoring Composition During Editing

Editing is not just about fixing exposure or color; it’s also about composition. I’ve occasionally found myself so focused on tweaking details that I overlooked the overall composition. For instance, I edited a beautiful portrait of a dancer, but I didn’t notice that the background was cluttered, which distracted from her movements. It’s crucial to maintain a clear vision of the composition during the editing process. I always take a step back during edits to ensure everything works together harmoniously.

Neglecting the Importance of Color Harmony

Color harmony can make or break a portrait. I learned this lesson the hard way when editing a series of portraits from a colorful street festival. I got carried away with mixing too many contrasting colors, and the final images felt disjointed. Now, I pay special attention to the color palette. I try to ensure that the colors complement each other rather than compete. Using tools like the color wheel in Lightroom helps me achieve a more cohesive look across my portraits. Understanding how colors interact allows me to create a more visually pleasing image.

Sharing and Showcasing Your Edited Travel Portraits

Best Platforms for Sharing Travel Portraits

I’ve often wondered where the best place is to share my travel portraits. Over the years, I’ve tried various platforms, and I’ve found that Instagram is a fantastic option for showcasing my work. The visual nature of Instagram allows my portraits to shine, and I love how I can connect with fellow travelers and photographers through hashtags. Facebook is another platform where I share my travel albums, allowing family and friends to see my adventures in one place. Recently, I’ve also started exploring Pinterest, which has become a great way to share photography tips along with my portraits. It’s exciting to see my work resonate with others and inspire them to travel and capture their own stories. Read Interesting article: Travel Portrait Lighting: Essential Techniques for Backpackers

Creating a Travel Photography Portfolio

Building a portfolio has been one of the most rewarding experiences for me as a traveler and photographer. I decided to create a website to showcase my favorite travel portraits. It was a fun process curating the images that represented my journey and the stories behind them. I recommend organizing your portfolio into categories, like “Cultural Portraits” and “Candid Moments,” to help viewers navigate your work easily. I also love including short narratives or captions with each photo, sharing the emotions and experiences behind the shot. It not only adds a personal touch but also invites the viewer into the moment, making the portraits feel more alive.

Engaging with a Photography Community Online

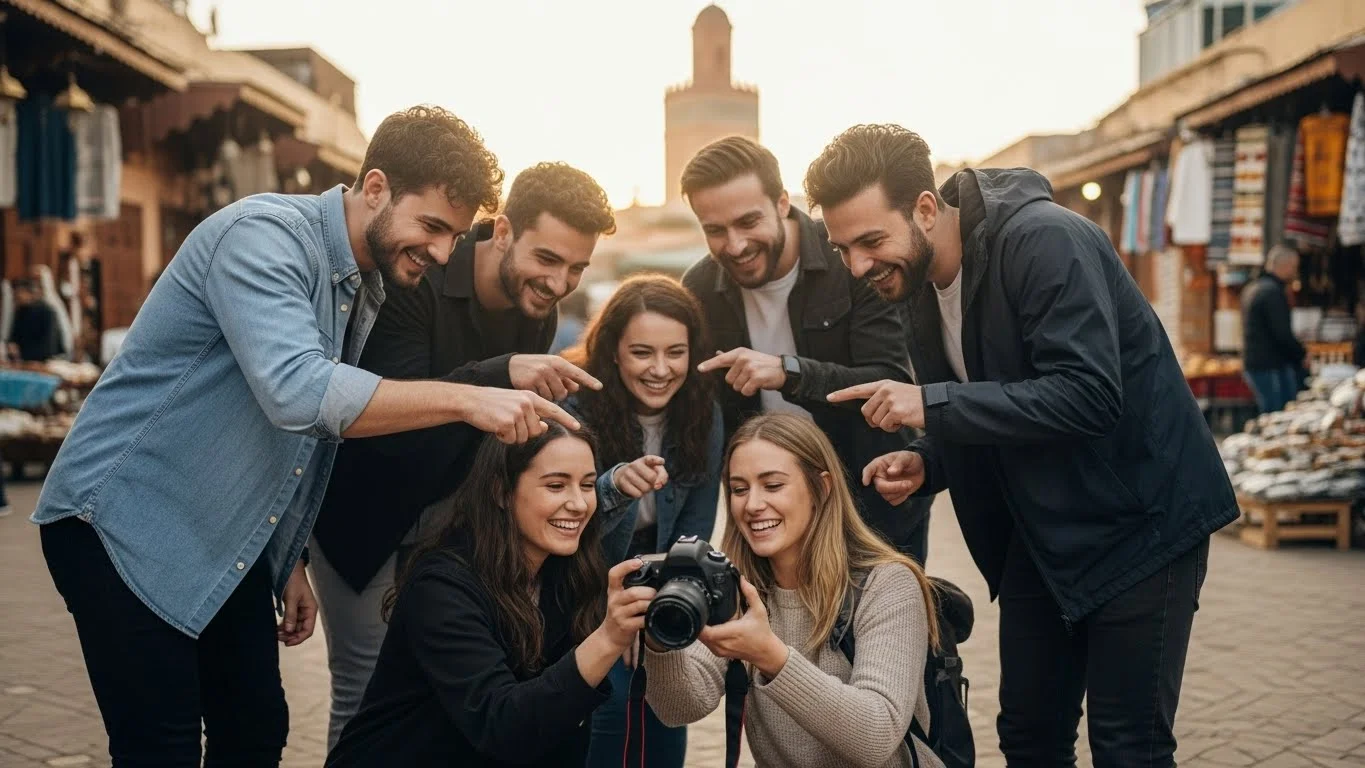
One of the best parts of being a travel photographer is the community I’ve found online. Joining photography groups on platforms like Facebook and Reddit has been an incredible way to connect with like-minded individuals. I’ve learned so much from others, shared my work, and received constructive feedback that has helped me grow. Engaging in discussions about techniques, gear, and even travel tips has enriched my experience. I also recommend participating in photo challenges or competitions; they push me to explore new techniques and keep my creativity flowing. I believe being part of a community not only enhances our skills but also brings immense joy through shared passions.

Final Thoughts

As I reflect on my journey through travel portrait photography, I feel grateful for the moments I’ve captured and the stories behind each image. The editing process is just as crucial as taking the photo itself, allowing us to enhance and preserve the essence of our experiences. I hope my tips and insights can inspire you to take your travel portraits to new heights, whether you’re just starting out or looking to refine your skills. Remember, every portrait has a story waiting to be told, so keep exploring, capturing, and sharing your unique perspective with the world!

Frequently Asked Questions

What is the importance of portrait photography in travel?

Portrait photography in travel captures the essence of the places visited, telling stories through the culture, emotions, and experiences encountered. It goes beyond just taking pictures of people, as it conveys deeper narratives, like the dedication of an elderly woman weaving baskets in Italy.

What are the different types of travel portraits?

There are several types of travel portraits, including candid portraits, posed portraits, cultural portraits, and environmental portraits. Each type offers a unique perspective, from capturing genuine expressions in candid shots to showcasing subjects within their surroundings in environmental portraits.

What essential photography gear is recommended for travel portraits?

For travel portraits, it is recommended to have a DSLR or mirrorless camera, quality portrait lenses (like 50mm or 85mm), a lightweight tripod, an external flash, and reflectors to manage lighting conditions effectively.

What editing software options are available for enhancing travel portraits?

Adobe Lightroom is a popular choice for its user-friendly interface and powerful features, while Photoshop is used for more detailed edits. For quick edits on the go, mobile apps like Snapseed and VSCO are also recommended.

What are some simple editing tricks to enhance travel portraits?

Some editing tricks include adjusting exposure and contrast to bring life to photos, using color correction techniques to match the original scene’s colors, applying filters and presets for a consistent look, and cropping to emphasize key elements of the portrait.

How can skin retouching improve travel portraits?

Skin retouching can enhance the appearance of subjects while maintaining a natural look. Techniques like using the healing brush and frequency separation help smooth blemishes without losing the texture that gives skin its life.

What are the common mistakes to avoid when editing travel portraits?

Common mistakes include over-editing, which can lead to unnatural images, ignoring composition during edits, and neglecting color harmony, which can result in disjointed visuals. It’s essential to maintain authenticity and a cohesive color palette.

Which platforms are best for sharing travel portraits?

Instagram is a fantastic platform for showcasing travel portraits due to its visual focus and community engagement. Facebook is also useful for sharing albums with friends and family, while Pinterest can be an excellent way to share photography tips alongside portraits.

How can one engage with a photography community online?

Joining photography groups on platforms like Facebook and Reddit helps connect with like-minded individuals. Participating in discussions, sharing work, and receiving feedback are beneficial for growth. Engaging in photo challenges or competitions can also inspire creativity.

What is the significance of the editing process in travel portrait photography?

The editing process is crucial as it enhances and preserves the essence of the experiences captured in travel portraits. It allows photographers to refine their images, ensuring that each portrait tells a compelling story and maintains its unique perspective.

Top Tips for Perfectly Editing Your Travel Portraits

Editing travel portraits can transform a good photo into a stunning one. With the right tools and techniques, we can bring our memories to life, showcasing the beauty of each destination in a unique way. Read Interesting article: Master Editing Travel Portraits for Stunning Memories

Top Tips for Perfectly Editing Your Travel Portraits

Understanding Travel Portraits

What is a Travel Portrait?

Travel portraits are more than just pictures; they capture the essence of our journeys and the stories behind them. I remember my trip to Italy, where I stood in front of the Colosseum, and a friend snapped a photo. That image didn’t just show me in a beautiful location; it conveyed excitement, awe, and adventure. Travel portraits often include people, iconic landmarks, or local culture, making them rich in context and emotion. They reflect our experiences and the places we’ve visited, allowing us to relive those moments every time we look at them.

Importance of Editing in Travel Portraits

Editings in travel portraits is crucial for several reasons. When I first started taking travel photos, I thought snapping the picture was enough. However, I quickly learned that editing can enhance details, make colors pop, and draw attention to the subject. It’s like putting a frame around a beautiful painting; it highlights the artwork and makes it stand out. Editing allows us to correct any exposure issues or enhance the overall feel of the image. For instance, adjusting the brightness can help bring out facial features that might have been lost in shadow, while color corrections can make a sunset look even more vibrant. The right edits can evoke emotions, making the viewer feel as if they were there with us.

Essential Editing Tools and Software

Popular Photo Editing Software

When it comes to editing travel portraits, choosing the right software can make all the difference. I’ve experimented with a few options, and I found that Adobe Lightroom and Photoshop are among my favorites. Lightroom is fantastic for making batch edits and adjusting overall images quickly, while Photoshop is perfect for more detailed work, like retouching or composite images. If you’re looking for something more user-friendly, I’d recommend trying out Capture One; it offers powerful tools without being overwhelmingly complex. Each of these programs has its strengths, and it really depends on what you’re looking to achieve with your photos. Additionally, for those interested in gear, check out the Ultimate Guide to Portrait Photography Gear for Backpackers.

Mobile Apps for On-the-Go Editing

Let’s face it, not every travel adventure allows us to sit down at a computer for hours of editing. I’ve found my mobile phone to be an incredible companion for quick edits. Apps like Snapseed and VSCO are fantastic for on-the-go editing. Snapseed has a wide range of tools, from basic adjustments to advanced filters, which I often use when I want to enhance a photo taken in less-than-ideal lighting. VSCO, on the other hand, has some beautiful presets that can give your photos a consistent look, making them feel cohesive when shared on social media. I remember sitting in a café in Paris, sipping coffee while editing my travel portraits right on my phone. It’s super convenient and allows me to share memories almost instantly.

Key Editing Techniques for Travel Portraits

Adjusting Exposure and Contrast

One of the first things I focus on when editing my travel portraits is exposure. Sometimes, a photo can come out too dark or too bright due to various lighting conditions. I usually adjust the exposure slider in Lightroom until the image looks balanced. Then, I play with the contrast to add depth. A little contrast can help make the colors pop and bring out details that might otherwise go unnoticed. I recall a time when I edited a photo from my trip to Japan. The colors were muted because of the cloudy weather, but with a bit of exposure adjustment and contrast, the image transformed into a vibrant memory.

Color Correction and Enhancement

After I’ve adjusted exposure and contrast, I often move on to color correction. I feel that the colors in my travel portraits should reflect the true essence of the location. Sometimes, the colors can be too warm or cool, depending on the lighting. I usually use the HSL (Hue, Saturation, Luminance) panel in Lightroom to fine-tune colors. I remember editing a beach photo where the sand looked too gray. With a few sliders, I was able to bring back the golden hues that made the scene feel alive. Color enhancement can really make your photos vibrant and appealing to the eye.

Cropping for Composition

Cropping might seem like a simple step, but it can significantly improve the composition of a photo. I often analyze the framing of my shots, asking myself if the subject is where I want it. I’ve learned to follow the rule of thirds, which helps me create a more dynamic image. I once captured a stunning portrait of a local artist at a market, but the composition felt off. After cropping, the focus shifted perfectly to the artist, and it transformed the photo entirely. Cropping can help us tell a story, emphasizing what’s important in the image.

Retouching Skin and Features

When it comes to portraits, retouching is essential, but I always strive for a natural look. I remember my first attempts at retouching, where I went overboard and ended up with an unrealistic appearance. Now, I use tools like the healing brush in Photoshop to subtly remove blemishes or distractions without making the subject look overly edited. It’s important to enhance features, but maintaining authenticity is key. I want the people in my portraits to look like themselves, just at their best.

Sharpening and Noise Reduction

Finally, I tackle sharpening and noise reduction. Sometimes, travel photos can come out a bit soft, especially if taken in low light. I apply a bit of sharpening to enhance details without making the image look unnatural. Additionally, if I notice any noise, especially in night shots, I use noise reduction tools in Lightroom. I’ve learned that this step is essential for ensuring my travel portraits look crisp and professional. It’s amazing how these final touches can elevate the overall quality of the portraits, ensuring they look stunning when shared with friends and family.

Creating a Consistent Style

Establishing a Color Palette

Creating a consistent style is something I’ve learned to value in my travel portraits. One of the first steps in achieving this is establishing a color palette. I like to think of a color palette as a visual signature that ties my images together. When I edit my photos, I focus on a few key colors that represent the spirit of the locations I’ve visited. For instance, when I traveled to Greece, I was inspired by the vibrant blues and whites of the buildings and the crystal-clear waters. I made a point to enhance those colors in my portraits, which not only made the images pop but also conveyed the essence of the place. I feel that when we stick to a color palette, our work becomes more recognizable and can create a striking visual story across our travel memories.

Using Presets for Cohesion

Another tool I love for maintaining a consistent style is the use of presets. I remember when I first discovered presets; it was like finding a treasure chest of editing shortcuts! They can save time and help achieve a cohesive look across a series of photos. I often create my own presets based on my preferred color palette and editing style. For example, after a trip to the lush landscapes of New Zealand, I developed a preset that enhances the greens and adds a bit of warmth to the images. This way, whether I’m sharing photos of the stunning fjords or the vibrant local markets, they all have a similar feel. I recommend experimenting with presets to find what resonates with you and your style. It’s exciting to see how your unique touch can shine through in your travel portraits.

Special Effects and Filters

When to Use Filters

Filters can be a fantastic way to add a creative edge to our travel portraits, but I’ve learned that moderation is key. There was a time when I went a bit filter-crazy, thinking that every photo needed a dramatic effect. Over time, I’ve come to appreciate the subtlety of filters. For instance, a soft vintage filter can evoke nostalgia without overpowering the original image. I find that using filters sparingly can enhance the mood of a photo. On my last trip to the mountains, I applied a light filter that brought out the golden hour glow without detracting from the natural beauty of the landscape. It’s all about complementing the image rather than overshadowing it. I suggest trying different filters but always keeping an eye on how they affect the overall vibe.

Creative Effects for Travel Portraits

In addition to filters, there are several creative effects that can elevate our travel portraits. I love experimenting with techniques like double exposure or adding light leaks for a dreamy effect. I remember trying double exposure for the first time during a sunset shoot in Bali. I layered an image of a stunning silhouette with the vibrant sunset backdrop, and the result was magical. It brought a unique storytelling element to the portrait, reflecting both the person and the beautiful surroundings. However, while it’s fun to play with these effects, I always strive to ensure that the essence of the travel experience remains intact. For me, the goal is to enhance the story behind the image, not distract from it.

Optimizing Your Portraits for Sharing

Best Formats and Sizes for Social Media

Sharing our travel portraits on social media can be a great way to connect with friends and fellow travelers. However, optimizing those images for sharing is essential. I’ve learned that different platforms have specific requirements for image sizes and formats. For example, Instagram favors square images, while Facebook works best with landscape-oriented photos. I often resize my portraits based on where I plan to share them. It’s frustrating when a beautifully composed photo gets cropped awkwardly or loses quality. By being mindful of the format, we can ensure that our images look their best and showcase our travels effectively.

Using Metadata and Tags for SEO

Another aspect I find important when sharing my travel portraits is incorporating metadata and tags. I’ve realized that using relevant keywords in the titles and descriptions can help others find my photos more easily. For instance, when I post a portrait from my trip to Barcelona, I include tags like “Barcelona travel” or “Spanish architecture.” This not only helps my images reach a wider audience but also connects me with others who share similar travel interests. Taking the time to add proper metadata has been a game-changer in how my work is discovered online, and I believe it can help you too! Also, consider learning about Travel Portrait Lighting: Essential Techniques for Backpackers for better results.

Common Mistakes to Avoid

Over-Editing vs. Natural Look

As I’ve shared my journey into editing travel portraits, I’ve also noticed some common pitfalls that many of us might fall into. One of the biggest mistakes is over-editing. Early on, I found myself getting carried away with filters and effects, thinking it would make my images stand out. Instead, I often ended up with portraits that looked unnatural. I learned that while it’s exciting to enhance photographs, keeping a natural look is essential. The best edits are those that bring out the beauty of the moment without taking away from the authenticity of the scene. I recommend stepping back and asking yourself if the image still feels true to the experience.

Ignoring Background Elements

Another mistake I’ve made—and I know I’m not alone—is neglecting the background elements in my portraits. I’ve taken stunning pictures where the subject was perfect, only to realize later that the background was distracting or cluttered. It’s crucial to pay attention to what’s happening behind our subjects. I now make it a habit to scan the entire frame before hitting the shutter button. If the background isn’t adding to the story, I try to find a better angle or even adjust my composition in post-editing. Being aware of background elements can dramatically improve the overall quality of our travel portraits.

Resources for Further Learning

Online Courses and Tutorials

As I’ve immersed myself in the world of travel portrait editing, I realized that there’s always more to learn, no matter how experienced we feel. Online courses have been a treasure trove of knowledge for me. Platforms like Skillshare and Udemy offer various courses specifically tailored to photography and editing techniques. I took a fantastic course on Lightroom that not only covered the basics but also delved into advanced techniques like local adjustments and color grading. It was eye-opening to see how professionals approach their edits, and I’ve been able to incorporate several of those tips into my workflow. I recommend looking for courses that fit your skill level—there’s no rush, and learning at your own pace helps solidify those new skills.

YouTube has also been an invaluable resource for me. There are countless tutorials that break down complex editing processes into bite-sized steps. I love watching editing sessions where creators share their screen and talk through their thought process. It’s almost like getting a personal lesson from a mentor. I remember stumbling upon a video about creative cropping techniques that changed how I approach framing my photos. Plus, it’s free, which is always a bonus!

Photography Blogs and Communities

Aside from formal courses, I’ve found that engaging with photography blogs can ignite inspiration and enhance my editing skills. There are amazing blogs dedicated to travel photography that often share tips, tricks, and personal experiences. One of my favorites is “The Wandering Lens,” which provides insights on everything from shooting techniques to editing workflows tailored for travel photographers. Reading about others’ journeys and challenges makes me feel connected to a larger community of like-minded individuals.

Communities, too, can be incredibly helpful. I joined a few photography groups on social media platforms like Facebook and Reddit. These groups are filled with passionate photographers who share their work, seek feedback, and offer advice. I remember posting one of my travel portraits for critique and received constructive feedback that helped me improve my editing style significantly. It’s reassuring to know that we’re not alone in our journeys, and being part of a supportive community can boost our confidence and skills.

For those who prefer a more visual approach, Instagram can also be a source of inspiration. I follow several photographers who specialize in portraits and travel photography. Seeing their work not only sparks ideas for my editing but also provides insights into how they create their unique styles. Engaging with their posts often leads to discovering new techniques, presets, and challenges to try out in my own work.

Lastly, I can’t stress enough the importance of practice. The more I edit, the more I discover what works for me and what doesn’t. It’s a journey of experimentation, and every portrait edited is a step towards honing my style. So, don’t hesitate to dive into those resources. Whether it’s a course, a tutorial, or a community, there’s a wealth of knowledge waiting to be tapped into!

Frequently Asked Questions

What is a travel portrait?

A travel portrait captures the essence of journeys and the stories behind them, often including people, iconic landmarks, or local culture, allowing us to relive those moments.

Why is editing important in travel portraits?

Editing enhances details, makes colors pop, and draws attention to the subject, correcting exposure issues and evoking emotions that make viewers feel as if they were present during the moment.

What are some popular photo editing software options for travel portraits?

Adobe Lightroom and Photoshop are popular choices, with Lightroom being great for batch edits and quick adjustments, while Photoshop is suited for detailed work like retouching. Capture One is also recommended for its user-friendly interface.

Which mobile apps are useful for on-the-go editing?

Snapseed and VSCO are excellent mobile apps for quick edits, offering a range of tools and presets that make it convenient to enhance photos while traveling.

What key techniques can improve travel portrait editing?

Key techniques include adjusting exposure and contrast, color correction and enhancement, cropping for composition, retouching skin and features, and applying sharpening and noise reduction.

How can I create a consistent style in my travel portraits?

Establishing a color palette and using presets can help create a consistent style, allowing your images to have a visual signature and cohesive look across various photos.

When should filters be used in travel portrait editing?

Filters should be used sparingly to add a creative edge without overpowering the original image. A subtle filter can enhance the mood of a photo while preserving its natural beauty.

What are the best formats and sizes for sharing travel portraits on social media?

Different platforms have specific requirements; for example, Instagram favors square images, while Facebook works best with landscape-oriented photos. Resizing portraits appropriately can ensure they look their best online.

How can metadata and tags improve the sharing of travel portraits?

Incorporating relevant keywords in titles and descriptions helps others find your photos more easily, increasing their reach and connecting you with like-minded individuals interested in similar travel experiences.

What common mistakes should be avoided when editing travel portraits?

Common mistakes include over-editing, which can result in unnatural images, and neglecting background elements that may distract from the subject, both of which can diminish the overall quality of the portrait.

Master Editing Travel Portraits for Stunning Memories

Editing travel portraits can transform simple snapshots into breathtaking memories. Let’s dive into the world of travel portrait photography and discover how to enhance those special moments we capture on our adventures.

Master Editing Travel Portraits for Stunning Memories

Understanding Travel Portraits

What is a Travel Portrait?

When I think of travel portraits, I picture those moments where a person connects deeply with their surroundings. A travel portrait captures not just a face, but the essence of a location, its culture, and the emotions tied to that experience. It’s often set against a stunning backdrop – a bustling market, a serene beach, or an ancient monument – and it tells a story of adventure. I’ve found that these portraits, whether candid or posed, reveal a unique glimpse into the traveler’s journey. They become more than just pictures; they are visual narratives that encapsulate our experiences and feelings.

Importance of Travel Portraits in Capturing Memories

Every time I look back at my travel portraits, I’m transported back to those moments. They evoke the laughter, the excitement, and sometimes even the challenges I faced while exploring new places. I believe that travel portraits serve as a powerful reminder of the people we met, the cultures we immersed ourselves in, and the landscapes we marveled at. In my experience, these portraits are crucial, not just for preserving memories but also for sharing our stories with others. They express who we are in those fleeting moments of travel, capturing the joy and spontaneity that comes with exploring the world.

Essential Tools for Editing Travel Portraits

Recommended Software for Photo Editing

When it comes to editing travel portraits, having the right software can make a huge difference. Over the years, I’ve tried various tools and have settled on a few favorites that I think work wonders. Adobe Lightroom is my go-to for its user-friendly interface and powerful editing capabilities. It allows me to make quick adjustments with sliders and presets. For more intricate edits, I often turn to Adobe Photoshop. It offers precision editing tools that help me refine my portraits exactly as I envision them. Other great options include Capture One for its color grading features and GIMP for a free alternative. No matter which software you choose, I recommend exploring their tutorials to fully unlock their potential. If you’re also interested in the gear that can enhance your travel photography, check out the Ultimate Guide to Portrait Photography Gear for Backpackers.

Hardware Considerations: Monitors and Cameras

Equally important as software is the hardware we use. I’ve learned the hard way that a good monitor can greatly affect how I perceive colors and details in my images. I prefer IPS monitors because they offer better color accuracy and viewing angles, which is crucial for photo editing. Additionally, investing in a quality camera can significantly elevate the quality of your travel portraits. I’ve had great experiences with mirrorless cameras for their portability and image quality, allowing me to capture stunning shots on the go. Don’t forget to also consider lenses; a good prime lens can work wonders for portraiture, providing that pretty bokeh effect that brings the subject into focus.

Basic Editing Techniques for Stunning Portraits

Color Correction: Enhancing Vibrancy and Mood

One of the first things I do when editing my travel portraits is color correction. I love how adjusting the colors can instantly change the mood of a photo. For me, enhancing vibrancy often means bringing out the blues of the ocean or the warm hues of a sunset. I typically start with the white balance to ensure the colors feel natural. It’s amazing how small changes can evoke different feelings. I remember editing a portrait from my trip to Thailand, and when I adjusted the colors to reflect the vibrant markets, it felt like I was back there, surrounded by the energy and excitement of the place.

Lighting Adjustments: Natural vs. Artificial Light

Lighting can make or break a portrait. I’ve often found that natural light provides the best results, especially during the golden hour. However, I’ve also had to deal with harsh midday sun or indoor lighting that just doesn’t cut it. In these cases, I rely on editing techniques to correct exposure and contrast. Using tools like curves and levels allows me to brighten up shadows and tone down highlights. I remember a portrait I took in a dimly lit café; with some editing magic, I was able to bring out the warmth of the scene, making it feel inviting and cozy. For more insights on lighting techniques, see Travel Portrait Lighting: Essential Techniques for Backpackers.

Cropping and Framing for Impact

Cropping is another essential editing technique that I often use to enhance my travel portraits. When I’m editing, I take a moment to consider the composition. I’ve noticed that sometimes, simply cropping out distractions or adjusting the framing can create a much stronger image. I like to follow the rule of thirds, placing my subject along those lines to draw the viewer in. It’s fascinating how a little change in framing can shift the focus and tell a different story within the same photo. Each time I edit, I remind myself to ask, “What do I want the viewer to feel?”

Advanced Editing Techniques

Using Layers and Masks for Precision Editing

As I began to dive deeper into photo editing, I discovered the power of layers and masks. This feature has truly transformed how I approach my travel portraits. Layers allow you to work non-destructively, meaning you can make changes without permanently altering your original photo. I remember the first time I used layers; it felt like I was painting on a canvas, adjusting bits and pieces until the image matched my vision. With masks, I could selectively edit parts of my portrait, enhancing certain areas while leaving others untouched. For example, if I wanted to brighten the subject’s face but keep the background moody, I could easily mask out the background and make adjustments just to the subject. This level of control is something I really appreciate, especially when trying to capture the true essence of a moment.

Skin Retouching: Balancing Natural and Flawless

When it comes to skin retouching, I’ve learned that it’s all about finding that sweet spot between natural and flawless. I remember the first few times I edited skin; I went a bit overboard, smoothing everything out to the point where my subjects looked almost unreal. Now, I focus on subtle adjustments that enhance natural beauty. One technique I love is frequency separation, which allows me to smooth out skin texture while maintaining the natural tones and details. It’s important to remember that we all have imperfections, and those little details tell a story. I try to ensure that my edits enhance my subjects’ features without erasing their individuality. This approach resonates well with me because I believe that every travel portrait should reflect the true character of the person in the shot.

Creating Depth with Focus and Blur Effects

Creating a sense of depth in my portraits has become a go-to technique for making them pop. I often experiment with focus and blur effects to draw the viewer’s eye exactly where I want it. I’ve found that adding a soft blur to the background can really make my subject stand out. For instance, during a visit to a market in Marrakech, I captured a portrait of a vendor surrounded by vibrant spices. By applying a slight blur to the background, I was able to emphasize the vendor and the colors of the spices, making the image feel more dynamic. I also love using depth of field in-camera, but editing gives me even more flexibility to enhance that effect. A little bit of blurriness can transform a busy scene into a captivating story.

Styling Travel Portraits

Selecting Filters and Presets that Fit Your Travel Aesthetic

Filters and presets have been a game-changer for me when it comes to establishing a cohesive travel aesthetic. I can’t tell you how many times I’ve scrolled through my photos and felt overwhelmed by the choices. That’s when I discovered the joy of creating and using my own presets. I like to think of them as shortcuts that help convey the mood of a particular trip. For example, when I traveled to Iceland, I created a preset that emphasized cool tones and added a slight vignette to echo the dramatic landscapes. It helped unify my portfolio and made my editing process much quicker. I encourage you to experiment with creating your own presets; it’s a fun way to develop your style while saving time.

Color Grading Techniques for a Cohesive Look

Color grading has become an essential part of my editing process. I’ve learned that adjusting the color tones across my images not only enhances individual portraits but also creates a harmonious collection. I remember the first time I applied a consistent color grade across a series of photos from a trip to Italy. It completely transformed my images, making them feel like they belonged together, almost like a visual diary. Using tools such as HSL sliders in Lightroom, I can tweak individual color channels to create a certain mood—like leaning into warm golden hues for a sunset-themed series or cooler tones for a winter wonderland vibe. This technique allows me to tell a more compelling story through my travel portraits.

Incorporating Text and Graphics for Personalization

Adding text and graphics is another layer of creativity I’ve enjoyed exploring. It’s a fantastic way to personalize my travel portraits and share the story behind them. I often incorporate quotes from my travels or small graphics that represent the culture I experienced. For instance, after visiting Japan, I added some handwritten-style text overlaying a portrait of me in front of a cherry blossom tree. It added a personal touch and made the image feel more like a memory rather than just a photograph. I find that a well-placed quote can evoke emotions and engage viewers, inviting them to connect with my experiences on a deeper level.

Editing for Different Travel Scenarios

Urban Portraits: Capturing City Life

Urban settings present a unique opportunity for travel portraits. I’ve found that city life brings an energy and vibrancy that can really elevate a photo. When I’m in a bustling urban environment, I love to incorporate iconic landmarks or street art in my portraits. The background elements add depth and context, making the portrait more than just a face; it becomes a story woven into the fabric of the city. For instance, during my visit to New York City, I captured a portrait of a street performer in Central Park. The lively atmosphere was palpable, and through editing, I enhanced the colors of the cityscape behind him, making the entire scene pop. I recommend using a slight vignette to draw the viewer’s attention toward the subject while still enjoying the details of the surroundings.

Nature and Adventure: Highlighting Landscapes

When I venture into nature, I always aim to capture the breathtaking landscapes that surround my subjects. The beauty of the outdoors can complement a portrait beautifully. I remember hiking in the Swiss Alps and taking a portrait of a friend against a backdrop of towering mountains. In post-processing, I adjusted the contrast and saturation to emphasize the vivid greens of the grass and the blues of the sky, which made the portrait feel more immersive. Another technique I’ve employed is to use selective editing; I enhance the natural elements in the background while keeping the subject’s colors more subdued. This creates a harmonious balance, allowing the viewer to appreciate both the person and their stunning environment. I suggest experimenting with different angles to find the most captivating composition, as nature offers countless possibilities.

Cultural Experiences: Showcasing Local Traditions

One of the most rewarding aspects of travel portraits is capturing the essence of different cultures. I’ve had the chance to witness various traditions and festivals around the world, and editing these portraits helps convey the rich stories behind them. For example, during a festival in India, I took portraits of locals wearing traditional attire. The vibrant colors of their clothing were so striking that I focused on enhancing those hues in my edits while keeping the skin tones natural. I also love adding subtle texture to the backgrounds, which can reflect the cultural elements of the scene. Textures like fabric or patterns can hint at the stories behind the traditions being celebrated. This approach not only highlights the subject’s cultural significance but also invites viewers to learn about the vibrant traditions that enrich our world. I’ve found that when editing these portraits, it’s important to maintain respect for the culture being portrayed, ensuring that the final image feels authentic.

Common Mistakes to Avoid in Editing

Over-Editing: Finding the Right Balance

As I’ve delved deeper into editing, I quickly learned how easy it is to go overboard with adjustments. I remember a time when I was so excited about a new editing technique that I applied it to every portrait, resulting in unnatural colors and overly smooth skin. Over-editing can strip away the essence of a moment, making it feel less genuine. It’s crucial to step back and evaluate our edits. I’ve found it helpful to take breaks during the editing process, allowing my eyes to rest and return with a fresh perspective. A good rule of thumb is to ask myself, “Does this enhance the story I’m trying to tell?” If the answer is no, I dial it back. Embracing the beauty of imperfection often leads to more authentic portraits.

Neglecting Composition in Post-Processing

While editing can be incredibly powerful, I’ve realized that it’s not a substitute for good composition. Sometimes, I’ve gotten so caught up in perfecting an image that I overlooked its basic structure. For instance, a portrait that is slightly off-center or poorly framed can lose its impact, no matter how much I edit it. I’ve learned to go back to the rules of composition, such as the rule of thirds or leading lines, even in post-processing. Cropping can help, but it’s always preferable to start with a strong composition during the shoot. I recommend analyzing your images before diving into editing; this way, any adjustments you make will strengthen the overall impact of the portrait.

Ignoring the Story Behind the Image

Every portrait has a story, and it’s our job as editors to honor that narrative. I’ve sometimes found myself so focused on technical details that I lost sight of the emotions and experiences captured in the shot. For example, I took a portrait of a local artisan during my travels, and while I was tempted to enhance the background significantly, I realized that the subject’s expression and the rawness of the environment were what made the image special. I decided to keep the edits minimal, allowing the story to shine through. When editing, I always try to remember what I felt in that moment and aim to reflect that feeling in the final image. This approach makes each portrait not just a visual representation but also a heartfelt memory that resonates with anyone who views it.

Frequently Asked Questions

What is a travel portrait?

A travel portrait captures not just a person’s face but the essence of a location, its culture, and the emotions tied to the experience. It tells a story of adventure and reveals a unique glimpse into the traveler’s journey.

Why are travel portraits important for capturing memories?

Travel portraits serve as powerful reminders of the people we met, the cultures we immersed ourselves in, and the landscapes we marveled at. They express who we are in those fleeting moments of travel and help preserve and share our stories with others.

What software is recommended for editing travel portraits?

Adobe Lightroom is a popular choice for its user-friendly interface and powerful editing capabilities. For more intricate edits, Adobe Photoshop is recommended. Other options include Capture One for color grading features and GIMP as a free alternative.

What basic editing techniques can enhance travel portraits?

Basic editing techniques include color correction to enhance vibrancy and mood, lighting adjustments to correct exposure and contrast, and cropping and framing to improve composition and impact.

How can layers and masks be used in editing travel portraits?

Layers and masks allow for non-destructive editing, enabling you to make changes without permanently altering the original photo. This provides control to selectively enhance certain areas of a portrait while leaving others untouched.

What is skin retouching and how should it be approached?

Skin retouching involves enhancing natural beauty without making subjects look unrealistic. Techniques like frequency separation help smooth skin texture while maintaining natural tones and details, ensuring the individuality of the subject is preserved.

How can filters and presets contribute to a travel aesthetic?

Filters and presets help establish a cohesive travel aesthetic by providing shortcuts to convey the mood of a trip. Creating and using your own presets can unify your portfolio and streamline the editing process.

What are some common mistakes to avoid in editing travel portraits?

Common mistakes to avoid include over-editing, neglecting composition in post-processing, and ignoring the story behind the image. It’s important to find the right balance in edits and maintain a strong composition from the beginning.

How can one enhance urban portraits effectively?

In urban settings, incorporating iconic landmarks or street art can add depth and context to portraits. Using editing techniques to enhance the colors of the cityscape can make the scene more vibrant and engaging.

What techniques can highlight cultural experiences in travel portraits?

Highlighting cultural experiences can be achieved by enhancing vibrant colors of traditional attire while maintaining natural skin tones. Adding subtle textures to backgrounds can reflect cultural elements and enhance the storytelling aspect of the portraits.

Ultimate Guide to Portrait Photography Gear for Backpackers

As a passionate backpacker and portrait photographer, finding the right gear can make all the difference in capturing stunning images while on the go. Let’s explore the essentials that can elevate your backpacking photography experience! Read Interesting article: Top 5 Essential Portrait Photography Gear for Travelers

Ultimate Guide to Portrait Photography Gear for Backpackers

Understanding Portrait Photography

What is Portrait Photography?

Portrait photography is all about capturing the essence of a person or group. It’s more than just taking a picture; it’s about telling a story through expressions, emotions, and body language. I remember my first attempt at portrait photography on a hike. I spotted a fellow traveler with a vibrant scarf and decided to snap a few shots. The results were magical, and I realized how powerful a simple portrait could be in capturing a moment in time. Portraits can range from candid shots to more posed setups, and they often focus on the subject’s face and expressions, highlighting their unique features and personality.

The Importance of Gear in Portrait Photography

The right gear can truly make or break your portrait photography experience. I’ve learned this lesson the hard way! When I first ventured into the world of portrait photography, I used my old point-and-shoot camera. While it did the job, the results were often disappointing. I quickly discovered that investing in quality gear not only improved my photos but also made the experience more enjoyable. For backpackers, it’s crucial to balance quality and portability. We need gear that’s lightweight yet effective, allowing us to capture stunning portraits without weighing ourselves down. Each piece of equipment serves a purpose, enhancing our ability to create compelling images.

Essential Gear for Portrait Photography

Camera Options

Choosing the right camera is a key step in your portrait photography journey. I spent countless hours researching the best options before settling on a camera that perfectly fits my needs, especially for backpacking.

DSLR vs. Mirrorless Cameras

When it comes to cameras, you often hear the debate of DSLR versus mirrorless. In my experience, both have their pros and cons. DSLRs tend to be bulkier but offer great battery life and optical viewfinders. On the other hand, mirrorless cameras are generally lighter and more compact, making them ideal for backpackers like us. If you’re hiking long distances, the weight savings of a mirrorless system can be a game-changer. I’ve enjoyed using a mirrorless camera during my travels because it allows me to carry extra lenses without feeling overloaded.

Recommended Camera Models for Backpackers

For backpackers, I highly recommend considering models like the Sony A6400 or the Fujifilm X-T30. Both are lightweight and deliver excellent image quality. I’ve had amazing results with the A6400, especially in low-light conditions. These cameras also have interchangeable lenses, which brings me to the next essential part of gear—lenses!

Lens Selection

The lens you choose can significantly impact your portrait photography. After experimenting with various types, I’ve learned that the right lens can elevate the quality of your images.

Prime Lenses vs. Zoom Lenses

Prime lenses are known for their sharpness and wide apertures, making them perfect for portrait photography. I fell in love with my 50mm f/1.8 lens because it produces beautiful bokeh, focusing on the subject while softly blurring the background. However, zoom lenses offer versatility, allowing you to adjust your composition without changing your position. I often carry a zoom lens for travel portraits, as it lets me adapt to various shooting environments quickly.

Best Lenses for Portraits on the Go

If you’re a backpacker, consider a 35mm or 50mm prime lens for their lightweight design and great performance. My favorite backpacking lens is a 24-70mm zoom lens. It strikes the perfect balance between flexibility and image quality, making it ideal for capturing portraits in different settings. I’ve found that this combination has helped me adapt to various lighting conditions and environments while on the trail.

Tripods and Stabilizers

Stability is crucial in portrait photography, especially if you want to achieve sharp images. I learned this the hard way while trying to shoot in low light without a tripod!

Lightweight Tripod Options

When backpacking, a lightweight tripod is essential. I recommend a compact travel tripod, like the Manfrotto Befree. It’s sturdy yet lightweight, making it perfect for carrying on long hikes. Having a tripod allows you to experiment with different angles and compositions, and it really comes in handy for group shots where you want to be in the frame too.

Gimbals for Smooth Shots

If you’re looking to create video portraits or need smooth shots, consider investing in a gimbal. I’ve used a small handheld gimbal for my mirrorless camera, and it has transformed the way I capture moving subjects. It’s lightweight and easy to pack, allowing me to shoot dynamic portraits without the jitters that can come from handheld shots.

Lighting Equipment for Portraits

Natural Light Techniques

One of the biggest joys of backpacking photography is working with natural light. I’ve often found that the golden hour, just after sunrise or before sunset, offers the most stunning light for portraits. The soft, warm tones can really bring out the best in your subjects. I remember finding a perfect spot on a mountain trail where the light filtered through the trees, creating a magical atmosphere. It was an unexpected moment that turned into one of my favorite photographs.

When working with natural light, it’s essential to pay attention to your surroundings. I’ve learned to observe how light changes throughout the day and how it affects the mood of my images. Finding shaded areas can help soften harsh sunlight, while shooting directly into the light can create dramatic silhouettes. Experimenting with different angles and using the environment to your advantage can lead to breathtaking results. Read Interesting article: Travel Portrait Lighting: Essential Techniques for Backpackers

Portable Flash Options

While natural light is fantastic, there are times when you need a bit more control, especially in low-light situations. This is where portable flash options come into play. I’ve found that having a reliable flash can be a game-changer in my portrait photography. It allows me to fill in shadows and add a bit of sparkle to my subject’s eyes. There are a couple of types of flash I recommend exploring.

Speedlights vs. Strobe Lights

Speedlights are compact and easy to carry, making them ideal for backpacking. I use a speedlight that I can attach to my camera’s hot shoe, which gives me flexibility without the bulk of larger strobes. It provides a powerful burst of light, and I can bounce it off surfaces to create softer lighting. My favorite way to use it is to create catchlights in my subject’s eyes, which adds an engaging element to the portrait.

On the other hand, strobe lights are generally more powerful and perfect for studio settings, but they can be heavy and cumbersome for hiking. If you’re planning to do a photoshoot in one location rather than on the move, a strobe could be worth considering. For me, though, the ease and portability of a speedlight suit my backpacking adventures far better.

Reflectors and Diffusers

Reflectors and diffusers are often underrated tools in portrait photography, but they can significantly enhance your lighting setup. When I first started using a reflector, I was amazed at how it could redirect light onto my subject’s face, illuminating features beautifully. They’re lightweight and foldable, making them easy to pack in my backpack.

How to Use Reflectors Effectively

Using a reflector is simple but effective. I often position a reflector opposite the light source to bounce light back onto my subject. This technique softens shadows and creates a more balanced exposure. I’ve learned to experiment with different colors of reflectors—gold for warmth, silver for a cooler tone, or white for a natural look. Each color can dramatically change the mood of a portrait. In one memorable shoot, I had my friend hold a gold reflector, and the result was a warm, inviting glow that perfectly complemented the golden hour light.

Accessories Every Backpacker Should Have

Camera Bags and Backpacks

Your camera bag is just as important as the gear inside it. I’ve gone through a few different options, and I can’t stress enough the importance of choosing a bag that suits your travel style. A good camera bag should protect your gear while being comfortable to carry on long hikes.

Choosing the Right Backpack for Travel

I personally love backpacks that offer padded compartments for my camera and lenses but also allow space for other essentials like snacks and water. My go-to is a bag with adjustable straps and a hip belt, which helps distribute the weight evenly. I remember a time when I opted for a smaller bag that barely fit my camera—by the end of the day, my shoulders were sore, and I regretted not choosing a more comfortable option. So, take the time to find a backpack that’s not only functional but also fits your body well. This way, you can focus on capturing those incredible moments instead of worrying about your gear!

Lens Filters

Lens filters can be a simple yet effective way to enhance your photography. I’ve found them particularly useful in various situations, especially when I want to protect my lenses or control light more precisely.

UV Filters, Polarizers, and ND Filters

A UV filter is a great investment for any backpacker. Not only does it protect your lens from scratches and dirt, but it also can improve clarity. I’ve had my fair share of accidents, and having a UV filter saved my lens from some serious damage. Polarizing filters are fantastic for reducing glare from water and enhancing colors, making landscapes pop in your portraits. I often use it when shooting near lakes or rivers. Neutral density (ND) filters allow you to shoot at wider apertures in bright conditions, giving you more creative control over the depth of field. I’ve learned that having these filters can open up possibilities for stunning outdoor portraits, even in challenging lighting.

Cleaning Kits

Taking care of your gear while on the road is essential, and that’s where a cleaning kit comes in handy. I always pack a small cleaning kit with lens wipes, a blower, and a microfiber cloth. Trust me, you’ll be grateful for it after a long day of hiking when dust and moisture find their way onto your lens!

Maintaining Your Gear on the Road

I’ve made it a habit to clean my gear each night after a day of shooting. It only takes a few minutes but ensures that I’m ready for the next adventure without worrying about dirt or smudges affecting my images. It’s a small step that makes a big difference in the long run, and I recommend incorporating this routine into your backpacking photography practices.

Post-Processing Tools

Software for Editing Portraits

Once you’ve captured those stunning portraits, the next step is to polish them up with some editing. I remember when I first started out, I thought the magic happened only behind the camera, but post-processing is where you can truly bring your vision to life. There are several software options available, but two of my favorites are Adobe Lightroom and Adobe Photoshop.

Lightroom vs. Photoshop

Lightroom is fantastic for photographers who want a streamlined way to organize and edit their photos. I love how it offers powerful editing tools while also allowing me to sort and categorize my images efficiently. The batch editing feature is a lifesaver, especially when I’m working with a series of portraits from a single shoot. I can apply similar adjustments across multiple images, saving me a ton of time.

Photoshop, on the other hand, is a bit like the Swiss Army knife of editing. It provides more advanced editing capabilities, which can be incredibly useful for retouching and compositing images. I’ve delved into Photoshop for tasks like skin retouching and background adjustments. It can feel overwhelming at first, but once you get the hang of it, the possibilities are endless. I recommend using both programs in tandem; start in Lightroom for initial edits and then jump into Photoshop for those special touches.

Mobile Editing Apps for Quick Touch-Ups

On those long hikes or while camping, I found that lugging my laptop around isn’t practical. That’s where mobile editing apps come in handy. I’ve tried several, but a few stand out for their ease of use and powerful features.

Snapseed is one of my go-to apps. It’s free and offers a variety of tools that can help enhance your portraits right from your phone. I love using the “Selective Adjust” feature to enhance specific areas of an image without affecting the entire photo. It allows me to brighten up a subject’s face or deepen the colors in the background, giving my images more depth and interest.

Another app I frequently use is Adobe Lightroom Mobile. It syncs with my desktop version, so any edits I make on the go are available when I get back to my computer. The mobile app is just as powerful as its desktop counterpart, allowing me to make fine adjustments to exposure, color, and sharpness. It’s a game-changer for those quick edits while waiting for the sunset or resting at camp.

Best Practices for Backpacking with Photography Gear

Weight Management and Packing Tips

When it comes to backpacking, weight management is crucial. I learned this lesson on one of my early trips when I overpacked and ended up regretting every ounce I carried. I realized that every piece of gear should earn its place in my pack. I recommend laying everything out before packing and asking yourself if each item is absolutely necessary. This helps in making tough decisions about what to leave behind.

I’ve adopted a system that includes packing lightweight gear and prioritizing versatility. For example, my zoom lens not only serves for portraits but also works beautifully for landscapes. I also like to keep my camera and essentials at the top of my pack for easy access. This way, I can quickly pull my gear out for spontaneous photo opportunities without rummaging through my bag.

Protecting Your Gear During Travel

Protecting my gear while on the trail is something I take very seriously. I’ve seen too many photographers lose their expensive equipment due to a single mishap. I invested in padded lens cases and a weather-resistant camera bag that keeps everything safe from bumps and harsh weather. I also use lens caps and body caps religiously. They may seem like small details, but they make a significant difference in protecting my gear from dirt and scratches.

Additionally, I always carry a rain cover for my backpack. I remember being caught in an unexpected downpour once, and it was a relief to have that extra layer of protection for my gear. Keeping my equipment safe allows me to focus on the photography instead of worrying about damage.

Staying Organized on the Road

Organization is key when you’re juggling multiple pieces of equipment while traveling. I’ve found that using small pouches helps keep similar items together. For instance, I have a pouch for my filters and another for my cleaning kit. This way, I don’t have to dig through my entire bag to find what I need. I also label my pouches, which saves time in the field.

Lastly, I make it a habit to do a quick inventory of my gear at the end of each day. This not only helps me ensure I haven’t left anything behind but also gives me a chance to assess what worked and what didn’t during the day’s shoot. It’s a simple practice that has saved me from potential headaches down the line.

Frequently Asked Questions

What is portrait photography?

Portrait photography is about capturing the essence of a person or group, telling a story through expressions, emotions, and body language. It can include candid shots or posed setups that focus on the subject’s face and unique features.

Why is gear important in portrait photography?

The right gear can significantly enhance your portrait photography experience. Quality equipment improves photo results and makes the shooting experience more enjoyable, especially for backpackers who need lightweight yet effective gear.

What camera types are best for backpacking portrait photography?

For backpackers, mirrorless cameras like the Sony A6400 or Fujifilm X-T30 are recommended due to their lightweight design and excellent image quality, making them suitable for long hikes.

Should I use prime lenses or zoom lenses for portrait photography?

Prime lenses are known for their sharpness and wide apertures, making them ideal for portraits. However, zoom lenses offer versatility for adjusting composition without changing position, which can be beneficial for travel portraits.

What type of tripod should I use for backpacking?

A lightweight and compact travel tripod, such as the Manfrotto Befree, is recommended for backpacking. It provides stability and allows for experimenting with different angles while being easy to carry on long hikes.

How can I utilize natural light in portrait photography?

Natural light is best during the golden hour, just after sunrise or before sunset. Observing how light changes throughout the day and using shaded areas can help create stunning portraits with soft lighting.

What are some portable flash options for outdoor photography?

Speedlights are compact and ideal for backpacking, providing a burst of light that can enhance portraits. They are easier to carry than larger strobes, making them suitable for outdoor settings.

Why are lens filters important for backpacking photographers?

Lens filters, such as UV filters for protection, polarizers for reducing glare, and ND filters for controlling light, are essential for enhancing photography and protecting lenses from damage during travels.

What are the best practices for packing photography gear while backpacking?

Weight management is crucial; every piece of gear should have its purpose. Packing lightweight and versatile equipment, keeping essentials accessible, and doing a quick inventory each day can help ensure a successful trip.

How can I protect my photography gear while traveling?

Investing in padded cases, a weather-resistant camera bag, and using lens caps are vital for protecting gear from damage. Additionally, carrying a rain cover for the backpack can safeguard equipment from unexpected weather conditions.

How can I create memorable travel portraits?

To create memorable travel portraits, focus on storytelling through your images, engage with your subjects, and utilize the surrounding environment creatively. Read Interesting article: Explore Cultures: How to Create Memorable Travel Portraits

“`

Top 5 Essential Portrait Photography Gear for Travelers

Traveling and capturing portraits can create memories that last a lifetime. To do this effectively, having the right gear is essential for any traveler passionate about photography. Read Interesting article: Travel Portrait Lighting: Essential Techniques for Backpackers

Top 5 Essential Portrait Photography Gear for Travelers

Understanding Portrait Photography Gear

What is Portrait Photography?

Portrait photography is all about capturing the essence of a person or group. It’s more than just a snapshot; it conveys emotions, personalities, and stories through the lens. When I first delved into portrait photography, I realized that each image tells a different story. The subject’s expression, the background, and even the lighting can completely change the context of the photograph. Whether it’s a candid shot of a traveler enjoying their adventure or a posed picture of a local in their environment, every portrait has its unique charm.

Importance of Gear in Portrait Photography

Having the right gear can make a significant difference in the quality of your portraits. I remember my early days of photography, where I used a basic camera and struggled with lighting and focus. As I invested in better equipment, I noticed a remarkable improvement in the clarity and emotion of my images. Good gear helps you capture details and nuances that might be missed otherwise, especially when you’re on the go. It’s not just about having the most expensive camera; it’s about having the right tools that match your style and needs as a photographer. Explore Cultures: How to Create Memorable Travel Portraits can provide additional insights.

Essential Gear for Travelers

1. Camera Body

The camera body is the heart of your photography gear. When I was choosing my first camera, I had to decide between a full-frame and a crop sensor camera. Both have their pros and cons, depending on what you want to achieve with your portraits.

Full-Frame vs. Crop Sensor

Full-frame cameras have larger sensors, which typically result in better image quality, especially in low light. When I upgraded to a full-frame camera, the difference was noticeable. I was able to capture more detail and depth in my portraits. However, crop sensors are smaller and often more affordable, making them a great option for beginners. They can also give you a bit more zoom due to the crop factor, which is handy when you want to capture subjects from a distance.

Compact Cameras for Travel

If you’re a traveler who values portability, compact cameras are a smart choice. I’ve used many compact cameras over the years, and I found that they allow for spontaneous photography without lugging around a heavy setup. These cameras may not always match the quality of a DSLR or mirrorless camera, but many modern models come equipped with impressive features that can capture stunning portraits on the go.

2. Lenses

Once you have your camera body sorted, the next essential piece of gear is the lens. I can’t stress enough how the right lens can elevate your portrait photography. Different lenses offer unique perspectives and capabilities, making them essential for various shooting scenarios.

Prime Lenses for Sharpness

Prime lenses are favorites among many portrait photographers for their ability to produce incredibly sharp images. I started using a 50mm prime lens, and it quickly became my go-to for portraits. The wide aperture allows for beautiful background blur, making your subjects pop against a softer background. This effect is often referred to as “bokeh,” and it adds a professional touch to your photos.

Zoom Lenses for Versatility

On the other hand, zoom lenses are fantastic for travel because of their versatility. With a zoom lens, you can quickly adjust your framing without needing to move around too much, which is especially useful in crowded places. I’ve traveled with a 24-70mm zoom lens that covered a great range for portraits, from wide shots to close-ups, allowing me to adapt to different environments quickly.

3. Tripod

A sturdy tripod is often overlooked, but I’ve found it to be invaluable, especially during low-light conditions. Whether you’re taking portraits at sunrise or sunset, having a tripod ensures that your images are sharp and well-composed.

Lightweight and Portable Options

As a traveler, I learned the hard way that not all tripods are created equal. I invested in a lightweight and portable tripod that I could easily carry in my bag. This has been a game changer for my travel photography. It’s easy to set up and helps me capture long-exposure shots without fear of camera shake.

Stability for Low Light Situations

Using a tripod also allows me to shoot at slower shutter speeds, which is essential in low-light situations. I remember a magical evening in Paris when I set up my tripod to capture portraits of locals against the backdrop of the Eiffel Tower sparkling at night. The stability of the tripod helped me achieve beautiful, sharp images that I cherish to this day.

4. External Flash or Speedlight

Lighting can make or break a portrait. I’ve faced many situations where natural light wasn’t enough, and that’s where having an external flash comes in handy. It’s a must-have for capturing well-lit portraits, especially in dimly lit environments.

Importance of Lighting in Portraits

Lighting can dramatically change the mood of a photograph. I learned that using an external flash allows me to control the light and create a more flattering look for my subjects. Whether it’s bouncing the flash off a wall or using it to fill in shadows, it helps me achieve a professional finish.

Portable Flash Options for Travel

Choosing a portable flash means I can easily take it anywhere. I recommend getting a compact speedlight that can fit in your camera bag without adding too much weight. It’s a small investment that can significantly improve the quality of your portraits.

5. Camera Bag

Your camera bag is essential for organizing and protecting your gear while traveling. I remember when I first started, I used a flimsy bag that didn’t provide enough protection. After a couple of close calls, I realized the importance of a well-designed camera bag.

Choosing a Travel-Friendly Design

Look for a bag that’s lightweight yet sturdy, with enough space for all your gear. I found a backpack style bag that allows for easy carrying during long walks while keeping my equipment secure. It’s also important to consider how easy it is to access your camera while on the move. A bag with quick-access pockets can be a lifesaver when you see that perfect shot.

Protection and Organization Features

Additionally, having padded compartments helps protect your gear from bumps and drops. I love that my bag has customizable dividers, so I can adjust the layout based on the gear I’m carrying for a specific trip. Being organized means I can focus more on capturing moments rather than fumbling through my bag.

Accessories to Enhance Portrait Photography

Reflectors and Diffusers

When I first started taking portraits, I quickly realized how important lighting is to the quality of my images. That’s when I discovered the magic of reflectors and diffusers. These accessories can drastically change how light interacts with your subject, especially in outdoor settings where the sun can be harsh.

Reflectors are fantastic for bouncing light back onto your subject. I remember one sunny afternoon in a park, where I used a simple white reflector to fill in shadows on a friend’s face. It made such a difference! The light became softer and more flattering, which is essential for capturing beautiful portraits. There are various types of reflectors, from collapsible ones that fit in your bag to larger panels for bigger setups.

Diffusers, on the other hand, soften the harsh sunlight, creating a more even light across the subject. I often carry a portable diffuser in my backpack. It’s lightweight and easy to set up, allowing me to create a soft glow around my subjects, especially during midday shoots when the sun can be unforgiving. I once helped a local artist capture portraits in the middle of a bustling market, and using a diffuser transformed the lighting into something magical.

Memory Cards and Storage Solutions

As someone who loves to take countless photos, I can’t stress enough how important it is to have reliable memory cards. I’ve had moments where I was on a fantastic trip, and my card filled up just as I was about to capture a stunning sunset. Since then, I’ve learned to carry multiple cards with ample storage. I usually opt for cards with fast write speeds, which help me shoot continuously without missing a beat.

Another essential aspect is having a proper storage solution. I’ve invested in a portable hard drive to back up my images while I’m on the road. This way, I can free up space on my cards and feel secure knowing my photos are safe. Additionally, I’ve found that using cloud storage can be helpful when I have access to Wi-Fi. It’s a bit of a hassle to manage, but having my memories stored in multiple places gives me peace of mind.

Cleaning Kits for Gear Maintenance

As travelers, we often find ourselves in dusty environments or dealing with unexpected weather changes. I learned the hard way that keeping my gear clean is essential for maintaining image quality. A simple cleaning kit has become a staple in my camera bag. It usually includes a lens brush, microfiber cloth, and sensor cleaning tools.

I can vividly remember a shoot where I was capturing portraits on a windy beach. Sand particles ended up on my lens, and I didn’t realize until I got home and reviewed the photos. The spots were a frustrating reminder of how crucial it is to keep my gear in top shape. Now, I make it a habit to clean my lenses regularly, especially after shooting in challenging conditions. It’s a small step that can significantly improve the clarity of my images, ensuring I capture the best possible portraits.

Tips for Traveling with Photography Gear

Choosing the Right Gear for Your Trip

Before heading out, I always take a moment to evaluate what gear I’ll need for my trip. It’s tempting to bring everything, but I’ve learned through experience that this can lead to weighty bags and missed opportunities. Instead, I prioritize versatility and pack only what I know I’ll use.

For instance, during a recent trip to a bustling city, I opted for my lightweight mirrorless camera and a couple of versatile lenses. This setup allowed me to be nimble while exploring, capturing street portraits and landscapes without feeling bogged down. I also make sure to consider the type of photography I plan to focus on, which helps me narrow down my choices. It’s all about striking a balance between having options and keeping my load manageable.

Travel Insurance for Photography Equipment

One of the best decisions I made as a traveling photographer was to get insurance for my gear. I’ve heard horror stories from fellow photographers about lost or damaged equipment, and I didn’t want to take any chances. I found a policy that covers theft, loss, and accidental damage, which gives me peace of mind while I’m on the road.

When I was in a busy market in Marrakech, my heart raced when I accidentally bumped into someone, and my camera slipped from my grip. Thankfully, I had insurance, which made the entire experience less stressful. Knowing I had a safety net allowed me to focus on capturing the vibrant culture around me without the constant worry of what could go wrong.

Best Practices for Carrying Gear

Over the years, I’ve developed some best practices for carrying my gear while traveling. First and foremost, I always use a comfortable camera bag. A well-padded backpack can make a world of difference on long walks, helping distribute the weight evenly across my back.

I also make a point to keep my most essential items easily accessible. For example, I have a side pocket for my camera and quick-access pockets for my lenses and cleaning kit. This layout saves me time when I spot a perfect portrait opportunity and need to act quickly. Another tip I found helpful is to use neck straps or wrist straps for my camera. They provide an extra layer of security, minimizing the risk of accidental drops.

Common Challenges in Travel Portrait Photography

Dealing with Different Lighting Conditions

One of the biggest challenges I face while traveling and shooting portraits is dealing with unpredictable lighting conditions. I’ve been in situations where the sun is blazing bright one moment, and then clouds roll in, casting shadows that can ruin a photo. I learned early on that adapting to these changes is crucial. For instance, I remember a day spent exploring a vibrant market where the sunlight shifted from harsh to soft in the blink of an eye. I had to quickly adjust my settings to maintain the quality of my images.

To tackle this, I recommend getting familiar with your camera’s settings. Understanding how to adjust your aperture, ISO, and shutter speed can help you react quickly. I also found that using reflectors and diffusers can be a game changer, especially in harsh sunlight. They help to soften the light and reduce stark shadows on your subjects.

Capturing Candid Moments vs. Posed Shots

Another challenge in portrait photography during travel is striking the right balance between candid and posed shots. I’ve experienced this first-hand while photographing locals in different countries. Some people are natural in front of the camera, while others may feel shy or uncomfortable. I remember approaching a group of children playing in the street. They were delightful to capture in their natural state, but as soon as they noticed me pointing my camera, they froze and started posing, which changed the dynamic of the photograph.

To capture those genuine moments, I’ve learned to be discreet and patient. I try to blend into the environment, giving subjects the space to act naturally. Often, I’ll engage in a little conversation to help break the ice before snapping a photo. This way, I get to document life as it happens, which is often more rewarding than a perfectly posed portrait.

Respecting Local Cultures and Privacy

While traveling, I’ve come to understand that respecting local cultures and privacy is paramount in portrait photography. Different cultures have various norms regarding photography, and I always strive to be sensitive to these differences. I recall a moment in a small village where I wanted to take a portrait of an elderly woman weaving by her door. Instead of assuming she’d be okay with it, I approached her politely, asked for her permission, and explained my interest in capturing her craft. To my delight, she agreed and even posed for me with a warm smile.

This experience taught me the importance of communication and respect. Always be prepared to politely decline if someone isn’t comfortable being photographed. I also carry a small notebook where I jot down the names of people I photograph and a bit about them. This adds a personal touch, and often, it leads to deeper conversations and connections, which can enhance the overall experience for both me and my subjects. The Art of Cultural Portraits: Travel Photography Essentials can provide further guidance.

Conclusion: Elevating Your Portrait Photography While Traveling

Frequently Asked Questions

What is portrait photography?

Portrait photography is about capturing the essence of a person or group, conveying emotions, personalities, and stories through the lens. Each image tells a different story based on the subject’s expression, background, and lighting.

Why is having the right gear important for portrait photography?

Having the right gear significantly impacts the quality of your portraits. Better equipment improves clarity and emotion in images, helping to capture details and nuances that may be missed with basic setups.

What is the difference between full-frame and crop sensor cameras?

Full-frame cameras have larger sensors that typically result in better image quality, especially in low light. Crop sensors are smaller and often more affordable, making them a great option for beginners, while also providing more zoom due to the crop factor.

What are the advantages of using prime lenses for portrait photography?

Prime lenses are favored for their ability to produce incredibly sharp images and allow for beautiful background blur, known as “bokeh,” which adds a professional touch to portraits.

How can a tripod enhance portrait photography?

A sturdy tripod ensures sharp and well-composed images, especially in low-light conditions. It allows for slower shutter speeds, which can be crucial for capturing portraits during sunrise or sunset.

What role does lighting play in portrait photography?

Lighting can dramatically change the mood of a photograph. Using an external flash or speedlight allows for better control over lighting, creating a more flattering look for subjects in various environments.

What should I look for in a camera bag for travel?

Choose a lightweight yet sturdy camera bag with enough space for all your gear. Quick-access pockets for your camera and a backpack style for easy carrying during long walks are essential features.

How can reflectors and diffusers improve portrait photography?

Reflectors help bounce light onto subjects, while diffusers soften harsh sunlight, creating a more even light across the subject. Both tools enhance the quality of portraits, especially in outdoor settings.

What are some best practices for carrying photography gear while traveling?

Use a comfortable camera bag to distribute weight evenly, keep essential items easily accessible, and consider using neck or wrist straps for added security to minimize the risk of accidental drops.

Why is it important to respect local cultures and privacy while photographing?

Respecting local cultures and privacy is vital in portrait photography. Different cultures have varying norms regarding photography, and it’s crucial to seek permission and communicate respectfully with subjects to enhance the overall experience.

Travel Portrait Lighting: Essential Techniques for Backpackers

Capturing stunning travel portraits is an adventure in itself, and lighting plays a crucial role in making those images memorable. Whether you’re hiking up a mountain or wandering through a bustling city, knowing how to harness the light around you can elevate your photography. To learn more about mastering this art, check out Master Travel Portrait Lighting: Tips for Stunning Shots.

Travel Portrait Lighting: Essential Techniques for Backpackers

Understanding Travel Portrait Lighting Basics

What is Travel Portrait Lighting?

When I think about travel portrait lighting, I envision the way light interacts with my subjects in diverse environments. It’s not just about having the right equipment; it’s about understanding how different lighting conditions can dramatically change the mood and quality of a photo. Travel portrait lighting combines the essentials of portrait photography with the unique challenges and opportunities that arise while exploring new places. It’s about using the environment to enhance your subject, creating a connection between them and the backdrop of their travels.

Importance of Lighting in Portrait Photography

In my experience, lighting can make or break a portrait. I remember a time when I was photographing a friend against a stunning sunset backdrop. The golden hues wrapped around them perfectly, capturing the essence of the moment. Without the right light, that shot would have fallen flat. Lighting shapes how we perceive the subject, emphasizing details or casting shadows that tell a story. It influences the emotions we feel when we view a photograph, which is why learning to manipulate it is essential for any backpacker wanting to improve their travel portraits. For more insights, read Unlock Perfect Travel Portraits with Lighting Techniques.

Types of Lighting: Natural vs. Artificial

As a backpacker, my gear is often limited, which is why I tend to rely heavily on natural light. There’s something inherently beautiful about the way sunlight interacts with our surroundings. Natural light provides a soft, flattering quality that’s hard to replicate. However, I’ve also found that having some artificial lighting options can be beneficial, especially during overcast days or in low-light situations. Understanding the difference between these two lighting types has helped me adapt to various conditions while on the road.

Essential Techniques for Using Natural Light

Golden Hour: The Best Time for Portraits

For me, the golden hour is like magic for portrait photography. This occurs during the first hour after sunrise and the last hour before sunset. The sunlight during this time is softer and warmer, casting a beautiful glow on my subjects. I make it a point to plan my shoots around this time whenever possible. One evening, while in a small village in Italy, I captured a portrait of an elderly woman sitting on her porch as the sun dipped below the horizon. The warm light created a stunning halo effect around her, making the moment unforgettable. If you’re traveling, definitely keep an eye on the sunrise and sunset times to take full advantage of this incredible natural lighting.

Finding Shade: Avoiding Harsh Shadows

One lesson I learned early on was to avoid direct sunlight, especially during midday. The harsh light creates unflattering shadows that can distort facial features. I often seek shade under trees or awnings when the sun is high. I remember a day in Greece when I was photographing a friend at the beach. The sun was blazing, and without shade, the shadows on their face were too stark. We moved under a nearby palm tree, and the diffused light created a softer and more flattering portrait. So, don’t hesitate to find that perfect shaded spot—it can make a huge difference.

Backlighting: Creating Dramatic Effects

Backlighting is another technique I’ve come to love. This involves positioning the light source—usually the sun—behind your subject. It creates a beautiful halo effect and adds depth to your images. I remember taking a portrait of my partner in the mountains at sunset. The sun was setting just behind her, and it illuminated her hair, giving it a golden glow. I was so thrilled with the result! Backlighting can be tricky, but with practice, you can create some stunning, ethereal portraits that capture the essence of your travels.

Reflectors: Enhancing Natural Light

While I often rely on natural light, I’ve found that using reflectors can help improve those shots significantly. A simple reflector can bounce light back onto your subject, filling in shadows and adding a little sparkle to their eyes. I’ve used everything from a white sheet to a collapsible reflector that fits easily in my backpack. On one occasion, while exploring a market in Thailand, I used a nearby wall to bounce some light onto a friend’s face, and it transformed the photo. Investing in a lightweight reflector can really elevate your portraits without adding much bulk to your gear.

Using Artificial Light for Portraits

Portable Lighting Options for Backpackers

As much as I love natural light, sometimes it just doesn’t cooperate. Whether it’s a cloudy day or I’m in a dimly lit indoor space, having portable lighting options can make a world of difference. I’ve learned to keep a compact LED light in my backpack, which can be a lifesaver in tricky situations. One time in a Moroccan bazaar, the shop was so dark that I could barely see my friend’s face. I quickly pulled out my LED light and aimed it at her, instantly brightening the scene. It transformed what could have been an underwhelming photograph into something vibrant and full of life. Portable lights are easy to pack and can really enhance your portraits when natural light is lacking.

LED Lights: Advantages and Setup

LED lights have become my go-to choice for artificial lighting. They are lightweight, energy-efficient, and offer adjustable brightness levels. I remember setting up a small LED panel while shooting at a local festival in Japan. The evening was starting to set in, and the ambient light was diminishing quickly. I positioned the LED light about three feet from my subject, angling it slightly to create a soft glow. The result was stunning! The colors popped, and my subject looked vibrant against the festive background. Plus, they don’t get hot like traditional lights, making them safe to use in close proximity. If you’re backpacking, I highly recommend investing in a good LED light. It can help you capture those special moments, even when the sun sets.

Using Flash: Tips for Better Portraits

Flash photography often gets a bad rap for being too harsh or unflattering, but I believe it can be a powerful tool when used correctly. I used to shy away from using a flash, thinking it would ruin my images. However, with some practice, I found that it could add depth and dimension to my portraits. One technique I often use is bouncing the flash off a nearby surface, like a wall or ceiling. This diffuses the light and creates a softer effect. I remember a time in a colorful alley in Mexico City: I used my flash bounced off a white wall to illuminate my friend’s face. The colors around her were vibrant, but the flash offered just enough light to keep her from disappearing into the shadows. Don’t be afraid to experiment with your flash settings; it can completely change the mood of your portraits.

Choosing the Right Locations for Portrait Lighting

Urban vs. Rural Settings: Light Considerations

Choosing the right location is crucial for capturing stunning portraits. Urban settings often present unique lighting challenges and opportunities. I’ve found that the reflections from buildings can create interesting effects, especially during golden hour. In contrast, rural settings provide a more open landscape that can enhance natural light. I remember a shoot in a sunflower field where the sunlight poured in beautifully, illuminating my subject perfectly. However, cities can surprise you, too! I once took portraits in a bustling market, and the interplay of shadows from awnings and streetlights added depth to my images. When scouting for locations, pay attention to how light interacts with your surroundings; it can lead to unexpected and beautiful results.

Iconic Backdrops: Landmarks and Natural Wonders

Traveling offers a plethora of iconic backdrops, and I’ve learned to use them to my advantage. Whether it’s the Eiffel Tower in Paris or a serene beach in the Maldives, these landmarks provide a stunning context for portraits. I remember snapping a portrait of my friend in front of the Colosseum in Rome. The late afternoon light cast a warm glow, and the ancient stones created a dramatic backdrop. It’s essential to be mindful of the time of day and how it affects the lighting on these landmarks. I suggest visiting these locations at different times to see how the light transforms them. You’ll discover that each moment offers a new perspective.

Indoor Locations: Utilizing Available Light

Sometimes, the best portraits can be captured indoors, especially when natural light streams through large windows. I often look for cafes or galleries that have good lighting. One of my favorite indoor portraits was taken in a tiny coffee shop in Vienna. The sunlight streamed in through the front window, creating a natural spotlight on my friend as she enjoyed her coffee. I always advise looking for interesting backdrops indoors, like painted walls or unique furniture. These elements can enhance your portrait, making it more engaging. Plus, if it’s raining outside, you don’t have to worry about getting wet!

Camera Settings for Optimal Portrait Lighting

Understanding Exposure: ISO, Aperture, and Shutter Speed

Getting the right exposure is crucial for capturing stunning portraits, and I’ve found that understanding ISO, aperture, and shutter speed can make a huge difference. To put it simply, ISO controls the sensitivity of your camera’s sensor to light. I usually keep my ISO as low as possible to avoid graininess, especially in bright conditions. For example, when I was shooting in the vibrant streets of Havana, I kept my ISO at 100 to capture the rich colors without any noise.

Aperture, on the other hand, affects the depth of field and how much light enters the camera. A lower f-stop like f/1.8 creates a nice blurry background, helping my subject stand out. I remember experimenting with this when photographing a dancer in front of a colorful mural; the slight blur of the background added a lovely artistic touch. Lastly, shutter speed plays a role in freezing motion. I typically set it to at least 1/250th of a second to avoid any motion blur, particularly if my subject is moving or if I’m shooting in lower light. Balancing these settings often feels like a dance, but with practice, I’ve become more confident in my choices.

Using Manual Mode for Better Control

Switching to manual mode was a game-changer for my photography. At first, it felt intimidating, but I realized that it allowed me to have complete control over my images. I remember a particularly bright day in Santorini when I decided to challenge myself. Instead of relying on auto settings, I adjusted my ISO, shutter speed, and aperture to get the perfect exposure for my subject against the bright white buildings. Taking control meant I could capture the details of their face and the vibrant colors in the background without losing quality. I recommend taking some time to practice in different lighting conditions. The more familiar you become with manual mode, the easier it will be to adapt on the go.

White Balance: Achieving Accurate Colors

White balance is another critical aspect that I’ve learned to pay attention to while capturing portraits. The way light hits your subject can alter colors dramatically, and I want my portraits to reflect the true essence of the scene. I often find myself adjusting the white balance based on the natural light conditions. For example, shooting indoors with warm tungsten light can give my portraits a yellowish tint, so I switch to the tungsten setting to keep colors true to life. When I was photographing a wedding in a lush garden, I set the white balance to cloudy, which enhanced the greens and created a warm feel. If you’re unsure, shooting in RAW format allows for adjustments in post-processing, but I still recommend getting it right in-camera for the best results.

Common Mistakes in Travel Portrait Lighting

Overexposure and Underexposure Issues

One of the most common mistakes I’ve made is overexposing or underexposing my images. It’s easy to get caught up in the excitement of a moment and forget to check your settings. I remember a bright afternoon in Thailand where I snapped a photo of a street vendor without adjusting my exposure. The bright sun washed out the details, and the photo lost its charm. To avoid this, I’ve learned to keep an eye on my camera’s histogram. If I see the graph pushed too far to the right, I know it’s time to dial down my exposure. Similarly, underexposure can darken the shadows too much, losing details I wanted to capture. Adjusting my settings on the fly has saved many portraits from being thrown out!

Ignoring Background Lighting

Another mistake I’ve made is focusing solely on my subject while neglecting the background lighting. The background plays a significant role in the overall composition. While shooting in a busy market in Marrakech, I was so focused on capturing the vibrant colors of my friend’s dress that I failed to notice the harsh shadows behind her. The result was a beautiful subject with a distracting background. I’ve learned to consider how the light interacts with the background as well. Sometimes, I’ll shoot from different angles to see if I can eliminate distractions or find a more interesting light source. Taking a moment to assess your surroundings can elevate your portraits tremendously.

Neglecting Subject Positioning

Positioning my subject correctly in relation to the light source has been something I’ve had to consciously work on. I used to think that as long as I had good lighting, I could shoot from any angle. But I quickly discovered that the right positioning can significantly affect the mood of the shot. I remember a time in the streets of Lisbon when I had my friend pose in direct sunlight, and their features looked flat. After repositioning them to a spot where the light framed their face perfectly, the difference was astounding. Always consider how your subject’s position in relation to the light can enhance your portraits. It’s all about creating that beautiful interaction between light and subject.

Post-Processing Techniques for Portraits

Editing Software: Recommended Tools

Once I’ve captured my portraits, the next exciting step is post-processing. I’ve experimented with various editing software and found a couple that I particularly love. Adobe Lightroom is my go-to for batch editing and adjustments. Its intuitive interface allows me to fine-tune exposure, contrast, and colors effortlessly. I also enjoy using Photoshop for more detailed edits, like retouching and creating composites. On my last trip, I took several portraits in a colorful market in India, and with a few adjustments in Lightroom, I was able to make the colors pop while retaining the natural feel of the scene. I recommend exploring different editing programs to find what works best for your style!

Adjusting Brightness and Contrast

One of the first things I do in post-processing is adjusting brightness and contrast. Brightness affects how light or dark the image appears, while contrast helps to define the relationship between the light and dark areas. I remember editing a portrait taken during a cloudy day in Scotland where the mood was quite subdued. By slightly increasing the brightness and contrast, I managed to bring out the details in my subject’s face while still keeping the moody atmosphere intact. A little adjustment can go a long way, so don’t hesitate to play around with these settings to see how they can enhance your portraits.

Enhancing Colors and Skin Tones

Finally, I always pay attention to color enhancement, especially for skin tones. It’s essential to maintain natural-looking colors while making your portraits pop. I like to use the HSL (Hue, Saturation, Luminance) panel in Lightroom to fine-tune specific colors. For example, if my subject’s skin looks too pale, I might increase the saturation slightly or adjust the luminance to give it a healthy glow. I remember a portrait I took in a bustling bazaar in Turkey, where the vibrancy of my friend’s dress was competing with the background. By enhancing her skin tone subtly, I ensured she stood out without losing the rich context of the scene. Finding that balance can create beautiful, authentic portraits that truly reflect the moment.

Practical Tips for Backpackers

Essential Gear for Travel Portrait Lighting

When it comes to travel portrait lighting, having the right gear is essential, and I’ve learned to keep my kit as compact as possible. A lightweight camera is a must, and I often opt for a versatile lens that allows for both wide-angle shots and close-ups. I love using a 50mm f/1.8 lens for its ability to create beautiful bokeh while keeping my setup light. Additionally, carrying a small tripod helps stabilize my shots, especially in low-light conditions. I also recommend bringing a portable reflector; it’s a small investment that can yield significant improvements in your portraits. Lastly, if you’re venturing into unpredictable weather, having a lens cloth handy to wipe off any moisture can save your shots!

Packing Light: What to Take

Packing light is an art form in itself, and I’ve become quite skilled at it over the years. I usually prioritize essentials and avoid bringing anything that I might not use. My typical packing list includes my camera, one or two lenses, a compact LED light, a reflector, and extra batteries. I also include a small notebook to jot down thoughts or ideas for future shoots. When I was hiking the Inca Trail in Peru, my backpack felt manageable because I’d carefully chosen what to carry, and it allowed me to focus on capturing incredible moments without feeling weighed down. Remember, less is often more when you’re on the move!

Documenting Your Journey: Capturing Memories

Ultimately, the goal of travel photography is to document your journey and create lasting memories. I’ve found that storytelling through portraits allows me to connect with the places I visit on a deeper level. Whether it’s capturing the laughter of a child in a remote village or the serene expression of a local artist, each portrait tells a story. I often take a moment to engage with my subjects, asking questions about their lives and sharing a bit about mine. This connection not only enriches the portraits but also makes the experience more meaningful. I encourage everyone to approach travel photography with an open heart and mind; you’ll find that the best portraits come from genuine interactions and shared moments. For more tips on this topic, explore Explore Cultures: How to Create Memorable Travel Portraits.

Frequently Asked Questions

What is travel portrait lighting?

Travel portrait lighting refers to how light interacts with subjects in diverse environments while capturing portraits. It combines essential portrait photography techniques with the unique challenges and opportunities present in various travel settings.

Why is lighting important in portrait photography?

Lighting can make or break a portrait, influencing how we perceive the subject and the emotions we feel when viewing a photograph. Proper lighting emphasizes details and shapes the overall mood of the image.

What are the differences between natural and artificial lighting?

Natural light is typically soft and flattering, providing a beautiful quality that is hard to replicate. Artificial lighting, while beneficial in low-light situations, can be used to enhance portraits when natural light is inadequate.

What is the golden hour and why is it important for portraits?

The golden hour occurs during the first hour after sunrise and the last hour before sunset, providing soft, warm sunlight that enhances the beauty of portrait photography. It creates a stunning glow around subjects, making for unforgettable images.

How can I avoid harsh shadows in my portraits?

Avoid direct sunlight during midday to prevent unflattering shadows. Instead, seek shade under trees or awnings to create a softer, more flattering light on your subjects.

What is backlighting and how can it be used in portraits?

Backlighting involves positioning the light source behind the subject, creating a halo effect and adding depth to the image. This technique can produce stunning and ethereal portraits when done correctly.

What are some portable lighting options for backpackers?

Backpackers can benefit from compact LED lights, which are lightweight, energy-efficient, and easy to pack. These lights can be utilized in low-light situations to enhance portrait quality.

What camera settings are essential for capturing optimal portrait lighting?

Understanding ISO, aperture, and shutter speed is crucial for exposure. Keeping ISO low to avoid graininess, using a lower f-stop for depth of field, and setting a fast shutter speed can help capture stunning portraits.

What common mistakes should I avoid in travel portrait lighting?

Common mistakes include overexposing or underexposing images, neglecting background lighting, and positioning subjects incorrectly relative to the light source. Each of these can impact the quality and mood of your portraits.

What essential gear should I pack for travel portrait lighting?

A lightweight camera, versatile lenses, a small tripod, and a portable reflector are essential for travel portrait lighting. Keeping the gear compact allows for easier movement and better focus on capturing moments.