Web Analytics

Recent Posts

Capture the World: A Guide to Street Photography Abroad

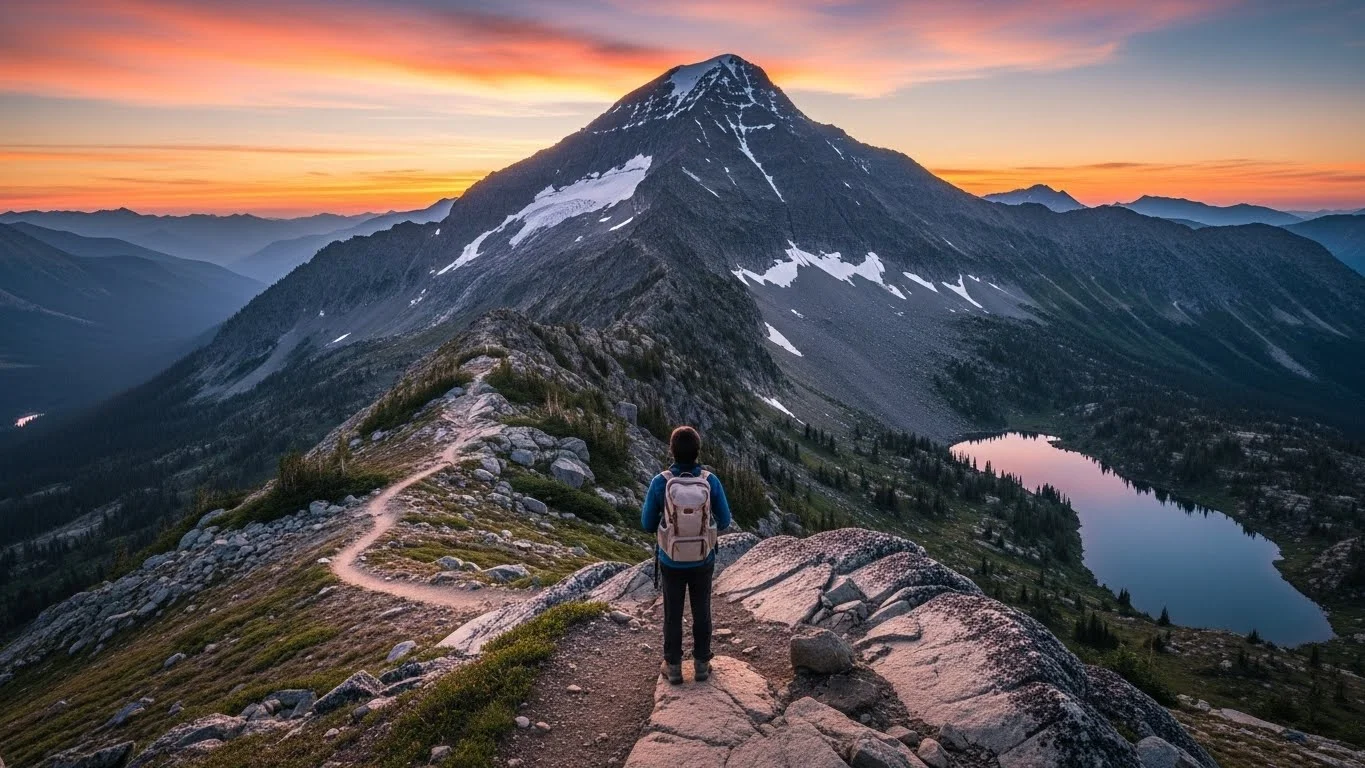
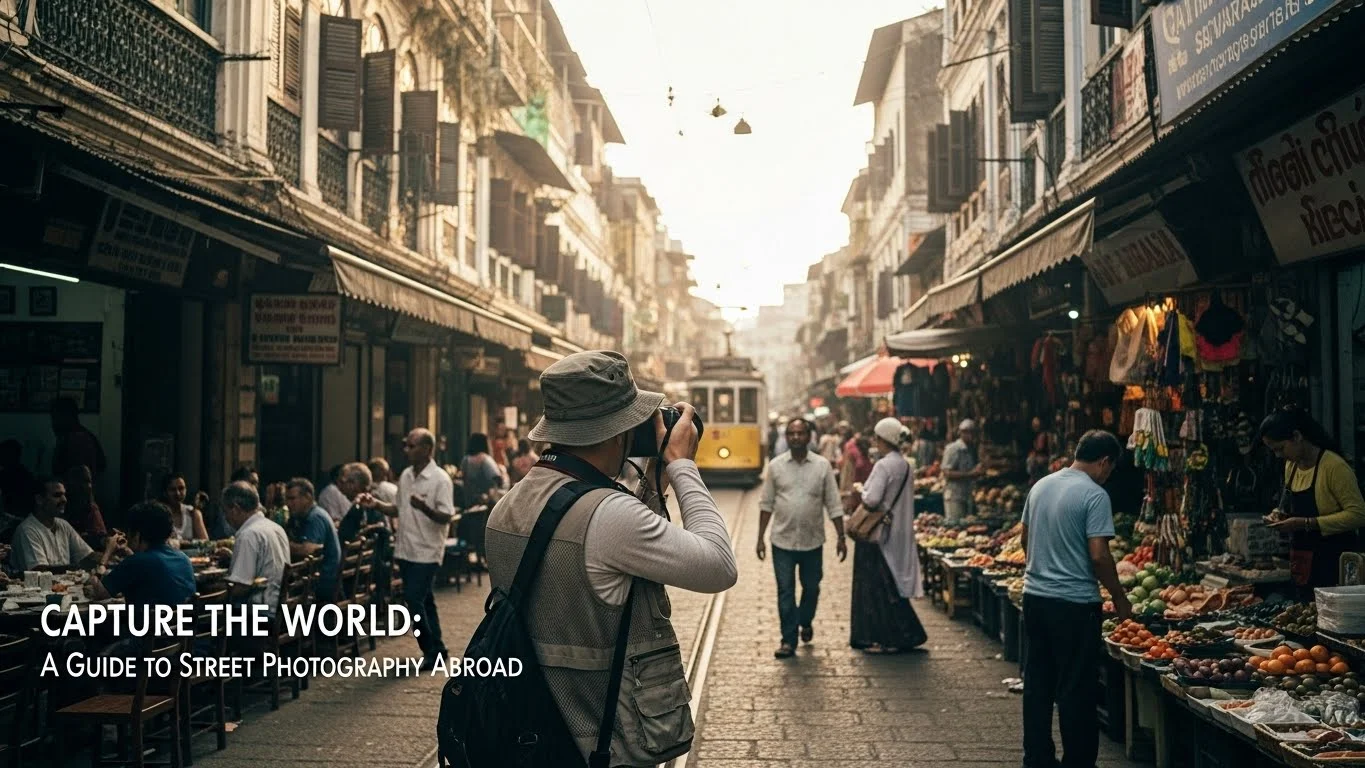
Street photography is a thrilling way to capture the essence of a place and its people. In this guide, we’ll explore everything you need to know to embark on your journey of street photography abroad. Read Interesting article: The Ultimate Guide to Street Photography on a Budget

Capture the World: A Guide to Street Photography Abroad

Understanding Street Photography

Definition and History of Street Photography

Street photography is more than just snapping pictures of passersby; it’s a form of art that captures candid moments in public spaces. I remember my first experience with street photography while wandering through a bustling market in Bangkok. The vibrant colors, the hustle and bustle, the mix of cultures – every corner presented a new story waiting to be told through my lens. Historically, street photography began in the early 20th century with pioneers like Henri Cartier-Bresson, who famously coined the term “the decisive moment.” This idea is at the heart of street photography: capturing fleeting moments that tell a larger narrative. As the years went on, many photographers adopted this style, each adding their unique flair, shaping the way we see urban life.

Famous Street Photographers and Their Impact

Some photographers have left an indelible mark on the genre. For instance, Vivian Maier, who was discovered posthumously, had a unique ability to portray the intimacy of everyday life. Her work reminds us of the beauty found in the mundane. I often find myself inspired by the raw emotion in her photographs. Then there’s Garry Winogrand, whose energetic style and ability to capture the chaotic nature of urban life resonates with me. Each of these artists has inspired countless others and helped define what street photography means today. They push us to look deeper, to capture not just images but the very spirit of a place.

Choosing Your Destination

Top Cities for Street Photography

When planning a street photography trip, the city you choose can significantly influence your experience. I’ve found that certain places just have that vibe, making it easier to connect with the surroundings and the people. Here are some of my favorite cities for street photography:

New York City

New York City is a photographer’s paradise. The energy is palpable, and every street corner offers a new story. From the iconic yellow cabs to the diverse crowds in Times Square, there’s never a shortage of subjects. I love capturing the contrasts between the towering skyscrapers and the intimate moments of everyday life. If you wander through neighborhoods like Chinatown or Brooklyn, you’ll find rich cultural tapestries to photograph.

Tokyo

Tokyo is a city that beautifully blends tradition with modernity. I remember feeling overwhelmed by the neon lights and the fast pace of life in Shibuya. Each district has its own character, from the serene temples of Asakusa to the bustling streets of Harajuku. The people are often very fashion-forward, providing fantastic opportunities for striking portraits. Plus, the etiquette around photography in Japan adds an interesting layer to the experience.

Paris

Ah, Paris! The city of love is also a city of light for photographers. Whether it’s the artistic vibe of Montmartre or the historic streets of Le Marais, Paris invites you to capture its charm. I often find myself drawn to the small cafes where life unfolds slowly – a conversation here, a laugh there. The architecture, the streets, and the people all contribute to an atmosphere that’s simply magical.

Barcelona

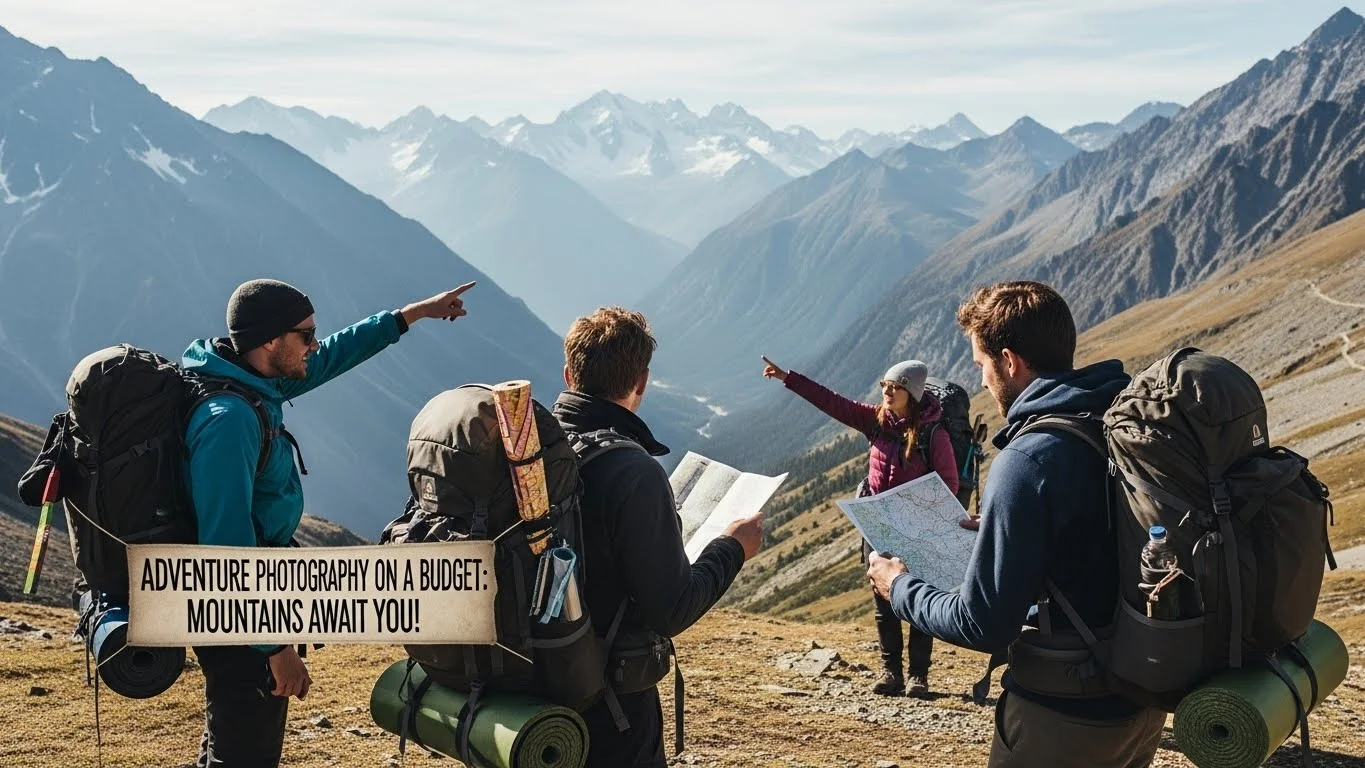
Barcelona is another gem for street photographers. The unique architecture of Antoni Gaudí, especially the Sagrada Família and Park Güell, provides a fantastic backdrop for candid shots. The lively streets of La Rambla are filled with performers, tourists, and locals, making it a perfect spot for dynamic photography. I love how the city’s art scene seeps into everyday life, creating endless opportunities for creativity. Read Interesting article: Capture Cultural Wonders: Budget-Friendly Adventure Photography

Cultural Considerations When Shooting Abroad

Street photography isn’t just about the camera; it’s also about understanding the people and their culture. This is something I’ve learned through my travels. Being aware of local customs can make or break your experience.

Understanding Local Customs

Before I embark on a trip, I like to research the local culture. Each country has its own set of rules about photography. For instance, in some places, asking for permission before taking a photo is the norm, while in others, it might be frowned upon. I remember feeling nervous while photographing in Morocco, but once I learned to navigate the local etiquette, I felt much more confident.

Respecting Privacy and Personal Space

Respecting people’s privacy is crucial in street photography. There have been times when I’ve instinctively backed away from a shot after realizing someone was uncomfortable. I believe that capturing authentic moments shouldn’t come at the expense of someone’s feelings. It’s about finding that balance between art and respect, ensuring that the story I want to tell is both beautiful and ethical.

Essential Gear for Street Photography

Camera Options for Street Photography

When it comes to street photography, the gear you choose can make a big difference in your experience and the quality of your shots. I’ve experimented with various camera types over the years, and I’ve come to appreciate the merits of each. The key is to find what feels right for you and your shooting style.

DSLR vs. Mirrorless vs. Compact Cameras

DSLR cameras are often praised for their image quality and versatility. They allow for interchangeable lenses and have a robust build, which can be appealing in busy street environments. However, I found that their size can be a bit cumbersome when trying to remain discreet and capture spontaneous moments. On the other hand, mirrorless cameras have gained popularity for street photography because they are typically lighter and more compact. I remember using a mirrorless camera in Tokyo and loved how easy it was to carry around while still producing excellent images.

Then there are compact cameras, which, although they may lack some of the advanced features of DSLRs and mirrorless options, are incredibly portable. I took a small compact camera with me to Paris once, and it allowed me to blend in seamlessly with the crowds. It’s perfect for capturing candid moments without drawing too much attention to myself. Ultimately, the best camera is the one that you feel comfortable using, so I recommend testing a few to see what suits you best.

Lens Selection for Different Scenarios

The lens you choose can dramatically affect your street photography style. I’ve often spent time pondering which lens to pack for a trip, as each option offers unique opportunities.

Prime vs. Zoom Lenses

Prime lenses are known for their sharpness and often have a wider aperture, which is excellent for low-light situations. I remember using a 50mm prime lens during a late evening stroll in Barcelona, and the bokeh I achieved from the streetlights was just magical. However, the challenge with prime lenses is that you have to physically move closer or farther away from your subject to frame your shot, which can sometimes be limiting.

On the other hand, zoom lenses offer flexibility, allowing you to quickly adjust your focal length without changing lenses. I found this incredibly useful in bustling markets, where moments unfold rapidly, and I didn’t have the luxury of time. A 24-70mm lens has been a trusty companion for me, giving me the versatility to capture everything from wide street scenes to tighter portraits. Whichever you choose, having the right lens can greatly enhance your ability to tell a story through your images.

Accessories to Enhance Your Photography

While your camera and lens are crucial, a few accessories can elevate your street photography experience. I’ve found certain tools indispensable on my journeys.

Tripods and Stabilizers

Although tripods might seem too bulky for street photography, I’ve discovered that lightweight, portable tripods can be quite handy, especially for night photography or in low-light conditions. I once set up a small tripod in a dimly lit alley in Paris to capture some long exposure shots, and it opened up a world of creative possibilities. Stabilizers are also great for shooting video or capturing smooth moving shots. If you’re planning to experiment, consider bringing a compact stabilizer along for the ride.

Bags and Carrying Solutions

Finding the right bag can make a world of difference in how comfortably you can carry your gear. I’ve tried various types of bags, from messenger bags to backpacks, and each has its pros and cons. I often opt for a messenger bag that’s easy to swing around to access my camera quickly. It keeps my gear safe while allowing me to maintain a low profile. Additionally, a good bag can help you store extra batteries, memory cards, and even a small notebook to jot down thoughts or details about the scenes you’re capturing.

In the end, investing in the right gear and accessories can significantly enhance your street photography experience. It’s all about finding what works best for you, and over time, you’ll develop a setup that feels just right for your adventures.

Techniques for Capturing Great Street Photos

Understanding Light and Its Effects

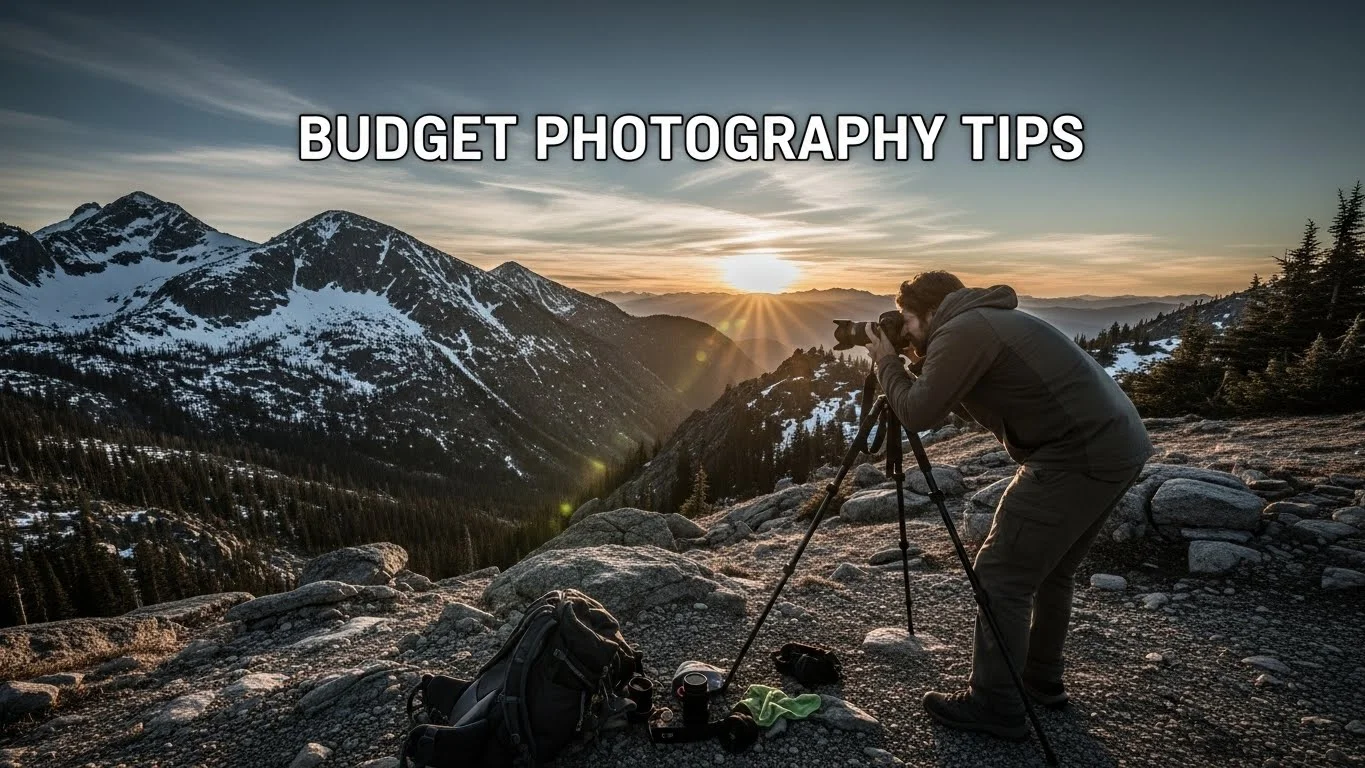
One of the most essential aspects of street photography is understanding light. I’ve noticed how different times of day can dramatically change the mood and tone of my photos. For instance, the golden hour—the time just after sunrise or before sunset—offers a warm, soft light that can make even the most mundane scenes look magical. I remember walking through a park in London during this time, and the sunlight filtering through the trees created stunning highlights and shadows that added depth to my images.

On the other hand, harsh midday sunlight can create strong contrasts and deep shadows. It took me a while to learn how to work with this light rather than against it. I often find myself looking for shaded areas or using the harsh light to my advantage by capturing silhouettes. Reflective surfaces, like glass buildings, can also create interesting effects. I’ve captured some of my favorite shots by experimenting with how light interacts with different surroundings. Watching the way light bounces off surfaces can inspire unique compositions and narratives.

Composition Tips for Dynamic Shots

Composition plays a vital role in street photography. I’ve learned that a well-composed image can convey a stronger message and engage the viewer more effectively. One of my go-to techniques is the rule of thirds, where I mentally divide the frame into a 3×3 grid and position key elements along the lines or at their intersections. This simple trick often leads to more balanced and dynamic images.

Another technique I cherish is leading lines. I love how roads, railings, or even the edges of buildings can guide the viewer’s eye through the image, creating depth and interest. I recall wandering through the streets of Amsterdam and spotting a canal with a beautiful, winding pathway. I positioned myself at an angle to capture the lines leading toward the horizon, which added depth to the photo.

Framing is also crucial. I often use natural elements like doorways, windows, or overhanging branches to frame my subject, which helps draw attention to the focal point of my shot. It can create a sense of intimacy, almost as if you’re peeking into someone’s world. I remember capturing a candid moment of a musician playing in a small square, framed perfectly by the arch of an old building behind him. It added context and brought the viewer into the scene.

Timing and Anticipation in Street Photography

Timing is everything in street photography. I’ve experienced the thrill of capturing a fleeting moment that tells a powerful story. I believe that being patient and anticipating a moment is key. Sometimes, I’ll stand in a busy area, looking for interactions between people or observing how light and shadows change. This is where the magic happens, and I find myself waiting for that perfect moment to unfold.

For instance, I was once in a crowded market in Istanbul, watching people interact and go about their day. I noticed a child chasing a pigeon, and I instinctively raised my camera, capturing that fleeting moment just as the child reached out to touch the bird. It’s these spontaneous moments that encapsulate the essence of street photography. I often remind myself to be ready and aware, as the most beautiful shots often happen when I least expect them.

Additionally, I’ve found that using a slower shutter speed can help capture movement, adding a sense of dynamism to my photos. I remember during a busy festival, I used a slower shutter speed to blur the motion of dancers while keeping the background sharp. The effect was striking, and it conveyed the energy and excitement of the event beautifully.

Ultimately, the techniques I’ve learned and the experiences I’ve gathered have shaped my approach to street photography. It’s about being present, observant, and ready to capture life as it unfolds around us. With every click of the shutter, I aim to tell a story that resonates with the viewer, inviting them to experience the world through my lens.

Post-Processing Your Street Photos

Editing Software Recommendations

After capturing my street photos, I always look forward to the editing process. It’s a chance to enhance the story I want to tell through my images. Over the years, I’ve tried several editing software options, and I’ve found a few that work best for me.

Adobe Lightroom is my go-to for its user-friendly interface and powerful editing capabilities. I love how I can easily adjust exposure, contrast, and colors while keeping my workflow organized. It’s also great for batch editing, which saves me time when I have a lot of images to process. Another favorite of mine is Adobe Photoshop, which I use for more detailed edits. If I want to remove distractions or play with layers, Photoshop gives me the tools to do that effectively.

For those who prefer free software, I recommend GIMP or Darktable. Both have impressive features, and I’ve seen some stunning results from photographers who use them. Ultimately, the best software is the one that fits your style and workflow. I encourage you to experiment with different options and see which one resonates with you.

Basic Editing Techniques for Street Photography

Editing street photos doesn’t have to be overly complicated. I’ve learned a few basic techniques that can drastically improve my images without losing their authenticity. Firstly, I always start with cropping. It helps me focus on the main subject and eliminate any distractions from the edges. I remember a particular shot of a street performer that looked cluttered until I cropped it down to highlight the performer’s expression and movements.

Next, adjusting the contrast can really make a difference. I often play with the contrast to bring out the details in shadows and highlights. Adding a bit of vibrance can also enhance the colors, making the scene pop without looking unnatural. I try to avoid over-editing because I want to keep the genuine feel of the moment I captured.

Finally, I find that sharpening my images can help bring clarity, especially if I shot in low light. It’s all about enhancing what’s already there rather than changing the essence of the photograph. I’ve found that these simple adjustments can elevate my street photography while maintaining the authenticity that drew me to the moment in the first place.

Legal Considerations When Photographing Abroad

Understanding Photography Laws in Different Countries

As I’ve traveled with my camera, I’ve come to realize that understanding the legal landscape of photography in different countries is crucial. Some places have strict laws about photographing people without consent, while others are more relaxed. For instance, in many European countries, there are laws that protect individuals’ rights to privacy, which means I often need to be cautious about photographing people in public spaces.

I remember being in Spain and learning that while street photography is generally accepted, I should be mindful when photographing children and certain public spaces, like schools. Before embarking on any trip, I like to do a bit of research to understand the local laws. This preparation helps me feel more confident and ensures that I’m being respectful of local customs and regulations.

How to Handle Confrontations with Subjects

Despite my efforts to respect privacy, I’ve occasionally faced confrontations when photographing people. It’s one of those situations that can be uncomfortable but also an opportunity to connect. I recall a time in Vietnam when a vendor became upset after I photographed her stall. Instead of feeling flustered, I approached her, apologized, and explained my intent to capture the vibrant market life. To my surprise, she softened, and we ended up having a friendly conversation. I learned that openness and a smile can often diffuse tension.

If someone expresses discomfort, I always respect their wishes and delete the photo if necessary. I’ve found that being polite and understanding goes a long way in maintaining a good relationship with the subjects I encounter. In the end, it’s about telling stories through our images while honoring the people who become part of them.

Building Your Portfolio and Sharing Your Work

Online Platforms for Showcasing Street Photography

Once I’ve captured and edited my street photos, I love sharing them with the world. Building a portfolio has been an exciting journey for me. I’ve tried several online platforms, but I’ve found Instagram to be particularly effective for street photography. The visual nature of the platform allows me to connect with other photographers and enthusiasts easily. I enjoy engaging with the community and getting feedback on my work.

Besides Instagram, I also recommend using platforms like 500px or Flickr. These sites cater more to photographers and can be great for showcasing portfolios in a more professional context. Having an online presence has allowed me to connect with other photographers, share experiences, and even participate in collaborations.

Networking with Other Photographers

Networking with other photographers can be incredibly rewarding. I’ve met some of my closest friends through photography meetups and workshops. Engaging with local photography groups or attending events in the cities I visit has opened up doors for collaboration and learning. I remember participating in a street photography workshop in Berlin, where I gained valuable insights from more experienced photographers and learned techniques I still use today.

Social media also provides a space to network. Joining photography groups on Facebook or forums can be a great way to share experiences and gain inspiration. I believe that surrounding ourselves with like-minded individuals fuels our creativity and can lead to exciting opportunities.

Tips for Traveling as a Street Photographer

Best Practices for Traveling Light

Traveling as a street photographer means being prepared but not weighed down by gear. I’ve learned that traveling light allows me to be more agile and spontaneous. I like to pack only the essentials: one camera body, a couple of lenses, and a small bag with necessary accessories. This way, I can move freely through crowded streets and quickly respond to unfolding moments.

Maintaining Safety While Shooting

Safety is another important consideration. I always stay aware of my surroundings and keep my gear secure. Using a crossbody bag helps me keep my camera close while still being able to access it quickly. I’ve learned to blend into the environment, which makes me less noticeable while shooting candid shots.

Connecting with Local Photographers

Lastly, connecting with local photographers can enhance my travel experience. They often know the best spots and the right times to shoot. Plus, it’s a great way to learn about the culture and photography scene of the area. I remember meeting a local photographer in Lisbon who took me to hidden gems off the tourist path, leading to some of my favorite shots. Building these connections enriches my travels and gives me a deeper understanding of the places I visit. Read Interesting article: Budget Backpacking: Mastering Cultural Adventure Photography

Final Thoughts

Street photography is more than just a hobby; it’s a way to connect with the world and share stories through our lenses. Each moment captured is a reflection of life as it unfolds around us. Whether I’m navigating the bustling streets of a new city or waiting patiently for that perfect shot, the thrill of street photography keeps me inspired and engaged. I encourage you to grab your camera and explore, embrace the unexpected, and let your unique perspective shine through your photography. Remember, there are stories everywhere, just waiting for you to discover them.

Frequently Asked Questions

What is street photography?

Street photography is a form of art that captures candid moments in public spaces, focusing on the essence of a place and its people. It involves telling a larger narrative through fleeting moments.

Who are some famous street photographers?

Some notable street photographers include Vivian Maier, known for portraying the intimacy of everyday life, and Garry Winogrand, who captured the chaotic nature of urban life. Their work has significantly influenced the genre.

Which cities are recommended for street photography?

Top cities for street photography include New York City, Tokyo, Paris, and Barcelona. Each city offers unique environments, cultures, and opportunities for capturing dynamic street scenes.

What should I consider regarding local customs when photographing abroad?

Understanding local customs is crucial for street photography. Some places might require asking for permission before taking photos, while in others, it could be frowned upon. Researching local etiquette is essential to navigate these situations confidently.

What camera types are best for street photography?

DSLR, mirrorless, and compact cameras are all good options for street photography. DSLR cameras offer great image quality, mirrorless cameras are lightweight and compact, while compact cameras are portable and discreet for capturing candid moments.

How does lighting affect street photography?

Light plays a vital role in street photography. The golden hour provides soft, warm light, while harsh midday sunlight can create strong contrasts. Understanding how to work with different lighting conditions can enhance the mood and tone of photos.

What composition techniques are useful in street photography?

Useful composition techniques include the rule of thirds, leading lines, and framing. These techniques help create balanced, dynamic images that draw the viewer’s eye and convey a stronger message.

What are some basic editing techniques for street photography?

Basic editing techniques include cropping to focus on the main subject, adjusting contrast to enhance details, adding vibrance to colors, and sharpening images for clarity. These adjustments help maintain authenticity while improving the overall quality of the photos.

What legal considerations should I be aware of when photographing abroad?

It’s important to understand the photography laws in different countries, as they vary. Some places have strict regulations regarding photographing individuals without consent, which may require extra caution, especially around children and certain public spaces.

How can I network with other photographers while traveling?

Networking can be done through photography meetups, workshops, and online platforms like social media groups. Connecting with local photographers can enhance your travel experience by providing insights into the local culture and photography scene.

Top Mountain Photography Locations for Budget Backpackers

Ready to capture breathtaking mountain landscapes without breaking the bank? Let’s explore the world of mountain photography tailored for budget backpackers, where stunning views and affordability go hand in hand! Read Interesting article: Adventure Photography on a Budget: Mountains Await You!

Top Mountain Photography Locations for Budget Backpackers

Understanding Mountain Photography

What is Mountain Photography?

Mountain photography is more than just snapping pictures of towering peaks; it’s about capturing the essence of nature’s grandeur. I remember my first trip to the mountains, feeling overwhelmed by the beauty surrounding me. Every angle offered a new perspective, and I soon realized that each photograph tells a story. From vibrant sunrises to serene sunsets, mountain photography invites us to experience the raw beauty of nature, inviting viewers to feel the tranquility and awe we felt in those moments.

Essential Gear for Budget Backpackers

As a backpacker on a budget, I’ve learned to keep my gear lightweight yet effective. Here’s what I consider essential for mountain photography:

  • Camera: I recommend a mirrorless camera or a DSLR with interchangeable lenses. They offer great image quality while remaining portable. If you’re just starting, a smartphone with a high-quality camera can also do wonders.
  • Tripod: A lightweight tripod is vital, especially for long exposure shots during dawn or dusk. I found a compact one that folds down small enough to fit in my backpack without adding much weight.
  • Lenses: A versatile zoom lens is a must-have. I usually carry a wide-angle lens for sweeping landscapes and a telephoto lens for capturing distant details.
  • Filters: Polarizing filters can enhance colors and reduce glare, making them perfect for bright mountain scenes. I often use a neutral density filter for long exposures of waterfalls or streams.
  • Extra Batteries and Memory Cards: I’ve had trips where I ran out of battery too soon. Bringing extras ensures I can keep shooting without worrying about running out of power.

It’s all about finding what works best for you while keeping your pack light. I’ve learned that each item should serve a purpose, so I avoid overpacking gear I won’t use.

Tips for Capturing Stunning Mountain Landscapes

Over time, I’ve picked up several tips that help me capture the beauty of mountain landscapes. Here are some of my favorites:

  • Know Your Lighting: The magic hour—just after sunrise and before sunset—offers the best lighting. I love waking up early to catch the first light hitting the peaks. The colors are softer and more vibrant during these times.
  • Composition Matters: Use the rule of thirds to create more dynamic images. Placing the horizon line in the top or bottom third can lead to more engaging photographs. I often look for leading lines, like trails or rivers, to draw the viewer’s eye into the scene.
  • Be Patient: Nature doesn’t always cooperate. I’ve spent hours waiting for the right moment, whether it’s a perfect cloud formation or the ideal light. Patience pays off, and often, those moments yield the most breathtaking shots.
  • Explore Different Perspectives: Don’t just shoot from the same height. Get low to the ground or find a higher vantage point. Changing your perspective can completely transform your images. I love climbing a little higher to capture the scene from above.
  • Embrace the Elements: Weather can change quickly in the mountains. Instead of being frustrated by rain or fog, I’ve learned to embrace it. These conditions can add a dramatic flair to my photos that clear skies simply can’t provide.

Ultimately, photography is about capturing your unique view of the world. Experimenting with different techniques has helped me discover my style, and I encourage you to do the same. Read Interesting article: Capture Stunning Mountain Moments: Budget Photography Tips

Top Mountain Photography Locations

1. Rocky Mountain National Park, Colorado

Best Time to Visit

When planning a trip to Rocky Mountain National Park, I found that late spring through early fall is the sweet spot for photographers. Specifically, June to September is ideal because the wildflowers bloom, and the weather is generally more predictable. I remember hiking through the meadows filled with vibrant colors, making every shot pop with life.

Must-Visit Spots for Photographers

There are so many breathtaking locations in Rocky Mountain National Park, but a few stand out. For me, Bear Lake is a must. The reflections of the peaks in the lake during early morning create a magical scene. Then there’s Alpine Visitor Center, where the panoramic views are simply stunning. Don’t forget Trail Ridge Road, which provides access to high-altitude photography options that are hard to beat. Each spot has its charm, and I’ve spent countless hours capturing the changing light.

Budget Accommodation Options

For budget stays, Estes Park is a great choice. I found several affordable motels and campgrounds that fit my backpacker budget. Staying at Lake Estes Campground was a highlight for me; waking up to the sounds of nature made the experience even more special. Plus, the short drive to the park entrance made it convenient for early morning shoots.

2. Glacier National Park, Montana

Best Time to Visit

From my experience, the best time to visit Glacier National Park is from late June to mid-September. The Going-to-the-Sun Road usually opens around this time, and the lush landscapes are in full bloom. I remember driving along this road, surrounded by towering peaks, and I couldn’t help but feel inspired by every twist and turn.

Must-Visit Spots for Photographers

For breathtaking shots, don’t miss Lake McDonald, especially at sunrise when the water is mirror-like. Many Glacier offers stunning vistas and incredible wildlife photography opportunities. I’ve seen bears and mountain goats, which added a whole new dimension to my gallery. And, of course, Grinnell Glacier is a hike worth taking for its dramatic landscapes!

Budget Accommodation Options

If you’re looking to save money, consider camping at one of the park’s campgrounds. Apgar Campground is affordable and located right near Lake McDonald, giving you quick access to stunning views. I loved roasting marshmallows by the campfire, reminiscing about the day’s adventures.

3. Banff National Park, Canada

Best Time to Visit

Banff is spectacular year-round, but I personally think that late spring and early fall present the best conditions for photography. The crowds are smaller, and the colors during these seasons are breathtaking. I was lucky enough to visit during the fall, where the golden larches against the blue lakes were something I’ll never forget.

Must-Visit Spots for Photographers

In Banff, you can’t miss Moraine Lake, which is like stepping into a postcard. The vibrant blue water against the surrounding peaks is a sight to behold. Lake Louise is another iconic spot, particularly stunning at sunrise. I also recommend hiking to Peyto Lake for a unique perspective that looks like a wolf’s head from above. Each location offers something different, and I found myself constantly amazed.

Budget Accommodation Options

Affordable lodging options can be found in Canmore, just a short drive from Banff. I stayed at a cozy hostel that offered both comfort and a chance to meet fellow travelers. It’s a great base for exploring the park without spending a fortune.

4. Mount Rainier National Park, Washington

Best Time to Visit

For capturing the best shots at Mount Rainier, I recommend visiting from July to mid-August. This is when the wildflowers are in full bloom, and the weather is generally mild. I can still recall the vibrant meadows covered in color, which made each photo feel alive.

Must-Visit Spots for Photographers

Paradise is a must for its stunning views and wildflower fields. The Reflection Lakes provide an incredible opportunity to capture the mountain’s reflection in the water. I also enjoyed the views from Sunrise Visitor Center, where the sunrise over the mountain is an unforgettable experience. Don’t forget to explore the numerous trails that offer unique angles and perspectives.

Budget Accommodation Options

For budget-friendly accommodations, consider camping in the park. Cougar Rock Campground is a fantastic option, where you can fall asleep under the stars. I loved being surrounded by nature and waking up ready to capture the day’s beauty.

5. Zion National Park, Utah

Best Time to Visit

For Zion, I believe the best time to visit is in the spring and fall. The temperatures are comfortable, and the light creates stunning contrasts on the red rock formations. I remember hiking the trails during this time and feeling like I had the park almost to myself.

Must-Visit Spots for Photographers

The Narrows is a breathtaking spot, where you can capture towering canyon walls reflected in the water. Angels Landing offers some of the most dramatic views in the park—though I recommend visiting early in the morning to avoid the crowds. Observation Point is another incredible location, providing a panoramic view that makes the effort to hike there well worth it.

Budget Accommodation Options

Zion has several campgrounds, and I stayed at Watchman Campground, which provided easy access to trails and stunning views. Camping in Zion is a great way to save money while immersing yourself in the park’s beauty.

Planning Your Trip

How to Get to These Locations on a Budget

When it comes to getting to these stunning mountain locations, I’ve learned that planning is key to keeping costs down. If you’re traveling from afar, consider booking flights to major airports nearby, and then use budget airlines or train services to reach your destination. For instance, flying into Denver for Rocky Mountain National Park or Calgary for Banff often has cheaper fares compared to smaller regional airports. I once snagged a great deal by booking my flight three months in advance—definitely something I’d recommend!

Once you’re in the area, look into public transportation options or rideshare services. I’ve found that many national parks offer shuttles that are budget-friendly and can help you avoid the hassle of parking. For a more adventurous option, consider carpooling with fellow travelers I’ve met along the way. Sharing gas costs not only saves money but often leads to great conversations and new friendships.

Transportation Options in the Mountains

Once you arrive at the park, having reliable transportation is crucial for exploring its beauty. I’ve discovered that renting a bike can be a fantastic way to get around, especially in places like Zion and Banff, where trails are accessible and stunning. There’s something exhilarating about cycling through these breathtaking landscapes, and it also allows for spontaneous stops to capture those unexpected photo opportunities.

If biking isn’t your thing, look for local shuttle services. Many parks have free or low-cost shuttles that can take you to popular trailheads and viewpoints. I remember hopping on a shuttle in Glacier National Park and being dropped off at different trailheads without worrying about parking. Plus, it’s a great way to meet fellow nature lovers!

Of course, if you’re comfortable driving, having a car gives you the freedom to explore at your own pace. Just be mindful of road conditions, as they can change rapidly in mountainous areas. I make it a habit to check local weather reports and park alerts before heading out for the day.

Best Hiking Trails for Photography

Hiking is often the best way to reach those breathtaking photography spots. I’ve hiked countless trails, and here are some of my favorites that are not only stunning but also accessible for photographers:

  • Emerald Lake Trail (Rocky Mountain National Park): This easy hike offers breathtaking views and options to capture the lake’s vibrant colors surrounded by mountains. I found the reflections in the water especially mesmerizing at sunrise.
  • Highline Trail (Glacier National Park): This iconic trail provides jaw-dropping views along the way, with opportunities to photograph sweeping vistas and wildlife. I encountered mountain goats, and it was a highlight of my trip!
  • Lake Agnes Trail (Banff National Park): A moderate hike that leads to a beautiful lake with a historic tea house. The views from the top are worth every step, and I remember capturing the iconic teahouse against the backdrop of rugged peaks.
  • Sunrise Trail (Mount Rainier National Park): This is a must for those looking to photograph the dawn light hitting the mountain. I started early, and the experience of watching the sun rise over the snow-capped peaks was simply unforgettable.
  • Angels Landing Trail (Zion National Park): A challenging hike, but the views from the top are worth it. Standing on the edge, I was able to capture some of the most dramatic landscapes I’ve ever seen.

Always remember to carry enough water and snacks, as hiking can be tiring. I usually pack light snacks like trail mix and energy bars to keep me fueled on longer hikes. And don’t forget your camera—there’s no telling when you’ll stumble upon that perfect shot!

Safety and Environmental Considerations

Staying Safe While Exploring

When venturing into the mountains for photography, safety should always be a top priority. I’ve learned this the hard way, with a few close calls. One of the most important tips I can offer is to pay attention to the weather. Conditions can change rapidly, and I’ve been caught in sudden storms that transformed a beautiful day into a challenging situation. Always check the forecast before heading out and be prepared with the right gear, including extra layers and rain protection.

Another crucial aspect is to let someone know your plans before you set out. I often share my itinerary with a friend or family member, just in case something goes awry. It gives me peace of mind knowing someone is aware of where I am. Also, carry a map and a compass or a GPS device—relying solely on your phone can be risky if service is spotty or you run out of battery.

Lastly, be aware of your surroundings. Wildlife encounters can be stunning, but keep a safe distance. I’ve had some incredible moments watching animals but always respected their space and never approached them. Staying safe is about making wise choices while still enjoying the beauty around us.

Leave No Trace Principles for Photographers

As photographers, we have a responsibility to protect the breathtaking landscapes we love to capture. I’ve embraced the Leave No Trace principles, and they have become second nature to my adventures. This means planning ahead, sticking to marked trails, and avoiding trampling sensitive vegetation. I always carry out whatever I bring in, from food wrappers to other small items—every little bit helps maintain the beauty of our natural spaces.

When photographing, I try to minimize my impact by using existing paths instead of creating new ones. I’ve found that some of the best angles can be captured while remaining on the trails. I also make it a point to respect wildlife and other visitors by keeping noise levels down and not disturbing the natural environment.

We should all strive to leave the mountains just as stunning as we found them, if not more so. By following these principles, we ensure that future generations can enjoy the same breathtaking photography opportunities we do today. Read Interesting article: Top Destinations for Extreme Sports Photography Adventures

Budget Tips for Backpackers

How to Save on Food and Supplies

Food can be a significant expense while traveling, especially in remote areas. I’ve found that meal planning and packing my own supplies can make a huge difference. I usually prepare simple meals like pasta, rice, or dehydrated meals that are lightweight and easy to cook. Bringing snacks like trail mix or energy bars helps keep my energy up on long hikes without breaking the bank.

When I can, I also take advantage of local grocery stores or farmer’s markets. I remember finding a great little market near Glacier National Park where I stocked up on fresh fruits and vegetables. Cooking my own meals not only saves money but also adds to the experience of camping and enjoying nature. Plus, it’s a great way to meet other travelers who might be doing the same.

Free or Low-Cost Activities in the Mountains

One of the best parts about exploring the mountains is that many activities are either free or low-cost. Hiking, of course, is at the top of my list. There’s nothing quite like hitting the trails, and many national parks offer stunning paths that lead to breathtaking views. I’ve also enjoyed activities like birdwatching, nature journaling, or simply soaking in the scenery—no cost involved!

Some parks may even host ranger-led programs or workshops that are free of charge. I’ve attended several that have enriched my experience and provided me with valuable insights into the local ecosystem. Be sure to check out the park’s schedule before your visit; it might surprise you to find activities that pique your interest.

Final Thoughts

Mountain photography has been an incredible journey for me, filled with awe-inspiring moments and unforgettable experiences. I feel that anyone can capture the beauty of these landscapes, even on a budget. By understanding your gear, planning carefully, and respecting the environment, you can create stunning images while making the most of your adventures. I encourage you to get out there, explore, and find your unique perspective on the world. Every mountain has a story, and through our photography, we get to share those stories with others. Happy shooting, and may your adventures be filled with beauty and inspiration!

Frequently Asked Questions

What is mountain photography?

Mountain photography involves capturing the essence of nature’s grandeur, focusing on the beauty of mountainous landscapes. It aims to tell a story through images, showcasing vibrant sunrises, serene sunsets, and the tranquility of nature.

What essential gear do budget backpackers need for mountain photography?

Budget backpackers should consider a mirrorless camera or DSLR with interchangeable lenses, a lightweight tripod, a versatile zoom lens, polarizing filters, extra batteries, and memory cards. A high-quality smartphone camera can also be effective for beginners.

When is the best time to visit Rocky Mountain National Park for photography?

The best time to visit Rocky Mountain National Park for photography is from late spring through early fall, specifically June to September, when wildflowers bloom and the weather is more predictable.

What are some must-visit spots for photographers in Glacier National Park?

Photographers should not miss Lake McDonald, Many Glacier, and Grinnell Glacier in Glacier National Park. Each location offers breathtaking vistas and opportunities for wildlife photography.

How can I save money on food while traveling in the mountains?

To save on food, consider meal planning and packing lightweight supplies, such as dehydrated meals and snacks like trail mix. Utilizing local grocery stores or farmer’s markets can also help in managing food costs.

What are some tips for capturing stunning mountain landscapes?

To capture stunning mountain landscapes, know your lighting, focus on composition, be patient, explore different perspectives, and embrace weather conditions. Each of these elements can enhance the quality of your photographs.

What are the Leave No Trace principles important for photographers?

Leave No Trace principles encourage photographers to protect natural landscapes by planning ahead, sticking to marked trails, minimizing impact, and respecting wildlife and other visitors, ensuring the environment remains beautiful for future generations.

What budget accommodation options are available near Banff National Park?

In Banff National Park, affordable lodging options can be found in Canmore, which is a short drive from the park. Hostels and budget motels are great choices for backpackers looking to save money.

How can I explore mountain parks on a budget?

To explore mountain parks on a budget, consider using public transportation, renting bikes, or taking advantage of local shuttle services. Carpooling with fellow travelers can also help reduce costs while allowing for shared experiences.

What are some recommended hiking trails for photography in the mountains?

Some recommended hiking trails for photography include Emerald Lake Trail in Rocky Mountain National Park, Highline Trail in Glacier National Park, Lake Agnes Trail in Banff, Sunrise Trail in Mount Rainier, and Angels Landing Trail in Zion National Park.

Adventure Photography on a Budget: Mountains Await You!

Adventure photography is an exhilarating way to capture the beauty of our world while embarking on journeys that challenge and inspire us. With mountains beckoning, let’s explore how to dive into this captivating hobby without breaking the bank. Read Interesting article: Essential Tips for Budget Underwater Adventure Photography

Adventure Photography on a Budget: Mountains Await You!

Understanding Adventure Photography

What is Adventure Photography?

Adventure photography is more than just snapping pictures; it’s about telling stories through images of outdoor activities, breathtaking landscapes, and unique experiences. I remember my first adventure trip; I was climbing a mountain, feeling the thrill of the ascent, and I wanted to capture every moment. From the adrenaline rush of rock climbing to the serene beauty of a sunrise over the hills, adventure photography encompasses it all. It’s about immersing myself in nature while documenting that experience for others to share.

Why Choose Adventure Photography?

The reasons for diving into adventure photography are numerous and personal. For many of us, it combines the love of the great outdoors with a creative outlet. I believe that capturing moments in nature helps us appreciate our planet and all its wonders. Plus, there’s something incredibly fulfilling about looking back at a stunning photo and recalling the journey that led to it. Sharing these experiences with friends and family or even online can inspire others and foster a deeper appreciation for nature. I’ve seen how my photos have sparked conversations and encouraged friends to explore the mountains themselves. Budget Backpacking: Mastering Cultural Adventure Photography is another great way to enhance your skills.

Essential Gear for Budget Adventure Photography

Camera Options on a Budget

When I first started adventure photography, I realized that I didn’t need the latest, most expensive camera to capture great images. There are plenty of budget-friendly options that produce stunning results. I began with a DSLR that I found on sale, which was perfect for learning the ropes. I recommend considering mirrorless cameras too, as they tend to be lightweight and versatile for hiking. If you’re looking for something even more budget-conscious, there are excellent compact cameras that can deliver high-quality images without the bulk.

Budget-Friendly Lenses

The lenses you choose can significantly affect your photography. I often gravitate toward a versatile zoom lens, which allows me to capture everything from wide landscapes to detailed close-ups without changing lenses on the go. A good budget lens can be found for under $200, and it’s worth exploring second-hand options. I’ve had great luck finding lenses on online marketplaces where photographers sell gear they no longer use. A prime lens can also be a great investment for low-light conditions, especially during dawn or dusk, when the light is just magical.

Accessories to Enhance Your Photography

While a good camera and lens are essential, don’t overlook the importance of accessories. A sturdy tripod is a must-have for capturing long exposures of mountain landscapes or those breathtaking night skies. I found an affordable travel tripod that fits nicely in my backpack without weighing me down. Also, invest in a sturdy camera bag that protects your gear while hiking. A UV filter is another inexpensive accessory I use to protect my lens and enhance image quality. It’s these little pieces of gear that can make a big difference in your photos and overall experience.

Smartphone Photography Tips

Let’s face it; not everyone has access to professional gear, and sometimes a smartphone is all you need. I’ve captured some of my favorite adventure shots with my phone. The key is to know how to use it to its fullest potential. I recommend using natural light whenever possible, as it can make your pictures pop. Experimenting with angles and perspectives can also yield stunning results. Don’t forget about the editing apps available; they can transform a good shot into something remarkable. I often use free apps to edit my photos before sharing them with friends and on social media.

Best Mountain Locations for Adventure Photography

Top National Parks for Photography

The United States is home to some of the most breathtaking national parks, perfect for adventure photography. I’ve had the pleasure of visiting several, including Yosemite and Glacier National Park. Each offers unique landscapes, from towering mountains to lush valleys. I found that planning my visits during shoulder seasons—spring and fall—often yields fewer crowds and more vibrant colors, enhancing my photos. If you can, try to explore lesser-known parks too; they often have just as much beauty and far fewer tourists. If you’re interested in exploring cultural aspects, check out Capture Cultural Wonders: Budget-Friendly Adventure Photography for more insights.

Hidden Gems: Lesser-Known Mountain Spots

While national parks are a fantastic choice, there are hidden gems waiting to be discovered. I remember stumbling upon a small trail that led to a secluded mountain lake. The tranquility and stunning views made for some of my best photos. Researching lesser-known trails and parks can lead to incredible opportunities for unique photography. Local forums or photography groups can offer valuable insights on where to find these hidden spots.

Seasonal Considerations for Mountain Photography

Every season brings its own magic to mountain photography. I love capturing the vibrant colors of fall or the serene beauty of winter landscapes. In my experience, each season has its challenges and rewards. Summer can be great for lush greenery, but it’s also the busiest time. I prefer to plan my trips during the off-peak seasons to avoid crowds and capture the peace of nature. Understanding how the seasons affect the landscape is essential for planning your shots and maximizing your photography opportunities.

Planning Your Adventure Shoot

Choosing the Right Time of Year

Planning when to shoot is just as crucial as knowing where to go. From my experience, each season offers a unique canvas. I’ve found that spring, with its blooming wildflowers and fresh greenery, can transform a landscape into a vibrant masterpiece. However, I also cherish the quiet beauty of winter, when snow blankets the mountains and creates a serene, almost magical atmosphere. I recommend considering what kind of mood or theme you want to capture. If you love bright colors, aim for late spring or early fall. If you prefer solemn, moody landscapes, then winter might be your best bet.

Understanding Weather Conditions

Weather can make or break a photography session. I’ve stood under a grey sky wishing I’d checked the forecast before heading out. I learned to always look ahead and plan for changing conditions. For instance, if you’re going to the mountains, be prepared for sudden weather shifts. I remember one hike when a sunny morning turned into a snowstorm by afternoon. Keeping an eye on weather apps and having a backup plan is essential. Also, consider how different weather conditions can affect your photos. Overcast days can produce soft, diffused light perfect for portraits or close-ups, while a sunny day might bring out the vibrant colors of a landscape.

Creating a Shot List for Your Trip

As I started my journey in adventure photography, I realized how helpful it was to create a shot list before heading out. This isn’t about being rigid; it’s more like having a roadmap for your adventure. I often jot down specific scenes I want to capture, like a particular viewpoint or an interesting rock formation. This way, I stay focused and make sure I don’t miss those must-have shots. I also include details like the time of day to shoot each location, as this can significantly affect the light and mood of the images. Knowing what I want helps me make the most of my time out there.

Techniques for Capturing Stunning Mountain Photos

Composition Tips for Landscape Photography

Composition is the backbone of any great photograph. I’ll never forget my first attempts at framing shots; I was often too focused on getting the subject that I neglected the overall scene. One technique I’ve learned is the rule of thirds. I try to imagine a grid over my viewfinder, placing the horizon along the top or bottom third, depending on what I want to emphasize. Leading lines, like a winding trail or river, can guide the viewer’s eye through the image. I’ve found that sometimes stepping back to include more of the surroundings tells a much richer story than a close-up shot.

Using Natural Light Effectively

Natural light is my favorite tool when shooting outdoors. I’ve discovered that the golden hour—just after sunrise or before sunset—offers the most magical light for photography. The warm tones can elevate even the simplest of scenes. I often plan my hikes to take advantage of this light. However, if you’re shooting during the day, look for shaded areas or wait for clouds to diffuse the sun’s harsh rays. I’ve learned to be patient and wait for that perfect moment when the light hits just right, and it’s often worth the wait.

Long Exposure Techniques for Waterfalls and Skies

Capturing movement in nature, like flowing waterfalls or clouds drifting across the sky, can add a dynamic element to your photos. I started experimenting with long exposure techniques, and it truly opened up a new dimension in my adventure photography. A sturdy tripod is essential for this. I’ve found that using a neutral density filter helps reduce the light entering the lens, allowing for longer exposures without overexposing the shot. Setting my camera to a slow shutter speed can create that dreamy effect on water, making it look silky smooth. Just remember to take your time and experiment with different settings to see what works best.

Macro Photography in Mountain Flora

While sweeping vistas are stunning, I also love capturing the intricate details of mountain flora. I remember stumbling upon a patch of wildflowers during one of my hikes; their colors and textures were mesmerizing. Using a macro lens or a setting on my camera that allows for close-ups has led to some of my favorite shots. I recommend getting down low to the ground for different perspectives and to highlight the beauty of these small wonders. Nature is full of details that often go unnoticed, and capturing them can provide a beautiful contrast to the grand landscapes around us.

Editing Your Adventure Photos on a Budget

Free and Affordable Editing Software

Editing is where the magic really happens in photography. I remember feeling a bit overwhelmed when it came to post-processing my adventure shots. However, I soon discovered that I didn’t need to spend a fortune on software to enhance my images. There are fantastic free options like GIMP and Darktable that mimic the capabilities of more expensive programs. I often use Lightroom’s mobile app, which is a great starter tool that’s free to use with basic features. It’s perfect for quick edits on the go, especially when I want to share my latest shots with friends right after a hike. For those looking for more comprehensive features without breaking the bank, Capture One offers a free trial that allows you to explore its robust editing capabilities.

Basic Editing Techniques for Beginners

When I first began editing my photos, I focused on mastering a few basic techniques that made a huge difference. Adjusting exposure, contrast, and saturation can dramatically enhance the overall feel of an image. I often start by correcting any exposure issues, especially in high-contrast scenes like mountain landscapes where the sky can easily become overexposed. Cropping is another essential skill I learned; it can help improve composition by removing distractions from the edges of the frame. Lastly, I recommend experimenting with sharpening and noise reduction. These tools can help make details pop and reduce graininess, especially in low-light conditions like early morning or late evening shots.

Advanced Techniques for Enhanced Visual Appeal

Once I got comfortable with the basics, I wanted to take my editing to the next level. Techniques like HDR (High Dynamic Range) imaging became a favorite of mine. I learned to merge multiple exposures of the same scene to capture a broader range of light and detail, especially in challenging lighting situations. I’ve also enjoyed diving into color grading, which allows me to add mood and atmosphere to my photos. For example, applying a warm tone to a sunset shot can evoke feelings of nostalgia and warmth, while cooler tones can lend a serene, calm vibe to snowy landscapes. Finally, I sometimes dabble in selective editing, where I might brighten just the foreground while keeping the background more subdued, drawing the viewer’s eye exactly where I want it.

Staying Safe While Adventuring

Essential Safety Gear for Mountain Adventures

Safety is paramount when it comes to adventure photography. I’ve learned this the hard way more than once. Investing in essential safety gear can make a world of difference. A good pair of hiking boots is non-negotiable for me; they provide the support and grip needed on rocky trails. I also carry a well-stocked first-aid kit, just in case an unexpected scrape occurs. A reliable map or GPS device helps prevent me from getting lost in unfamiliar areas. Lastly, I make sure to pack plenty of water and snacks to keep my energy up during long hikes. These small precautions help me focus more on capturing stunning photos rather than worrying about potential mishaps.

Understanding Risks in Mountain Photography

Every adventure comes with its own set of risks, and I’ve had my share of close calls. Weather conditions can change rapidly in the mountains, so I always check forecasts before heading out. I remember one hike where I was caught in an unexpected thunderstorm; it was a scary situation that taught me to respect the elements. I also learned to be aware of my surroundings, especially when photographing near cliffs or unstable ground. Wildlife encounters can be thrilling, but I’ve also had moments where I needed to back away slowly from curious bears or aggressive animals. Understanding the risks involved helps me make safer choices and ensures I enjoy my photography adventures to the fullest.

Tips for Solo Adventurers

As someone who often ventures out alone, I’ve picked up a few tips to stay safe while enjoying my passion for photography. First and foremost, I always let someone know my planned route and expected return time. This simple step provides peace of mind for both me and my loved ones. I also make a habit of carrying a fully charged power bank for my phone; having a way to communicate in case of emergencies is crucial. Additionally, I try to stay within my limits and choose trails that match my experience level. It’s easy to get caught up in the excitement of exploring new places, but I find that sticking to what I’m comfortable with allows me to enjoy my photography without unnecessary risk.

Budgeting for Your Adventure Photography Trip

Travel Costs: How to Save on Transportation

Budgeting for adventure photography doesn’t have to be daunting. I’ve discovered a few tricks to save on transportation costs that can make a big difference. Whenever possible, I opt for carpooling with fellow photographers or friends who share my passion. Splitting gas and tolls can significantly cut expenses. If I’m traveling further, I often look for discounted flights or consider using travel reward points. Flexibility with travel dates can also lead to better deals. I remember booking a last-minute flight to a national park and getting a fantastic rate. Additionally, I scout out local transportation options, like public transit or shuttle services, which can be a cost-effective way to reach trailheads.

Accommodation Options for Budget Travelers

Finding the right place to stay can be challenging, especially while trying to stick to a budget. I often look for campsites or hostels, which provide affordable options and a great way to meet fellow adventurers. If I prefer more comfort, I check out budget hotels or vacation rentals, especially during the off-peak seasons when prices drop. I also utilize apps that offer last-minute deals on accommodations. I’ve had success with this approach when visiting popular destinations, allowing me to snag a cozy spot at a fraction of the regular price.

Food and Supplies: Eating on a Budget

Eating out can quickly eat into my photography trip budget, so I try to plan ahead. I often pack meals and snacks before heading out, which saves money and allows me to enjoy healthy options while on the trail. Trail mixes, energy bars, and sandwiches are my go-to choices. When I do decide to eat out, I look for local diners or cafes that offer affordable meals. I’ve found that asking locals for recommendations often leads to delicious and budget-friendly dining experiences. Plus, I enjoy discovering hidden gems off the beaten path.

Maximizing Your Budget for Gear and Expenses

When it comes to gear, I believe in being smart about investments. I’ve learned to prioritize quality over quantity and focus on versatile pieces that can serve multiple purposes. For instance, rather than buying multiple lenses, I invest in a good zoom lens that covers a variety of focal lengths. I also keep an eye out for sales and discounts, especially during holidays or special events. If you’re like me and love trying out new gear, renting equipment for specific trips can also be a budget-friendly option. It allows me to test different setups without committing to a purchase. By being strategic about my spending, I can allocate more of my budget toward experiences that matter most to me.

Frequently Asked Questions

What is adventure photography?

Adventure photography is about telling stories through images of outdoor activities, breathtaking landscapes, and unique experiences. It involves immersing oneself in nature while documenting those moments for others to share.

Why should I choose adventure photography?

Adventure photography combines a love for the outdoors with a creative outlet, helping individuals appreciate the beauty of the planet. It can inspire conversations and encourage others to explore nature.

What are some budget camera options for adventure photography?

Budget-friendly options include DSLR cameras, mirrorless cameras, and compact cameras. These can produce stunning results without the need for the latest expensive gear.

What type of lens is recommended for budget adventure photography?

A versatile zoom lens is recommended for capturing a variety of shots, from wide landscapes to close-ups. Budget lenses can be found for under $200, and second-hand options are worth exploring.

What accessories should I consider for adventure photography?

Essential accessories include a sturdy tripod for long exposures, a protective camera bag, and UV filters to enhance image quality. These can significantly improve the photography experience.

What are some top national parks for adventure photography in the US?

Some of the most breathtaking national parks for photography include Yosemite and Glacier National Park. Visiting during shoulder seasons can provide fewer crowds and more vibrant colors.

How does the season affect mountain photography?

Each season offers unique opportunities and challenges for mountain photography. For instance, spring brings blooming wildflowers, while winter offers serene snowy landscapes. Planning trips during off-peak seasons can enhance the experience.

What should I keep in mind when planning a photography shoot?

Consider the time of year, weather conditions, and create a shot list to stay focused on specific scenes you want to capture. Knowing what to aim for helps maximize your photography opportunities.

What editing software is recommended for beginners?

Free options like GIMP and Darktable can mimic the capabilities of more expensive programs. Lightroom’s mobile app is also a great starter tool for quick edits on the go.

What safety precautions should I take while adventuring?

Invest in essential safety gear such as hiking boots, a first-aid kit, and a reliable map or GPS device. Also, let someone know your planned route and stay aware of your surroundings to ensure a safe photography experience.

Capture Stunning Mountain Moments: Budget Photography Tips

Capturing stunning mountain moments doesn’t have to break the bank. With a few budget-friendly tips and techniques, you can elevate your photography game while exploring breathtaking landscapes! Read Interesting article: Essential Tips for Budget Underwater Adventure Photography

Capture Stunning Mountain Moments: Budget Photography Tips

Understanding Mountain Photography

What Makes Mountain Photography Unique?

Mountain photography has a distinct charm that pulls at my heartstrings. The grandeur of towering peaks, the textures of rocky terrains, and the tranquility of untouched nature create a canvas that’s hard to resist. I believe what makes mountain photography unique is not just the scenery but also the profound sense of adventure it evokes. Each mountain tells a story, and capturing that story requires an understanding of the landscape itself. I’ve found that the way I approach mountain photography is to immerse myself in the environment, allowing myself to feel its essence. When I’m out there, I try to connect with the surroundings, which often inspires my compositions and angles.

The Importance of Light and Weather Conditions

One thing I’ve learned is that lighting and weather can make or break your shots. Early mornings and late afternoons are magical times for photography, known as the golden hours. I remember one trip where I woke up before dawn, trekking to a viewpoint just in time to see the sun rise over the mountains. The soft, warm light transformed the rugged landscape into a breathtaking scene. On the flip side, I’ve also faced really harsh midday sun, which can wash out colors and create unflattering shadows. I recommend keeping an eye on the weather forecast; cloud cover can create stunning moodiness in your photos, while a clear sky might offer vibrant blue backdrops. So, if you’re able to, choose a day with dynamic weather for more dramatic shots.

Essential Photography Equipment on a Budget

Choosing the Right Camera for Mountain Photography

When it comes to selecting a camera, I always tell my friends that it’s not about having the most expensive gear, but rather understanding what you have and how to use it. While DSLRs and mirrorless cameras are great, I’ve seen some stunning mountain shots taken with compact cameras. If you’re starting out, consider what suits your needs best. I’ve used my trusty DSLR for years, but I also keep a small point-and-shoot for hikes where I want to travel light. It’s about finding a balance between quality and convenience. Read Interesting article: 10 Budget-Friendly Tips for Stunning Wildlife Photography

Affordable Lenses for Landscape Shots

Lenses can significantly impact your mountain photography. A wide-angle lens is often my go-to for landscapes, allowing me to capture the vastness of the scene. I’ve found that you don’t need the latest model; older lenses can be just as effective. For those on a budget, consider looking for second-hand options. Some of my best finds have come from local photography shops or online marketplaces. A 24-70mm lens is versatile enough for most situations, and I’ve used it to catch everything from sweeping vistas to close-up nature details.

Tripods: Budget-Friendly Options

A sturdy tripod is essential, especially for long exposures or low-light situations. I learned this the hard way after capturing blurry images due to shaky hands! There are budget-friendly tripods out there that don’t compromise on stability. I remember splurging a bit on a lightweight aluminum tripod that has served me well on countless hikes. Make sure to look for something that fits your camera and can handle the weight of your gear. Sometimes, local rental shops offer gear at an affordable price, which could be a great option for trying different tripods without a full purchase.

Using Smartphones for Stunning Shots

Smartphones have come a long way in photography, and I can’t tell you how many impressive mountain photos I’ve taken with mine. I often find myself reaching for my phone because it’s lightweight and easy to carry. Modern smartphones have great cameras with various features like HDR and portrait modes, which can make your mountain shots pop. Additionally, there are numerous apps available that can help enhance your photos right on your phone. I usually edit my smartphone images with a free app that allows me to adjust exposure and contrast, which can really elevate the final result.

Budget-Friendly Photography Techniques

Mastering Composition in Mountain Landscapes

When I first started exploring mountain photography, I quickly realized that composition can make all the difference in capturing a breathtaking shot. One of my favorite techniques is the rule of thirds. By dividing the frame into a grid of nine equal parts, I place the horizon along one of the horizontal lines or position key elements like a tree or peak along the vertical lines. This creates a more balanced and engaging image. I remember standing atop a ridge, adjusting my position to catch the sun setting behind a mountain peak, and it made all the difference in how the photo turned out. Trust me, exploring different angles and framing can breathe new life into your images. Don’t be afraid to get low to the ground or climb a bit higher for a unique perspective. The beauty of mountain landscapes is how they change with your viewpoint.

Utilizing Natural Light Effectively

Natural light is our best friend as photographers, especially in the mountains. I’ve discovered that the quality of light can transform a scene from ordinary to extraordinary. For instance, shooting during the golden hour not only adds warmth to my photos but also enhances the textures of the landscape. I often scout my locations in advance and mentally note where the light will hit at different times of day. I remember one evening, I was at a scenic overlook just as the sun dipped behind the mountains. The entire sky lit up in hues of pink and orange, creating a magical backdrop for my shot. Reflections on lakes can also amplify the beauty of lighting. If you’re near water, try to capture the reflection of the mountains in the water during those golden hours for a truly stunning effect. Read Interesting article: Capture the Wild: Budget Tips for Wildlife Adventure Photography

Long Exposure Techniques Without High-End Gear

I used to think that capturing long exposure shots required expensive equipment, but I’ve learned that with a bit of creativity, you can achieve stunning results on a budget. A sturdy tripod is essential for this, as it stabilizes your camera during longer exposures. One of my favorite techniques is to shoot waterfalls or flowing streams with a slow shutter speed. By using a neutral density filter, I can reduce the light entering the lens and achieve that silky smooth effect, even during the day. I remember experimenting with various shutter speeds at a mountain waterfall, and each one produced a different mood in the water. I recommend starting with a shutter speed of around 1/4 to 1 second and adjusting as needed. Even if you don’t have a filter, you can still use longer exposures during low light conditions, like dawn or dusk, to create ethereal effects in your shots.

Best Mountain Locations for Budget Photography

National Parks to Explore

Visiting national parks is one of the best ways to experience mountain photography without breaking the bank. The entry fees are often reasonable, and the stunning landscapes are worth every penny. Some of my favorite parks include Rocky Mountain National Park in Colorado and Glacier National Park in Montana. I remember my trip to Glacier, where I hiked along the scenic trails, capturing the vibrant colors of wildflowers against the backdrop of towering peaks. Each park offers unique perspectives and diverse ecosystems, so planning visits to several parks can provide an array of photographic opportunities.

Publicly Accessible Trails and Viewpoints

Sometimes the best views come from simple, accessible trails. I’ve found numerous local hiking spots that boast breathtaking views without requiring a hefty entrance fee. Places like Mount Tamalpais in California or the Appalachian Trail offer amazing vistas and are free to explore. I often pack a lunch and make a day out of it, exploring different viewpoints along the way. I’ve captured some of my most cherished photos from these hidden trails. A little research can lead to discovering local gems that are often overlooked.

Hidden Gems Off the Beaten Path

While popular destinations attract many photographers, don’t underestimate the beauty of lesser-known locations. I once stumbled upon a secluded lake surrounded by mountains that was off the typical tourist route. The solitude allowed me to connect with the scenery in a way I hadn’t experienced before. I recommend checking out local tourism websites or social media groups focused on hiking and photography. You might be surprised at how many hidden spots there are waiting to be explored. It’s often in these quiet places that I find the most inspiring scenes, free from the crowds.

Planning Your Photography Trip

When to Visit for Optimal Conditions

Timing can make a world of difference when it comes to mountain photography. Over the years, I’ve learned that each season offers its own unique charm. For instance, summer often brings lush green valleys and vibrant wildflowers that can add bursts of color to your photos. I remember hiking during this season in the Cascades, where the landscape was alive with color and energy. Autumn, on the other hand, transforms the mountains into a canvas of fiery reds, oranges, and yellows. I find that planning my trips around the fall foliage can yield some truly stunning results. Winter provides a different kind of beauty, with snow blanketing the peaks, creating a serene and magical atmosphere. I often check seasonal guides and local photography blogs to find out the best times to visit particular locations. Understanding the seasonal changes in the mountains can help us capture the breathtaking beauty of each landscape throughout the year.

Budgeting for Travel and Accommodations

Traveling to mountain locations doesn’t have to be an expensive endeavor. I’ve discovered that planning ahead is key to keeping costs down. I often set a budget before each trip, factoring in transportation, accommodation, and food. When it comes to accommodations, I love exploring options like camping or staying at budget-friendly hostels. Not only do they save money, but they also provide a unique experience. I once camped in a national forest, waking up to the sounds of nature and breathtaking views just outside my tent. If camping isn’t your thing, consider platforms like Airbnb for affordable stays with local hosts. These options can often be more budget-friendly than hotels, and they allow us to immerse ourselves in the local culture more deeply.

Finding Free or Low-Cost Activities

Mountain photography can be paired with a host of free or low-cost activities that enhance the experience. I love taking advantage of the many free hiking trails and scenic viewpoints available. I often research online for local hikes or viewpoints that provide incredible views without any entry fees. Many national and state parks host free events, such as guided hikes or photography workshops, which can be a fantastic way to learn while exploring. I remember joining a free night photography session at a park, where I learned about capturing the stars and the Milky Way above the mountains. It’s a great way to meet fellow photography enthusiasts while keeping costs at bay. Additionally, I try to pack my meals for the day to avoid pricey dining. A simple picnic with a view can be more rewarding than a meal at a restaurant, plus it allows us to fully enjoy the natural beauty around us.

Post-Processing on a Budget

Free Photo Editing Software Options

After a day of capturing stunning mountain imagery, the fun doesn’t stop! Editing is a crucial step in bringing our photos to life, and I’ve found several free editing software options that are both powerful and user-friendly. My go-to is GIMP, which has a range of tools similar to more expensive programs. I remember initially being intimidated by it, but with a bit of practice, I was able to enhance my images significantly. Another favorite is Lightroom Mobile, which offers a free version packed with useful features for editing on the go. I often edit my smartphone photos right after a hike while the memories are still fresh. These tools help me adjust exposure, contrast, and saturation, making my mountain landscapes pop even more.

Basic Editing Techniques to Enhance Your Shots

Even with great shots right out of the camera, a little editing can elevate our images to new heights. I usually start with adjusting the brightness and contrast to bring out details in the shadows and highlights. Cropping is another crucial step; I often refine my composition during this stage, ensuring that the focus is where I want it. I remember transforming a good shot into a great one just by adjusting the crop and applying a subtle vignette to draw the viewer’s eye to the center of the frame. I also love to use filters sparingly to enhance the mood of my photos, especially when capturing dramatic skies. I believe that less is often more when it comes to editing; it’s essential to keep the natural feel of the landscape while improving its beauty.

Sharing and Showcasing Your Work

Utilizing Social Media for Exposure

Once I’ve edited my photos, sharing them is one of my favorite parts of the process. Social media platforms like Instagram and Facebook are fantastic for showcasing our mountain photography. I love using relevant hashtags and engaging with fellow photographers to increase my reach. I remember my first post that gained traction simply because I shared it in a photography group. It felt amazing to connect with others who appreciated the same beauty I did! I also recommend participating in photo challenges or contests, as they can provide motivation and exposure. Engaging with a community that shares similar interests has helped me grow as a photographer and learn new techniques.

Creating a Photography Portfolio on a Budget

Building a portfolio doesn’t have to cost a fortune. I started by creating a simple website using platforms like Wix or WordPress, which offer free templates. This space allows me to showcase my best work while telling my story as a photographer. I also love creating themed photo books using online services to compile my favorite mountain shots. These books not only serve as a personal keepsake but can also be great conversation starters. I remember gifting one to a friend who had inspired my love for mountain photography. Sharing my journey through both online and physical formats has helped me connect with others and open doors for potential collaborations.

Community and Resources for Mountain Photographers

Online Forums and Groups for Budget Tips

Being part of a community can greatly enhance our photography journey. I’ve found numerous online forums and groups dedicated to mountain photography, where members share tips, gear recommendations, and budget-friendly advice. Platforms like Reddit and Facebook host groups that are incredibly helpful. I remember posting a question about affordable gear and received a wealth of suggestions from experienced photographers. Engaging with a community not only expands our knowledge but also provides support and encouragement. It can be reassuring to know we’re not alone in our challenges and triumphs in photography.

Workshops and Meetups for Learning Opportunities

While some workshops can be pricey, many local photography clubs or parks host affordable or even free workshops. I’ve participated in several local meetups where experienced photographers shared their knowledge on various topics, from composition to editing techniques. These events often allow us to practice our skills in a friendly environment. I recall one workshop where we had a chance to shoot together at a scenic overlook; it was not only informative but also a lot of fun! Networking with fellow photographers can lead to opportunities for collaboration and learning, which is invaluable in our growth as artists.

Frequently Asked Questions

What makes mountain photography unique?

Mountain photography is unique due to the grandeur of towering peaks, the textures of rocky terrains, and the tranquility of untouched nature. It evokes a profound sense of adventure, as each mountain tells a story that requires an understanding of the landscape to capture effectively.

What are the best times for mountain photography?

The best times for mountain photography are during the golden hours, which are early mornings and late afternoons. During these times, the light is soft and warm, enhancing the beauty of the landscape.

What type of camera should I use for mountain photography on a budget?

When selecting a camera for mountain photography on a budget, it’s important to understand how to use what you have rather than focusing on expensive gear. DSLRs, mirrorless cameras, and even compact cameras can produce stunning shots depending on your needs and preferences.

What lens is recommended for landscape shots in mountain photography?

A wide-angle lens is often recommended for landscape shots as it allows you to capture the vastness of the scene. Older lenses can also be effective and can often be found as affordable second-hand options.

Why is a tripod important for mountain photography?

A sturdy tripod is essential for mountain photography, especially for long exposures or low-light situations. It helps stabilize your camera to avoid blurry images caused by shaky hands.

Can I use my smartphone for mountain photography?

Yes, modern smartphones have come a long way in photography and can be very effective for mountain photography. They are lightweight and easy to carry, often equipped with features like HDR and portrait modes, and editing apps are available to enhance your images.

What composition techniques should I master for mountain landscapes?

One effective composition technique is the rule of thirds, where you divide the frame into a grid and position key elements along the grid lines. Exploring different angles and viewpoints can also significantly enhance your images.

How can I capture long exposure shots on a budget?

Capturing long exposure shots on a budget requires a sturdy tripod to stabilize your camera. You can achieve stunning results with a slow shutter speed, even without expensive equipment, particularly during low light conditions.

What are some budget-friendly locations for mountain photography?

National parks, publicly accessible trails, and hidden gems off the beaten path are all great budget-friendly locations for mountain photography. These places often offer stunning views without requiring high entrance fees.

How can I find free or low-cost activities while mountain photography?

Look for free hiking trails, scenic viewpoints, and free events hosted by national or state parks, such as guided hikes or photography workshops. Packing your meals can also save money while enhancing your outdoor experience.

Affordable Gear for Underwater Adventure Photography Beginners

Underwater adventure photography opens up a vibrant world filled with stunning visuals and unique experiences. If you’re a beginner, don’t worry! I’m here to help you dive in without breaking the bank. Read Interesting article: Essential Tips for Budget Underwater Adventure Photography

Affordable Gear for Underwater Adventure Photography Beginners

Understanding Underwater Adventure Photography

What is Underwater Photography?

Underwater photography is an exciting form of photography that involves capturing images beneath the surface of the water. Whether you’re in a pool, ocean, or a serene lake, the underwater world is full of vibrant life and beautiful scenery that simply cannot be found on land. I remember the first time I submerged my camera, the thrill of discovering a whole new environment was exhilarating. From colorful coral reefs to schools of fish, the underwater realm has its own unique beauty waiting to be captured. To further enhance your experience, check out Your Guide to Underwater Adventure Photography Locations.

Different Types of Underwater Photography

When it comes to underwater photography, there are various styles to explore. Here are a few that I find especially captivating:

  • Marine Life Photography: This focuses on capturing the beauty of underwater creatures. I’ve spent hours watching fish dart around, and each photo tells a story of their underwater world.
  • Underwater Landscape Photography: This style highlights the scenery, like reefs and underwater caves. The play of light and shadow, especially with sunlight filtering through water, creates stunning compositions.
  • Wreck Photography: Many divers explore and photograph sunken ships or planes. I’ve found that these sites are often teeming with marine life, providing an eerie yet fascinating backdrop.
  • Freediving and Snorkeling Photography: Perfect for those who want to capture the essence of the ocean without heavy gear. I started with snorkeling, and it allowed me to get comfortable in the water while snapping some beautiful shots.

Benefits of Underwater Photography

There are so many reasons to try underwater photography, and I can personally vouch for the benefits:

  • Connection with Nature: Being underwater fosters a unique connection with marine life. It’s a peaceful escape from everyday life, allowing you to appreciate the beauty of nature.
  • Creative Expression: Every underwater shot can be different, encouraging creativity. I often find myself experimenting with angles and lighting, which makes every dive an adventure.
  • Encouragement for Conservation: Capturing the beauty of the underwater world can inspire others to protect it. I’ve seen my photos spark conversations about marine conservation, which is vital in today’s world.
  • Physical Benefits: Diving and swimming provide an excellent workout. I’ve found that regularly participating in underwater photography keeps me active and healthy.

Essential Gear for Beginners

Underwater Cameras

When I first started underwater photography, I quickly learned that my regular camera just wouldn’t cut it. Investing in a good underwater camera is crucial. There are many affordable options that provide excellent quality. I recommend looking for cameras that are waterproof, have a good frame rate, and can handle low-light conditions effectively.

Waterproof Housing

If you already have a camera, consider buying waterproof housing. It allows you to take your existing gear underwater without risking damage. I remember the excitement of finding a compatible housing for my camera; it opened up so many new possibilities. Just make sure to check the depth rating to ensure it meets your diving needs.

Underwater Lenses

Having the right lens can significantly enhance your underwater photography experience. Wide-angle lenses are fantastic for capturing expansive underwater landscapes and schools of fish. Macro lenses are perfect for photographing small creatures and intricate details like coral or textures on fish. I’ve found that switching between lenses can bring a fresh perspective to my underwater shots.

Lighting Equipment

Underwater lighting can be tricky, but it’s essential for taking vibrant and colorful photos. Natural light can only penetrate water to a certain depth, so using external lights or strobes can make a big difference. I learned this the hard way after taking some dull photos without any extra light. Investing in a good lighting setup can elevate your images dramatically.

Stabilization Gear

Underwater currents and movements can make it hard to capture steady shots. Using a stabilizer or tripod can help keep your camera steady, ensuring clearer images. I initially struggled with blurriness in my photos, but once I started using stabilization gear, I noticed a significant improvement in my results.

Affordable Options for Underwater Photography Gear

Best Budget Underwater Cameras

When I began my journey into underwater photography, I quickly realized that I didn’t need to spend a fortune to get quality gear. There are plenty of budget-friendly underwater cameras that deliver fantastic results. For instance, I found the Olympus Tough TG-6 to be an excellent choice for beginners. It’s waterproof, durable, and packed with features like a fast autofocus and great macro capabilities. Another option is the Canon PowerShot D30, which is not only affordable but also offers good image quality in challenging underwater conditions. I remember being amazed at how well these cameras performed, even on a tight budget. If you’re looking for more insights, check out Capture Stunning Underwater Photos on a Budget Adventure.

Affordable Waterproof Housing Solutions

If you already own a camera and want to dive into underwater photography without breaking the bank, consider affordable waterproof housings. Brands like Sea Frogs and Meikon offer good-quality housing that won’t empty your wallet. I purchased a housing for my DSLR from Sea Frogs, and it fit perfectly while providing excellent protection. When shopping for waterproof housing, always check reviews and ensure it’s compatible with your camera model. I found that having the right housing transformed my photography experience, allowing me to use my trusted gear underwater.

Cost-Effective Underwater Lighting Options

Lighting can make or break underwater photos, but you don’t need to splurge to get great results. I started with simple, budget-friendly options like LED video lights. Brands like Neewer offer affordable underwater lights that provide excellent illumination without burning a hole in your pocket. I learned that the key is to experiment with the positioning of your light; sometimes just a slight adjustment can dramatically change the mood of a shot. If you’re on a tight budget, consider DIY solutions too, like using a flashlight with a diffusion filter, which can work wonders in dark conditions.

Inexpensive Accessories for Underwater Photography

Accessories can enhance your underwater photography without costing too much. For example, I invested in a simple floating strap to prevent my camera from sinking if I accidentally dropped it. It gave me peace of mind while I focused on capturing the underwater beauty around me. Additionally, consider getting a silicone sealant to maintain your gear and avoid leaks. I found that having a few extra batteries and memory cards handy was also essential; I didn’t want to miss any magical moments underwater because of a dead battery or full memory card.

Comparative Analysis of Popular Gear

Top Underwater Cameras Under $500

As I explored different underwater cameras, I often found myself drawn to options under $500 that performed well. For instance, the Fujifilm FinePix XP140 is a fantastic compact option that’s waterproof up to 82 feet, making it perfect for many diving adventures. I also discovered that the GoPro HERO9 Black is a popular choice, especially for those who enjoy action shots and video. It’s compact, versatile, and the image stabilization feature is a game changer for underwater shots. I loved how easy it was to carry around, and the quality of both photos and videos exceeded my expectations for the price point.

Comparison of Waterproof Housing Brands

Choosing the right waterproof housing can be overwhelming given the variety of brands available. I’ve compared several, and two brands that stood out to me were Aquatica and Ikelite. Aquatica housings tend to be robust and are often praised for their build quality and ease of use. On the other hand, Ikelite housings are typically more affordable and offer a great balance of performance and value. I remember the first time I used my Ikelite housing; it was easy to operate and allowed me to focus on capturing the moments rather than worrying about my gear.

Best Budget Lighting Kits

When it comes to lighting, there are several budget kits that impressed me. The YSD-2 underwater strobe light offers excellent performance for its price, providing enough power to illuminate even deeper dives. Another great option I found is the Underwater Kinetics Light Cannon, which is both effective and affordable. I learned that having at least one quality light source can make a significant difference in my photos, enhancing colors and details that might otherwise be lost in the water.

Getting Started with Underwater Photography

Basic Techniques for Beginners

When I first started out in underwater photography, I quickly realized that there are some basic techniques that can make a world of difference. One of the first things I learned was the importance of buoyancy control. It took me a bit of practice to get the hang of it, but mastering this skill can really help you maintain your position and avoid unwanted movement while shooting. I recommend using a buoyancy control device (BCD) to help manage your buoyancy, allowing you to focus on capturing stunning images rather than struggling to stay still.

Another technique I found invaluable was understanding how to compose my shots. I often think about the rule of thirds, where I mentally divide the frame into a grid, placing my subject at the intersections. This simple adjustment can create a more dynamic and balanced photo. I also learned to pay attention to the background; a clean, uncluttered background can make your subject pop. Sometimes, I would change my position slightly to avoid distractions that could take away from my main focus.

Lastly, don’t forget to experiment with angles! Shooting from above, below, or to the side can dramatically change the perspective of your images. I’ve found that getting low to the ground or even at eye level with your subject often results in more engaging and impactful photos.

Common Mistakes to Avoid

As I navigated the world of underwater photography, I made my share of mistakes. One of the biggest was not checking my gear before heading into the water. I learned the hard way that a small leak in my housing could ruin a dive and a day’s worth of potential photos. I recommend always doing a dry test before every dive to ensure everything is functioning correctly.

Another mistake I made was not paying attention to my settings. It can be easy to forget about adjusting white balance and ISO, especially in varying light conditions underwater. I found that using manual settings instead of automatic helped me control the exposure better. I also discovered that shooting in RAW format gives me more flexibility during editing, allowing me to recover details that might get lost in JPEG.

Lastly, I often rushed my shots, which led to blurry images. It’s easy to get excited and forget about stability. Taking a moment to steady my breathing and focus my camera helped me capture clearer photos. I learned that patience is key, and sometimes waiting for the right moment can result in breathtaking shots.

Tips for Shooting in Different Water Conditions

Throughout my underwater adventures, I’ve encountered a variety of water conditions, and each one requires a different approach. For instance, in clear water, I’ve found that I can use natural light effectively. However, I always try to get as close to my subject as possible to avoid losing details. I remember a dive in the Caribbean where the visibility was incredible, and I was able to capture vibrant colors and details I hadn’t seen before.

In contrast, shooting in murky or less clear water presents its own challenges. I quickly learned that using artificial lighting became essential in these conditions. A good strobe can help cut through the haze, bringing out the colors that may otherwise be washed out. I also started to pay more attention to my composition—adding elements like rocks or plants in the foreground can provide depth and context to my photos.

Another thing I noticed is that currents can dramatically affect my shooting experience. During my first dive with strong currents, I struggled to maintain position while trying to capture images. Now, I make it a priority to assess the current before diving and plan my shots to make the most of my time. Sometimes, I will find a spot where I can anchor myself against a rock or coral, allowing me to focus on taking photos without being swept away.

Post-Processing Tips for Underwater Photography

Best Software for Editing Underwater Photos

Once I started capturing images underwater, I quickly realized that post-processing is just as important as taking the photos. For editing, I found several software options that cater to different levels of expertise. Adobe Lightroom became my go-to choice because of its user-friendly interface and powerful tools. It allows me to make adjustments to exposure, contrast, and color balance, which are especially crucial in underwater photography. I’ve also experimented with Adobe Photoshop for more advanced edits, like removing distractions or fine-tuning specific details. For those new to editing, I recommend starting with GIMP, a free alternative that offers impressive capabilities without the cost.

Basic Editing Techniques

When it comes to basic editing techniques, I often start with cropping and straightening my images to ensure they’re visually balanced. I found that adjusting the exposure can significantly improve the clarity of underwater shots, especially if the lighting conditions were less than ideal. Additionally, tweaking the contrast helps to make colors pop, which is essential for capturing the vibrant marine life. I also learned the importance of sharpening my images slightly to highlight details that might get lost in the water.

Enhancing Colors and Details

One of the biggest challenges in underwater photography is the loss of color due to water absorption. To combat this, I often adjust the white balance to bring back the natural hues of the underwater world. I usually lean towards cooler tones to restore the blues and greens that can sometimes appear washed out. Another trick I’ve discovered is using saturation and vibrance sliders to enhance colors without overdoing it. This approach allows me to breathe life into my images while keeping them looking natural. I remember the first time I applied these techniques to a photo of a coral reef; the transformation was astonishing!

Resources for Further Learning

Online Courses and Tutorials

As I continued my journey in underwater photography, I found that learning from others was invaluable. I enrolled in several online courses that focused specifically on underwater techniques. Websites like Udemy and Skillshare offer courses that cater to various skill levels. These platforms not only provide structured learning but also allow you to learn at your own pace. I particularly enjoyed watching tutorials on YouTube, where many photographers share their experiences and tips.

Books on Underwater Photography

Books can also be a fantastic resource for deepening my understanding of underwater photography. I’ve read “Underwater Photography Guide” by Scott Gietler, which covers everything from gear to techniques. The insights and tips shared in these books have shaped my approach to photography significantly. I recommend checking out your local library or bookstore for titles that inspire you.

Photography Communities and Forums

Being part of a community can make a world of difference. I joined forums like Wetpixel and Underwater Photography Community, where I connect with fellow enthusiasts. These platforms are filled with advice, critiques, and support from others who share the same passion. Participating in discussions and sharing my work has helped me grow as a photographer, and I’ve appreciated the feedback I’ve received from more experienced individuals.

Final Thoughts

Underwater adventure photography has truly enriched my life in ways I never anticipated. It’s become more than just a hobby; it’s a way to connect with nature, express creativity, and even inspire others to appreciate the beauty beneath the waves. I encourage anyone interested in this field to dive in—literally! With the right mindset, gear, and a willingness to learn, you can create stunning images that tell the story of the underwater world. Remember, every shot is a chance to capture a moment, so embrace the adventure with an open heart and a curious mind.

Frequently Asked Questions

What is underwater photography?

Underwater photography is a form of photography that involves capturing images beneath the surface of the water, showcasing the vibrant life and beautiful scenery found in pools, oceans, or lakes.

What are some popular styles of underwater photography?

Some popular styles include Marine Life Photography, Underwater Landscape Photography, Wreck Photography, and Freediving and Snorkeling Photography.

What are the benefits of underwater photography?

Benefits include a unique connection with nature, opportunities for creative expression, encouragement for marine conservation, and physical fitness from diving and swimming.

What essential gear is needed for beginners in underwater photography?

Beginners should consider investing in an underwater camera, waterproof housing for existing cameras, appropriate underwater lenses, lighting equipment, and stabilization gear.

Can you recommend any budget-friendly underwater cameras?

Yes, the Olympus Tough TG-6 and Canon PowerShot D30 are excellent budget-friendly underwater cameras that deliver good quality results.

What should I look for in waterproof housing for my camera?

When choosing waterproof housing, ensure it is compatible with your camera model and check reviews for quality and depth rating to match your diving needs.

What are some common mistakes to avoid in underwater photography?

Common mistakes include not checking gear for leaks before diving, neglecting to adjust camera settings, and rushing shots which can lead to blurriness.

What editing software is recommended for underwater photos?

Adobe Lightroom is highly recommended for its user-friendly interface, while Adobe Photoshop can be used for more advanced editing. GIMP is a great free alternative for beginners.

How can I enhance colors and details in my underwater photos?

Adjust the white balance to restore natural hues, and use saturation and vibrance sliders to enhance colors without overdoing it. Experimenting with these settings can significantly improve your images.

Where can I find resources for further learning about underwater photography?

Online courses from platforms like Udemy and Skillshare, books on underwater photography, and photography communities and forums such as Wetpixel and Underwater Photography Community are great resources for learning.

Your Guide to Underwater Adventure Photography Locations

Underwater adventure photography opens up a vibrant world filled with color, life, and stunning landscapes. Whether you’re a seasoned pro or a curious beginner, there’s so much to explore beneath the waves. If you’re looking to optimize your experience without breaking the bank, check out Essential Tips for Budget Underwater Adventure Photography.

Your Guide to Underwater Adventure Photography Locations

Understanding Underwater Adventure Photography

What is Underwater Adventure Photography?

Underwater adventure photography is more than just snapping pictures beneath the surface; it’s about capturing the essence of life in aquatic environments. I remember the first time I submerged my camera into the ocean—the thrill of witnessing a bustling coral reef filled with colorful fish took my breath away. This style of photography allows us to document the beauty of marine life, the intricate details of underwater ecosystems, and the emotions that come with exploring the deep blue.

To me, it’s a blend of adventure and art. Each dive presents a new opportunity to capture unique moments, whether it’s the graceful glide of a manta ray or the intricate patterns of coral. When I look at my photos, I’m reminded not just of the visuals but of the experience—my heart racing as I swam alongside a school of fish or the tranquility I felt while gliding through a kelp forest. For anyone with a love for both photography and the ocean, it’s a perfect match.

Essential Equipment for Underwater Photography

Having the right gear can make all the difference in your underwater photography journey. From my own experiences, I’ve learned that investing in good equipment is crucial for capturing stunning underwater images. Here’s a breakdown of what you’ll need:

  • Camera: A good waterproof camera or a DSLR with an underwater housing is essential. I started with a compact underwater camera, which was lightweight and easy to use. As I grew more comfortable, I upgraded to a DSLR for greater control.
  • Underwater Housing: If you opt for a DSLR, make sure to invest in high-quality underwater housing. This keeps your camera safe from water damage. I once made the mistake of using subpar housing, and it almost cost me my gear!
  • Strobe Lights: Natural light diminishes as you go deeper, so having strobe lights helps illuminate your subjects and brings out vibrant colors. I found that using a strobe made my photos pop, especially when photographing coral reefs.
  • Wide-Angle Lens: A wide-angle lens is great for capturing expansive underwater scenes. I often find that many of my best shots come from using a lens that allows me to capture both the foreground and background.
  • Filters: Color correction filters can help bring back the colors lost in deeper water. I often use a red filter when I’m diving shallow to enhance the reds and oranges of the coral.
  • Buoyancy Control Device (BCD): A BCD is crucial for maintaining proper buoyancy and positioning while photographing. It allows you to stay still in the water, reducing movement and ensuring your shots are steady.

Photography Techniques for Underwater Environments

Once you have your gear ready, the next step is mastering the techniques that will help you capture stunning images. Having dived in various locations, I’ve picked up a few tricks along the way that I believe can elevate your underwater photography:

  • Control Your Buoyancy: Maintaining control over your buoyancy is key to stable shots. Practicing this skill has allowed me to float effortlessly while framing my shots without disturbing marine life.
  • Use Natural Light: If you’re diving in shallow waters, take advantage of natural light. I love experimenting with angles and shooting upwards to capture rays of sunlight filtering through the water. It creates a magical effect.
  • Get Close: Underwater photography can sometimes distort distances. I’ve found that getting as close as possible to your subject makes for more impactful photos. It immerses viewers in the scene and captures intricate details.
  • Be Patient: Patience is key in underwater photography. I often wait for the right moment—like a fish swimming into the perfect position—before clicking the shutter. It’s about capturing that fleeting instant that tells a story.
  • Experiment with Angles: Changing your perspective can dramatically enhance your photos. I love shooting from below, which can give a sense of grandeur to smaller subjects like nudibranchs or sea turtles.

Each dive is an adventure, filled with unique opportunities to learn and grow as a photographer. I’ve discovered that while the right gear and techniques are essential, what truly makes underwater photography special is the connection we build with the ocean and its inhabitants. The next time you gear up for a dive, remember that you’re not just capturing images; you’re telling a story about the beauty that lies beneath the waves.

Top Underwater Adventure Photography Locations Worldwide

The Great Barrier Reef, Australia

The Great Barrier Reef has always been a bucket-list destination for underwater photographers, and for good reason. This sprawling reef ecosystem is home to thousands of marine species, vibrant coral formations, and crystal-clear waters. I remember my first dive here; the sheer variety of life was overwhelming. From the colorful clownfish dancing among anemones to the majestic sea turtles gliding effortlessly, every moment felt like a dream.

Whether you’re photographing the coral gardens of the Whitsundays or exploring the famous Cod Hole, there’s no shortage of subjects. I often found that early morning dives offered the best lighting and the least crowded experience. Just remember to respect the environment and follow local guidelines to preserve this natural wonder.

Blue Hole, Belize

The Blue Hole is a unique underwater sinkhole famous for its deep blue waters and fascinating marine life. When I dived here, I was struck by the dramatic underwater cliffs and the chance to see species like nurse sharks and giant groupers. The water clarity is exceptional, which really allows for stunning photographs. I found that diving deeper into the hole offered fantastic opportunities for capturing the contrasts of light and shadow against the blue backdrop.

This location is a photographer’s paradise, but it’s essential to plan your dive carefully. The best time to visit is during the dry season, from late November to mid-April, when visibility is at its peak. For those on a budget, I recommend checking out Capture Stunning Underwater Photos on a Budget Adventure.

Palau, Micronesia

Palau is often referred to as one of the last underwater paradises. For me, diving in the Rock Islands was one of the most memorable experiences. The stunning coral reefs, abundant marine life, and vibrant underwater landscapes make it a haven for photographers. I was particularly captivated by the Jellyfish Lake, where you can swim among non-stinging jellyfish—a surreal experience that makes for incredible photos.

In Palau, I learned that patience pays off. Waiting for the perfect moment to capture a passing manta ray or a school of fish can lead to some breathtaking shots. I highly recommend taking the time to explore various dive sites, as each offers something special.

Red Sea, Egypt

The Red Sea is renowned for its rich biodiversity and stunning coral reefs. I recall diving in places like Sharm El Sheikh and the Sinai Peninsula, where I encountered everything from vibrant lionfish to graceful dolphins. The visibility is often fantastic, making it easier to capture the vibrant colors of the coral and fish.

One of my favorite dives was at the Thistlegorm wreck, which is not only an underwater museum of history but also a fantastic site for photography. The way light filters through the wreck and the surrounding life thriving there creates a unique atmosphere. Timing your visit during the cooler months can enhance the experience, as the water is clearer and the marine life is more active.

Galápagos Islands, Ecuador

The Galápagos Islands are another dream destination for underwater adventure photography. The unique marine life, including sea lions, hammerhead sharks, and vibrant marine iguanas, offers endless photographic opportunities. I remember diving at Wolf and Darwin Islands and being awestruck by the sheer number of schools of fish and the majestic creatures that inhabit the waters.

One tip I learned from my experience is to stay flexible with your dive plans. The currents can be unpredictable, and often the best experiences come from following the movement of the marine life. The Galápagos are best visited during the dry season, from June to November, when the waters are cooler but teeming with life.

Maldives

The Maldives is well-known for its stunning atolls and crystal-clear waters. I’ve had some of my best underwater experiences here, especially while diving in sites like Maaya Thila and Fish Head. The colorful reefs and the diverse marine life, including manta rays and whale sharks, truly take your breath away. I remember how exhilarating it was to capture a manta ray gliding through the water, its wings outstretched in grace.

For photographers, the Maldives offers a chance to shoot both wide-angle landscapes and close-up details. I found that the best time to visit is between November and April, when the weather is ideal and visibility is fantastic.

Key Largo, Florida, USA

If you’re looking for a more accessible dive destination, Key Largo should be on your list. It’s home to the John Pennekamp Coral Reef State Park, where I experienced some fantastic dives. The vibrant coral reefs, along with the famous Christ of the Abyss statue, make for excellent photo opportunities.

What I love about diving in Key Largo is the variety of dive sites and the chance to encounter diverse marine life, from colorful fish to playful dolphins. The water is generally warm year-round, making it a suitable destination at any time.

Silfra Fissure, Iceland

For a unique underwater experience, Silfra Fissure in Iceland offers something completely different. The crystal-clear glacial waters provide stunning visibility, allowing you to photograph the incredible tectonic rift between the North American and Eurasian plates. I was fascinated by the surreal underwater landscapes, filled with vibrant blue hues and fascinating rock formations.

This dive is best suited for those who enjoy cold-water diving, as temperatures can drop significantly. But trust me, the experience is well worth it. I found that visiting during the summer months provided the best conditions, with calmer waters and excellent visibility.

When to Visit: Seasonal Considerations

Best Time of Year for Each Location

Timing your underwater photography adventure is crucial for capturing the best images. Each location has its own ideal seasons. For example, I’ve found that the best time to visit the Great Barrier Reef is between June and November when the weather is calm and visibility is at its peak. Similarly, the Maldives shines between November and April, making it a prime choice for divers seeking clear waters and abundant marine life.

In Belize, the dry season from late November to mid-April is perfect for diving the Blue Hole, ensuring you get the best visibility. If you’re dreaming of diving in Palau, aim for the months of April to June for optimal conditions and a chance to see the famous jellyfish bloom. Each of these locations comes alive during its respective season, and I can attest that planning your trip around these periods can make a world of difference in your photography.

Weather Conditions and Visibility

Weather conditions can dramatically impact your diving experience. I remember a dive in the Red Sea where the currents were strong, and visibility was compromised due to a recent storm. It was a reminder that while we can plan our dives, nature ultimately decides what we’ll get to see. The best visibility tends to be found during the dry seasons; for example, the Galápagos Islands are best visited from June to November when the water is cooler, and the chances of spotting marine wildlife increase.

Always check the local weather forecasts before your dive trip. I often consult dive shops or local experts for real-time updates about water conditions. Good visibility can elevate your underwater photography, helping you capture the vibrant colors and intricate details of the marine environment.

Marine Life Migration Patterns

One of the most exciting aspects of underwater photography is the chance to witness and photograph marine life during their migration patterns. In my experience, timing my dives to coincide with these migrations often resulted in breathtaking encounters. For instance, if you dive in the Galápagos during the migration of hammerhead sharks, you’re in for a treat! Similarly, the Maldives sees whale sharks cruising through its waters, especially during certain months.

In the Red Sea, I’ve noticed that the months of late summer attract large numbers of reef fish and pelagic species, making it an excellent time for underwater photography. Learning about the seasonal patterns of marine life can help you not only plan your trips but also enhance your photography portfolio. Connecting with local dive operators can provide valuable insights into when and where to spot specific species, creating opportunities for capturing those elusive shots that can define your underwater adventures.

Where to Stay: Accommodation Options

Resorts and Liveaboards

Finding the right place to stay can greatly enhance your underwater photography experience. I’ve had my share of stays at luxurious resorts that offer direct access to dive sites, making early morning dives a breeze. In the Maldives, for example, I loved staying at resorts that offered packages with daily diving. This not only saved time but also allowed me to meet fellow divers and share tips about photography.

Liveaboard trips have also become one of my favorite ways to dive. They allow you to explore multiple dive sites without the hassle of changing accommodations constantly. I remember a week-long liveaboard in Palau where we dove at some of the most stunning locations, often having the sites all to ourselves. The convenience of having meals prepared and your gear set up for you can make the diving experience even more enjoyable.

Budget-Friendly Options

Not everyone can splurge on luxury resorts or liveaboards, and I completely understand that. I’ve found that there are many budget-friendly options available without compromising on the diving experience. In Key Largo, I discovered cozy hostels and motels that were just a short drive from dive shops. I was amazed to find that these places often had great amenities and friendly atmospheres. Plus, the money saved could be used for extra dive trips! For more tips on budget-friendly photography, check out Capture the Wild: Budget Tips for Conservation Photography.

In addition to hostels, I recommend looking for guesthouses or Airbnb options. I’ve had wonderful stays in local homes where the hosts often provide valuable advice on the best dive sites and conditions. This kind of personal connection can enhance your experience, making it even more memorable.

Proximity to Dive Sites

When choosing your accommodation, being close to dive sites can be a game-changer. I’ve learned the hard way that a long commute can cut into precious dive time. For example, in Belize, I opted for a dive resort that was a short boat ride away from the Blue Hole and other fantastic sites. It allowed me to maximize my underwater photography sessions and have more flexibility with dive schedules.

Before booking, I always check the distance to the nearest dive shop and the dive spots I’m most excited about. Many resorts offer free shuttle services or packages that include diving, which can be super convenient. Proximity not only enhances convenience but also allows you to take advantage of early morning dives when the light is perfect for photography.

Frequently Asked Questions

What is Underwater Adventure Photography?

Underwater adventure photography is the practice of capturing the essence of life in aquatic environments, documenting the beauty of marine life and underwater ecosystems.

What essential equipment do I need for underwater photography?

You will need a good waterproof camera or a DSLR with underwater housing, strobe lights for illumination, a wide-angle lens for expansive shots, color correction filters, and a buoyancy control device (BCD) for stability.

How can I improve my underwater photography techniques?

To improve your techniques, control your buoyancy, use natural light, get close to your subjects, be patient, and experiment with different angles to enhance your photos.

What are some top locations for underwater adventure photography?

Some top locations include the Great Barrier Reef in Australia, Blue Hole in Belize, Palau, the Red Sea in Egypt, the Galápagos Islands, the Maldives, and Key Largo in Florida, USA.

When is the best time to visit the Great Barrier Reef for photography?

The best time to visit the Great Barrier Reef is between June and November when the weather is calm and visibility is at its peak.

What are the ideal conditions for diving in the Blue Hole?

The best time to dive in the Blue Hole is during the dry season, from late November to mid-April, when visibility is exceptional.

What type of marine life can I expect to see in Palau?

In Palau, you can expect to see stunning coral reefs, abundant marine life, and unique experiences like swimming among non-stinging jellyfish in Jellyfish Lake.

What should I consider when choosing accommodation for diving trips?

Consider proximity to dive sites, the type of accommodation (such as resorts or liveaboards), and budget-friendly options to enhance your underwater photography experience.

How does weather affect underwater photography?

Weather conditions can impact visibility and marine life encounters. It’s best to dive during dry seasons for optimal visibility and to check local weather forecasts before your dive trip.

What should I do to maximize my underwater photography sessions?

To maximize your sessions, choose accommodations close to dive sites, plan dives during ideal seasons, and stay flexible with your dive plans to follow marine life movements.