Web Analytics

Recent Posts

Capture Candid Moments: Urban Photography Tips for Travelers

Urban photography is an exciting journey that captures the essence of city life. With a keen eye for candid moments, travelers can create stunning visual stories that resonate with their experiences. For those looking to enhance their skills, check out 10 Tips for Stunning Urban Cityscape Photography.

Capture Candid Moments: Urban Photography Tips for Travelers

Understanding Urban Photography

What is Urban Photography?

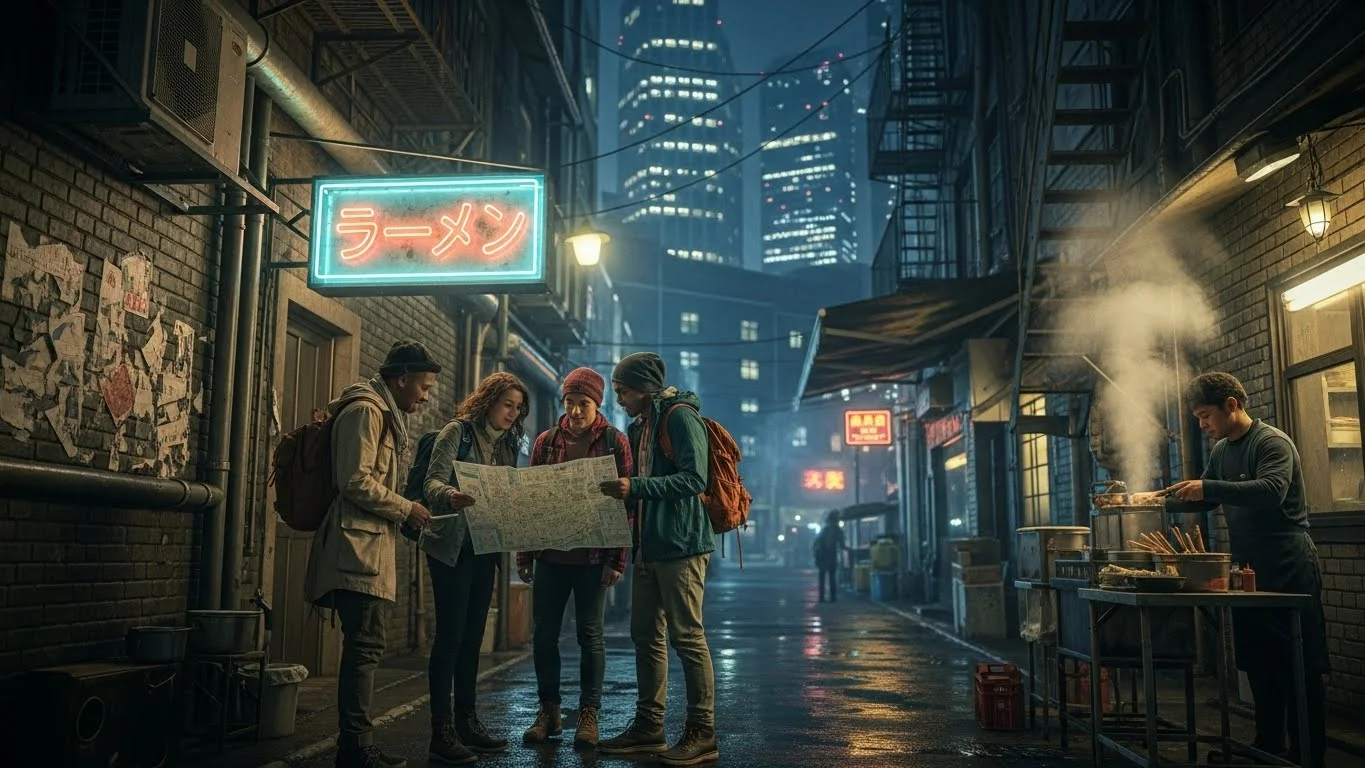
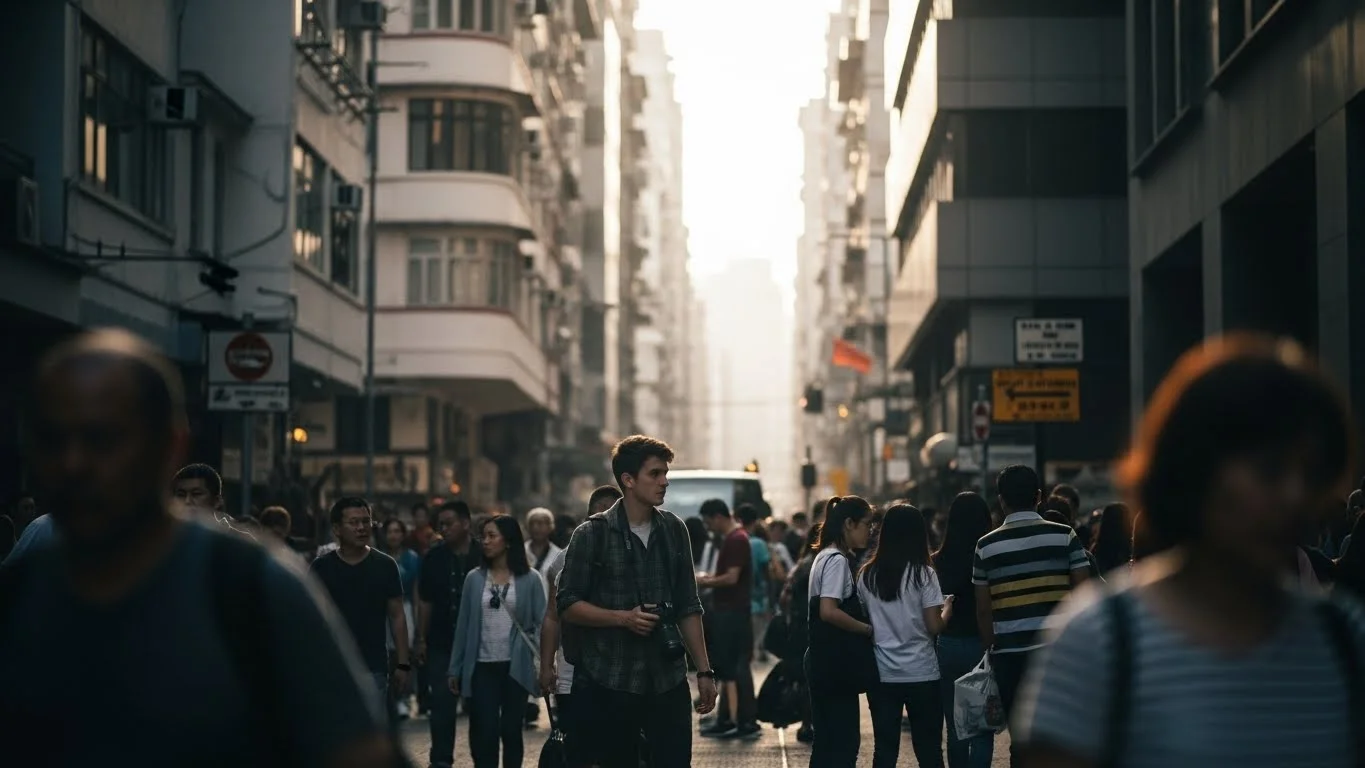
Urban photography, for me, is more than just snapping pictures of buildings or streets; it’s about capturing the pulse of a city. It’s the lively interactions between people, the unique architecture, and the everyday stories unfolding in urban spaces. I remember my first trip to New York City, where I wandered through the streets, my camera in hand, trying to freeze those fleeting moments that tell a bigger story. I realized that every street corner had something special to offer, and it was my job to capture that essence.

The Importance of Candid Moments

Candid moments are the heart of urban photography. They show life in its truest form—raw, unfiltered, and often beautiful. I’ve found that some of my favorite photos are those taken when people aren’t posing or aware of the camera. For instance, I once captured a little girl chasing pigeons in a park, her laughter filling the air. Those moments reveal emotions and stories that a posed shot simply can’t convey. It’s about being present, observing, and waiting for the right moment to click the shutter.

Essential Equipment for Urban Photography

Choosing the Right Camera

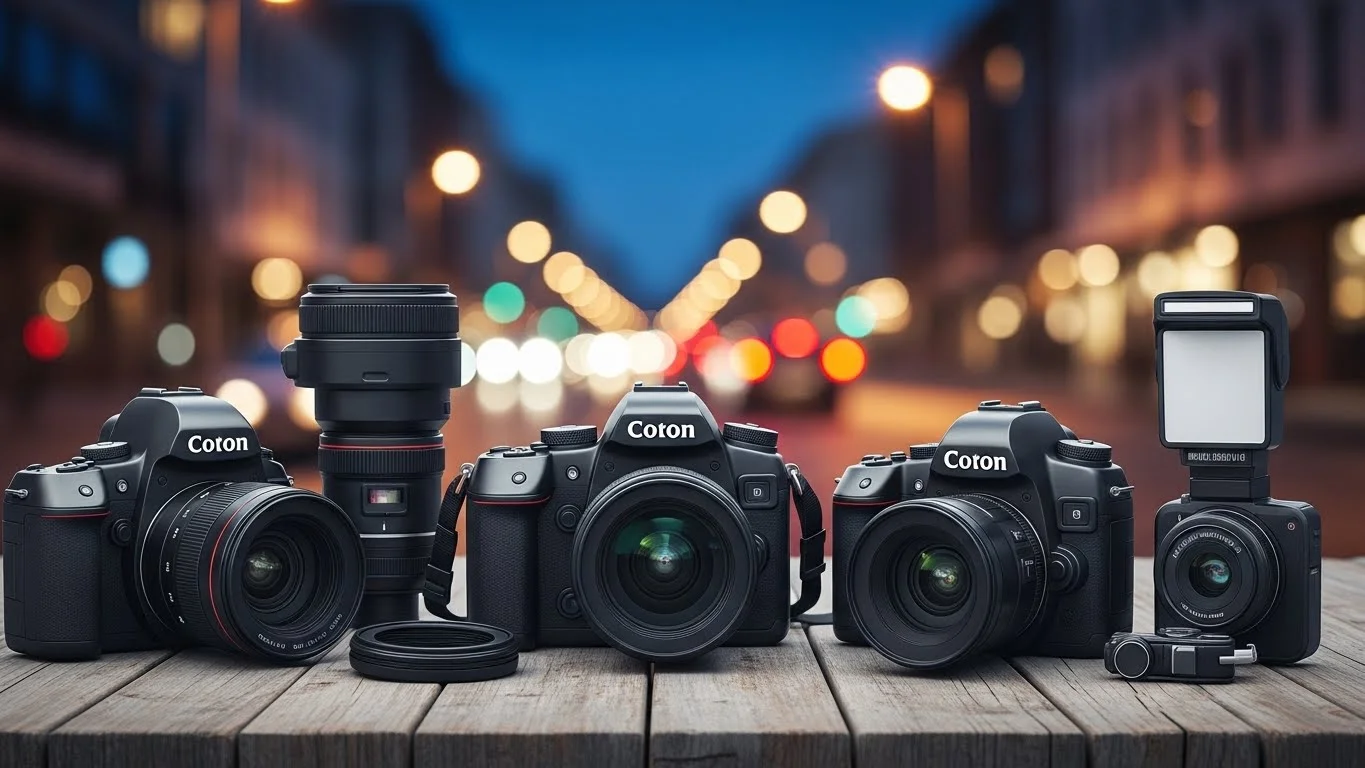
When it comes to urban photography, the camera you choose can make a significant difference. I’ve experimented with various cameras over the years, and while I appreciate the versatility of DSLRs, I often lean towards mirrorless cameras for their compact size and lightweight design. They’re perfect for traveling, as I can easily carry them around without feeling weighed down. If you’re new to photography, even a good smartphone camera can work wonders. I’ve seen stunning urban shots taken with just a phone!

Lens Selection for Urban Settings

The lens you pick can greatly influence your perspective in urban photography. I usually carry a couple of lenses: a wide-angle lens for capturing sweeping cityscapes and a prime lens for street portraits. Wide-angle lenses allow me to fit more of the scene into the frame, which is especially useful when shooting tight spaces. On the other hand, a prime lens with a larger aperture helps me focus on subjects while blurring out the busy background, creating a beautiful depth of field. I recommend experimenting with different lenses to find what suits your style best.

Accessories to Enhance Your Shots

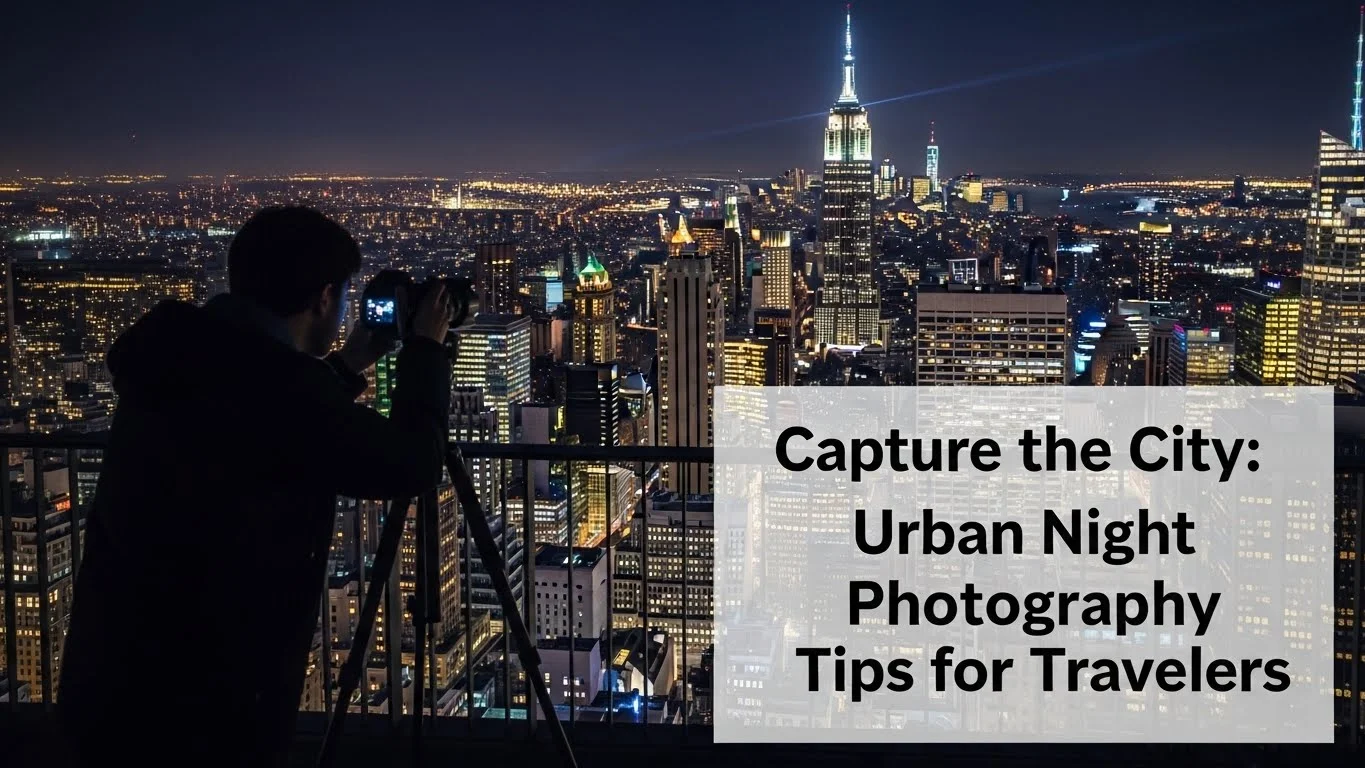
Accessories can make a world of difference in urban photography. A sturdy tripod is essential for low-light conditions or long exposures, which I often use when capturing city lights at night. I also carry extra batteries and memory cards—trust me, you don’t want to run out of power or storage while on a photography spree! Additionally, a good camera strap can help keep your gear secure while you’re moving around, and a lens cleaning kit is handy for quickly wiping away dust or smudges. For those interested in urban night photography, I highly recommend checking out Capture the City: Urban Night Photography Tips for Travelers.

Best Times for Urban Photography

The Golden Hour: Timing Your Shots

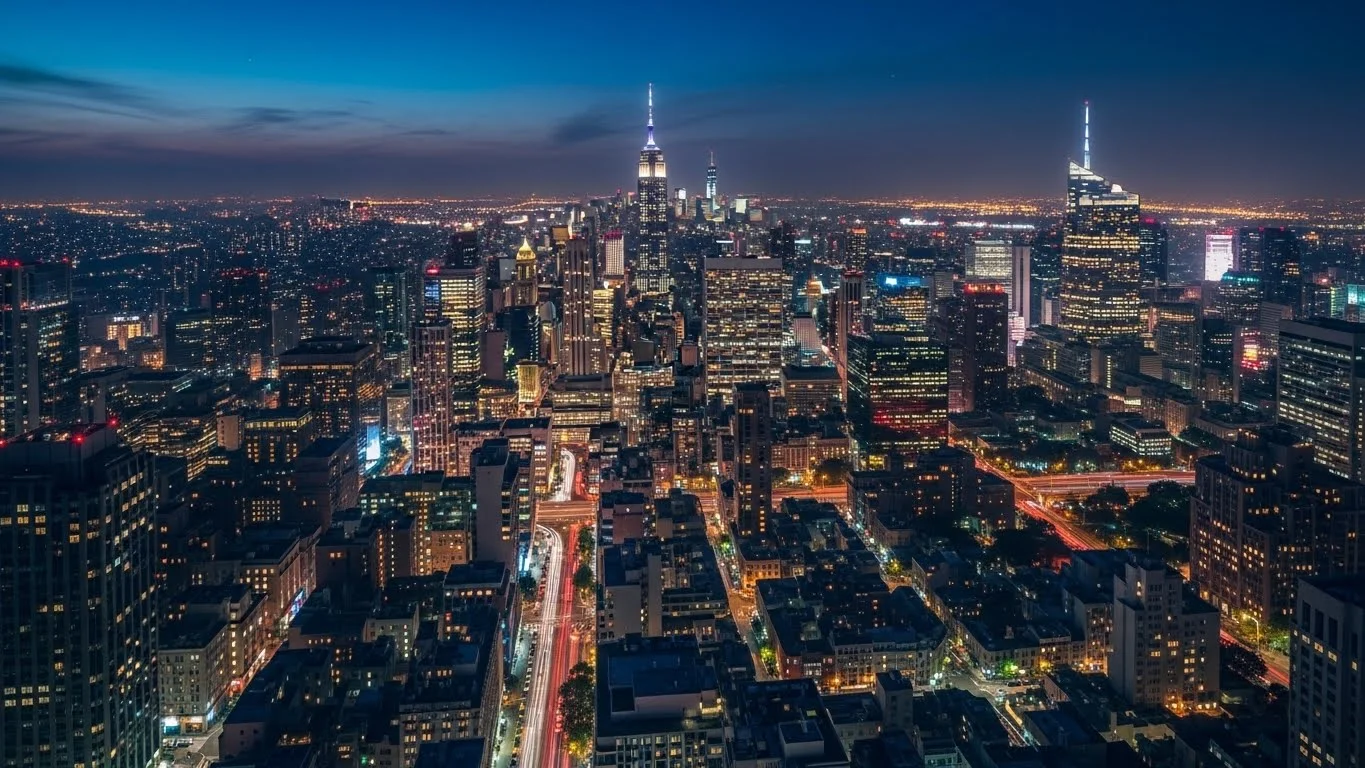
Timing your shots can significantly elevate your urban photography. The golden hour—shortly after sunrise or before sunset—offers soft, warm light that enhances colors and creates dramatic shadows. I’ve found that some of my best urban images were taken during this magical time. The light gives a different feel to the city, making it appear vibrant and alive. I often plan my shooting schedule around these hours to make the most of the beautiful natural light.

Seasonal Considerations

Each season brings a unique charm to urban environments. I love how cities transform throughout the year. In spring, blooming flowers add a splash of color; summer offers lively street fairs; autumn brings a rich tapestry of falling leaves, and winter can turn a city into a snowy wonderland. I try to capture the essence of each season, as they all tell different stories. Planning your trip according to the season can help you catch the city in its best light.

Weather Effects on Photography

Weather plays a crucial role in urban photography. Clear blue skies can make for stunning shots, but don’t shy away from overcast days or even rain. I’ve discovered that moody skies can create drama, and reflections on wet streets can bring an entirely new dimension to my images. When it’s cloudy, I often find that colors pop more, making urban scenes visually striking. Embracing the weather can lead to unexpected and compelling photographs.

Techniques for Capturing Candid Moments

Blending into the Environment

One of the best pieces of advice I can give for capturing candid moments is to blend into your surroundings. I’ve learned that when I act like a tourist, I end up drawing attention to myself, which can disrupt those natural interactions I’m trying to photograph. Instead, I aim to be as unobtrusive as possible. Wearing neutral clothing and moving slowly helps me stay low-key. I find that this approach encourages people to act naturally, allowing me to capture those genuine moments that tell their stories. The more I observe, the more I notice those beautiful interactions happening around me, whether it’s a couple sharing a laugh or a street performer captivating a small audience. I think of myself as a fly on the wall, and adopting this mindset truly helps in capturing the essence of urban life.

Using Natural Light to Your Advantage

Natural light can be your best friend in urban photography, especially when it comes to candid shots. I remember wandering through a bustling market, and the way the early morning sun filtered through the stalls created a warm glow. I always keep an eye on how light interacts with the environment—how it casts shadows or highlights certain details. For me, the best lighting often comes from side or backlighting, which not only adds depth but also enhances the textures of the scene. When I see the right light, I’m quick to set up my shot, ensuring that the natural beauty of the moment shines through. Embracing natural light has transformed my photography, turning ordinary moments into extraordinary captures.

Composition Techniques for Candid Shots

Composition is everything in photography, especially for candid shots. I’ve experimented with various techniques over the years. One of my favorites is the rule of thirds, which involves dividing the frame into three sections and placing points of interest along these lines or their intersections. This simple adjustment often leads to more dynamic images. I also enjoy using leading lines—like streets or pathways—to draw the viewer’s eye toward my subject. When I’m out shooting, I often look for interesting foreground elements that can frame my subject, adding layers to the image. I’ve found that a well-composed shot can elevate a fleeting moment, making it feel deliberate and impactful.

Utilizing Depth of Field in Urban Scenes

Depth of field is another powerful tool in my urban photography toolbox. By controlling the focus, I can draw attention to my subject while blurring out distractions in the background. I love using a wide aperture for portraits, which helps isolate individuals against the busy urban backdrop. This technique also creates a beautiful bokeh effect, lending a dreamy quality to my images. I remember capturing a street musician playing his guitar; the focus was on him, with the bustling city blurred behind him. This not only highlights his performance but also conveys the vibrancy of the city around him. I often play around with depth of field to see how it changes the mood of my photos, and experimenting with this can lead to stunning results.

Popular Urban Photography Locations

Iconic Landmarks and Their Surroundings

When it comes to urban photography, iconic landmarks are a must-see. I’ve explored many cities, and each one has its signature sights that are perfect for photography. For instance, capturing the Eiffel Tower from various angles in Paris revealed different aspects of the city’s charm. I learned that combining these landmarks with context—like a bustling café or people enjoying the view—adds depth to my compositions. By including surrounding elements, I tell a more complete story, showing how these landmarks interact with daily life. I recommend researching the best viewpoints and times of day for capturing these famous spots, as lighting can drastically alter the feel of the photo.

Hidden Gems in the City

While popular landmarks are fantastic, I often find that the real magic of urban photography lies in hidden gems. I remember stumbling upon a quaint alleyway in Lisbon, filled with colorful street art and local cafés. It was a refreshing change from the typical tourist spots, and I was able to capture the unique character of the city. I suggest wandering off the beaten path and exploring lesser-known areas. Ask locals for their favorite spots, or simply allow yourself to get lost in the streets. You might discover charming nooks that provide a fresh perspective on city life, making your portfolio stand out.

Street Markets and Local Life

Street markets are an incredible way to witness and capture the vibrancy of urban life. I love visiting local markets because they are filled with energy, colors, and candid moments. The sights and sounds create a rich tapestry that’s perfect for photography. I remember visiting a bustling market in Bangkok where vendors shouted their wares and customers haggled for the best prices. I found myself in the midst of a whirlwind of activity, and I tried to capture those spontaneous interactions. From the spices to the smiles, there’s so much to photograph. If you can, try to visit during peak hours to catch the liveliness, and don’t be afraid to engage with vendors—they can add a personal touch to your photos.

Engaging with Subjects

Approaching Strangers for Portraits

Engaging with subjects is a vital part of urban photography, especially when it comes to portraits. I’ve learned that approaching strangers can be a bit daunting, but it often leads to some of my most rewarding shots. When I first started out, I was shy about asking people if I could photograph them, but I soon realized that most people are quite receptive if approached respectfully. A simple smile and a genuine compliment can break the ice. I remember a moment in Havana, Cuba, where I spotted an elderly man sitting on a colorful step, his face telling stories of a lifetime. I approached him, shared a few words, and asked if I could take his portrait. The result was a striking image, filled with character and emotion. It’s all about being friendly and making a connection; once you do, capturing that person’s essence becomes much easier.

Reading Body Language and Context

Understanding body language is crucial when engaging with subjects in urban settings. I often find myself scanning the environment for signs of openness or discomfort. For instance, if someone is engrossed in their phone or has their arms crossed, I usually take that as a cue to keep my distance. On the other hand, a person making eye contact or smiling can be a great opportunity to connect. I’ve noticed that when I’m in busy environments, like a crowded street or subway station, taking a moment to observe interactions can lead to candid shots that capture the ebb and flow of city life. Reading the context around me, whether it’s a couple sharing a moment or a group of friends laughing together, helps me decide when to capture a moment and when to simply enjoy the scene.

Respecting Privacy and Cultural Norms

Respect is key in urban photography, especially when photographing people. I’ve learned that cultural norms vary greatly from one place to another, which is why it’s essential to do a little research before traveling. In some cultures, people may be more open to being photographed, while in others, it may be frowned upon. I remember visiting a market in Morocco where I was eager to capture the vibrant local life. However, I quickly realized that some vendors were not comfortable being photographed. I made it a point to ask for permission, and in cases where it wasn’t granted, I respected their wishes. This approach not only helps maintain a positive atmosphere but also fosters trust, allowing for more authentic interactions in the long run.

Post-Processing Techniques for Urban Photos

Basic Editing for Candid Shots

Once I’ve captured my urban shots, the next step is post-processing. I believe that editing is an essential part of the photography process, as it allows me to enhance my images while staying true to the original moment. I usually start with basic adjustments like cropping to improve composition and adjusting exposure to ensure the photo reflects the mood I felt at the moment. I remember a candid shot of a street performer I took in Berlin. The lighting was a bit harsh, but with some adjustments, I was able to soften the image, making it feel more inviting. Simple editing can bring out the best in your photos, allowing the emotions and stories to shine through.

Enhancing Colors and Textures

Enhancing colors and textures is where I have a lot of fun with post-processing. Urban environments are filled with rich colors, and I love to make them pop. I often use tools like saturation and contrast sliders to give my images more life. For example, during a rainy afternoon in Tokyo, I captured reflections on wet pavement. With a little enhancement, the colors became more vivid, and the textures of the street came alive. I also enjoy experimenting with filters and presets that can add a unique flair to my images while maintaining their authenticity. Remember, the goal is to enhance, not alter, the essence of the moment.

Creating a Consistent Style

Developing a consistent editing style is something I’ve worked hard to achieve. I believe that a cohesive look unifies my portfolio and helps viewers connect with my work. I’ve experimented with various styles over the years, from vibrant and punchy to soft and muted tones. My current style leans towards warm tones, which I feel resonate with the feelings I aim to convey in my urban photography. I recommend creating a set of editing presets that reflect your personal style, making it easier to maintain consistency across your images. This process has not only improved my workflow but also helped me define my unique voice as a photographer.

Sharing and Showcasing Your Work

Best Platforms for Urban Photography

Now that I have a collection of urban photographs I’m proud of, sharing them with the world has become an exciting part of my journey. There are so many platforms to choose from, but I’ve found that Instagram is particularly effective for visual storytelling. It allows me to connect with other photographers and enthusiasts who appreciate urban photography. I also use platforms like Flickr and 500px, which cater specifically to photographers. Each platform has its unique audience, so I recommend exploring different options to see where your work resonates best.

Building an Online Portfolio

Creating an online portfolio has been a game-changer for me. I started by using website builders that offer beautiful templates, allowing me to showcase my work in a visually appealing way. I believe that a well-organized portfolio not only highlights my best work but also tells a story about my photography journey. Including sections for different themes, like candid moments or street portraits, helps viewers navigate my work easily. Additionally, sharing the stories behind certain photos adds a personal touch that can engage visitors even further.

Engaging with the Photography Community

Engaging with the photography community has enriched my experience immensely. I remember joining local photography groups and attending meetups where I could connect with fellow enthusiasts. Sharing tips, critiques, and experiences has helped me grow as a photographer. Social media also plays a crucial role in this, as I often participate in challenges and discussions that inspire new ideas. I encourage everyone to seek out communities, both online and offline, as they provide valuable support and motivation to keep exploring urban photography.

Frequently Asked Questions

What is urban photography?

Urban photography is the art of capturing the essence of city life, focusing on candid moments, unique architecture, and the interactions between people in urban spaces.

Why are candid moments important in urban photography?

Candid moments are crucial as they reveal life in its truest form—raw and unfiltered. These moments often convey emotions and stories that posed shots cannot, making them more impactful.

What type of camera is recommended for urban photography?

While DSLRs are versatile, mirrorless cameras are often preferred for their compact size and lightweight design, making them ideal for travel. Even a good smartphone camera can produce stunning urban shots.

What lens is best for urban photography?

A wide-angle lens is useful for capturing cityscapes, while a prime lens with a larger aperture is great for street portraits, allowing you to focus on subjects and create a beautiful depth of field.

When is the best time for urban photography?

The golden hour, shortly after sunrise or before sunset, provides soft, warm light that enhances colors and creates dramatic shadows, making it an ideal time for urban photography.

How can weather affect urban photography?

Weather can greatly influence urban photography; while clear skies are appealing, overcast days or rain can create dramatic effects, with moody skies and reflections adding depth to images.

What are some techniques for capturing candid moments?

To capture candid moments, blend into your environment, observe natural interactions, and use natural light to your advantage. Being unobtrusive and patient helps in capturing genuine moments.

What are some popular locations for urban photography?

Iconic landmarks provide great opportunities, but hidden gems like quaint alleyways and local street markets often reveal the unique character of a city and can lead to more authentic photos.

How should one approach strangers for portraits in urban photography?

Approaching strangers for portraits can be rewarding. A friendly demeanor, a smile, and respectful conversation can help build rapport and lead to meaningful portraits.

What is the importance of post-processing in urban photography?

Post-processing is essential for enhancing images while staying true to the original moment. Basic adjustments like cropping, exposure, and color enhancement can significantly improve the final result.

Nighttime Adventures: Urban Photography for Budget Travelers

Have you ever wandered the vibrant streets of a city at night, camera in hand, eager to capture its magic? Nighttime urban photography is an exhilarating adventure, blending creativity with exploration, especially for those of us traveling on a budget. To get started, check out our article on Essential Gear for Urban Night Photography on a Budget.

Nighttime Adventures: Urban Photography for Budget Travelers

Understanding Urban Nighttime Photography

The Art of Night Photography

When I first dipped my toes into nighttime photography, I was captivated by how cities transformed once the sun dipped below the horizon. The way neon lights flicker and shadows stretch can create an entirely different atmosphere compared to daytime shots. I remember my first nighttime adventure in my hometown; the familiar streets felt new and alive, and it awakened my passion for capturing those fleeting moments. Urban nighttime photography isn’t just about snapping pictures; it’s about storytelling. Each photograph has the potential to evoke emotions, spark curiosity, and transport the viewer to that moment in time.

Equipment Essentials for Night Photography

Now, let’s talk gear. I know that as a budget traveler, the thought of investing in expensive equipment can feel daunting. But fear not! You don’t need a top-of-the-line camera to explore nighttime photography. Here’s what I’ve found to be essential:

  • Camera: A DSLR or mirrorless camera is ideal, but even a good smartphone with a decent camera can work wonders. I’ve captured some of my best shots using my smartphone, especially when I’m out exploring without my DSLR.
  • Tripod: Stability is key in low-light situations. I invested in a lightweight tripod that I can easily carry around. It’s been a game changer for long exposure shots.
  • Lens: A fast lens (with a low aperture like f/2.8 or lower) can help a lot. It allows more light to hit the sensor, making it easier to capture stunning night shots.
  • Remote Shutter Release: This little gadget is fantastic for eliminating camera shake during long exposures. If you don’t have one, you can often use the timer on your camera to achieve similar results.

These essentials don’t have to break the bank, and you can often find quality second-hand equipment that performs just as well as new. For more tips on gear, check out our article on Budget Backpacking: Mastering Urban Night Photography.

Camera Settings for Low Light Conditions

Now, let’s dive into the technical side of things. When I first started shooting at night, I was overwhelmed by all the settings, but I learned some basics that really helped me improve my shots. Here’s what I recommend:

  • ISO: I usually start with an ISO setting between 800 and 3200, depending on the light available. Higher ISO values can introduce noise, so I adjust as needed to find a balance between brightness and clarity.
  • Aperture: As I mentioned earlier, a wide aperture (like f/2.8) is beneficial because it lets in more light. This means you can capture sharper, brighter images without a flash.
  • Shutter Speed: For night photography, I often use slow shutter speeds (like 1/10 to several seconds) to capture more light. It’s important, though, to use a tripod to avoid motion blur when using slower speeds. I remember my first attempts resulted in blurry images, but with practice, I got the hang of timing my shots.

Experiment with these settings; it’s all about finding what works best for you and the specific scene you’re trying to capture. I’ve found that the more I play around with my camera, the more comfortable and confident I become.

As I reflect on my journey into nighttime urban photography, I realize it’s about more than just capturing pretty pictures. It’s about exploring, experiencing, and expressing myself through the lens. Each city has its own unique vibe at night, and I can’t wait to share some of my favorite urban locations for nighttime adventures in the next sections. So, grab your gear, and let’s dive deeper into this exhilarating world of nighttime photography together!

Best Cities for Nighttime Urban Photography

New York City: The City That Never Sleeps

New York City holds a special place in my heart when it comes to nighttime photography. The energy is palpable, and the city truly lives up to its nickname, “The City That Never Sleeps.” I remember walking through Times Square for the first time at night, enveloped in a sea of neon lights and bustling crowds. The vibrancy of the billboards against the backdrop of towering skyscrapers creates an electrifying atmosphere that is perfect for capturing stunning images.

Beyond Times Square, there are gems like the Brooklyn Bridge, where the city skyline lights up the night sky. I found that the view from the bridge offers a breathtaking perspective of the city that is hard to resist. Additionally, neighborhoods like Greenwich Village and SoHo showcase charming streets and unique architecture, perfect for capturing the essence of NYC after dark.

Tokyo: Neon Lights and Vibrant Streets

Tokyo is a city that dazzles with its neon lights and dynamic street scenes. My first nighttime stroll through Shinjuku felt like stepping into a futuristic film set. The blend of traditional and modern elements creates an atmosphere filled with contrasts, which I found fascinating to capture. The bright hues of the signs and the bustling atmosphere make it easy to lose track of time while shooting.

Don’t miss Akihabara, known for its electronics and otaku culture, where you can capture the unique vibe of the city. I found the streets alive with energy, and the eclectic mix of shops provided endless opportunities for interesting compositions. The cherry blossoms at night during sakura season add a magical touch to the cityscape, showcasing the beauty of Tokyo in a whole new light.

Paris: Romantic Nightscapes

Ah, Paris! The city of love is even more enchanting after sundown. I’ve walked along the Seine River under the soft glow of street lamps and the twinkling lights of the Eiffel Tower, which sparkles every hour on the hour. It’s a sight that never fails to inspire awe and creativity. I remember taking photos near the Trocadéro Gardens, where the view of the tower against the night sky is simply breathtaking.

Montmartre is another favorite spot of mine. The cobblestone streets and charming cafés create a romantic atmosphere that is perfect for capturing intimate moments. The Basilica of Sacré-Cœur, perched high on a hill, offers panoramic views of the city lights and is a fantastic location to photograph the Parisian skyline at night.

Barcelona: Architectural Wonders at Night

Barcelona is a beautiful tapestry woven with stunning architecture, and experiencing it at night is a treat. I was mesmerized by Antoni Gaudí’s masterpieces, especially the Sagrada Família, which is beautifully illuminated after dark. I found that visiting the Park Güell at sunset gives you that perfect golden hour light, transforming the colorful tiles into a magical scene.

Walking through the Gothic Quarter at night is like stepping back in time. The narrow, winding streets are filled with history and character, and I loved capturing the interplay of shadows and lights in this atmospheric neighborhood. I’ve discovered that the blend of modern and traditional architecture in Barcelona creates endless opportunities for captivating nighttime photography.

Berlin: A Blend of History and Modernity

Berlin has a unique charm that comes alive at night, blending its rich history with modern vibrancy. The Berlin Wall at night, lit with colorful lights, tells a powerful story of change and resilience. I felt a deep connection to the past as I wandered along the East Side Gallery, where vibrant murals adorn the remnants of the wall.

Additionally, the Brandenburg Gate is a must-see. When it’s illuminated at night, it takes on a majestic quality that’s hard to capture during the day. The lively atmosphere of neighborhoods like Kreuzberg and Friedrichshain, filled with street art and nightlife, offers a different side of Berlin that I found thrilling to photograph. Each corner reveals a new story, making it a photographer’s paradise.

These cities have enriched my nighttime photography journey, providing countless memories and stunning images. Each location has its own unique vibe and charm, encouraging creativity and exploration. As I think back on my experiences, I’m excited to share some budget-friendly tips for urban photography in the next section. Let’s make the most of our nighttime adventures without breaking the bank! For more city recommendations, check out our article on Top 10 Cities for Stunning Urban Night Photography.

Budget-Friendly Tips for Urban Photography

Choosing Affordable Photography Gear

When I first ventured into nighttime photography, the gear seemed intimidating, especially with the high price tags associated with many cameras and lenses. However, I quickly learned that there are plenty of budget-friendly options that can deliver stunning results. First and foremost, consider what you already have. If you own a smartphone with a good camera, you’re already set up to capture some amazing shots!

For those looking to invest in a camera, I recommend checking out entry-level DSLRs or mirrorless cameras. Brands like Canon, Nikon, and Sony offer models that won’t break the bank but provide excellent image quality. Also, don’t overlook the second-hand market; I’ve found some fantastic deals on used cameras and lenses that were still in great condition. Sometimes, local photography shops have great trade-in programs that can help make gear more affordable.

Finding Free or Low-Cost Locations

One of the best things about urban photography is that you don’t need to spend a fortune to find beautiful locations. I’ve discovered that many cities have public parks, waterfronts, and iconic landmarks that are free to access and offer stunning views at night. For example, in Barcelona, I often found myself wandering along the beach, where the city lights reflect beautifully off the water. It’s moments like these that make photography feel magical.

Local events can also be a goldmine for capturing unique scenes without any cost. I remember stumbling upon a night market in Berlin, full of vibrant lights and lively people. Festivals and public art installations can offer incredible backdrops, so keep an eye on community calendars while traveling. Exploring less touristy areas can lead to discovering hidden gems that are just waiting for your lens to capture them.

Utilizing Public Transportation

Using public transportation can save both time and money while providing fantastic opportunities for photography. During my time in Tokyo, I used the subway system to hop between districts, and it allowed me to capture the hustle and bustle of city life. The way the trains light up the platforms and the movement of people can create striking images.

Moreover, many cities have night buses or trams that can take you to popular spots for nighttime photography. I found that riding the double-decker buses in London at night offered a unique perspective of the illuminated landmarks. Just remember to keep your camera handy; you never know when a perfect shot will present itself!

Timing Your Visits for the Best Shots

Timing is everything in photography, especially at night. I often plan my outings for the “golden hour” right before sunset, which can provide a beautiful transition from daylight to nighttime. The soft glow of the setting sun against the cityscape can create stunning contrasts. After the sun sets, I usually give myself about 30 minutes to an hour for the sky to darken fully; this is when the city lights start to shine bright.

Another tip I’ve learned is to keep an eye on the weather. Clear nights can be excellent for starry skies, while overcast nights can create moody atmospheres. There’s something uniquely captivating about capturing a city under a blanket of clouds, with lights glowing through the mist. I remember one night in Paris when the clouds created a soft diffusion of light, making the Eiffel Tower seem ethereal. Don’t be afraid to adapt your schedule based on the conditions; it can lead to unexpected and beautiful results!

Applying these budget-friendly tips has transformed my urban photography experiences. I feel empowered to explore and create without the pressure of spending a lot of money. Each outing becomes an adventure, filled with opportunities to capture stunning nighttime scenes while making the most of my resources. As I continue my nighttime photography journey, I’m excited to dive into more advanced techniques for capturing stunning night photos. Let’s explore those next!

Techniques for Capturing Stunning Night Photos

Long Exposure Techniques

Long exposure photography is one of the most exciting techniques I’ve embraced in my nighttime adventures. It allows me to capture movement in a way that creates an ethereal quality, especially in urban environments filled with life. I remember my first attempt at this technique at a busy intersection. I set my camera on a tripod, adjusted my shutter speed to several seconds, and waited. The result? A breathtaking image where the cars appeared as streams of light, while the people seemed to vanish into the night. It was a reminder that sometimes, stillness captures the chaos around us beautifully.

When trying long exposures, I recommend using a low ISO and a small aperture to avoid overexposing the shot. It’s all about experimenting with different shutter speeds; I’ve found that anywhere from 2 to 30 seconds can yield mesmerizing results, depending on the scene. If you’re new to this, start with slightly longer exposures and then refine your timing as you gain confidence.

Using Tripods and Stabilization Tools

The importance of a sturdy tripod cannot be overstated when shooting at night. I can’t tell you how many blurry photos I’ve taken because of unsteady hands! Investing in a lightweight tripod has truly transformed my nighttime photography. Not only does it keep my camera stable for those long exposures, but it also allows me to frame my shots precisely without feeling rushed. I’ve even experimented with different angles, placing the camera low to the ground to capture reflections in puddles or shooting from above to include interesting perspectives of the streets below.

If you’re on the move and can’t carry a tripod, consider using stabilization tools like a Gorillapod or even placing your camera on a stable surface like a ledge or wall. I’ve found that with a little creativity, I can utilize my surroundings to achieve a solid base for my shots.

Playing with Light: Light Trails and Bokeh Effects

One of the joys of nighttime photography is playing with light. Capturing light trails from cars or trains can add a dynamic element to your images. I remember standing on a bridge, waiting for cars to zoom by, and with a little patience and the right settings, I finally got the shot! This effect brings energy to an otherwise static scene, making it come alive.

Additionally, experimenting with bokeh can create a dreamy feel in your photos. This is especially effective when there are plenty of light sources around. I’ve often found that focusing on a subject in the foreground while letting the background lights blur creates a beautiful contrast that elevates the overall composition. Just remember to use a wide aperture to really make those lights pop!

Street Photography at Night: Tips and Tricks

Street photography at night has its own magic. The way the light interacts with the people and the environment is exhilarating. When I stroll through the streets, I try to capture candid moments that tell a story. The soft glow of street lamps can create a beautiful mood, so I often look for scenes where the light hits just right. I remember one evening in Berlin, watching a couple share a quiet moment on a bench, illuminated by a nearby lamp. That image has become one of my favorites because it encapsulates the feeling of connection amidst the bustling city.

For street photography at night, I recommend keeping your camera settings flexible. Use a wide aperture for low-light conditions and don’t be afraid to increase your ISO if necessary. I’ve learned that sometimes, the best images come from quick snaps, so being ready to capture those fleeting moments is key. Blend in with the crowd, and let your curiosity guide you as you explore the streets; you might just find the perfect shot when you least expect it!

Editing Night Photography: Tools and Techniques

Best Software for Night Photo Editing

Editing is where I can really bring my nighttime photos to life. While I love the raw beauty of night shots, I often use software like Adobe Lightroom or Photoshop to enhance my images. These tools allow me to adjust exposure, contrast, and colors, making the photos even more striking. I remember the first time I edited a photo of the Eiffel Tower; it felt like I was unveiling a masterpiece as I adjusted the vibrancy to make those lights pop!

Enhancing Colors and Contrast

When editing nighttime photos, I find that playing with colors can change the whole mood of the image. Often, I’ll boost the saturation to bring out the vibrant hues from neon lights or cool down the temperature to create a more dramatic atmosphere. Adjusting the contrast can also help to define the light and shadow areas, which is essential for night shots. I’ve often found that a subtle contrast boost can add depth to an image, making it more visually appealing.

Noise Reduction Techniques

No one enjoys noise in their photos, especially in low-light conditions. I’ve had my fair share of shots marred by grain, but I’ve learned how to handle it through editing. Most editing software offers noise reduction tools that can significantly improve image quality. I usually apply a little noise reduction during the editing process, but I make sure to balance it out so that the details remain sharp. It’s all about finding that sweet spot where the photo retains its integrity without unwanted distractions.

Sharing Your Nighttime Photography

Best Platforms for Photographers

Sharing my nighttime photography has become one of the most rewarding parts of my journey. I love showcasing my work on platforms like Instagram and Flickr, where I can connect with other passionate photographers. Building a following has allowed me to receive feedback and inspire others to explore their nighttime photography adventures. Plus, it’s been a great way to discover new tips and techniques from fellow creatives.

Building an Online Portfolio

Having an online portfolio is essential for showcasing my work. I’ve created a website where I can display my favorite nighttime shots and tell the stories behind them. It’s a fantastic way to track my growth as a photographer and share my unique perspective with others. I recommend using platforms like WordPress or Squarespace, which offer easy-to-navigate templates that let my work shine.

Participating in Photography Communities

Joining photography communities has opened doors to new friendships and opportunities. I’ve found groups on social media platforms where I can share my work, receive constructive criticism, and participate in challenges. Engaging with fellow photographers motivates me to keep improving and experimenting in my craft. It’s a reminder that we’re all on this journey together, fueled by our love for capturing the beauty of the world around us.

Safety Tips for Nighttime Urban Photography

Staying Aware of Your Surroundings

Your safety is paramount when shooting at night. I always make it a point to stay aware of my surroundings. It’s easy to get lost in the moment, but I’ve learned to keep my head up, observe the people around me, and avoid isolated areas. Traveling with a buddy can add another layer of safety, especially in unfamiliar places.

Choosing Safe Locations

Before heading out, I research the areas I plan to shoot. I prefer well-lit streets and popular spots that are frequented by others. There’s a comfort in being around fellow night owls, and I’ve found that often leads to unexpected connections and conversations. I’ve even made friends while shooting in bustling markets or by iconic landmarks!

Travel Insurance for Photographers

Investing in travel insurance is something I now consider essential. Knowing my gear is covered gives me peace of mind, allowing me to focus on capturing the moment without worrying about what could happen. I’ve learned that accidents can occur, and being prepared ensures I can bounce back without financial strain.

Final Thoughts

As I reflect on my urban nighttime photography journey, it’s become clear that this art form is more than just capturing images; it’s about connecting with the world around us. Each city, each moment has its own story waiting to be told. I encourage anyone interested in this exhilarating pursuit to grab their gear, step into the night, and create. Remember, it’s about exploring, learning, and enjoying the process. So let’s keep our lenses focused on the magic that unfolds after dark!

Frequently Asked Questions

What is urban nighttime photography?

Urban nighttime photography is an exhilarating adventure that blends creativity with exploration, capturing the unique atmosphere of cities after dark. It involves storytelling through images that evoke emotions and transport viewers to specific moments in time.

What essential equipment do I need for nighttime photography?

You need a camera (DSLR, mirrorless, or even a good smartphone), a tripod for stability, a fast lens (with a low aperture like f/2.8 or lower), and a remote shutter release to eliminate camera shake during long exposures.

What camera settings should I use for low light conditions?

For low light conditions, start with an ISO setting between 800 and 3200, use a wide aperture (like f/2.8) to let in more light, and utilize slow shutter speeds (like 1/10 to several seconds) to capture more light while ensuring you use a tripod to avoid motion blur.

Which cities are recommended for nighttime urban photography?

Recommended cities include New York City for its vibrant energy, Tokyo for its neon lights, Paris for romantic nightscapes, Barcelona for architectural wonders, and Berlin for its blend of history and modernity.

What budget-friendly tips are there for urban photography?

Consider using affordable photography gear, finding free or low-cost locations, utilizing public transportation for access, and timing your visits to coincide with the “golden hour” and optimal lighting conditions.

What are long exposure techniques in nighttime photography?

Long exposure techniques involve using a tripod to capture movement over several seconds, creating ethereal images where moving elements, like cars or people, appear as streams of light, while stillness captures the chaos beautifully.

How can I enhance my nighttime photos during editing?

You can enhance nighttime photos by using software like Adobe Lightroom or Photoshop to adjust exposure, contrast, and colors. Boosting saturation and contrast can significantly improve the visual appeal of night shots.

What safety tips should I consider when photographing at night?

Stay aware of your surroundings, choose well-lit and populated locations, and consider traveling with a buddy. Additionally, investing in travel insurance for your gear can provide peace of mind while shooting at night.

How can I share and showcase my nighttime photography?

You can share your work on platforms like Instagram and Flickr, build an online portfolio using websites like WordPress or Squarespace, and participate in photography communities to connect with other photographers and receive feedback.

What are some tips for street photography at night?

For street photography at night, keep your camera settings flexible with a wide aperture, be ready to capture candid moments, and blend in with the crowd to find unique shots that tell a story. Lighting conditions can add a beautiful mood to your images.

Essential Gear for Urban Night Photography on a Budget

Urban night photography is a magical experience, blending city lights with the artistry of the night. If you’re keen to explore this fascinating world without breaking the bank, let’s dive into the essential gear you need. Read Interesting article: Budget Backpacking: Mastering Urban Night Photography

Essential Gear for Urban Night Photography on a Budget

Understanding Urban Night Photography

What is Urban Night Photography?

Urban night photography is all about capturing the vibrancy and life of a city after the sun goes down. I remember the first time I wandered through the streets at night with my camera. The glow of neon signs, the hustle of nightlife, and the enchanting shadows created a backdrop that transformed the ordinary into the extraordinary. This form of photography focuses on how light interacts with the urban landscape, showcasing everything from bustling streets to quiet corners, all bathed in the contrasting beauty of darkness and artificial light.

Why Night Photography is Different

Night photography presents unique challenges and opportunities. The low light conditions mean that your camera settings and gear play a crucial role in achieving stunning images. I’ve learned that there’s a distinct rhythm to night photography—timing your shots, understanding exposure, and mastering the art of light manipulation. The absence of sunlight forces you to get creative, relying on available light sources and artificial illumination. This not only enhances your technical skills but also allows for incredible artistic expression through shadows, reflections, and color contrasts.

Essential Gear for Night Photography

Camera Options

DSLR Cameras

If you’re serious about night photography, a DSLR can be a great investment. These cameras typically have larger sensors, which means they can capture more light, resulting in clearer images with less noise. I remember my first DSLR; the ability to adjust settings manually opened a whole new world of possibilities for my night shots. Look for models with good low-light performance, as this will make a noticeable difference in your results.

Mirrorless Cameras

Mirrorless cameras are another fantastic option, especially for those who want something lightweight without sacrificing quality. I switched to a mirrorless system for its compact size, which makes it easier to carry around the city at night. These cameras often feature excellent autofocus in low light, and many models offer impressive video capabilities, making them versatile for both photography and videography.

Smartphones with Night Mode

Don’t overlook your smartphone! Many modern smartphones come equipped with impressive night modes that can produce surprisingly good results. I’ve found myself in situations where I didn’t have my camera but was able to capture stunning night scenes with my phone. Plus, apps can help you edit on the go, making it a convenient choice for spontaneous outings.

Lenses

Fast Prime Lenses

When it comes to lenses, fast prime lenses are a must-have for night photography. These lenses typically have wide apertures (like f/1.8 or f/1.4) that allow more light to hit the sensor. I’ve had amazing experiences with my 50mm f/1.8 lens; it’s affordable and produces beautiful, sharp images even in low light. If you can, invest in a good prime lens—it can elevate your night photography significantly.

Wide-Angle Lenses

Wide-angle lenses are essential for capturing expansive night scenes, especially in urban environments. I’ve enjoyed shooting cityscapes that include both the architecture and the sky, and a wide-angle lens provides that dramatic perspective. They’re particularly useful for landscapes and shots where you want to include more of the scene in a single frame.

Tripods

Compact Tripods for Portability

A sturdy tripod is indispensable for night photography, as it helps stabilize your camera during longer exposures. I learned this the hard way when I attempted handheld shots only to find them blurry. I recommend a compact tripod that can easily fit into your camera bag. Look for one that balances portability with stability so you can set up quickly and efficiently in the city.

Affordable Options for Stability

If you’re on a budget, there are many affordable tripods that still provide great stability. Brands like Manfrotto and Neewer offer options that won’t break the bank. I found a solid tripod for under $50, and it’s served me well on countless night shoots. Just make sure it can support the weight of your camera and lens combination.

Remote Shutter Release

A remote shutter release is a small but mighty tool in night photography. It minimizes camera shake when taking long exposures, which can be crucial for capturing sharp images. I use a simple wired remote for my camera, and it has made a noticeable difference in my shots. If your budget allows, you can also find wireless options that offer even more convenience.

Lighting Equipment

External Flash Units

When I first started diving into urban night photography, I quickly realized that natural light can sometimes fall short, especially in darker areas. That’s where external flash units come into play. I remember one night in a dimly lit alley where I wanted to highlight some graffiti art, and my built-in flash just wasn’t cutting it. An external flash not only provides more power but also allows for greater control over the direction of light, which can add depth and dimension to your shots. I suggest looking for models that are compatible with your camera and offer adjustable power settings. This flexibility can really elevate your nighttime images.

Continuous Lighting Options

Another fantastic tool I discovered is continuous lighting. Unlike flashes that produce a bright burst of light, continuous lights allow you to see exactly how the light will affect your scene before you take the shot. I’ve used LED panels in various locations, and they’ve helped me create some striking portraits against urban backdrops. The benefit of continuous lighting is that you can experiment with different setups and adjust the intensity as needed. Plus, they’re handy if you’re shooting videos, too, making them a versatile addition to your kit.

Reflectors and Diffusers

Reflectors and diffusers are often overlooked in night photography but can be game-changers. I once found myself shooting a friend in front of a brightly lit storefront, and the harsh light created unflattering shadows on his face. That’s when I pulled out my collapsible reflector. By bouncing some light back onto his face, I was able to soften those shadows, and the result was a much more balanced image. Diffusers can also be useful for softening the light from an external flash or continuous light, making the light more pleasing and natural. Investing in a basic set of these can significantly enhance your night photography without breaking the bank.

Accessories to Enhance Your Night Photography

Filters

Filters can be a real boon for night photography, helping to control light and enhance your images. I’ve experimented with several types, but two stand out for nighttime urban scenes.

ND Filters for Long Exposures

Neutral Density (ND) filters are fantastic for creating long exposure shots, even at night. I remember a beautiful bridge lit up against a dark sky; by using an ND filter, I was able to slow down the shutter speed and capture the smooth motion of the river below. This effect turns a simple shot into something truly mesmerizing. ND filters reduce the amount of light entering the lens, allowing for longer exposure times without overexposing your images. It’s a great way to add an artistic touch to your night photography.

Polarizing Filters for Urban Reflections

Polarizing filters are another accessory I recommend for night photography, especially if you’re shooting near water or glass surfaces. I once took a shot of a skyscraper reflecting in a lake, and using a polarizer helped me cut through the glare, bringing out the colors and details that would have otherwise been lost. These filters can enhance the contrast and saturation of your night shots, making neon lights pop and reflections sharper. They can be a little pricey, but the difference they make is worth every penny.

Camera Bags

As we gear up for night adventures, having a reliable bag to carry everything is crucial. I’ve gone through a few different styles, and having a bag that fits my needs has made my outings much more enjoyable.

Budget-Friendly Options

If you’re on a budget, there are plenty of camera bags that won’t empty your wallet. I found a simple sling bag that fits my camera and a couple of lenses perfectly. It’s lightweight and easy to access, which is ideal for when I’m out shooting in busy urban environments. Look for something that offers padding and compartments to keep your gear protected and organized.

Weather-Resistant Bags

Urban night photography can sometimes expose you to unexpected weather changes. I learned this the hard way when a sudden rain shower caught me off guard during a shoot. Now, I always carry my gear in a weather-resistant bag. These bags not only protect against rain but also provide extra cushioning to shield my equipment from bumps and drops. Investing in a quality weather-resistant camera bag is something I highly recommend for any photographer, especially those who like to shoot outdoors at night.

Techniques for Urban Night Photography

Understanding Exposure Settings

When I first started with night photography, I was often confused by exposure settings. It felt like a daunting task to get everything right in low light. However, I quickly learned that understanding how to manipulate ISO, shutter speed, and aperture can dramatically improve my night shots. For me, a common starting point is setting my camera to manual mode. This way, I can take control of each setting to get the perfect exposure.

One trick I discovered is to use a higher ISO setting, which makes the sensor more sensitive to light. But I have to be careful, as too high of an ISO can introduce noise, which can ruin an otherwise beautiful photo. I usually start around 800 ISO and adjust as needed. Shutter speed is next on the list. I tend to keep it slower—something like 1/15 to 1/60 of a second—depending on the available light and whether I’m using a tripod.

Aperture also plays a critical role. I often shoot at wider apertures (like f/2.8 or f/4) to allow more light in, which helps capture those stunning night scenes. Balancing these three settings can take some practice, but I promise it’s worth it when you see your images come to life!

Utilizing Long Exposures

Long exposure photography is one of my favorite techniques for night shoots. It allows me to capture the beauty of movement and light in a way that’s simply not possible with a quick shutter speed. I remember my awe the first time I captured light trails from passing cars. The streams of red and white light transformed a mundane street scene into a vibrant painting.

To achieve this, I set my camera on a sturdy tripod, lower my ISO, and use a slower shutter speed, sometimes several seconds long. I’ve found that using ND filters can be beneficial here, as they allow me to slow down my shutter speed even more without overexposing the shot. It can be mesmerizing to see how the city comes alive over several seconds—just be sure to keep the camera steady!

Capturing Motion and Light Trails

One of the most exhilarating aspects of urban night photography is capturing motion. Light trails, whether from moving vehicles or pedestrians, can add a dynamic element to your images. I’ve enjoyed experimenting with various shutter speeds to see how the movement translates in my shots. For instance, using a slower shutter speed allows me to create those beautiful trails of light, while a faster shutter speed freezes the action, capturing people or cars in sharp detail.

To create light trails, I usually find a vantage point overlooking a busy street or intersection. Then, I set my camera on the tripod and adjust the settings to a slower shutter speed—this might be anywhere from 2 to 10 seconds or more, depending on the intensity of the lights and the speed of the traffic. I’ve often found that adding a creative framing element—like an interesting foreground—can enhance the composition and draw the viewer’s eye into the shot.

Composition Tips for Night Scenes

Composition is key in any photography, but at night, it becomes even more crucial due to the unique challenges posed by lighting. I’ve learned that planning my shots and being mindful of the composition can make a significant difference in the final image. I often utilize the rule of thirds to create balanced and engaging photographs. For instance, positioning the city skyline along one of the horizontal lines can guide the viewer’s eye across the image.

Also, I’m a big fan of including leading lines in my photos. Whether it’s a road, a river, or architectural features, these elements can draw the viewer’s attention to the main subject of your shot. I’ve spent hours walking around, searching for those perfect lines that can lead into the heart of a city, especially when illuminated at night.

Lastly, don’t be afraid to experiment with angles. I’ve found that shooting from a low angle can add drama to a scene, highlighting the towering buildings against the night sky. Conversely, a high vantage point can offer a breathtaking overview of the city, especially when it’s all lit up. The beauty of night photography is that there’s always something new to discover, so embrace the exploration!

Budget-Friendly Tips for Gear Acquisition

Buying Used or Refurbished Equipment

As a photography enthusiast, I often find myself dreaming of the latest gear, but I also know the importance of sticking to a budget. One of the best strategies I discovered is buying used or refurbished equipment. There are so many resources online, like eBay or dedicated photography forums, where photographers sell their gear at much lower prices. I’ve snagged some fantastic deals this way, and it’s a great way to get high-quality equipment without spending a fortune.

When buying used, I always make sure to check the condition of the gear and, if possible, ask for a demonstration before purchasing. I’ve learned to look for reputable sellers and even local shops that offer warranties on used equipment. This way, I can have peace of mind knowing that I’m making a sound investment.

Renting Gear for Specific Projects

Sometimes, I find myself needing specific gear for a particular project, but I don’t want to buy something I might only use once. That’s where renting comes in handy. I’ve utilized local rental shops and online services that cater to photographers. Renting allows me to access high-end lenses or cameras at a fraction of the cost of purchasing.

Before renting, I always have a clear plan for what I need and how I’ll use it. I’ve learned to book in advance to ensure availability, especially if I have a specific project in mind. Plus, many rental companies offer packages that include accessories like tripods or filters, which can save me even more money.

DIY Solutions for Accessories

One of the most rewarding aspects of photography for me is getting creative, especially when it comes to accessories. I’ve discovered that many tools can be easily and cheaply made at home. For instance, I once needed a diffuser for my external flash and ended up using a simple piece of white plastic. It worked like a charm and saved me money!

Another DIY project I tackled was creating a custom shoulder strap for my camera out of fabric and clips I had at home. Not only did it save me some cash, but it also added a personal touch to my gear. Online DIY tutorials are plentiful, and I love that the photography community often shares creative solutions to common problems. Embracing DIY can be a fun way to enhance my gear while keeping costs low.

Frequently Asked Questions

What is Urban Night Photography?

Urban night photography is about capturing the vibrancy and life of a city after dark, showcasing how light interacts with the urban landscape, including bustling streets and quiet corners illuminated by artificial light.

Why is Night Photography Different?

Night photography presents unique challenges such as low light conditions, requiring specific camera settings and gear to achieve stunning images. It allows for creative expression through shadows, reflections, and color contrasts.

What are the best camera options for night photography?

The best camera options for night photography include DSLR cameras for their larger sensors and low-light performance, mirrorless cameras for their lightweight and excellent autofocus, and smartphones with night modes for convenience.

Why are fast prime lenses important for night photography?

Fast prime lenses are important for night photography because they have wide apertures (like f/1.8 or f/1.4) that allow more light to hit the sensor, resulting in sharper images in low light conditions.

What role do tripods play in night photography?

Tripods are essential for night photography as they stabilize the camera during longer exposures, preventing blurry images. Compact and affordable tripods are recommended for easy portability and stability.

How can external flash units enhance night photography?

External flash units enhance night photography by providing more power and control over the direction of light, which can add depth and dimension to shots, especially in darker areas.

What are ND filters and how do they benefit night photography?

Neutral Density (ND) filters reduce the amount of light entering the lens, allowing for longer exposure times without overexposing images. They are beneficial for creating artistic long exposure shots at night.

What composition tips are useful for night scenes?

Useful composition tips for night scenes include utilizing the rule of thirds, incorporating leading lines to guide the viewer’s eye, and experimenting with different angles to add drama and perspective.

What are some budget-friendly tips for acquiring photography gear?

Budget-friendly tips for acquiring photography gear include buying used or refurbished equipment, renting gear for specific projects, and creating DIY solutions for accessories to save money.

How can long exposures be effectively utilized in urban night photography?

Long exposures can be effectively utilized by setting the camera on a sturdy tripod, lowering the ISO, using slower shutter speeds, and potentially employing ND filters to capture the beauty of movement and light in night scenes.

Read Interesting article: Top 10 Cities for Stunning Urban Night Photography

Read Interesting article: Capture the City: Urban Night Photography Tips for Travelers

Top 10 Cities for Stunning Urban Night Photography

If you’re passionate about capturing the beauty of cities after dark, you’re in for a treat. Urban night photography offers a unique perspective, revealing the vibrant life and stunning architecture that shines under the night sky. Read Interesting article: Capture the City: Urban Night Photography Tips for Travelers

Top 10 Cities for Stunning Urban Night Photography

Understanding Urban Night Photography

What is Urban Night Photography?

Urban night photography is all about capturing the essence of city life after the sun sets. I remember my first time wandering through a city at night with my camera in hand. I was amazed by how different everything looked—the way the lights danced on the pavement and how shadows created a completely new atmosphere. This genre of photography not only focuses on the bright lights and buildings but also portrays the emotions and stories that unfold in urban settings under the moonlight.

Importance of Lighting and Composition

Lighting is the heart of night photography. It can transform a mundane scene into something magical. I’ve learned that understanding how to work with various light sources—like streetlights, neon signs, and car headlights—can make or break your shot. Composition plays a crucial role too. During my adventures, I’ve often found that the right angle can showcase the relationship between light and shadow, adding depth and intrigue to my images. For instance, framing a building with a bright neon sign can create a stunning contrast that draws the viewer in.

Gear Recommendations for Night Photography

When it comes to gear, I’ve tried various equipment, and here are my favorites for night photography:

  • Camera: A camera with good low-light performance is essential. Full-frame DSLRs or mirrorless cameras are great choices. My go-to is a mirrorless camera because of its compact size and excellent sensor quality.
  • Lenses: A fast prime lens (like f/1.8 or f/1.4) can work wonders in low light. I often use a wide-angle lens to capture expansive cityscapes.
  • Tripod: Stability is key at night. I cannot stress enough how useful a sturdy tripod is for avoiding blurry shots. I’ve had great results with a lightweight tripod that’s easy to carry around.
  • Remote Shutter Release: This tool helps prevent camera shake. I often use it to take long exposures without touching the camera.

With the right gear, you can start to explore the night and capture the stunning visuals that urban environments have to offer. Read Interesting article: Budget Backpacking: Mastering Urban Night Photography

Top 10 Cities for Stunning Urban Night Photography

1. New York City

Iconic Landmarks: Times Square, Brooklyn Bridge

New York City, the city that never sleeps, is a dream destination for urban night photography. Times Square is a riot of neon lights and activity, perfect for capturing the hustle and bustle. I love to wander around the area, snapping shots of the massive billboards and the vibrant crowd. The Brooklyn Bridge offers an incredible view of the Manhattan skyline; I can’t recommend it enough for stunning night shots.

Best Time to Shoot: Blue Hour and Midnight

The blue hour, just after sunset, creates a soft glow that complements city lights beautifully. Midnight, with fewer crowds, allows for cleaner shots of the famous landmarks. I often find myself back in the city’s heart during these times for the best photographs.

2. Tokyo

Neon Lights and Urban Density

Tokyo is a visual feast, especially at night. The neon lights bring the city to life, and it’s hard not to be captivated by the energy. I remember being overwhelmed by the shimmering lights of Shibuya Crossing, where the chaos of pedestrian traffic creates a unique atmosphere.

Recommended Locations: Shibuya Crossing, Akihabara

Akihabara is another must-visit. The vibrant shops and entertainment venues bathed in colorful lights provide endless opportunities for stunning captures. I’ve spent hours just wandering, looking for the perfect angle to showcase Tokyo’s electric charm.

3. Paris

Historic Architecture: Eiffel Tower, Notre-Dame

Paris at night is nothing short of enchanting. There’s something magical about the soft glow illuminating the historic architecture. The Eiffel Tower, especially when it sparkles every hour, is a sight to behold. I felt like I was in a fairy tale the first time I photographed it at night.

Best Practices for Capturing Paris at Night

To capture the essence of Paris, try shooting from different angles and distances. I often find that including the Seine River in my shots adds a beautiful reflection that enhances the overall composition. The city’s romantic vibe is palpable, and I believe every corner offers a photo opportunity worth exploring.

4. Hong Kong

Victoria Harbour Views

Hong Kong’s skyline is iconic, especially when viewed from Victoria Harbour. The blend of tall buildings and the harbor creates a stunning backdrop for night photography. I remember standing at the waterfront, feeling the energy of the city, with the lights reflecting on the water.

Exploring the Skyline from Tsim Sha Tsui

Tsim Sha Tsui is a fantastic spot for panoramic shots of the skyline. The vibrant city lights against the dark sky create a dramatic effect that I can’t get enough of. Each visit offers something new, whether it’s the latest architectural addition or a different weather condition affecting the lighting.

5. Chicago

Reflections on Lake Michigan

Chicago has a unique charm at night, especially with the reflections shimmering on Lake Michigan. I remember the first time I stood by the waterfront, looking out at the city skyline lit up against the inky darkness of the lake. The way the lights danced on the water created a mesmerizing effect that I couldn’t resist capturing. I often find myself returning to this spot, eager to experiment with different angles and compositions. The reflections make for some of the most striking images I’ve ever taken.

Must-Visit Spots: Millennium Park, Navy Pier

Millennium Park is another gem in Chicago for night photography. The combination of modern architecture and art installations, like the famous Cloud Gate (or “The Bean”), offers fantastic opportunities for creative shots. I love how the sculptures reflect the city lights and the night sky. Navy Pier is also worth exploring; the vibrant atmosphere, with its Ferris wheel and various attractions, adds a festive touch to my nighttime captures. The view of the skyline from the pier is simply breathtaking and changes dramatically throughout the year.

6. London

Iconic Structures: The Shard, Tower Bridge

London’s night scenery feels almost cinematic, with its iconic structures illuminated against the night sky. The Shard, with its impressive height, becomes a beacon of light, while Tower Bridge, lit up beautifully, stands as a testament to the city’s rich history. I’ve spent many evenings wandering along the Thames, capturing these landmarks from various viewpoints. Each time, I discover something new about how the city transforms at night.

Best Timing for Night Shots

I’ve found that the best time to shoot in London is during the blue hour, just after sunset. The soft light creates a perfect backdrop for the city’s architecture, adding a warm glow to my images. As the city’s lights begin to twinkle, I feel an energy that’s hard to describe. I often venture out during this time to capture the blend of natural and artificial light, which can make for some truly stunning photos.

7. Dubai

Modern Architecture: Burj Khalifa, Palm Jumeirah

When it comes to modern urban landscapes, Dubai is in a league of its own. The Burj Khalifa, the tallest building in the world, is a sight to behold at night. I remember being in awe of its towering presence, with lights illuminating the surrounding area. The architectural details are fascinating, and I try to capture them from different perspectives. Palm Jumeirah, with its unique shape and luxury resorts, also offers great opportunities for night photography. I love how the lights reflect off the water, creating a dreamy atmosphere.

Capturing the City’s Vibrancy

The vibrant nightlife in Dubai adds another layer to urban night photography. From bustling markets to lively beach clubs, there’s no shortage of subjects to capture. I enjoy wandering through the souks, where the colorful lights and bustling crowds create a dynamic environment for my photos. Each corner I turn reveals something new, whether it’s an extravagant display of lights or an interesting cultural moment.

8. San Francisco

Golden Gate Bridge and City Lights

San Francisco’s foggy nights create a magical atmosphere that I find utterly captivating. The Golden Gate Bridge, often shrouded in mist, becomes an ethereal subject. I’ve spent many nights at viewpoints like Battery Spencer or Marin Headlands, waiting for the perfect moment when the city lights twinkle through the fog. The contrast between the illuminated bridge and the dark water below creates a stunning scene that I love to capture.

Unique Perspectives from Twin Peaks

For a broader view, I highly recommend heading to Twin Peaks. The panoramic view of the city at night is breathtaking. I remember standing there, feeling the breeze and taking in the entire skyline—each twinkling light telling a story. It’s a fantastic spot for long exposure shots, and I often experiment with different shutter speeds to really capture the motion of the city. Each visit offers a different perspective, thanks to the ever-changing weather and cityscape.

9. Las Vegas

The Strip: A Playground for Night Photographers

Las Vegas is synonymous with nightlife, and its famous Strip is a paradise for photographers. The neon lights, extravagant resorts, and lively atmosphere create a visual spectacle that’s hard to resist. I’ve spent countless evenings walking along the Strip, capturing the vibrant energy and colorful displays. There’s an electric buzz in the air, and I love how every hotel and casino has its own unique style and lighting schemes, providing endless opportunities for creative photos.

Famous Attractions: Bellagio Fountains, Neon Boneyard

The Bellagio Fountains are a must-see. The choreographed water shows against the backdrop of the lit-up hotel are mesmerizing. I remember setting up my tripod to capture the action, experimenting with different exposures to convey both the movement of the water and the stunning reflections. The Neon Boneyard is another favorite spot of mine, where old neon signs tell the story of Las Vegas’s history. The contrast of the vintage signs against the night sky adds a nostalgic touch to my photography.

10. Sydney

Harbour Views: Sydney Opera House, Harbour Bridge

Sydney is a city that takes on a new life at night. The Sydney Opera House, illuminated against the dark sky, looks stunning. I’ve marveled at its unique architecture while trying to capture it from different angles, often including the Harbour Bridge in my shots. The combination of these iconic structures creates a breathtaking scene that I can’t get enough of.

Best Locations for Night Photography

For the best views, I recommend visiting spots like Mrs. Macquarie’s Chair or the Observatory Hill. These locations offer panoramic views of the harbour and the city skyline, especially during sunset transitioning into night. Each time I visit, I’m reminded of the beauty that unfolds as the city lights come on, creating a magical backdrop for my photography.

Tips for Capturing Stunning Night Shots

Camera Settings for Night Photography

Getting the right camera settings for night photography can really elevate your images. From my experience, I usually start by setting my camera to manual mode. This gives me full control over the exposure. I often begin with a low ISO, usually around 100 or 200, to minimize noise. It’s amazing how much difference a clean image can make when you’re editing later.

Next, I adjust the aperture. A wider aperture (like f/1.8 or f/2.8) allows more light into the lens, which is crucial at night. However, if I want to capture more of the scene in focus, I might choose a smaller aperture (like f/8) and compensate with a longer shutter speed. I’ve learned that a shutter speed of around 10 seconds can work wonders, especially for capturing light trails or starry skies. But remember, this is where a sturdy tripod becomes invaluable!

White balance is another aspect I pay attention to. I typically set it to auto and adjust in post-processing, but sometimes I’ll try a cooler setting to bring out the blues in the night sky. Every city has its unique light, and I love experimenting with these settings to see how they affect the final image.

Using Tripods and Stabilization Techniques

As I mentioned earlier, a tripod is a must-have for night photography. I can’t stress enough how important it is to have a stable base, especially when shooting long exposures. I’ve had my fair share of blurry images when I forgot to use one. I usually carry a lightweight tripod that’s easy to set up and adjust. There’s nothing like the peace of mind knowing my camera is stable, allowing me to focus on getting the shot right.

If I’m in a pinch and don’t have a tripod, I’ve found a few creative solutions. Leaning against a sturdy wall or resting my camera on a flat surface can help steady my shots. I also use my camera’s self-timer or a remote shutter release to avoid any camera shake when pressing the shutter button. It’s amazing how little techniques like these can improve the clarity of the photos.

Post-Processing Tips for Night Images

After a night of shooting, I always look forward to the editing process. In my experience, post-processing can truly transform a good shot into a great one. I start by importing my images into Lightroom or Photoshop, where I can adjust the exposure and contrast. I often find that evening out the exposure helps bring out details in both the highlights and shadows, which is essential for night images.

Color correction is also a big part of my workflow. Sometimes, those vibrant neon lights can create strange color casts, so I like to tweak the white balance to ensure everything looks natural. I’ll add a bit of vibrance to enhance the colors without going overboard, as too much saturation can often detract from the beauty of the night scene.

Finally, I often apply noise reduction, especially if I shot at a higher ISO. I’ve learned that while some noise can add character, too much can be distracting. A little sharpening can also go a long way in highlighting the details in my images, making them pop. Each step in editing is an opportunity to bring out the magic of the night that I experienced while taking the photo.

When to Visit for the Best Night Photography

Seasonal Considerations

The season can greatly influence the kind of night photography I aim for. I’ve found that summer offers longer days and warmer nights, which can be perfect for late-night shoots. However, I also enjoy the crisp air of fall, which often brings vibrant colors to the city landscape and a unique atmosphere. The way the lights reflect off the fallen leaves can create beautiful images that I love to capture.

Winter presents its own challenges, like cold temperatures and shorter days, but it can also be incredibly rewarding. The way cities decorate for the holidays provides ample opportunities for festive night shots. I remember wandering through my city during the holiday season, capturing twinkling lights and seasonal displays that made everything feel magical.

Spring brings a sense of renewal, and I find that the combination of blooming flowers and city lights creates stunning contrasts. Each season has its charm, and I love adapting my style and approach based on what’s happening around me.

Special Events and Festivals for Night Shots

One of the best ways to enhance your night photography experience is to plan your trips around special events and festivals. I’ve attended various festivals, where the streets come alive with lights, music, and vibrant crowds. Events like city-wide light festivals or cultural celebrations often offer stunning visuals that are perfect for night photography.

For instance, shooting during New Year’s Eve or local parades can yield exciting and dynamic shots. The energy in the air is palpable, and the unique decorations and fireworks create endless opportunities for creativity. I remember capturing a stunning firework display over a city skyline, and it quickly became one of my favorite images.

Another great opportunity is during city art installations or light shows. These events often feature stunning displays that make for unforgettable photographs. I recommend doing some research to find out what’s happening in the cities you plan to visit, as these experiences can elevate your night photography to a whole new level. Read Interesting article: 10 Tips for Stunning Urban Cityscape Photography

Safety Tips for Night Photography in Urban Areas

Awareness of Surroundings

When I’m out shooting at night, one of the most important things I keep in mind is my surroundings. Being aware of where I am and what’s happening around me is crucial. I’ve learned to trust my instincts; if a place feels off, I tend to move on to a different location. Keeping my gear close and not getting too engrossed in my camera helps me stay alert.

It’s also wise to avoid isolated areas, especially if I’m alone. I prefer shooting in well-lit, populated areas where I feel safe, and where there’s always a chance to engage with other photographers or locals. I’ve found that sharing tips and experiences with others can be not only enjoyable but also a great way to stay safe while exploring new places.

Choosing Safe Locations

Choosing the right locations for night photography can make a big difference in safety and the quality of my shots. I often opt for popular landmarks or well-maintained parks that are known for being safe at night. Researching ahead of time helps me identify these spots, and I often check online forums or local photography groups for recommendations. Some cities even have designated photography areas that are popular among locals, which can be comforting to know.

Additionally, I try to shoot in groups whenever possible. There’s safety in numbers, and sharing the experience with fellow photography enthusiasts can be rewarding. I’ve had the chance to make great friends through night photography meet-ups, and it always adds to the adventure. Being part of a community not only enhances my experience but also fosters a sense of security as we explore the night together.

Recommended Accommodations for Night Photographers

Hotels with Great City Views

When I travel for night photography, I often prioritize accommodations that offer stunning city views. There’s nothing quite like waking up and knowing I can easily access great spots for shooting at night. I’ve stayed in hotels that feature rooftop bars or lounges, allowing me to enjoy the skyline while planning my evening shoots. These places often become great spots for capturing the sunset, transitioning beautifully into night.

For instance, I remember booking a room with a view of the Manhattan skyline in New York. Being able to step out onto my balcony and capture the city lighting up as dusk fell was an unforgettable experience. It’s worth checking for hotels that promote their views or have photography-friendly amenities, as they can enhance my overall experience.

Hostels and Budget Options

If you’re traveling on a budget, I’ve found that hostels can also be a great option for night photographers. Many hostels are located in vibrant areas, making it easy to explore the city at night. I’ve met fellow travelers who shared tips about the best spots for night photography, and it’s a great way to connect with like-minded individuals.

Some hostels even have rooftop terraces or communal areas that provide great views for evening shooting. I often choose accommodations that are close to public transportation, making it easy to get to popular photography locations without hassle. Plus, staying in a lively neighborhood can add to the experience, allowing me to immerse myself in the city’s nightlife while finding inspiration for my next shot.

Frequently Asked Questions

What is Urban Night Photography?

Urban night photography is all about capturing the essence of city life after the sun sets, focusing on the vibrant life and stunning architecture illuminated by city lights.

What gear is recommended for night photography?

For night photography, it’s recommended to use a camera with good low-light performance, a fast prime lens, a sturdy tripod for stability, and a remote shutter release to prevent camera shake.

Which cities are ideal for urban night photography?

Top cities for stunning urban night photography include New York City, Tokyo, Paris, Hong Kong, Chicago, London, Dubai, San Francisco, Las Vegas, and Sydney.

When is the best time to shoot night photography in New York City?

The best times to shoot in New York City are during the blue hour, just after sunset, and at midnight when there are fewer crowds for cleaner shots.

What camera settings are recommended for night photography?

For night photography, it’s best to use manual mode with a low ISO (around 100 or 200), a wider aperture (like f/1.8 or f/2.8), and a longer shutter speed (about 10 seconds) for capturing light trails or starry skies.

How can I ensure safety while night photography in urban areas?

To ensure safety while night photography, be aware of your surroundings, choose well-lit and populated areas, avoid isolated locations, and consider shooting in groups.

What are some tips for post-processing night images?

In post-processing, adjust exposure and contrast for better details, correct color balance to address any strange color casts, and apply noise reduction and sharpening to enhance image clarity.

What seasonal considerations should I keep in mind for night photography?

Seasonal considerations include longer days and warmer nights in summer, vibrant colors in fall, unique holiday decorations in winter, and blooming flowers in spring, each offering different photographic opportunities.

What are the benefits of booking accommodations with great city views for night photography?

Booking accommodations with great city views allows easy access to prime shooting locations and can enhance the photography experience, especially if they have rooftop bars or lounges for sunset and night captures.

How can hostels be a good option for night photographers on a budget?

Hostels can be a great option as they are often located in vibrant areas, allow for easy exploration at night, and provide opportunities to connect with fellow travelers who share photography tips.

Budget Backpacking: Mastering Urban Night Photography

Urban night photography offers a unique blend of artistry and adventure, allowing us to capture the vibrant life of cities after dark. Let’s dive into mastering this captivating skill without breaking the bank. Read Interesting article: Capture the City: Urban Night Photography Tips for Travelers

Budget Backpacking: Mastering Urban Night Photography

Understanding Urban Night Photography

What is Urban Night Photography?

Urban night photography is the art of capturing the essence of a city once the sun has set. I remember the first time I wandered the streets at night with my camera. The city transformed; neon lights flickered, shadows danced, and the hustle and bustle of daytime gave way to a serene, almost magical atmosphere. It’s not just about taking pictures; it’s about telling a story through the lens. Each shot can evoke emotions, capture moments, and showcase the beauty that often goes unnoticed during the day.

The Importance of Lighting in Night Photography

Lighting is the heart of night photography. I’ve learned that unlike daytime shooting, where sunlight is abundant, night photography requires us to be more creative with available light. Street lamps, car headlights, and shop windows become our best friends. I often find myself experimenting with long exposures to capture the trails of moving lights or the soft glow of a distant building. I encourage you to explore how different light sources can change the mood of your photographs. Urban areas provide a variety of lighting that can make your images pop, from the warm tones of street lights to the cooler hues of neon signs.

Essential Equipment for Budget Backpackers

Camera Options: DSLRs vs. Mirrorless vs. Smartphones

As a budget backpacker, I’ve tried various cameras and know that the right choice can significantly impact your night photography experience. DSLRs offer great image quality and control, but they can be heavy and expensive. I’ve personally shifted towards mirrorless cameras, which are lighter and more compact without sacrificing quality. However, I can’t ignore my smartphone either! With advancements in camera technology, many smartphones now come equipped with impressive low-light capabilities. When packing for a night shoot, I recommend considering what you’re comfortable carrying. For me, a compact mirrorless camera combined with a good smartphone strikes the perfect balance. Read Interesting article: 10 Tips for Stunning Urban Cityscape Photography

Affordable Lenses for Night Photography

Choosing the right lens can open up a world of possibilities for night photography. Fast lenses with wide apertures (f/2.8 or lower) are ideal for low-light situations. I’ve found that a prime lens, like a 50mm f/1.8, can be budget-friendly and perfect for capturing stunning night shots. The wider aperture allows more light to hit the sensor, which is crucial when shooting in the dark. I often recommend checking second-hand markets or rental services if you’re unsure about committing to a specific lens.

Tripods on a Budget: What to Look For

A stable base is essential for night photography, especially when working with longer exposure times. I’ve gone through a few tripods, and I’ve learned there’s no need to splurge on expensive options. Look for lightweight, sturdy tripods that can handle your camera setup. I found that compact tripods are great for backpacking. Some models even fold up small enough to fit in my daypack! I suggest checking out user reviews and comparing prices online to find a reliable tripod that won’t break the bank.

Additional Accessories: Filters and Remote Shutters

While not everyone considers filters essential, I’ve discovered that they can add depth and creativity to my night shots. A neutral density (ND) filter can help control light exposure during brighter nights, allowing for longer exposures without overexposing your image. Additionally, a remote shutter release is a small investment that can make a big difference. It helps eliminate camera shake, especially during long exposures. I often find myself using a smartphone app as a remote shutter, which is budget-friendly and convenient!

Urban night photography is an exciting journey that allows us to see our surroundings in a new light. Having the right equipment while keeping an eye on our budget can make this experience even more rewarding. As we explore more about locations and techniques, I’m eager to share what I’ve learned along the way.

Best Urban Locations for Night Photography

Iconic Landmarks and Cityscapes

When it comes to urban night photography, iconic landmarks are often the first places that come to mind. I remember the thrill of capturing the Eiffel Tower illuminated against the night sky; it felt surreal. These landmarks not only provide beautiful backdrops but also reflect the character of a city. Places like Times Square in New York, the Sydney Opera House, or the Golden Gate Bridge in San Francisco offer vibrant light displays and bustling energy that can make for stunning photographs. I suggest visiting these spots after dark to take advantage of the lights and the unique atmosphere. Don’t forget to explore different angles and perspectives—sometimes, the best shots come from unexpected viewpoints.

Hidden Gems: Off the Beaten Path Locations

While iconic landmarks are amazing, I’ve discovered that some of the best night photography can happen in lesser-known spots. Exploring off the beaten path often leads to surprising and unique captures. For example, I found a quaint alleyway filled with string lights that created a magical ambiance, perfect for intimate night portraits. Parks, local murals illuminated by street lights, or waterfront areas can also offer fantastic opportunities. I recommend checking out local photography forums or social media groups to find hidden gems recommended by fellow photographers. Sometimes, just wandering around a neighborhood can lead to unexpected treasures!

Safe Areas for Night Photography

Safety is a priority when shooting at night, and I’ve learned that choosing the right locations can make a big difference. Some urban areas are safer than others, so I always do a bit of research ahead of time. Popular pedestrian areas tend to be more secure, as they usually have better lighting and foot traffic. I also like to scout locations during the day to get a feel for the area before returning at night. I’ve found that places near busy cafes or restaurants not only feel safer but also provide interesting scenes to capture. Remember to trust your instincts; if a location feels off, it’s best to move on.

Techniques for Capturing Stunning Night Shots

Understanding Exposure Settings: ISO, Aperture, Shutter Speed

Mastering exposure settings is crucial for night photography, and I can’t emphasize enough how much I’ve learned through trial and error. When shooting in low light, I typically adjust my ISO first. A higher ISO lets me capture more light, but I’m cautious not to push it too high, as that can introduce noise. Aperture is next; I love using a wide aperture (like f/1.8 or f/2.8) to let in as much light as possible while creating a lovely bokeh effect in the background. Finally, shutter speed comes into play. Slower shutter speeds help gather more light but can also lead to motion blur if I’m not careful. I often find that a combination of these settings tailored to my scene creates the perfect balance.

Long Exposure Techniques for Night Photography

Long exposures can create mesmerizing effects in night photography. I remember my first attempt at capturing light trails from passing cars; it was a game-changer! To do this, I set my camera on a tripod, adjusted my shutter speed to a few seconds, and allowed the moving lights to paint across the frame. I also love using long exposures to capture the smoothness of water in cityscapes or the starry sky above a skyline. I recommend experimenting with different exposure lengths to see how they change the dynamic of your shots. The key is to have patience and be willing to try different settings until you find what works for you.

Using Natural Light and City Lights Creatively

In urban environments, I’ve discovered that combining natural light with city lights creates stunning visuals. A sunset fading into twilight can provide a beautiful gradient in the sky, making city lights pop even more. I often plan my night shoots around the golden hour to capture that magical transition. I also love to incorporate reflections from puddles or windows, which can add an extra layer of depth to my images. Using light creatively, like capturing silhouettes against a brightly lit background, can lead to dramatic and eye-catching compositions. Always keep an open mind and be ready to adapt to the lighting conditions around you!

Post-Processing Tips for Night Photography

Basic Editing Techniques for Night Shots

Edit your night shots to enhance their beauty; I’ve found that a little post-processing can go a long way. I usually start by adjusting the exposure to bring out details that might be hidden in the shadows. Increasing contrast helps to make the colors pop, especially the vibrant tones from city lights. I also like to play with clarity and sharpness, as this can bring out intricate details in my images. Color balance is another essential step, as sometimes night shots can come out with an unwanted color cast. I often find that warming up the colors a bit can make the image feel more inviting.

Recommended Software: Free and Budget-Friendly Options

There are plenty of budget-friendly editing software options, which is great for someone like me who wants to keep costs down while still enhancing my photos. I started with free programs like GIMP and Darktable, which offer powerful editing tools without the price tag. More recently, I’ve been enjoying Lightroom for its intuitive interface and mobile option. It allows me to edit photos on the go, which is super convenient when I’m traveling. I encourage you to explore different software to find what works best for your style and budget!

Budgeting for Urban Night Photography

Cost-Effective Travel Tips for Backpackers

Traveling on a budget while capturing stunning urban night photography can be a fulfilling experience. From my travels, I’ve learned a few strategies that not only help save money but also enhance my photography experience. First, I recommend using public transportation whenever possible. It’s usually cheaper than taxis and gives us a chance to explore different parts of the city. Plus, the bus or subway can offer unique photography opportunities! I’ve captured some of my favorite candid shots on public transport—people in motion, the glow of the city lights through the windows, and more.

Another tip is to travel during the off-peak season. I’ve noticed that cities are less crowded and more affordable outside of the high tourist seasons. Not only does this help with lodging and flight costs, but it also allows for more personal and intimate photography. Additionally, always keep an eye out for free events or festivals happening in the city. These can be fantastic opportunities to capture vibrant scenes while enjoying local culture. I once stumbled upon a nighttime street fair that offered incredible photo ops without costing me a dime!

Finding Affordable Accommodations with Great Views

When it comes to accommodations, I’ve found that booking a place with a view can enhance my night photography without breaking the bank. Websites like Airbnb often feature budget-friendly options that offer stunning city vistas. I remember finding a cozy apartment with a balcony overlooking a famous skyline, allowing me to capture breathtaking night shots right from my home base. It’s a wonderful way to save time and money on travel while still getting those perfect shots.

Another option is to look for hostels that offer rooftop terraces or communal areas with great views. I’ve met fellow travelers and photographers at hostels, sharing tips and experiences while enjoying a panoramic view of the city at night. Sometimes, just chatting about our favorite spots can lead to discovering hidden gems that we wouldn’t have found otherwise. I always check reviews to ensure the area is safe and the view is worth it!

Resources for Budget-Friendly Photography Workshops

Learning and improving my photography skills on a budget has been a rewarding journey. I’ve discovered online resources that offer free or low-cost photography workshops, which are perfect for backpackers like us. Websites like Meetup and Eventbrite often list local photography workshops or photo walks, and many are wallet-friendly. Participating in these events has not only improved my skills but has also provided networking opportunities with other photographers.

Additionally, I often check social media platforms for photography groups that host events or tutorials. I remember joining a weekend night photography walk organized by a local group. Not only did I learn new techniques, but I also connected with others who share my passion. Sometimes, I find free webinars hosted by professional photographers discussing urban night photography, providing me with valuable insights I can apply during my travels. Read Interesting article: Best Destinations for Unforgettable Safari Photography

Engaging with the Photography Community

Online Forums and Social Media Groups

Connecting with fellow photographers has been one of the most rewarding aspects of my journey. I’ve found that online forums and social media groups can be excellent resources for sharing tips, experiences, and inspiration. Platforms like Facebook and Reddit have active photography communities where members post their work and seek advice. I remember posting one of my night shots in a group and receiving constructive feedback that helped me improve my technique.

Instagram is another platform where the photography community thrives. Following hashtags related to urban night photography not only inspires me but also connects me with other photographers worldwide. I love seeing how different cultures approach night photography and the unique perspectives they bring. Engaging with others by commenting and sharing my work has led to exciting collaborations and friendships, making my photography journey even more enriching.

Participating in Local Meetups and Workshops

Getting involved in local meetups has been a game-changer for my photography skills. I’ve attended several workshops specifically focused on night photography, where I’ve learned from experienced photographers and practiced hands-on. These meetups often create a supportive environment where we can share our knowledge and experiences. I remember one workshop where we explored various neighborhoods at night, each person bringing their unique style to the table. The camaraderie and collective creativity were inspiring!

Local photography clubs are also worth checking out. They often host events, photo walks, and exhibitions that can enhance our skills while making new friends. I’ve discovered that many clubs welcome photographers of all skill levels, providing an excellent opportunity to learn and grow together. Getting involved in the community not only enriches our photography journey but also gives us a sense of belonging among fellow enthusiasts.

Safety Tips for Night Photography in Urban Areas

Staying Aware of Your Surroundings

When I’m out shooting at night, being aware of my surroundings is crucial. I always make it a point to stay alert, especially in unfamiliar areas. I’ve learned to keep an eye on who’s around and what’s happening nearby. If I notice anything that feels off, I don’t hesitate to move to a different location. I recommend choosing busy streets or areas with good foot traffic, as they’re generally safer. Keeping my camera gear close and being mindful of my personal space has helped me feel more secure during my night adventures.

Keeping Your Equipment Secure

Protecting your gear is just as important as staying aware of your surroundings. I’ve experienced the sinking feeling of almost losing my camera in a crowded area, and it taught me to be more careful. I usually opt for a camera bag that’s not too flashy, something that doesn’t scream “expensive gear inside.” I prefer bags that I can wear crossbody, allowing me to keep one hand on my equipment while the other is free to navigate. Additionally, I often use a wrist strap while taking shots, since it provides a little extra security. I suggest being discreet with my setup and avoiding drawing too much attention to myself when I’m shooting in public.

Choosing Safe Locations and Times for Shooting

Timing and location are everything when it comes to night photography. I’ve found that certain times of night can be quieter or more dangerous than others. I tend to shoot early in the evening when there’s still a bit of daylight left, which helps me scout locations before it gets too dark. I also make it a point to research neighborhoods ahead of time to find out which areas are known for being safe. Some cities have neighborhoods that transform at night, so it’s helpful to talk to locals or check online forums to get the lowdown on where to go and when.

Final Thoughts

Urban night photography has truly become one of my favorite ways to express my creativity. Each outing feels like an adventure waiting to happen, with the potential for unique captures around every corner. I’ve realized that with the right approach—being aware of my surroundings, securing my equipment, and choosing safe locations—I can enjoy the thrill of night photography without feeling anxious. The skills I’ve developed, the hidden gems I’ve discovered, and the connections I’ve made with fellow photographers have all enriched my journey. I hope my experiences inspire you to grab your camera and explore the vibrant world of urban night photography. Remember, the city is alive after dark, and it has so many stories waiting for us to capture.

Frequently Asked Questions

What is Urban Night Photography?

Urban night photography is the art of capturing the essence of a city once the sun has set. It involves telling a story through the lens, evoking emotions, and showcasing the beauty that often goes unnoticed during the day.

Why is lighting important in night photography?

Lighting is crucial in night photography because, unlike daytime shooting, where sunlight is abundant, night photography requires creativity with available light sources such as street lamps, car headlights, and shop windows to enhance the mood of photographs.

What camera options are recommended for budget backpackers?

For budget backpackers, mirrorless cameras are recommended as they are lighter and more compact than DSLRs while maintaining quality. Smartphones with impressive low-light capabilities are also a viable option for night photography.

What type of lens is best for night photography?

Fast lenses with wide apertures (f/2.8 or lower) are ideal for low-light situations. A prime lens, such as a 50mm f/1.8, is budget-friendly and perfect for capturing stunning night shots.

What should I look for when choosing a tripod for night photography?

When choosing a tripod for night photography, look for lightweight, sturdy options that can accommodate your camera setup. Compact tripods that fit in a daypack are great for backpacking and provide stability for longer exposure times.

How can I enhance my night shots during post-processing?

In post-processing, you can enhance night shots by adjusting exposure, increasing contrast, and playing with clarity and sharpness. Additionally, correcting color balance can help eliminate unwanted color casts.

What are some safe areas for night photography?

Safe areas for night photography typically include popular pedestrian zones with good lighting and foot traffic. It’s advisable to scout locations during the day and choose places near busy cafes or restaurants for added security.

What techniques can improve my night photography?

To improve night photography, mastering exposure settings like ISO, aperture, and shutter speed is essential. Additionally, experimenting with long exposures and creatively using natural and city lights can result in stunning images.

How can I engage with the photography community?

Engaging with the photography community can be done through online forums, social media groups, and participating in local meetups or workshops. These platforms offer opportunities for sharing tips, experiences, and networking with fellow photographers.

What are some budget-friendly tips for urban night photography travel?

Budget-friendly travel tips include using public transportation, traveling during the off-peak season, and seeking out free events or festivals. Additionally, finding affordable accommodations with great views can enhance your night photography experience without extra costs.

Capture the City: Urban Night Photography Tips for Travelers

Urban night photography is a magical experience, capturing the beauty of cities in a whole new light. With a few simple tips and the right mindset, you can transform your travel memories into stunning visuals that tell a captivating story. For more insights, check out 10 Tips for Stunning Urban Cityscape Photography.

Capture the City: Urban Night Photography Tips for Travelers

Understanding Urban Night Photography

The Appeal of Night Photography in Urban Settings

When I first ventured into night photography, I was mesmerized by how cities transform after the sun sets. The hustle and bustle of the day fades, and a different kind of energy emerges. I found that urban landscapes come alive with neon lights, illuminated buildings, and the striking contrast of shadows. There’s a certain intimacy that night photography offers—like being let in on a secret world that many people miss. I love how each city has its unique vibe at night; whether it’s the lively streets of New York or the romantic ambiance of Paris, there’s always something special waiting to be captured.

Essential Equipment for Night Photography

Having the right gear can make a significant difference in your night photography experience. I remember my first night out with just my smartphone, and while I got some decent shots, it was nothing compared to what I could achieve with a dedicated camera. Here are some essentials I recommend:

  • Camera: A DSLR or mirrorless camera is ideal for low-light conditions. They tend to perform better with larger sensors.
  • Lens: A fast lens with a wide aperture (like f/1.8 or f/2.8) helps gather more light. I often use a prime lens for its sharpness and low-light capability.
  • Tripod: Stability is crucial for longer exposures. I can’t emphasize enough how much clearer my photos became once I started using a sturdy tripod.
  • Remote Shutter Release: This can help eliminate camera shake when pressing the shutter button, especially for longer exposures.
  • Extra Batteries and Memory Cards: Night photography can drain your camera’s battery quicker than you think, so I always pack extras.

Camera Settings for Low Light Conditions

Getting the settings right is key to capturing stunning night shots. I learned through trial and error that each situation may require a different approach. Here’s a breakdown of what I typically adjust:

  • ISO: In low light, I often start at ISO 800 and adjust from there. Higher ISO settings can introduce noise, so finding the right balance is essential.
  • Aperture: I prefer to use a wide aperture (like f/2.8) to let in more light. However, if I want a greater depth of field, I may stop down to f/8. It’s all about what I want to capture.
  • Shutter Speed: This is where it gets fun; I usually start with a shutter speed of around 1/60 seconds for handheld shots and adjust as necessary. For lower light scenarios or intentional light trails, I may go for longer exposures of several seconds.
  • White Balance: I often shoot in auto white balance, but I’ll review images and switch to manual if the colors look off. Many times, I find that the city lights add their own color cast, which can be beautiful.

As I experimented with these settings, I found a rhythm that worked for me. It’s all about understanding the interplay between these elements and adjusting based on the scene in front of you. Sometimes, I’ll take a test shot to see how it turns out, then tweak my settings before getting the shot I envision.

Each time I head out to capture the night, I feel a rush of excitement. The thrill of seeing how a familiar place can transform in the dark keeps me coming back for more. I believe anyone can capture breathtaking images of urban landscapes at night with the right equipment, settings, and a bit of practice. I encourage you to pick up your camera and explore your city after hours; you might just discover a new favorite side of it that you never knew existed. For more inspiration, check out Best Destinations for Unforgettable Safari Photography.

Best Cities for Night Photography

New York City: The City That Never Sleeps

I have to start with New York City. There’s something about the energy here that captivates me every time I walk its streets at night. From the iconic skyline to the bright billboards of Times Square, every corner offers a unique photo opportunity. One of my favorite spots is Brooklyn Bridge, where I can capture both the bridge itself and the stunning backdrop of Manhattan. The way the lights of the city reflect off the East River creates a mesmerizing scene. I often find myself wandering through neighborhoods like SoHo or Greenwich Village, where the streets are lined with charming brownstones and vibrant nightlife. I think NYC’s charm at night is unparalleled—every shot I take feels alive, as if the city is telling its own story.

Tokyo: Neon Lights and Urban Energy

When I think of Tokyo, the image of neon lights flashing against the night sky comes to mind. I remember my first night in Shibuya, standing at the famous crossing, feeling overwhelmed by the sea of people and lights. The energy is contagious! I can’t recommend taking a stroll through Akihabara enough; the electric town is alive with color and technology, perfect for capturing the essence of this vibrant city. I also love heading to the Tokyo Tower at night. The tower’s illumination adds a touch of elegance to my shots, making them feel both modern and timeless. It’s fascinating how Tokyo offers both futuristic and traditional scenes, all beautifully lit at night.

Paris: Romantic Nightscapes

Ah, Paris—the City of Light. There’s a reason it’s famous for its romantic ambiance, especially at night. I remember walking along the Seine with the Eiffel Tower sparkling in the distance. The reflections on the water create a magical atmosphere that is hard to resist photographing. Montmartre is another one of my favorite spots. The charming streets, lit by warm street lamps, offer countless opportunities for stunning shots of the Sacré-Cœur and the surrounding cafes. I’ve learned that capturing the mood of Paris at night is all about the soft glow of the lights and the intimate moments of people enjoying the city. It’s like stepping into a painting.

London: Historic Landmarks at Night

London holds a special place in my heart for night photography. The mix of history and modernity makes for some captivating shots. I’ve spent many evenings by the Thames, capturing the illuminated Tower Bridge and the Houses of Parliament. The way the city lights reflect on the water creates a dramatic effect that I can’t get enough of. I also love exploring neighborhoods like Covent Garden, where street performers and cozy eateries come alive at night. One tip I have is to look for unique angles of famous landmarks, like the London Eye, to capture something different from the usual tourist shots. Each photo I take here tells a story of its rich history.

Barcelona: Vibrant Nightlife and Architecture

Barcelona is another gem for night photography. I remember the first time I wandered through the Gothic Quarter at night; the narrow, winding streets felt like stepping back in time. The soft lighting on the ancient architecture creates a surreal atmosphere, perfect for capturing the essence of the city. I also love Gaudí’s masterpieces, like the Sagrada Família, which looks stunning against the night sky. The colors and intricate details of his work come alive in my photos, giving a whole new perspective. Nightlife in Barcelona is vibrant, and I often find myself at tapas bars or beach clubs, where the energy of the city truly shines through in my images. If you’re a photography enthusiast, consider exploring Top Budget Destinations for Bird Photography Enthusiasts as well.

When to Shoot: Timing Your Night Photography

Golden Hour vs. Blue Hour

Timing is everything in photography, especially at night. I’ve learned that the golden hour, just before sunset, offers incredible lighting to set the stage for a great night shot. The warm hues can complement the upcoming city lights beautifully. However, the blue hour, which follows sunset, is equally magical. The sky takes on a deep blue shade, creating a striking contrast with the bright lights of the city. I often plan my outings to coincide with these times to capture that perfect balance of natural and artificial light.

Finding the Best Time for City Lights

One thing I’ve noticed is that not all city lights are created equal. Some places truly come alive after the sun goes down, while others might be better during twilight. For instance, I find that cities like New York and Tokyo have their best lighting once the sky is fully dark, while other locations, like Paris, can be stunning even during the blue hour. I typically scout my locations during the day, then return at night to see how the scene changes. It’s fascinating to see how the same spot can evoke different feelings depending on the time of day.

Seasonal Considerations for Night Photography

Seasonality plays a significant role in urban night photography as well. I’ve learned that winter nights can feel especially magical, with holiday lights illuminating the streets. Conversely, summer nights often bring a lively atmosphere, with people out and about enjoying the warm weather. Each season offers unique opportunities; for example, I love capturing autumn leaves illuminated by streetlights or the festive spirit of winter markets. No matter when you decide to shoot, there’s always something special to capture in every season.

Techniques for Capturing Stunning Night Shots

Using Long Exposures for Light Trails

One of my favorite techniques for night photography is using long exposures to capture light trails. The first time I tried this, I was standing on a bridge overlooking a busy street. As the cars zipped by, I set my camera to a longer shutter speed, and the mesmerizing streaks of light transformed my shot into something truly dynamic. I love how it adds a sense of movement and energy to urban scenes. Generally, I start with a shutter speed of about 5 to 10 seconds, depending on the amount of traffic. It’s amazing how something as simple as a moving vehicle can create beautiful lines in an otherwise still image. Just make sure you have a stable tripod to avoid any unwanted blurriness.

Incorporating Foreground Elements

Another technique I’ve found incredibly useful is incorporating foreground elements in my compositions. This approach adds depth and context to my night shots, which can transform an ordinary photo into something extraordinary. For example, I remember capturing a shot of the Tokyo skyline from a distance, but instead of just shooting the buildings, I included a railing in the foreground. It drew the viewer’s eye into the image, making them feel as if they were standing right there beside me. Whether it’s a tree, a statue, or even a passerby, finding interesting foreground elements can create layers in your photos that make them more engaging.

Experimenting with Different Angles and Perspectives

Night photography is a great time to get creative with angles and perspectives. I can’t tell you how many stunning shots I’ve taken just by changing my viewpoint. For instance, when photographing the Eiffel Tower, instead of taking the traditional shot from the Trocadéro, I decided to shoot from the Champ de Mars, using the pathways and gardens to frame the tower. The result was a unique photo that stood out from the typical tourist shots. I often remind myself that getting low to the ground or finding a higher vantage point can completely change the feel of an image. Don’t be afraid to explore and try different perspectives; you never know what magic you might capture!

Using Tripods and Stabilization Techniques

Having a sturdy tripod is essential for night photography, especially when using longer exposures. I learned this lesson the hard way when I tried shooting without one and ended up with a series of blurry images. I recommend investing in a good tripod that can handle various terrains, as some nights I find myself shooting on uneven ground. Additionally, I’ve found that using a remote shutter release or the camera’s timer can greatly reduce camera shake, which is crucial for clarity in low-light situations. If I don’t have my tripod with me, I’ll look for sturdy surfaces to rest my camera on, like a ledge or a wall, to stabilize my shots. Every little bit helps when it comes to capturing those crisp night images.

Post-Processing Tips for Night Photos

Editing Software Recommendations

Once I’ve captured my night shots, the next step is post-processing. I’ve tried various editing software, but I keep coming back to Adobe Lightroom for its user-friendly interface and powerful tools. I love how I can easily adjust exposure, contrast, and color balance to make my images pop. If you’re new to editing, there are plenty of tutorials online that can help you get started. I also dabble in Photoshop for more advanced edits, especially when I need to blend multiple exposures or make detailed adjustments. It’s amazing how a little editing can elevate an already stunning photo.

Enhancing Colors and Contrast

One of my favorite aspects of post-processing is enhancing the colors and contrast in my night photographs. The city lights can sometimes look washed out, so I usually increase the vibrance and saturation slightly to make them stand out. I’ve found that adjusting the contrast helps separate the highlights and shadows, giving my images more depth. I remember going back to an old shot of London’s skyline, and with just a few tweaks in color and contrast, it transformed into a breathtaking image that truly captured the essence of the city at night.

Noise Reduction Techniques

Night photography often comes with the challenge of noise, especially when shooting at higher ISO settings. I’ve experienced this firsthand, and it can be frustrating to see beautiful images marred by grainy spots. Thankfully, most editing software has noise reduction tools that can significantly improve image quality. I typically use these features cautiously, as too much noise reduction can make photos look overly smooth and unnatural. I’ve learned to balance noise reduction with detail retention, which helps keep the integrity of the image while minimizing distractions.

Safety Tips for Night Photography in Urban Areas

Staying Aware of Your Surroundings

As much as I love capturing the beauty of cities at night, I’ve learned the importance of staying aware of my surroundings. It’s easy to get lost in the moment and forget about potential safety concerns. I always make a point to scout my location before dusk and familiarize myself with the area. This way, I can identify any spots that might be less safe and avoid them. I also keep my gear secure and close to me, as night shooting can sometimes attract unwanted attention.

Choosing Safe Locations for Shooting

When selecting locations for night photography, I tend to stick to well-lit and populated areas. I’ve found that shooting in busy neighborhoods not only creates great photo opportunities but also provides a sense of security. In my experience, places with vibrant nightlife, such as markets or popular tourist spots, are ideal. It’s comforting to know that there are people around, and it often leads to spontaneous interactions that can enhance my photography experience.

Traveling in Groups vs. Solo Shooting

While I enjoy the solitude of solo night photography, I’ve realized that traveling in groups can be safer and more fun. There’s something special about sharing the experience with fellow photography enthusiasts, and it’s a great way to learn from each other. Often, we brainstorm ideas for shots together, and it ends up being a collaborative effort. If I do decide to shoot alone, I make sure to tell someone where I’ll be and check in periodically. This way, I can focus on capturing the beauty of the night without worrying too much.

Frequently Asked Questions

What is urban night photography?

Urban night photography is the practice of capturing the beauty of cities after sunset, showcasing their unique ambiance and energy through visuals that tell captivating stories.

What equipment is essential for night photography?

Essential equipment for night photography includes a DSLR or mirrorless camera, a fast lens with a wide aperture, a sturdy tripod, a remote shutter release, and extra batteries and memory cards.

What camera settings should I use for low light conditions?

For low light conditions, you should start with an ISO of around 800, use a wide aperture (like f/2.8), adjust shutter speed based on the scene (starting with around 1/60 seconds), and set white balance to auto or manual as needed.

Which cities are recommended for night photography?

Recommended cities for night photography include New York City, Tokyo, Paris, London, and Barcelona, each offering unique lighting and ambiance that enhance night shots.

When is the best time to shoot night photography?

The best times to shoot night photography are during the golden hour just before sunset and the blue hour after sunset, as they create beautiful contrasts between natural and artificial light.

What techniques can enhance night photography shots?

Techniques to enhance night photography include using long exposures for light trails, incorporating foreground elements for depth, and experimenting with different angles and perspectives to capture unique images.

How can post-processing improve night photos?

Post-processing can improve night photos by enhancing colors and contrast, reducing noise, and adjusting exposure and balance to make the images pop and better reflect the night scene.

What safety tips should I consider for night photography in urban areas?

Safety tips for night photography include staying aware of your surroundings, choosing well-lit and populated locations, and considering traveling in groups for added security.

How can I avoid camera shake during long exposures?

To avoid camera shake during long exposures, use a sturdy tripod, a remote shutter release, or the camera’s timer to minimize movement when pressing the shutter button.

What are some seasonal considerations for night photography?

Seasonal considerations for night photography include capturing holiday lights in winter, vibrant nightlife in summer, and unique autumn colors illuminated by streetlights, each season offering distinct photographic opportunities.