Web Analytics

Recent Posts

The Best Cities for Capturing Breathtaking Cityscapes

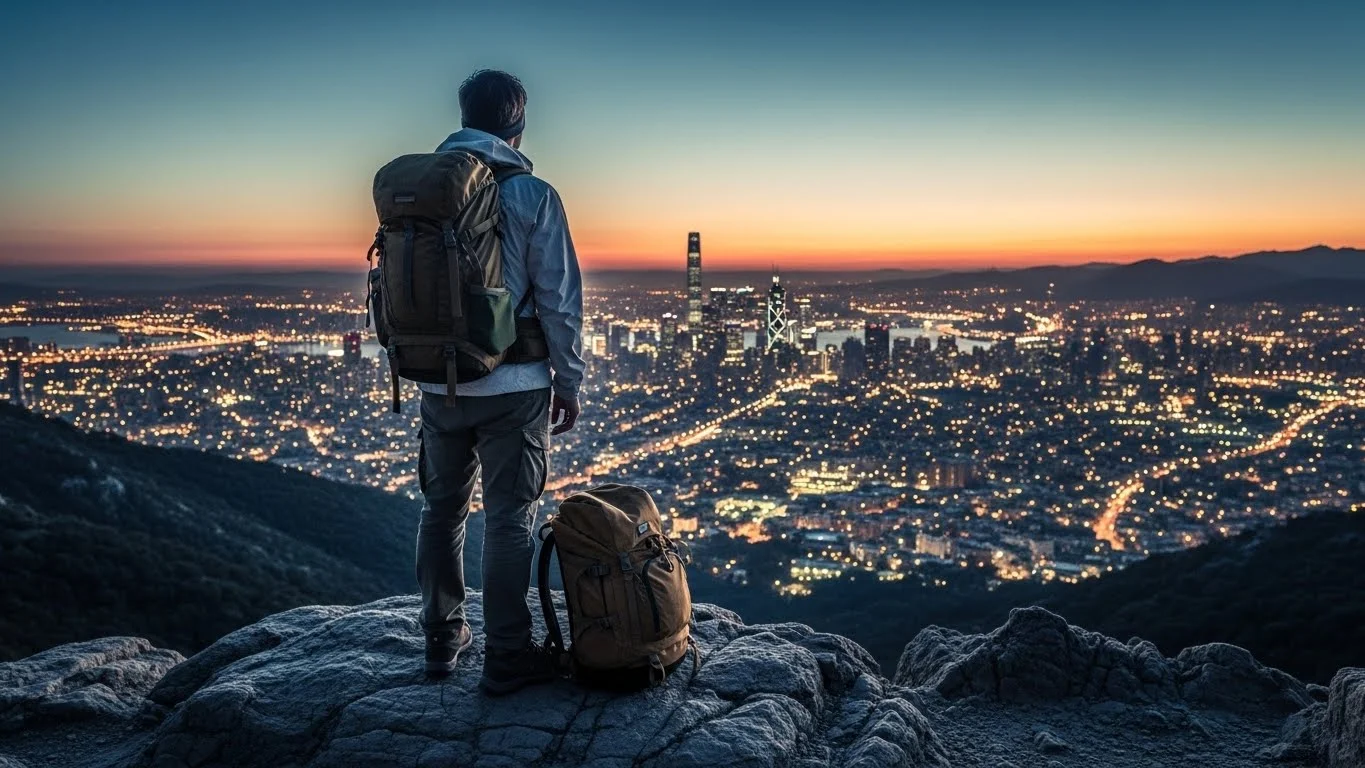
Cityscapes tell stories through their towering buildings, bustling streets, and vibrant lights. If you’re a photography enthusiast like me, capturing these scenes can be a thrilling adventure in some of the world’s most iconic cities. Read Interesting article: Budget Backpacking: Capture Incredible Cityscapes

The Best Cities for Capturing Breathtaking Cityscapes

Overview of Cityscapes Photography

What is Cityscape Photography?

Cityscape photography is an art form that focuses on the urban environment, showcasing the unique blend of architecture, culture, and life that each city embodies. I remember my first serious attempt at cityscapes, standing on a rooftop at dusk, watching as the city transformed into a dazzling mosaic of lights. The thrill of capturing that moment inspired me to explore more cities and hone my skills. From skyscrapers piercing the sky to quaint streets lined with charming cafes, cityscapes present a diverse canvas for photographers. I’ve learned that it’s not just about taking pictures; it’s about telling a story and capturing the essence of a place.

The Importance of Location in Cityscapes

Location plays a crucial role in cityscape photography. Some cities are renowned for their stunning skylines, while others may offer a vibrant street life or unique architectural styles. I often find myself researching before I travel, looking into the best spots to capture a city’s character. Each city has its hidden gems, and discovering them can lead to incredible photography. For instance, while in Paris, I stumbled upon a quiet café with a view of the Eiffel Tower framed perfectly by blooming trees—an unexpected find that became one of my favorite shots. I believe knowing the right locations can elevate your photography from ordinary to extraordinary. Read Interesting article: Best Budget Gear for Urban Landscape Photography

Top Cities for Capturing Stunning Cityscapes

New York City

Iconic Landmarks: Statue of Liberty, Empire State Building

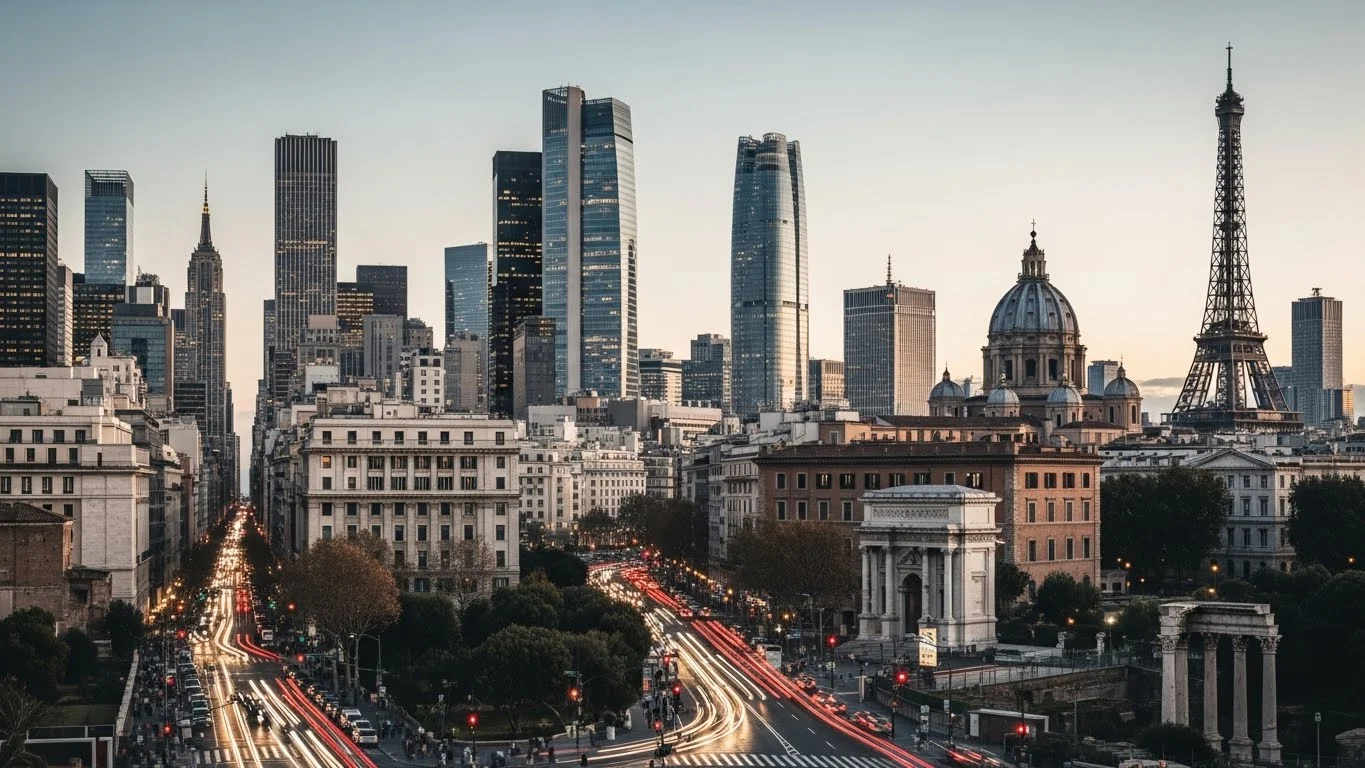
New York City is often referred to as the city that never sleeps, and it’s easy to see why. The iconic skyline, dominated by landmarks like the Statue of Liberty and the Empire State Building, offers countless opportunities for breathtaking shots. I remember standing on a ferry to capture Lady Liberty against the backdrop of Manhattan; it was a moment I’ll never forget. The sheer scale and energy of the city can be overwhelming, but that’s what makes it so exciting as a photographer. Each corner holds a new perspective just waiting to be discovered.

Best Viewpoints: Top of the Rock, One World Observatory

If you’re looking for the best viewpoints, I highly recommend visiting the Top of the Rock and the One World Observatory. From these vantage points, you can capture panoramic views of the city that are simply stunning. The sunset from the Top of the Rock is particularly magical, as the golden hour casts a warm glow over the skyscrapers. I’ve spent hours up there, just soaking in the sights and snapping photos as the city transitions from day to night. The contrast between the warm hues of sunset and the cool blues of twilight creates a beautiful backdrop for cityscapes.

Tokyo

Unique Architecture: Skytree, Shibuya Crossing

Tokyo’s unique blend of tradition and modernity makes it a fascinating city for capturing cityscapes. The Tokyo Skytree stands tall, offering an incredible view of the city below. Every time I visit, I find myself mesmerized by the organized chaos of Shibuya Crossing, where thousands of people cross paths at once. It’s a photographer’s dream, capturing the energy and rhythm of city life. I’ve found that incorporating people into my shots often adds a layer of depth and storytelling that purely architectural shots might lack.

Best Times for Photography: Day vs. Night

One of my favorite experiences in Tokyo was shooting at night. The city comes alive with neon lights, and the reflections create stunning images. I recommend visiting during both day and night to capture the city’s dual personality. During the day, the vibrant colors of the buildings pop against the clear blue sky, while nighttime transforms the city into a glittering wonderland. Each time I’ve visited, I’ve returned with a fresh perspective and a collection of images that reflect Tokyo’s dynamic spirit.

Paris

Iconic Structures: Eiffel Tower, Notre-Dame Cathedral

Ah, Paris! This city is a dream for any photographer, especially those passionate about capturing iconic structures. The Eiffel Tower, with its intricate ironwork, is a must-shoot for anyone visiting. I remember climbing to the second floor and feeling a rush of excitement as I looked out over the city. The view was breathtaking! Additionally, Notre-Dame Cathedral, with its Gothic architecture, provides countless angles and perspectives. I love wandering the streets of Paris, finding little nooks and crannies where I can capture the beauty of these landmarks.

Scenic Spots: Montparnasse Tower, Seine River

For stunning views, Montparnasse Tower offers a unique vantage point to capture the skyline of Paris, including the Eiffel Tower. Another favorite spot of mine is along the Seine River, where you can capture the reflections of the city lights in the water. I’ve spent many evenings strolling along the river, snapping photos as the sun sets and the city lights begin to twinkle. If you want to capture the romantic essence of Paris, this is the place to be. Read Interesting article: Exploring Cities: Budget-Friendly Urban Landscape Shots

Hong Kong

Skyline Views: Victoria Peak, Tsim Sha Tsui Promenade

Hong Kong is a city that dazzles with its skyline, especially when viewed from Victoria Peak. I remember making the hike up there, the anticipation building as I climbed higher. The view from the top was nothing short of breathtaking. The skyline, packed with skyscrapers, glittered against the backdrop of the harbor. There’s a dynamic energy in the air that makes photographing this city exhilarating. Tsim Sha Tsui Promenade, on the other hand, offers a different perspective. Strolling along the waterfront, I couldn’t resist stopping to snap pictures of the skyline reflecting off the water. Both locations are perfect for capturing the essence of Hong Kong’s remarkable urban landscape.

Best Time for Sunset Shots

If there’s one time to be in Hong Kong with your camera, it’s during sunset. I’ve experienced some truly mesmerizing moments as the sun dipped below the horizon, painting the sky with hues of orange and pink. This is when the city transitions from day to night, and the lights begin to twinkle. It’s a magical time to capture the skyline, as the illumination of the buildings creates a stunning contrast against the vibrant sky. I recommend arriving early to secure a good spot and to enjoy the whole spectacular transformation. Each sunset offers a unique palette, and I’ve found that no two evenings are ever the same.

Dubai

Modern Architecture: Burj Khalifa, Palm Jumeirah

Dubai is truly a wonder, showcasing some of the most stunning modern architecture in the world. The Burj Khalifa, being the tallest building on the planet, is a must-visit. I’ve stood at its base, looking up at its towering presence, and it’s hard not to feel small. Capturing this beauty is a joy, especially during the golden hour. Palm Jumeirah, with its unique palm tree shape, is another photographic gem. I remember taking a helicopter ride to get aerial shots, which offered a breathtaking perspective on this engineering marvel. There’s something surreal about photographing such futuristic designs surrounded by the desert and sea.

Unique Photography Locations: Desert Dunes, Marina

Beyond the glitz of the skyscrapers, the desert dunes offer a completely different landscape to explore. I took a trip during golden hour, and the way the light danced across the sands was magical. The curves and textures of the dunes create stunning compositions, and I found that playing with shadows can lead to some striking images. The Dubai Marina is yet another fantastic location, especially at night. The reflections of the buildings on the water create captivating scenes that I couldn’t resist capturing. Whether you’re looking for modern architecture or natural beauty, Dubai has something for every cityscape photographer.

Barcelona

Architectural Wonders: Sagrada Familia, Park Güell

Barcelona is a city filled with artistic flair, and its architecture reflects that creativity. The Sagrada Familia is a masterpiece that I believe every photographer should visit. Its intricate details offer endless angles for capturing stunning images. I spent hours there, just wandering around and finding unique perspectives. Then there’s Park Güell, another of Gaudí’s creations, which provides vibrant colors and whimsical designs. I remember feeling like I was in a dream world, snapping photos of the colorful mosaics and unique structures. Each visit to Barcelona has left me with new insights and fresh perspectives on cityscape photography.

Best City Views: Montjuïc Hill, Bunkers del Carmel

For panoramic views of Barcelona, Montjuïc Hill is a fantastic spot. I often hike up there, the climb rewarding me with breathtaking vistas of the city below. It’s a great place to capture the sprawling urban landscape against the backdrop of the Mediterranean Sea. The Bunkers del Carmel offer another stunning viewpoint, especially at sunset. I remember sharing the moment with fellow photographers as we all grabbed our cameras, excited to capture the sun dipping behind the city. This spot is less touristy and provides a more local feel, making it a perfect escape for capturing the essence of Barcelona.

London

Historic Landmarks: Tower Bridge, The Shard

London is a city rich with history and iconic landmarks, making it a haven for cityscape photography. Tower Bridge is one of my favorite spots; its Victorian gothic architecture creates a stunning backdrop for photographs. I’ve captured it from various angles, including from the river, where the reflections add depth to my images. The Shard, with its modern design, contrasts beautifully with the historical architecture around it. I remember taking a walk along the Thames, snapping photos that showed this blend of old and new, which is so characteristic of London.

Best Areas for Urban Photography: Southbank, Greenwich

The Southbank area is filled with vibrant street life and picturesque views. I love wandering along the river, stopping to capture street performers and the hustle and bustle of daily life. I’ve found that urban photography thrives in places where people interact with their environment. Greenwich, on the other hand, offers a quieter ambiance with its parks and historic sites. The view from Greenwich Park overlooking the city is stunning, especially with the skyline in the distance. I believe that finding different neighborhoods allows us to tell a more complete story of the city through our lens.

When to Visit for Optimal Cityscapes

Best Seasons for Photography

Choosing the right season can dramatically influence the mood and aesthetic of your cityscape photography. Personally, I’ve found that spring and autumn are my favorite times to visit most cities. During spring, flowers bloom, and cities feel alive with color. In Paris, for instance, the cherry blossoms create a beautiful backdrop for the Eiffel Tower. Autumn, on the other hand, offers warm tones and a cozy atmosphere. I remember wandering through Barcelona’s streets as the leaves began to change, adding a beautiful golden hue to the city’s vibrant architecture.

Summer can also be a great time, especially for cities known for their outdoor festivals and lively street life. However, the heat can be intense, and crowds can be overwhelming. I’ve had to adjust my shooting times to early mornings or later evenings to avoid the harsh midday sun. Winter may not be the most popular choice, but it has its charm. I’ve captured stunning shots of city lights against a backdrop of snow, like the quiet beauty of London in December. Each season has its unique character, and I believe exploring different times of the year can enrich your photography experience.

Time of Day for Capturing Lighting

The time of day can change the entire vibe of a photograph. I’ve always had a soft spot for the golden hour, which is that magical time just after sunrise or before sunset. The soft, warm light creates a beautiful glow that can transform ordinary cityscapes into something extraordinary. I remember standing on a rooftop in Hong Kong, watching the skyline bathe in a golden light as the sun dipped below the horizon. It was breathtaking!

Nighttime photography is another favorite of mine. Many cities come alive with colors and lights that create striking contrasts. I’ve spent countless evenings wandering through Tokyo, capturing the neon lights and bustling streets. The reflections on wet pavement after a rain shower often add an extra layer of depth to my images. I recommend planning your shoots around these times to make the most of the natural light available. Understanding how light changes throughout the day can elevate your photos significantly.

Weather Considerations

Weather can be unpredictable, but I’ve learned not to let it deter me from capturing stunning cityscapes. Overcast days, for example, can provide soft lighting that’s perfect for capturing details without harsh shadows. I remember a cloudy day in London when the sky became a giant softbox, allowing me to take detailed shots of Tower Bridge without the glare of the sun. Plus, the dramatic clouds can add an epic feel to your photos.

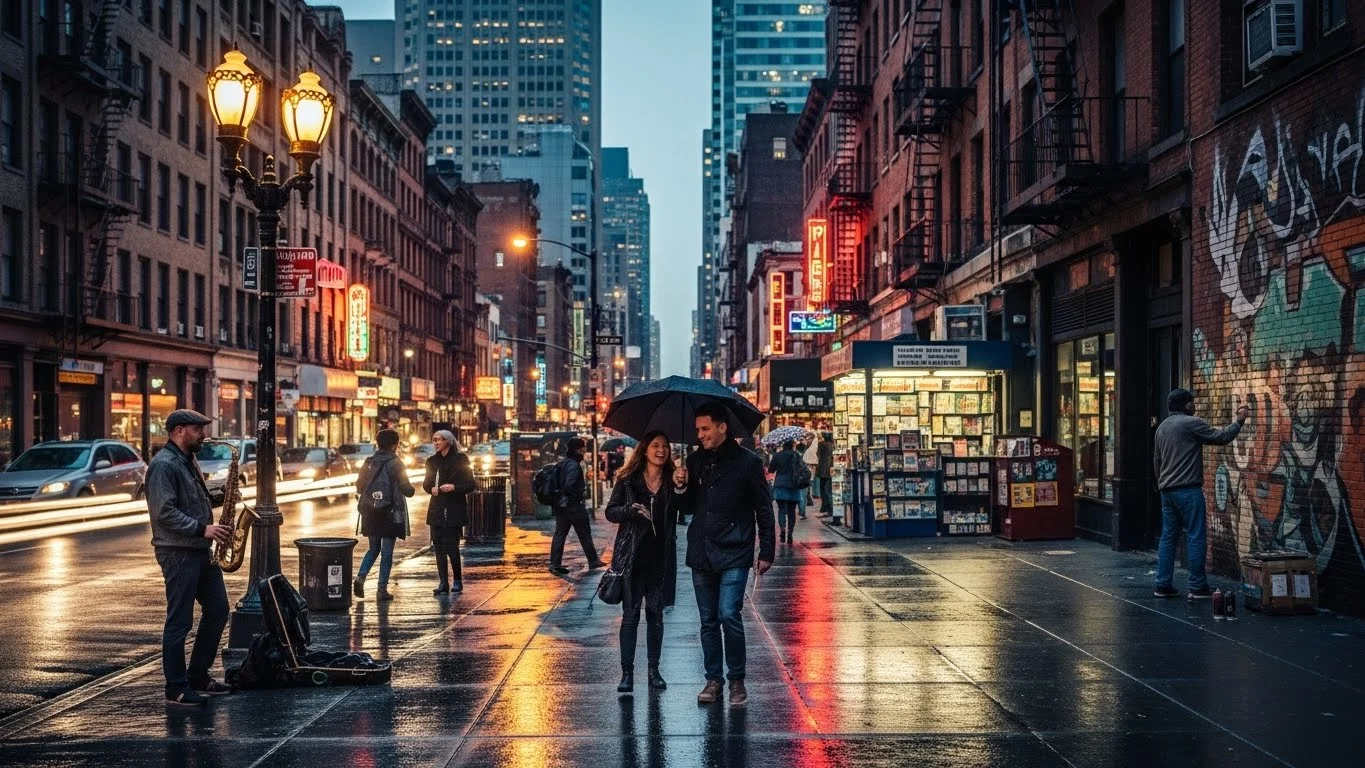
Rain can also be a wonderful opportunity for photography. I’ve often grabbed my camera and ventured out in the rain to capture reflections on wet streets. The way the city glows under streetlights on a rainy evening is something magical. Just remember to protect your gear! I use a weather-sealed camera and bring along a rain cover for my lens to avoid any mishaps.

On the flip side, clear blue skies can make for vibrant, cheerful photos, especially in cities known for their colorful architecture. I recall shooting in Dubai on a sunny day, where the brilliance of the blue sky made the skyscrapers pop with color. So, whether it’s a sunny day, a cloudy afternoon, or a rainy evening, I believe there are always opportunities for great photography; it just takes a bit of creativity and willingness to adapt.

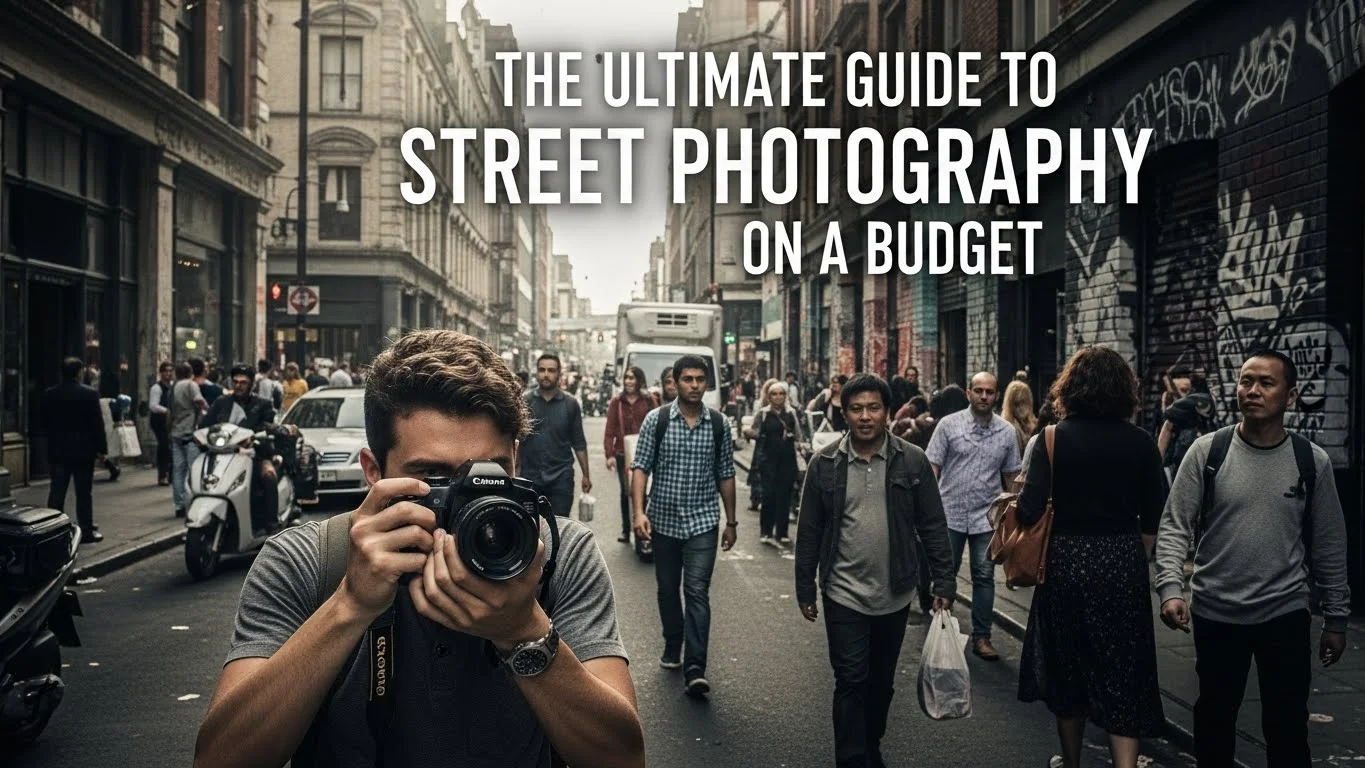
Photography Tips for Cityscapes

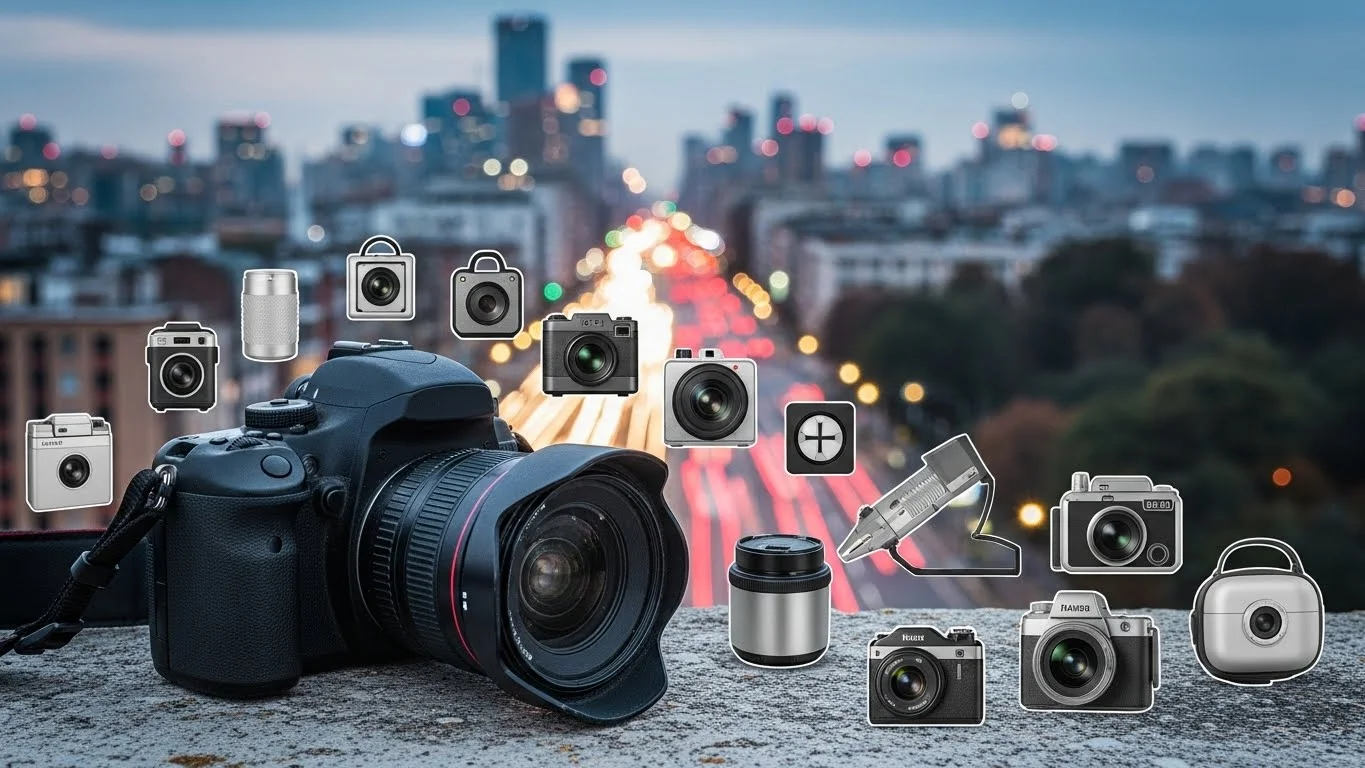
Essential Gear for Urban Photography

When I head out for cityscape photography, I like to keep my gear manageable yet versatile. A good camera is essential, but I often find that a quality lens can make a huge difference. I usually carry a wide-angle lens to capture the expansive skylines and architecture. I remember a time in Barcelona when I used my wide-angle lens to capture the Sagrada Familia in its entirety—it made all the difference in showcasing its grandeur.

I also recommend bringing a sturdy tripod, especially for low-light conditions or long exposures. I’ve had moments where setting up my tripod allowed me to take breathtaking shots of city lights reflecting in water. Additionally, don’t forget extra batteries and memory cards. I’ve found myself running out of space or power in the middle of an exciting shoot, and it’s always better to be prepared!

Framing and Composition Techniques

Composition is key in photography, and cityscapes offer so many opportunities to play with framing. I often think about the rule of thirds when composing my shots. Placing key elements off-center can create a more dynamic image. For example, when capturing a skyline, I like to leave space in the foreground for interesting architectural features or street life. This creates a narrative in my photos, inviting the viewer to explore the scene.

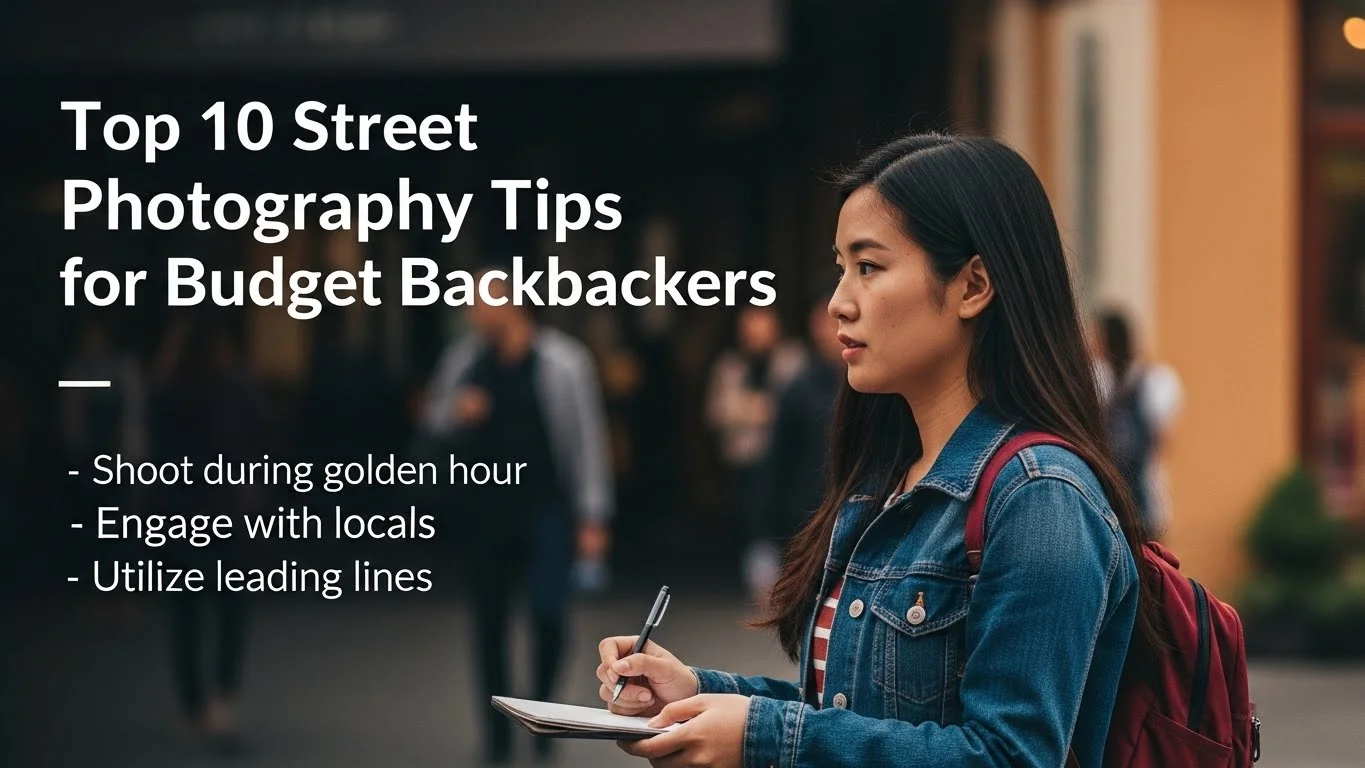
Leading lines are another powerful tool. Whether it’s a road, a river, or a row of buildings, using lines to draw the viewer’s eye can enhance the sense of depth. I once shot a busy street in Tokyo, using the lines of the crosswalk to lead the viewer’s eye toward the bustling crowd. I recommend experimenting with different angles and perspectives; sometimes, getting low to the ground or finding a higher vantage point can completely change the composition.

Using Natural Light Effectively

Natural light can be your best friend in cityscape photography. I’ve learned to observe how light interacts with the buildings at different times of the day. For instance, I enjoy shooting during the golden hour when the light is soft and warm, creating beautiful shadows and highlights. I remember standing on a rooftop in New York City during sunset, the light dancing off the skyscrapers and creating a warm glow that made everything feel magical.

Don’t shy away from experimenting with backlighting as well. Capturing a city’s silhouette against a vibrant sunset can produce striking images. I’ve taken some of my favorite photos this way, where the buildings almost look like dark shapes against a colorful sky. Learning to see light and how it affects your subject can open up a world of creative possibilities.

Frequently Asked Questions

What is cityscape photography?

Cityscape photography is an art form that focuses on the urban environment, showcasing the blend of architecture, culture, and life that each city embodies. It involves capturing the essence of a place and telling a story through images of city scenes.

Why is location important in cityscape photography?

Location plays a crucial role as different cities are known for their unique skylines, vibrant street life, or architectural styles. Researching the best spots can help photographers discover hidden gems that elevate their photography from ordinary to extraordinary.

What are some top cities for capturing stunning cityscapes?

Some top cities highlighted for capturing stunning cityscapes include New York City, Tokyo, Paris, Hong Kong, Dubai, Barcelona, and London, each offering unique landmarks and perspectives for photographers.

What are the best viewpoints in New York City for cityscape photography?

The best viewpoints in New York City include the Top of the Rock and the One World Observatory, where photographers can capture panoramic views of the city, especially during sunset.

When is the best time to photograph Tokyo?

The best times to photograph Tokyo are during both day and night. Daytime captures vibrant colors against a clear blue sky, while nighttime showcases the city alive with neon lights.

What makes Dubai a unique city for photography?

Dubai is known for its stunning modern architecture, with landmarks like the Burj Khalifa and Palm Jumeirah. The city’s futuristic designs, along with its desert dunes and marina views, provide diverse photography opportunities.

What are some essential gear recommendations for cityscape photography?

Essential gear includes a good camera, a quality wide-angle lens for capturing expansive views, a sturdy tripod for low-light conditions, and extra batteries and memory cards to avoid running out of power or space during shoots.

What composition techniques are useful for cityscape photography?

Composition techniques include using the rule of thirds to place elements off-center for dynamic images, and employing leading lines to draw the viewer’s eye and enhance depth in photographs.

How does natural light affect cityscape photography?

Natural light significantly impacts cityscape photography. Shooting during the golden hour provides soft, warm light that enhances shadows and highlights, while backlighting can create striking silhouettes against colorful sunsets.

What seasons are best for cityscape photography?

Spring and autumn are often the best seasons for cityscape photography, as spring brings blooming flowers and vibrant colors, while autumn offers warm tones and a cozy atmosphere. Each season has its unique character that can enrich the photography experience.

Budget Backpacking: Capture Incredible Cityscapes

Budget backpacking can be an exhilarating way to explore new cities while capturing stunning cityscapes. With the right mindset and a little creativity, you can experience the world without breaking the bank. If you’re passionate about photography, consider incorporating wildlife shots into your travels. Check out Wildlife Wonders: Budget Backpacking for Conservation Shots for tips on how to do this effectively.

Budget Backpacking: Capture Incredible Cityscapes

Understanding Budget Backpacking

What is Budget Backpacking?

When I first heard about budget backpacking, I was intrigued. It seemed like a way to see the world on my terms, without spending a fortune. Essentially, budget backpacking means traveling with limited funds while maximizing experiences. It’s not just about cheap accommodations; it’s about immersing yourself in the culture, meeting new people, and finding joy in the journey. I’ve always believed that the best memories come from the simplest adventures, and budget backpacking truly embodies that spirit.

Benefits of Budget Backpacking

The benefits of budget backpacking extend far beyond saving money. For me, one of the most significant advantages is the freedom it provides. Without the constraints of a lavish budget, I can choose where to go and how long to stay. This flexibility lets me linger in places that captivate me while moving quickly through those that don’t. I also discovered that traveling on a budget encourages creativity. I’ve learned to seek out local experiences that are often overlooked by tourists—like street festivals or community events. Not only do these experiences enrich my travels, but they also lead to unexpected friendships and connections.

Another perk is the sense of accomplishment that comes from managing my resources. I remember my first trip, where I meticulously planned my budget and discovered amazing street food options and affordable local attractions. Each small win, like finding a cozy hostel or a cheap bus pass, felt like a victory. Plus, budget backpacking often offers a more authentic travel experience. I’ve found that when you’re not holed up in a luxury hotel, you’re more likely to engage with locals and immerse yourself in the culture.

Essential Gear for Backpacking on a Budget

Having the right gear is crucial for a successful budget backpacking trip. I learned this the hard way during my early travels. I packed way too much, which made lugging my backpack around a struggle. Now, I focus on packing light and carrying only what I truly need. Here’s what I recommend:

  • Backpack: Invest in a good-quality, lightweight backpack. I prefer one with multiple compartments for easy organization. A 50-70L pack is usually ideal for longer trips.
  • Clothing: I pack versatile, quick-drying clothes. Layering is key, and I never forget a waterproof jacket. It has saved me on more than one occasion!
  • Footwear: Comfortable shoes are a must. I usually carry a pair of sturdy walking shoes and flip-flops for hostel stays or beach days.
  • Travel Accessories: Useful items include a portable charger, a water bottle, and a travel-sized first-aid kit. I’ve found that a good travel pillow makes a huge difference when trying to catch sleep on long bus rides.

As I hit the road, I also prioritize tech essentials. A smartphone can serve multiple purposes—navigating, taking photos, and staying in touch with family. I use apps for budgeting and finding local attractions, which helps me stay organized and on track. If you’re interested in wildlife photography while backpacking, be sure to read Budget Backpacking for Macro Wildlife Photography Lovers for specialized tips.

One of my favorite gear hacks is using a packing cube system. It keeps my belongings organized, saves time when I’m in a rush, and makes finding items in my backpack much easier. I often take a small daypack for city exploration, which allows me to carry just the essentials while I wander.

In the end, the right gear can make or break your budget backpacking experience. I’ve learned to prioritize quality over quantity, ensuring I’m well-prepared without overpacking. Whether I’m hiking through a national park or exploring the streets of a bustling city, my gear supports my journey rather than hinders it.

Choosing the Right Cityscapes

Popular Budget-Friendly Cities for Backpackers

When I think about budget backpacking, certain cities pop into my mind as ideal destinations. One of my favorites is Lisbon, Portugal. The city’s rich history, stunning architecture, and vibrant culture make it a backpacker’s paradise. Plus, it’s incredibly affordable! I remember discovering delicious pastéis de nata at local bakeries without spending more than a couple of euros. Another great option is Budapest, Hungary. With its thermal baths, ruin bars, and affordable public transportation, I found countless ways to experience the city without stretching my budget.

Chiang Mai, Thailand, is also worth mentioning. This city offers a lovely blend of culture, nature, and affordability. I was thrilled to find inexpensive street food and affordable accommodations, along with the chance to explore stunning temples and lush mountains. Finally, consider Mexico City. It surprised me with its vibrant street life, rich culinary scene, and plentiful free attractions. I could easily spend a week there without feeling the pressure on my wallet.

Off-the-Beaten-Path Destinations

If you’re looking for something a bit different, I recommend exploring off-the-beaten-path destinations. One place that left a lasting impression on me was Sucre, Bolivia. This charming city is often overshadowed by La Paz but offers beautiful colonial architecture, friendly locals, and a much lower cost of living. I felt like I had truly discovered a hidden gem.

Another unique city I stumbled upon was Lviv, Ukraine. It boasts stunning architecture, a rich coffee culture, and a vibrant arts scene—all at a fraction of the cost of more popular European cities. I found that wandering through its cobblestone streets and sipping coffee at local cafés was one of the most enjoyable experiences of my travels. Lastly, Kraków, Poland, continues to be a personal favorite. It’s a city steeped in history, and the costs are quite reasonable, especially if you explore the local eateries and markets.

Factors to Consider When Choosing a City

Choosing the right city for budget backpacking goes beyond just the cost of living. When I plan my trips, I consider several factors. First, I look at the overall safety of the destination. I always prioritize cities where I feel comfortable exploring alone, especially at night. I’ve learned that doing a bit of research on local crime rates can help me feel more secure during my travels.

Next, accessibility is crucial. I prefer cities with good public transportation options or walkable neighborhoods. It not only saves me money on taxis but also allows me to get a real feel for the city. For instance, in Lisbon, I loved taking the tram to various neighborhoods while soaking in the views along the way.

Another important factor is the availability of free or low-cost activities. I tend to gravitate toward cities that offer parks, museums with free admission days, and local festivals. I’ve found that these experiences often provide the most authentic engagement with the local culture. I also consider the local climate, as I prefer destinations where I can enjoy outdoor activities. A city with beautiful parks and pleasant weather can make all the difference in my overall experience.

Ultimately, each city offers something unique, and I find that being open to new experiences often leads to the most memorable adventures. Embracing both popular and lesser-known destinations has enriched my travels, allowing me to connect with diverse cultures while keeping my budget intact.

When to Visit: Best Times for Budget Travelers

Seasonal Variations in Costs

Timing can make a huge difference in your budget backpacking experience. From my travels, I’ve learned that visiting popular destinations during their shoulder seasons can save you a lot of money. For example, if you go to places like Barcelona or Paris in early spring or late fall, you’ll often find lower accommodation rates and fewer crowds. I remember wandering through the streets of Rome in October—mild weather, stunning autumn leaves, and hotel prices that were significantly reduced compared to the summer months.

On the flip side, peak tourist seasons typically mean higher prices across the board, from flights to food. If you can’t avoid traveling during these times, I recommend booking your accommodations well in advance to lock in better rates. In my experience, planning ahead not only helps with finances but also gives you peace of mind as you build your itinerary.

Local Festivals and Events

Attending local festivals can be a fantastic way to experience culture while keeping costs down. I’ve participated in various local celebrations around the world, and they often feature free or low-cost activities, delicious food stalls, and a chance to meet locals. For instance, while I was in Mexico City, I stumbled upon the Day of the Dead festivities, which were vibrant and full of life—definitely a highlight of my trip.

However, I’ve also learned to check the timing of these events before planning my trip, as some festivals can cause accommodation prices to spike. If you’re flexible, you might consider extending your stay to enjoy both the festival and the quieter days before or after. This way, you get the best of both worlds!

Weather Considerations

The weather can also play a crucial role in both your comfort and budget. I always keep an eye on climate patterns before traveling. For example, I love visiting Southeast Asia during the dry season, which typically runs from November to February. The sunny weather allows for outdoor activities, and I find that many attractions are more enjoyable without the rain.

Conversely, I’ve traveled to places in the off-season when the weather may not be ideal, but the savings were worth it. I remember visiting Iceland in the winter. Yes, it was cold, but I was able to see stunning landscapes and experience the Northern Lights without the summer tourist crowds. Just be sure to pack accordingly. A few extra layers can make a world of difference!

Finding Affordable Accommodations

Hostels: The Budget Backpacker’s Haven

Hostels are often the go-to choice for budget backpackers like myself. They not only provide a place to sleep but also a chance to meet fellow travelers. I’ve had some of my best travel conversations in hostel common rooms! Many hostels offer dormitory-style rooms, which significantly cut costs, but I also appreciate those that provide private rooms at reasonable rates.

One thing to look out for is the location of the hostel. I always try to find accommodations that are close to public transportation or within walking distance of major attractions. It saves on transport costs and allows for spontaneous exploration of the area. I remember a particularly great hostel in Lisbon that was just a short walk from the city center, making it easy to pop back and drop off my purchases or take a break between sightseeing.

Alternative Lodging Options (Couchsurfing, Airbnb)

While hostels are fantastic, I’ve also enjoyed the unique experiences offered by Couchsurfing and Airbnb. Couchsurfing allows you to stay with locals for free, which can provide a deeper connection to the culture. I’ve met some incredible hosts who shared their favorite spots and gave me insights that I would have never found in a guidebook.

Airbnb can be a good option too, especially if you’re traveling with a group. I find that splitting the cost of an apartment can often be cheaper than booking multiple hostel beds. Plus, having a kitchen allows me to prepare some of my meals, which is a great way to save money while enjoying local ingredients. I remember cooking with friends in an Airbnb in Budapest; it felt like a home away from home.

Tips for Booking Budget Accommodations

When booking accommodations, I always keep a few tips in mind. First, I recommend using comparison websites to find the best deals. I often start my search on sites like Hostelworld or Booking.com, but then I check the hostel or hotel’s website for any direct booking discounts.

Flexibility with your travel dates can also lead to better deals. I’ve noticed that adjusting my stay by even a day or two can significantly change the prices. Lastly, read the reviews! I can’t stress this enough. I’ve occasionally arrived at places that looked great online but were not what I expected. Reviews give real insights into what you can expect, helping me avoid unpleasant surprises.

Transportation Tips for Budget Backpackers

Public Transportation vs. Walking

When it comes to getting around a new city, I often weigh my options between public transportation and walking. In my experience, public transport can be a game changer. It’s usually affordable and efficient, allowing me to cover more ground than I could on foot. I remember hopping on the metro in Paris and feeling like I was part of the city’s heartbeat, zipping from one iconic landmark to another.

However, I’ve also discovered the joys of wandering through cities on foot. Walking allows me to stumble upon hidden gems like local cafes or quirky shops that I might otherwise miss. I particularly enjoyed exploring the streets of Istanbul this way; every turn revealed beautiful architecture or intriguing street art. I often try to balance both modes of transportation to make the most of my time and budget.

Budget Airlines and Train Passes

For longer distances, budget airlines can be a lifesaver. I’ve flown with several low-cost carriers that have allowed me to travel across Europe without draining my wallet. Booking in advance often helps snag the best deals. I learned to be flexible with my travel dates, which has led to some incredible savings. Just be wary of extra fees for baggage—those can add up quickly!

Train travel is another fantastic option, especially in regions like Europe where rail networks are extensive. I’ve found that purchasing a rail pass can sometimes save money, especially if you plan to visit multiple cities. For example, I bought a Eurail pass for a trip through Italy, and it was worth it for the convenience and access to scenic routes. Plus, there’s something magical about watching the countryside glide by from a train window.

How to Navigate Cities on a Budget

To navigate efficiently, I always download offline maps and public transport apps before I arrive. Having this information readily available has saved me from getting lost. I usually familiarize myself with the transport routes and schedules once I get to my destination. I remember feeling empowered when I figured out the tram system in Budapest; it felt like I was truly mastering the city!

Another tip: don’t hesitate to ask locals for directions or tips on transportation. I’ve found that people are often more than willing to help, and their insights can lead to better routes or even recommendations for places to visit. Embracing this local knowledge can enhance both my travel experience and my budget!

Capturing Incredible Cityscapes

Best Times for Photography (Golden Hour, Blue Hour)

As someone who loves photography, I’ve learned that timing is everything when it comes to capturing stunning cityscapes. The golden hour, which happens shortly after sunrise and before sunset, casts a warm glow that makes even the most ordinary buildings look magical. I remember standing on a rooftop in Lisbon, waiting for the sun to dip below the horizon, and the city transformed into a canvas of vibrant colors.

Blue hour, the time just after sunset, is equally enchanting. The sky shifts into a deep blue, providing a stunning backdrop for city lights. I’ve taken some of my favorite photos during this time, like in Prague, where the lights reflected off the Vltava River, creating a breathtaking scene.

Iconic Locations for Cityscape Photography

There are certain spots I always seek out for iconic cityscape shots. High viewpoints, like hills or observation decks, often provide sweeping views that capture the essence of a city. For instance, I climbed to the top of the Basilica di Santa Maria del Fiore in Florence, and the panoramic view of the terracotta rooftops was unforgettable.

Each city has its own unique landmarks that are worth capturing. I love to photograph the skyline of New York City from Brooklyn Bridge Park. The contrast between the historic bridge and the modern skyline is stunning. Finding these spots often involves a bit of research, but it’s always rewarding when I discover a perfect angle.

Utilizing Local Viewpoints and Hidden Gems

While iconic locations are fantastic, I find that some of the best photography spots are hidden gems—places that don’t make it onto the typical tourist list. I’ve stumbled upon secret gardens, quiet streets, and lesser-known viewpoints that offer a different perspective of the city. In Barcelona, for instance, I found a small park that was off the beaten path, and it provided a beautiful, peaceful setting for photos without the crowds.

As I explore, I keep my camera ready, ready to capture spontaneous moments and unique angles. Engaging with the local culture through photography not only enhances my travel experience but also creates lasting memories. I’ve often looked back at my photos and felt transported back to those moments, reliving the excitement of discovery. For those interested in underwater photography, I recommend checking out Explore Underwater Wildlife: Budget Backpacking Photography Guide for more insights.

Local Food on a Budget

Street Food vs. Restaurants

One of the joys of budget backpacking is experiencing local cuisine without overspending. I’ve found that street food is often not only affordable but also a delicious way to sample authentic dishes. I remember my time in Bangkok, where I savored pad Thai from a street vendor for just a few dollars. Each bite was bursting with flavors that I still crave!

While I enjoy street food, I also like to explore budget-friendly restaurants. I usually ask locals for their recommendations, and I’ve discovered fantastic places that offer hearty meals at reasonable prices. In Lisbon, I was taken to a small tavern where I tried bacalhau à brás—delicious codfish that felt like a warm hug on a chilly evening.

Local Markets and Grocery Shopping

Visiting local markets is another highlight of my travels. I love wandering through vibrant markets, sampling fresh fruits, and admiring the local produce. In Mexico City, I visited a market where I tried a variety of salsas and ended up chatting with vendors about their recipes. I find that these experiences help me connect with the culture on a deeper level.

Doing a bit of grocery shopping can also save money. I often buy snacks or ingredients to prepare simple meals in my accommodation. I remember cooking a stir-fry with fresh veggies from a market in Chiang Mai; it felt great to eat healthy while saving money. Plus, it’s a fun way to experiment with local ingredients!

Budget-Friendly Dining Tips

To save money while dining out, I look for lunch specials or “menu del dia,” which many restaurants offer. These meals usually come at a great price and provide a taste of various local dishes. I also try to avoid touristy areas for dining since prices can be inflated. Exploring neighborhoods less frequented by tourists has led me to some of my best meals.

Lastly, I always keep an eye out for food trucks or pop-up eateries. They often serve amazing dishes at reasonable prices. I’ve found that being adventurous with food not only satisfies my taste buds but also enriches my travel experiences.

Safety Tips for Backpacking in Cities

Staying Safe While Exploring Urban Areas

Safety is always a priority when I travel. I’ve learned to trust my instincts and stay aware of my surroundings, especially in crowded areas. It’s essential to keep my belongings secure—using a crossbody bag helps me feel more at ease. I’ve also developed the habit of keeping my valuables in a money belt or hidden pouch, which gives me peace of mind when exploring a new city.

I find that it’s important to research the safety of neighborhoods ahead of time. I usually ask fellow travelers or locals about areas to avoid and stick to well-lit spots when I’m out after dark. While most cities are safe, knowing where to go and where to be cautious can make a significant difference.

Common Scams and How to Avoid Them

During my travels, I’ve encountered a few scams, and I learned to be alert. One common one is when someone approaches you asking for help and distracts you while an accomplice takes your belongings. I’ve found that keeping my distance and politely declining can often avoid such situations.

Another scam I’ve seen involves overly friendly strangers offering to take your photo or show you around. While many people are genuinely nice, I prefer to keep interactions brief and avoid engaging too much. Trusting my gut has helped me navigate these encounters safely.

Emergency Contacts and Resources

It’s wise to have emergency contacts readily available. I make sure to note down local emergency numbers and the address of my accommodation. Having a local SIM card or a portable Wi-Fi device can also be beneficial for accessing maps and emergency contacts on the go. In my experience, being prepared can make all the difference in a challenging situation.

Budgeting Your Trip

Creating a Daily Budget

Budgeting is crucial for a successful backpacking trip. I usually start by estimating my daily expenses, including accommodation, food, transportation, and activities. I’ve found that setting a daily budget helps me stay on track and avoid overspending. For instance, on a recent trip to Southeast Asia, I aimed for around $30 per day, which pushed me to seek out affordable food and experiences.

Managing Expenses on the Road

As I travel, I keep track of my expenses in a simple notebook or app. I record my daily spending, which helps me see where my money is going and adjust if necessary. I remember a time when I realized I was spending too much on coffee, so I shifted to buying instant coffee for my hostel. Small changes like this can add up over time!

Tools and Apps for Budget Tracking

There are several budgeting apps that I’ve found helpful, like Trail Wallet or Mint. They allow me to categorize my expenses and see how I’m doing against my budget in real time. Knowing that I have a handle on my finances gives me the freedom to enjoy my travels without stress.

Engaging with Local Culture

Free Activities and Attractions

One of my favorite ways to engage with local culture is through free activities. I often seek out free walking tours, which are a great way to explore a city while learning about its history. I’ve joined several of these tours, and they’ve led me to places I might not have discovered on my own. Plus, it’s a chance to meet fellow travelers!

Connecting with Locals

During my travels, I’ve made an effort to connect with locals. Whether it’s through Couchsurfing, attending community events, or just striking up conversations at cafes, these interactions have enriched my experience. I remember chatting with a local artist in Lviv who shared his perspectives on the city; it gave me a deeper appreciation for the culture.

Supporting Local Businesses on a Budget

Whenever possible, I try to support local businesses. I enjoy shopping at local markets and eating at family-owned restaurants. Not only does it keep my budget intact, but it also helps the local economy thrive. I’ve found that these small steps can lead to more meaningful connections and experiences, making my travels even more rewarding.

Final Thoughts

Budget backpacking has transformed the way I explore the world. It’s about embracing simplicity, creativity, and connection. The memories I’ve made aren’t tied to lavish spending but rather to genuine experiences, new friendships, and the thrill of discovery. As I continue my adventures, I find joy in the little things—like sharing a meal with locals or capturing a breathtaking sunset. I hope this journey inspires you to embark on your own budget backpacking adventures, where every penny saved can lead to priceless memories.

Frequently Asked Questions

What is budget backpacking?

Budget backpacking means traveling with limited funds while maximizing experiences. It’s about immersing yourself in the culture, meeting new people, and finding joy in the journey, rather than just seeking cheap accommodations.

What are the benefits of budget backpacking?

The benefits include freedom to choose your destinations and duration of stay, encouragement of creativity in seeking local experiences, a sense of accomplishment from managing resources, and a more authentic travel experience by engaging with locals.

What essential gear should I pack for budget backpacking?

Essential gear includes a good-quality, lightweight backpack, versatile quick-drying clothing, comfortable footwear, travel accessories like a portable charger and water bottle, and tech essentials like a smartphone for navigation and budgeting.

What are some popular budget-friendly cities for backpackers?

Popular budget-friendly cities include Lisbon, Portugal; Budapest, Hungary; Chiang Mai, Thailand; and Mexico City, known for their affordability and rich cultural experiences.

What factors should I consider when choosing a city for budget backpacking?

Consider safety, accessibility (public transportation and walkable neighborhoods), availability of free or low-cost activities, and the local climate when choosing a city for budget backpacking.

When is the best time to visit for budget travelers?

Visiting during shoulder seasons can save money. Local festivals can offer cultural experiences at low costs, but be cautious as they might increase accommodation prices. Weather considerations are also important for comfort and enjoyment.

What are some tips for finding affordable accommodations?

Look for hostels, consider Couchsurfing or Airbnb, use comparison websites for the best deals, be flexible with travel dates, and read reviews to ensure the accommodation meets expectations.

How can I navigate cities on a budget?

Balance public transportation with walking to explore cities effectively. Use offline maps and local transport apps, and ask locals for directions or tips to enhance your travel experience.

What are some budget-friendly dining options while traveling?

Street food and local markets are great for affordable meals. Look for lunch specials, avoid touristy areas, and consider cooking simple meals if you have kitchen access in accommodations.

How can I stay safe while backpacking in cities?

Trust your instincts, keep your belongings secure, research safety of neighborhoods, avoid engaging too much with overly friendly strangers, and have emergency contacts readily accessible.

10 Tips for Stunning Urban Cityscape Photography

Urban cityscape photography offers a unique chance to capture the vibrant life and architecture of a city. With the right techniques and tips, you can transform ordinary scenes into stunning visual stories. Read Interesting article: Urban Landscape Photography: Travel on a Budget

10 Tips for Stunning Urban Cityscape Photography

Understanding Urban Cityscape Photography

The Essence of Urban Cityscapes

When I think of urban cityscape photography, I envision the bustling streets, towering skyscrapers, and the little moments that often go unnoticed. It’s more than just capturing buildings; it’s about telling a story through the lens. The essence of urban cityscapes lies in the way these environments interact with the people who inhabit them. I remember my first time walking through a busy downtown area, overwhelmed by the sights and sounds, and how I wanted to hold that feeling in a photograph. Each city has its unique character, from the historical architecture of European towns to the ultra-modern skylines of cities like Dubai or New York. Capturing that essence is what makes cityscape photography so compelling.

Different Types of Cityscapes

Urban cityscapes can be broadly categorized into several types, each offering its own challenges and rewards. For me, exploring these different types has helped sharpen my skills and broaden my creative perspective. Here are a few common types:

  • Architectural Cityscapes: These focus on buildings and structures, showcasing their design and form. I often find myself drawn to the intricate details of older buildings and the sleek lines of modern designs.
  • Street Scenes: These capture the daily life of the city, featuring people, vehicles, and interactions. I love the spontaneity of capturing a candid moment amidst the chaos.
  • Skyline Shots: A classic approach, where the skyline of a city is the main subject. I often plan my trips around specific vantage points to get the best views, especially during sunset.
  • Nightscapes: These are all about capturing the city after dark when the lights come alive. There’s something magical about the glow of neon signs and the shimmering reflections on wet pavement.

Popular Urban Locations for Photography

Every city has its hotspots for photography, and discovering these locations can be a thrilling part of the process. I’ve made it a habit to research and explore before I head out. Here are some popular urban locations that I’ve found particularly rewarding:

  • Iconic Landmarks: Places like the Eiffel Tower in Paris or the Golden Gate Bridge in San Francisco are not just tourist spots; they can be the centerpiece of stunning compositions. I remember standing on the Brooklyn Bridge, waiting for the right moment to capture both the city and the bridge in one shot.
  • Rooftop Views: Many cities offer rooftop bars or observation decks that provide breathtaking views. I’ve often found these spots to be perfect for both sunset and night photography, as the city lights start to sparkle.
  • Parks and Public Spaces: Urban parks can provide a contrasting backdrop to the concrete jungle. I love capturing the juxtaposition of nature within the city, whether it’s a serene lake in Central Park or people enjoying their day in a city square.
  • Quaint Neighborhoods: Exploring neighborhoods with unique architecture and culture can yield unexpected gems. I often wander through local streets, finding charming buildings and vibrant street art that reflects the city’s character.

Choosing the right location can dramatically affect your photos. I always keep my camera ready, as the best shots often come when I least expect them. Urban cityscape photography invites us to look deeper, to find beauty in the everyday and to share our unique perspective through our images.

Essential Gear for Urban Cityscape Photography

Camera Types: DSLR vs. Mirrorless

Choosing the right camera for urban cityscape photography can feel a bit overwhelming, especially with so many options available. Personally, I’ve experimented with both DSLR and mirrorless cameras, and I can honestly say each has its strengths. DSLRs are known for their durability and battery life; I often appreciate the feel of a sturdy DSLR in my hands when I’m out shooting. However, mirrorless cameras have been a game-changer for me due to their compact size, lighter weight, and silent operation, which helps when I’m trying to capture candid moments without drawing too much attention. If I had to recommend one, I’d say go for what feels right in your hands and fits your shooting style. You might find that trying out both types can help you determine what you prefer.

Lenses for Cityscape Photography

The lens you choose can dramatically influence your cityscape images. From my experience, a wide-angle lens is often indispensable for capturing the breadth of a skyline or the grandeur of towering buildings. I particularly love my 16-35mm lens; it allows me to fit more of the scene into the frame without having to step back too far. However, I’ve also found that having a good prime lens, like a 50mm, brings a level of sharpness and clarity that can make a big difference in detailed shots. Additionally, I’ve realized that experimenting with telephoto lenses can help create unique perspectives by isolating architectural elements or compressing the distance between buildings. It’s all about what story you want to tell with your images. Read Interesting article: Best Budget Gear for Urban Landscape Photography

Tripods: Stability and Composition

Now let’s talk tripods, which I’ve learned are essential for urban photography, especially in low-light situations or when using longer exposures. A sturdy tripod allows you to eliminate camera shake, ensuring that your images are crisp and clear. I remember one time setting up my tripod in a busy square, waiting for the perfect moment to capture the city lights reflecting off a glass building. Without my tripod, I wouldn’t have been able to achieve the longer exposure necessary to get that dreamy effect. I prefer lightweight models that are easy to transport, but I also ensure they’re stable enough to handle windy conditions. It’s a balance, but investing in a good tripod has made a noticeable difference in the quality of my photos.

Mastering Composition Techniques

The Rule of Thirds in City Photography

Composition is critical in photography, and one of the first techniques I learned was the rule of thirds. This simple guideline suggests dividing your frame into a 3×3 grid and placing key elements along these lines or at their intersections. I often find that it helps create more balanced and visually appealing images. For example, when photographing a city skyline, I might place the horizon along the bottom third while positioning a notable building off to one side. This not only draws the viewer’s eye but gives the image a sense of movement. I can’t tell you how many times I’ve reviewed my shots and realized that just a slight adjustment in composition could elevate the entire photo.

Leading Lines and Symmetry

Another technique I love utilizing is leading lines, which naturally guide the viewer’s eye through an image. Urban environments are filled with these lines—from roads and pathways to the edges of buildings. I’ve often found that a well-placed street or sidewalk can lead the viewer directly to the main subject of my photograph. Additionally, symmetry can create striking images, especially when capturing the facades of buildings or reflecting pools. I remember snapping a shot of a perfectly symmetrical building, and it felt like the image almost popped off the page. Combining these two techniques can add depth and intrigue to your photographs, making them more engaging.

Incorporating Foreground Elements

Including foreground elements is another technique that can enhance the depth of your cityscapes. I enjoy finding interesting objects like benches, street signs, or even people that can frame the main subject. This technique creates layers in your image, drawing the viewer’s eye from the foreground to the background. For instance, during a visit to a busy plaza, I positioned a chair in the foreground while capturing the bustling scene behind it. It added context and a sense of place to my shot. I believe it’s all about enhancing the storytelling aspect of urban photography and providing viewers a glimpse into the life that surrounds the main subject.

Lighting and Timing for Stunning Shots

Golden Hour: When to Shoot

When it comes to lighting, the golden hour is my absolute favorite time to shoot. This magical period right after sunrise or before sunset bathes the city in warm, soft light and creates long shadows that add drama to my images. I always try to plan my outings around this time; I’ve found that it brings a whole new level of beauty to even the most ordinary scenes. The way the sun reflects off buildings and highlights their textures is something I never get tired of. I’ve learned that a little bit of planning goes a long way in capturing those stunning, golden moments.

Dealing with Harsh Midday Sun

Of course, not every shoot happens at golden hour, and I’ve had to adapt to shooting during the harsh midday sun sometimes. I’ve discovered that finding shaded areas can help reduce squinting and harsh shadows on my subjects. Additionally, I try to shoot at an angle where the sun is at my back, which helps create more even lighting on my subject. If I can’t find shade, I often look for interesting reflections or shadows cast by buildings. These elements can add an artistic touch that transforms the harsh light into an advantage, rather than a hindrance.

Night Photography: Capturing the City Lights

Night photography holds a special allure for urban photographers like me. There’s something magical about capturing the city lights as they illuminate the streets and buildings. I’ve learned to embrace longer exposures during these shoots, which allows me to capture the vibrant colors and movement of nightlife. A good tip I’ve picked up is to scout my locations during the day so I know where to set up later. I remember one night walking along a bustling street, setting my camera on a tripod, and just being in awe as the lights danced in my frame. It’s moments like these that remind me why I love urban photography.

Post-Processing Tips for Urban Cityscapes

Editing Software Recommendations

Once I’ve captured some great shots, the fun doesn’t stop there! The editing process is a crucial part of my workflow. I’ve tried several software options, and I’ve found that Adobe Lightroom and Photoshop are my go-tos. Lightroom is fantastic for batch editing and organizing photos, which saves me a lot of time. The intuitive sliders make adjusting exposure and color balance a breeze. For more detailed edits, like retouching or compositing, I turn to Photoshop. It’s powerful and allows for endless creativity. If you’re looking for something more budget-friendly, I highly recommend checking out Your Guide to Budget-Friendly Seasonal Landscape Photography or even free options like GIMP. Each tool has its unique features, so it’s worth experimenting to see what fits your style best.

Basic Adjustments: Contrast and Exposure

One of the first things I do in post-processing is adjust contrast and exposure. I’ve learned that even a slight tweak can dramatically enhance a photo. For cityscapes, making the shadows deeper can add drama, while boosting highlights can bring out the sparkle of city lights. I always keep an eye on the histogram to ensure I’m not losing detail in the highlights or shadows. I remember one photo of a sunset skyline where increasing the contrast really made the colors pop and added depth to the buildings. It’s all about balancing those adjustments to get a natural yet striking look.

Enhancing Colors and Details

After the basic adjustments, I dive into enhancing colors and details. I love playing with vibrance and saturation to make the hues of a cityscape come alive. It’s important to be careful here; too much saturation can make a photo look unnatural. I often use selective adjustments to enhance specific areas without overdoing it. For example, I might increase the vibrancy of the sky while keeping the foreground colors more subdued. Additionally, sharpening can help bring out the fine details in architecture, which I think adds a professional touch to my images. I remember editing a shot of a historic building where a bit of sharpening helped highlight the intricate carvings—transforming it into a focal point of the image.

Creative Techniques to Stand Out

Long Exposure Photography

One technique that has truly transformed my urban photography is long exposure. It allows me to capture movement in a way that’s visually striking. I often use this technique when photographing busy streets or flowing water. By using a tripod and a neutral density filter, I can extend my exposure time, creating that silky smooth effect of cars and people in motion while keeping the buildings sharp. I remember one evening at a busy intersection, capturing the trails of headlights and taillights as streaks of color against the stillness of the buildings. It added a dynamic layer to the photo, telling a story of urban life in motion.

Using Reflections in Urban Environments

Reflections are another creative element I love to incorporate in my cityscape photography. Glass buildings, puddles, and even shiny surfaces can create unique compositions. I’ve found that capturing reflections can add a whole new dimension to an image. For instance, while shooting a modern skyscraper, I aimed my camera downwards toward a puddle after a rain. The reflection mirrored the building perfectly, creating a symmetrical and intriguing shot. It’s moments like these that remind me to always look down as much as I look up. There’s a whole world reflected in the surfaces around us!

Incorporating People for Scale and Story

Including people in my cityscape shots has been a game-changer for storytelling. It adds scale and context to the images, making them feel alive. I often wait for the right moment to capture a person walking through a frame or interacting with their environment. One of my favorite shots features a lone figure standing at a busy crosswalk against a backdrop of towering buildings. This contrast not only showcases the scale of the city but also invites viewers to imagine the story behind that person. I feel that including human elements brings an emotional connection to the image, making it more relatable.

Safety and Etiquette in Urban Photography

Staying Safe While Shooting in Cities

Shooting in urban environments can be thrilling, but it’s essential to prioritize safety. I always stay aware of my surroundings, especially in crowded areas or unfamiliar neighborhoods. I’ve learned to avoid displaying expensive gear in public and to keep my camera secure and close. It’s also wise to plan my shooting times and locations, opting for busier areas during daytime hours. I remember once getting lost in a less populated area while trying to find a unique shot; it was a reminder that keeping my head on a swivel is vital. Safety should never take a backseat to creativity.

Respecting Privacy and Local Laws

Respecting privacy is crucial when photographing in urban settings. I always consider whether someone might feel uncomfortable being in my shot. If I’m focusing on a specific person or group, I make sure to ask for permission first. Additionally, I’ve learned about local laws regarding photography, especially in places like museums or private property. It’s always better to err on the side of caution. I remember one instance where I was photographing a local street festival; I made sure to respect the organizers’ requests and only took photos of people who were open to it. It’s about creating a positive experience for everyone involved.

Best Practices for Interacting with Locals

Interacting with locals can enrich my urban photography experience. I always try to engage with people I meet, asking for recommendations on hidden gems or unique spots. This not only helps me find great locations but also creates a sense of community. I remember chatting with a street vendor who shared some amazing local insights about the area. That conversation led me to some of my favorite photo opportunities, like vibrant murals and bustling markets. Being friendly and respectful can open doors and create memorable experiences while capturing the essence of a city.

Frequently Asked Questions

What is the essence of urban cityscape photography?

The essence of urban cityscape photography lies in capturing the vibrant life and architecture of a city, telling a story through the lens, and showcasing the interaction between the environment and the people who inhabit it.

What are the different types of urban cityscapes?

Urban cityscapes can be categorized into several types, including architectural cityscapes, street scenes, skyline shots, and nightscapes, each offering unique challenges and rewards for photographers.

What are some popular urban locations for photography?

Some popular urban locations for photography include iconic landmarks, rooftop views, parks and public spaces, and quaint neighborhoods that reflect the city’s character.

What camera types are recommended for urban cityscape photography?

Both DSLR and mirrorless cameras are recommended for urban cityscape photography. DSLRs are known for their durability and battery life, while mirrorless cameras are appreciated for their compact size and silent operation.

What lens is often considered essential for cityscape photography?

A wide-angle lens is often considered essential for cityscape photography, as it allows photographers to capture the breadth of a skyline or the grandeur of buildings effectively.

Why are tripods important in urban photography?

Tripods are important in urban photography as they provide stability, especially in low-light situations or when using longer exposures, eliminating camera shake and ensuring crisp, clear images.

What is the ‘golden hour’ in photography?

The ‘golden hour’ refers to the magical period right after sunrise or before sunset when the city is bathed in warm, soft light, creating ideal conditions for photography.

How can harsh midday sun be managed in photography?

To manage harsh midday sun, photographers can find shaded areas to reduce squinting and harsh shadows, or position themselves with the sun at their back to create more even lighting on subjects.

What role do reflections play in urban cityscape photography?

Reflections can add a unique dimension to urban cityscape photography, creating interesting compositions by capturing mirrored images from glass buildings, puddles, and shiny surfaces.

What are some safety tips for shooting in urban environments?

Safety tips for shooting in urban environments include staying aware of surroundings, avoiding displaying expensive gear, planning shooting times and locations, and being cautious in less populated areas.

The Ultimate Guide to Street Photography on a Budget

Street photography is an exciting way to capture the world around us, but it doesn’t have to break the bank. Whether you’re a beginner or just looking to expand your skills, I’m here to share insights into street photography on a budget. For more tips, check out Top 10 Street Photography Tips for Budget Backpackers.

The Ultimate Guide to Street Photography on a Budget

Understanding Street Photography

What is Street Photography?

Street photography, to me, is about capturing everyday life in public spaces. It tells stories, reveals emotions, and showcases the beauty of the ordinary. I remember the first time I picked up my camera, wandering through city streets, feeling a rush of excitement as I snapped moments that spoke to me. It’s not just about the photos; it’s about the experiences we have while capturing them. Each click of the shutter allows us to freeze a fleeting moment in time, making it a powerful form of artistic expression.

History and Evolution of Street Photography

Street photography has a rich history that dates back to the early 20th century. With pioneers like Henri Cartier-Bresson and Garry Winogrand, it evolved from mere documentation to an art form that captures the soul of urban life. I’ve often found myself inspired by the way these photographers used their cameras to tell stories about the world around them. They ventured into busy streets, capturing candid moments that resonate with us today. Over the decades, the evolution of technology, from film to digital, has made street photography more accessible. I remember when I first transitioned to digital; it opened up a whole new world of possibilities for me. No longer confined to a limited number of exposures, I could shoot freely, experimenting with angles and compositions.

Key Elements of Street Photography

When I think about street photography, several key elements come to mind. Firstly, candidness is essential. I love capturing people in their natural state, unaware of the camera. This spontaneity adds authenticity to the images. Secondly, composition plays a vital role. I’ve learned that framing a shot can completely change its impact. Understanding light and shadows is another crucial aspect; they can transform a dull scene into something magical. Finally, storytelling is at the heart of it all. Every photo should have a narrative, whether it’s the joy of an impromptu moment or the melancholy of a solitary figure in a bustling city. These elements combined create compelling images that resonate with viewers. For more on capturing life in urban settings, visit Urban Street Photography: Techniques for Capturing Life.

Essential Gear for Street Photography on a Budget

Choosing the Right Camera

When it comes to gear, I’ve found that you don’t need the latest and greatest camera to take stunning street photos. In my experience, a compact camera or even a mirrorless option can work wonders. These types of cameras are lightweight, making it easier to carry them around all day. I often use my older model, which has served me well without the hefty price tag of newer versions. The key is to understand your camera and make it an extension of yourself. Familiarizing yourself with its settings can help you react quickly to unexpected moments.

Best Budget Lenses for Street Photography

Choosing the right lens can feel overwhelming, but I’ve found that a good prime lens is often the best choice for street photography on a budget. A 35mm or 50mm lens provides a natural perspective, which is great for capturing everyday scenes. I remember my first 50mm lens; it opened up a whole new way of seeing the world. It’s affordable and offers a beautiful depth of field, allowing me to isolate subjects from their backgrounds. This simple investment has been a game-changer for my street photography.

Accessories to Enhance Your Photography

While the camera and lens are important, certain accessories can enhance your street photography experience without costing much. A sturdy strap can make carrying your camera more comfortable, especially during long walks. I also recommend investing in a good lens cleaning kit; keeping your lens free of smudges can dramatically improve your photos. A portable reflector can help bounce light onto your subject, especially in tricky lighting conditions. I’ve used reflectors to create stunning portraits right on the street, which was a fantastic way to elevate my images.

Smartphone Photography for Street Shots

Don’t underestimate the power of a smartphone for street photography. I’ve had days when my DSLR was too bulky or heavy, and my phone saved the day. Modern smartphones come equipped with impressive cameras that can capture high-quality images. I love using my phone for spontaneous shots when I’m out and about. Plus, apps like Snapseed and VSCO allow for quick edits right on the spot. I feel that incorporating smartphone photography into my street shooting has expanded my ability to capture moments without the pressure of carrying all my gear.

Techniques to Capture Stunning Street Photos

Using Natural Light Effectively

I’ve always been fascinated by how natural light can completely transform a scene. When I’m out shooting, I pay close attention to the time of day and the quality of light around me. Early mornings and late afternoons, known as the golden hours, are my favorite times to capture street photos. The warm, soft light creates beautiful shadows and highlights; it’s as if the world is painted anew. I remember one evening when I was wandering through a park, and the sunlight filtered through the trees, creating a magical atmosphere. That moment reminded me of how important it is to be mindful of our surroundings and the way light interacts with our subjects. In my experience, shooting with natural light not only enhances the images but also gives them a more organic feel.

Understanding Composition and Framing

Composition is another aspect that I’ve come to value deeply in my street photography. There are various techniques, like the rule of thirds, which I often use to create balance and interest in my shots. I find that placing the main subject off-center can lead to more dynamic images. I’ve also experimented with leading lines, which guide the viewer’s eye through the photo. An example that sticks with me is when I captured a busy street scene where the lines of the crosswalk led directly to a woman crossing the road, her colorful outfit standing out against the monochrome background. It was all about visual flow, and it made the photo more engaging. I recommend taking time to think about how you frame your shots; it can change the whole story your photo tells.

Capturing Candid Moments

One of the most rewarding parts of street photography, for me, is capturing candid moments. There’s something truly special about freezing a moment in time when people are unaware of the camera. I’ve learned that patience is key in these situations. I often find a spot where I can wait and observe rather than rush in. I recall a day in a bustling market where I spotted an elderly man feeding pigeons. I waited for a while, watching as the scene unfolded, and when he smiled at the birds, I snapped the shot. That genuine smile told a story of joy and simplicity. I think being a good street photographer means being present in the moment, allowing the scene to unfold naturally before capturing it.

Working with Different Perspectives

Changing my perspective has been a game-changer in my street photography. I’ve discovered that getting low to the ground or finding a higher vantage point can completely alter the mood of a photograph. I remember one instance where I climbed a small step to get a shot of a child playing with a dog; it made the image feel more intimate and engaging. The child looked larger than life, and the angle added depth to the scene. I encourage you to play around with angles and perspectives in your photography. Don’t be afraid to experiment—sometimes the best shots come from the most unexpected positions. It’s all about finding new ways to see the world through your lens.

Finding Unique Locations for Street Photography

Urban Landscapes and Architecture

Urban landscapes and unique architecture have always captured my imagination. I love wandering through city streets, where every corner holds a new opportunity for a striking photo. Places with interesting buildings, murals, or even a simple alleyway can serve as fantastic backdrops. I remember a weekend exploring an old part of my city filled with vintage buildings and colorful street art. Each shot I took felt like a little piece of history, a snapshot of the character of the neighborhood. I think it’s important to take your time exploring these areas; you never know what hidden gems you might find. I often find that the most compelling photographs come from locations that resonate with my own experiences and emotions.

Local Events and Festivals

Attending local events and festivals has been another source of inspiration for my street photography. The energy, colors, and diverse range of people create an incredible atmosphere that’s perfect for candid shots. I’ve had some of my best experiences shooting during community fairs or cultural festivals. Each event tells a story, and I love capturing the interactions between people, the vibrant displays, and the joy in the air. One particular festival I attended had dancers in traditional costumes, and the way their outfits swirled in the wind was mesmerizing. I felt privileged to document those moments. I believe that participating in local events not only enriches your portfolio but also connects you with your community in a meaningful way.

Markets and Public Spaces

Markets and public spaces are often bustling with life, making them ideal spots for street photography. I find that they’re filled with interesting subjects and dynamic scenes that can tell a story. I often visit farmers’ markets or flea markets and love capturing the interactions between vendors and customers. I remember a morning at a local farmer’s market; I spotted a woman laughing with a vendor while selecting fresh produce. The genuine connection they shared made for a heartwarming photograph. I encourage you to explore these types of environments where life naturally unfolds. They often provide endless opportunities for candid shots and unique stories.

Exploring Off-the-Beaten-Path Areas

Sometimes, the most magical moments happen in unexpected places. I’ve discovered that exploring off-the-beaten-path areas can yield surprising results. I remember getting lost during a trip and finding myself in a quiet neighborhood with colorful murals and friendly locals. It was a stark contrast to the busy tourist areas, and I was able to connect more personally with my subjects. I captured some of my favorite shots there—pictures that felt more intimate and authentic. I believe that stepping outside our comfort zones can lead to beautiful discoveries, and I always encourage fellow photographers to venture beyond the crowded tourist spots.

Street Photography Ethics and Best Practices

Respecting Privacy and Personal Space

I’ve come to realize that street photography is as much about ethics as it is about capturing beautiful images. Respecting people’s privacy and personal space is crucial for us as photographers. When I’m out shooting, I always try to be aware of my surroundings and how people might perceive my presence. There have been times when I’ve hesitated to take a picture because I sensed that the subject might not be comfortable with it. I believe that being mindful and empathetic can create a more positive relationship between photographers and the people we photograph. It’s important to remember that everyone has their own story, and sometimes they may not want to share it with a stranger and a camera.

Seeking Permission: When to Ask

While candid shots are often the heart of street photography, I’ve learned that seeking permission can also lead to some incredible moments. There have been instances when I approached someone, explained my passion for photography, and asked if I could take their picture. To my surprise, many have been more than happy to oblige. I remember one occasion at a local café when I asked a barista if I could photograph her while she prepared a drink. The warmth in her smile and the way she interacted with her craft created a stunning shot. I think it’s important to gauge the situation; if a person seems open and welcoming, don’t hesitate to ask for their permission. It can make the experience more rewarding for both of you.

Building Rapport with Subjects

Building rapport with the people I photograph has enriched my street photography experience immensely. I’ve found that taking a moment to connect with subjects, even just through a smile or a few friendly words, can create a more genuine and relaxed atmosphere. I often chat with people before snapping their photos; sometimes, I learn fascinating stories that add depth to the images. One time, I met a street musician who shared his journey and passion for music, which made capturing his portrait feel even more meaningful. I encourage you to approach your subjects with kindness and curiosity. Establishing a connection can transform a simple photograph into a powerful narrative.

Editing and Post-Processing Tips on a Budget

Free or Low-Cost Editing Software

Editing is an essential part of photography for me. Fortunately, there are plenty of free or low-cost editing software options available that can give your street photos a polished look without emptying your wallet. Programs like GIMP and Darktable are fantastic for beginners and offer many of the same features as pricier software. I remember starting with GIMP; it allowed me to learn the basics of photo editing without the pressure of a subscription. Even mobile apps like Snapseed or Lightroom Mobile can be game-changers, providing powerful editing tools right at your fingertips.

Basic Editing Techniques for Street Photos

When it comes to post-processing street photos, I keep it simple. My go-to techniques include adjusting exposure and contrast to make my images pop. I often find that increasing the contrast can help bring out the details in shadows and highlights, giving my photos more depth. Cropping is another essential technique; sometimes, a slight adjustment can enhance composition dramatically. I remember a photo I took of a busy street scene that felt cluttered. After cropping, the focus shifted to a couple holding hands, creating a more intimate moment amidst the chaos. I encourage you to experiment with these basic edits and see how they can elevate your images.

Creating a Consistent Style

As I’ve grown as a street photographer, I’ve come to realize the importance of developing a consistent editing style. It not only helps my images stand out but also creates a cohesive look across my portfolio. I recommend selecting a color palette or tone that resonates with you and applying it consistently. For instance, I enjoy warmer tones that evoke a sense of nostalgia, so I adjust my color balance during editing to reflect that. Finding a style that represents my vision has made my work more recognizable, and I believe it can do the same for you. Additionally, check out Mastering Street Photography: Essential Techniques for Travelers for more insights.

Inspiration from Notable Street Photographers

Influential Street Photographers to Follow

Finding inspiration from other photographers has been a vital part of my journey. Numerous influential street photographers have left a mark on the genre, and I always recommend following their work. Photographers like Vivian Maier and her incredible ability to capture the human experience through her candid shots has taught me so much. I often revisit her work when I’m in need of motivation. Another favorite of mine is Steve McCurry, known for his vibrant colors and powerful storytelling. By studying their images, I’ve learned about composition, emotion, and the essence of street photography.

Learning from Iconic Street Photography Projects

Delving into iconic street photography projects can also spark creativity. Projects like “Humans of New York” showcase the beauty of diverse stories in urban settings, reminding me of the power of narrative in photography. I love how the interaction between the photographer and subjects breathes life into the images. Similarly, exploring collections from Magnum Photos has opened my eyes to various styles and approaches, each telling a unique story. I believe immersing ourselves in these projects can inspire new ideas and perspectives in our own work.

Online Communities and Resources for Street Photography

Being part of an online community has been a fantastic way to grow as a photographer. Platforms like Instagram and Flickr allow us to share our work, connect with fellow photographers, and glean feedback. I’ve found supportive groups on Facebook dedicated to street photography, where members share tips, experiences, and critiques. Joining a community can be incredibly motivating, especially when we see others pushing their creative boundaries. I encourage you to actively participate in these spaces, as they can provide valuable insights and camaraderie in our photography journeys.

Frequently Asked Questions

What is street photography?

Street photography is about capturing everyday life in public spaces. It tells stories, reveals emotions, and showcases the beauty of the ordinary. It is not just about the photos but also about the experiences while capturing them.

What gear do I need for street photography on a budget?

You don’t need the latest camera for street photography. A compact camera or mirrorless option works well. A good prime lens, such as a 35mm or 50mm, is recommended for capturing everyday scenes on a budget.

How can I enhance my street photography experience without spending much?

Investing in accessories like a sturdy camera strap, a lens cleaning kit, and a portable reflector can enhance your experience without significant costs. These items help improve comfort and the quality of your photos.

Can I use my smartphone for street photography?

Yes, smartphones can be powerful tools for street photography. They are convenient for spontaneous shots, and modern smartphones have impressive cameras that can capture high-quality images.

What are the best times of day for street photography?

The best times for street photography are early mornings and late afternoons, known as the golden hours. The warm, soft light during these times creates beautiful shadows and highlights.

What are some techniques for capturing stunning street photos?

Effective techniques include using natural light, understanding composition and framing, capturing candid moments, and experimenting with different perspectives to add depth to your photographs.

How can I respect privacy while practicing street photography?

Respecting people’s privacy and personal space is crucial. Be aware of your surroundings and how people might perceive your presence. If a subject seems uncomfortable, it’s best to refrain from taking their picture.

When should I seek permission to take someone’s photo?

While candid shots are common, seeking permission can lead to incredible moments. If someone seems open and welcoming, asking for their permission can create a more rewarding experience for both the photographer and the subject.

What editing software is recommended for street photography?

Free or low-cost editing software options like GIMP and Darktable are great for beginners. Mobile apps like Snapseed and Lightroom Mobile also provide powerful editing tools without significant expense.

How can I find inspiration for street photography?

Finding inspiration can come from following influential street photographers, exploring iconic photography projects, and participating in online communities dedicated to street photography. These resources can spark creativity and motivate you in your own work.

Urban Street Photography: Techniques for Capturing Life

Urban street photography captures the pulse of city life, offering a unique glimpse into everyday moments. Through this lens, we can explore stories hidden in plain sight, revealing the vibrant tapestry of human experience.

Urban Street Photography: Techniques for Capturing Life

Understanding Urban Street Photography

Definition of Urban Street Photography

Urban street photography, for me, is not just about snapping pictures of people in a city. It’s an art form that invites us to observe and document the stories unfolding all around us. It thrives on spontaneity, capturing candid moments that might otherwise go unnoticed. Whether it’s a child playing in the park, a couple laughing on a busy street, or an elderly person sitting quietly on a bench, urban street photography encapsulates the essence of daily life in urban settings. The goal is to reflect the soul of the city through its inhabitants, showcasing their interactions, emotions, and the environment that surrounds them. Read Interesting article: Top 10 Street Photography Tips for Budget Backpackers

History and Evolution of Street Photography

The roots of street photography date back to the early 20th century, with pioneers like Henri Cartier-Bresson, who is often referred to as the father of modern street photography. I remember reading about his concept of the “decisive moment,” where he emphasized capturing that fleeting instant that tells a story. Over the decades, street photography has evolved alongside societal changes and advancements in technology. The advent of 35mm cameras made it easier for photographers to carry their equipment and shoot spontaneously. In the 1960s and 70s, photographers like Garry Winogrand and Diane Arbus pushed the boundaries, focusing on the eccentricities of urban life and challenging social norms. Today, we see street photography embracing digital technology, with smartphones providing a new way to capture and share moments instantly.

Notable Urban Street Photographers

As I dove deeper into urban street photography, I became inspired by several notable photographers whose work resonates with me. One such artist is Vivian Maier, whose posthumously discovered photographs showcase a profound understanding of human emotion and street life. Her ability to capture intimate moments while remaining an observer is something I aspire to emulate. Another favorite of mine is Joel Meyerowitz, who beautifully blends color and light, bringing vibrancy to the streets of New York. Also, I can’t overlook the impact of street photography collectives, like the Street Photographers Association, that continue to encourage and promote the work of emerging talents. It’s fascinating to see how their unique perspectives contribute to the evolving narrative of urban environments. Read Interesting article: Mastering Street Photography: Essential Techniques for Travelers

As we explore the essence of urban street photography, we begin to understand that it’s more than just technique; it’s about connection. It’s about immersing ourselves in the rhythm of the city and being present to capture those fleeting moments that tell a larger story. In my experience, connecting with the environment and the people around us is what truly brings our photographs to life. The streets are alive with possibilities, and every click of the shutter can reveal a new facet of the human experience.

Essential Equipment for Street Photography

Cameras: Choosing the Right Gear

When I first started street photography, I was overwhelmed by the choices in cameras. I learned that the best camera for street photography is one that you feel comfortable carrying around and using. A compact mirrorless camera can be a fantastic choice because it offers great image quality without the bulk of a DSLR. I’ve found that being discreet helps me capture candid moments without drawing too much attention to myself. If you’re just getting started, a camera with a good autofocus system and a decent low-light performance can make a significant difference.

Lenses: Prime vs. Zoom

Choosing the right lens is another crucial aspect of street photography. Personally, I prefer prime lenses—specifically a 35mm or 50mm. They encourage me to move around and engage more with my subjects, which results in more dynamic compositions. I’ve noticed that using a prime lens forces me to think more creatively about my shots. However, zoom lenses can also be beneficial for those moments when you need flexibility. If I’m in a crowded area, I might reach for a zoom lens to capture the scene without having to get too close.

Accessories: Tripods, Filters, and More

While I typically prefer to shoot handheld, I’ve found that having a lightweight tripod can come in handy, especially during low-light situations or when I want to achieve a specific composition. Neutral density filters can also be useful for managing exposure in bright sunlight, allowing me to achieve that dreamy motion blur in bustling street scenes. There’s a balance to find here; I try to keep my gear minimal to maintain mobility but also ensure that I have the essentials to capture the moment effectively.

Techniques for Capturing Life in the City

Composition Principles

When I first started exploring urban street photography, I quickly realized that composition plays a vital role in how a photograph tells a story. It’s not just about what you capture, but how you frame it. There are a few key principles I’ve found particularly helpful in creating more compelling images.

Rule of Thirds

The rule of thirds is something I often think about when composing my shots. By dividing the frame into nine equal parts with two horizontal and two vertical lines, I can position my subject along these lines or at their intersections. This creates a more balanced and interesting image. I remember one instance where I captured a street performer in a busy plaza. By placing him off-center, I was able to include the bustling crowd around him, which added context and energy to the image.

Leading Lines

Another technique I enjoy using is leading lines. These are natural lines in the scene that draw the viewer’s eye toward the focal point. Whether it’s a road, a fence, or even a line of people, leading lines can guide the viewer through the photograph. I’ve had moments where I found myself standing at an intersection, noticing how the lines of the pavement seemed to lead directly to an interesting scene. By positioning myself just right, I could capture the convergence of these lines, enhancing the visual flow of the image.

Framing and Layering

Framing and layering are techniques that help add depth to my photographs. I often look for natural frames—like doorways, windows, or even branches—that can help isolate my subject while providing context. This gives the image a sense of place. For example, during one of my city strolls, I noticed a man reading a newspaper inside a café. By shooting through the café window, I could frame him within the setting, revealing a slice of life that felt intimate yet expansive.

Lighting Techniques

Lighting is another fundamental aspect of street photography that can dramatically change the mood of an image. I’ve learned to pay close attention to how light interacts with my subjects and the environment.

Natural Light vs. Artificial Light

For me, natural light is often the best friend of a street photographer. I love how different times of day can create diverse atmospheres. Early mornings and late afternoons offer softer light, which can be magical for capturing the essence of a city. However, I’ve also experimented with artificial light sources, like street lamps and neon signs, to create dramatic contrasts and highlight certain features. It’s fascinating how a single street light can transform a scene, giving it a completely different vibe.

Golden Hour and Blue Hour

The golden hour, just after sunrise or before sunset, is a time I try to plan my shoots around whenever possible. The warm glow during this time can enhance colors and add a dreamy quality to my images. I remember capturing a stunning shot of a couple walking hand in hand as the sun dipped below the horizon. The soft light wrapped around them, creating a moment that felt almost cinematic. The blue hour, just before dawn or after dusk, is also beautiful, with cooler tones that can evoke a sense of calm and stillness in an otherwise bustling city.

Timing and Anticipation

Understanding timing is crucial in street photography. It’s about being patient and waiting for the perfect moment to unfold.

Understanding Peak Moments

There are certain peak moments in street photography that can make a shot truly special. I’ve learned to recognize these moments—like a child bursting into laughter, a couple sharing a kiss, or a street vendor interacting with customers. Developing an instinct for these fleeting instances has improved my photography immensely. I often find myself hanging around busy areas, observing the ebb and flow of life, and waiting for that perfect moment to click the shutter.

Patience and Observation

Patience is a virtue, especially in street photography. I’ve spent hours in one spot, just observing the world around me. This practice has taught me to see things I might have missed if I was always on the move. Sometimes, it’s the small interactions—a smile exchanged, a child playing, or an elderly person deep in thought—that make for the most compelling images. I’ve found that allowing myself to slow down opens up opportunities for those beautiful, candid moments that tell the real story of the streets.

Street Photography Styles and Themes

Documentary Style

Documentary-style street photography holds a special place in my heart. It’s about telling a story and capturing the essence of a moment in time. I remember walking through a local market, where the vibrant colors and the chaos created a perfect backdrop for storytelling. I focused on the vendors as they interacted with customers, their faces reflecting a mix of emotions—pride, exhaustion, and joy. Each shot revealed a slice of life that spoke volumes about our shared human experience. The goal here is to create a narrative; I often think about how each photograph can stand alone yet also be part of a larger story. This approach challenges me to think critically about the images I capture and how they fit into the broader context of life around me.

Portraits in Public Spaces

One of my favorite themes in street photography is capturing portraits in public spaces. There’s something incredibly intimate about freezing a moment of a stranger’s life while they navigate through their day. I remember a day spent in a bustling square, where I noticed a woman sitting alone on a bench, lost in thought. I approached her and asked if I could take her picture. The resulting shot, with her expression revealing a combination of serenity and contemplation, became one of my favorites. It’s a reminder that people are often more open than we think, and a simple smile or a genuine question can lead to extraordinary moments. These portraits reveal the depth of character and emotion within the urban landscape.

Street Art and Urban Landscapes

Street art fascinates me and has become a prominent theme in my photography. Cities are alive with murals, graffiti, and installations that reflect the culture and creativity of their inhabitants. During a recent walk, I stumbled upon a vibrant mural that showcased the community’s spirit. I realized that these works of art tell stories just as much as the people do. Capturing street art in its context—whether it’s on the side of a building, a forgotten alleyway, or an urban park—adds layers to my photographs. I often juxtapose the art with people interacting with it. It’s amazing how a well-placed figure can breathe life into an otherwise static image. This thematic approach encourages me to explore the city in new ways, constantly searching for hidden gems that contribute to the urban narrative.

Daily Life and Routine

Documenting daily life and routine in the city has become a personal mission for me. I’ve often found beauty in the mundane—people commuting, waiting for buses, or enjoying a cup of coffee at their favorite café. I remember standing on a busy street corner one rainy afternoon, watching as people scurried past, umbrellas in hand. I snapped a shot of a child jumping in a puddle, laughter erupting amidst the dreariness. Those fleeting moments are the heartbeat of the city, reminding us that even in the rush of life, joy can be found in unexpected places. Capturing these routines allows me to reflect on the shared experiences we all have, and I believe it helps others connect with the images on a deeper level. Read Interesting article: Your Guide to Budget-Friendly Seasonal Landscape Photography

Legal and Ethical Considerations in Street Photography

Understanding Local Laws

As I immersed myself in street photography, I quickly learned that understanding local laws is crucial. Each city has different regulations regarding photography, especially when it comes to capturing people in public spaces. I remember my first trip to a major city, where I was hesitant to take photos in areas that seemed off-limits. I did some research beforehand and discovered that in many places, it’s legal to photograph individuals in public without consent, but it’s wise to respect local norms. Being aware of the laws helps us navigate potential issues and allows us to focus on what we love about street photography—capturing life as it unfolds.

Respecting Privacy and Consent

Respecting privacy is another critical aspect of street photography that I’ve come to appreciate. While I love capturing candid moments, I also believe in treating my subjects with dignity. If I sense someone is uncomfortable, I won’t take their photo. I recall an instance where I spotted a man playing music on the street. I was tempted to capture his performance, but instead, I paused and asked if he would mind. His smile and willingness to engage made the moment even more rewarding. This experience taught me that asking for consent not only shows respect but can also lead to richer stories and connections.

Ethical Implications of Street Photography

Ethics in street photography can be a complex topic, and I often find myself reflecting on it. While we have the right to capture images, we also have a responsibility to consider their impact. I’ve seen photos that exploit vulnerable individuals, and it makes me uncomfortable. In my work, I strive to highlight the humanity in my subjects rather than objectifying them. I believe that street photography should celebrate life, not diminish it. By approaching my subjects with compassion and understanding, I aim to create images that resonate positively and tell meaningful stories.

Editing and Post-Processing Techniques

Choosing Editing Software

Editing plays a significant role in street photography, and I’ve experimented with various software options to find what works best for me. I started with basic programs like iPhoto and gradually moved to more advanced tools like Adobe Lightroom and Photoshop. I appreciate Lightroom for its intuitive interface and powerful editing capabilities, which allow me to enhance my images while maintaining their authenticity. I love how I can adjust exposure, contrast, and colors to better reflect the mood I experienced while shooting. Finding the right software that suits my style has been a game changer in my photography journey.

Basic Editing Techniques for Street Photography

When it comes to editing, I focus on a few basic techniques to enhance my street photographs. Cropping is one of my go-to methods, as it helps me draw attention to the subject and eliminate distractions. I also pay close attention to exposure and contrast, often adjusting these settings to bring out the details in shadows and highlights. I recall a photo I took during a winter afternoon where the light was flat. By increasing the contrast during editing, I was able to bring a new life to the image, making it pop with clarity and depth. Simple adjustments can sometimes transform an ordinary shot into something extraordinary.

Enhancing Colors and Contrast

Colors can tell a story in street photography, and I love the opportunity to play with them during the editing process. I often boost saturation or vibrancy to make colors stand out, especially in urban environments where bold hues can create striking images. I remember capturing a shot of a colorful mural with people walking by. By enhancing the colors in post-processing, I was able to create an image that felt lively and engaging. However, I’ve learned to be cautious not to overdo it—finding the right balance is essential to maintaining the natural feel of the scene.

Building a Portfolio and Sharing Your Work

Creating a Cohesive Body of Work

Utilizing Social Media Platforms

Participating in Photography Communities

Tips for Improving Your Street Photography Skills

Practice and Experimentation

Learning from Critiques

Attending Workshops and Classes

Frequently Asked Questions

What is urban street photography?

Urban street photography is an art form focused on observing and documenting the stories unfolding in urban settings. It captures candid moments that reflect the essence of daily life, showcasing the interactions and emotions of city inhabitants.

Who are some notable urban street photographers?

Some notable urban street photographers include Vivian Maier, known for her profound understanding of human emotion, and Joel Meyerowitz, who beautifully blends color and light. Street photography collectives, like the Street Photographers Association, also contribute to promoting emerging talents.

What equipment is recommended for street photography?

A recommended setup for street photography includes a compact mirrorless camera for ease of use and portability. Prime lenses, particularly 35mm or 50mm, are preferred for their ability to encourage engagement with subjects. Additionally, lightweight tripods and neutral density filters can be useful for specific situations.

What are some key composition principles in street photography?

Key composition principles in street photography include the rule of thirds, which helps create balanced images, leading lines that draw the viewer’s eye, and framing and layering techniques that add depth to photographs.

What is the significance of lighting in street photography?

Lighting is fundamental in street photography as it dramatically changes the mood of an image. Natural light is often preferred, with the golden hour providing a warm glow that enhances colors, while artificial light can create dramatic contrasts.

What styles and themes can be explored in street photography?

Styles and themes in street photography include documentary-style photography that captures moments in time, portraits in public spaces which highlight individual stories, capturing street art, and documenting daily life and routine in urban environments.

What legal and ethical considerations should street photographers keep in mind?

Street photographers should understand local laws regarding photography, respect privacy and consent, and consider the ethical implications of their work. This includes treating subjects with dignity and highlighting their humanity without exploitation.

What basic editing techniques can enhance street photographs?

Basic editing techniques include cropping to focus on the subject, adjusting exposure and contrast to bring out details, and enhancing colors to create striking images while maintaining the natural feel of the scene.

How can photographers build a portfolio and share their work?

Photographers can build a cohesive body of work by utilizing social media platforms and participating in photography communities to share their images and gain feedback.

What tips can help improve street photography skills?

Improving street photography skills can be achieved through practice and experimentation, learning from critiques, and attending workshops and classes to gain new insights and techniques.

Top 10 Street Photography Tips for Budget Backpackers

Street photography holds a unique charm, especially for those of us wandering the world on a budget. Capturing candid moments while exploring new places can elevate any travel experience, and I’m excited to share my top tips for budget backpackers like us! Read Interesting article: Mastering Street Photography: Essential Techniques for Travelers

Top 10 Street Photography Tips for Budget Backpackers

Understanding Street Photography

What is Street Photography?

Street photography is all about capturing the essence of everyday life. It’s not about posed portraits or staged scenes; instead, it embraces the spontaneity of urban environments. I remember my first attempt at street photography in a bustling market. I felt a rush of excitement as I clicked my camera, trying to catch genuine moments: a child laughing, an elderly couple holding hands, or a street vendor passionately selling his goods. Each shot told a story that words simply couldn’t convey.

Importance of Street Photography for Backpackers

For those of us backpacking on a budget, street photography becomes a powerful tool for documenting our adventures. It allows us to connect with the culture and people of the places we visit. Through my lens, I’ve captured the distinct flavors of local life, which often enriches my travel experiences. Plus, it’s a cost-effective way to create lasting memories. With just a camera and a keen eye, you can turn a simple walk through the city into an immersive storytelling journey. Your Guide to Budget-Friendly Seasonal Landscape Photography can provide additional insights on capturing nature on a budget.

Essential Gear for Budget Backpackers

Choosing the Right Camera

You don’t need the latest high-end camera to get started in street photography. I began with a basic DSLR and later moved to a mirrorless camera. The key is to choose something portable and easy to use. I recommend cameras that allow for manual settings; this gives you flexibility in different lighting conditions. If you have a smartphone with a good camera, don’t underestimate its potential! I’ve seen stunning street shots taken with just a mobile phone.

Best Lenses for Street Photography

When it comes to lenses, a versatile zoom lens can be a great choice for capturing a variety of scenes without the need to switch lenses constantly. I’ve often used a 24-70mm lens, which works well for both wide shots and close-ups. Prime lenses, like a 35mm or 50mm, are also fantastic for street photography, giving you that beautiful background blur and sharpness. My favorite is a 50mm lens for its affordability and quality—it truly captures the essence of the moment.

Affordable Accessories: Tripods, Filters, and More

While you might think that tripods are an unnecessary expense for street photography, a compact one can actually be very handy. I always carry a small tripod with me for low-light situations or long exposures. Filters can also improve your shots—polarizing filters help enhance colors and reduce reflections. I’ve found that investing a little in these accessories can significantly enhance the quality of my work without breaking the bank.

Preparing for Street Photography

Researching Your Destination

Before heading out, I like to do a little homework on my destination. Learning about the local customs and popular photo spots can open up new avenues for creativity. I often look for neighborhoods known for their vibrant street life or iconic landmarks. Websites like travel blogs and photography forums have been invaluable resources for gathering tips specific to the area I’m visiting.

Best Times for Street Photography

The golden hour—just after sunrise and before sunset—offers the best natural light for photography. I’ve learned that this time can create stunning effects in my photos. However, I also enjoy shooting during overcast days, as the soft light reduces harsh shadows and highlights. I’ve even captured some of my best street photos when the weather wasn’t ideal, so don’t shy away from shooting in different conditions!

Understanding Local Culture and Etiquette

Respecting local culture is crucial in street photography. I’ve found that interacting with people can lead to stunning shots, but it’s important to approach subjects with kindness and understanding. In some cultures, photography can be sensitive, and it’s essential to gauge whether it’s appropriate to take someone’s photo. I always carry a smile and, if necessary, ask for permission. This not only builds trust but often leads to more meaningful interactions and photos.

Top 10 Street Photography Tips

1. Blend In with the Environment

One of the best pieces of advice I can give is to try to blend in with your surroundings. When I first started, I would often stand out like a sore thumb, especially in vibrant local markets or busy streets. I realized that dressing like the locals or keeping a low profile helped me feel more comfortable and allowed me to capture more authentic moments. When people don’t feel like they’re being watched, they tend to act more naturally, which makes for some of the best candid shots.

2. Use Natural Lighting to Your Advantage

Natural light is a game-changer in street photography. I’ve discovered that shooting in different lighting conditions can drastically change the mood of a photo. I love the soft, diffused light of overcast days, but I also enjoy the warm, golden light just before sunset. Experimenting with shadows and highlights can create depth and texture in your photos. I always carry my camera, ready to take advantage of those fleeting moments when the light is just right.

3. Capture Candid Moments

Candid moments are where the magic happens. I remember standing on a street corner, watching a group of children play. Instead of staging a shot, I simply waited for the right moment when their joy radiated through their laughter. Those spontaneous shots often tell a richer story than any posed photo could. I’ve found that the more patient I am, the more rewarding my photography becomes.

4. Play with Perspectives and Angles

Changing your perspective can transform an ordinary shot into something extraordinary. I often crouch down for a lower angle to capture the scene from a child’s viewpoint or find a higher vantage point to take in the entire street scene. By varying my angles, I’ve been able to highlight details that might go unnoticed from a standard viewpoint. Don’t be afraid to get creative—climb a few steps or lie on the ground if it helps tell your story!

5. Focus on Composition Techniques

Good composition can elevate your street photography. I’ve learned about the rule of thirds, leading lines, and framing, which helped my photos stand out. For instance, placing the subject off-center can create more dynamic images. I often look for leading lines, like streets or pathways, to draw the viewer’s eye into the shot. Taking a moment to think about composition can make a world of difference in how your story is perceived.

6. Experiment with Different Settings

One of the joys of photography is experimentation. I remember the first time I switched my camera to manual mode; it felt daunting but exhilarating. I started playing with aperture, shutter speed, and ISO, discovering how these settings affected my images. I recommend trying different settings to see what works best for you and your style. Don’t be afraid to make mistakes—each shot is a learning opportunity!

7. Tell a Story Through Your Photos

Every street photo can tell a story if you look closely. I’ve found that focusing on a theme or subject can help create a narrative in my work. Whether it’s capturing the hustle of city life or the tranquility of a quiet moment, I try to think about what I want to convey. I often look for interactions between people or unique scenes that represent a culture. It’s amazing how a single photo can evoke emotions and tell a profound story.

8. Engage with Your Subjects

Engagement can lead to some incredible photographs. I’ve approached people and asked for their permission to take their portrait, which often results in genuine smiles and interactions. Sometimes, I even share a bit about my travels or compliment them, making them feel comfortable. This connection not only enriches my photographs but also my experience as a traveler. I’ve met wonderful individuals this way, and those stories often inspire my photography.

9. Post-Processing on a Budget

Editing is an essential part of the photography process, and luckily, there are plenty of budget-friendly options available. I started with free software like GIMP and later moved on to more advanced tools like Lightroom. Post-processing allows me to enhance colors, adjust lighting, and crop photos for better composition. I believe that a little editing can go a long way in making your street shots pop. Plus, it feels great to see how much you can improve your images with just a few tweaks!

10. Utilize Online Communities for Feedback

Joining online photography communities has been one of the best decisions I made as a photographer. Platforms like Flickr and Instagram allow me to share my work and receive constructive feedback. I also participate in Facebook groups dedicated to street photography where members share tips and critique each other’s work. It’s wonderful to connect with like-minded individuals, and I’ve found that their insights have helped me grow tremendously in my craft.

Editing and Sharing Your Work

Editing and Sharing Your Work

Best Free Editing Software for Beginners

When it comes to editing my street photos, I’ve learned that finding the right software can make all the difference. Thankfully, there are some fantastic free options out there for those of us on a budget. I started with GIMP, a powerful open-source program that offers many features similar to Photoshop. It took a bit of time to learn, but I found it well worth the effort. Another favorite of mine is Snapseed, which is perfect for mobile editing. Its user-friendly interface and range of filters let me enhance my images quickly, whether I’m on the go or relaxing in a café. I also recommend trying Darktable if you’re looking for something that caters more to photographers—it’s like Lightroom but free! Experimenting with these tools has allowed me to elevate my photos without spending a dime.

How to Create an Online Portfolio

Sharing my work online became a pivotal part of my photography journey. I decided to create an online portfolio to showcase my best street photos, and let me tell you, it’s easier than I thought! I chose platforms like Wix and WordPress because they offer customizable templates specifically for photographers. The best part? Many of them allow you to start for free! I focused on selecting my favorite images and arranging them in a way that tells a story. Including a brief bio helped viewers connect with me and my work. Over time, I’ve received positive feedback, and it’s been gratifying to see my portfolio evolve as I improve.

Sharing on Social Media and Photography Platforms

Social media has been a game-changer for me as a street photographer. Platforms like Instagram and Flickr enable me to share my work with a wider audience. I remember the excitement of my first post on Instagram—seeing likes and comments from fellow photography enthusiasts encouraged me to keep sharing. I try to maintain a consistent posting schedule while engaging with other photographers by commenting on their work. This sense of community has not only boosted my confidence but also provided a space for constructive feedback. I also recommend checking out specific photography groups on Facebook and participating in challenges that often push your creativity even further.

Staying Safe While Shooting

Understanding Local Laws and Regulations

As I’ve traveled and explored various cities, I quickly realized that understanding local laws regarding photography is essential. I always take a few minutes to research the regulations before heading out. Some places have strict rules about photographing people without permission, especially in markets or religious sites. I remember a time in a bustling Asian city when I almost got into trouble for snapping a photo of a local vendor. Thankfully, I was able to ask for permission, and he ended up posing for a shot! Being aware of the laws not only keeps you safe but also shows respect for the local culture.

Keeping Your Gear Secure

When you’re out on the streets, it’s crucial to keep your gear secure. I’ve learned this lesson the hard way. One day in a crowded market, I was so focused on capturing shots that I didn’t realize my bag was unzipped! Thankfully, a kind stranger pointed it out before anything went missing. Now, I always use a crossbody camera bag that I can easily access but also keep closed. It’s also a good idea to stay aware of your surroundings. When in a busy area, I often wear my bag in front of me instead of slinging it over my shoulder. A little caution goes a long way in ensuring your gear remains safe!

Staying Aware of Your Surroundings

Being aware of my surroundings is something I consciously practice every time I step out with my camera. I’ve found it’s not only crucial for my safety but also enhances my photography. While I’m focused on capturing moments, I also pay attention to the people around me and the environment. I remember once in a crowded plaza, I noticed a group of street performers drawing a crowd. Instead of getting lost in the moment, I stepped back and observed the dynamics of the crowd. This perspective allowed me to capture not just the performance but also the reactions of the audience, which added depth to my photos. Keeping an eye on my surroundings helps me anticipate unique moments before they happen.

Budget Tips for Backpackers Interested in Photography

Finding Affordable Accommodation with Great Views

Accommodation can often take up a significant portion of our travel budget, but I’ve learned some tricks to find places that not only save money but also offer fantastic views! I love using platforms like Airbnb and Hostelworld, where I can filter for listings that highlight scenic spots. On my last trip, I found a charming hostel with a rooftop terrace overlooking the city skyline. Waking up to that view inspired me to get out and shoot early every morning. I recommend looking for hostels or guesthouses that are slightly off the beaten path; they often come with unique perspectives that can enhance your photography.

Utilizing Public Transportation for Access to Hotspots

Public transportation can be a budget-friendly way to explore and access some amazing photography hotspots. I always try to familiarize myself with local transit systems before I arrive. In cities with extensive metro systems or bus routes, I’ve discovered some hidden gems simply by hopping on a train or bus and exploring different neighborhoods. During one trip, I rode the tram to a lesser-known district and stumbled upon an incredible street art scene—those spontaneous discoveries often result in my favorite shots. Plus, using public transport is a great way to blend in with locals and experience the city more authentically!

Getting the Most from Free Photography Workshops

I’ve found that many cities offer free photography workshops or meetups, which can be an invaluable resource for improving my skills. These events often attract local photographers who are eager to share tips and insights about shooting in the area. I remember joining a street photography workshop in a city park, where we not only learned composition techniques but also explored the city together. It was a fantastic way to meet fellow photography enthusiasts, share experiences, and discover new locations. I recommend checking community centers or local photography clubs to find similar opportunities. Read Interesting article: Urban Landscape Photography: Travel on a Budget

Frequently Asked Questions

What is street photography?

Street photography is about capturing the essence of everyday life, focusing on spontaneous moments in urban environments rather than posed portraits or staged scenes.

Why is street photography important for budget backpackers?

For budget backpackers, street photography serves as a powerful tool to document adventures and connect with local culture, providing a cost-effective way to create lasting memories.

What type of camera should I use for street photography?

You don’t need a high-end camera; a basic DSLR or a mirrorless camera is suitable. A good smartphone camera can also produce stunning street shots.

What lenses are recommended for street photography?

A versatile zoom lens, such as a 24-70mm, is great for various scenes. Prime lenses like 35mm or 50mm are also excellent choices for their quality and background blur.

What are some tips for preparing for street photography?

Research your destination to learn about local customs and popular photo spots, visit during the golden hour for the best light, and understand local culture and etiquette regarding photography.

How can I improve my street photography composition?

Good composition can be enhanced by applying techniques like the rule of thirds, using leading lines, and varying angles to create dynamic images.

What should I consider when engaging with subjects in street photography?

Engaging with your subjects can lead to better photographs. Approach them with kindness, ask for permission, and build trust to capture more meaningful interactions.

What is the best free editing software for beginners?

Free editing software options like GIMP, Snapseed, and Darktable are great for beginners, allowing you to enhance your images without spending money.

How can I keep my photography gear secure while shooting?

Use a secure camera bag, stay aware of your surroundings, and consider wearing your bag in front of you to keep your gear safe from theft.

What budget tips can help backpackers interested in photography?

Look for affordable accommodations with great views, utilize public transportation to explore different neighborhoods, and take advantage of free photography workshops to improve your skills.