Web Analytics

Recent Posts

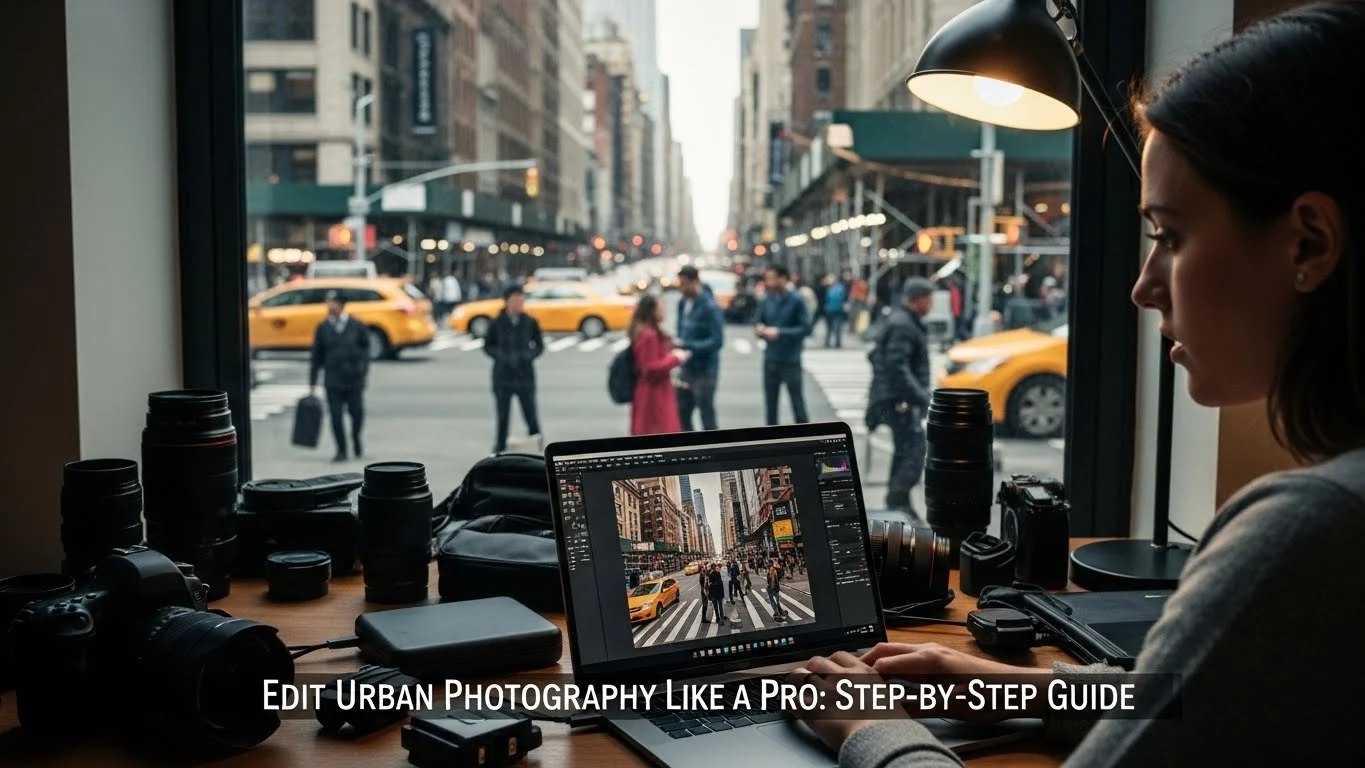
Edit Urban Photography Like a Pro: Step-by-Step Guide

Urban photography is a vibrant and expressive form of art that captures the heartbeat of city life. Whether you’re a seasoned pro or just starting, mastering the editing process can elevate your photos from ordinary to extraordinary. Read Interesting article: Transform Your Urban Photos: Essential Editing Tips
Edit Urban Photography Like a Pro: Step-by-Step Guide

Understanding Urban Photography

What is Urban Photography?

Urban photography is all about capturing the essence of city life. I remember my first time walking through a bustling downtown area, my camera in hand, feeling inspired by the energy around me. Urban photography encompasses everything from architectural shots to candid moments of daily life. It’s about conveying a story, an emotion, or simply the beauty of the urban environment. For me, it’s a way to explore and document the world around us, highlighting the unique character of different cities.

Key Elements of Urban Photography

When I think about what makes urban photography special, several key elements come to mind. Light and shadow play crucial roles. I often find that early mornings or late afternoons provide the best natural light, casting interesting shadows that can add depth to my images. Composition is another vital aspect. I usually try to incorporate leading lines, symmetry, or contrasting colors to draw viewers in. Finally, capturing the human element, whether it’s people walking, biking, or engaging in street performances, adds life and relatability to my photos. Each element works together to create a compelling visual narrative.

Popular Urban Photography Styles

Urban photography is diverse, and exploring different styles can be an exciting journey. I’ve dabbled in street photography, which focuses on candid moments and the spontaneous nature of urban life. Then there’s architectural photography, where I pay homage to the buildings and structures that define a city’s skyline. I also enjoy documentary-style photography, capturing everyday life in a way that tells a broader story about the urban experience. Each style has its unique charm, and experimenting with them can help refine my skills and enhance my creative vision. Read Interesting article: Explore Iconic Urban Photography Locations on a Budget

Essential Tools for Editing Urban Photography

Camera Equipment and Settings

The right equipment makes a difference when capturing urban scenes. I remember investing in a good DSLR camera, which allowed me to play with settings like aperture and shutter speed. I usually shoot in RAW format, as it provides greater flexibility during editing. A versatile lens, such as a 24-70mm, is my go-to because it allows me to capture wide cityscapes and closer details without changing lenses constantly. I’ve also learned that stabilizing my camera with a tripod can help prevent blurriness, especially in low-light situations.

Editing Software Options

When it comes to editing my urban photos, I’ve discovered several software options that cater to different skill levels and needs. Adobe Lightroom has become my favorite for organizing and processing images. Its user-friendly interface and powerful editing tools make it easy for me to enhance my photos. Photoshop is another essential tool, especially for more complex edits. I often switch between the two, depending on the adjustments required. Recently, I’ve also started exploring Capture One, which offers excellent color grading capabilities that I find particularly useful for urban photography.

Mobile Apps for Quick Edits

Sometimes, I’m out and about and want to share a quick edit on social media, and that’s where mobile apps come in handy. I’ve tried several, but my favorites are Snapseed and VSCO. Snapseed provides a wide range of editing tools, from basic adjustments to advanced features like selective editing. VSCO, on the other hand, offers beautiful presets that can give my images that polished look with just a few taps. Both apps allow me to edit on the go, ensuring I don’t miss sharing those urban moments.

Step-by-Step Editing Process

Importing Your Photos

Once I’ve captured my urban shots, the first thing I do is import my photos into my editing software. This step may seem simple, but it’s crucial. I usually create a dedicated folder for each shoot on my computer, which helps keep everything organized. Using software like Adobe Lightroom, I can import images directly from my camera or memory card. I’ve found this process to be seamless, and it allows me to start sorting through my images right away. I often take this time to review my shots, flagging the best ones that I want to focus on during editing.

Organizing Your Workflow

As I sift through my photos, I like to establish a workflow that makes sense for me. I categorize my images by shooting conditions, such as time of day or location. This method can simplify the editing process later on. For example, if I’ve shot a series of images in a specific area during sunset, I can easily find those shots when I’m ready to edit. I also use ratings or color labels to highlight my favorites, which helps me identify the best candidates for editing quickly. This organization saves me time and reduces the overwhelm that can come when I have hundreds of photos to sort through.

Basic Adjustments

When I sit down to edit, I start with basic adjustments that lay the groundwork for a polished final image. These initial tweaks can dramatically improve the overall look of my urban photos.

Exposure and Contrast

One of the first things I adjust is exposure. Sometimes, I find that my urban shots can be a little too dark or washed out, depending on the lighting conditions when I shot them. I gradually tweak the exposure slider until I achieve a balanced look. I often boost the contrast slightly to help the colors pop and add depth to the image. It’s all about finding that sweet spot where the details shine without looking overly edited.

White Balance

Next, I tackle the white balance. Urban environments can have tricky lighting, especially with artificial lights at night. I usually adjust the temperature to give my images a natural feel. If the photo has a yellow or blue tint, I’ll correct it by either warming or cooling down the colors. I often find that using the eyedropper tool to select a neutral area in the image helps me achieve a more accurate white balance.

Crop and Straighten

Finally, I like to crop and straighten my images. I’ve learned that a well-composed photo can be significantly improved by adjusting the framing. I check for any distractions at the edges of the frame that might pull a viewer’s eye away from the main subject. Straightening is crucial too; I can’t stand when a photo looks slanted! I often use grid overlays to help me align my shots properly.

Advanced Editing Techniques

Once I’ve made those basic adjustments, it’s time to dive into more advanced editing techniques that really bring my urban photography to life. Read Interesting article: Top 10 Urban Photography Spots for Budget Backpackers

Color Grading for Urban Vibes

I love experimenting with color grading to create a specific mood in my images. Urban settings can take on different vibes depending on the colors I choose. I often play with hue and saturation sliders to enhance certain colors that reflect the character of the city. For instance, if I want to emphasize the blue tones of the sky or the warm glow of streetlights, I’ll adjust those colors accordingly. I’ve found that color grading can transform an ordinary photo into something striking and memorable.

Sharpening and Noise Reduction

Another critical step is sharpening and noise reduction. Urban environments can feature a lot of detail, and I want my images to showcase that. I use the sharpening tool to enhance the edges of my subjects, making them stand out. However, I’m careful not to overdo it, as too much sharpening can create unwanted artifacts. Noise reduction comes into play, especially in low-light situations. I often find that applying a little noise reduction helps smooth out graininess without sacrificing detail.

Blending Multiple Exposures

Sometimes, I capture multiple exposures for a single scene, especially in high-contrast situations where I want to retain details in both the shadows and highlights. I’ve learned to blend these exposures using layer masks in Photoshop. This technique allows me to create a balanced image that showcases the full dynamic range of the scene. I find this method particularly rewarding, as it can result in stunning urban landscapes that truly convey the essence of the moment.

Creative Enhancements for Urban Photography

Adding Filters and Presets

One of my favorite ways to give my urban photos a unique flair is by using filters and presets. I’ve found that applying the right filter can instantly change the mood of an image. For instance, when I want to evoke a nostalgic feel, I often reach for warm, vintage-inspired filters. These filters can subtly enhance colors and textures, making my photos feel alive.

While many editing software options come with built-in filters, I also enjoy exploring third-party presets. I remember downloading a few from popular photographers whose styles I admire. These presets saved me time and often served as a great starting point for my edits. It’s like having a creative guide at my fingertips! By tweaking the intensity of these presets, I can customize them to fit my vision, blending my style with their unique touch.

Incorporating Textures and Overlays

Textures can breathe new life into my urban photographs, adding depth and interest. I often think about how urban environments are filled with fascinating surfaces – brick walls, rough pavements, and intricate graffiti. By incorporating textures into my edits, I can mimic that complexity. I’ve experimented with overlaying textures like scratches, grunge effects, or even light leaks. It’s amazing how these elements can transform an image from a simple snapshot into a piece of art that tells a story.

To do this, I usually select a texture layer in Photoshop and adjust the blending mode to create the desired effect. Lowering the opacity allows the underlying image to show through while adding that extra layer of visual interest. I remember one time, I added a subtle concrete texture to a photo of a bustling street. It not only enhanced the urban feel but made the colors pop in a way that felt authentic and real. It was a little detail that made such a big difference!

Utilizing Light Leaks and Lens Flares

Light leaks and lens flares can bring a dreamy quality to urban photography, which I absolutely love. These effects create a sense of warmth and spontaneity, as if the image captures a fleeting moment of magic. Sometimes, I find that adding a light leak can create that perfect burst of color that draws the viewer in right away.

When I’m editing, I’ll often browse through different light leak overlays and experiment with their placement and opacity. I remember using a soft pink light leak on a photo of a city park during golden hour. The result was breathtaking; it enhanced the warm hues of the sunset and added a romantic touch to the scene. I think that using these effects should be about enhancing the story I want to tell, not overshadowing the main subject. They should feel like a natural part of the urban landscape.

Final Touches Before Exporting

Reviewing Your Edits

Once I’ve completed my edits, I find it essential to take a step back and review my work. This process helps me ensure that the final image aligns with my vision. I typically zoom in and check the details, ensuring there’s no unwanted noise or artifacts from my editing. Sometimes, I’ll even let the image sit for a while and return with fresh eyes. It’s amazing how a little distance can help me spot things I might have missed initially.

Another technique I use is comparing my edited image with the original. This helps me see how far I’ve come and whether the adjustments serve the story I want to convey. I’ve found that this comparison can be an excellent way to ensure I haven’t over-edited my photos, preserving the authenticity of the urban scene.

Export Settings for Different Platforms

When it comes time to export my images, I pay close attention to settings. Different platforms require different formats and sizes. For example, when I’m preparing photos for Instagram, I usually export them as JPEGs at a resolution of around 1080 pixels on the longest side. This ensures my images look sharp without being too large for quick uploads.

On the other hand, if I’m preparing images for a gallery or print, I’ll export them in TIFF format for the highest quality. I remember the first time I printed one of my urban landscapes; seeing it in physical form was exhilarating. I always make sure to check the color profile as well, using sRGB for online sharing and Adobe RGB for prints to capture a wider color range.

Best Practices for Sharing on Social Media

Sharing my work on social media is one of the most rewarding parts of being an urban photographer. I’ve learned that presenting my images thoughtfully can make a big difference in how they’re received. I always think about the caption and how it can enhance the viewer’s experience. I try to share a story behind the photo, whether it’s about the location or the moment I captured.

Consistency is key too. I aim for a cohesive look across my social media feed, which often involves using similar editing styles and color palettes. This not only helps in branding but also makes my work more recognizable. I remember scrolling through my feed one day and feeling a sense of pride in how my images flowed together. It felt like a visual diary of my urban adventures!

Common Mistakes to Avoid in Urban Photography Editing

Over-Editing Your Images

One of the most common pitfalls I’ve encountered in urban photography editing is the tendency to over-edit my images. It’s so easy to get caught up in the excitement of enhancing colors or sharpening details, but I’ve learned that less is often more. When I first started editing, I remember pushing the sliders to extremes, thinking that bold colors and heavy contrast would make my photos stand out. However, many of those images ended up looking unnatural, losing the very essence of the urban scenes I wanted to capture. Now, I try to approach editing with restraint, ensuring that my tweaks enhance rather than detract from the authenticity of the photograph.

Ignoring the Urban Environment

Another mistake I often see is ignoring the context of the urban environment. Each city has its own unique character, and I believe it’s essential to reflect that in my edits. I remember a time when I edited an image taken in a gritty part of town, applying a soft, pastel filter that felt out of place. It didn’t resonate with the raw energy of the scene. Instead, I’ve found that embracing the character of the environment helps me create a more cohesive and meaningful image. Whether it’s enhancing the vibrant street art or the textures of old buildings, I try to align my edits with the story the city is telling.

Neglecting Composition in Post-Processing

Composition is crucial in photography, and it doesn’t stop in the editing phase. In my earlier days, I would sometimes neglect the composition during post-processing, thinking that cropping could fix any issues. While cropping can indeed help, I’ve learned that it’s important to start with a well-composed shot. I remember one photo where I had a stunning subject in the frame, but it was slightly off-center. Instead of adjusting the composition in the editing phase, I should have taken the time to reframe the shot when capturing it. Now, I focus on composition both in-camera and during editing to ensure my images are balanced and visually appealing.

Resources for Further Learning

Online Courses and Tutorials

As I’ve continued to refine my urban photography skills, I’ve found online courses and tutorials to be incredibly helpful. Websites like Skillshare and Udemy offer a variety of classes focused on photography techniques, editing skills, and even specific urban photography styles. I remember taking a course on street photography that opened my eyes to new techniques and perspectives. These resources can provide structured learning and inspiration that helps push my creativity further.

Photography Forums and Communities

Engaging with photography forums and communities has been a game-changer for me. Sites like Reddit and Flickr allow me to connect with fellow urban photographers, share my work, and get valuable feedback. I love participating in discussions and seeing how others approach similar challenges. These communities are fantastic for learning new tips, discovering different editing techniques, and finding motivation from like-minded individuals.

Recommended Books on Urban Photography

Books are another fantastic resource for deepening my understanding of urban photography. I’ve read several that have inspired me to see the world differently. One of my favorites is “The Photographer’s Eye” by Michael Freeman, which delves into composition and design principles that are essential for any photographer. Another great read is “Street Photography: The Art of Capturing the Candid Moment” by Gary Winogrand, which provides insights into capturing authentic urban life. These books have helped shape my style and approach, and I always keep them close for reference.

Final Thoughts

Urban photography has become a passion of mine, and mastering the editing process has been a significant part of that journey. Each step, from capturing the image to the final touches before sharing, is an opportunity to express my unique perspective on city life. I encourage you to embrace your own style and experiment with different techniques. Remember that editing is not just about enhancing photos but also about telling a story and evoking emotions. So grab your camera, explore your urban surroundings, and let your creativity shine through every edit you make!

Frequently Asked Questions

What is urban photography?

Urban photography is an art form that captures the essence of city life, encompassing everything from architectural shots to candid moments of daily life. It aims to convey a story, emotion, or the beauty of the urban environment.

What are the key elements of urban photography?

The key elements of urban photography include light and shadow, composition, and the human element. These aspects work together to create a compelling visual narrative that captures the unique character of cities.

What styles are common in urban photography?

Common styles in urban photography include street photography, which focuses on candid moments; architectural photography, that highlights city structures; and documentary-style photography, capturing everyday life to tell broader stories about the urban experience.

What camera equipment is recommended for urban photography?

It is recommended to use a good DSLR camera and shoot in RAW format for flexibility in editing. A versatile lens, such as a 24-70mm, is ideal for capturing both wide cityscapes and closer details. A tripod is also helpful to prevent blurriness in low-light situations.

Which editing software is suggested for urban photography?

Adobe Lightroom is favored for organizing and processing images, while Photoshop is essential for more complex edits. Capture One is also recommended for its excellent color grading capabilities.

What basic adjustments should be made during the editing process?

Basic adjustments include tweaking exposure and contrast, adjusting white balance, and cropping and straightening images to improve composition and eliminate distractions.

What advanced editing techniques can enhance urban photography?

Advanced techniques include color grading to create specific moods, sharpening and noise reduction to enhance details, and blending multiple exposures to capture a full dynamic range in high-contrast situations.

How can filters and textures enhance urban photography?

Filters can change the mood of an image, while incorporating textures adds depth and interest. Using overlays like scratches or light leaks can transform a simple snapshot into a more artistic piece that tells a story.

What are some common mistakes to avoid in urban photography editing?

Common mistakes include over-editing images, ignoring the unique character of the urban environment, and neglecting composition during post-processing. It’s important to maintain authenticity and focus on well-composed shots from the start.

Where can one find resources for further learning in urban photography?

Resources for further learning include online courses and tutorials on platforms like Skillshare and Udemy, engaging with photography forums and communities like Reddit and Flickr, and reading recommended books on urban photography to deepen understanding and inspiration.
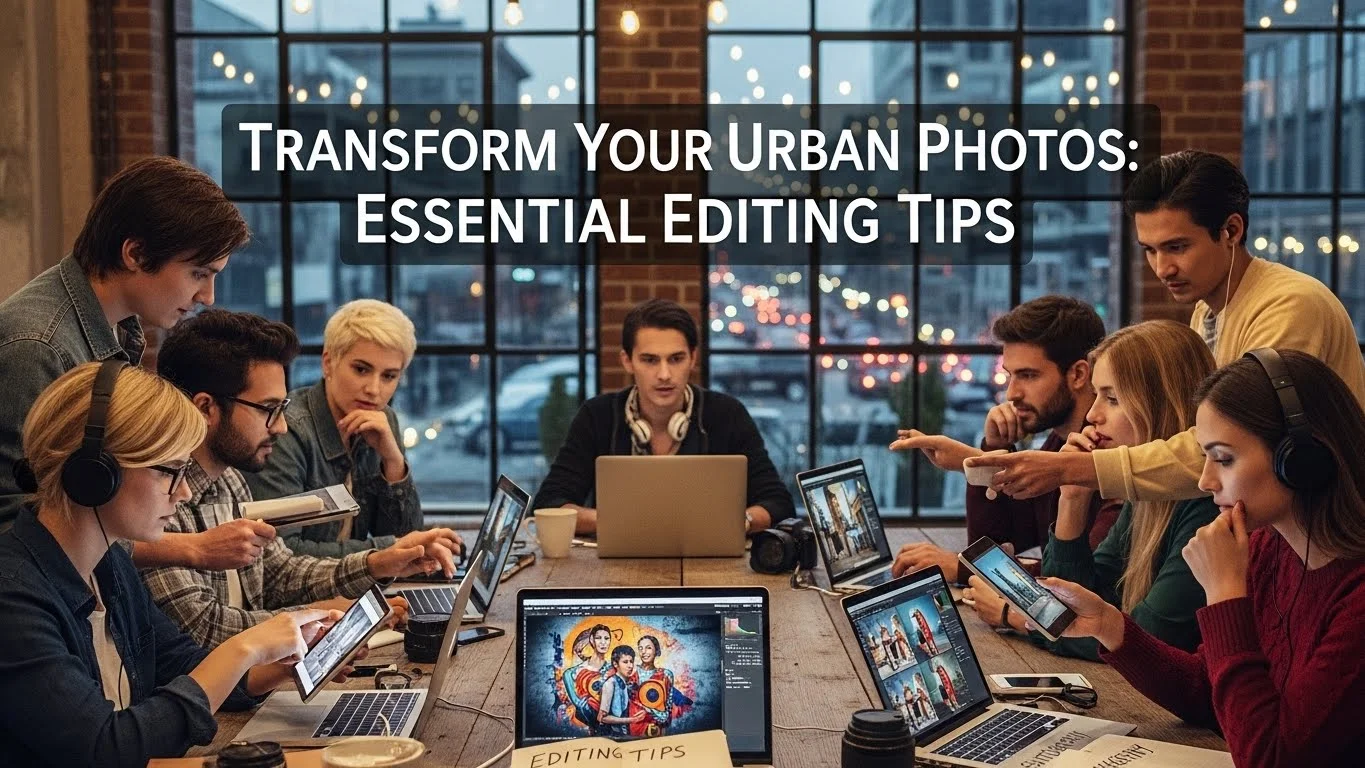
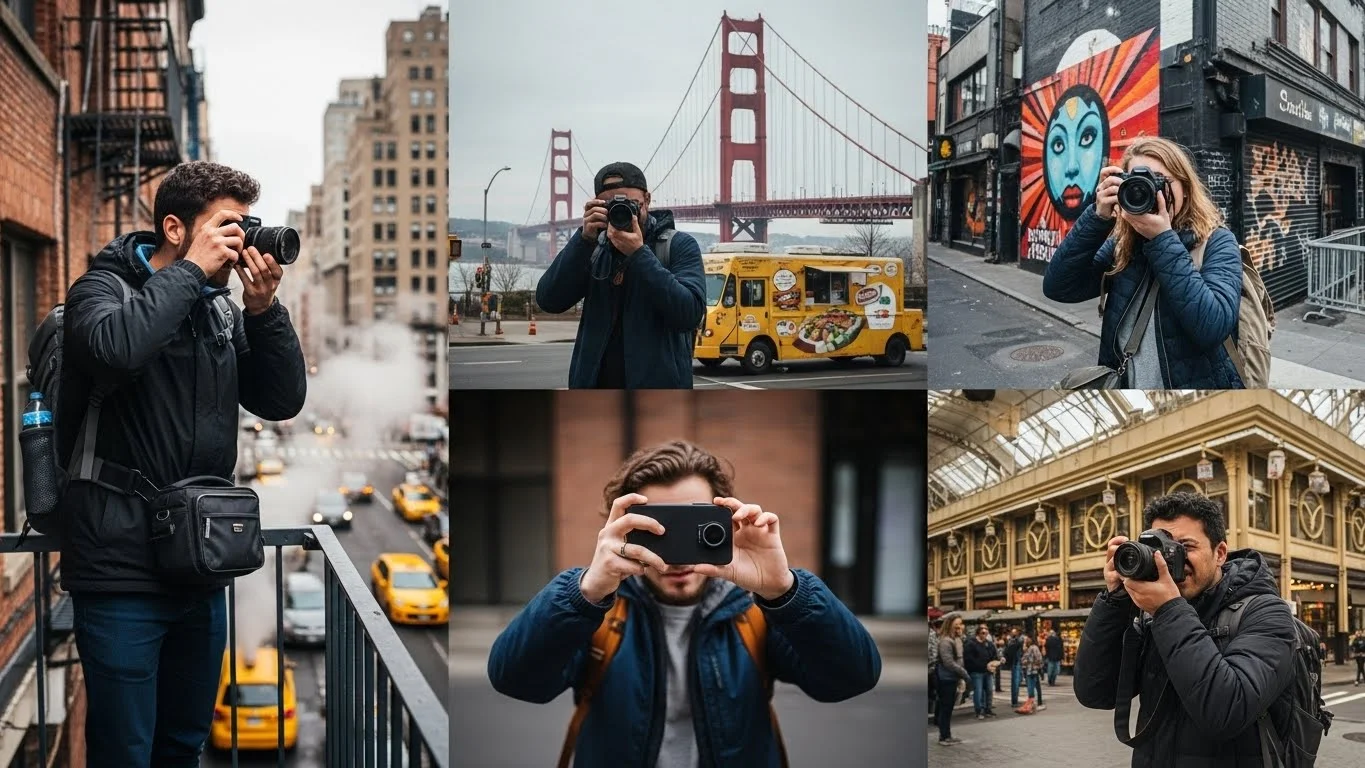
Transform Your Urban Photos: Essential Editing Tips

Urban photography can transform ordinary city scenes into extraordinary visual stories. With the right editing techniques, you can elevate your photos and capture the essence of urban life. If you’re looking to explore urban photography without breaking the bank, Explore Iconic Urban Photography Locations on a Budget offers fantastic insights.

Transform Your Urban Photos: Essential Editing Tips

Understanding Urban Photography

The Essence of Urban Photography

Urban photography is more than just snapping pictures of buildings or streets; it’s about capturing the heartbeat of a city. I remember my first time wandering through downtown with my camera, feeling the energy of the bustling crowds and the rhythm of the city. I’ve learned that urban photography reflects the culture, architecture, and emotions of the people who inhabit these spaces. It tells stories through the lens, showcasing everything from towering skyscrapers to the intimate life of street vendors.

When I think of what makes urban photography special, I realize it’s about finding unique perspectives and details that often go unnoticed. Shadows cast by buildings, reflections in puddles, or the vibrant colors of street art can all play a role in creating a compelling photograph. For me, it’s exciting to explore different neighborhoods, discovering the hidden gems that make each area distinct. To discover more great spots, check out Top 10 Urban Photography Spots for Budget Backpackers.

Common Challenges in Urban Photography

While urban photography is thrilling, it comes with its own set of challenges. One of the biggest hurdles I faced was dealing with harsh lighting conditions, especially during midday when the sun is blazing. I’ve learned that the light can create unwanted shadows or wash out colors. Early mornings or late afternoons, often referred to as the golden hour, are golden indeed for capturing softer light.

Another challenge I encountered was composition in busy environments. There can be so many distractions in urban settings that it can be tough to focus on the subject. I’ve found that taking a step back and observing the scene can help me identify what to include or exclude for a cleaner composition. This practice has made a significant difference in the overall impact of my photos.

One obstacle I believe many photographers face is the feeling of being overwhelmed by the sheer number of options and elements present in a bustling city. Sometimes, it helps to have a clear vision or theme in mind. I started asking myself questions like: What story do I want to tell? Is it about the architecture, the people, or a specific event? This approach has guided me in crafting more meaningful photographs.

Finally, capturing movement can be tricky. Whether it’s cars zooming by or people rushing along the street, freezing that moment in time requires practice. I experimented with different shutter speeds to find that sweet spot where motion is either captured sharply or artistically blurred. It’s all about what you want to convey through your image.

Essential Editing Tools for Urban Photos

Photo Editing Software Overview

Editing is where the magic truly happens, and having the right tools can make all the difference. Personally, I’ve tried various software options, but a few have become staples in my editing process. Adobe Lightroom is one of my favorites; it offers a user-friendly interface and powerful features that let me adjust everything from exposure to color balance. I love how easy it is to create presets, which speeds up my workflow for consistent editing across multiple photos.

Another excellent option is Adobe Photoshop. While it has a steeper learning curve, the layering and masking capabilities are incredible. I remember spending hours learning how to manipulate images to achieve the desired results. If you’re looking for something free, GIMP is a robust alternative that offers many advanced features without the price tag.

Mobile Editing Apps for Quick Fixes

Sometimes, I find myself on the go, and that’s where mobile editing apps come in handy. Apps like Snapseed and VSCO have become my go-to for quick edits while I’m out and about. Snapseed, in particular, has a range of features that enable me to fine-tune my photos with just a few taps. I appreciate how easy it is to apply filters or adjust brightness and contrast without needing a computer.

VSCO, on the other hand, provides beautiful presets that can instantly enhance a photo’s mood. I’ve often found myself scrolling through its library, looking for that perfect filter that complements my urban shots. While I love the convenience of these apps, I always try to maintain a balance, ensuring that my edits enhance rather than overwhelm the original image.

Incorporating these tools into my editing routine has transformed the way I approach my urban photography. It’s about finding the right balance between creativity and technical skill. Embracing both aspects has helped me tell richer stories through my images, allowing my urban photography to shine. I can’t wait to share more tips and techniques that I’ve picked up along the way! If you’re interested in mastering candid shots, Exploring Cities: Mastering Candid Urban Photography on a Budget is a great resource.

Basic Editing Techniques to Enhance Your Urban Shots

Adjusting Exposure and Contrast

One of the first things I learned about editing is the importance of exposure and contrast. When I first started editing my urban photos, I often found them looking flat or dull. I quickly realized that adjusting the exposure could breathe life into my images. I remember discovering the importance of not just brightening the shadows but also ensuring the highlights didn’t get blown out. It’s like finding that sweet spot where all the details shine without losing the essence of the moment I captured.

Contrast plays a crucial role, too. I’ve learned to increase contrast to make the urban elements pop, especially in photos with a lot of textures, like brick walls or intricate architectural details. By adjusting contrast, I can emphasize the differences between light and dark areas, resulting in a more dynamic photograph. I usually start by adjusting the exposure slightly, then tweak the contrast until I feel the image has that punchy feel that draws the viewer in.

Color Correction for Urban Landscapes

Urban landscapes can be tricky when it comes to color accuracy. I’ve often found that the colors in my images don’t always reflect what I saw with my own eyes. I remember one particular photo where the sky looked washed out, and the colors of the buildings seemed muted. That’s when I started delving into color correction.

I find it helpful to adjust the white balance to ensure that the colors look true to life. Sometimes, I’ve had to cool down the warmth of a sunset shot or warm up a gray day to bring back the vibrancy. There’s something incredibly satisfying about seeing the colors come to life during this process. I often use the HSL (Hue, Saturation, Lightness) sliders to tweak individual colors, making sure the reds, greens, and blues reflect the energy of the city. This technique has helped me create a stronger connection between the viewer and the scene.

Sharpening Images for Clarity

After enhancing exposure and color, I realized that sharpening was the final touch that brought everything together. I remember my early attempts at sharpening; I was often too aggressive and ended up with a grainy look. Over time, I learned the importance of subtlety. Now, I apply sharpening carefully, focusing on the areas that matter most, like the edges of buildings or intricate details in street scenes.

Each editing software has its own sharpening tools, and I typically use a combination of global sharpening and selective sharpening. This means I’ll apply a general sharpening effect across the image, then enhance specific areas where I want to draw attention. I’ve noticed that this technique not only improves clarity but also helps to guide the viewer’s eye to the focal points in my photos. It’s like giving my images a little polish, making them stand out in a crowded feed.

Advanced Editing Techniques for Stunning Results

Utilizing Layers and Masks

As I became more comfortable with editing, I started exploring the world of layers and masks. At first, the idea seemed daunting, but once I got the hang of it, I discovered how powerful these tools could be. I remember one specific project where I wanted to combine two different photos to create a unique urban scene. Layers allowed me to stack images, and masks let me control which parts of each layer were visible.

This approach opened up a whole new level of creativity. For instance, I could enhance the sky in one image while keeping the cityscape intact from another. By using masks, I could seamlessly blend the two, creating a more compelling and dynamic photograph. This technique has become invaluable for correcting specific areas without affecting the entire image.

Creating Depth with Selective Focus

Depth adds a certain richness to urban photography that can elevate an image. I learned that by using selective focus, I could draw attention to specific subjects while creating a soft blur around them. I often experiment with this technique in busy environments where distractions abound. By applying a shallow depth of field, I can isolate my subject and create a more intimate connection with the viewer.

I usually achieve this effect by adjusting the aperture settings on my camera, but post-processing can also help. In my editing software, I can use selective blur tools to enhance the depth further. It’s fascinating how this technique can transform an ordinary scene into something that feels more three-dimensional and engaging.

Transforming Skies and Weather Effects

Urban photography often benefits from dynamic skies and weather effects. I remember feeling frustrated when I’d capture a breathtaking cityscape only to have a bland, gray sky in the background. That’s when I started experimenting with transforming skies during the editing process. I learned how to replace or enhance skies in my images, which can dramatically change the mood and narrative.

Whether it’s adding dramatic clouds or a vibrant sunset, the right sky can add so much storytelling power. I often use blending modes and adjustment layers to create a seamless look. It’s a bit of a trial-and-error process, but when it comes together, it feels like magic. Adding elements like rain or snow can also enhance the atmosphere, making the viewer feel as if they’re right there in the moment with me.

All of these techniques have become part of my journey in urban photography. Each step in the editing process is a chance to tell a story, to enhance the experience, and to invite viewers into my world. I’m excited to continue sharing more tips that have influenced my photography journey!

Specific Tips for Different Urban Subjects

Editing Cityscapes for Maximum Impact

Cityscapes are one of my favorite subjects in urban photography. There’s something captivating about capturing the skyline, especially during sunset or twilight when the lights begin to twinkle. One technique I’ve found particularly effective is to enhance the contrast and saturation of the buildings. This makes them pop against the often dramatic skies. I remember when I edited a shot of a famous skyline; I adjusted the shadows to create depth in the buildings while boosting the highlights to make the glass windows sparkle.

Additionally, I like to play with the clarity slider. Increasing clarity can help bring out texture in the buildings and foreground elements, creating a more vivid representation of the urban environment. I’ve also learned that including leading lines, such as roads or paths, can guide the viewer’s eye toward the cityscape, enhancing the overall composition. It’s a great way to draw attention to the architectural beauty that defines urban landscapes.

Enhancing Street Photography

Street photography holds a special place in my heart because it captures the essence of everyday life. When editing these candid shots, I focus on mood and emotion. I often experiment with black and white conversions to emphasize the rawness of the moment. This technique can convey feelings more powerfully than color sometimes. I remember a particular shot of a street performer; converting it to black and white allowed me to highlight the expressions of both the performer and the audience, creating a more poignant image.

In addition to color adjustments, cropping plays a significant role in street photography. By framing the shot tightly, I can eliminate distractions and focus on the subject. This helps to create a stronger narrative. I also like to use vignetting subtly to draw attention toward the center of the image, enhancing that intimate feel. It’s like creating a spotlight on the life happening in the streets.

Improving Architectural Shots

Architectural photography is all about showcasing the beauty and intricacy of structures. When I edit my architectural shots, I pay close attention to perspective correction. I’ve encountered many photos where buildings appear distorted due to the angle I shot from, which can be distracting. Using tools in editing software to correct perspective helps to straighten lines and maintain the integrity of the architecture.

Another technique that has worked wonders for me is highlighting details. I often zoom in on specific architectural features like doorways or decorative elements and apply selective sharpening. This draws the viewer’s attention to the unique aspects that might otherwise go unnoticed. I’ve also experimented with different color palettes to match the mood of the building—warmer tones for historic structures and cooler tones for modern designs. It’s fascinating how color can change the perception of an architectural photograph.

Creative Editing Styles and Trends

Black and White vs. Color Editing

Choosing between black and white and color editing is a decision I often wrestle with. Each style has its unique strengths. Black and white editing can convey timelessness and emotion, while color editing captures the vibrancy of urban life. I’ve found that some images lend themselves better to monochrome, especially when the play of light and shadows creates striking contrasts. For instance, capturing a rainy day in the city can evoke a sense of nostalgia when rendered in black and white.

On the flip side, color editing allows me to highlight the lively hues of street art or the vibrancy of market scenes. I’ve learned that sometimes, a photo can benefit from both styles. I’ll create a black and white version alongside a color version to see which one tells the story better. It’s about experimenting and finding what resonates most.

Vintage and Film Effects

Recently, I’ve been drawn to vintage and film effects, which add a nostalgic charm to urban photography. I remember stumbling upon some old photos of my city and feeling inspired by the faded colors and grainy textures. By using filters and textures in my editing software, I’ve been able to replicate that vintage look in my own photographs. This technique works beautifully for street scenes, lending them a sense of history and character.

I usually play with grain levels, softening the overall sharpness and adding vignetting for that classic film feel. There’s something magical about seeing a modern city through the lens of the past, creating an intriguing juxtaposition that sparks conversation.

HDR Techniques in Urban Photography

High Dynamic Range (HDR) photography is another technique I’ve embraced, especially for urban landscapes. This method allows me to capture a broader range of light and detail, which is crucial in environments with stark contrasts between light and shadow. I remember taking a photo of a city at dusk, where the bright lights and dark buildings created a challenging scene. By combining multiple exposures, I was able to create a balanced image that showcased both the city lights and the architectural details.

In my experience, the key to HDR is subtlety. I’ve seen many HDR images that look overly processed, losing the natural feel. I’m careful to blend the exposures just enough to maintain realism while still enhancing the details. It’s about finding that perfect balance to create a stunning urban photo that feels alive.

Frequently Asked Questions

What is urban photography?

Urban photography is about capturing the heartbeat of a city, reflecting its culture, architecture, and the emotions of its inhabitants. It tells stories through images, showcasing everything from skyscrapers to street vendors.

What are some common challenges faced in urban photography?

Common challenges include harsh lighting conditions, busy environments that complicate composition, feeling overwhelmed by options, and capturing movement effectively. Addressing these challenges often requires a clear vision or theme and experimenting with techniques like shutter speed.

Which photo editing software is recommended for urban photography?

Adobe Lightroom and Adobe Photoshop are highly recommended for urban photography. Lightroom is user-friendly with powerful features, while Photoshop offers advanced capabilities like layering and masking. GIMP is a free alternative that also provides many features.

What mobile editing apps can be used for quick fixes in urban photography?

Snapseed and VSCO are popular mobile editing apps. Snapseed offers a range of features for fine-tuning photos, while VSCO provides beautiful presets to enhance photos’ moods quickly.

How can exposure and contrast be adjusted in urban photography?

Adjusting exposure and contrast is crucial for enhancing urban photos. Increasing exposure can bring life to dull images, while adjusting contrast helps to emphasize textures and create a more dynamic photograph.

What techniques can improve color accuracy in urban landscapes?

Techniques for improving color accuracy include adjusting the white balance and using the HSL sliders to tweak individual colors. This helps ensure that the colors reflect the scene as seen in real life.

What are layers and masks, and how do they enhance urban photography?

Layers and masks are powerful editing tools that allow photographers to stack images and control visibility. They enable selective editing, enhancing specific areas of a photo without affecting the entire image, thus creating more compelling compositions.

How can depth be created in urban photography?

Depth can be created using selective focus to draw attention to specific subjects while blurring the background. This can be achieved through camera aperture adjustments or selective blur tools in editing software.

What is the significance of HDR techniques in urban photography?

HDR techniques capture a broader range of light and detail, which is essential in urban environments with stark light contrasts. By combining multiple exposures, photographers can create balanced images that showcase both highlights and shadows.

How do black and white and color editing differ in urban photography?

Black and white editing conveys timelessness and emotion, while color editing highlights the vibrancy of urban life. Photographers often experiment with both styles to determine which better tells the story of the image.

Explore Iconic Urban Photography Locations on a Budget

Urban photography captures the essence of city life, blending architecture, culture, and spontaneity. Exploring iconic locations on a budget is not only possible but can also lead to some of the most memorable experiences. Let’s dive into understanding urban photography and how to thrive in it without breaking the bank. Read Interesting article: Top 10 Urban Photography Spots for Budget Backpackers

Explore Iconic Urban Photography Locations on a Budget

Understanding Urban Photography

What is Urban Photography?

Urban photography is a fascinating genre that focuses on cityscapes, street life, and the intricate relationship between people and their urban environments. I’ve always found there’s something magical about capturing the hustle and bustle of city life, the architecture that tells stories, and the moments that unfold in public spaces. It’s about documenting the spirit of a place, whether it’s the vibrant street art or the quiet corners of a bustling metropolis. Urban photography can be as simple as snapping a photo of a busy street or as complex as showcasing the interplay of light and shadow in towering skyscrapers.

History and Evolution of Urban Photography

The roots of urban photography can be traced back to the late 19th century. I remember learning about pioneers like Alfred Stieglitz, who captured the essence of American cities. As cities grew, so did the need to document them. Over the decades, urban photography evolved, reflecting societal changes, technological advancements, and artistic movements. From the gritty realism of the Great Depression to the sleek modernism of the 21st century, urban photography has always mirrored the world around us. I’ve noticed that today’s photographers often blend traditional techniques with innovative approaches, capturing the dynamic nature of urban spaces in ways that resonate with diverse audiences.

Why Explore Urban Photography on a Budget?

Benefits of Budget Photography

Exploring urban photography on a budget opens doors to creativity and adaptability. I’ve experienced firsthand how working within financial constraints can push me to think outside the box. It’s about finding beauty in the overlooked details and learning to appreciate the simplicity of everyday life. Budget photography encourages us to utilize what we have—whether it’s a basic camera, a smartphone, or even borrowed gear. It’s not just about the equipment; it’s about the eye behind the lens. Capturing stunning imagery can be achieved without high-end gear, and sometimes, the best shots come from moments of spontaneity rather than meticulous planning. Read Interesting article: Exploring Cities: Mastering Candid Urban Photography on a Budget

How to Maximize Your Experience for Less

When I began my journey into urban photography, I quickly realized that maximizing my experience didn’t mean I had to spend a fortune. Here are some strategies that worked well for me:

  • Research Locations: I’ve found that planning ahead by researching locations can save time and money. Look for iconic spots that don’t require an entrance fee, like public parks or famous streets.
  • Utilize Natural Light: Timing my shoots during the golden hour—shortly after sunrise or before sunset—has greatly improved my photos without any additional cost. The soft light creates magical effects that elevate even the simplest compositions.
  • Engage with Locals: Connecting with residents can lead you to hidden gems. On one trip, I met a local artist who showed me fantastic corners of the city that aren’t in any travel guide. Their insights can inspire unique shots.
  • Join Free Workshops or Meetups: Many cities have photography groups or communities where you can learn and share without paying a dime. I’ve attended several meetups that enriched my skills and expanded my network.

By implementing these tips, I discovered that urban photography is less about the latest gear and more about creativity, perspective, and the stories we choose to tell through our lenses.

Top Iconic Urban Photography Locations

New York City

Brooklyn Bridge

The Brooklyn Bridge is a must-visit for any urban photographer. I remember standing in the middle of the bridge, surrounded by the stunning skyline of Manhattan, feeling inspired. The combination of the bridge’s historic architecture and the modern city backdrop offers endless photographic opportunities, especially at sunrise or sunset.

Central Park

Central Park provides a beautiful contrast to the surrounding urban jungle. I find that wandering its paths leads to picturesque scenes, from the iconic Bow Bridge to the serene Bethesda Terrace. It’s also a great spot for candid photos of people enjoying nature amidst the city’s chaos.

Paris

Eiffel Tower

No trip to Paris is complete without capturing the Eiffel Tower. Whether it’s from Trocadéro Gardens or a cozy café nearby, I’ve found this landmark offers countless angles and perspectives that can make for a stunning photograph.

Montmartre

Montmartre, with its charming streets and artistic vibe, is a treasure trove for photographers. I remember getting lost in its winding alleys, where every corner seemed to tell a story. The views from the Sacré-Cœur basilica are breathtaking, especially during sunset when the city lights begin to twinkle.

Tokyo

Shibuya Crossing

Shibuya Crossing is a chaotic yet vibrant spot that epitomizes Tokyo’s energy. I’ve spent hours here, capturing the flow of people crossing in every direction. It’s a perfect example of urban life in motion, and the neon lights at night create a surreal atmosphere.

Asakusa and Senso-ji Temple

In contrast to the modernity of Shibuya, Asakusa offers a glimpse into Japan’s rich history with the Senso-ji Temple. The colorful architecture and surrounding market stalls provide excellent photography opportunities that blend tradition with the modern urban landscape.

London

Big Ben and the Houses of Parliament

Big Ben’s iconic clock tower is a quintessential London landmark. I’ve enjoyed capturing its grandeur from various angles, especially from across the River Thames. It’s a spot that never fails to impress.

Borough Market

Borough Market is not just a food lover’s paradise; it’s also a vibrant place for urban photography. The lively atmosphere, colorful stalls, and diverse crowd create a dynamic environment perfect for candid shots.

Barcelona

Park Güell

Park Güell, with its whimsical architecture by Antoni Gaudí, offers a unique backdrop for photography. I often find myself marveling at the colorful mosaics and organic forms that seem to blend seamlessly with nature.

Gothic Quarter

The Gothic Quarter’s narrow streets and medieval buildings create a mysterious and enchanting atmosphere. I love wandering around, capturing the interplay of light and shadow, and discovering hidden courtyards that feel like stepping back in time.

Budget Tips for Urban Photography

Using Public Transportation

One of the best budget tips I can share is to embrace public transportation. It’s not just economical; it opens up a world of photographic opportunities. I’ve found that taking the subway, bus, or tram allows me to experience the city like a local. Each ride offers glimpses of everyday life—from commuters absorbed in their phones to the vibrant street art that often decorates stations. Plus, public transport can take you to less touristy areas, where you can capture authentic moments that tell a richer story about the urban landscape.

Finding Free or Low-Cost Photography Tours

When I travel to new cities, I love seeking out free or low-cost photography tours. These tours can be a fantastic way to discover hidden gems while learning from experienced photographers. I remember stumbling upon a free walking tour in Lisbon that focused on street photography. The guide was incredibly knowledgeable, and I ended up capturing some of my favorite shots from that trip. Websites like Meetup or local tourism boards often list these opportunities, so it’s worth checking them out before your visit. Read Interesting article: Capture the City: Best Urban Photography Locations Revealed

Time Your Visits for the Best Lighting

Timing can make all the difference in urban photography. I learned early on that the best lighting happens during the golden hour—just after sunrise or just before sunset. During these times, the light is soft and warm, casting beautiful shadows and enhancing colors. I often set my alarm to catch the early morning light, and it’s always worth it. I’ve captured stunning cityscapes and vibrant street scenes that simply wouldn’t have looked the same under harsh midday sun. Planning your shooting schedule around these key times can elevate your photos without any additional cost.

Utilizing Local Resources and Apps

In this digital age, there are so many resources at our fingertips that can enhance our urban photography experience. I often use apps like Google Maps to explore neighborhoods and find viewpoints that may not be as obvious. Additionally, social media platforms like Instagram can be goldmines for inspiration. I’ve discovered local photographers who share their favorite spots, and these insider tips often lead me to unique locations. Furthermore, photography forums and online communities can provide valuable feedback and suggestions, making it easier to improve my skills while connecting with others who share the same passion.

Essential Gear for Budget Urban Photography

Camera Options for Beginners

When I first started urban photography, I didn’t have a fancy camera. I began with a basic DSLR that I borrowed from a friend. It was a great way to dip my toes into photography without investing a lot of money upfront. If you’re just starting out, I recommend looking for entry-level DSLRs or mirrorless cameras that offer a good balance between quality and affordability. Brands like Canon and Nikon have budget-friendly options that still deliver excellent results. If you prefer something even more portable, compact cameras can also do the trick, especially for street photography.

Affordable Lenses and Accessories

One of the key lessons I learned was that having the right lens can significantly impact your photography. While expensive lenses can be tempting, there are many affordable options that can deliver great results. A versatile zoom lens is often a good choice for urban photography, allowing you to capture wide landscapes and close-up details without having to switch lenses frequently. Additionally, investing in a sturdy tripod can enhance your low-light photography. I found a lightweight, budget-friendly tripod that I could easily carry around, which helped me get sharper images during longer exposures.

Smartphone Photography Techniques

I can’t stress enough how powerful smartphones have become for photography. When I traveled without my camera, my smartphone was my go-to tool. I learned to maximize its potential by exploring various features like HDR mode, which helps capture better details in high-contrast scenes. Additionally, using editing apps directly on my phone allowed me to tweak images on the go. I found that even basic adjustments like brightness and contrast can greatly enhance a photo. The key is to experiment with different angles and compositions; sometimes, the most unexpected shots come from being spontaneous with my smartphone.

Editing Your Urban Photography on a Budget

Free and Low-Cost Editing Software

Editing is a crucial step in the photography process, and thankfully, there are plenty of free or low-cost options available. When I started editing my photos, I turned to software like GIMP and Paint.NET, which are excellent free alternatives to pricier programs like Photoshop. Over time, I also discovered Lightroom, which offers a subscription model that’s quite affordable for what it provides. These tools helped me learn the basics of photo editing, from cropping to enhancing colors, all without breaking the bank.

Basic Editing Tips for Stunning Photos

While powerful editing tools are important, I’ve found that knowing some basic techniques can go a long way. Simple adjustments like cropping to improve composition or adjusting exposure can breathe new life into an image. I’ve learned that enhancing the vibrancy of colors can bring out the beauty in urban scenes, while sharpening the details can make architectural shots pop. I also recommend playing around with filters and presets, as they can give a unique flair to your images, often with just a click. The goal is to enhance the story your photo tells while keeping it true to the original moment.

Sharing and Showcasing Your Work

Best Platforms for Urban Photography

Once I felt confident in my urban photography skills, I wanted to share my work with others. There are many great platforms available for photographers to showcase their photos. Instagram has become one of my favorites because it allows for visual storytelling and connecting with other photographers. I’ve also found that Flickr and 500px are fantastic for sharing high-resolution images with a community that appreciates photography. Each platform has its unique audience, so I recommend experimenting to see where your work resonates best.

Building a Portfolio on a Budget

Creating a portfolio doesn’t have to be an expensive endeavor. I started by using a free website builder to showcase my best work. Platforms like Wix or WordPress provide templates that are easy to customize, allowing me to present my images professionally. Additionally, I’ve used social media to share my work and gather feedback, which has been invaluable in refining my style. I also encourage fellow photographers to consider printing a few pieces for local art shows or community events, which can provide exposure without significant costs.

Making the Most of Your Urban Photography Journey

Creating a Unique Style

One of the most rewarding aspects of urban photography is developing a style that feels authentic to you. I remember when I first started, I was heavily influenced by the works of famous photographers, trying to mimic their styles. While that’s a great place to start, I learned that finding my voice is far more fulfilling. I began experimenting with different techniques, compositions, and themes. For instance, I developed a love for capturing reflections in puddles after a rainstorm, which added a unique twist to my urban scenes. I encourage you to explore what resonates with you personally. Maybe it’s the way shadows play in alleys or the vibrant colors of street art. The more you shoot, the clearer your style will become.

Engaging with the Community

Connecting with fellow photographers has been one of the best parts of my urban photography journey. I’ve met so many passionate people who share the same interests, and it’s incredibly inspiring. Engaging with local photography communities can provide not only motivation but also invaluable feedback on your work. I often attend local exhibitions or workshops, where I’ve met talented photographers who are eager to share tips and experiences. Social media is also a fantastic platform for connecting with others. I’ve formed friendships through Instagram by commenting on each other’s work and participating in photography challenges. Building these connections has enriched my perspective and helped me grow as a photographer.

Staying Inspired

There are times when I feel a creative block, and it can be frustrating. However, I’ve found that seeking inspiration from various sources can reignite my passion for urban photography. Visiting galleries or watching documentaries about photography has opened my eyes to different styles and techniques. I also enjoy following photographers whose work I admire on platforms like Instagram and Pinterest. Seeing their perspectives often sparks new ideas for my own projects. A simple walk through my neighborhood can also be inspiring; I make it a point to look for new angles or moments that I haven’t noticed before. I’ve learned that inspiration is everywhere, sometimes in the most unexpected places.

Participating in Challenges

Participating in photography challenges has been a fun way to push my skills and creativity. I remember joining a 30-day urban photography challenge on social media, where each day had a specific theme, like “leading lines” or “night photography.” It encouraged me to think critically about each shot and explore different aspects of urban life. I found myself capturing scenes I might have overlooked otherwise. If you’re looking to improve your skills, I highly recommend finding a challenge that excites you. It can be a great way to structure your practice while keeping it fun and engaging.

Staying Safe While Shooting

As much as I love exploring urban environments, I also recognize the importance of staying safe while doing so. I always keep my gear secure and be aware of my surroundings. I’ve learned that it’s best to shoot in areas where I feel comfortable and to avoid isolated spots, especially at night. Additionally, I try to blend in with the crowd; wearing casual clothing rather than flashy attire helps me avoid drawing unnecessary attention. When I’m traveling in new cities, I often research areas beforehand and stay informed about safety tips from locals. It’s essential to balance your passion for photography with a sense of security.

Continuously Learning and Growing

Urban photography is a journey of continuous learning. I’ve found that there’s always something new to discover, whether it’s a new technique, a fascinating location, or a different aspect of the urban landscape. I make it a point to regularly read photography books, take online courses, and watch tutorials. Each of these resources adds to my knowledge and helps me refine my skills. I also encourage you to seek out constructive criticism from others. Feedback can be invaluable in understanding how your work is perceived and where you can improve. Embracing the learning process has been incredibly rewarding, and it keeps my passion for urban photography alive.

Documenting Your Journey

Finally, documenting your journey can be a beautiful way to reflect on your growth as a photographer. I started keeping a photography journal where I jot down thoughts, challenges, and successes from my shoots. This practice has allowed me to track my progress and appreciate how far I’ve come. I also love looking back at my earlier photos and seeing how my style has evolved over time. Whether it’s through journaling, blogging, or even creating a visual diary on Instagram, capturing your journey can be a source of motivation and inspiration for both yourself and others.

Frequently Asked Questions

What is urban photography?

Urban photography is a genre that focuses on cityscapes, street life, and the relationship between people and their urban environments. It captures the spirit of a place through moments in public spaces, architecture, and the hustle and bustle of city life.

What are the benefits of exploring urban photography on a budget?

Exploring urban photography on a budget fosters creativity and adaptability. It encourages photographers to find beauty in overlooked details and appreciate the simplicity of everyday life, utilizing basic equipment like smartphones or borrowed gear.

How can I maximize my urban photography experience without spending much?

To maximize your experience on a budget, research locations that don’t require entrance fees, utilize natural light during the golden hour, engage with locals for hidden gems, and join free workshops or meetups to enhance your skills.

What are some iconic locations for urban photography?

Some top iconic locations include the Brooklyn Bridge and Central Park in New York City, the Eiffel Tower and Montmartre in Paris, Shibuya Crossing and Senso-ji Temple in Tokyo, Big Ben and Borough Market in London, and Park Güell and the Gothic Quarter in Barcelona.

What budget tips can help with urban photography?

Embrace public transportation for economical travel and unique photo opportunities, seek out free or low-cost photography tours, time your visits for the best lighting during the golden hour, and utilize local resources and apps to find great photography spots.

What camera options are recommended for beginners in urban photography?

Beginners can start with entry-level DSLRs or mirrorless cameras that balance quality and affordability, as well as compact cameras that are suitable for street photography. Brands like Canon and Nikon offer budget-friendly options.

How can I edit my urban photography on a budget?

There are many free or low-cost editing software options available, such as GIMP and Paint.NET. Additionally, Lightroom offers an affordable subscription model. Basic editing techniques like cropping, adjusting exposure, and enhancing colors can significantly improve photos.

What are the best platforms to showcase urban photography?

Instagram, Flickr, and 500px are great platforms for showcasing urban photography. Each platform has its unique audience, allowing photographers to connect and share their work effectively.

How can I create a unique style in urban photography?

Developing a unique style involves experimenting with different techniques, compositions, and themes. It’s important to explore what resonates personally, allowing your photography to reflect your individual perspective and voice.

What safety measures should I take while shooting urban photography?

To stay safe while photographing, keep your gear secure, be aware of your surroundings, and avoid isolated spots, especially at night. Blending in with the crowd and researching areas beforehand can also enhance your safety while exploring urban environments.

Affordable Urban Photography Destinations You Can’t Miss

Urban photography is a treasure trove of opportunities, waiting to be explored at affordable destinations. Let’s dive into the world of vibrant streets, stunning skylines, and captivating cultural scenes that every photographer should experience.

Affordable Urban Photography Destinations You Can’t Miss

Overview of Urban Photography

What is Urban Photography?

Urban photography is, at its core, about capturing the essence of city life. It involves photographing the architecture, streets, and the people that inhabit urban spaces. I’ve always found urban photography to be a fascinating blend of art and storytelling. You’re not just taking pictures; you’re capturing moments that reflect the pulse of a city. Each photograph tells a tale, whether it’s the bustling streets filled with life or the quiet corners adorned with history. From my experience, urban photography challenges us to see the beauty in everyday life, encouraging us to explore and connect with our surroundings.

Importance of Capturing Urban Landscapes

Capturing urban landscapes is essential for several reasons. First, cities are living entities that evolve constantly. By photographing them, we document their history, culture, and transformations. I remember walking through the streets of Chicago and feeling the weight of its architectural legacy. Each building, each street corner, narrates a story of the city’s past, present, and future. Secondly, urban photography offers a unique perspective on various social issues. By capturing the diverse lives and cultures within a city, we gain insight and empathy for the experiences of others. I believe that through our lenses, we can bridge gaps and foster a deeper understanding of what makes each city unique.

Top Affordable Urban Photography Destinations

Street Art Hotspots

Street art has become a defining feature of urban culture, transforming blank walls into vibrant canvases. For anyone interested in photography, these hotspots are pure gold.

Wynwood Walls, Miami

Wynwood Walls in Miami is a paradise for street art lovers. I visited this area and was blown away by the colorful murals and the creativity that sprawls across the walls. Each piece tells a story, reflecting the culture and vibe of the city. It’s a perfect place to practice shooting wide-angle shots and capturing intricate details. The best part? It’s completely free to explore! Just grab your camera, walk around, and you’ll find endless subjects to photograph. I often recommend visiting early in the morning when the sunlight casts a warm glow, illuminating the vibrant colors of the murals.

Shoreditch, London

Another must-see location is Shoreditch in London. This trendy neighborhood is known for its eclectic street art scene. I found that every turn I took revealed a new mural or sticker, making it an exciting place to shoot. The mix of styles—from graffiti to stencils—adds character to the area. I loved capturing candid shots of people interacting with the art, which adds a layer of storytelling to my photos. Plus, Shoreditch has a lively atmosphere with cafes and markets, making it a great spot to relax and reflect on your shots.

Iconic Skyline Views

Every city has its iconic skyline, and capturing these views can elevate your urban photography game.

Chicago Riverwalk, Chicago

The Chicago Riverwalk is an incredible spot for skyline photography. I remember standing by the water, watching the city’s skyscrapers reflect off the river. The combination of modern and historic buildings creates a stunning backdrop. I recommend heading there during the golden hour; the warm light makes the skyline pop. You can also experiment with different angles from the bridges or the banks, giving you plenty of variety in your shots.

Brooklyn Bridge, New York City

Another iconic location is the Brooklyn Bridge in New York City. Walking across this bridge offers breathtaking views of the Manhattan skyline. I found it exhilarating to capture both the bridge’s architecture and the city in the background. Early mornings or late afternoons are the best times to visit, as the light enhances the beauty of the scene. Don’t forget to include some foreground elements, like the bridge’s cables, to create depth in your photos!

Historic Architecture

Historic architecture is another fascinating aspect of urban photography. It tells a story of a city’s past and offers a beautiful contrast to modern designs.

French Quarter, New Orleans

The French Quarter in New Orleans is a photographer’s dream. The colorful buildings and intricate ironwork balconies create a charming atmosphere that invites exploration. I was captivated by the lively street scenes, music, and unique culture. When photographing the architecture, I found that incorporating local life into the frame resulted in more dynamic images. I suggest wandering through the streets during the daytime to capture the vibrant energy of this historic area.

Gaslamp Quarter, San Diego

In San Diego, the Gaslamp Quarter offers a mix of Victorian architecture and modern flair. Strolling through this district, I noticed how the buildings tell the story of the city’s development. This area is especially beautiful at night when the buildings are lit up. Read Interesting article: Budget Backpacking: Mastering Urban Night Photography It’s a great opportunity to practice nighttime photography and experiment with long exposures. The contrast of the warm lights against the cool night sky creates a magical atmosphere.

Vibrant Markets and Cultural Districts

Markets and cultural districts are alive with colors, textures, and people, making them perfect for urban photography.

La Boqueria, Barcelona

La Boqueria in Barcelona is one of the liveliest markets I’ve ever visited. The vibrant colors of the fresh produce, meats, and local delicacies are a feast for the eyes. I loved capturing candid shots of vendors and locals interacting with the products. The bustling atmosphere provides endless opportunities for dynamic photography. I recommend getting there early to avoid the crowds and to fully enjoy the experience.

Chinatown, San Francisco

Chinatown in San Francisco is another vibrant area that captures the essence of urban life. The colorful storefronts, traditional decorations, and lively streets are perfect for capturing culture and community. I found that photographing the details—like the intricate designs on the buildings or the food stalls—tells a more profound story about the place. It’s an excellent way to immerse yourself in the culture and capture the city’s spirit.

Best Times for Urban Photography

Golden Hour: When to Shoot for the Best Light

One of the best pieces of advice I ever received about photography was to pay attention to the light. The golden hour, that magical time shortly after sunrise and just before sunset, creates a warm, soft glow that can transform even the most mundane scenes into stunning visuals. I remember standing on a busy street in San Francisco, camera in hand, as the sun dipped low on the horizon. The light filtered through the buildings, casting long shadows and illuminating the pavement with a golden hue. It felt like the city was wrapped in a cozy blanket, and my photos reflected that warm atmosphere.

During the golden hour, colors become more vibrant, and the contrast in your images improves significantly. I often find that shooting during this time helps me capture the energy of urban life in a way that feels more intimate and inviting. It’s incredible how the same scene can look drastically different at various times of the day. If you’re planning a photo walk, I highly recommend checking the sunrise and sunset times for your location to make the most of this beautiful lighting.

Seasonal Considerations and Events

Urban photography isn’t just about the time of day; the seasons can also dramatically affect your images. Each season brings its unique palette and mood. For instance, I’ve found spring to be particularly magical, especially in cities with lush parks and blooming flowers. I remember visiting Washington, D.C. during the cherry blossom festival. The streets were filled with pink and white blossoms, and I was able to capture the beauty of the trees against the backdrop of historic monuments. It was a sight to behold!

Fall can be equally stunning, with the changing leaves adding warm hues to cityscapes. I love photographing urban parks during this time when the trees are ablaze with color. Additionally, don’t overlook local events and festivals. They can provide a wealth of photo opportunities, from street performers to unique cultural celebrations. I had a fantastic time shooting a local street fair where the vibrant decorations and lively crowd added layers of excitement to my shots. Read Interesting article: Capture the City: Urban Night Photography Tips for Travelers

Essential Photography Gear for Urban Shooting

Camera Recommendations for Beginners

If you’re just starting with urban photography, you might feel overwhelmed when it comes to choosing the right camera. I’ve been there! I recommend starting with a good entry-level DSLR or mirrorless camera. Cameras like the Canon EOS Rebel series or the Sony Alpha a6000 are user-friendly and offer great image quality without breaking the bank. They allow you to experiment with different settings as you learn, which is essential for capturing the dynamic environments of urban settings.

Another option is to use a compact camera or even a smartphone with a good camera. I often carry my smartphone for quick snaps when I don’t want to lug around my DSLR. The convenience of having a camera in your pocket means you can capture spontaneous moments that reflect the essence of city life.

Must-Have Lenses for Urban Landscapes

The lens you choose can make a significant difference in your urban photography. A versatile zoom lens, like a 24-70mm, is a great all-rounder for capturing everything from street scenes to architecture. I’ve used this lens countless times, and it never fails me. For those moments when I want to capture sweeping cityscapes or tight spaces, a wide-angle lens, like a 16-35mm, comes in handy. It’s perfect for fitting more into the frame and creating dramatic perspectives.

Additionally, a prime lens, such as a 50mm f/1.8, can be fantastic for street photography. The shallow depth of field lets you isolate your subjects beautifully, helping to convey stories in my images. I often find that using different lenses helps me see familiar places in new ways, which keeps my photography fresh and exciting.

Accessories to Enhance Your Urban Photography

When it comes to urban photography gear, there are a few accessories that I believe can elevate your experience. A sturdy tripod is essential for low-light situations or capturing long-exposure shots, especially at night when the city lights come alive. I’ve found that using a tripod allows me to experiment with different compositions and ensures my images are sharp.

Another accessory I can’t live without is a good camera bag. Urban environments can be chaotic, and having a secure, comfortable bag to carry my gear helps me stay organized and ready to shoot. I recommend looking for one that blends style and functionality, allowing you to navigate the streets without drawing too much attention to your gear.

Lastly, consider investing in a polarizing filter. This little gem can help reduce glare and enhance colors, particularly when shooting urban scenes with reflective surfaces. I’ve noticed that using a polarizing filter can add a level of depth to my photographs, making the colors pop and the sky more vibrant. Read Interesting article: Capture the Wild: Budget Tips for Conservation Photography

Techniques for Capturing Stunning Urban Shots

Playing with Perspectives and Angles

One of the joys of urban photography is the ability to experiment with different perspectives. I’ve learned that changing your point of view can drastically alter the mood of a photograph. For example, I often find myself getting low to the ground for a unique angle that emphasizes the vastness of the city skyline above. It’s amazing how this simple shift can create a more dramatic and engaging image.

Another technique I enjoy is finding elevated viewpoints, like rooftops or hills, to capture the city from above. This perspective can add depth and context to your shots, highlighting the layout of the urban landscape. I remember climbing to the top of a parking garage in Los Angeles and capturing the sprawling city below—an incredible sight that I wouldn’t have experienced from street level.

Utilizing Natural Light Effectively

Natural light is one of our best friends in photography, and it can change the tone of an urban scene in an instant. I’ve found that shooting during overcast days can create a soft, diffused light that’s perfect for capturing details without harsh shadows. On the other hand, shooting at sunset can add a warm glow to your images, as I experienced during a dusk photo walk along the waterfront in Seattle.

Pay attention to how light interacts with buildings and people. I often look for interesting shadows or reflections that can add depth and intrigue to my photos. This attention to natural light can transform a good photo into a great one.

Incorporating Movement and People

Urban environments are full of life, and incorporating movement into your shots can make them more dynamic. I love capturing people in their everyday routines—whether it’s a cyclist zipping past, a street performer entertaining a crowd, or locals chatting at a café. These candid moments breathe life into my photographs and tell more engaging stories.

To capture movement effectively, I sometimes use a slower shutter speed to create a sense of motion. For example, while shooting a busy street scene, I might set my shutter speed to around 1/30th of a second to blur the passing cars while keeping my subject in focus. This technique adds a sense of energy and urgency to the image, encapsulating the hustle and bustle of city life.

Local Food and Culture: A Photographer’s Delight

Popular Local Dishes to Capture

As I’ve explored various cities, one of the most delightful parts of urban photography has been capturing the local food culture. Food isn’t just sustenance; it’s a representation of a city’s identity and history. I remember being in New Orleans, where the vibrant colors and textures of dishes like gumbo and beignets were as photogenic as they were delicious. The way the powdered sugar dusted these fluffy pastries against the backdrop of the lively streets was pure magic. When photographing food, I often choose natural light to highlight the details and colors, which brings the dish to life.

Another memorable experience was in Barcelona, where I indulged in tapas. The presentation of these small plates, with their vibrant ingredients, provided excellent opportunities for close-up shots. I recommend experimenting with different angles—overhead shots can work wonders, especially when the table is filled with a variety of dishes. Whether it’s street food vendors or fine dining, capturing the local cuisine can convey a story about the culture and lifestyle of the people.

Cultural Events and Festivals to Photograph

Cultural events and festivals are some of the best moments to capture the essence of a city. I’ve had the chance to attend a few local festivals while traveling, and they always provide rich photography opportunities. For instance, during the Carnival in Rio de Janeiro, the streets were alive with color, music, and dance. I felt like I was in the midst of a vibrant painting, with people dressed in elaborate costumes and the lively rhythms filling the air. I learned that photographing events like this requires a good mix of anticipation and spontaneity; the energy is infectious, and being ready to capture candid moments is key.

Another fantastic experience was during the Día de los Muertos celebration in Mexico City. The altars adorned with marigolds, photos, and offerings were breathtaking, and the atmosphere was filled with love and remembrance. I found that engaging with locals and asking for permission before taking their photos made the experience even richer. Festivals allow us to tell powerful stories through our images, capturing the unity and joy of a community celebrating together.

Safety Tips for Urban Photographers

Staying Safe While Shooting in the City

While urban photography offers incredible opportunities, safety should always be a priority. I remember feeling a mix of excitement and caution while exploring unfamiliar streets. One of the first things I learned was to be aware of my surroundings. I often avoid pulling out my camera in crowded areas where I might attract unwanted attention. Instead, I try to blend in and shoot discreetly, especially in urban environments that may feel a bit sketchy. Trusting my instincts has kept me safe more times than I can count.

It’s also vital to keep your gear secure. I prefer using a crossbody camera bag that I can easily access while keeping it close to my body. This way, I can quickly grab my camera without it being overly cumbersome. And, of course, it’s wise to travel light—bringing only what I truly need for the day helps me stay nimble and focused on the photography rather than my equipment.

Respecting Local Customs and People

Respecting local customs and the people I photograph is something I feel passionately about. I’ve found that engaging with locals can lead to more meaningful photographs. Before snapping a picture of someone, I always try to make eye contact and smile, conveying that I appreciate their presence in my frame. If they seem receptive, I often ask for permission, which builds trust and can lead to more genuine moments being captured.

Additionally, I try to familiarize myself with the cultural norms of the area I’m visiting. For example, in some cultures, photography may be frowned upon in certain areas or during specific events. Being mindful of these customs shows respect and enhances the overall experience for both myself and the community. I think it’s essential to remember that photography is not just about the shot; it’s about the connections we make along the way.

Budget Travel Tips for Urban Photographers

Affordable Accommodation Options

Finding a place to stay that won’t break the bank is crucial for any budget-conscious traveler. I’ve had great success with platforms like Airbnb, where I’ve found unique and affordable accommodations in the heart of various cities. Staying in residential neighborhoods often gives me a more authentic experience and insights into local life. I remember booking a cozy apartment in Lisbon, which not only saved me money but also allowed me to explore local markets and eateries just around the corner.

Hostels are another excellent option, especially for solo travelers or those looking to meet new people. I’ve stayed in several hostels where I made friends from all over the world, and many of them offered great communal spaces to share stories and tips about photography and travel. Plus, they often have organized tours or activities, which can be a fun way to discover the city.

Public Transportation Tips

Using public transportation is not only budget-friendly, but it also offers a chance to experience the city like a local. I’ve found that getting a day pass or travel card can save you a lot of money while allowing unlimited travel on buses, trams, or subways. In cities like Tokyo or Paris, I’ve enjoyed hopping on and off trains, capturing candid moments of daily life along the way. I often carry my camera in a small bag to have it handy for spontaneous shots during my commutes.

Also, walking is one of the best ways to experience a city intimately. I love wandering through neighborhoods, discovering hidden gems, and capturing unique scenes that might be missed from a vehicle. Bringing a comfortable pair of shoes is essential, as you never know how far you’ll roam while chasing the perfect shot!

Free or Low-Cost Attractions to Photograph

Every city has its share of free or low-cost attractions that make for fantastic photography opportunities. I often seek out parks, public squares, or historical landmarks that don’t require an entry fee. For example, in Paris, the Sacré-Cœur Basilica offers stunning views of the city and beautiful architecture without any cost. I spent a sunny afternoon there, capturing the lively atmosphere of people enjoying the space.

Another tip is to explore local art installations or community events that are often free to access. I remember stumbling upon an outdoor exhibit in a park in Berlin that showcased local artists. It not only provided excellent photo opportunities but also allowed me to connect with the city’s vibrant art scene. Taking the time to research free events or attractions before my trip has always paid off, giving me memorable experiences without straining my wallet.

Frequently Asked Questions

What is urban photography?

Urban photography is about capturing the essence of city life, including architecture, streets, and the people inhabiting urban spaces. It blends art and storytelling, reflecting the pulse of a city through photographs that narrate its history and culture.

Why is capturing urban landscapes important?

Capturing urban landscapes is essential as it documents the history, culture, and transformations of cities. It also offers unique perspectives on social issues, fostering understanding and empathy for the diverse lives within urban environments.

What are some top affordable destinations for urban photography?

Some top affordable urban photography destinations include Wynwood Walls in Miami, Shoreditch in London, the Chicago Riverwalk, and the Brooklyn Bridge in New York City, as well as historic areas like the French Quarter in New Orleans and the Gaslamp Quarter in San Diego.

When is the best time for urban photography?

The best time for urban photography is during the golden hour, shortly after sunrise and just before sunset, when the light is warm and soft. Additionally, considering seasonal changes and local events can enhance the mood and color of urban images.

What camera recommendations are there for beginners in urban photography?

For beginners, entry-level DSLR or mirrorless cameras like the Canon EOS Rebel series or the Sony Alpha a6000 are recommended. Compact cameras or smartphones with good cameras can also be convenient for quick shots.

What lenses are essential for urban photography?

A versatile zoom lens, such as a 24-70mm, is great for various urban scenes, while a wide-angle lens (16-35mm) is useful for cityscapes. A prime lens like a 50mm f/1.8 is excellent for street photography due to its shallow depth of field.

What safety tips should urban photographers keep in mind?

Urban photographers should stay aware of their surroundings, avoid attracting attention in crowded areas, keep their gear secure, and travel light to stay nimble and focused on photography.

How can photographers respect local customs and people?

Photographers can respect local customs by engaging with locals, asking for permission before taking photos, and familiarizing themselves with cultural norms of the area they are visiting to enhance the experience and build trust.

What budget travel tips are available for urban photographers?

Affordable accommodation options include using platforms like Airbnb or staying in hostels. Utilizing public transportation can also save money and offer authentic city experiences, while seeking out free or low-cost attractions provides excellent photography opportunities.

What techniques can enhance urban photography?

Techniques that can enhance urban photography include playing with perspectives and angles, utilizing natural light effectively, and incorporating movement and people to create dynamic and engaging images.

Capture the City: Best Urban Photography Locations Revealed

Urban photography is a thrilling adventure that captures the heartbeat of a city. Whether you’re an experienced photographer or just starting out, the vibrant streets and unique architecture offer endless inspiration. For those looking for budget-friendly options, check out Top 10 Urban Photography Spots for Budget Backpackers.

Capture the City: Best Urban Photography Locations Revealed

Understanding Urban Photography

The Art of Urban Photography

Urban photography, for me, is all about storytelling. Every city has its own rhythm, culture, and personality, and I’ve found that the best photos often come from understanding that unique essence. I remember my first trip to New York City; I was captivated by how the towering skyscrapers juxtaposed with the bustling streets filled with diverse people. It was exhilarating to capture those moments that reflected the city’s energy. Urban photography is not just about the buildings; it’s about life unfolding in urban settings. It’s about documenting history, culture, and emotion. I believe that a great urban photo can transport you right into the scene, making you feel as if you’re walking those streets yourself.

Essential Gear for Urban Photography

When it comes to gear, I’ve learned that you don’t need the fanciest equipment to take stunning photos. A good camera and a lens that suits your style are usually enough. I prefer using a DSLR or a mirrorless camera because they offer versatility. Having a prime lens, like a 50mm or 35mm, can help you capture beautiful portraits and street scenes with a shallow depth of field. I also recommend carrying a wide-angle lens, especially for architecture shots, to capture the grandeur of buildings. Another essential piece of gear I never leave home without is a sturdy but lightweight tripod. This has been invaluable for low-light situations or when I need stability while composing my shot. Lastly, I always keep an extra battery and memory card in my bag. There’s nothing worse than missing a perfect shot because your battery died or you ran out of space. Trust me, I’ve been there!

Techniques for Capturing the City

Over the years, I’ve picked up several techniques that have transformed my urban photography. One of the biggest lessons I learned is the importance of patience. Sometimes, the best shots come when you simply wait for the right moment. I often find myself hanging out in a cool spot, watching the world go by until something catches my eye—like a child playing in a fountain or an artist painting on the street. Another technique I love is to play with angles and perspectives. I remember one time in Chicago, I climbed up a stairwell to get a higher viewpoint of the bustling street below. The resulting shot was a vibrant mix of colors and movement that I wouldn’t have captured from eye level. Getting creative with angles can add depth to your photos and make them stand out. Also, don’t shy away from including people in your shots. They can bring life to your photographs and tell stories. I often photograph people interacting with their environment—waiting for a bus, stopping to look at street art, or just chatting on a bench. These candid moments make my images feel more alive and relatable. For more tips on capturing these moments, check out Capture Candid Moments: Urban Photography Tips for Travelers. Lighting is another crucial element. I’ve found that the best lighting for urban photography often occurs during the golden hour—just after sunrise or before sunset—when the light is softer and warmer. This is when I usually venture out with my camera, soaking in the beautiful hues that envelop the city. Additionally, experimenting with long exposure photography can yield some stunning results. I recall capturing a busy intersection at night, where the headlights of cars created light trails. It gave the photo an abstract quality and conveyed the hustle and bustle of urban life beautifully.

Urban photography is a blend of art and adventure. It encourages us to explore our surroundings, connect with the people we meet, and express ourselves creatively. I feel that anyone can capture the essence of a city with a little practice and passion. So grab your camera and start exploring—there’s a whole world waiting for you to discover! If you’re on a budget, consider Exploring Cities: Mastering Candid Urban Photography on a Budget.

Top Urban Photography Locations in Major Cities

New York City

Brooklyn Bridge

One of my favorite spots in New York City is the Brooklyn Bridge. The views of Manhattan from the bridge are simply breathtaking. I remember walking across it during sunrise, when the soft morning light began to illuminate the skyline. It was magical! The combination of the bridge’s architectural beauty and the city backdrop provides countless opportunities for stunning photographs. I recommend trying different angles—like capturing the lines of the bridge leading into the city or framing your shot with the bridge itself. You can even include the pedestrians and cyclists going about their day, which adds a sense of scale and life to your images.

Times Square

Times Square is another iconic location that embodies the energy of New York City. The bright lights, the bustling crowds, and the electric atmosphere create a unique canvas for urban photography. I’ve spent hours here just observing and capturing the moment. My favorite time to shoot is during the blue hour, just after sunset when the sky transitions to deep blue, and the neon lights of the billboards pop against it. I always try to incorporate people in my shots as they interact with their surroundings—tourists taking selfies, street performers entertaining the crowd, and locals going about their evening. It’s a place where every corner offers a different story.

Central Park

Central Park is a beautiful contrast to the urban jungle surrounding it. I love wandering through the park, as it offers a different vibe from the city’s hustle. The lush landscapes, iconic bridges, and serene lakes provide endless possibilities for capturing nature within an urban environment. I find that early mornings or late afternoons are the best times to shoot here, as the light filters through the trees, creating a soft glow. Don’t forget to wander off the beaten paths—there are hidden gems like the Bethesda Terrace and the Bow Bridge that are perfect for capturing intimate moments in nature.

Los Angeles

The Hollywood Sign

No trip to Los Angeles is complete without a visit to the Hollywood Sign. The hike to get there can be a bit challenging, but the view from the top is worth every step. I remember the first time I reached the summit; the sign loomed large against the backdrop of the sprawling city below. For me, capturing the sign at sunset was a must. The warm hues of the setting sun against the white letters create a dramatic and iconic shot. I suggest playing with different perspectives—shooting from below or even including the city skyline in the foreground can make for a compelling composition.

Downtown Los Angeles

Downtown LA offers a mix of modern architecture and historic buildings, making it a fascinating area for urban photography. I often explore places like the Walt Disney Concert Hall, where the sleek, metallic curves present a unique challenge and opportunity. The reflections on its surface can create interesting patterns in photographs. I also recommend visiting the Arts District, where colorful street art and murals breathe life into the urban landscape. Capturing the vibrant art against the backdrop of old warehouses and buildings creates a striking contrast.

Venice Beach

Venice Beach is a lively spot that perfectly encapsulates the laid-back California vibe. I love spending time here, capturing the beach culture, street performers, and colorful characters that make this place unique. The boardwalk is always bustling with activity, and I often find myself drawn to the skate park, where skaters show off their skills. The golden hour here is particularly enchanting, as the warm light enhances the colors of the beach and the atmosphere. Don’t forget to snap some candid shots of the vibrant murals that adorn the buildings; they add so much character to my collection.

Chicago

Willis Tower Skydeck

When I think of Chicago, the Willis Tower (formerly known as the Sears Tower) immediately comes to mind. Standing on the Skydeck is an exhilarating experience. The view from 1,353 feet up is simply stunning! I remember being there on a clear day, with the city sprawling out beneath me. Capturing the skyline from this vantage point can be breathtaking, especially if you can incorporate the glass ledge that extends out from the building. It adds a thrilling perspective to photos and can create a sense of depth that draws the viewer in.

Millennium Park

Millennium Park is another must-visit location in Chicago. The iconic Cloud Gate sculpture, known as “The Bean,” is a fantastic subject for urban photography. I love how it reflects the surrounding skyline and changes with the light throughout the day. Early mornings are particularly serene, allowing for fewer crowds and clearer reflections. The surrounding gardens and architecture, including the Jay Pritzker Pavilion, provide various opportunities for interesting compositions. I often play with angles, capturing the park’s beauty from different perspectives to create a rich narrative in my images.

Lincoln Park

Lincoln Park is a beautiful area that combines nature with urban charm. The park offers picturesque pathways, gardens, and even a zoo! I find it perfect for capturing leisurely activities, whether it’s families enjoying picnics or joggers along the paths. The flowers in the gardens are particularly vibrant during spring and summer, providing a lovely backdrop for photos. I like to explore different times of day here, as the light changes everything. It can transform a simple scene into something magical.

London

South Bank

South Bank is a fantastic area for urban photography in London. The riverside walk offers stunning views of iconic landmarks like the London Eye, Big Ben, and the Houses of Parliament. I often find myself wandering here, especially at twilight when the city lights start to reflect off the Thames. There’s a vibrant mix of street performers, food stalls, and people enjoying the view, making it a lively backdrop for candid shots. I love experimenting with long exposures at night, capturing the movement of people and the light trails from passing boats.

Notting Hill

Notting Hill is famous for its colorful houses and charming streets. I remember strolling through Portobello Road Market, soaking in the vibrant atmosphere and the eclectic mix of stalls. The pastel-colored houses create a picturesque setting for photos, especially during the golden hour when the light casts a warm glow. I find that including locals interacting with the environment—like vendors or shoppers—adds life to my shots and gives a sense of community that makes Notting Hill so special.

Sky Garden

The Sky Garden is another incredible spot in London that offers a unique perspective of the city. Located atop the Walkie Talkie building, the garden provides panoramic views of the London skyline. I often enjoy visiting during the day to capture the city in all its glory. The lush greenery contrasted against the modern architecture creates a stunning visual. I recommend arriving early to secure a spot, as the views from here are breathtaking and can transform your urban photography experience.

Tokyo

Shibuya Crossing

Shibuya Crossing is one of the busiest pedestrian crossings in the world, and it’s an absolute must for urban photographers. The energy of the crowd is palpable, and I find myself drawn to the chaos of it all. I often shoot from an elevated viewpoint, capturing the sea of people as they flow across the street. My favorite time to visit is during the evening when the neon lights illuminate the scene, creating a vibrant and dynamic atmosphere. It’s a fantastic opportunity to experiment with long exposures, capturing the movement of people as they cross.

Akihabara

Akihabara, known as the center of otaku culture, offers a unique urban landscape filled with electronics stores, anime shops, and themed cafes. I love the colorful signage and bustling streets that reflect this vibrant culture. There are countless opportunities for street photography here, especially capturing the interactions between locals and tourists. I often spend time photographing cosplayers and the lively atmosphere, which can transport you to a completely different world. The mix of modern and traditional elements makes for a fascinating subject.

Tokyo Tower

Tokyo Tower is an iconic landmark that offers fantastic views of the city. I remember taking the elevator to the observation deck and being mesmerized by the sprawling urban landscape. Capturing the tower itself from various angles is a must, as its bright red and white color stands out beautifully against the skyline. I like to focus on framing the tower with other elements of the city—like nearby buildings or cherry blossoms in spring—to add depth and context to my photographs.

Hidden Gems: Lesser-Known Locations

Street Art Districts

As I explored various cities, I discovered that street art districts are some of the most vibrant and dynamic locations for urban photography. I remember wandering through the Wynwood Walls in Miami, which is a stunning open-air gallery filled with colorful murals and graffiti. Each piece has its own story to tell, and capturing the intricate details of the artwork against the backdrop of everyday life can create powerful images. I often spend hours here, finding new angles and perspectives. In my experience, early mornings are the best time to shoot, as the soft light enhances the colors and there are fewer people around.

Another fantastic street art spot is the East Side Gallery in Berlin, where the Berlin Wall has been transformed into a canvas for artists from around the world. The combination of history and creativity makes for compelling photography. I found that including elements of the environment—like passersby interacting with the murals—adds a layer of depth to the images. It’s a vibrant way to show how art and urban life intersect.

Abandoned Places

Exploring abandoned places can feel like stepping into a different world. I’ve always been fascinated by the stories these locations hold, and they can evoke a sense of nostalgia and mystery in photographs. I remember visiting an old factory on the outskirts of Detroit. The decaying structures and graffiti-covered walls were hauntingly beautiful. I found that capturing the textures and details of the environment—rusted machinery, broken windows, and peeling paint—tells a story of what was once there. Just be sure to prioritize safety and respect any private property laws if you venture into these places.

Another gem I stumbled upon was an abandoned amusement park in New Orleans. The overgrown foliage mixed with rusting rides created an eerie yet captivating atmosphere. I often use my wide-angle lens to encompass the entire scene, which helps convey the scale and emptiness of these spaces. Playing with shadows and light can also yield striking results, especially in dimly lit areas.

Local Markets

Local markets are an absolute treasure trove for urban photography. I love the energy, colors, and the hustle and bustle of people interacting with vendors. One of my favorite experiences was in Marrakech, at the souks. The vibrant textiles, aromatic spices, and friendly banter of the merchants created a lively atmosphere that I couldn’t resist capturing. I found that getting up close to the stalls—focusing on the expressions of the vendors or the details of their wares—can result in intimate and engaging photographs.

In my hometown, I often visit farmers’ markets. The fresh produce and handmade goods provide endless opportunities for candid shots of families shopping, friends chatting, and children exploring. I usually aim for natural light during the day, as it brings out the true colors of the fruits and vegetables, making them pop in my photos.

Unique Neighborhoods

Every city has its unique neighborhoods, each with their own character and charm. I’ve found that exploring these areas often leads to unexpected discoveries. One of my favorite neighborhoods is the Mission District in San Francisco, known for its vibrant murals and rich culture. Walking through the streets, I noticed how the art reflects the community’s history and identity. Capturing the murals alongside local residents adds a narrative element to my photos.

Another hidden gem is the Historic Distillery District in Toronto. The cobblestone streets and Victorian buildings create a charming atmosphere that feels like stepping back in time. I recommend visiting on a weekend when local artisans and food vendors set up shop. The combination of architecture, art, and community life makes for captivating compositions. I often play with the angles of the buildings while incorporating people enjoying their day, creating a sense of place and connection.

These lesser-known locations often provide a fresh perspective on urban life, allowing us to capture the essence of a city beyond its famous landmarks. In my experience, taking the time to seek out these hidden gems can lead to some of the most rewarding photography adventures. So, don’t hesitate to wander off the beaten path—you never know what stories you might uncover!

Frequently Asked Questions

What is urban photography?

Urban photography is a genre that captures the essence of a city, focusing on its rhythm, culture, and personality. It involves documenting life in urban settings, highlighting the stories and emotions that unfold in these environments.

What equipment is essential for urban photography?

Essential equipment for urban photography includes a good camera (preferably a DSLR or mirrorless), a versatile lens (like a prime lens of 50mm or 35mm), a wide-angle lens for architecture, a sturdy but lightweight tripod, and extra batteries and memory cards.

What techniques can improve urban photography?

Techniques that can enhance urban photography include being patient to wait for the right moment, experimenting with angles and perspectives, including people in shots to add life, and utilizing natural lighting during the golden hour for softer, warmer tones.

What are some top urban photography locations in New York City?

Top locations for urban photography in New York City include the Brooklyn Bridge, Times Square, and Central Park, each offering unique opportunities for capturing the city’s energy and beauty.

Why is the golden hour important in urban photography?

The golden hour, occurring just after sunrise or before sunset, provides softer and warmer light, which is ideal for creating stunning urban photographs with enhanced colors and mood.

What should I consider when photographing street art?

When photographing street art, consider including elements of the environment, such as people interacting with the artwork, to add depth to your images and showcase the intersection of art and urban life.

How can I capture the essence of people in urban photography?

Capturing the essence of people in urban photography can be achieved by photographing candid moments, such as individuals interacting with their environment, which adds relatability and life to your images.

What are some hidden gems for urban photography?

Hidden gems for urban photography include street art districts, abandoned places, local markets, and unique neighborhoods that provide a fresh perspective on urban life beyond famous landmarks.

What is the significance of lighting in urban photography?

Lighting is crucial in urban photography as it can dramatically affect the mood, colors, and overall quality of the images. Using natural light effectively can enhance the visual appeal of photographs.

Can anyone learn urban photography?

Yes, anyone can learn urban photography with practice and passion. Exploring surroundings, connecting with people, and expressing creativity are key elements that contribute to capturing the essence of a city.

Top 10 Urban Photography Spots for Budget Backpackers

Urban photography offers a vibrant glimpse into the heartbeat of a city, perfect for budget backpackers craving adventure without breaking the bank. Let’s explore how to capture stunning cityscapes and memorable moments on a budget! Read Interesting article: Exploring Cities: Mastering Candid Urban Photography on a Budget

Top 10 Urban Photography Spots for Budget Backpackers

Understanding Urban Photography

The Importance of Urban Photography for Backpackers

When I first set off on my backpacking journey, I realized that urban photography was more than just a hobby; it was a way to connect with each city I visited. Every street, every building tells a story. As backpackers, we often find ourselves in bustling urban environments, and what better way to document our adventures than through our lenses? Urban photography allows us to capture the essence of a place, showcasing its culture, vibrancy, and unique character.

I remember wandering the streets of Berlin, my camera in hand, feeling like an explorer in a world filled with history and modernity. Each click of the shutter was a moment frozen in time, a reminder of the experiences I was having. For budget backpackers like us, urban photography offers a creative outlet while providing a tangible way to share our journey with friends and family. It’s a blend of art and storytelling, where we can express our perceptions and emotions tied to each location. Read Interesting article: Capture Candid Moments: Urban Photography Tips for Travelers

Essential Gear for Budget Backpackers

Now, let’s talk about the gear. You don’t need to splurge on the latest camera to become a great urban photographer. I’ve learned that sometimes, less is more. My go-to setup includes just a lightweight DSLR or a mirrorless camera with a versatile lens. If you’re working with a tighter budget, don’t hesitate to use your smartphone! Many modern smartphones boast impressive camera capabilities that can capture stunning shots.

Here’s a quick list of essentials I recommend packing:

  • Camera: A lightweight DSLR or mirrorless camera, or simply your smartphone.
  • Lenses: A versatile zoom lens (like 18-55mm) is perfect for capturing various scenes.
  • Tripod: A compact tripod can help with low-light shots and long exposures.
  • Extra Batteries: Always a good idea to have spares on hand, especially during long days of shooting.
  • Memory Cards: Bring multiple cards to ensure you don’t run out of space.
  • Editing Apps: I love using apps like Lightroom or Snapseed to enhance my photos on-the-go.

Beyond the gear, it’s all about your eye for detail. Pay attention to lighting, composition, and the stories unfolding around you. I’ve found that some of my best shots came from simply being patient and observing my surroundings.

Top 10 Urban Photography Spots

1. New York City, USA

Iconic Locations: Times Square and Central Park

New York City is a dream for urban photographers. Times Square, with its dazzling lights and energy, offers countless opportunities for striking photos. I often find myself wandering through Central Park, capturing the blend of nature amidst the towering skyscrapers. The contrast is stunning and always a highlight of my trips.

Hidden Gems: DUMBO and The High Line

DUMBO, with its picturesque views of the Manhattan skyline framed by the iconic Brooklyn Bridge, is one of my favorite hidden gems. And then there’s The High Line, an elevated park that showcases stunning street art and unique perspectives of the city. The vibe is relaxed, making it perfect for both casual strolls and serious photography.

2. Tokyo, Japan

Must-Visit: Shibuya Crossing and Akihabara

Tokyo is a whirlwind of activity, and Shibuya Crossing is the heartbeat of that chaos. The sight of hundreds of people crossing in unison is mesmerizing. I often spend hours snapping away, trying to capture the energy of this iconic spot. Akihabara, known for its tech and anime culture, provides vibrant colors and quirky sights that are a photographer’s paradise.

Off the Beaten Path: Yanaka District

If you’re looking for something more traditional, Yanaka District offers a glimpse into old Tokyo with its quaint streets and historic temples. I enjoyed wandering through the narrow alleyways, capturing the charm of old wooden houses and small shops.

3. Barcelona, Spain

Famous Sights: Sagrada Familia and Park Güell

Barcelona’s architectural wonders are a feast for the eyes. Sagrada Familia, with its intricate designs, is an absolute must-see. I remember standing in awe, camera in hand, trying to capture its beauty from every angle. Park Güell, designed by Gaudí, is another magical location filled with color and creativity that can ignite your imagination.

Local Favorites: El Raval and Gràcia Neighborhood

For a more local experience, head to El Raval. The vibrant street art and multicultural atmosphere provide endless inspiration. Gràcia Neighborhood, with its bohemian vibe, charming plazas, and cafes, is perfect for candid shots of everyday life.

4. Berlin, Germany

Historic Landmarks: Brandenburg Gate and East Side Gallery

Berlin is steeped in history, and I found it fascinating to capture its contrasts. The Brandenburg Gate is iconic, and I loved photographing it at different times of day for varying effects. The East Side Gallery, a preserved section of the Berlin Wall, is covered in stunning murals and tells powerful stories through art.

Trendy Areas: Kreuzberg and Mitte

Kreuzberg is a trendy area with a vibrant art scene and fantastic street photography opportunities. The lively atmosphere makes it easy to blend in and capture the essence of local life. Mitte, on the other hand, is filled with chic cafes and boutiques, perfect for capturing the modern side of Berlin.

5. Paris, France

Classic Spots: Eiffel Tower and Montmartre

Ah, Paris! The Eiffel Tower is a classic shot, but finding unique angles can make all the difference. I love exploring Montmartre, where the charming streets and artists create a romantic backdrop for photography. Just walking around this area, I often stumble upon beautiful street scenes that tell the story of the city.

Charming Streets: Le Marais and Canal Saint-Martin

Le Marais is filled with quaint boutiques and cafes, perfect for snapping candid shots. Canal Saint-Martin offers a more relaxed vibe, with its picturesque bridges and tree-lined waterside paths. It’s a great spot to capture Paris’s everyday life.

Top 10 Urban Photography Spots

6. London, England

Landmarks: Tower Bridge and Buckingham Palace

London is a city that buzzes with life and history, making it a playground for urban photographers. Tower Bridge is one of my all-time favorite spots. Capturing it at dawn, when the city is waking up, always gives my photos a magical touch. The way the light reflects off the Thames can create some stunning shots. And who could resist the allure of Buckingham Palace? The guards, the architecture, and the surrounding gardens make it a quintessential London experience. I remember standing there, watching the Changing of the Guard ceremony, trying to find that perfect angle with my camera.

Quaint Locations: Notting Hill and Camden Market

For a touch of charm, Notting Hill is a must-visit. The colorful houses and vibrant atmosphere are perfect for capturing the essence of London. I enjoyed wandering through its streets, snapping pictures of the iconic pastel-colored homes. Camden Market, on the other hand, is a feast for the senses. The eclectic stalls, street food vendors, and unique characters create a lively backdrop for candid photography. I found myself lost in the moment, capturing the hustle and bustle of market life.

7. Mexico City, Mexico

Cultural Icons: Zócalo and Frida Kahlo Museum

Mexico City is a rich tapestry of culture and history, and Zócalo, the main square, is the heart of it all. I remember visiting there and being awestruck by the grand architecture surrounding the square. The atmosphere is electric, filled with locals and tourists alike. It’s a great spot to capture life in motion. The Frida Kahlo Museum, located in her vibrant blue house, offers a different kind of charm. The colors, the artwork, and the stories behind her life provide a unique perspective for photography. I loved capturing the whimsical details that reflect her artistic spirit.

Local Neighborhoods: Coyoacán and Roma Norte

Coyoacán feels like a step back in time, with its cobblestone streets and colonial architecture. I wandered through local markets and enjoyed the vibrant street art that fills the area. It was an excellent opportunity for me to hone my candid photography skills, capturing locals in their daily routines. Roma Norte, on the other hand, is a trendy neighborhood bursting with creativity. The cafes, galleries, and lush parks offer endless inspiration. I found myself drawn to the murals and the lively atmosphere, which made for some stunning shots.

8. Istanbul, Turkey

Historic Sites: Hagia Sophia and Grand Bazaar

Istanbul is a city where East meets West, and it’s an urban photographer’s dream. The Hagia Sophia is a breathtaking blend of architecture and history. I spent hours there, trying to capture its grandeur from different angles. The play of light through its windows creates a dramatic effect that I found truly captivating. The Grand Bazaar is another iconic spot; the colors, the textures, and the hustle and bustle of the vendors make it an ideal location for vibrant street photography. I loved getting lost among the stalls, snapping pictures of the intricate patterns and lively interactions.

Scenic Views: Galata Bridge and Bosphorus

Galata Bridge is a perfect place to soak in the city’s energy. The views of the skyline and the Golden Horn are phenomenal, especially at sunset. I often set up my tripod here, waiting for the golden hour to capture the city bathed in warm light. The Bosphorus, with its stunning waterfront, offers a serene escape from the bustling city. Taking a ferry ride is not only a great way to see the city but also provides fantastic photo opportunities. I remember capturing the silhouettes of fishermen against the backdrop of the setting sun—an unforgettable moment.

9. Buenos Aires, Argentina

Vibrant Areas: La Boca and San Telmo

In Buenos Aires, La Boca is bursting with color and life. The brightly painted houses and lively street performances make it a fantastic spot for photography. I enjoyed wandering around, capturing the essence of tango and the vibrant street art that tells stories of the city’s culture. San Telmo, with its cobblestone streets and antique shops, feels like a time capsule. The Sunday market here is perfect for candid shots of locals and tourists mingling, and I found the atmosphere incredibly inspiring.

Cultural Landmarks: Recoleta Cemetery and Teatro Colón

Recoleta Cemetery is a unique location that captivated me. The ornate tombs and mausoleums have a haunting beauty that is perfect for dramatic photography. I spent hours wandering through its pathways, capturing the artistry and history. Nearby, Teatro Colón stands as a magnificent architectural gem. The opulence of the interior is breathtaking, and I was fortunate enough to catch a tour that allowed me to take photos of its stunning details. The combination of history and artistry made for an incredible experience.

10. Sydney, Australia

Iconic Views: Sydney Opera House and Harbour Bridge

Sydney is incredibly picturesque, and the Sydney Opera House is undoubtedly its crown jewel. I remember arriving at Circular Quay and feeling a rush of excitement as I took in the iconic sails against the backdrop of the harbor. Capturing this architectural wonder at sunrise was one of my favorite moments. The Harbour Bridge is another iconic spot that offers breathtaking views. Climbing the bridge is a thrilling experience, and I captured some stunning panoramic shots that showcased the beauty of the harbor and city.

Relaxed Spots: Bondi Beach and The Rocks

Bondi Beach is perfect for capturing the laid-back Aussie lifestyle. I love the vibrant beach culture, and the colors of the beach umbrellas against the golden sand create a lively scene. It’s also an excellent place for candid shots of surfers catching waves. The Rocks, with its historic buildings and cobbled streets, offers a different vibe. I enjoyed exploring the weekend markets there, snapping pictures of local artisans and enjoying the lively atmosphere. There’s something special about capturing the essence of a city through its people and surroundings.

Tips for Budget-Friendly Urban Photography

Choosing the Right Time for Photography

Utilizing Public Transport for Accessibility

Finding Affordable Accommodation Near Photography Spots

Engaging with Locals for Hidden Locations

Tips for Budget-Friendly Urban Photography

Choosing the Right Time for Photography

Timing can make all the difference in urban photography, and I’ve learned that the golden hours—just after sunrise and just before sunset—are magical for capturing stunning images. The soft, warm light creates a beautiful glow that enhances the colors and details of your surroundings. I remember waking up early in Barcelona to catch the sunrise over the Sagrada Familia. It was worth the early wake-up call; the building looked even more breathtaking in the soft light.

Additionally, I’ve found that mid-week tends to be less crowded at popular spots, allowing for clearer shots without the hustle and bustle of weekend tourists. If you can, aim for early mornings or late afternoons during weekdays; this not only helps in getting the best light but also makes your experience less hectic. I would often have entire streets to myself in the early hours, which brought an added sense of peace to my photography sessions.

Utilizing Public Transport for Accessibility

One of the best ways to explore a city is through its public transport. Not only is it budget-friendly, but it can also provide unique photography opportunities. I’ve hopped on trams, buses, and subways in cities like Tokyo and London, capturing candid moments of locals and travelers alike. The vibrant energy within these transport hubs often leads to unexpected and authentic shots.

For example, riding the iconic double-decker buses in London gave me a fresh perspective of the city as I snapped photos from the upper deck, capturing the hustle below. Plus, public transport can take you to lesser-known neighborhoods that are rich in character and culture. I loved discovering hidden corners of cities that I wouldn’t have found otherwise. Always keep your camera handy; you never know when an interesting candid moment will unfold right in front of you!

Finding Affordable Accommodation Near Photography Spots

When traveling on a budget, accommodation can take a significant portion of your funds. I’ve learned that staying close to the areas you want to photograph can save you time and transportation costs. Look for hostels, guesthouses, or budget hotels that are within walking distance of iconic landmarks and vibrant neighborhoods. This way, you can easily pop out for a morning shoot or head to a location at sunset without worrying about long travel times.

During my trip to Paris, I found a cozy hostel in Le Marais, allowing me to explore the beautiful streets filled with character. I often wandered out in the early morning to catch the soft light filtering through the historic buildings. Plus, being close to my favorite photography spots enabled me to revisit them multiple times, experimenting with different angles and lighting conditions. I recommend checking platforms like Airbnb or Booking.com for affordable options that suit your needs.

Engaging with Locals for Hidden Locations

One of the most rewarding aspects of urban photography is the chance to engage with locals. I’ve found that chatting with residents can lead to discovering hidden gems that aren’t in guidebooks. Whether it’s a charming local café, a quiet park, or a vibrant street market, locals often know the best spots for unique photography.

During my time in Mexico City, I struck up a conversation with a barista at a local coffee shop. She shared her favorite places to photograph vibrant street art and lesser-known neighborhoods. Following her advice, I headed to Roma Norte and stumbled upon stunning murals that really captured the spirit of the city. Engaging with locals not only enriches your travel experience but also leads to unforgettable photographic opportunities. Don’t be shy! A simple “What’s your favorite spot to take photos?” can open up a world of inspiration.

Frequently Asked Questions

What is urban photography and why is it important for backpackers?

Urban photography offers a vibrant glimpse into the heartbeat of a city, allowing backpackers to connect with each location they visit. It serves as a creative outlet to document adventures, showcasing the culture, vibrancy, and unique character of urban environments.

What gear do I need for budget urban photography?

You don’t need to spend a lot on gear. A lightweight DSLR or mirrorless camera, or even a modern smartphone, can suffice. Essential items include a versatile zoom lens, a compact tripod, extra batteries, memory cards, and editing apps like Lightroom or Snapseed.

What are some top urban photography spots mentioned in the article?

Some highlighted urban photography spots include New York City (Times Square, Central Park), Tokyo (Shibuya Crossing, Yanaka District), Barcelona (Sagrada Familia, El Raval), Berlin (Brandenburg Gate, Kreuzberg), and many others across the globe.

How can I choose the right time for photography in urban settings?

The golden hours right after sunrise and just before sunset are ideal for capturing stunning images due to the soft, warm light. Mid-week visits tend to be less crowded, allowing for clearer shots and a more peaceful photography experience.

What are some budget-friendly tips for engaging in urban photography?

Utilize public transport to explore cities affordably and capture candid moments. Stay close to photography spots to save on travel costs, and engage with locals to discover hidden gems that are not listed in guidebooks.

What should I consider when using public transport for urban photography?

Public transport is budget-friendly and can provide unique photography opportunities. Riding trams, buses, or subways allows you to capture candid moments of locals and offers different perspectives of the city.

How can I find affordable accommodations near photography spots?

Look for hostels, guesthouses, or budget hotels within walking distance of desired photography locations. This saves time and transportation costs, allowing for easier access to early morning or sunset shoots.

What are some hidden photography gems to look for in urban environments?

Engaging with locals can lead to discovering hidden gems such as charming cafés, quiet parks, or vibrant street markets. Locals often know the best spots for unique photography that may not be in guidebooks.

What editing apps are recommended for enhancing urban photography?

Apps like Lightroom and Snapseed are recommended for enhancing photos on-the-go, helping to improve the quality of images captured during your urban photography adventures.

How can urban photography serve as a storytelling tool for backpackers?

Urban photography allows backpackers to express their perceptions and emotions tied to each location, capturing the essence of their experiences and sharing them with friends and family through visual storytelling.

Read Interesting article: Nighttime Adventures: Urban Photography for Budget Travelers