Web Analytics

Recent Posts

Master Landscape Adventure Photography Without Breaking the Bank

Landscape adventure photography opens up a world of breathtaking vistas and thrilling experiences. You don’t need to spend a fortune to capture stunning images that tell your story. For those looking for affordable options, be sure to check out Explore the World: Budget-Friendly Landscape Photography Spots.

Master Landscape Adventure Photography Without Breaking the Bank

Understanding Landscape Adventure Photography

What is Landscape Adventure Photography?

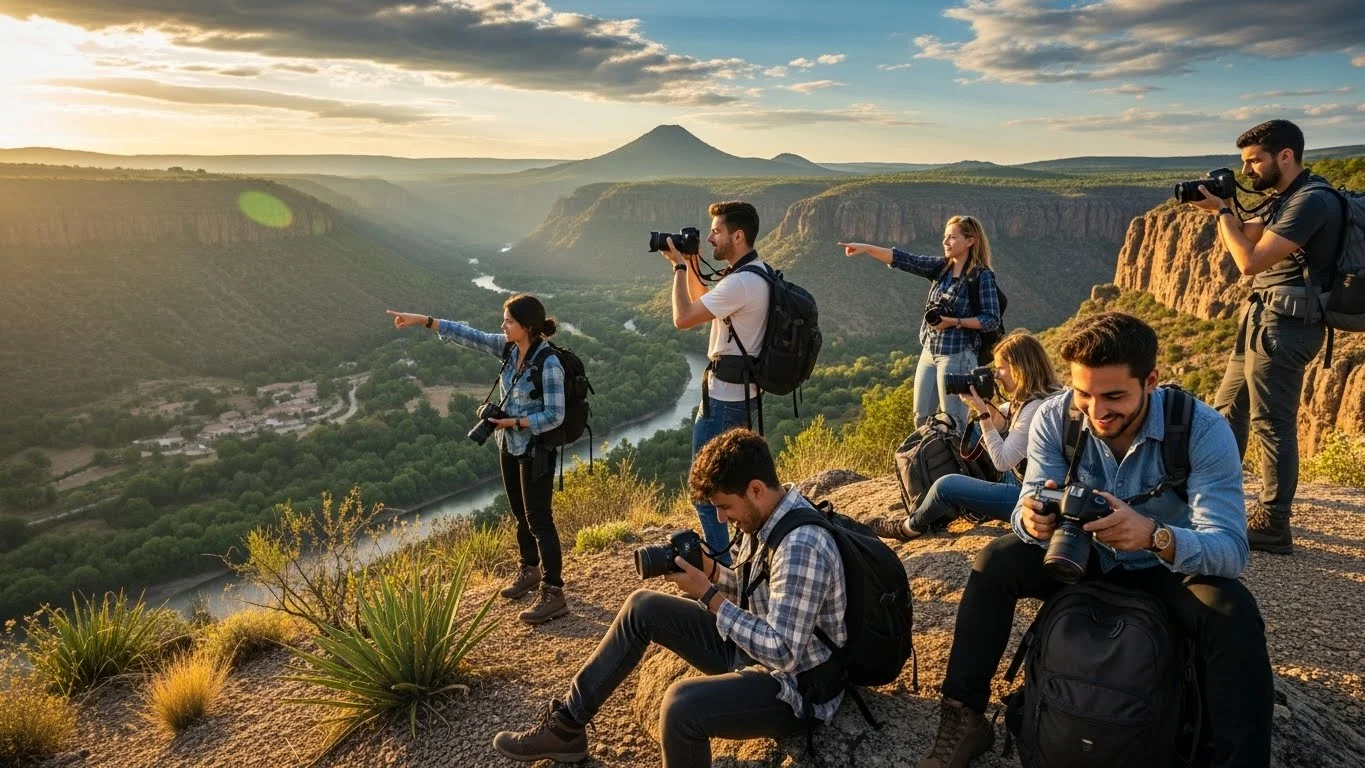
Landscape adventure photography is more than just snapping pretty pictures of mountains and lakes; it’s about immersing yourself in nature and capturing its beauty in a way that resonates with others. I’ve learned that this photography style often combines elements of adventure and exploration, pushing us to discover new places, whether it’s a hike to a hidden waterfall or a trip to a national park. I remember my first venture into this form of photography; I felt a thrill not just from the majestic views but also from the journey to reach them.

The Importance of Composition in Landscape Photography

Composition is key in any type of photography, but in landscape photography, it can make or break your shot. While I was learning, I found that understanding the rule of thirds was a game-changer. By placing the horizon along the third line of your frame, the image feels more balanced and engaging. I often experiment with foreground elements to add depth to my photos. A rock, a flower, or even a person in the foreground can lead the viewer’s eye into the scene, creating a more immersive experience. Different angles and perspectives can also reveal stunning details that might be missed at first glance. I often find myself walking around to explore how the light hits various elements of the landscape. Each angle tells a different story.

Essential Gear for Landscape Adventure Photography

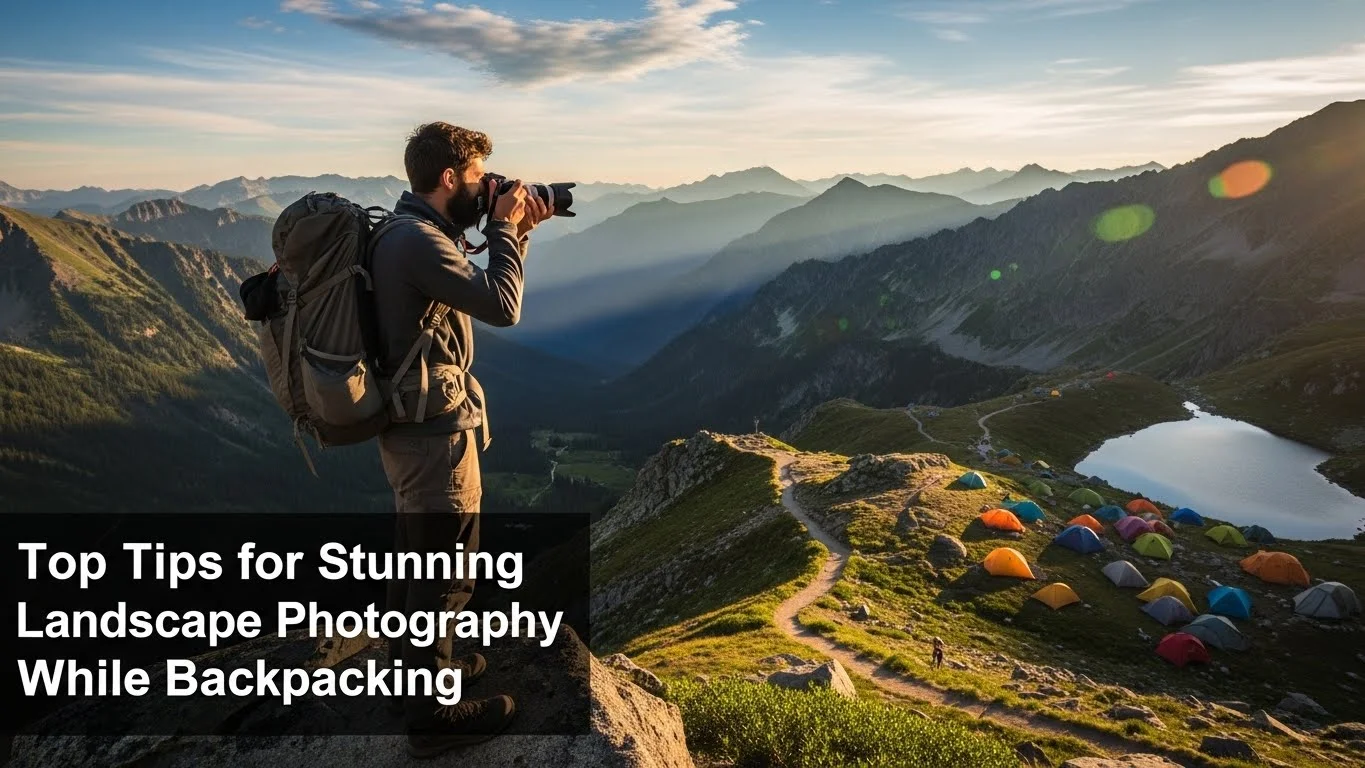
When I first started, I was overwhelmed by the sheer amount of gear available for landscape photography. I felt the pressure to invest in expensive equipment, but I quickly realized that good photography is more about skill than gear. That said, there are some essentials you should consider. A reliable camera, sturdy tripod, and a selection of lenses can significantly enhance your photography experience. For me, carrying a lightweight camera made it easier to hike and explore without being bogged down by heavy equipment. I often found myself reaching for my trusty DSLR or even a compact mirrorless camera that delivered fantastic results without excessive bulk. And let’s not forget about a good lens; I learned the hard way that the right lens can transform ordinary shots into extraordinary ones. I recommend starting with a wide-angle lens to capture sweeping landscapes and a zoom lens for more detail-oriented shots. You can find great tips in Top Tips for Stunning Landscape Photography While Backpacking.

Budget-Friendly Photography Gear

Best Affordable Cameras for Landscape Photography

If you’re just starting out, you don’t need the latest high-end camera to take fantastic landscape photos. There are many budget-friendly options available that can deliver excellent results. I remember using an entry-level DSLR that produced stunning images without breaking the bank. Brands like Canon and Nikon offer great starter cameras that are user-friendly and versatile. Mirrorless cameras are also worth considering; they are typically lighter and more compact, making them perfect for hiking. I found that looking for used or refurbished models can save a lot of money while still getting quality gear.

Budget Lenses for Stunning Landscape Shots

When I first dived into landscape photography, I thought I needed a collection of expensive lenses to achieve my vision. However, I quickly discovered that a few versatile lenses could cover most of my needs. A wide-angle lens is essential for capturing sweeping vistas, and a standard zoom lens can be great for versatility. In my case, I invested in a decent 24-70mm lens that allowed me to capture everything from expansive landscapes to closer details without needing to swap lenses constantly. Plus, there are budget options out there that perform surprisingly well. I often check online marketplaces for deals on used lenses, which can be a great way to build a solid kit without spending a fortune.

Tripods: Finding Stability Without Spending a Fortune

A tripod is another piece of equipment that I initially thought was too expensive. But I quickly learned that it’s an essential tool for landscape photography, especially for long exposures. I started with a budget tripod that was light and portable, which suited my hiking adventures without adding too much weight to my pack. I recommend looking for a tripod that is sturdy and has adjustable height and angles; it makes a big difference in achieving those perfect shots, especially during sunrise or sunset when every second counts! There are several affordable options that don’t compromise on quality.

Editing Software: Free and Low-Cost Options

Editing is a crucial step in bringing your photography to life. I used to think I needed expensive software to edit my photos, but I found some fantastic free and low-cost options that deliver impressive results. Programs like GIMP and Darktable offer robust features for editing without a price tag. I also discovered mobile apps like Snapseed that are perfect for quick edits on the go. Investing in affordable software like Lightroom has also been worthwhile for me, as it allows for more advanced editing while still being user-friendly. The best part? Many of these options offer free trials, so you can test them out before committing.

Techniques for Capturing Stunning Landscapes

Understanding Lighting: The Golden Hour and Blue Hour

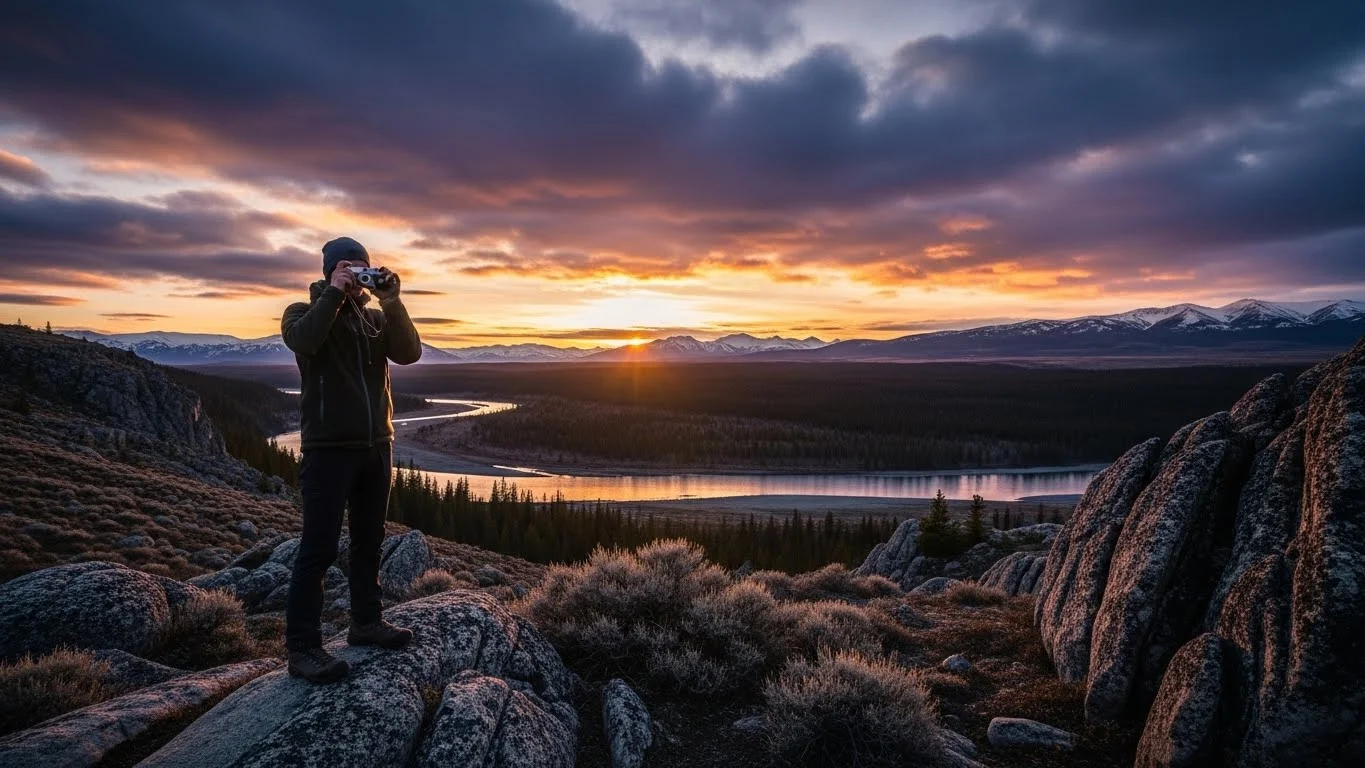
Lighting is everything in photography, and through my experience, I have learned just how crucial it is to pay attention to the times of day when the light is most flattering. The golden hour, that dreamy time just after sunrise and before sunset, offers a warm, soft glow that brings landscapes to life. I can’t tell you how many times I rushed out of bed, coffee in hand, excited to catch that magical light hitting the mountains or fields. The colors seem to pop, shadows soften, and everything feels more inviting. I remember one particular sunrise at a local lake where the reflection was so perfect, it felt almost surreal.

Then there’s the blue hour, which comes right before sunrise and just after sunset. This is when the sky takes on a deep blue hue, and the world feels tranquil. I’ve found that capturing images during this time can create a moody atmosphere, especially when the foreground is illuminated by artificial lights. It’s a different vibe altogether, and I often experiment with long exposures to enhance the soft glow from the sky.

Utilizing Natural Elements for Composition

As I delved deeper into landscape photography, I began to realize how vital it is to incorporate natural elements into my composition. Rocks, trees, or flowers in the foreground can create layers and lead the viewer’s eye into the scene. I often look for interesting textures or lines in the landscape that can guide the eye through my image. For instance, I once stumbled upon a winding path leading to a distant mountain; framing my shot with the path as a leading line made the photo feel more dynamic and engaging.

Additionally, I’ve learned to embrace the weather. Overcast skies can add a soft, even light that flattens shadows, while dramatic clouds can provide a striking backdrop. I remember one stormy afternoon where I captured a breathtaking shot of a sunbeam breaking through the clouds over a valley. The result was something I never could have orchestrated on a sunny day. Nature is full of surprises, and I think the key is to be adaptable and ready to seize the moment.

Long Exposure Techniques for Dramatic Effects

Long exposure photography became one of my favorite techniques as I explored the possibilities it offers. By using a tripod and a slow shutter speed, I could capture movement in a way that added drama to my landscapes. Waterfalls and rivers became silky smooth, and clouds turned ethereal as they drifted across the sky. I often carry an ND (Neutral Density) filter to help manage the light when shooting during the day. This allows me to extend my exposure time without overexposing the image.

One evening, I set up by the ocean during sunset, eager to capture the waves crashing against the rocks. By using a long exposure, the churning water took on a dreamlike quality that really emphasized the power of nature. It was a moment of pure creativity, and I felt a rush when I reviewed the shots on my camera. It’s as if I had transported the viewer into that exact moment, allowing them to feel the energy of the scene.

HDR Photography on a Budget

High Dynamic Range (HDR) photography is a technique I began exploring when I realized that my camera sometimes struggled with scenes that had both bright skies and dark foregrounds. HDR involves taking multiple exposures of the same scene and blending them together to create an image that captures the full range of light. I used to think this was only possible with expensive software, but I found several free or low-cost apps that make it easy.

When I first tried HDR, I visited a local park during the late afternoon when the sun was low in the sky. I took three different exposures: one for the highlights, one for the mid-tones, and one for the shadows. After merging them using an app, I was thrilled with the result. The details in the shadows popped, while the clouds retained their texture and color. I recommend experimenting with this technique, as it can dramatically enhance the quality of your images, especially in challenging lighting situations.

Best Locations for Landscape Adventure Photography

National Parks: Affordable Access to Nature’s Beauty

When I think of breathtaking landscapes, national parks immediately come to mind. These incredible places are often a photographer’s paradise, offering a diverse range of stunning vistas, from towering mountains to serene lakes. One of my favorite experiences was visiting Yosemite National Park. The iconic views of El Capitan and Half Dome were even more captivating in person. I remember hiking up to Glacier Point, where the panoramic views took my breath away, and I felt the thrill of capturing such beauty on camera. The best part? Many national parks have affordable entrance fees, making them accessible for anyone eager to explore and photograph nature.

Another amazing spot is Zion National Park, where the striking red rock formations provide a perfect backdrop for capturing vibrant colors, especially during sunrise and sunset. Each national park has its unique charm, and I believe they offer some of the best opportunities for landscape adventure photography without needing to break the bank. If you’re looking for more tips on budget-friendly adventures, check out Capture Breathtaking Landscapes on a Budget Adventure.

State Parks and Hidden Gems

In my quest for stunning landscapes, I’ve also discovered that state parks can be just as rewarding as the more famous national parks. These often-overlooked gems can provide fantastic photo opportunities without the crowds. For instance, I visited a small state park in my area that featured a beautiful waterfall surrounded by lush greenery. The tranquility of the scene allowed me to experiment with long exposure techniques, and the results were breathtaking.

I recommend checking out local state parks or even regional parks that may not be on everyone’s radar. You might find unique landscapes waiting to be captured. I’ve come across unexpected views, such as hidden trails that lead to stunning overlooks or quiet lakes perfect for reflection shots. Exploring these lesser-known places can lead to unique compositions and a fulfilling adventure.

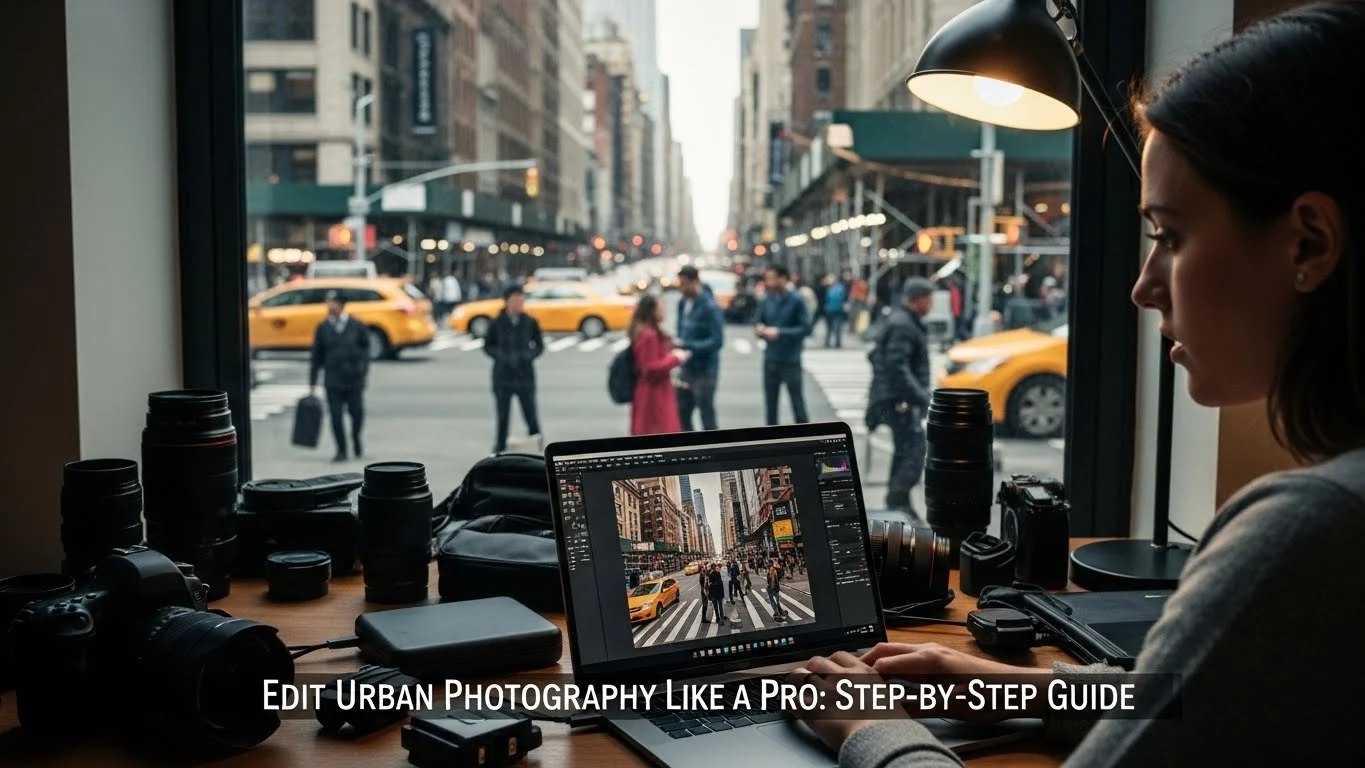
Urban Landscapes: Capturing Cityscapes on a Budget

Don’t underestimate the beauty of urban landscapes! I’ve found that cities provide a unique blend of architecture, culture, and nature, all of which can make for compelling photographs. I remember wandering through downtown during the blue hour, where the city lights began to twinkle against the deepening sky. Capturing the contrast between the warm glow of street lamps and the cool tones of the evening sky created a captivating scene.

Many cities have parks or waterfronts that offer fantastic views of the skyline. I often scout out elevated locations, such as rooftops or hills, to capture sweeping cityscapes. One of my best shots came from a hill overlooking the city, where I framed the skyline with trees in the foreground. Urban landscapes can be captured on a budget, especially if you take advantage of public spaces and free events. I also love using my smartphone for spontaneous shots when I’m exploring the city, as it allows me to capture moments quickly without lugging around heavy gear.

Planning Your Photography Adventures

Researching Locations: Free Resources and Guides

Once I became serious about landscape adventure photography, I realized that planning my trips was crucial for success. I often use free online resources like AllTrails and Google Maps to discover hiking trails and viewpoints. These platforms provide helpful information about the difficulty level, distance, and even user-submitted photos that give me an idea of what to expect. I also love reading travel blogs where fellow photographers share their experiences and tips. This way, I can find hidden spots and avoid the tourist traps.

Another tip I found useful is joining local photography groups on social media. I’ve connected with other photographers who share their favorite locations, and this has opened up a treasure trove of ideas for my next adventure. It’s amazing how much you can learn from others who are just as passionate about photography.

Timing Your Visits for Optimal Lighting

Knowing when to visit a location is just as important as where to go. I’ve learned the hard way that showing up at the wrong time can lead to disappointing shots. The golden hour, as I mentioned earlier, is a fantastic time to shoot, but I also pay attention to the season. For example, I visited a local park in the fall, and the vibrant foliage created stunning backdrops for my photos. I often plan my trips around the best times for lighting conditions, which can elevate my images significantly. I keep a weather app handy to track conditions that might enhance the scene, like stormy skies or clear sunsets.

Safety Tips for Outdoor Photography

As much as I love exploring new landscapes, I’ve learned that safety should always be a priority. Before heading out, I make sure to check for trail conditions, weather forecasts, and any park regulations. It’s essential to stay aware of your surroundings, especially in remote areas. I remember one hike where I encountered a steep cliff—taking a moment to evaluate my path ensured I could capture amazing shots safely.

Additionally, I always carry a basic first aid kit and some snacks for longer hikes. Hydration is key, especially on hot days, and I’ve learned to pack plenty of water. I also try to hike with a friend or let someone know my plans in case of emergencies. Knowing that I’m prepared allows me to focus more on capturing stunning landscapes and enjoying the adventure!

Building Your Photography Skills

Online Courses and Tutorials for Beginners

As I ventured deeper into landscape adventure photography, I realized that learning from others could significantly enhance my skills. There are countless online courses and tutorials available that cater to beginners and intermediate photographers alike. I remember signing up for a free course on platforms like YouTube, where professional photographers shared their insights on composition, lighting, and editing. It was eye-opening to learn different techniques that I hadn’t considered before.

Websites like Udemy or Skillshare also offer affordable courses that go into more depth, often with step-by-step instructions. I took a course that focused specifically on landscape photography, and it helped me refine my approach to capturing nature. One of my favorite parts was watching live demonstrations where instructors showcased their thought process behind each shot. I always recommend checking out reviews to find courses that fit your style and learning pace.

Joining Photography Communities and Workshops

Finding a community of like-minded individuals has been incredibly rewarding. I discovered local photography clubs and online forums where enthusiasts share their work, give constructive feedback, and organize group outings. I joined a local photography group that frequently arranges workshops in various scenic locations. Participating in these workshops has not only improved my skills but has also led to friendships with others who share my passion for photography.

These communities often provide valuable resources, such as tips on the best locations and techniques. I remember one trip organized by my group to a nearby state park, where we explored various shooting spots together, learning from each other and sharing our experiences. Being surrounded by fellow photographers ignited my creativity and pushed me to try new things.

Practice Tips: How to Improve Without Spending Much

Practice truly is the key to improvement. I started setting aside time each week to head out and shoot, even if it was just in my backyard or a nearby park. I found that consistency helped me develop my eye for composition and lighting. One exercise I enjoy is picking one subject—like a tree or a rock—and photographing it in different lighting conditions and angles throughout the day. This not only hones my skills but also deepens my appreciation for the subtleties in nature.

Another practice technique I adopted was to challenge myself with specific themes or styles for my outings. For instance, I might focus on capturing textures one day and colors the next. This approach keeps my photography fresh and exciting, and it encourages me to think creatively. Plus, it doesn’t require spending extra money; just my time and enthusiasm!

Sharing and Selling Your Work

Creating an Online Portfolio for Free

Once I felt confident in my photography, I wanted to share my work with the world. Creating an online portfolio was a natural step, and I found several free platforms like Wix and WordPress that made it easy to showcase my images. I remember spending an afternoon curating my favorite shots and laying them out on a clean, simple website. It allowed me to tell my story and present my unique perspective on landscape photography.

Including a blog section became a great way to engage with visitors. I shared my experiences from various shoots, which not only helped others but also made my portfolio feel more personal. I discovered that sharing my journey attracted an audience that resonated with my passion for adventure photography.

Social Media Strategies for Photographers

Social media has been a powerful tool for connecting with fellow photographers and potential clients. I started by creating an Instagram account dedicated solely to my photography. Posting regularly and engaging with other photographers helped me build a following. I’ve learned the importance of using relevant hashtags and geo-tags to increase visibility. Sharing behind-the-scenes stories or tips in my captions allows me to connect with my audience on a personal level.

Additionally, I found groups on platforms like Facebook where photographers share tips and opportunities. It’s amazing to see how supportive this community can be. Participating in challenges or contests not only motivates me to shoot more but can also lead to exposure and recognition.

How to Sell Your Photography on a Budget

If you’re looking to sell your work, you don’t need to invest a lot of money upfront. I started by offering prints of my favorite shots through online marketplaces like Etsy or Redbubble. These platforms handle the logistics, allowing me to focus on creating. I also found that reaching out to local businesses to display my work can be a great way to get started. I approached a coffee shop in town, and they agreed to feature some of my prints, which led to sales and even commissions!

Another option is to enter photography competitions and exhibitions. Many of these opportunities have low entry fees, and they can offer fantastic exposure. I once entered a local photography contest and was thrilled when my image was selected for display. It’s a great way to boost your confidence and get your work seen by a broader audience.

Final Thoughts

Landscape adventure photography has enriched my life in so many ways. It’s not just about capturing beautiful images; it’s about the experiences, the connections made, and the personal growth along the way. I’ve learned that anyone can embark on this creative journey without needing the most expensive gear or extensive training. With passion, practice, and a willingness to learn, we can all create stunning landscapes that tell our unique stories. So grab your camera, hit the trails, and let your adventures inspire your photography!

Frequently Asked Questions

What is landscape adventure photography?

Landscape adventure photography is about immersing yourself in nature and capturing its beauty in a way that resonates with others. It often combines elements of adventure and exploration, allowing photographers to discover new places while telling their unique stories through images.

Why is composition important in landscape photography?

Composition is key in landscape photography as it can significantly affect the balance and engagement of an image. Understanding techniques like the rule of thirds and incorporating foreground elements can add depth, leading the viewer’s eye into the scene and creating a more immersive experience.

What essential gear do I need for landscape adventure photography?

The essential gear for landscape adventure photography includes a reliable camera, a sturdy tripod, and a selection of lenses. A lightweight camera is recommended for hiking, and starting with a wide-angle lens and a zoom lens can cover most photography needs.

Are there affordable camera options for beginners in landscape photography?

Yes, there are many budget-friendly cameras available that can deliver excellent results for beginners. Brands like Canon and Nikon offer user-friendly entry-level DSLRs, and mirrorless cameras are also great options due to their lightweight and compact design.

How can I achieve stunning landscape shots without spending a lot on lenses?

Instead of investing in a collection of expensive lenses, you can focus on a few versatile options. A wide-angle lens is essential for sweeping landscapes, while a standard zoom lens can provide versatility. There are budget options available that perform well, and buying used lenses can also save money.

What is the significance of the golden hour and blue hour in photography?

The golden hour, occurring just after sunrise and before sunset, offers warm, soft light that enhances landscape photos. The blue hour, which is just before sunrise and after sunset, provides a deep blue hue that creates a tranquil atmosphere, ideal for capturing moody scenes.

What are some effective techniques for capturing dramatic landscape photos?

Techniques for capturing dramatic landscape photos include long exposure photography to create silky smooth effects in water and clouds, as well as High Dynamic Range (HDR) photography, which blends multiple exposures to capture a full range of light in challenging scenes.

Where are the best locations for landscape adventure photography?

National parks are often considered the best locations for landscape adventure photography due to their stunning vistas and affordable entrance fees. State parks and hidden gems can also provide fantastic photo opportunities without the crowds. Urban landscapes can be compelling as well, combining architecture and nature.

How can I improve my photography skills on a budget?

You can improve your photography skills on a budget by taking advantage of free online courses and tutorials, joining photography communities for feedback and support, and practicing consistently in various locations and conditions without needing to spend extra money.

What are some strategies for sharing and selling my photography?

To share your photography, you can create an online portfolio using free platforms and leverage social media for visibility. Selling your work can be done through online marketplaces, local businesses, and participating in photography competitions and exhibitions, which often have low entry fees.

Explore the World: Budget-Friendly Landscape Photography Spots

Capturing the beauty of our planet through landscape photography is an adventure that doesn’t have to break the bank. Join me as we explore affordable spots that will inspire your photography journey without emptying your wallet.

Explore the World: Budget-Friendly Landscape Photography Spots

Understanding Landscape Photography

What is Landscape Photography?

Landscape photography is more than just snapping pictures of pretty views; it’s about capturing the essence and emotion of a place. I remember the first time I stood at the edge of a breathtaking vista, my camera in hand, feeling the wind on my face and the light dancing across the landscape. It’s a genre that focuses on the natural environment, showcasing everything from mountains and forests to beaches and deserts. The goal is to convey the beauty of nature and evoke feelings in the viewer. Whether you’re a seasoned pro or just starting, it’s all about finding the right scene and capturing it in a way that speaks to your audience.

Essential Gear for Budget-Friendly Photography

When I first ventured into landscape photography, I thought I needed the most expensive gear to get great shots. However, I quickly learned that you can create stunning imagery without a hefty investment. Here’s what I think you should have:

  • Camera: A DSLR or mirrorless camera is ideal, but even a decent smartphone can work wonders. I started with a basic DSLR and gradually upgraded my gear.
  • Tripod: A sturdy tripod is essential for long exposures and stabilizing your shots, especially in low light. I always carry a lightweight model that’s easy to transport.
  • Lenses: A wide-angle lens is perfect for capturing expansive landscapes, while a telephoto lens helps zoom into distant details. I recommend starting with a versatile zoom lens that covers multiple focal lengths.
  • Filters: Neutral density (ND) and polarizing filters help control light and enhance colors. I’ve found that investing in a good ND filter can really elevate the quality of my images.
  • Editing Software: Post-processing can transform your photos. I use software like Lightroom or even free options like GIMP to enhance my images after the fact.

Photography Techniques for Stunning Landscapes

Techniques can make all the difference in your photography. I’ve experimented with various methods, and here are some that have enriched my work:

  • Composition: The rule of thirds is a simple yet powerful guideline. By placing the main subject off-center, my photos often feel more dynamic. Try to find leading lines that draw the viewer’s eye into the image.
  • Lighting: Golden hour, right after sunrise or before sunset, provides the best natural light. I’ve made it a habit to wake up early or stay out late to capture that magical glow.
  • Depth of Field: Using a smaller aperture (higher f-stop number) can help keep more of the scene in focus, creating a more immersive experience for the viewer. I often shoot at f/8 or f/11 for landscapes.
  • Long Exposures: This technique allows you to capture movement in the scene, like flowing water or moving clouds. I love using ND filters to achieve this effect, especially in waterfall shots.
  • Experimentation: Don’t be afraid to try new things. I’ve learned some of my best techniques through trial and error. Sometimes, a unique angle or different time of day can produce unexpected results.

As I ventured further into the world of landscape photography, I discovered how important it is to connect with the environment. Each location has its own story, and I try to capture that narrative in my images. By being mindful of the surroundings, I not only improve my photography but also deepen my appreciation for nature.

Whether you’re just starting out or looking to improve your skills, understanding these basics can set a strong foundation for your journey into landscape photography. Remember, it’s not just about the gear or techniques; it’s about your unique perspective and the stories you want to tell through your lens.

Top Budget-Friendly Landscape Photography Destinations

National Parks

Yellowstone National Park

Yellowstone has always held a special place in my heart. The diverse landscapes and vibrant geothermal features create an otherworldly experience. I remember my first visit, early in the morning, with the mist rising off the hot springs. The colors were so vivid, it felt like I was in a painting. With vast meadows, towering mountains, and iconic geysers like Old Faithful, every corner of the park offers something unique to capture. Plus, the entry fee is quite reasonable compared to other attractions, making it a perfect spot for budget-friendly photography.

Yosemite National Park

Yosemite is another gem that I recommend wholeheartedly. The dramatic cliffs of El Capitan and the stunning views from Glacier Point are simply breathtaking. I recall hiking to Yosemite Falls, where the sound of rushing water provided a perfect backdrop for my photos. The park’s towering sequoias and lush valleys create endless opportunities for stunning shots. If you visit during the off-peak season, you can find even better deals on accommodations and enjoy fewer crowds, allowing for a more intimate experience with nature.

Coastal Locations

Big Sur, California

There’s something magical about the coastline of Big Sur. The rugged cliffs meeting the Pacific Ocean create dramatic scenery that can leave any photographer in awe. I remember pulling over at various viewpoints, my heart racing with excitement as I snapped photos of the waves crashing against the rocks and the vibrant sunsets. The drive along Highway 1 itself is a feast for the eyes, and while some areas can be touristy, there are plenty of hidden spots that you can access without spending a lot. Pack a picnic, find a quiet overlook, and let the landscape inspire you. Explore Coastal Wonders: Budget-Friendly Photography Guide

Acadia National Park, Maine

Acadia has a charm all its own, especially in the fall when the foliage transforms into a rainbow of colors. I was lucky enough to visit during this season, and it was one of the highlights of my photography journey. The park offers a variety of landscapes, from rocky coastlines to serene lakes. One of my favorite experiences was hiking up Cadillac Mountain to capture the sunrise. It’s a simple thrill to be one of the first people in the U.S. to see the sun each day. Acadia’s entrance fee is also quite affordable, making it easy on the wallet.

Mountain Ranges

The Rocky Mountains

The Rocky Mountains are a true playground for landscape photographers. I’ve spent countless weekends exploring this majestic range, from Colorado to Canada. Each season brings its own beauty, whether it’s the vibrant wildflowers or the snow-covered peaks in winter. I found that places like Rocky Mountain National Park offer spectacular views and plenty of trails, allowing you to discover hidden gems without breaking the bank. Early morning hikes often reward you with breathtaking scenery and fewer people, letting you connect with nature.

The Appalachian Trail

The Appalachian Trail holds a special place in my heart, as it stretches over 2,000 miles along the eastern U.S. There are numerous access points where you can hike a small portion without needing to commit to the entire trail. I’ve captured countless sunrises and sunsets from various overlooks, each view telling its own story. The changing seasons add an extra layer of beauty, from blooming wildflowers in spring to the stunning fall foliage. Plus, the surrounding towns often have affordable accommodations and local eateries that make the trip even more enjoyable.

Desert Landscapes

Monument Valley, Arizona

Monument Valley is iconic, and I was thrilled to photograph its towering sandstone buttes. The contrast between the deep blue sky and the red rock formations creates a striking image. I remember driving through the valley, soaking in the scenery, and stopping at various viewpoints to catch the light as it changed throughout the day. It’s a photographer’s dream, and the entrance fees are minimal, making it easy to explore without spending too much. Visiting during sunrise or sunset can yield some of the most stunning shots.

Death Valley National Park

While it might sound paradoxical, Death Valley has an ethereal beauty that I found captivating. The vast, otherworldly landscapes and extreme conditions create unique photography opportunities. I was fascinated by the salt flats and the colorful badlands. I learned to plan my visits around the cooler months, as summer temperatures can be daunting. The solitude of the park allows for a deep connection to nature, and I often found myself lost in thought while capturing the shifting light and shadows. It’s a budget-friendly destination since entrance fees are low and the views are priceless.

International Landscape Photography Spots on a Budget

Europe

Lake Bled, Slovenia

Lake Bled is one of those places that feels like it’s straight out of a fairy tale. I vividly remember the first time I laid eyes on its emerald waters with the charming island in the center. The backdrop of the Julian Alps makes it a stunning location for landscape photography. I found that hiking up to the viewpoint at Ojstrica provided an unforgettable sunrise experience. The soft light reflecting off the lake was magical. Best of all, the costs are reasonable, with free access to many trails surrounding the lake. I recommend exploring the area in the off-season, as it allows you to capture the beauty without the crowds.

Scottish Highlands, Scotland

The Scottish Highlands are a photographer’s dream. I was completely enchanted by the rugged landscapes, lochs, and castles. I remember driving through Glencoe, where the dramatic mountains and valleys just took my breath away. Every turn in the road reveals another picturesque scene begging to be captured. The highlands are relatively affordable to explore, and I discovered that wild camping is allowed in many areas, offering a unique and budget-friendly way to immerse myself in nature. I suggest visiting during the shoulder seasons for vibrant colors and fewer tourists.

Asia

Mount Fuji, Japan

Mount Fuji is iconic, and witnessing its beauty was a highlight of my travels. I stood at the shores of Lake Kawaguchi, where the reflection of the mountain on the water was simply perfect. I learned that the best time to photograph Mount Fuji is during the early morning when the air is crisp and the skies are clear. The surrounding area has plenty of affordable accommodations, and I found that getting around via public transport was both easy and economical. Exploring the nearby flower fields during spring added a burst of color to my shots, making the experience unforgettable.

Rice Terraces, Bali, Indonesia

The rice terraces in Bali are like a living canvas, and I was fascinated by the lush greens and intricate patterns. I spent a day wandering through Tegalalang, taking photos of the farmers tending to their crops. The soft morning light created a serene atmosphere that made my images pop. I found it easy to engage with the locals, learning about their farming practices and gaining insights for my photography. The best part? The cost of visiting these terraces is minimal, and often there are no entry fees. Just be sure to show respect for the land and the people who work it.

South America

Patagonia, Chile and Argentina

Patagonia has always been on my bucket list, and when I finally made it there, it didn’t disappoint. The landscapes are jaw-dropping, from the glacial lakes to the towering mountains of Torres del Paine. I remember hiking the W Trek and being awed by the ever-changing scenery. Capturing the vibrant blues of the lakes against the stark whites of the glaciers was one of my favorite challenges. While Patagonia can seem pricey, I discovered that there are budget-friendly hostels and camping options that make it accessible. Traveling during the shoulder seasons also helps reduce costs while still offering stunning views.

Amazon Rainforest, Brazil

The Amazon Rainforest is a treasure trove for photographers. I was fortunate to spend time in a lodge that offered guided tours into the jungle. I learned so much about the biodiversity and the importance of conservation. The lush greens and the intricate wildlife provided endless opportunities for capturing unique shots. While some parts of the Amazon can be expensive, I found that joining a group tour helped lower costs. Visiting during the dry season allowed for easier access to various locations while still providing a vibrant environment for photography.

When to Visit: Best Times for Landscape Photography

Seasons and Weather Considerations

Timing can make a significant difference in the quality of your landscape photography. In my experience, early spring and late fall are often the best times to capture vibrant colors without the crowds. I’ve found that each season brings its own magic—spring blossoms, summer greens, autumn foliage, and winter snows all present unique photography opportunities. It’s essential to check the weather forecasts as well, as conditions can change rapidly, especially in mountainous or coastal areas. I strive to be flexible with my plans, allowing me to adjust based on the best lighting and weather conditions. Your Guide to Budget-Friendly Seasonal Landscape Photography

Golden Hour and Blue Hour Tips

The golden hour, which occurs shortly after sunrise and before sunset, is my favorite time for landscape photography. I’ve learned that the soft, diffused light creates stunning images, adding depth and warmth to the scene. I often scout locations ahead of time to identify the best spots for capturing this magical light. The blue hour, which happens just before sunrise and after sunset, can also create beautiful, moody images. It’s a great time to capture the transition from day to night, especially with cityscapes reflecting off water. I recommend bringing a tripod for these moments, as longer exposures can enhance your shots significantly.

Major Photography Events and Festivals

Attending photography events and festivals has been a fantastic way for me to connect with other photographers and learn new techniques. I’ve attended events like the Banff Mountain Film and Book Festival, which showcases stunning photography and offers workshops. Festivals often provide opportunities for networking and gaining insights from experienced photographers. I recommend checking local calendars for events in the areas you plan to visit. Not only do these festivals offer inspiration, but they can also provide valuable tips on best practices for capturing the local landscapes. Capture Nature’s Wonders: Budget-Friendly Photography Tips

Budget Travel Tips for Photographers

Finding Affordable Accommodations

When I travel for photography, I always keep an eye out for budget-friendly accommodations. I’ve found that hostels, motels, and budget hotels can save a good deal of money. Websites like Hostelworld and Booking.com often have great deals, and I always check for reviews to ensure I’m getting a decent place. I’ve also tried camping in national parks, which not only saves money but immerses me in nature, right where I want to be. There’s nothing quite like waking up to the sound of birds and the smell of fresh pine. Plus, it gives me unique opportunities for early morning shots without the hassle of commuting from far away.

Transportation Options for Budget Travelers

Getting around can sometimes be a challenge, but I’ve discovered a few tricks that help keep costs down. Renting a car can offer flexibility, especially in places where public transit is limited, but I tend to look for options like public transportation or rideshare services for shorter distances. In cities, walking can also be a great way to explore and find hidden spots that aren’t in the guidebooks. I remember once wandering through a quaint neighborhood in San Francisco, just following my feet, and stumbled upon a breathtaking view of the Golden Gate Bridge that wasn’t on any tourist map. For longer trips, I often use buses or trains, which can be both affordable and scenic.

Eating on a Budget: Local Cuisine Tips

Food is an essential part of the travel experience, but it doesn’t have to be expensive. I’ve learned to seek out local markets and street food vendors, which often provide delicious meals without the hefty price tag. In places like Thailand, I found that street vendors served up some of the best food I’ve ever tasted! Packing snacks or simple meals can also help cut costs while out shooting. I often take along fruits, nuts, and sandwiches, allowing me to focus more on capturing the beauty around me without worrying about finding a place to eat. Plus, it gives me more time to enjoy the landscapes I’m there to photograph!

Local Culture and Community Engagement

Interacting with Locals for Unique Perspectives

One of the most rewarding aspects of my photography travels has been connecting with local communities. I’ve found that engaging with locals can provide invaluable insights and unique perspectives that I might not have discovered on my own. Whether it’s chatting with farmers in Bali or joining a guided tour in the Amazon, these interactions often lead to unexpected photographic opportunities. I remember talking with a local artist in the Scottish Highlands who shared stories about the landscape’s history. Her passion was contagious, and it added depth to my photos, capturing not just the scenery, but the heart of the place.

Respecting Nature and Local Guidelines

As photographers, it’s our responsibility to respect the environments we explore. I always make it a point to follow local guidelines and leave no trace when I’m out in nature. I’ve witnessed the impact that careless visitors can have on fragile ecosystems, and I strive to be a good steward of the places I photograph. Whether it’s sticking to marked trails or being mindful of wildlife, I believe that showing respect for nature enhances not just my experience but also the quality of my photography. I’ve often found that a little bit of mindfulness can lead to more authentic and meaningful images.

Post-Processing Tips for Landscape Photography

Basic Editing Techniques

Once I’ve captured my images, the editing process begins. I tend to keep my edits simple, focusing on enhancing the natural beauty of the landscape rather than transforming it. I often adjust the exposure, contrast, and saturation to make colors pop without looking unnatural. Cropping can also help improve composition, allowing me to draw attention to the most important elements of the photo. I remember spending hours in front of my computer screen, learning the ins and outs of editing software, and it was worth every minute. These tweaks can truly elevate a good photo to something special.

Recommended Software for Beginners

For those just starting with post-processing, I highly recommend trying out Lightroom or Adobe Photoshop. They both offer user-friendly interfaces and plenty of online tutorials to help you learn. If you’re looking for free options, GIMP and Darktable can also do the trick. I started with basic programs before moving on to more advanced options, and each step taught me something new about editing. No matter which software you choose, just remember to have fun with it and let your creativity shine through!

Final Thoughts

Reflecting on my journey through landscape photography, I feel grateful for the experiences and lessons learned along the way. Whether it’s standing atop a mountain at sunrise or wandering through a bustling market, each moment has contributed to my growth as a photographer. I encourage you to explore the world around you with an open heart and mind. Capture the beauty that speaks to you and share your unique perspective with others. Remember, photography is not just about the final image; it’s about the stories we tell through our lenses and the connections we make along the way. Happy shooting!

Frequently Asked Questions

What is landscape photography?

Landscape photography is about capturing the essence and emotion of a place, showcasing natural environments like mountains, forests, beaches, and deserts. The goal is to convey nature’s beauty and evoke feelings in the viewer.

What essential gear do I need for budget-friendly landscape photography?

You should consider having a camera (DSLR or mirrorless), a sturdy tripod, a versatile zoom lens, neutral density and polarizing filters, and editing software like Lightroom or GIMP to enhance your images.

What techniques can enhance my landscape photography?

Key techniques include composition using the rule of thirds, shooting during golden hour for optimal lighting, using a smaller aperture for depth of field, experimenting with long exposures, and being open to trying new methods.

Which national parks are recommended for budget-friendly photography?

Recommended national parks include Yellowstone National Park, known for its diverse landscapes; Yosemite National Park, with dramatic cliffs and waterfalls; and Acadia National Park, especially beautiful in the fall.

What are some budget-friendly coastal photography locations?

Big Sur in California offers stunning coastal views, while Acadia National Park in Maine features picturesque coastlines and serene lakes, especially vibrant during the fall season.

What international locations are good for landscape photography on a budget?

Affordable international spots include Lake Bled in Slovenia, the Scottish Highlands in Scotland, Mount Fuji in Japan, and the rice terraces in Bali, Indonesia.

When is the best time to visit for landscape photography?

Early spring and late fall are often the best times for vibrant colors without crowds. Each season offers unique photography opportunities, and checking weather forecasts is essential for good lighting conditions.

How can I find affordable accommodations while traveling for photography?

Consider budget-friendly options like hostels, motels, camping in national parks, and using websites like Hostelworld and Booking.com for great deals on accommodations.

What tips can help me eat on a budget while traveling?

Seek out local markets and street food vendors for delicious and inexpensive meals. Packing snacks and simple meals can also help reduce costs while you’re out shooting.

How can I engage with local culture and communities while traveling?

Engaging with locals can provide valuable insights and unique perspectives. Interactions, like chatting with farmers or joining guided tours, often lead to unexpected photographic opportunities and enrich your experience.

Top Tips for Stunning Landscape Photography While Backpacking

Backpacking through breathtaking landscapes is a dream for many photographers. I’ve found that capturing those stunning views requires more than just pointing and shooting. Let’s dive into some essential tips to elevate your landscape photography while on the trail!

Top Tips for Stunning Landscape Photography While Backpacking

Understanding Landscape Photography

What is Landscape Photography?

Landscape photography is about capturing the beauty of nature in all its forms. It goes beyond just taking pictures of mountains or sunsets; it’s about telling a story through the environment around us. I remember my first trip to the mountains, where I was captivated by the vibrant colors of the sunrise reflecting off the peaks. That moment made me realize how powerful landscape photography could be in conveying emotions and experiences. We often strive to capture not just what we see but how it makes us feel.

The Importance of Composition

Good composition is essential for stunning landscape photographs. I learned early on that just having a pretty view isn’t enough; how we frame that view can make all the difference. The rule of thirds is a fantastic starting point. Imagine dividing your frame into a 3×3 grid and placing key elements along those lines or intersections. I’ve found that this simple adjustment often leads to more dynamic and engaging shots.

Another technique that has helped me tremendously is understanding leading lines. These can be natural elements like rivers or paths that guide the viewer’s eye through the image. When I first started incorporating these lines, I noticed that my photos became more inviting and immersive. It’s like giving your audience a pathway to follow right into the landscape. For more about incorporating wildlife into your photography, check out Top Tips for Wildlife Photography in Scenic Landscapes.

Types of Landscape Photography

There are various styles of landscape photography, and exploring these can enhance your skill set. From sweeping vistas to intimate details of nature, each type offers its unique challenges and rewards. For instance, I find myself drawn to both grand landscapes, where I can capture the vastness of a mountain range, and close-ups of a blooming flower or textured rock. Each approach teaches me to appreciate different aspects of the environment.

Another exciting type is astrophotography, which involves capturing the night sky. I remember my first attempt at photographing the Milky Way. I spent hours planning for the right location, ensuring minimal light pollution and clear skies. The result was a breathtaking image that reminded me of how vast and beautiful our universe is. By experimenting with different types of landscape photography, I’ve gained a deeper understanding of light, composition, and the world around me.

Essential Gear for Backpacking Photographers

Cameras: DSLR vs. Mirrorless

When it comes to choosing a camera for backpacking, it often boils down to personal preference. I’ve used both DSLRs and mirrorless systems, and I’ve found that each has its strengths. DSLRs are typically more robust and have a longer battery life, which is crucial on long hikes. However, I’ve fallen in love with the lightweight design and quiet operation of mirrorless cameras, making them perfect for capturing wildlife without disturbing the scene.

Ultimately, I recommend picking a camera that you feel comfortable with and that fits your photography style. If you’re a beginner, it might be worth renting a camera or borrowing one to see what feels right for you before making a purchase.

Lenses: Wide-Angle and Telephoto Options

Choosing the right lenses is equally important. For landscape photography, wide-angle lenses are my go-to. They allow me to capture expansive scenes and fit more of the landscape into the frame. I remember being in the Grand Canyon with my wide-angle lens, and it felt like I could almost reach out and touch the distant cliffs. However, having a telephoto lens in my backpack for those distant details or wildlife shots can also be beneficial. It broadens my perspective as a photographer.

Tripods: Choosing the Right One for Backpacking

A sturdy tripod is essential for landscape photography, especially in low-light situations or when using slower shutter speeds. I’ve made the mistake of skimping on a tripod in the past, and it led to blurry shots. Now, I opt for a lightweight, compact tripod that fits easily in my backpack without weighing me down. It’s been a game-changer, allowing me to set up quickly and capture those perfect moments.

Accessories: Filters, Extra Batteries, and Memory Cards

Don’t forget about accessories! A polarizing filter can help reduce glare and enhance colors, making landscapes pop. I always pack extra batteries and memory cards since I never know when inspiration will strike. There’s nothing worse than running out of space or power just when you’re about to capture that stunning sunset. I’ve learned to plan ahead, ensuring I’m always ready for whatever the trail throws my way.

Planning Your Backpacking Trip for Photography

Choosing the Right Destination

When I think about planning a backpacking trip for photography, the first step is always choosing the right destination. It’s exciting to explore places that inspire creativity and offer breathtaking views. I remember my trip to the Pacific Northwest; the lush forests and coastal cliffs were a photographer’s dream. I suggest considering not just the landscapes but also what type of photography you want to focus on. Are you drawn to mountains, deserts, or perhaps coastal scenes? Finding a destination that aligns with your vision can make all the difference in capturing compelling images. For those interested in urban photography, check out Top Tips for Budget Urban Landscape Photography.

Best Times of Year for Landscape Photography

The timing of your trip can be crucial for capturing stunning landscapes. I’ve learned that each season offers unique opportunities. For example, spring brings vibrant wildflowers, while autumn showcases beautiful fall foliage. I found that summer can be great for high-altitude hikes, where the views are often unobstructed. However, I also love winter for its serene beauty, with snow blanketing the landscape. Planning your trip according to these seasonal changes can really elevate your photography game.

Researching Scenic Locations and Trails

Before setting out, I always spend some time researching scenic locations and hiking trails. Online resources like photography blogs, hiking websites, and social media platforms can be incredibly helpful. I often check out sites like Instagram and Pinterest for inspiration, looking for places that resonate with me. I remember finding a hidden waterfall on a hiking app that led to one of my favorite photographs. Taking the time to research can reveal those hidden gems that might not be on the typical tourist path.

Weather Considerations and Safety

Understanding the weather is a key part of planning any trip. I cannot stress enough how important it is to check forecasts before heading out. I’ve had experiences where I underestimated the weather, thinking a sunny day would last, only to be caught in sudden rain. I recommend bringing appropriate gear for varying conditions, including a rain cover for your camera and sturdy waterproof clothing for yourself. Safety is paramount; knowing the terrain and potential hazards helps me feel more secure while capturing the beauty of nature.

Techniques for Capturing Stunning Landscapes

Mastering the Rule of Thirds

While I mentioned the rule of thirds earlier, mastering it can take time and practice. I still remember how shifting my focal point to one of the grid lines transformed my photos. Instead of placing my subject in the center, I began to position it off-center, which created a more dynamic and engaging composition. It’s amazing how such a simple concept can dramatically change the feeling of a photo. I encourage you to experiment with this rule, as it can lead to some of your most captivating shots.

Utilizing Leading Lines

Incorporating leading lines into my landscape photography has been one of my favorite techniques. These can be paths, rivers, or even fences that draw the viewer’s eye through the photo. I remember a particular day at a national park, where a winding trail led directly to a stunning mountain backdrop. By framing my shot to include that path, I created a sense of depth and perspective that made the image feel more inviting. It’s like inviting viewers to join me in the adventure and experience the beauty firsthand.

Incorporating Foreground Interest

Adding foreground elements can provide context and depth to your images. I’ve started looking for interesting rocks, flowers, or even a fallen tree to include in my shots. This not only adds layers to the composition but also helps to lead the viewer’s eye into the scene. I remember capturing a sunset at a lake, where I used some mossy rocks in the foreground. Those details created a sense of scale and made the photo more compelling. Don’t be afraid to get low to the ground and experiment with different angles!

Long Exposure Techniques for Water and Sky

Long exposure photography has opened up a whole new world for my landscape images. I love how it can soften water and create that dreamy effect, especially during sunrise or sunset. I recommend using a tripod to keep your camera steady. One of my favorite moments was capturing a waterfall with a long exposure; the water seemed to flow like silk. Learning to adjust your shutter speed and using ND filters can enhance this technique. It takes a bit of practice, but the results are often breathtaking.

Using Natural Light: Golden Hour vs. Blue Hour

One of the most magical times for landscape photography is during the golden hour, right after sunrise or before sunset. The warm light can transform a scene, adding depth and richness to colors. Conversely, I’ve also fallen in love with blue hour, that magical moment when the sky turns deep blue just before nightfall. Both times have their unique charm and can dramatically impact your photos. I always try to plan my shoots around these times, as the lighting can make or break a photograph.

Post-Processing Tips for Landscape Photography

Choosing the Right Editing Software

Post-processing is an essential part of landscape photography that can dramatically enhance my images. I’ve tried several editing software options, and each has its own strengths. Adobe Lightroom is one of my favorites because of its user-friendly interface and powerful tools tailored for photographers. It allows me to adjust exposure, contrast, and color balance easily. I also enjoy using Photoshop when I want to dive deeper into editing, especially for tasks like retouching or creating composites. For anyone just starting out, I recommend experimenting with free software like GIMP or even mobile apps like Snapseed, which can be surprisingly effective for on-the-go edits.

Basic Adjustments: Exposure, Contrast, and Color Correction

One of the first things I do when I import my photos into my editing software is to make basic adjustments. I’ve learned that small tweaks to exposure and contrast can breathe new life into a photo. If the image seems too dark or washed out, adjusting the exposure can help bring out the details I want to highlight. I often use the contrast slider to add depth to my images, making the colors pop. Color correction is another crucial step; I’ve noticed that correcting the white balance can make a huge difference in how natural the colors look. I find that taking the time to make these basic adjustments sets a strong foundation for the rest of my editing process.

Advanced Techniques: HDR and Panoramas

As I’ve progressed in my photography journey, I started exploring more advanced techniques like High Dynamic Range (HDR) and panoramas. HDR photography has allowed me to capture scenes with a broad range of light, ensuring that both shadows and highlights are well-exposed. I remember my first HDR attempt at a sunset; by merging multiple exposures, I was able to create a striking image that retained detail in both the bright sky and the dark foreground. For panoramic shots, I love capturing sweeping vistas that showcase the beauty of a location. By stitching together multiple images, I can create a sense of scale that a single shot sometimes lacks. Just make sure to use a tripod and keep consistent settings for the best results!

Common Mistakes to Avoid in Landscape Photography

Ignoring the Weather Conditions

Weather can make or break my landscape photos. I learned this lesson the hard way during a trip to a national park when I neglected to check the forecast. What started as a promising day turned into a gloomy downpour, leaving me with a handful of dull, overcast shots. Now, I always pay close attention to weather conditions before venturing out. Sometimes, the most dramatic skies can lead to the most stunning images, but I’ve found that preparation is key. If rain is on the horizon, I pack a weatherproof cover for my camera and consider how that weather might impact my shots.

Overlooking Composition Elements

In my early days of photography, I often overlooked the importance of composition elements. I would get so caught up in the beauty of the scene that I’d forget to think about how I framed it. I found that taking a moment to step back and analyze the composition can drastically improve my images. I’ve learned to look for distractions in the frame and to consider how elements interact within the scene. By consciously focusing on composition, I can create more compelling and balanced photographs.

Not Paying Attention to the Horizon Line

The horizon line can be a subtle but essential element in landscape photography. I remember a few instances where I didn’t pay enough attention to it, resulting in tilted horizons that distracted from the beauty of the scene. I always make it a point to check my horizon line before pressing the shutter. Using my camera’s grid overlay feature has helped me immensely in ensuring that the horizon is level, which creates a more polished and professional look for my images.

Failing to Scout Locations in Advance

One of the most valuable lessons I’ve learned is the importance of scouting locations in advance. I used to head out without a plan, hoping to stumble upon the perfect shot. However, I quickly realized that taking the time to research potential spots pays off. I often use apps and websites to find popular locations and even read reviews from fellow photographers. I also recommend visiting the site beforehand, if possible, to get a feel for the landscape and to identify the best angles. This preparation can save time and ensure I’m ready to capture the moment when I arrive.

Sharing and Showcasing Your Work

Best Platforms for Photography Sharing

Once I’ve edited my landscape photos, I love sharing them with the world. There are so many platforms available, but I’ve found that Instagram is one of the best for photographers. Its visual nature allows my work to shine, and I enjoy connecting with other photography enthusiasts. I also share my images on photography-specific sites like 500px and Flickr, which cater to a community that appreciates the art. Each platform has its unique audience, so I recommend experimenting to see where your work resonates best.

Building an Online Portfolio

Creating an online portfolio has been a game-changer for me. It’s a great way to showcase my best work and track my progress as a photographer. I use platforms like Squarespace and Wix to create a professional-looking site without needing extensive tech skills. Having my portfolio online has also made it easier to share my work with potential clients or collaborators. I suggest curating my best images to ensure my portfolio reflects my style and skills effectively.

Engaging with the Photography Community

Engaging with the photography community has not only inspired me but also helped me grow as a photographer. I often participate in photography forums and social media groups where I can share my work and get feedback. I’ve learned so much from others’ experiences and have even made some great friends along the way. Attending workshops and local meetups has also been a fantastic way to connect with like-minded individuals. I encourage anyone interested in photography to get involved — it’s a rewarding part of the journey!

Frequently Asked Questions

What is landscape photography?

Landscape photography is about capturing the beauty of nature in all its forms. It aims to tell a story through the environment and convey emotions and experiences, rather than just taking pictures of scenic views.

Why is composition important in landscape photography?

Good composition is essential because it enhances the visual appeal of landscape photographs. Techniques like the rule of thirds and leading lines help frame the view in a more dynamic and engaging way, guiding the viewer’s eye through the image.

What types of landscape photography can I explore?

There are various styles of landscape photography, including sweeping vistas, intimate details of nature, and astrophotography. Each type offers unique challenges and can help photographers appreciate different aspects of the environment.

What camera type is recommended for backpacking photographers?

Both DSLRs and mirrorless cameras have their strengths for backpacking photography. DSLRs are more robust with longer battery life, while mirrorless cameras are lightweight and quiet, making them ideal for capturing wildlife without disturbing the scene.

What essential gear should a backpacking photographer bring?

Essential gear for backpacking photographers includes a reliable camera, wide-angle and telephoto lenses, a sturdy yet lightweight tripod, and accessories like filters, extra batteries, and memory cards to ensure readiness for any photography opportunity.

How can I choose the right destination for a photography trip?

Choosing the right destination involves exploring places that inspire creativity and offer breathtaking views. Consider the type of landscapes you want to capture, such as mountains, deserts, or coastal scenes, to align with your vision.

What are the best times of year for landscape photography?

Each season offers unique opportunities for landscape photography. Spring features vibrant wildflowers, autumn showcases beautiful fall foliage, summer is great for unobstructed high-altitude views, and winter provides serene beauty with snow-covered landscapes.

What are some techniques for capturing stunning landscapes?

Key techniques include mastering the rule of thirds, utilizing leading lines, incorporating foreground interest, experimenting with long exposure for water and sky, and using natural light during the golden and blue hours for dramatic effects.

How do I enhance my landscape photos in post-processing?

Post-processing can dramatically enhance images. Basic adjustments like exposure, contrast, and color correction are essential. Advanced techniques like HDR and panoramas can also help capture a broader range of light and create a sense of scale.

What are common mistakes to avoid in landscape photography?

Common mistakes include ignoring weather conditions, overlooking composition elements, not paying attention to the horizon line, and failing to scout locations in advance. Preparation and awareness significantly improve the quality of landscape photographs.

Capture Breathtaking Landscapes on a Budget Adventure

Capturing breathtaking landscapes doesn’t have to break the bank! With a little creativity and resourcefulness, we can explore stunning scenery while sticking to a budget. Join me on this adventure as we uncover tips and tricks for amazing landscape photography. Read Interesting article: Nighttime Adventures: Urban Photography for Budget Travelers

Capture Breathtaking Landscapes on a Budget Adventure

Understanding Landscape Photography

What is Landscape Photography?

Landscape photography is more than just snapping pictures of pretty views; it’s about capturing the essence of a place. I’ve always felt a deep connection to nature, and when I delve into landscape photography, it allows me to share that passion with others. It’s about telling a story through the image, whether it’s a sprawling mountain range, a serene lake at dawn, or a vibrant sunset over the ocean. The goal is to evoke emotion and transport viewers to those breathtaking moments. When I look at a landscape photo, I want to feel the air, hear the sounds, and experience the beauty of the location.

Essential Equipment for Capturing Landscapes

Now, you might be wondering what you need to get started with landscape photography. While there are many gadgets out there, I’ve learned that you don’t need the most expensive gear to capture stunning images. Here’s what I consider essential:

Cameras

When I first started, I used a simple DSLR camera, and it worked wonders for me. I realized that having a good camera helps, but it’s not the only thing that matters. Many folks use mirrorless cameras or even high-quality smartphones, which can produce amazing results. The important thing is to get comfortable with your camera settings, like aperture, shutter speed, and ISO, so you can adjust them based on the lighting conditions.

Lenses

The choice of lens can significantly impact your landscape photography. A wide-angle lens is often my go-to because it allows me to capture expansive vistas. I remember hiking up a hill to catch the sunrise and using my 16-35mm lens to get the whole scene in one shot. For those closer details, I also keep a telephoto lens handy to zoom in on specific features of the landscape. Experimenting with different lenses can really enhance your creativity!

Tripods

Investing in a sturdy tripod is one of the best decisions I made for my photography. It’s especially useful in low-light situations, like during sunrise or sunset when I want to use longer exposures. I’ve had moments where I was able to capture silky smooth waterfalls or starry skies thanks to my trusty tripod. It’s also great for framing shots perfectly, allowing me to compose my images just right.

Filters

Filters can be a game changer in landscape photography. I always keep a polarizing filter with me to reduce glare from water and enhance colors in the sky. A neutral density filter is another one I love, especially for long exposures during the day. It helps create that dreamy effect on water or clouds. I highly recommend experimenting with filters to see how they can transform your photos.

Choosing the Right Locations

Top Budget-Friendly Landscape Destinations

Finding the right spot to shoot is just as crucial as having the right gear. I’ve discovered that there are plenty of budget-friendly destinations that offer stunning landscapes without emptying my wallet. Here are some of my favorites:

National Parks

National parks are often the first place that comes to mind for landscape photography. They are filled with breathtaking views and natural wonders. I’ve spent weekends exploring local national parks, capturing everything from dramatic cliffs to serene lakes. The best part? Many parks have affordable entrance fees, and some even offer free admission days!

State Parks

State parks are another treasure trove for landscape photographers. They are typically less crowded than national parks, making for a peaceful shooting experience. I remember visiting a state park near my home that had lush forests and beautiful trails, which provided endless opportunities for stunning compositions. The entry fees are usually very reasonable, too!

Local Nature Reserves

Don’t overlook local nature reserves or wildlife refuges. These places can be just as beautiful as larger parks and are often free or have minimal entry fees. I’ve found hidden gems in my area that I had no idea existed, filled with scenic trails and picturesque views. Exploring closer to home can yield fantastic results while saving on travel expenses. Read Interesting article: Essential Tips for Budget Mountain Photography Adventures

Hidden Gems for Landscape Photography

Sometimes, the best landscapes are found off the beaten path. Here are a couple of hidden gems I’ve discovered:

Off-the-Beaten-Path Locations

I love venturing into lesser-known locations. For instance, I stumbled upon a quiet riverbank while hiking that offered stunning reflections of the trees above. It was a magical spot, and I had it all to myself! Exploring local maps or asking fellow photographers can often lead you to secret spots that are perfect for capturing beautiful landscapes.

Urban Landscapes

Don’t forget about urban landscapes! Cities can offer unique photographic opportunities with their architectural beauty and vibrant life. I’ve had a blast capturing cityscapes during twilight when the lights start to twinkle. From bridges to rooftops, urban settings provide a different perspective on landscape photography that can be just as rewarding. Read Interesting article: Edit Urban Photography Like a Pro: Step-by-Step Guide

Best Times for Landscape Photography

Golden Hour and Blue Hour

One of the most magical times for landscape photography is during the golden hour, which occurs shortly after sunrise and just before sunset. The light during these times is soft and warm, casting a beautiful glow over everything. I remember waking up early on a summer morning, hiking to my favorite viewpoint, and witnessing the sun rise over the horizon. The landscape transformed before my eyes; the colors were vibrant, and the shadows were gentle, making it easy to capture stunning images.

Blue hour, on the other hand, occurs just before sunrise and after sunset, when the sky takes on a deep blue hue. This time is equally enchanting, especially in urban settings where the city lights begin to twinkle against the twilight sky. I’ve found that shooting during blue hour can create an ethereal quality in my photos, and it always feels rewarding to capture that fleeting moment. So, whether it’s the golden hour or the blue hour, planning your shoots around these times can dramatically enhance the quality of your landscape photography.

Seasonal Considerations

Each season brings its own unique charm to landscape photography, and I’ve learned to embrace what each one has to offer. The changing scenery can completely alter the mood of my photos, making it worthwhile to capture landscapes year-round.

Spring Blooms

Spring is a personal favorite of mine. As flowers begin to bloom and trees regain their vibrant greens, the world comes alive with color. I’ve spent countless weekends exploring gardens and parks, capturing the blooms and the fresh, lively essence of the season. The contrast of colorful flowers against a clear blue sky can create breathtaking compositions. I remember a particular day spent at a botanical garden, where I captured delicate cherry blossoms in full bloom. It was a reminder of how beautiful nature can be when it awakens from its winter slumber.

Autumn Foliage

Autumn, or fall, is another incredible time for landscape photography. The changing colors of the leaves create a stunning palette of reds, oranges, and yellows that transforms forests and parks into living paintings. I love taking drives through wooded areas to find the perfect spots to photograph the foliage. I once stumbled upon a scenic overlook where the trees were ablaze with color reflecting off a calm lake. It was one of those moments that made me feel grateful to be a photographer. The crisp air during this season also adds a special feel to the photos, making them resonate with warmth and nostalgia.

Budgeting for Your Adventure

Cost-Effective Travel Tips

Now that we know when to shoot, let’s talk about budgeting for those photography adventures. Traveling can be expensive, but with a bit of planning, I’ve found ways to keep costs low without sacrificing the experience.

Transportation on a Budget

When it comes to getting to those stunning locations, I try to be strategic about my transportation. Carpooling with friends or fellow photographers not only cuts down on gas costs, but it also makes for a fun road trip! I’ve had some of my best conversations and laughs while sharing rides to our next photo destination. If you’re traveling solo, consider using public transportation or even biking if the location allows it. It can be a refreshing way to explore while saving money.

Affordable Accommodation Options

Finding budget-friendly places to stay can also make a big difference. I’ve often used platforms like Airbnb or hostels, which can offer more affordable rates than hotels. Camping is another favorite of mine—there’s something about sleeping under the stars that adds to the adventure! I remember a trip to a national park where I camped right by a river. Waking up to the sound of flowing water and capturing the morning light filtering through the trees was an experience I’ll never forget. Plus, many parks have campgrounds that are incredibly affordable, allowing me to make the most out of my budget.

Free and Low-Cost Activities

While landscape photography is my main focus, I’ve found that there are plenty of free or low-cost activities to enjoy along the way. Exploring new places doesn’t have to be expensive, and some of my favorite memories come from simply wandering around and soaking in the environment.

Nature Hikes

Nature hikes are a fantastic way to discover new landscapes. Many trails are free to access, and they provide the opportunity to find hidden spots that are perfect for photography. I’ve spent hours on various trails, often stumbling upon breathtaking views that I never anticipated. I remember one hike that led me to a beautiful waterfall, where I was able to experiment with long exposure shots. The adventure itself turned into part of the experience, and it often leads to unexpected photographic treasures.

Public Parks and Beaches

Don’t forget about local public parks and beaches! These places can be rich with photographic opportunities and are often free to enter. I’ve enjoyed wandering through city parks filled with unique trees and flowers, capturing the essence of the local landscape. Beaches, with their ever-changing tides and stunning sunsets, have also offered some of my favorite photography moments. I always bring my camera along for spontaneous trips; you never know when a perfect photo opportunity will arise!

Techniques for Capturing Stunning Landscapes

Composition Tips

Once I’ve chosen the location and the right time to shoot, I dive into the exciting part: composition. I’ve learned that good composition can take a photo from ordinary to extraordinary. Each element in the frame contributes to the story I want to tell, so I pay close attention to how I arrange my shots.

Rule of Thirds

One of the first composition techniques I grasped was the rule of thirds. It’s simple but powerful. I imagine dividing my frame into a grid of nine equal parts with two vertical and two horizontal lines. By placing the focal point of my image along these lines or at their intersections, I create a more balanced and engaging photograph. I remember a time I was shooting a sunset over the ocean. Instead of centering the horizon, I aligned it along the top third of the frame, which allowed the vibrant colors of the sky to shine. The result was a dynamic photo that drew the viewer’s eye across the image.

Leading Lines

Another technique that has greatly improved my landscape shots is using leading lines. I’ve found that natural elements like roads, rivers, or trails can guide the viewer’s eye into the scene, creating depth and interest. For example, while hiking through a winding path in a forest, I noticed how the trail led towards a beautiful clearing. I positioned myself to capture the trail leading into the vibrant green trees, which resulted in a captivating photo that invited the viewer to imagine walking that path themselves. It’s all about inviting the audience into my world through the image.

Utilizing Natural Light

Light is everything in photography, and understanding how to use natural light has dramatically impacted my landscape photos. I often experiment with different types of light, as they can change the mood and tone of my images. The golden hour is a favorite of mine, but I also enjoy shooting in harsher midday light when the sun is high. I’ve learned to embrace this light by looking for interesting shadows and contrasts, sometimes capturing the texture of rocks or the vibrant colors of flowers that pop against a bright sky.

Additionally, I pay attention to how clouds and weather affect the light. I’ve had incredible luck photographing landscapes after a rainstorm. The air is fresh, and the clouds create dramatic skies that add depth to my photos. Once, after a sudden downpour, I hurried to a nearby lake, and the reflections of the dark clouds on the water created an ethereal atmosphere. It’s moments like these that remind me of the unpredictability and beauty of nature.

Post-Processing on a Budget

Once I’ve captured my images, the next step is editing. I believe that post-processing can enhance a photo, but I’ve also learned that it doesn’t have to cost a fortune. There are many budget-friendly options that allow me to polish my images without breaking the bank.

Free Editing Software

For those just starting, I recommend exploring free editing software like GIMP or RawTherapee. I used GIMP for quite some time before investing in more advanced tools. It offers a robust set of features that allowed me to adjust exposure, contrast, and color balance. I remember the first time I edited a photo of a mountain landscape; I was amazed at how much it transformed. I could enhance the colors to match the breathtaking view I witnessed while still being accessible to beginners.

Mobile Editing Apps

Also, I’ve found that mobile editing apps can be incredibly useful for quick adjustments on the go. Apps like Snapseed and Lightroom Mobile have become staples on my phone. I often edit photos right after a shoot while still riding the high of capturing something special. With these apps, I can easily crop, adjust brightness, and apply filters to my images. They make it simple to create stunning visuals without needing a computer. I’ve posted many edited photos on social media that started as quick edits right on my phone!

By applying these techniques in both capturing and editing my landscape photography, I’ve seen significant improvements in my photos. It’s incredibly satisfying to look back on my earlier work and notice how I’ve grown and evolved as a photographer. Each experience teaches me something new, and I can’t wait to keep exploring and sharing my journey with others.

Frequently Asked Questions

What is landscape photography?

Landscape photography is about capturing the essence of a place, telling a story through images of natural scenery, and evoking emotions in viewers. It encompasses various scenes like mountain ranges, lakes, and sunsets.

What essential equipment do I need to get started with landscape photography?

Essential equipment includes a camera (DSLR, mirrorless, or high-quality smartphone), lenses (wide-angle and telephoto), a sturdy tripod, and filters (polarizing and neutral density) to enhance your shots.

What are some budget-friendly landscape photography destinations?

Some budget-friendly destinations include national parks, state parks, and local nature reserves, which often have affordable or free entrance fees and stunning landscapes to capture.

What is the golden hour in landscape photography?

The golden hour refers to the time shortly after sunrise and just before sunset when the light is soft and warm, creating beautiful lighting conditions for landscape photography.

How does each season affect landscape photography?

Each season brings unique charm to landscape photography. Spring offers colorful blooms, while autumn showcases vibrant foliage, each altering the mood and composition of photos.

What are some cost-effective travel tips for landscape photography?

Cost-effective travel tips include carpooling with friends, using public transportation, finding budget accommodations like hostels or camping, and engaging in free activities like nature hikes and visiting public parks.

What composition techniques should I consider in landscape photography?

Key composition techniques include the rule of thirds for balanced framing and using leading lines to guide the viewer’s eye into the scene, enhancing depth and interest in your photos.

How can I utilize natural light in my landscape photography?

Utilizing natural light involves understanding how different types of light affect your images, experimenting with the golden hour, and capturing unique lighting conditions after rainstorms for dramatic effects.

What are some free editing software options for post-processing photos?

Free editing software options include GIMP and RawTherapee, which provide a robust set of features for adjusting exposure, contrast, and color balance without incurring costs.

What mobile editing apps are recommended for landscape photography?

Recommended mobile editing apps include Snapseed and Lightroom Mobile, which allow for quick adjustments on the go, such as cropping, brightness adjustments, and applying filters directly from your phone.

Maximize Impact: Editing Techniques for Urban Photos

Urban photography captures the heartbeat of city life, revealing stories hidden in the streets. The power of editing can transform these images, enhancing their impact and drawing viewers into the urban narrative. Read Interesting article: Transform Your Urban Photos: Essential Editing Tips

Maximize Impact: Editing Techniques for Urban Photos

Understanding Urban Photography

The Essence of Urban Photography

When I think about urban photography, I imagine bustling streets, towering skyscrapers, and vibrant street art. It’s more than just a pretty picture; it’s about capturing the essence of a place and its people. Urban photography tells the stories of cities, reflecting their culture, energy, and sometimes even their struggles. It allows us to see the world from different perspectives, bringing attention to details we might overlook in our daily lives. Read Interesting article: Urban Street Photography: Techniques for Capturing Life

Every photo has the potential to evoke emotions and provoke thoughts. For me, the most powerful urban images often showcase a conversation between light and shadow, movement and stillness. The contrast of human life against the backdrop of architecture can create a dynamic visual story that resonates deeply. I believe that understanding this essence is crucial for anyone looking to maximize the impact of their urban photos.

Key Elements of Urban Composition

As I ventured into urban photography, I quickly realized that composition plays a vital role in storytelling. Here are some key elements that I’ve found essential:

  • Leading Lines: Streets, sidewalks, and buildings can guide the viewer’s eye through the photograph. I often look for natural lines that draw attention to my subject.
  • Framing: Utilizing elements like windows, doors, or even trees can create a frame within the frame, adding depth and interest to the shot. I love experimenting with this technique to make the viewer feel like they’re stepping into the scene.
  • Rule of Thirds: Placing the main subject off-center can create a more engaging composition. I often find that breaking this rule leads to more exciting images, but it’s a good starting point for beginners.
  • Texture and Patterns: Urban environments are rich with textures and patterns, from brick walls to graffiti. I try to capture these details, as they add layers to the story and engage the viewer’s senses.
  • Juxtaposition: The contrast between different elements, such as old and new architecture or nature versus urban settings, can make a powerful statement. I find that these contrasts often tell the most compelling stories.

These elements are just the beginning. While I’ve learned to appreciate them through trial and error, they can be refined through editing to maximize their impact. With the right techniques, we can enhance our photos in ways that truly resonate with our audience.

Essential Editing Techniques for Urban Photos

Color Correction and Grading

Once I’ve captured my urban images, the next step is editing, particularly color correction. I’ve often found that the colors in my raw images don’t always represent the vibrancy of the scene I experienced. Whether it’s adjusting the white balance to eliminate unwanted tints or enhancing the saturation to make hues pop, I believe color correction is essential for conveying the mood of the photograph.

Color grading can take it further by creating a specific atmosphere. For instance, I sometimes want a warm, inviting tone to reflect the golden hour, while other times, I might opt for cooler tones to evoke a sense of calm. This choice can dramatically affect how viewers interpret the scene.

Enhancing Contrast and Brightness

Contrast is another powerful tool in my editing arsenal. I often play with contrast to give my photos depth and dimension. Increasing contrast can help separate the subject from the background, making it stand out. I’ve found that balancing contrast with brightness is key; too much contrast can make an image look harsh, while too little can render it flat.

Finding that sweet spot often takes some experimentation. I recommend adjusting these settings until the photo feels just right. For me, the goal is to create an image that is visually striking while still maintaining a natural look.

Sharpening and Noise Reduction

Another editing step I pay attention to is sharpening. Urban scenes can be full of intricate details, and sharpening helps bring those to life. I focus on enhancing the details without overdoing it; too much sharpening can lead to unnatural-looking images. Noise reduction is equally important, especially in low-light situations, where grain can detract from the overall quality. I’ve learned to strike a balance, ensuring my images are crisp and clean.

Crop and Reframe: Focusing on the Subject

Sometimes, I find that cropping is the simplest way to improve a photograph. It allows me to remove distractions and focus on the main subject. I often experiment with different crops to see how they affect the overall composition. This technique can breathe new life into an otherwise mundane photo. I’ve also learned that reframing can lead to unique perspectives that I may not have initially considered.

When editing urban photos, I always keep in mind the story I want to tell. Each adjustment I make should serve that narrative. Whether it’s enhancing the mood with color grading or focusing on the subject through cropping, I believe every choice contributes to the overall impact of the image.

Popular Editing Software and Tools

Adobe Lightroom

I’ve spent countless hours in Adobe Lightroom, and I can honestly say it’s one of my favorite tools for editing urban photography. Its intuitive interface makes it easy to navigate, and the range of features is impressive. The ability to adjust exposure, contrast, and color grading all in one place is a game-changer. I often find myself using the graduated filter and radial filter tools to enhance specific areas of my images, creating a focal point that draws the viewer’s attention.

One feature I particularly love is the ability to create and save presets. After spending time perfecting a look, I can apply it to other images with just a click. This not only saves time but also helps to maintain consistency across my urban photo series. If you’re looking for a reliable software option that balances power and user-friendliness, I highly recommend giving Lightroom a try.

Adobe Photoshop

While Lightroom is fantastic for overall edits, I turn to Adobe Photoshop for more detailed adjustments. This software opens up a world of possibilities, especially when I want to manipulate an image in more complex ways. For example, I’ve used Photoshop to remove unwanted elements from a photo or to blend multiple shots together for a composite image.

One technique I enjoy is using the clone stamp and healing brush tools to clean up distractions. It can be tedious, but the results are often worth it. Photoshop also allows for advanced layering techniques, which I’ve found helpful when creating unique effects or enhancing specific details in my urban shots. It’s a powerful tool that, when mastered, can elevate your work significantly.

Mobile Editing Apps (Snapseed, VSCO, etc.)

As much as I love my desktop editing software, I can’t overlook the convenience of mobile editing apps. Snapseed is one of my go-to apps for quick fixes while I’m out and about. Its user-friendly interface means I can make adjustments on the fly, which is perfect for those spontaneous urban shots. I particularly enjoy the selective adjust feature that allows me to tweak exposure, saturation, and contrast in specific areas of the photo.

VSCO is another favorite of mine for its stylish filters. While I typically prefer to edit my photos in a more manual way, there’s something about the curated aesthetic of VSCO filters that can enhance my urban images beautifully. I’ve even found that using these apps, I can create a cohesive look for my social media feed, making my work feel more polished and intentional.

Advanced Editing Techniques

Layering and Blending Modes

Once I started exploring advanced editing, layering and blending modes became fascinating tools in my editing process. Using layers in Photoshop, I can adjust individual elements of a photo without affecting the whole image. This is particularly useful for urban photography, where different aspects of the scene might need varying levels of enhancement.

Blending modes allow me to experiment with how layers interact with each other. For instance, I enjoy using the ‘multiply’ mode to darken specific areas or the ‘screen’ mode to add brightness. I’ve found that playing around with these settings can lead to unexpected and unique effects that truly make my photos stand out.

Creating HDR Images for Urban Landscapes

High Dynamic Range (HDR) photography is another technique I’ve embraced for urban landscapes. I love how it captures a wider range of light and detail, especially in scenes with stark contrasts between light and shadow. To create an HDR image, I typically take multiple exposures of the same scene and blend them together in post-processing.

The software I use often has an HDR merging feature that simplifies this process. I remember the first time I tried it; the results were breathtaking. The vibrancy and detail it brought to my urban images were unlike anything I had achieved with a single exposure. It’s a fantastic way to showcase the complexity of city life, bringing out the beauty in both highlights and shadows.

Using Presets and Filters Effectively

While I love creating my own looks, I’ve also learned the value of using presets and filters. The key is to use them wisely; I often tweak them to fit my style rather than applying them straight out of the box. There’s something satisfying about starting with a preset and then fine-tuning it to make it uniquely mine.

In my experience, using filters can help evoke a specific mood or atmosphere. For instance, if I want to convey a gritty urban vibe, I might choose a filter that desaturates colors and adds a bit of grain. Conversely, for a bright and lively street scene, I opt for something that enhances colors and sharpness. It’s all about finding the right balance to enhance the story I want to tell through my images.

Styling Your Urban Photos

Black and White vs. Color Photography

One of the most exciting decisions I face while editing urban photos is choosing between black and white and color. Each style tells a different story and evokes different feelings. I remember the first time I converted a vibrant street scene into black and white; the transformation was incredible. It stripped away the distractions of color and brought the focus to shapes, textures, and emotions. The rawness of black and white can highlight the grit and beauty of city life, allowing viewers to feel the atmosphere more intensely.

On the other hand, color photography has its allure, too. It captures the vibrancy of street art, the bustling life in markets, and the glow of neon lights. I love how color can convey mood instantly. A warm sunset can evoke feelings of nostalgia, while cooler tones might feel more subdued. I often find myself experimenting with both styles to see which one resonates more with the story I want to tell. It’s like having two different languages at my disposal, each with its own unique way of expressing emotions.

Creating a Consistent Aesthetic

As I’ve developed my urban photography style, I’ve realized that consistency in editing is key, especially if I want my work to be recognizable. I believe that a cohesive aesthetic can help build my personal brand and create a stronger connection with my audience. To achieve this, I often create a mood board that captures the colors, tones, and styles that inspire me.

When editing, I try to stick to a specific color palette and adjust my images to fit that theme. For example, if I’m leaning towards a warm, nostalgic feel, I’ll use similar color grading techniques across my photos. I’ve found that this not only makes my work more visually appealing but also creates a stronger narrative thread that ties my series together. If you’re looking to establish your style, I recommend taking the time to identify what resonates with you and applying those elements consistently across your portfolio.

Urban Minimalism: Less is More

Urban minimalism is a trend that I’ve become increasingly drawn to in my photography. It emphasizes simplicity and can often highlight the beauty in everyday scenes that might go unnoticed. I remember capturing a lone figure waiting at a bus stop against a backdrop of stark architecture. By removing unnecessary elements from the frame, I was able to focus on the isolation and contemplation of that moment.

In my experience, embracing minimalism can create powerful imagery that invites viewers to engage more deeply with the subject. I often find that the less cluttered the frame, the more room there is for the story to unfold. This approach isn’t just about stripping away elements; it’s about carefully selecting what remains in the frame to enhance the narrative. If you haven’t tried it yet, I encourage you to experiment with minimalistic compositions in your urban photography—you might be surprised by the results.

Incorporating Textures and Overlays

Finding and Using Textures

Textures can add a whole new dimension to urban photography. I’ve learned that incorporating textures—like the roughness of concrete, the softness of a cloud, or the intricacies of a brick wall—can elevate my images and create a tactile quality. I often spend time looking for interesting textures during my walks through the city, capturing them with my camera or even sourcing them from other resources.

When editing, I like to layer these textures over my images to enhance depth and character. It’s a technique that can create a sense of place and time, making the viewer feel as though they’re stepping right into the scene. I remember blending a gritty concrete texture into an otherwise bright street shot; the result was a compelling contrast that added a layer of story to the image. Just remember to adjust the opacity and blending modes so the texture enhances rather than overwhelms the original photo.

Overlay Techniques for Unique Effects

Overlay techniques are another fantastic way to add uniqueness to urban photography. I often experiment with light leaks, bokeh effects, or even film grain overlays to create a specific mood. These elements can evoke nostalgia or a sense of whimsy that complements the urban environment. For instance, a soft light leak can transform a sunset shot into something ethereal and dreamlike, while a gritty film grain can add a vintage feel to a contemporary scene.

In my experience, the key to successful overlays is subtlety. A little can go a long way, and I find that overdoing it can detract from the original image. I typically start with a low opacity and gradually increase it until I achieve the desired effect. This way, I can ensure that the overlay enhances the story without taking away from the beauty of the urban scene I captured. If you haven’t tried using overlays yet, I highly recommend it—it’s a playful way to infuse your personality into your work.

Frequently Asked Questions

What is the essence of urban photography?

The essence of urban photography lies in capturing the heartbeat of city life, telling the stories of places and their people. It reflects culture, energy, and struggles, allowing viewers to see the world from different perspectives and notice details often overlooked in daily life.

What are some key elements of urban composition?

Key elements of urban composition include leading lines, framing, the rule of thirds, texture and patterns, and juxtaposition. These elements help guide the viewer’s eye, create depth, and tell compelling stories through contrasting visuals.

Why is color correction important in urban photography?

Color correction is important because raw images may not accurately represent the vibrancy of the scene. Adjusting white balance and enhancing saturation can convey the mood of the photograph effectively, while color grading can create a specific atmosphere.

What role does contrast and brightness play in editing urban photos?

Contrast adds depth and dimension to urban photos, helping to separate the subject from the background. Balancing contrast with brightness is crucial; too much contrast can make an image harsh, while too little can render it flat.

How can cropping improve a photograph?

Cropping can enhance a photograph by removing distractions and focusing on the main subject. Experimenting with different crops can lead to unique perspectives and breathe new life into the image.

Which software is recommended for editing urban photography?

Adobe Lightroom is highly recommended for overall edits due to its intuitive interface and range of features. Adobe Photoshop is suggested for more detailed adjustments, while mobile editing apps like Snapseed and VSCO are great for quick fixes on the go.

What is High Dynamic Range (HDR) photography?

High Dynamic Range (HDR) photography captures a wider range of light and detail by blending multiple exposures of the same scene. This technique is particularly effective in urban landscapes, showcasing the beauty in both highlights and shadows.

How does one create a consistent aesthetic in urban photography?

Creating a consistent aesthetic involves establishing a cohesive color palette and style throughout your work. Using a mood board to capture inspiring colors and tones can help maintain visual appeal and strengthen the narrative across a series of photos.

What is urban minimalism in photography?

Urban minimalism emphasizes simplicity by focusing on fewer elements within a frame. This approach highlights beauty in everyday scenes and can create powerful imagery that invites deeper engagement with the subject.

How can textures and overlays enhance urban photography?

Textures can add dimension and a tactile quality to urban photography, while overlays like light leaks or film grain can create unique moods. Subtle use of these techniques can enhance the story of the image without overwhelming the original scene.

Edit Urban Photography Like a Pro: Step-by-Step Guide

Urban photography is a vibrant and expressive form of art that captures the heartbeat of city life. Whether you’re a seasoned pro or just starting, mastering the editing process can elevate your photos from ordinary to extraordinary. Read Interesting article: Transform Your Urban Photos: Essential Editing Tips

Edit Urban Photography Like a Pro: Step-by-Step Guide

Understanding Urban Photography

What is Urban Photography?

Urban photography is all about capturing the essence of city life. I remember my first time walking through a bustling downtown area, my camera in hand, feeling inspired by the energy around me. Urban photography encompasses everything from architectural shots to candid moments of daily life. It’s about conveying a story, an emotion, or simply the beauty of the urban environment. For me, it’s a way to explore and document the world around us, highlighting the unique character of different cities.

Key Elements of Urban Photography

When I think about what makes urban photography special, several key elements come to mind. Light and shadow play crucial roles. I often find that early mornings or late afternoons provide the best natural light, casting interesting shadows that can add depth to my images. Composition is another vital aspect. I usually try to incorporate leading lines, symmetry, or contrasting colors to draw viewers in. Finally, capturing the human element, whether it’s people walking, biking, or engaging in street performances, adds life and relatability to my photos. Each element works together to create a compelling visual narrative.

Popular Urban Photography Styles

Urban photography is diverse, and exploring different styles can be an exciting journey. I’ve dabbled in street photography, which focuses on candid moments and the spontaneous nature of urban life. Then there’s architectural photography, where I pay homage to the buildings and structures that define a city’s skyline. I also enjoy documentary-style photography, capturing everyday life in a way that tells a broader story about the urban experience. Each style has its unique charm, and experimenting with them can help refine my skills and enhance my creative vision. Read Interesting article: Explore Iconic Urban Photography Locations on a Budget

Essential Tools for Editing Urban Photography

Camera Equipment and Settings

The right equipment makes a difference when capturing urban scenes. I remember investing in a good DSLR camera, which allowed me to play with settings like aperture and shutter speed. I usually shoot in RAW format, as it provides greater flexibility during editing. A versatile lens, such as a 24-70mm, is my go-to because it allows me to capture wide cityscapes and closer details without changing lenses constantly. I’ve also learned that stabilizing my camera with a tripod can help prevent blurriness, especially in low-light situations.

Editing Software Options

When it comes to editing my urban photos, I’ve discovered several software options that cater to different skill levels and needs. Adobe Lightroom has become my favorite for organizing and processing images. Its user-friendly interface and powerful editing tools make it easy for me to enhance my photos. Photoshop is another essential tool, especially for more complex edits. I often switch between the two, depending on the adjustments required. Recently, I’ve also started exploring Capture One, which offers excellent color grading capabilities that I find particularly useful for urban photography.

Mobile Apps for Quick Edits

Sometimes, I’m out and about and want to share a quick edit on social media, and that’s where mobile apps come in handy. I’ve tried several, but my favorites are Snapseed and VSCO. Snapseed provides a wide range of editing tools, from basic adjustments to advanced features like selective editing. VSCO, on the other hand, offers beautiful presets that can give my images that polished look with just a few taps. Both apps allow me to edit on the go, ensuring I don’t miss sharing those urban moments.

Step-by-Step Editing Process

Importing Your Photos

Once I’ve captured my urban shots, the first thing I do is import my photos into my editing software. This step may seem simple, but it’s crucial. I usually create a dedicated folder for each shoot on my computer, which helps keep everything organized. Using software like Adobe Lightroom, I can import images directly from my camera or memory card. I’ve found this process to be seamless, and it allows me to start sorting through my images right away. I often take this time to review my shots, flagging the best ones that I want to focus on during editing.

Organizing Your Workflow

As I sift through my photos, I like to establish a workflow that makes sense for me. I categorize my images by shooting conditions, such as time of day or location. This method can simplify the editing process later on. For example, if I’ve shot a series of images in a specific area during sunset, I can easily find those shots when I’m ready to edit. I also use ratings or color labels to highlight my favorites, which helps me identify the best candidates for editing quickly. This organization saves me time and reduces the overwhelm that can come when I have hundreds of photos to sort through.

Basic Adjustments

When I sit down to edit, I start with basic adjustments that lay the groundwork for a polished final image. These initial tweaks can dramatically improve the overall look of my urban photos.

Exposure and Contrast

One of the first things I adjust is exposure. Sometimes, I find that my urban shots can be a little too dark or washed out, depending on the lighting conditions when I shot them. I gradually tweak the exposure slider until I achieve a balanced look. I often boost the contrast slightly to help the colors pop and add depth to the image. It’s all about finding that sweet spot where the details shine without looking overly edited.

White Balance

Next, I tackle the white balance. Urban environments can have tricky lighting, especially with artificial lights at night. I usually adjust the temperature to give my images a natural feel. If the photo has a yellow or blue tint, I’ll correct it by either warming or cooling down the colors. I often find that using the eyedropper tool to select a neutral area in the image helps me achieve a more accurate white balance.

Crop and Straighten

Finally, I like to crop and straighten my images. I’ve learned that a well-composed photo can be significantly improved by adjusting the framing. I check for any distractions at the edges of the frame that might pull a viewer’s eye away from the main subject. Straightening is crucial too; I can’t stand when a photo looks slanted! I often use grid overlays to help me align my shots properly.

Advanced Editing Techniques

Once I’ve made those basic adjustments, it’s time to dive into more advanced editing techniques that really bring my urban photography to life. Read Interesting article: Top 10 Urban Photography Spots for Budget Backpackers

Color Grading for Urban Vibes

I love experimenting with color grading to create a specific mood in my images. Urban settings can take on different vibes depending on the colors I choose. I often play with hue and saturation sliders to enhance certain colors that reflect the character of the city. For instance, if I want to emphasize the blue tones of the sky or the warm glow of streetlights, I’ll adjust those colors accordingly. I’ve found that color grading can transform an ordinary photo into something striking and memorable.

Sharpening and Noise Reduction

Another critical step is sharpening and noise reduction. Urban environments can feature a lot of detail, and I want my images to showcase that. I use the sharpening tool to enhance the edges of my subjects, making them stand out. However, I’m careful not to overdo it, as too much sharpening can create unwanted artifacts. Noise reduction comes into play, especially in low-light situations. I often find that applying a little noise reduction helps smooth out graininess without sacrificing detail.

Blending Multiple Exposures

Sometimes, I capture multiple exposures for a single scene, especially in high-contrast situations where I want to retain details in both the shadows and highlights. I’ve learned to blend these exposures using layer masks in Photoshop. This technique allows me to create a balanced image that showcases the full dynamic range of the scene. I find this method particularly rewarding, as it can result in stunning urban landscapes that truly convey the essence of the moment.

Creative Enhancements for Urban Photography

Adding Filters and Presets

One of my favorite ways to give my urban photos a unique flair is by using filters and presets. I’ve found that applying the right filter can instantly change the mood of an image. For instance, when I want to evoke a nostalgic feel, I often reach for warm, vintage-inspired filters. These filters can subtly enhance colors and textures, making my photos feel alive.

While many editing software options come with built-in filters, I also enjoy exploring third-party presets. I remember downloading a few from popular photographers whose styles I admire. These presets saved me time and often served as a great starting point for my edits. It’s like having a creative guide at my fingertips! By tweaking the intensity of these presets, I can customize them to fit my vision, blending my style with their unique touch.

Incorporating Textures and Overlays

Textures can breathe new life into my urban photographs, adding depth and interest. I often think about how urban environments are filled with fascinating surfaces – brick walls, rough pavements, and intricate graffiti. By incorporating textures into my edits, I can mimic that complexity. I’ve experimented with overlaying textures like scratches, grunge effects, or even light leaks. It’s amazing how these elements can transform an image from a simple snapshot into a piece of art that tells a story.

To do this, I usually select a texture layer in Photoshop and adjust the blending mode to create the desired effect. Lowering the opacity allows the underlying image to show through while adding that extra layer of visual interest. I remember one time, I added a subtle concrete texture to a photo of a bustling street. It not only enhanced the urban feel but made the colors pop in a way that felt authentic and real. It was a little detail that made such a big difference!

Utilizing Light Leaks and Lens Flares

Light leaks and lens flares can bring a dreamy quality to urban photography, which I absolutely love. These effects create a sense of warmth and spontaneity, as if the image captures a fleeting moment of magic. Sometimes, I find that adding a light leak can create that perfect burst of color that draws the viewer in right away.

When I’m editing, I’ll often browse through different light leak overlays and experiment with their placement and opacity. I remember using a soft pink light leak on a photo of a city park during golden hour. The result was breathtaking; it enhanced the warm hues of the sunset and added a romantic touch to the scene. I think that using these effects should be about enhancing the story I want to tell, not overshadowing the main subject. They should feel like a natural part of the urban landscape.

Final Touches Before Exporting

Reviewing Your Edits

Once I’ve completed my edits, I find it essential to take a step back and review my work. This process helps me ensure that the final image aligns with my vision. I typically zoom in and check the details, ensuring there’s no unwanted noise or artifacts from my editing. Sometimes, I’ll even let the image sit for a while and return with fresh eyes. It’s amazing how a little distance can help me spot things I might have missed initially.

Another technique I use is comparing my edited image with the original. This helps me see how far I’ve come and whether the adjustments serve the story I want to convey. I’ve found that this comparison can be an excellent way to ensure I haven’t over-edited my photos, preserving the authenticity of the urban scene.

Export Settings for Different Platforms

When it comes time to export my images, I pay close attention to settings. Different platforms require different formats and sizes. For example, when I’m preparing photos for Instagram, I usually export them as JPEGs at a resolution of around 1080 pixels on the longest side. This ensures my images look sharp without being too large for quick uploads.

On the other hand, if I’m preparing images for a gallery or print, I’ll export them in TIFF format for the highest quality. I remember the first time I printed one of my urban landscapes; seeing it in physical form was exhilarating. I always make sure to check the color profile as well, using sRGB for online sharing and Adobe RGB for prints to capture a wider color range.

Best Practices for Sharing on Social Media

Sharing my work on social media is one of the most rewarding parts of being an urban photographer. I’ve learned that presenting my images thoughtfully can make a big difference in how they’re received. I always think about the caption and how it can enhance the viewer’s experience. I try to share a story behind the photo, whether it’s about the location or the moment I captured.

Consistency is key too. I aim for a cohesive look across my social media feed, which often involves using similar editing styles and color palettes. This not only helps in branding but also makes my work more recognizable. I remember scrolling through my feed one day and feeling a sense of pride in how my images flowed together. It felt like a visual diary of my urban adventures!

Common Mistakes to Avoid in Urban Photography Editing

Over-Editing Your Images

One of the most common pitfalls I’ve encountered in urban photography editing is the tendency to over-edit my images. It’s so easy to get caught up in the excitement of enhancing colors or sharpening details, but I’ve learned that less is often more. When I first started editing, I remember pushing the sliders to extremes, thinking that bold colors and heavy contrast would make my photos stand out. However, many of those images ended up looking unnatural, losing the very essence of the urban scenes I wanted to capture. Now, I try to approach editing with restraint, ensuring that my tweaks enhance rather than detract from the authenticity of the photograph.

Ignoring the Urban Environment

Another mistake I often see is ignoring the context of the urban environment. Each city has its own unique character, and I believe it’s essential to reflect that in my edits. I remember a time when I edited an image taken in a gritty part of town, applying a soft, pastel filter that felt out of place. It didn’t resonate with the raw energy of the scene. Instead, I’ve found that embracing the character of the environment helps me create a more cohesive and meaningful image. Whether it’s enhancing the vibrant street art or the textures of old buildings, I try to align my edits with the story the city is telling.

Neglecting Composition in Post-Processing

Composition is crucial in photography, and it doesn’t stop in the editing phase. In my earlier days, I would sometimes neglect the composition during post-processing, thinking that cropping could fix any issues. While cropping can indeed help, I’ve learned that it’s important to start with a well-composed shot. I remember one photo where I had a stunning subject in the frame, but it was slightly off-center. Instead of adjusting the composition in the editing phase, I should have taken the time to reframe the shot when capturing it. Now, I focus on composition both in-camera and during editing to ensure my images are balanced and visually appealing.

Resources for Further Learning

Online Courses and Tutorials

As I’ve continued to refine my urban photography skills, I’ve found online courses and tutorials to be incredibly helpful. Websites like Skillshare and Udemy offer a variety of classes focused on photography techniques, editing skills, and even specific urban photography styles. I remember taking a course on street photography that opened my eyes to new techniques and perspectives. These resources can provide structured learning and inspiration that helps push my creativity further.

Photography Forums and Communities

Engaging with photography forums and communities has been a game-changer for me. Sites like Reddit and Flickr allow me to connect with fellow urban photographers, share my work, and get valuable feedback. I love participating in discussions and seeing how others approach similar challenges. These communities are fantastic for learning new tips, discovering different editing techniques, and finding motivation from like-minded individuals.

Recommended Books on Urban Photography

Books are another fantastic resource for deepening my understanding of urban photography. I’ve read several that have inspired me to see the world differently. One of my favorites is “The Photographer’s Eye” by Michael Freeman, which delves into composition and design principles that are essential for any photographer. Another great read is “Street Photography: The Art of Capturing the Candid Moment” by Gary Winogrand, which provides insights into capturing authentic urban life. These books have helped shape my style and approach, and I always keep them close for reference.

Final Thoughts

Urban photography has become a passion of mine, and mastering the editing process has been a significant part of that journey. Each step, from capturing the image to the final touches before sharing, is an opportunity to express my unique perspective on city life. I encourage you to embrace your own style and experiment with different techniques. Remember that editing is not just about enhancing photos but also about telling a story and evoking emotions. So grab your camera, explore your urban surroundings, and let your creativity shine through every edit you make!

Frequently Asked Questions

What is urban photography?

Urban photography is an art form that captures the essence of city life, encompassing everything from architectural shots to candid moments of daily life. It aims to convey a story, emotion, or the beauty of the urban environment.

What are the key elements of urban photography?

The key elements of urban photography include light and shadow, composition, and the human element. These aspects work together to create a compelling visual narrative that captures the unique character of cities.

What styles are common in urban photography?

Common styles in urban photography include street photography, which focuses on candid moments; architectural photography, that highlights city structures; and documentary-style photography, capturing everyday life to tell broader stories about the urban experience.

What camera equipment is recommended for urban photography?

It is recommended to use a good DSLR camera and shoot in RAW format for flexibility in editing. A versatile lens, such as a 24-70mm, is ideal for capturing both wide cityscapes and closer details. A tripod is also helpful to prevent blurriness in low-light situations.

Which editing software is suggested for urban photography?

Adobe Lightroom is favored for organizing and processing images, while Photoshop is essential for more complex edits. Capture One is also recommended for its excellent color grading capabilities.

What basic adjustments should be made during the editing process?

Basic adjustments include tweaking exposure and contrast, adjusting white balance, and cropping and straightening images to improve composition and eliminate distractions.

What advanced editing techniques can enhance urban photography?

Advanced techniques include color grading to create specific moods, sharpening and noise reduction to enhance details, and blending multiple exposures to capture a full dynamic range in high-contrast situations.

How can filters and textures enhance urban photography?

Filters can change the mood of an image, while incorporating textures adds depth and interest. Using overlays like scratches or light leaks can transform a simple snapshot into a more artistic piece that tells a story.

What are some common mistakes to avoid in urban photography editing?

Common mistakes include over-editing images, ignoring the unique character of the urban environment, and neglecting composition during post-processing. It’s important to maintain authenticity and focus on well-composed shots from the start.

Where can one find resources for further learning in urban photography?

Resources for further learning include online courses and tutorials on platforms like Skillshare and Udemy, engaging with photography forums and communities like Reddit and Flickr, and reading recommended books on urban photography to deepen understanding and inspiration.