Web Analytics

Recent Posts

Top 10 Breathtaking Locations for Aerial Photography

Aerial photography offers a unique perspective, showcasing stunning landscapes and breathtaking views from above. Whether you’re an experienced photographer or a curious beginner, exploring the world through aerial lenses is an adventure like no other. Read Interesting article: Budget Backpacking: Enhance Aerial Photos with Simple Edits

Top 10 Breathtaking Locations for Aerial Photography

What is Aerial Photography?

Definition and Techniques

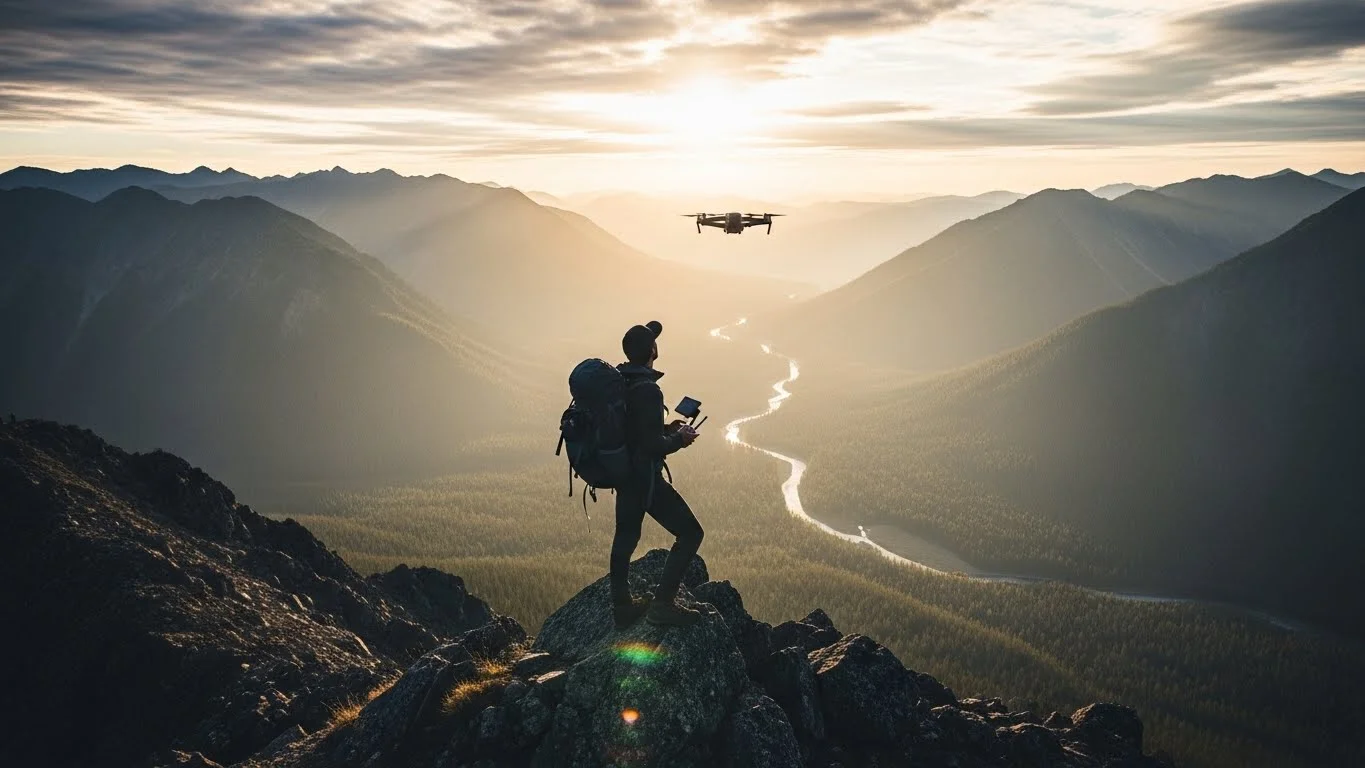
Aerial photography is the art of capturing images from an elevated position, typically from aircraft, drones, or even tall structures. I remember the first time I shot aerial photos; the sense of freedom I felt was incredible. It’s not just about the height; it’s about the angles, the light, and the incredible landscapes that often go unnoticed from the ground. The techniques can vary widely, from using high-end drones equipped with advanced cameras to traditional aircraft like helicopters or planes. Each method offers a different experience and results.

One popular technique I’ve enjoyed is using drones, which allow for precision and creativity. With a drone, you have the flexibility to shoot dynamic angles, such as directly overhead or at low altitudes. I’ve learned that planning is crucial; knowing your subject and how the light interacts with it can make all the difference in the final image. Experimenting with various heights and distances has also helped me find unique compositions that draw viewers in. Read Interesting article: Top Techniques for Editing Aerial Photos on a Budget

Equipment Needed for Aerial Photography

When I first ventured into aerial photography, I quickly realized that having the right equipment can greatly enhance the experience. A good quality drone is essential, and I recommend starting with a model that offers 4K video and high-resolution stills. Some popular options include the DJI Mavic series or the Phantom series, which I’ve found user-friendly and reliable.

Beyond the drone, a solid camera is essential. Many drones come with built-in cameras, but I’ve often attached my DSLR or mirrorless camera for better quality images. A wide-angle lens is particularly useful for capturing expansive landscapes. I also recommend investing in filters, such as ND filters, which help manage exposure and create stunning effects in bright sunlight.

Don’t forget about batteries! I’ve made the mistake of running out mid-session, which can be frustrating. Having extra batteries and a portable charger can extend your shooting time. Additionally, a sturdy backpack is great for carrying your gear and protecting it while you’re on the go.

Top 10 Locations for Aerial Photography

1. Grand Canyon, USA

Best Time to Visit

The Grand Canyon is a photographer’s paradise, with its vast and colorful layers of rock. I’ve found that visiting during the early morning or late afternoon provides the best light, enhancing the canyon’s textures and colors. Spring and fall are also great times to visit, as the weather is mild and crowds are thinner.

Unique Features to Capture

When I flew over the Grand Canyon, the meandering Colorado River stood out beautifully, reflecting the sunlight in shades of turquoise. The contrast between the rugged rock formations and the lush greenery along the riverbanks is something I still think about. From above, the sheer scale of the canyon is awe-inspiring, and capturing the shadows cast by the canyon walls during sunrise or sunset creates stunning images.

2. Santorini, Greece

Best Time to Visit

Santorini is famous for its whitewashed buildings and stunning sunsets, making it a dream location for aerial photography. I recommend visiting during the shoulder seasons of late spring or early fall to avoid the summer crowds while still enjoying pleasant weather.

Unique Features to Capture

The iconic blue domes of Oia are even more mesmerizing from the air. The contrast of the white buildings against the deep blue Aegean Sea is something I’ve never tired of photographing. I also love capturing the caldera views and the intricate patterns of the terraced vineyards that can only be appreciated from above.

3. Great Barrier Reef, Australia

Best Time to Visit

The Great Barrier Reef is one of the most beautiful natural wonders on the planet. I’ve found that visiting in the dry season, from June to November, provides the clearest waters and the best visibility for aerial shots.

Unique Features to Capture

From above, the vibrant coral formations and the striking blue waters create a breathtaking scene. I’ve enjoyed capturing the intricate patterns of the reef and the various shades of blue that surround it. The contrast between the reefs and the ocean is absolutely stunning, especially during the golden hour.

4. Machu Picchu, Peru

Best Time to Visit

Machu Picchu is a wonder that looks incredible from above. The best time to visit is during the dry season, from May to September. I remember standing above this ancient site, amazed by its beauty.

Unique Features to Capture

The terraces and ruins of Machu Picchu are a sight to behold from the sky. I recommend capturing the mist rising from the mountains at dawn; it creates an ethereal atmosphere that’s magical. The surrounding Andes mountains also provide a dramatic backdrop for your photographs.

5. Dubai, UAE

Best Time to Visit

Dubai is known for its modern architecture and desert landscapes. I suggest visiting between November and March when the temperatures are more bearable for outdoor shooting.

Unique Features to Capture

The skyline, featuring the iconic Burj Khalifa, looks stunning from above. I love capturing the contrast between the urban environment and the surrounding desert. The geometric patterns of the Palm Jumeirah island are another highlight that’s best appreciated from the air.

6. Banff National Park, Canada

Best Time to Visit

Banff National Park is a breathtaking destination I’ve had the pleasure of visiting multiple times. The best time to capture its stunning vistas is during late spring and early fall. In spring, the snow-capped peaks contrast beautifully with the turquoise lakes, and in fall, the vibrant colors of the leaves create a picturesque scene. I’ve found that the early morning light really showcases the beauty of the lakes and mountains, making it an ideal time for aerial photography.

Unique Features to Capture

From the sky, the iconic Lake Louise, with its bright blue water, is simply mesmerizing. I’ve enjoyed capturing the reflections of the surrounding mountains on the lake’s surface. Another must-capture feature is the stunning Moraine Lake, which is surrounded by the Valley of the Ten Peaks. The unique shape and color of the lake create a striking image from above. I often recommend taking a flight over the park to see the expansive views of the wilderness and the intricate patterns formed by the mountain ranges.

7. The Northern Lights, Iceland

Best Time to Visit

Chasing the Northern Lights has been one of my most thrilling experiences. The best time to visit Iceland for aerial photography of the auroras is from late September to early April. I remember standing in awe as the vibrant colors danced across the night sky. The contrast between the dark landscape and the shimmering lights creates unforgettable images.

Unique Features to Capture

Aerial shots of the Northern Lights provide a breathtaking perspective. I loved capturing the ethereal glow of the lights over the rugged Icelandic terrain. Additionally, the juxtaposition of the auroras with glaciers, volcanoes, and waterfalls creates captivating compositions. I’ve found that including elements of the landscape in the foreground adds depth to the photos, making them even more striking.

8. Venice, Italy

Best Time to Visit

Venice is a city like no other, and photographing it from the air is a magical experience. I recommend visiting in the early morning or late afternoon to catch the soft light and avoid large crowds. The spring and early fall months also provide pleasant weather, ideal for exploring and capturing the city’s charm.

Unique Features to Capture

The intricate canals of Venice are mesmerizing from above. I loved capturing the winding waterways framed by the colorful buildings. The contrast of the blue water with the historic architecture creates stunning images. Don’t miss the opportunity to photograph landmarks like the Grand Canal and St. Mark’s Basilica. I found that getting high enough to include both the canals and the surrounding islands adds a unique perspective to the photos.

9. Angkor Wat, Cambodia

Best Time to Visit

Visiting Angkor Wat is like stepping back in time, and capturing its grandeur from the air is an unforgettable experience. The best time to visit is during the dry season, from November to February. I remember the cool mornings that made it pleasant to explore the vast temple complex.

Unique Features to Capture

The ancient temples surrounded by lush jungle are magnificent from above. I found that capturing the intricate designs of the temples, especially Angkor Wat itself, is awe-inspiring. The play of light and shadows on the stone structures during sunrise or sunset adds depth to the images. I often focused on the symmetry of the temple layouts, which stands out beautifully when viewed from the sky.

10. Patagonia, Argentina and Chile

Best Time to Visit

Patagonia is one of the most stunning regions I’ve ever photographed. The best time for aerial photography here is during the summer months, from December to February, when the weather is milder. I’ve experienced the wild beauty of the landscapes, which seem to change with every passing hour.

Unique Features to Capture

From above, the dramatic peaks of the Torres del Paine National Park are simply captivating. I loved capturing the contrast between the rocky mountains and the turquoise lakes below. The vast glaciers, like the famous Perito Moreno Glacier, look incredible from the air, showcasing their blue hues against the surrounding landscape. I often found myself drawn to the winding rivers and unique rock formations that make Patagonia one of the most visually stunning places on Earth.

Tips for Capturing Stunning Aerial Photographs

Choosing the Right Time of Day

Timing plays a crucial role in photography, especially for aerial shots. I’ve discovered that the golden hours—shortly after sunrise and before sunset—offer the most beautiful light. The soft, warm tones during these times can enhance landscapes and create dramatic shadows. I always try to plan my flights around these times to capture the best images.

Understanding Light and Shadows

Light can make or break an image. I’ve learned to pay close attention to how light interacts with my subject. Shadows can add depth and interest to an aerial photograph. Experimenting with different angles and times of day can reveal unique patterns and textures that are often overlooked.

Camera Settings for Aerial Photography

Getting the right camera settings is vital for capturing stunning aerial photos. I usually set my camera to shoot in RAW format, which gives me greater flexibility in post-processing. I tend to use a faster shutter speed to minimize motion blur while flying. Adjusting the ISO according to the lighting conditions also helps in achieving clear images. I recommend practicing with different settings to see what works best for your style.

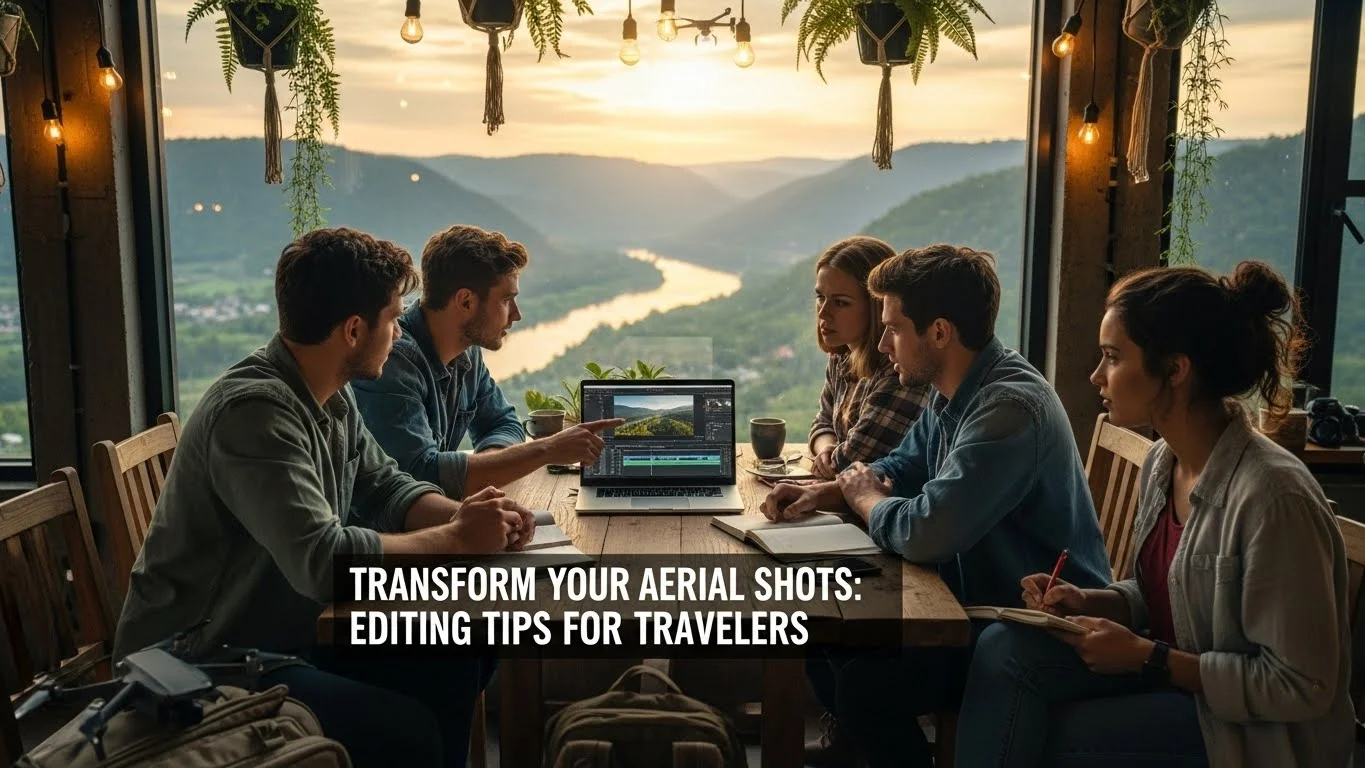
Post-Processing Techniques

Post-processing is where I really bring my images to life. I enjoy using software like Lightroom or Photoshop to enhance colors, adjust contrasts, and crop for better composition. I often apply subtle enhancements to highlight the natural beauty of the landscape without over-editing. Finding a style that reflects my vision for aerial photography has been an exciting part of my journey. Read Interesting article: Mastering Aerial Photo Editing: Essential Tips for Backpackers

Safety and Legal Considerations

Drone Regulations in Different Countries

As I’ve traveled with my drone, I’ve learned that understanding the regulations in different countries is essential. Before flying, I always check local laws regarding drone use, as rules can vary significantly. Some places require permits, while others have strict no-fly zones. I’ve found that being informed not only keeps me safe but also ensures a smoother photography experience.

Safety Tips for Aerial Photography

Safety should always be a priority when engaging in aerial photography. I make sure to conduct pre-flight checks on my drone, ensuring everything is functioning correctly. It’s also important to maintain visual line-of-sight with the drone and avoid flying over crowded areas to minimize risks. I’ve experienced that being aware of my surroundings helps me enjoy my photography sessions while keeping everyone safe.

Recommended Resources for Aerial Photographers

Online Communities and Forums

One of the best ways to grow as an aerial photographer is to connect with others who share the same passion. I’ve found that online communities and forums are invaluable for sharing experiences, gaining insights, and seeking feedback on my work. Websites like DPReview and Reddit’s r/drones have active discussions where you can ask questions, share your photos, and learn from seasoned aerial photographers.

Facebook groups are another fantastic resource. I’ve joined several dedicated to aerial photography and drone enthusiasts. These groups often host challenges, offer tips, and even provide information about local meetups. Seeing the diverse work of others can inspire me and help me discover new techniques I hadn’t considered before.

Books and Courses on Aerial Photography

When I decided to dive deeper into aerial photography, I turned to books and online courses for guidance. I recommend starting with “The Photographer’s Guide to Drones” by Colin Smith. This book covers everything from the basics of drone operation to advanced photography techniques. It’s been a great reference for me, especially when experimenting with new styles.

Online platforms like Udemy and Skillshare offer a range of courses specifically focused on aerial photography. I’ve taken several courses that taught me about composition, editing, and even how to navigate the legal landscape of drone use. Learning from experienced instructors has helped me refine my skills and broaden my perspective on what’s possible with aerial photography.

Equipment Reviews and Recommendations

With technology constantly evolving, staying updated on the latest gear is essential for any photographer. I often check websites like TechRadar and Digital Trends for reviews on the newest drones and camera equipment. Reading reviews helps me make informed decisions about what to invest in next.

YouTube is also a treasure trove of equipment reviews and tutorials. I love watching unboxing videos and hands-on demonstrations. Channels like Mavic Pilots and DroneDJ provide in-depth analysis and user experiences that can be incredibly helpful. Seeing footage captured with different gear gives me a better sense of what I might want to add to my kit.

Finally, I recommend following established photographers on social media platforms like Instagram. Not only can you see their incredible work, but they often share behind-the-scenes looks at their gear and techniques. I’ve discovered new tools and accessories simply by following my favorite aerial photographers and observing how they create their stunning images.

Final Thoughts

Aerial photography has truly opened my eyes to the beauty of our world from a completely different angle. It’s not just about capturing stunning images; it’s about experiencing the thrill of seeing landscapes unfold from above. I remember the first time I launched my drone and watched it soar into the sky, my heart racing with excitement and curiosity. Each time I’m up in the air, I feel a sense of adventure that drives me to explore more and discover hidden gems that I might have missed while wandering on foot.

For anyone considering diving into aerial photography, I wholeheartedly encourage you to take that leap. Start small, whether it’s with a simple drone or even capturing images from the top of a hill. I’ve learned that the journey is just as rewarding as the final photographs. Each flight has taught me something new—about my equipment, my surroundings, and myself as a photographer.

As we’ve explored various locations, tips, and resources, I hope you feel inspired to chase your own aerial photography dreams. The world is full of breathtaking views just waiting to be captured, and each unique angle offers the potential for a story. Remember to embrace the learning process, connect with other photographers, and most importantly, have fun while you create. I know I will continue to explore and capture the beauty of our planet from the skies for years to come.

So, grab your gear, plan your next adventure, and let the skies be your canvas. Who knows? You might just uncover your new favorite perspective on the world.

Frequently Asked Questions

What is aerial photography?

Aerial photography is the art of capturing images from an elevated position, typically using aircraft, drones, or tall structures. It allows photographers to explore unique perspectives and landscapes that are often overlooked from the ground.

What equipment is necessary for aerial photography?

Essential equipment for aerial photography includes a good quality drone capable of 4K video and high-resolution stills, a solid camera (such as a DSLR or mirrorless), a wide-angle lens, filters like ND filters, extra batteries, and a sturdy backpack for carrying gear.

What are the best times to visit the Grand Canyon for aerial photography?

The best times to visit the Grand Canyon for aerial photography are early morning or late afternoon, as these times provide the best light for enhancing the canyon’s textures and colors. Spring and fall are also recommended for milder weather and fewer crowds.

Which locations are considered top spots for aerial photography?

Some of the top locations for aerial photography include the Grand Canyon (USA), Santorini (Greece), Great Barrier Reef (Australia), Machu Picchu (Peru), Dubai (UAE), Banff National Park (Canada), Northern Lights (Iceland), Venice (Italy), Angkor Wat (Cambodia), and Patagonia (Argentina and Chile).

What tips can help capture stunning aerial photographs?

To capture stunning aerial photographs, consider timing your shots during the golden hours (shortly after sunrise and before sunset) for the best light. Pay attention to how light interacts with subjects and experiment with different angles and heights for unique compositions.

What camera settings are recommended for aerial photography?

When shooting aerial photos, it’s advisable to set your camera to RAW format for better post-processing flexibility. Use a faster shutter speed to minimize motion blur, and adjust the ISO according to the lighting conditions to achieve clear images.

How important is post-processing in aerial photography?

Post-processing is crucial in aerial photography as it enhances colors, adjusts contrasts, and improves composition. Utilizing software like Lightroom or Photoshop can help bring images to life while reflecting the photographer’s vision.

What safety considerations should be taken when using drones for aerial photography?

Safety considerations include understanding local drone regulations, conducting pre-flight checks, maintaining visual line-of-sight with the drone, and avoiding flying over crowded areas to minimize risks and ensure a safe photography experience.

What resources are recommended for learning about aerial photography?

Recommended resources include online communities and forums like DPReview and Reddit’s r/drones, books such as “The Photographer’s Guide to Drones” by Colin Smith, and online courses from platforms like Udemy and Skillshare that focus on aerial photography techniques.

How can one connect with other aerial photographers?

Connecting with other aerial photographers can be achieved through online communities, Facebook groups, and forums where photographers share experiences, seek feedback, and participate in challenges. Engaging with these platforms can inspire and enhance one’s aerial photography skills.

Budget Backpacking: Enhance Aerial Photos with Simple Edits

Backpacking opens up a world of adventure, and capturing those breathtaking moments from above can elevate your travel memories. With a few simple edits, you can transform your aerial photos into stunning masterpieces. Read Interesting article: Transform Your Aerial Shots: Editing Tips for Travelers

Budget Backpacking: Enhance Aerial Photos with Simple Edits

Understanding Aerial Photography for Backpackers

What is Aerial Photography?

Aerial photography involves capturing images from above the ground, often using drones or other flying devices. I remember the first time I took an aerial photo; it completely changed how I viewed landscapes. Instead of just seeing trees and hills, I saw patterns, shapes, and the bigger picture. It’s like stepping into a new dimension where the world unfolds beneath you. Aerial photography is not just about taking pictures; it’s about telling a story from a new perspective. For backpackers like us, this can mean showcasing the beauty of a hard-earned vista or capturing the vastness of nature.

Benefits of Aerial Photography for Backpackers

In my experience, aerial photography brings several unique benefits to backpackers:

  • Showcases Scale: When you’re on the ground, it’s hard to appreciate the scale of a mountain or canyon. Aerial shots reveal how small we are in comparison to the grandeur of nature.
  • Captures Unique Perspectives: Traditional photos might miss the essence of a breathtaking view. Aerial photography gives us a fresh angle, highlighting features we might overlook.
  • Memorable Souvenirs: After a long trek, returning home with stunning aerial photos to share with friends and family adds to the adventure. It’s like giving them a glimpse into our journey.

Essential Equipment for Aerial Photography

Before diving into the world of aerial photography, I learned about the essential gear we need. It’s not just about having a fancy drone; understanding what works for our backpacking adventures is crucial. Here’s what I recommend:

  • Drones: These are the most popular tools for aerial photography. Lightweight drones with good camera capabilities are perfect for backpackers. Look for models known for their portability and decent battery life.
  • Smartphones: Surprisingly, many smartphones today come equipped with impressively high-quality cameras. If you’re not ready to invest in a drone, using your phone can still yield fantastic results. I’ve captured some of my favorite aerial shots using just my smartphone.
  • Camera Stabilizers: If you’re using a camera instead of a drone, stabilizers help keep your shots steady, especially when taking photos while moving.
  • Extra Batteries: When backpacking, I always bring extra batteries for my equipment. The last thing I want is to miss a stunning sunset because my drone ran out of juice!

Budget-Friendly Aerial Photography Gear

Affordable Drones for Backpackers

Finding the right drone can be tricky, especially on a budget. I’ve researched several affordable options that pack a punch without breaking the bank. One of my favorites is the DJI Mini series. They are compact, lightweight, and offer excellent photo quality. Another great option is the Holy Stone HS720, which is also budget-friendly and has features that make it user-friendly, even for beginners. Remember, when choosing a drone, consider its flight time and camera quality to ensure you get the best value for your investment.

Smartphone Camera Options

If you’re not keen on carrying a drone, smartphones can surprise you. Many models, like the iPhone or Samsung Galaxy series, come with advanced camera features like panoramic shots and aerial view modes. You can even enhance your phone’s camera with clip-on lenses, which can improve your aerial photography significantly. I often use my smartphone when hiking in remote areas, as it’s lightweight and easy to carry. Plus, there’s a certain thrill in snapping a photo that looks like it was taken from a drone!

Accessories to Enhance Your Aerial Shots

To get the most out of your aerial photography, consider investing in a few accessories. For drones, a set of ND filters can help manage light exposure, giving your photos a more professional touch. If using a smartphone, a sturdy tripod can stabilize your shots, especially in windy conditions. I also recommend carrying a good quality backpack to protect your equipment while on the trail. It’s important to keep everything safe and organized so you can focus on capturing those beautiful moments. Read Interesting article: Top Techniques for Editing Aerial Photos on a Budget

Basic Aerial Photography Techniques

Framing and Composition

When I started taking aerial photos, I quickly realized that framing and composition are crucial in making a shot truly captivating. Just like any photograph, the way you frame your subject can change everything. I found that using the rule of thirds works wonders. This technique involves dividing your image into a grid of nine equal sections and placing the focal point at one of the intersections. It draws the viewer’s eye to the most interesting parts of the landscape, creating a sense of balance.

Another tip I picked up is to include leading lines in your shots. Roads, rivers, or the edges of fields can guide the viewer’s gaze through the image. I remember capturing a winding river from above, and the way it snaked through the landscape added depth and intrigue to the photo. Experimenting with different angles can also bring out unique textures and patterns in the earth below. Sometimes, that slight shift in angle can make all the difference in how the photo turns out.

Optimal Flying Altitudes for Stunning Shots

The altitude at which you fly your drone can dramatically impact your aerial photography. After some trial and error, I discovered that different heights can yield varying perspectives. For broad landscapes, flying at a higher altitude can help capture the vastness and scale of the scene, giving viewers a sense of space and context. I’ve taken some of my best panoramic shots from about 300 feet up, where the horizon stretches endlessly.

On the other hand, for more intimate shots, flying lower can reveal details that higher altitudes might miss. If you’re capturing a specific feature, like a stunning rock formation or a hidden waterfall, getting down to around 50-100 feet can provide a more personal connection with the subject. I often adjust my altitude based on the composition I’m aiming for, which has led to some breathtaking captures. Just be sure to follow local regulations regarding drone flight heights!

Lighting Considerations for Aerial Photography

Lighting can make or break an aerial photograph. I learned this the hard way when I took photos during the harsh midday sun, resulting in images that were washed out and lacking vibrancy. The golden hour, which is the hour just after sunrise or before sunset, is my favorite time to shoot. The soft, warm light during this time creates beautiful shadows and brings out the colors of the landscape.

Overcast days can also be a blessing in disguise. I’ve found that cloudy skies can help diffuse sunlight, reducing harsh shadows and making colors pop. This can be particularly helpful when capturing vibrant foliage or serene water bodies. It’s all about experimenting with different lighting conditions and noticing how they affect your shots. When I plan my backpacking trips, I try to align my drone flights with these optimal lighting times, ensuring I get the best possible results.

Simple Edits to Enhance Aerial Photos

Choosing the Right Editing Software

Once I’ve captured my aerial shots, the next step is editing. I used to think that editing was only for professional photographers, but I quickly realized that simple tweaks can elevate my photos significantly. There are plenty of editing software options out there; some are user-friendly and perfect for beginners. Adobe Lightroom and Photoshop are two of my go-to choices. They offer powerful tools, but I appreciate that they also have basic features that are easy to grasp.

If you’re looking for something even simpler, mobile apps like Snapseed and VSCO can do wonders right from your phone. I often edit my photos on the go, especially when I want to share them quickly with friends. It’s convenient to make adjustments directly from my smartphone while reflecting on the day’s adventure! Read Interesting article: Mastering Aerial Photo Editing: Essential Tips for Backpackers

Basic Editing Techniques

Crop and Straighten

One of the first things I do after uploading my photos is to crop and straighten them. Sometimes, I find that I’ve captured something amazing, but a little extra sky or ground can distract from the main subject. Cropping helps me hone in on what I want to highlight. Straightening is equally important; a tilted horizon can throw off the balance of the entire image. I’ve seen how a little adjustment can make a photo feel much more polished.

Adjusting Brightness and Contrast

Adjusting brightness and contrast is another simple yet effective technique that can breathe new life into your aerial photos. I remember a shot I took of a sunset where the colors looked muted in the original. After a little increase in brightness and contrast, the colors exploded! It’s like giving your photo a fresh coat of paint. Just be careful not to overdo it, as I’ve learned that a subtle touch often yields the best results.

Color Correction and Saturation

Color correction is something I pay close attention to, especially in aerial photography where the colors of the landscape can vary significantly. Sometimes, the camera doesn’t capture the hues as I see them in real life. By adjusting saturation levels, I can make the greens of the trees and the blues of the sky pop, bringing the image closer to the vibrant scene I experienced. I’ve found that a little color enhancement can transform a good photo into a stunning one.

Advanced Editing Techniques for Beginners

Applying Filters and Presets

For those who want to add a creative flair to their aerial photography, applying filters and presets can be a fun way to experiment. I’ve enjoyed using filters that give my photos a vintage or cinematic look. It’s a quick way to change the mood and feel of an image without spending too much time on detailed adjustments.

Creating HDR Images

Creating High Dynamic Range (HDR) images is something I’ve recently started exploring. This technique combines multiple exposures of the same scene to capture the full range of light and detail. I’ve found that it works particularly well in landscapes with contrasting light, like a bright sky above a dark forest. The results can be breathtaking! There are apps and software that make this process straightforward and beginner-friendly.

Best Practices for Sharing Aerial Photos

Optimal Image Formats and Sizes

After putting in all that effort to capture stunning aerial shots, it’s important to share them in a way that does justice to their beauty. I used to overlook the importance of image formats, but I’ve learned that the right choice can make a big difference. For most online platforms, JPEG is the go-to format because it compresses images without too much loss in quality, making it ideal for sharing on social media. However, for higher quality prints, I recommend using TIFF or PNG formats. These preserve more detail, which can be vital when showcasing the intricate beauty of landscapes.

When it comes to image size, I always keep in mind the platform I’m using. Social media sites have specific recommendations to ensure your photos display well. For instance, Instagram favors images that are 1080 pixels wide, while Facebook offers an optimal size of 1200 pixels wide. By resizing my images to fit these dimensions, I’ve noticed they look much sharper and more engaging. Adjusting the size before uploading also helps with loading times, which is crucial for keeping viewers engaged.

Using Social Media to Showcase Your Work

Sharing my aerial photos on social media has been one of the most rewarding experiences. Platforms like Instagram and Facebook allow me to reach a wide audience and connect with fellow backpackers and photographers. I’ve found that using relevant hashtags can dramatically increase my visibility. For instance, hashtags like #AerialPhotography, #BackpackingAdventures, or even specific location tags can help others discover my work. I also try to engage with other photographers by commenting on their posts and sharing tips, creating a sense of community.

Stories and reels are another fantastic way to showcase my adventures. I often compile short clips of my aerial shots along with snippets from my hikes. This not only keeps my audience engaged but also gives them a glimpse into my journey, making the experience personal. I remember sharing a reel of a sunrise hike that led to stunning aerial views, and the feedback was incredible. People love to see the story behind the shots!

Building an Online Portfolio

Creating an online portfolio has been a game changer for me. It’s a space where I can curate my best aerial photography and share my backpacking adventures in one place. I started by using platforms like Wix and Squarespace, which offer user-friendly templates tailored for photographers. This way, I can showcase my aerial shots alongside stories from my travels, giving visitors a deeper insight into my experiences.

Having a dedicated website allows me to present my work professionally. I’ve also included sections for prints and commissions, which have opened up opportunities for me to sell my work. I believe that sharing my journey, along with my images, helps to connect with people who share similar interests. It’s rewarding to hear from others who feel inspired by my travels, and it motivates me to keep exploring and capturing more.

Common Mistakes to Avoid in Aerial Photography

Over-editing Your Photos

When I first started editing my aerial photos, I went a little overboard. With so many tools at our fingertips, it’s easy to get carried away with filters and adjustments. I remember one particular photo where I cranked up the saturation and contrast, thinking it would make the colors pop. Instead, it looked unnatural and over-processed. I learned that sometimes, less is more. Maintaining the integrity of the original shot allows the natural beauty of the landscape to shine through.

Now, I aim for subtle adjustments that enhance the photo without losing its essence. I often take a step back and ask myself if the edits really reflect what I saw during my adventure. Keeping a consistent style across my images also helps create a cohesive look that’s appealing to viewers.

Ignoring Local Regulations and Safety Guidelines

Flying a drone comes with responsibilities, and I learned this the hard way. Before embarking on a trip, I always research local regulations regarding drone usage. Some national parks and protected areas have strict rules about where and when you can fly. I once found myself at a breathtaking lookout only to realize that drones were prohibited in that area. It was a disappointing moment, and I had to make do with ground shots instead.

Additionally, safety is paramount. I’ve taken the time to familiarize myself with my drone’s features, ensuring I can operate it confidently. Weather conditions can change quickly, especially in mountainous areas, so I always check forecasts before taking off. Being prepared helps me avoid mishaps and ensures that I can focus on capturing stunning aerial shots instead of worrying about potential issues.

Neglecting Backup Options for Your Images

After a long day of hiking and photographing, the last thing I want is to lose my photos. I learned this lesson when my laptop crashed and I lost a whole trip’s worth of images. Since then, I make it a point to back up my photos in multiple locations. I use an external hard drive and cloud storage to ensure my images are secure.

Also, I’ve started bringing a portable hard drive on my trips. It’s a great way to transfer my photos from my camera or drone after a day of shooting, ensuring I have a backup while still on the trail. This way, I can focus on enjoying my adventure without the fear of losing my hard-earned memories!

Inspiring Aerial Photography Locations for Backpackers

National Parks and Natural Wonders

The world is filled with breathtaking locations perfect for aerial photography, and I’ve had the privilege to explore many of them. National parks, in particular, offer some of the most stunning vistas. Places like Yellowstone and the Grand Canyon provide vast landscapes that are simply mesmerizing from above. I remember flying my drone over the Grand Canyon, and the patterns of the rock formations truly left me in awe.

Another favorite spot of mine is Zion National Park. The contrast between the green valleys and the red rock cliffs creates a striking image, especially during sunrise or sunset. Each trip to these national parks not only allows me to capture incredible aerial shots but also deepens my love for nature and adventure.

Frequently Asked Questions

What is aerial photography?

Aerial photography involves capturing images from above the ground, often using drones or other flying devices. It allows photographers to see landscapes from a new perspective, showcasing the beauty of vistas and the vastness of nature.

What are the benefits of aerial photography for backpackers?

Aerial photography offers several benefits, including showcasing the scale of landscapes, capturing unique perspectives that traditional photos might miss, and providing memorable souvenirs from backpacking adventures.

What essential equipment do I need for aerial photography while backpacking?

Essential equipment includes lightweight drones with good camera capabilities, smartphones with high-quality cameras, camera stabilizers for steadiness, and extra batteries to ensure equipment doesn’t run out during use.

What budget-friendly drones are recommended for backpackers?

Affordable options for backpackers include the DJI Mini series, known for being compact and lightweight, and the Holy Stone HS720, which is budget-friendly and user-friendly for beginners.

What basic techniques should I consider for aerial photography?

Key techniques include framing and composition using the rule of thirds, optimizing flying altitudes to capture various perspectives, and considering lighting conditions to enhance the overall quality of photos.

What are some simple editing techniques to enhance aerial photos?

Simple editing techniques include cropping and straightening images, adjusting brightness and contrast for better color representation, and performing color correction to make landscapes more vibrant.

What are the best practices for sharing aerial photos online?

Optimal image formats for sharing are JPEG for social media and TIFF or PNG for high-quality prints. It’s also essential to resize images according to platform recommendations to ensure they display well.

What common mistakes should I avoid in aerial photography?

Common mistakes include over-editing photos, ignoring local regulations and safety guidelines regarding drone usage, and neglecting to back up images to prevent loss of valuable photos.

Where are some inspiring locations for aerial photography?

Inspiring locations include national parks like Yellowstone and the Grand Canyon, which offer stunning vistas from above. Zion National Park is also notable for its striking contrasts between green valleys and red rock cliffs.

How can I build an online portfolio for my aerial photography?

Creating an online portfolio can be done using user-friendly platforms like Wix and Squarespace, which allow photographers to showcase their work alongside stories from their travels, enhancing the connection with viewers.

Transform Your Aerial Shots: Editing Tips for Travelers

Transforming your aerial shots can elevate your travel memories into stunning visuals. With the right editing tips, you can turn ordinary views into breathtaking images that truly capture the essence of your adventures. For more insights, check out our guide on Mastering Aerial Photo Editing: Essential Tips for Backpackers.

Transform Your Aerial Shots: Editing Tips for Travelers

Understanding Aerial Photography Basics

Aerial photography is a fascinating realm that offers unique perspectives of our world. I remember the first time I took an aerial shot from a drone while traveling through the lush landscapes of New Zealand. The sweeping views and the ability to capture expansive scenery from above felt exhilarating. Understanding aerial photography basics is crucial to getting those stunning shots, so let’s dive into the key elements.

The Importance of Perspective in Aerial Shots

One of the most significant advantages of aerial photography is perspective. When we shoot from above, we can reveal patterns and shapes in the landscape that are often missed from the ground. I’ve noticed that different altitudes can dramatically change how a scene is perceived. For instance, a shot taken from a lower altitude can evoke intimacy, while a higher altitude can portray vastness. Consider how the perspective will influence the story you want to tell with your image. I often play with various heights during my shoots to see which angle captures the feeling I want to convey best.

Essential Equipment for Capturing Aerial Images

Now, let’s talk equipment. To get started with aerial photography, you’ll need a reliable drone or an aerial camera rig. I’ve experimented with a few different models, and I’ve found that having a drone with a good camera is essential for high-quality shots. Look for features like 4K video capability, stability in windy conditions, and a decent battery life. My favorite drone is one that’s lightweight and easy to transport, making it perfect for my travel adventures.

Alongside the drone, investing in spare batteries, ND filters, and even a decent smartphone app for flight planning can enhance your aerial photography experience. I always make sure to have extras on hand, as you never know when you might want that perfect shot. Also, don’t forget about safety measures. Understanding local laws regarding drone usage is critical to ensuring you can shoot without any worries. For more information on this topic, refer to Aerial Photography Laws: What Every Backpacker Should Know.

Choosing the Right Editing Software

Once you’ve captured your aerial shots, the next step is editing. This is where you can really bring your images to life. Choosing the right editing software can make a world of difference in the final result.

Popular Editing Tools for Aerial Photography

I’ve tried numerous editing programs over the years, and I can confidently say that Adobe Lightroom and Photoshop are among the top choices for photographers. Lightroom excels in batch processing and organizing photos, while Photoshop offers advanced editing capabilities. For those who prefer a more user-friendly interface, I’ve found that apps like Snapseed or Pixlr can also be quite effective for quick edits on the go. Each tool has its strengths, and it’s worth exploring a few to see which suits your style best.

Comparing Free vs. Paid Software Options

When it comes to editing software, you’ll encounter both free and paid options. From my experience, while free programs can be decent for basic editing, they often lack the advanced features needed for aerial shots. I remember trying a free tool once, and while it worked in a pinch, I felt limited by its capabilities. If you’re serious about enhancing your aerial photography, investing in a paid solution can be worthwhile. Many offer trial versions, allowing you to test them out before committing. For budget-friendly options, check out our article on Top Techniques for Editing Aerial Photos on a Budget.

Fundamental Editing Techniques for Aerial Shots

After choosing your editing software, it’s time to dive into some fundamental techniques. These are the building blocks of transforming your aerial shots into eye-catching images.

Adjusting Exposure and Contrast

One of the first things I do when editing my aerial photos is adjust the exposure and contrast. Aerial shots can sometimes appear washed out due to the bright skies. I recommend using the histogram to guide your adjustments. Often, a simple tweak here can bring life back to the image. For me, it’s about finding that sweet spot where the details in the shadows and highlights are both visible and balanced.

Color Correction for Vibrant Landscapes

Next, color correction is vital, especially for landscapes. The colors in aerial shots can sometimes be misleading due to camera settings or lighting conditions. I’ve learned to play with the saturation and vibrance sliders to enhance the natural beauty of the landscape without overdoing it. It’s essential to keep the colors looking natural while making them pop. I often reference my original scene to ensure the edited image remains true to what I experienced.

Crop and Composition Enhancements

Lastly, I often take a good look at the composition of my images. Cropping can help eliminate distractions and direct the viewer’s focus to the main subject. I’ve found that adhering to the rule of thirds can create a more balanced image. If there are elements in the frame that don’t contribute to the story, I don’t hesitate to crop them out. It’s all about enhancing the visual appeal while staying true to the essence of the moment I captured.

Advanced Editing Techniques

Once you’ve mastered the fundamental editing techniques, it’s time to elevate your aerial photography even further with some advanced editing techniques. These methods can truly transform your images, allowing you to add depth and interest that really draws the viewer in.

Using Layers and Masks for Precision

One of my favorite features in Photoshop is the ability to use layers and masks. This technique allows for precise edits without permanently altering the original image. I remember the first time I experimented with layers; it felt like unlocking a whole new level of creativity. By separating different elements of my image into layers, I could make targeted adjustments. For instance, if the sky looked overexposed, I could create a mask just for that area and adjust the exposure without affecting the rest of the image.

When using masks, I often use a soft brush to blend changes seamlessly. This technique has helped me refine details in my aerial shots, like enhancing the clouds or improving the contrast in the landscape below. I recommend spending a little time getting comfortable with this feature, as it can make a huge difference in the quality of your edits.

Implementing HDR for Dynamic Range

High Dynamic Range (HDR) imaging is another technique I’ve come to love for aerial photography. This method involves taking multiple shots at different exposures and merging them together to create a single image with a broader range of light and detail. I remember capturing a stunning sunset over the mountains, and the HDR process brought out the colors in the sky while still retaining the details in the shadows below. It’s a game changer for those scenes where both the highlights and shadows are essential.

For HDR, I use a tripod to ensure my images align perfectly. Some drones even have an HDR mode, which simplifies the process. After capturing the images, I merge them in my editing software, adjusting the settings to achieve a natural look. It’s a bit of extra work, but the results are often worth it, creating images that feel vibrant and lifelike.

Creating Panoramas from Multiple Images

Panoramas are another fantastic way to showcase vast landscapes from above. I’ve had some memorable experiences stitching together images to create sweeping vistas, especially when exploring breathtaking coastlines or sprawling cities. The beauty of aerial panoramas lies in their ability to convey a sense of scale that a single shot may not capture.

To create a panorama, I take overlapping shots as I slowly rotate my drone or camera. In my case, I typically aim for about a 30% overlap to ensure a smooth blend later on. Once I have my images, I use software like Lightroom or Photoshop to stitch them together. This process usually involves selecting the images and letting the software do its magic. It’s fascinating to see individual images transform into a cohesive panorama that encapsulates an entire scene.

Enhancing Visual Impact

After you’ve incorporated advanced techniques, it’s time to focus on enhancing the visual impact of your photos. These techniques can significantly elevate your final images and make them stand out.

Applying Filters and Presets

Filters and presets can dramatically change the mood of your aerial shots. I often find myself experimenting with different styles, whether I’m aiming for a vibrant, sunny look or a moody, dramatic effect. I’ve created a few of my own presets based on the styles I love, which helps speed up my editing process.

When applying filters, I usually adjust the intensity to maintain a natural look. I once over-applied a filter to a beautiful forest shot, and while it was striking, it didn’t reflect the original beauty I saw that day. Subtlety is key. I recommend playing around with various filters and presets to see how they can enhance your photos without overwhelming them.

Focus on Leading Lines and Natural Patterns

In aerial photography, leading lines and natural patterns can guide the viewer’s eye through the image. I’ve noticed that when I emphasize these elements, my photos become more engaging. Look for roads, rivers, or even the lines of fields and mountains that draw the viewer into the scene. Enhancing these lines during editing can amplify their impact.

In my editing process, I might boost the contrast or clarity of these elements to ensure they stand out. It’s all about drawing attention to the beautiful patterns that nature creates from above. I’ve seen how this can transform an ordinary shot into something mesmerizing, making it a memorable piece of art.

Saving and Sharing Your Edited Aerial Shots

Once you’ve completed your edits, it’s essential to save and share your work properly to showcase your stunning aerial shots to the world.

Optimal File Formats for Different Platforms

When saving your images, I’ve learned that choosing the right file format is crucial. For online sharing, JPEGs are typically the go-to option due to their smaller file size and broad compatibility. However, for prints or high-quality displays, I prefer saving in TIFF or PNG formats, as they maintain more detail and color depth.

Each platform has its specifications, too. For social media, keeping file sizes manageable while maintaining quality is important. I often resize my images for different platforms, ensuring they look sharp and appealing on Instagram, Facebook, or my personal blog.

Best Practices for Social Media Sharing

When it comes to sharing on social media, I’ve found that timing and captions can make a big difference in engagement. Posting during peak hours can help your images reach a wider audience. Additionally, writing a captivating caption that shares the story behind the shot can draw people in. I often include details about my experience during the shoot or what inspired me. It adds a personal touch that resonates with viewers.

Don’t forget to use relevant hashtags to increase visibility and connect with fellow photography enthusiasts. I’ve also discovered that engaging with comments and sharing behind-the-scenes glimpses can help build a community around my work, making the sharing experience even more rewarding.

Common Mistakes to Avoid in Aerial Editing

As I’ve honed my skills in aerial photography and editing, I’ve made my fair share of mistakes along the way. These missteps can easily detract from the beauty of a photo and even the overall experience of sharing it. Learning to recognize and avoid common pitfalls can make all the difference in the final outcome of my images.

Over-Editing and Maintaining Authenticity

One of the most significant mistakes I see—and have made myself—is over-editing photos. When I first started editing, I was so excited about the possibilities that I often went overboard with adjustments. I remember one particular image of a vibrant sunset where I cranked up the saturation and contrast to the point where it looked unnatural. While it stood out, it lost the essence of the moment I had captured.

From my experience, maintaining authenticity is crucial. It’s essential to enhance your images while still keeping them true to what you actually saw. I now take a more restrained approach, often reminding myself that subtlety can have a far more significant impact. I recommend stepping away from your edits for a bit and then coming back to see if it still resonates with the experience you had when capturing the shot. Sometimes taking a fresh look can help you spot those areas where you might have overdone it.

Neglecting Composition Fundamentals

Another mistake I’ve noticed among both beginners and more experienced photographers is neglecting the fundamentals of composition. Aerial photography can be mesmerizing, but that doesn’t mean we should overlook the basic principles that make an image engaging. I’ve found that sometimes in my excitement to capture a stunning view, I’ve forgotten to consider the framing and composition of my shots.

One key element to keep in mind is the rule of thirds. Placing points of interest along these lines or at their intersections can create a more balanced and compelling image. I often find myself re-evaluating my crop, making sure the main subject doesn’t get lost in the vastness of the landscape. Additionally, keeping an eye on leading lines can help guide the viewer’s eye through the image, creating a sense of depth and movement.

It’s easy to get wrapped up in the excitement of aerial photography, but taking a moment to assess the composition can elevate the overall impact of the photo. I’ve learned that being mindful of these elements, even in the editing phase, can help me create images that truly resonate with viewers.

Resources for Further Learning

As I continue to explore aerial photography, I’ve discovered that there’s always more to learn. Whether it’s new editing techniques, updates on equipment, or inspiration from fellow photographers, tapping into various resources can help us all improve our skills.

Online Courses and Tutorials for Aerial Photography

One of the best ways I’ve found to enhance my skills is through online courses. Platforms like Skillshare and Udemy offer a variety of classes specifically focused on aerial photography and editing. I remember enrolling in a course that covered drone photography techniques, and it opened my eyes to new methods I hadn’t considered before. These courses often provide valuable insights from experienced photographers, helping us understand the nuances of both capturing and editing aerial shots.

YouTube is another fantastic resource for tutorials. I love browsing channels dedicated to photography and drone operations, where I’ve found everything from basic how-tos to advanced editing tips. Watching others share their experiences can be incredibly motivating and insightful. I often take notes while watching, eager to implement new techniques in my own editing process.

Recommended Books and Blogs on Photo Editing

In addition to online courses, I’ve come across some excellent books and blogs that delve deep into photo editing. One book that stands out to me is “The Digital Photography Book” by Scott Kelby, which offers practical advice and easy-to-follow tips that can enhance any photographer’s skill set. I often refer back to it when I need inspiration or a refresher on specific techniques.

As for blogs, I’ve found several photography-focused sites that regularly post articles on editing techniques, gear reviews, and creative inspiration. Websites like PetaPixel and Fstoppers have become staples in my reading list. They not only keep me updated on industry trends but also provide a wealth of knowledge from professionals in the field.

Exploring these resources has helped me grow as a photographer and editor. I recommend setting aside some time to dive into these materials; you might just discover a new technique or perspective that transforms your work!

Frequently Asked Questions

What is aerial photography?

Aerial photography is the practice of taking photographs from an elevated position, typically using drones or aerial camera rigs, to capture unique perspectives of landscapes and scenes that may be missed from the ground.

Why is perspective important in aerial shots?

Perspective is crucial in aerial shots as it reveals patterns and shapes in the landscape that are often overlooked from the ground. Different altitudes can dramatically change the perception of a scene, affecting the emotional impact of the image.

What equipment is essential for aerial photography?

Essential equipment for aerial photography includes a reliable drone or an aerial camera rig, preferably with features like 4K video capability and stability in windy conditions. Additional items like spare batteries, ND filters, and a flight planning app can also enhance the experience.

Which editing software is recommended for aerial photography?

Popular editing software for aerial photography includes Adobe Lightroom and Photoshop for their advanced capabilities. For more user-friendly options, apps like Snapseed or Pixlr are effective for quick edits.

What are some fundamental editing techniques for aerial shots?

Fundamental editing techniques for aerial shots include adjusting exposure and contrast, performing color correction, and enhancing composition through cropping. These techniques help to bring life and clarity to the images.

How can advanced editing techniques improve aerial photography?

Advanced editing techniques, such as using layers and masks for precision, implementing HDR for dynamic range, and creating panoramas from multiple images, can significantly enhance the quality and depth of aerial photographs.

What mistakes should be avoided in aerial editing?

Common mistakes to avoid in aerial editing include over-editing, which can lead to unnatural results, and neglecting composition fundamentals like the rule of thirds, which can detract from the overall impact of the image.

What resources are available for further learning in aerial photography?

Resources for further learning in aerial photography include online courses on platforms like Skillshare and Udemy, YouTube tutorials, and recommended books and blogs that focus on photography and editing techniques.

What file formats are best for saving edited aerial images?

For online sharing, JPEG is the preferred file format due to its smaller size and compatibility. For prints or high-quality displays, TIFF or PNG formats are recommended as they maintain more detail and color depth.

How can I effectively share my edited aerial shots on social media?

To effectively share edited aerial shots on social media, consider posting during peak hours, writing engaging captions that tell the story behind the shot, using relevant hashtags for visibility, and interacting with comments to build a community around your work.

Top Techniques for Editing Aerial Photos on a Budget

Editing aerial photos can transform your stunning captures into breathtaking visuals. Fortunately, you don’t need an endless budget to achieve amazing results—there are techniques and tools that can help elevate your work without breaking the bank. For more tips on editing, check out Mastering Aerial Photo Editing: Essential Tips for Backpackers.

Top Techniques for Editing Aerial Photos on a Budget

Understanding Aerial Photography

What is Aerial Photography?

Aerial photography is the art of capturing images from above, typically using drones, aircraft, or even balloons. I remember the first time I looked at an aerial photo; it was like seeing the world from a completely different perspective. The ability to showcase landscapes, buildings, and natural formations from above is what makes aerial photography so mesmerizing. It gives us a bird’s-eye view of our surroundings, revealing patterns and textures that we might miss at ground level.

Types of Aerial Photography

There are a few different types of aerial photography, each with its unique appeal. The most common types I’ve encountered include:

  • Vertical Aerial Photography: This is taken directly from above, often used for mapping and surveying.
  • Oblique Aerial Photography: Captured at an angle, this type provides a more dynamic view and is often more visually appealing.
  • Drone Photography: With the rise of drones, this has become a popular method for capturing stunning aerial shots without the need for expensive aircraft.

Each type has its advantages, and I often choose based on the story I want to tell through my images.

Common Uses of Aerial Photos

Aerial photos are used in various fields, from real estate to environmental studies. Personally, I’ve found that these photos are incredibly effective for:

  • Real Estate: They provide potential buyers with a comprehensive view of a property and its surroundings.
  • Land Surveys: Aerial images help assess land use and changes over time, particularly in urban planning.
  • Marketing: Businesses use aerial photography for promotional materials, showcasing the scale and beauty of their locations.
  • Nature and Conservation: These images are valuable for monitoring wildlife habitats and understanding ecological changes.

Seeing how my aerial photos can be used in such diverse ways really motivates me to keep honing my craft. If you’re interested in the legal aspects, be sure to read Aerial Photography Laws: What Every Backpacker Should Know.

Essential Equipment for Aerial Photography

Budget-Friendly Drones

When I first dabbled in aerial photography, the thought of purchasing a drone felt daunting. However, I’ve discovered that there are many budget-friendly options available that don’t compromise on quality. Brands like DJI offer entry-level models like the DJI Mini that are lightweight, easy to fly, and take excellent photos without costing a fortune. I’ve personally used the Mini SE; its 12 MP camera takes stunning shots, and the battery life is decent for my needs. Before investing, I recommend reading reviews and watching videos to see what fits your style best.

Smartphones vs. Professional Cameras

The debate between using smartphones and professional cameras for aerial photography is ongoing. I used to believe only high-end DSLRs could produce great images, but I’ve learned that modern smartphones can compete surprisingly well, especially when paired with drones. The camera quality on smartphones like the iPhone or Samsung Galaxy is impressive, and some apps allow for manual adjustments. When I’m out and about, I often reach for my smartphone for quick shots, but for more serious projects, I still prefer my DSLR for its versatility and image quality.

Stabilization Tools

One of the biggest challenges in aerial photography is stability. I remember my first few attempts resulted in shaky shots that were hard to edit later on. To combat this, I invested in a gimbal stabilizer for my drone. This tool keeps your camera steady in windy conditions, which is crucial for capturing clear, sharp images. If you’re on a tight budget, look for handheld stabilizers or even DIY options that can help smooth out your shots without spending a lot.

As I explored these essential pieces of equipment, I realized that it’s possible to achieve incredible results without emptying my wallet. Each tool has contributed to my growth as a photographer, and I believe that with the right knowledge and tools, anyone can create stunning aerial photos on a budget. For more insights, check out Essential Legal Tips for Aerial Photography on a Budget.

Basic Editing Techniques for Aerial Photos

Crop and Straighten for Better Composition

Editing aerial photos begins with a few simple adjustments that can make a big impact. I remember my early days of editing when I’d overlook the power of cropping and straightening. Cropping allows you to focus on the main subject, eliminating distractions from the frame’s edges. When I crop my pictures, I often seek to enhance the composition by following the rule of thirds, which brings a more balanced and appealing look to the image.

Straightening is equally important, especially since aerial shots can sometimes come out tilted due to the drone’s angle. I’ve found that taking a moment to adjust the horizon line can make my photos feel more professional. Most editing software has a simple straighten tool, which makes this adjustment a breeze. It’s these small tweaks that can transform a good photo into a great one.

Adjusting Exposure and Contrast

Once I’ve cropped and straightened my images, I turn my attention to exposure and contrast. Aerial photos can vary widely in lighting conditions, and I’ve learned that adjusting exposure is crucial for bringing out the details in both the highlights and shadows. Sometimes, my photos come out too bright or too dark, so I usually experiment with the exposure slider until I find the right balance.

Contrast can also dramatically change the mood of a photo. By increasing contrast, I can make the colors pop and add depth to the image. I remember the first time I cranked up the contrast on one of my photos; it was like the image came to life! However, I’ve learned to be careful not to overdo it—too much contrast can result in loss of detail. Finding the sweet spot takes practice, but it’s worth the effort.

Color Correction Techniques

Aerial photos often have unique lighting conditions, which can sometimes lead to color imbalances. I’ve experienced this firsthand, especially during sunrise or sunset shots when colors can appear overly warm or cool. Color correction has become one of my favorite parts of the editing process. I usually start by adjusting the white balance to ensure that the colors look natural. This step can be a game-changer, as it helps to remove unwanted color casts.

Next, I play around with saturation and vibrance. Increasing saturation can make colors more vivid, while vibrance targets the less intense colors without affecting skin tones—perfect for landscape shots. I love the feeling of seeing the colors in my photos come alive again. Just like with contrast, though, moderation is key; I aim for a look that feels realistic and not overly edited.

Free and Low-Cost Editing Software

Top Free Editing Software Options

When I started editing my aerial photos, I was surprised at the number of free tools available that deliver fantastic results. My go-to free option is GIMP, which I found to be quite powerful. It has many features similar to Photoshop, so I could experiment without spending a dime. The learning curve is a bit steep, but there are plenty of tutorials online that helped me get started.

Another favorite of mine is Canva. While it’s often recognized for graphic design, I found it surprisingly effective for basic photo editing. I can easily crop, adjust colors, and even add text overlays to my aerial shots. Plus, it’s user-friendly, which makes it great for beginners. I’ve used Canva for creating social media posts with my aerial images, and the results are always impressive.

Affordable Paid Software Solutions

As my editing skills developed, I decided to invest in some paid software. Adobe Lightroom quickly became a staple in my editing toolkit. I love its intuitive interface and the ability to make batch edits, which saves me so much time. The subscription model gives me access to updates and new features, making it a worthwhile investment for me. I often find myself using its presets to give my aerial photos that polished look with just a few clicks.

Another option I’ve explored is Skylum’s Luminar. It offers a one-time payment option, which I liked compared to subscription models. Luminar has some fantastic AI-powered features that make editing even easier. I remember using its AI Sky Replacement tool for a dramatic sunset effect on one of my photos, and I was blown away by how natural it looked.

Mobile Editing Apps for On-the-Go Editing

In our fast-paced lives, mobile editing apps have become a lifesaver for me. I can’t tell you how many times I’ve edited photos on my phone after a shoot. Snapseed is my favorite mobile app; it’s free and packed with features. I love the selective adjustment tools, which allow me to enhance specific areas of my photos directly from my phone. It’s perfect for making quick fixes while I’m on the go.

Another app I recommend is VSCO. It has a range of beautiful filters that can really elevate a photo with just a tap. I’ve used it to give my aerial images a cohesive look, especially when sharing on social media. The community aspect of VSCO is also a bonus, as I enjoy discovering other photographers’ work and getting inspired by their editing styles.

Advanced Editing Techniques on a Budget

Layering and Masking Techniques

As I dove deeper into photo editing, I discovered the magic of layering and masking. These techniques opened up a whole new world of creative possibilities for my aerial photos. I remember my first experience with layering; it felt like adding different dimensions to my images. By placing one image on top of another, I could blend skies or add effects without altering the original photo. I find that using layers allows for more control and flexibility in my edits.

Masking is where things get truly exciting. It lets me apply adjustments to specific areas of a photo without affecting the whole image. I recall a time when I wanted to enhance the vibrancy of a sunset in one of my aerial shots. By masking the sky, I could boost the colors while keeping the rest of the image natural. The key is to take your time with the masking process; a well-executed mask can transform an ordinary photo into something extraordinary.

Using Filters and Presets

Filters and presets are some of my favorite tools for quickly enhancing my aerial photos. I used to think that filters were just for social media, but I’ve learned that they can actually help establish a cohesive style across my work. In my editing journey, I found that Adobe Lightroom offers a variety of presets that can give my photos a polished look with minimal effort. I enjoy experimenting with different presets, especially those that enhance colors or give a vintage vibe to my images.

When it comes to filters, I often create my own based on the styles I love. I remember the thrill of developing a filter that perfectly captured the essence of my favorite landscapes. It’s all about trial and error—finding the right combination of adjustments that feels true to my vision. The best part? Once I create a filter I love, I can apply it to multiple photos, saving me precious time during the editing process.

Creating HDR Images on a Budget

High Dynamic Range (HDR) imaging has become a staple in my aerial photography arsenal. I used to think that creating HDR images required expensive software, but I discovered that there are budget-friendly ways to achieve stunning results. The beauty of HDR is that it allows you to capture a wider range of light and detail, which is especially useful for aerial shots that include both bright skies and darker landscapes.

To create an HDR image, I usually take three to five different exposures of the same scene. I remember the first time I stacked my shots in post-processing; it was fascinating to see how much detail emerged. Most editing software, including GIMP and Lightroom, has built-in HDR features that make merging these exposures easy. I recommend playing around with the settings to find a look that resonates with you. The result can be breathtaking, with vibrant colors and an incredible depth that draws viewers in.

Time-Saving Tips for Editing Aerial Photos

Batch Processing Techniques

One of my biggest challenges when editing a large number of aerial photos was finding a way to streamline the process. That’s when I discovered batch processing. This technique allows me to apply the same settings or adjustments to multiple photos at once, saving me valuable time. I remember feeling like I had unlocked a secret weapon when I learned how to batch process in Lightroom. Now, instead of adjusting each photo individually, I can select several images and apply my favorite edits in one go.

For example, if I have a set of photos taken during the same lighting conditions, I can make adjustments like exposure, contrast, and color correction to one photo and then sync those settings across the batch. It’s a game-changer, especially for someone like me who loves to shoot in bursts while flying my drone.

Keyboard Shortcuts for Efficiency

As I became more comfortable with editing software, I realized that learning keyboard shortcuts could significantly speed up my workflow. I remember how hesitant I was at first; it seemed overwhelming to memorize a bunch of commands. However, I found that focusing on a few key shortcuts made a noticeable difference. For instance, using shortcuts for frequently used actions like cropping, adjusting exposure, or switching between tools became second nature over time.

Many editing programs provide a list of shortcuts, and I often keep a cheat sheet nearby while I’m editing. It’s a small step, but it can save me a lot of time in the long run, allowing me to spend more time capturing new images rather than sitting in front of the computer.

Building a Workflow That Saves Time

Creating an efficient workflow has been key in my editing process. I remember how chaotic it felt to jump between tasks without a clear plan. Over time, I developed a routine that includes organizing my photos immediately after a shoot, prioritizing my edits based on the images that resonate with me the most, and setting aside dedicated time for editing. I’ve found that this structure not only helps me stay organized but also keeps me motivated.

Additionally, I like to set small goals for each editing session. For instance, I might focus on editing five photos in one sitting, which feels more manageable than trying to tackle an entire batch. This method keeps me engaged and prevents the editing process from feeling overwhelming. Plus, it helps ensure that I’m producing my best work, as I’m not rushing through just to get it done.

Resources for Learning Aerial Photo Editing

Online Tutorials and Courses

As I’ve progressed in my aerial photography journey, I found that online resources can be invaluable for honing my editing skills. Websites like Udemy and Skillshare offer courses specifically focused on aerial photography and photo editing. I remember stumbling upon a course that guided me through advanced Lightroom techniques, which opened my eyes to new editing possibilities. These platforms often have user reviews, so I recommend checking them out to find a course that matches your skill level and learning style.

Another fantastic resource is Adobe’s own website, which has a plethora of tutorials for Lightroom and Photoshop. I’ve spent countless hours watching their step-by-step guides, and it has undoubtedly improved my editing workflow. Many of these tutorials are free, making it a great option for anyone on a budget.

Community Forums and Groups

Connecting with fellow photographers can be a game-changer. I’ve joined several online communities, such as Reddit’s r/photography and dedicated Facebook groups focused on aerial photography. These platforms allow me to ask questions, share my work, and get feedback from others who share my passion. I remember posting one of my edited aerial photos in a forum and receiving constructive criticism that helped me see my work from different perspectives.

Participating in these groups also keeps me updated on the latest trends and tips in aerial photography. Many members share their own experiences, which can be incredibly helpful for learning new techniques or discovering new editing software.

YouTube Channels for Aerial Photography Editing

YouTube has become one of my favorite places to learn about aerial photo editing. There are countless channels dedicated to photography and editing tutorials. I’ve learned so much from creators like Peter McKinnon and Jessica Kobeissi, who offer practical tips and tricks for editing. Their engaging styles make learning fun and accessible, and I often find myself pausing the video to try out techniques in my own editing software.

Additionally, many photographers share their editing processes with before-and-after comparisons, which is one of the best ways to understand the impact of various techniques. I remember watching a video on color grading that completely transformed how I approach my edits, making my aerial shots pop like never before.

Showcasing and Sharing Your Edited Aerial Photos

Best Platforms for Displaying Your Work

Once I’ve edited my aerial photos, I love showcasing them on various platforms. Websites like Flickr and 500px are excellent for photographers looking to connect with other enthusiasts and showcase their work professionally. I’ve found that these platforms allow for high-quality uploads, which is essential for displaying the details in my aerial shots.

Creating a personal website or blog can also be an effective way to share my photography journey. I remember the excitement of launching my photography site; it felt like a home for all my work. Plus, it gives me the freedom to tell the stories behind each shot and connect with my audience on a more personal level.

Creating a Portfolio on a Budget

Building a portfolio doesn’t have to be an expensive endeavor. I started with a simple layout using free website builders like Wix or WordPress. These platforms offer templates that make it easy to create a visually appealing portfolio without needing to know any coding. I focused on showcasing my best aerial shots, organizing them by themes or locations, which helped potential clients or viewers navigate my work easily.

I also recommend including a short bio and a contact section so that people can reach out for collaborations or feedback. It’s amazing how a little effort can open up opportunities in the photography community.

Using Social Media to Share Your Photos

Social media has become an essential tool for sharing my edited aerial photos. Platforms like Instagram and Pinterest work wonders for visual storytelling. I remember when I first started sharing my aerial shots on Instagram; it was thrilling to see the engagement from viewers. Using relevant hashtags helped my work reach a wider audience, and engaging with my followers has built a supportive community around my photography.

Additionally, I found that participating in photo challenges or collaborations on social media can boost visibility and inspire creativity. It’s a fantastic way to connect with other photographers and share our experiences while growing our skills together.

Final Thoughts

Embarking on the journey of aerial photography and editing has been an exciting and rewarding experience for me. From learning the basics to mastering advanced techniques, each step has contributed to my growth as a photographer. I believe that with the right tools, techniques, and resources, anyone can create stunning aerial photos that tell a story. Remember to embrace the learning process, experiment with different styles, and connect with the photography community. It’s not just about the final image; it’s about enjoying the journey and capturing the beauty of the world from above.

Frequently Asked Questions

What is aerial photography?

Aerial photography is the art of capturing images from above, typically using drones, aircraft, or balloons. It offers a unique perspective of landscapes, buildings, and natural formations, revealing patterns and textures that may be missed at ground level.

What are the different types of aerial photography?

The main types of aerial photography include vertical aerial photography, which is taken directly from above; oblique aerial photography, which is captured at an angle for a more dynamic view; and drone photography, which has become popular for capturing stunning images without the need for expensive aircraft.

What are some common uses of aerial photography?

Aerial photos are used in various fields, including real estate for providing comprehensive views of properties, land surveys for assessing land use, marketing for showcasing locations, and nature and conservation for monitoring wildlife habitats.

What budget-friendly drones are recommended for aerial photography?

Brands like DJI offer entry-level models such as the DJI Mini, which is lightweight, easy to fly, and produces excellent photos without a high cost. The Mini SE, for instance, has a 12 MP camera and decent battery life, making it a great choice for beginners.

What basic editing techniques can enhance aerial photos?

Basic editing techniques include cropping and straightening for better composition, adjusting exposure and contrast to bring out details, and performing color correction to ensure natural-looking colors while maintaining vibrancy.

What are some free editing software options for aerial photography?

Free editing software options include GIMP, which offers powerful editing features similar to Photoshop, and Canva, which is user-friendly and effective for basic photo editing tasks.

How can layering and masking techniques improve photo editing?

Layering allows for the placement of one image over another to blend effects without altering the original photo, while masking lets you apply adjustments to specific areas of a photo, enhancing certain elements without affecting the entire image.

What are some time-saving tips for editing aerial photos?

Time-saving tips include batch processing techniques to apply the same settings across multiple photos, learning keyboard shortcuts to speed up workflow, and building an organized editing routine to manage tasks efficiently.

What resources are available for learning aerial photo editing?

Resources for learning include online tutorials and courses on platforms like Udemy and Skillshare, community forums and groups for feedback and tips, and YouTube channels that provide practical editing tutorials and techniques.

How can I showcase my edited aerial photos effectively?

You can showcase your work on platforms like Flickr and 500px for professional display, create a personal website or blog to tell the story behind your shots, and use social media platforms like Instagram and Pinterest to share your images and engage with a wider audience.

Mastering Aerial Photo Editing: Essential Tips for Backpackers

Capturing breathtaking aerial shots while backpacking can elevate your travel memories to new heights. With the right editing techniques, you can transform these images into stunning visual stories that inspire others to explore the great outdoors. It’s also essential to understand the aerial photography laws that every backpacker should be aware of.

Mastering Aerial Photo Editing: Essential Tips for Backpackers

Understanding Aerial Photography

What is Aerial Photography?

Aerial photography is all about capturing images from an elevated perspective, typically using drones or aircraft. I’ve always found it fascinating how a simple shift in viewpoint can completely change the story a photo tells. When I first started backpacking, I was amazed at how aerial photography could reveal the vastness of landscapes, the winding trails, and the majestic beauty of nature that is often missed from the ground. Each shot taken from above offers a fresh perspective, allowing us to appreciate the world in a brand-new light.

Benefits of Aerial Photography for Backpackers

For us backpackers, aerial photography opens up a whole new realm of possibilities. First, it provides a unique way to document our adventures. Instead of standard snapshots, we can capture sweeping panoramas that showcase the beauty of our surroundings. I remember landing a perfect shot of a valley at sunrise, with the golden light spilling over the hills. It wasn’t just a picture; it was a memory captured in its full glory.

Secondly, aerial photography helps us share our experiences in a more engaging way. When you post a stunning aerial image of a hidden lake or a rugged mountain pass, it piques interest and inspires others to venture beyond their comfort zones. I often find that my friends are more motivated to explore new trails or destinations after seeing my aerial shots. Plus, it’s a fantastic way to keep those memories alive, reminding us of the adventures we’ve had and the ones still to come. Additionally, understanding navigating the legalities of aerial photography while traveling is crucial for a smooth experience.

Common Use Cases in Backpacking

There are plenty of ways we can utilize aerial photography in our backpacking journeys. One of the most common use cases is capturing scenic views. Think about all those moments when you reach a summit and just want to freeze that breathtaking view in time. Aerial shots can encapsulate the grandeur of mountains, forests, and lakes in a way that ground-level photos simply can’t. I’ve found that these shots not only serve as personal mementos but also as stunning visuals for social media.

Another common use is documenting our hiking routes. Aerial photography can help highlight the trails we’ve conquered, providing a visual map that can inspire others to follow in our footsteps. I often take shots of winding paths through forests or across ridges, which can be particularly motivational for fellow hikers who may be contemplating a similar journey. Additionally, these images can be useful for trail organizations looking to promote specific routes or areas.

Lastly, aerial photography is perfect for showcasing the natural beauty of places we visit. Whether it’s an untouched beach, a vibrant fall forest, or a serene mountain lake, capturing these moments from above can create stunning imagery that emphasizes nature’s artistry. Each photo becomes a piece of the larger story of our travels, and I cherish the way they allow me to relive those experiences whenever I look back at them.

Essential Aerial Photography Equipment

Drones: Choosing the Right Model

When it comes to aerial photography, having the right equipment is key. Drones are, without a doubt, the most popular choice for backpackers. Personally, I learned that it’s crucial to select a model that balances portability and performance. My first drone was lightweight and foldable, making it easy to pack in my backpack. I recommend looking for features like GPS stabilization, high-quality cameras, and decent battery life. You want a drone that can withstand the rigors of outdoor use while still delivering stunning images.

Camera Specifications for Aerial Shots

The camera is the heart of any aerial photography setup. I’ve found that drones with at least 12 megapixels are ideal for capturing sharp images. Furthermore, consider the camera’s video capabilities if you’re also interested in filming your adventures. Some drones allow you to shoot in 4K resolution, which can vastly improve the quality of your final product. I often prefer drones with adjustable apertures, as this gives me more control over exposure in various lighting conditions.

Accessories: Filters, Batteries, and More

To further enhance my aerial photography, I’ve learned the importance of investing in a few key accessories. ND filters, for example, help manage light exposure, especially on sunny days, allowing for smoother motion when filming. Extra batteries are a must-have for longer trips; there’s nothing worse than needing to land your drone just as the light is perfect. I also keep an extra memory card handy, as I often find myself snapping more photos than I initially planned. Little preparations like these can make a massive difference in capturing those perfect shots!

Fundamentals of Aerial Photo Editing

Overview of Aerial Photo Editing Software

When it comes to editing aerial photos, the right software can make a world of difference. I remember feeling overwhelmed when I first started looking for editing tools. There are so many options out there, but I found that a few stand out for their user-friendliness and functionality. Software like Adobe Lightroom and Photoshop became my go-to choices. These programs offer powerful editing capabilities, allowing me to fine-tune my images with precision. I also discovered some great free options like GIMP and Pixlr, which are perfect for beginners like I was. What’s important is to choose software that fits your comfort level and editing needs, so you can focus on bringing your aerial photos to life.

Basic Editing Techniques

Once I settled on my editing software, I began experimenting with basic techniques that transformed my photos. Cropping is one of the first things I do; it helps me emphasize key elements in the composition and eliminate distractions. I also found adjusting exposure and white balance crucial for enhancing the colors in my aerial shots. Drones sometimes struggle with lighting, especially in high-contrast environments, so playing with these settings can really make a difference. I usually spend some time sharpening the image to ensure that fine details stand out, especially when I’m showcasing textures in landscapes. These basic edits can turn a good photo into a great one!

Understanding Image Resolution and Quality

Image resolution is another aspect I’ve learned to prioritize. After all, what’s the point of capturing stunning aerial views if the quality isn’t up to par? I make it a habit to always shoot in the highest resolution possible. This gives me more flexibility when it comes to cropping and enlarging images later on without losing detail. I often find myself looking closely at the final quality before sharing my shots; a high-resolution image can make all the difference in how vibrant and professional my work looks. Plus, it’s a good idea to keep the original files saved, just in case I want to revisit them later for new edits or uses.

Advanced Editing Techniques

Color Correction for Aerial Photos

Once I was comfortable with the basics, I started diving into advanced techniques, and color correction quickly became a favorite of mine. Aerial shots can sometimes come out with a color cast due to lighting conditions or the time of day, so I took the time to learn how to correct these issues. I usually start by adjusting the temperature and tint sliders to bring back the natural colors of the landscape. I also found that using color grading tools allows me to enhance specific hues, making the greenery more vibrant or the sky more striking. It’s incredible how a few tweaks can turn a dull photo into a breathtaking piece of art!

Enhancing Contrast and Brightness

Enhancing contrast and brightness can breathe life into aerial photos. I remember a particular shot of a mountain range that didn’t pop as much as I wanted. By adjusting the contrast, I was able to define the shadows and highlights more clearly, which added depth to the image. Brightness adjustments can help to bring out details that might be hidden in darker areas. I always recommend experimenting with these settings until you find a balance that highlights the beauty of the scene without overdoing it. It’s all about making the image feel as close to what I experienced while capturing it.

Creating Depth Using Layers

Layers have opened up a whole new world for my edits. When I learned how to use layers in Photoshop, I felt like I had unlocked a superpower. By stacking images, I could blend different exposures together to create a more dynamic shot. This technique is especially useful for aerial photography, where the sky and landscape can be dramatically different. I often use layers to bring out the clouds, making them stand out against the backdrop of mountains or lakes. It allows me to create images that feel three-dimensional, pulling the viewer into the scene.

Adding Effects: HDR and Panorama

Finally, I’ve found that adding effects like HDR (High Dynamic Range) and panorama can elevate my aerial photography even further. HDR allows me to capture a wider range of light and detail, which is especially handy in high-contrast scenes. I often shoot multiple exposures of the same scene and blend them together in editing. Panorama shots are another fantastic option, particularly for expansive landscapes. By stitching together several images, I can showcase the sweeping beauty of a vista in a single frame. I love how these techniques help me share the grandeur of nature in a way that feels immersive and breathtaking.

Best Practices for Editing Aerial Photos

Workflow Tips for Efficiency

As I dove deeper into aerial photo editing, I quickly realized that having an efficient workflow is essential. It can be easy to get lost in the multitude of options and features available in editing software. To streamline my process, I developed a few habits. First, I always import my photos and organize them into folders based on the trip or event. This helps me locate them easily and keeps everything tidy.

Next, I recommend starting with a consistent preset or style. I created a few basic presets in Lightroom that reflect my editing preferences. This allows me to apply a base look to my images quickly, saving time during the editing process. From there, I can make specific adjustments as needed. I also make it a habit to edit in batches; instead of editing one photo at a time, I’ll go through similar images together. This approach keeps my editing cohesive and helps maintain a consistent look across my album.

Maintaining Natural Appearance

While it’s tempting to push the limits of editing and create dramatic effects, I believe that maintaining a natural appearance is vital. My philosophy is that the best aerial photos showcase the beauty of nature as it is. To achieve this, I often remind myself to step back and evaluate my edits. I try to avoid over-saturation or excessive sharpening, which can detract from the authentic experience I want to convey. Instead, I focus on enhancing the natural colors and textures that I saw when I captured the shot. This not only helps my work resonate better with viewers but also preserves the true essence of the landscapes I love.

Common Mistakes to Avoid

Through my journey in aerial photography editing, I’ve encountered several common pitfalls that can derail an otherwise great photo. One mistake I see often is failing to check the image’s histogram. This simple tool helps gauge exposure levels, and I’ve learned the hard way that ignoring it can lead to blown-out highlights or lost details in shadows. I always make it a point to review the histogram during my editing to ensure I am capturing the full dynamic range of the scene.

Another mistake is neglecting to save different versions of an image. I’ve had moments where I edited a photo, only to decide later that I preferred the original look. To avoid this, I create multiple versions during the editing process. This allows me to go back and explore different styles or adjustments without starting from scratch.

Finally, I recommend not getting too attached to a particular shot. Sometimes, despite our best efforts, an image just doesn’t turn out as we envisioned. I’ve learned to embrace this reality and move on rather than spending excessive time trying to salvage a photo that might not work. This mentality allows me to focus on capturing new adventures rather than getting stuck in the past.

Sharing and Showcasing Your Aerial Photos

Preparing Images for Social Media

Once I’ve edited my aerial photos, the next exciting step is sharing them with the world. I love using social media platforms to showcase my adventures, but I’ve discovered that preparation is key for making the most impact. One of the first things I do is optimize my images for the platform I’m using. Each platform has its own preferred dimensions and quality settings, so I make sure to resize my photos accordingly. This ensures they appear sharp and polished, drawing viewers in right away.

I also pay attention to captions. I’ve found that adding a personal touch or a brief story behind the photo can make it much more engaging. Sharing the emotions I felt while capturing the moment often resonates with my audience and encourages them to connect with my experiences. Using relevant hashtags helps too; it can increase visibility and attract fellow outdoor enthusiasts who share similar interests.

Creating a Portfolio for Backpacking Adventures

Building a portfolio has been a rewarding experience for me. It’s a wonderful way to reflect on my journey and progress as a photographer. I started by selecting my best aerial shots, focusing on those that tell a story or showcase the beauty of the places I’ve visited. I often categorize them by location or theme, making it easy for viewers to navigate through my collection.

I also opted for a clean and simple layout to let the images speak for themselves. I found that incorporating a mix of different styles, like panoramas and HDR shots, adds variety and keeps the portfolio dynamic. Additionally, I make sure to include a brief introduction about myself and my passion for backpacking and photography. This personal touch helps viewers connect with my work on a deeper level.

Using Aerial Photos in Travel Blogs

In my experience, incorporating aerial photos into travel blogs elevates the storytelling aspect significantly. When I write about my hiking adventures, I love to include aerial shots that complement the narrative. It’s fascinating to see how a photo can enhance the reader’s understanding of the landscape I’m describing. For instance, when I wrote about a challenging summit hike, I included an aerial view of the trail winding up the mountainside. This not only illustrated the difficulty but also showcased the stunning views that awaited at the top.

I also recommend using images to break up large blocks of text. It keeps the reader engaged and provides visual relief, making the blog more enjoyable to read. Including captions or anecdotes alongside the photos adds depth, inviting readers to connect with my experiences in a more meaningful way. I’ve found that this approach resonates with my audience and encourages them to explore similar adventures themselves.

Frequently Asked Questions

What is aerial photography?

Aerial photography is the technique of capturing images from an elevated perspective, typically using drones or aircraft. It offers a unique viewpoint that can reveal the vastness of landscapes and the beauty of nature that is often missed from the ground.

How does aerial photography benefit backpackers?

Aerial photography allows backpackers to document their adventures in a unique way, capturing sweeping panoramas that showcase their surroundings. It also helps share experiences more engagingly, inspiring others to explore new trails and keep memories alive.

What are common use cases for aerial photography in backpacking?

Common use cases include capturing scenic views from summits, documenting hiking routes to inspire others, and showcasing the natural beauty of various locations, such as beaches and forests, from an aerial perspective.

What should I consider when choosing a drone for aerial photography?

When selecting a drone, it’s important to balance portability and performance. Look for features like GPS stabilization, high-quality cameras, and decent battery life to ensure it can withstand outdoor conditions while delivering stunning images.

What camera specifications are ideal for aerial shots?

Drones with at least 12 megapixels are ideal for capturing sharp images. Additionally, consider drones with video capabilities, such as 4K resolution, and adjustable apertures for better control over exposure in varying lighting conditions.

What basic editing techniques are recommended for aerial photos?

Basic editing techniques include cropping to emphasize key elements, adjusting exposure and white balance to enhance colors, and sharpening images to highlight details. These edits can transform a good photo into a great one.

How can I enhance the colors in my aerial photos?

Color correction involves adjusting the temperature and tint sliders to eliminate color casts and using color grading tools to enhance specific hues, making landscapes more vibrant and visually appealing.

What are some best practices for editing aerial photos?

Best practices include maintaining a natural appearance by avoiding over-saturation, checking the image’s histogram to gauge exposure levels, saving different versions of an image, and being open to moving on from shots that don’t turn out as expected.

How can I prepare my aerial images for social media sharing?

To prepare images for social media, optimize them for the platform by resizing according to preferred dimensions, crafting engaging captions that tell a story, and using relevant hashtags to increase visibility.

What is the value of creating a portfolio for aerial photography?

Creating a portfolio allows photographers to reflect on their journey and showcase their best work. It helps in categorizing images by location or theme, providing a clean layout, and including personal introductions to connect with viewers.

Aerial Photography Laws: What Every Backpacker Should Know

Aerial photography opens up a whole new world for backpackers, allowing us to capture breathtaking landscapes from above. Understanding the laws surrounding it can help us avoid legal troubles while enjoying our adventures. Read Interesting article: Navigating Legalities of Aerial Photography While Traveling

Understanding Aerial Photography

Definition of Aerial Photography

Aerial photography refers to the process of taking pictures from an elevated position, typically using drones, aircraft, or even handheld cameras mounted on poles or other devices. For me, the thrill of capturing stunning vistas from above is a game changer when it comes to documenting my hiking adventures. I love how it provides a unique perspective that ground-level photography simply can’t match.

Aerial Photography Laws: What Every Backpacker Should Know

Types of Aerial Photography

There are several types of aerial photography, each serving different purposes and audiences. I’ve explored a few of them during my travels:

  • Drone Photography: This is probably the most popular form today, especially among backpackers. Drones allow us to easily navigate different terrains and capture stunning shots with minimal effort.
  • Helicopter or Airplane Photography: While more expensive, this method can cover vast areas quickly and provide breathtaking views that drones may not be able to reach.
  • Handheld Photography from High Points: Sometimes, all you need is a good viewpoint. Climbing to a mountain ridge or using a tall building can yield fantastic aerial shots without the need for complex equipment.

Importance for Backpackers

As backpackers, we often seek out unique experiences and opportunities to connect with nature. Aerial photography enhances this connection by documenting the beauty of our surroundings in a way that still photography can’t. I remember the first time I took photos from a drone while hiking in a national park; the sweeping landscapes and intricate details of the terrain were simply mesmerizing. Plus, sharing these experiences on social media can inspire others to explore the great outdoors, which is something I’m passionate about.

However, engaging in aerial photography comes with responsibilities, especially regarding legal aspects. It’s crucial for us to understand the laws and regulations that govern this activity. Without proper knowledge, we risk facing legal consequences that could overshadow our enjoyment of the great outdoors. I’ve made it a priority to research these legal frameworks, and I encourage all backpackers to do the same. For more information, check out Essential Legal Tips for Aerial Photography on a Budget.

Legal Framework for Aerial Photography

Federal Laws Governing Aerial Photography

When it comes to aerial photography in the United States, the legal landscape is shaped by federal regulations, primarily governed by the Federal Aviation Administration (FAA). Understanding these laws is essential for anyone looking to capture the world from above.

FAA Regulations

The FAA has established a set of regulations that govern the use of drones, which have become the primary tools for aerial photography among backpackers. For instance, the FAA requires drone operators to follow the Part 107 regulations, which include registering their drones if they weigh more than 0.55 pounds. I remember the first time I registered my drone; it was a simple process, but it made me feel more responsible as an operator.

Restrictions on Drone Use

Aside from registration, there are also restrictions on drone use. For example, drones cannot be flown above 400 feet, over people, or in restricted airspace. I learned this the hard way when I nearly flew my drone too close to an airport. Always check for no-fly zones before setting out to avoid any mishaps.

State-Specific Laws

While federal laws lay the groundwork, each state can establish its own set of laws regarding aerial photography. This means what’s legal in one state may be restricted in another. I’ve found that checking state regulations is just as important as understanding federal laws.

Variations Across States

For instance, some states may require permits for drone use in state parks, while others may have different rules. I was surprised to find out that in certain areas, even flying a drone can be restricted during specific seasons to protect wildlife. Being mindful of these variations can save us from unnecessary fines or legal issues.

Notable State Laws to Watch For

States like California and New York have stricter regulations concerning drone use, especially in urban areas. It’s crucial for us to be aware of these regulations before embarking on our adventures. I’ve made it a habit to familiarize myself with local laws wherever I travel, which has kept my experiences hassle-free.

Local Ordinances and Regulations

In addition to federal and state laws, local ordinances can impose further restrictions on aerial photography. Every city may have its own rules, and it’s essential to research these before flying a drone.

City-Specific Rules

For example, some cities may prohibit drone flights over certain landmarks or during specific events. I once found myself in a major city where drone use was completely banned due to safety concerns. It was a disappointment, but it taught me to always check city-specific regulations before planning my shoot.

Permits and Licensing Requirements

In some cases, local authorities may require a permit for aerial photography, especially if it’s for commercial purposes. I’ve learned that applying for these permits can take time, so planning ahead is always a good idea. It’s better to be safe and informed than to face unexpected obstacles while on a trip.

Drone Use and Photography

Understanding Drones

Drones have become the go-to tool for many of us who love aerial photography. These small unmanned aircraft can be equipped with high-resolution cameras, making it easy to capture stunning images from the sky. I’ll never forget the first time I flew my drone; the sensation of controlling it from the ground while watching the footage stream back to my phone was exhilarating. It felt like I was soaring above the landscape! I’ve learned a lot about the different types of drones, and each has its own strengths and weaknesses.

For example, some drones are designed specifically for photography, featuring better stabilization and camera quality. Others may focus more on speed or agility, which can be fun for racing but might not deliver the best images. I’ve found that investing in a drone that’s tailored to photography significantly enhances the quality of the shots I take. If you’re considering getting one, I recommend researching which models suit your needs best, especially if you plan on taking it on our outdoor adventures.

How to Legally Operate Drones

While using a drone can be incredibly rewarding, it’s crucial to operate it legally. I remember feeling overwhelmed by the rules at first, but once I broke them down, it became manageable. Here are some key points I’ve learned about legally flying drones:

Registration Requirements

As I mentioned earlier, if your drone weighs more than 0.55 pounds, you must register it with the FAA. This process is straightforward and can be done online. I took just a few minutes to fill out the form, and it gave me peace of mind knowing that I was compliant with the regulations. Plus, it’s a good idea to keep my registration number visible on the drone itself, just in case it gets lost or needs identification.

Insurance Considerations

Another aspect to think about is insurance. While it’s not always mandatory, having insurance can protect you from liability in case of accidents or damage caused by your drone. I decided to get a policy after a friend shared a story about a drone crash that resulted in costly repairs. Knowing I had coverage helped me feel more secure when flying in unfamiliar areas. It’s something I recommend looking into, especially if you plan to use your drone frequently or in crowded locations.

Best Practices for Safe and Legal Drone Use

Beyond registration and insurance, there are several best practices I’ve adopted for flying my drone safely and legally:

  • Always check the weather: I’ve had to cancel flights due to unexpected wind or rain. Weather can change quickly, and I’ve learned to prioritize my safety and the drone’s performance.
  • Maintain line of sight: Keeping the drone within my line of sight is not only a legal requirement but also a good practice. It helps me avoid obstacles and makes controlling the drone easier.
  • Respect privacy: I always make sure to stay clear of private property and sensitive areas. This not only keeps me within legal boundaries but also fosters goodwill with those around me.
  • Be aware of other people: Flying my drone in crowded areas can be risky. I prefer to scout my locations beforehand to ensure I’m not intruding on anyone’s space. Plus, it makes for a more enjoyable experience for everyone involved.

These practices have become second nature for me, and they help me avoid potential legal headaches while enjoying the thrill of capturing aerial imagery.

Privacy Concerns in Aerial Photography

Understanding Privacy Laws

As we delve deeper into aerial photography, it becomes clear that privacy is a significant concern. I’ve come to realize that many people are unaware of how their privacy rights can intersect with drone use. Laws can vary widely from one location to another, but it’s essential to be informed. I remember feeling uneasy about flying my drone near residential areas, knowing that I could inadvertently invade someone’s privacy. Researching local privacy laws is a smart move for all of us.

Respecting Personal Privacy

In my experience, respecting personal privacy should always be a priority for anyone using drones. I’ve made it a habit to avoid capturing images of individuals without their consent. It’s not just about legality; it’s about treating others with respect. If I find myself near a gathering of people or a neighborhood, I’ll either change my flight path or wait until the area clears out. This not only builds trust with the community but also enriches my own experience.

Obtaining Permission for Photography

When in doubt, I always consider asking for permission. If I see a fantastic scene that involves someone’s private property or an event, I’ll approach the property owner or organizers to explain what I’m doing. Most of the time, people appreciate the courtesy. I’ve even made friends this way! Obtaining permission can make a world of difference and ensure that we all enjoy our time outdoors without legal worries. It’s about building positive relationships while we capture the beauty of nature together.

Common Mistakes Backpackers Make with Aerial Photography

Ignoring Local Laws

One of the biggest blunders I’ve seen among backpackers when it comes to aerial photography is ignoring local laws. I remember my excitement when planning a trip to a scenic national park, and I almost overlooked the state’s drone regulations. Thankfully, I did my homework just in time. Local laws can be vastly different from federal regulations, and it’s easy to get caught off guard. I’ve learned that taking a moment to research the specific area I’m visiting can save me from potential legal headaches and fines. Ignoring these laws not only risks penalties but can also spoil an otherwise enjoyable adventure.

Not Getting Necessary Permits

Another mistake I’ve encountered is neglecting to obtain the necessary permits. Many parks and protected areas require special permission for drone use, especially for commercial purposes. One time, I set out to capture sweeping views of a popular hiking trail, only to find out that I needed a permit to use my drone in that specific location. I had to pack up and leave, which was a bummer. I’ve since made it a rule to check the requirements for any area I plan to explore. It’s far easier to get the proper paperwork sorted out ahead of time than to face disappointment on the day of the shoot.

Underestimating Safety Risks

Safety should always be top of mind when flying drones, and I’ve realized that many backpackers underestimate the potential risks. There’s this adrenaline rush that comes with flying a drone, but it’s important to remember that it’s still a piece of equipment that can cause accidents. I once had a close call when a sudden gust of wind threw my drone off course. Luckily, I regained control just in time, but it was a wake-up call. I now prioritize safety checks before every flight, including assessing the environment and ensuring I have adequate battery life. I recommend that everyone do the same to avoid accidents that could not only damage your drone but also harm the surrounding environment or people nearby.

Resources for Backpackers

Online Tools for Checking Regulations

There are some fantastic online resources that can help us stay informed about aerial photography regulations. One of my go-to tools is the FAA’s UAS Data Delivery System, where I can check the current airspace status. Additionally, websites like Airmap or UAV Forecast provide detailed maps and updates about no-fly zones, weather conditions, and other critical data. I find it incredibly helpful to have all this information at my fingertips, making planning my shoots easier and much more efficient.

Communities and Forums for Aerial Photographers

Connecting with fellow drone enthusiasts has been invaluable for my growth as an aerial photographer. I often visit forums like DJI Forum or Reddit’s r/drones, where I can learn from others’ experiences and share tips. These communities offer a wealth of knowledge, from technical advice on flying to recommendations on best practices and gear. I’ve made some great friends through these platforms, and they’ve helped me enhance my skills by offering constructive feedback on my work.

Recommended Apps and Software for Aerial Photography Planning

Leveraging technology can significantly enhance our aerial photography experiences. I frequently use apps like Litchi and DroneDeploy for flight planning and shooting. These apps enable me to create flight paths and set specific camera angles, which helps me capture the perfect shot every time. I also recommend using editing software like Adobe Lightroom or Snapseed after the shoot to enhance and fine-tune the images. The combination of good planning and post-processing can turn a decent photo into something truly spectacular.

Tips for Responsible Aerial Photography

Respecting Nature and Wildlife

One of the key lessons I’ve learned while pursuing aerial photography is the importance of respecting nature and wildlife. We are guests in these beautiful environments, and it’s our responsibility to minimize our impact. I always make it a point to avoid flying my drone over sensitive areas, especially those that are home to wildlife. For example, I’ve read about how drone noise can disturb nesting birds, and I’ve made it a personal rule to steer clear of their habitats during breeding seasons. Being mindful of our surroundings not only protects the ecosystem but also ensures we can continue to enjoy these magical places for years to come.

Best Locations for Aerial Photography

Finding the right location can make all the difference for stunning aerial shots. I’ve had the best luck in places with varied terrains, such as coastlines, mountains, and national parks. I remember capturing the sun setting over a mountain range, and the view was breathtaking. Researching potential locations before my trips has helped me discover hidden gems. Websites like AllTrails or local tourism boards can provide insights into the best vantage points and trails that offer incredible aerial photography opportunities.

Tips for Capturing Stunning Aerial Shots

Finally, I’ve picked up some tips that have significantly improved my aerial photography. First, I always shoot during the golden hour—just after sunrise or before sunset. The soft light during these times adds warmth and depth to my images. Additionally, I try to incorporate interesting foreground elements, like trees or rock formations, to create depth in my photos. Lastly, experimentation is key! I’ve tried various angles and altitudes, which has led to some of my favorite shots. Don’t be afraid to get creative with your compositions and have fun with it!

Frequently Asked Questions

What is aerial photography?

Aerial photography refers to the process of taking pictures from an elevated position, typically using drones, aircraft, or handheld cameras mounted on poles or other devices. It provides a unique perspective that ground-level photography cannot match.

What are the different types of aerial photography?

The different types of aerial photography include drone photography, helicopter or airplane photography, and handheld photography from high points like mountain ridges or tall buildings.

Why is aerial photography important for backpackers?

Aerial photography enhances the connection with nature by documenting the beauty of surroundings in a unique way. It also allows backpackers to share their experiences on social media, inspiring others to explore the outdoors.

What federal laws govern aerial photography in the United States?

The legal landscape for aerial photography in the U.S. is primarily governed by the Federal Aviation Administration (FAA) regulations, which include guidelines for drone registration and usage.

What are the FAA regulations for drone operators?

Drone operators must follow the Part 107 regulations, which include registering drones that weigh more than 0.55 pounds, flying below 400 feet, and avoiding flights over people or in restricted airspace.

How do state-specific laws affect aerial photography?

Each state can establish its own laws regarding aerial photography, meaning what is legal in one state may be restricted in another. Some states may require permits for drone use in specific areas or during certain seasons to protect wildlife.

What are some common mistakes backpackers make with aerial photography?

Common mistakes include ignoring local laws, not obtaining necessary permits, and underestimating safety risks associated with flying drones.

What should a backpacker do to operate drones legally?

Backpackers should register their drones if they weigh more than 0.55 pounds, consider insurance for liability protection, and adhere to best practices such as checking weather conditions, maintaining line of sight, and respecting privacy.

What resources are available for backpackers interested in aerial photography?

Useful resources include online tools like the FAA’s UAS Data Delivery System, community forums for aerial photographers, and apps like Litchi and DroneDeploy for flight planning and shooting.

How can backpackers capture stunning aerial shots?

To capture stunning aerial shots, backpackers should shoot during the golden hour, incorporate interesting foreground elements, and experiment with different angles and altitudes for creative compositions.