Web Analytics

Recent Posts

How to Choose Budget Drones for Travel Photography

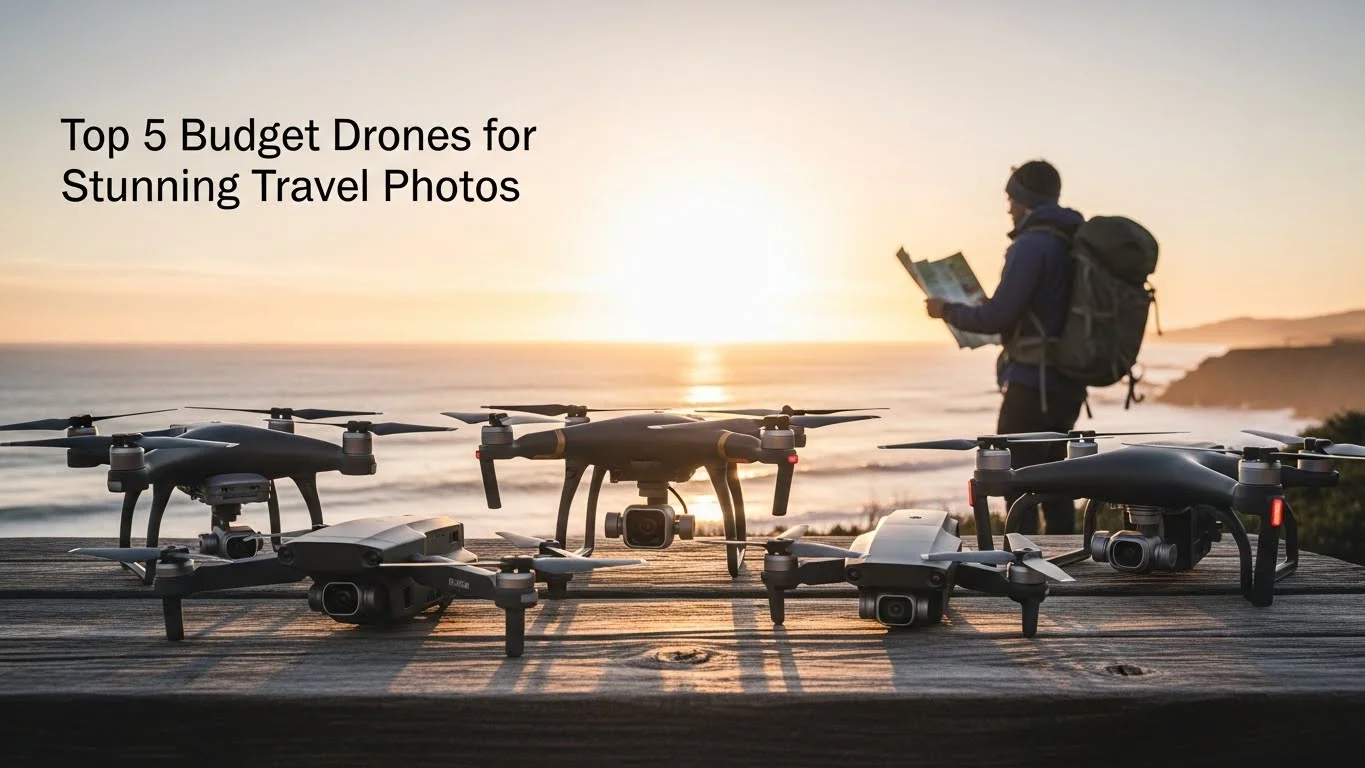
In the world of travel photography, capturing breathtaking aerial views can elevate your storytelling. Budget drones make this possible without breaking the bank, allowing us to explore new perspectives on our adventures. If you’re looking for more options, check out Reviewing the Best Budget Drones for Travelers.

How to Choose Budget Drones for Travel Photography

Understanding Budget Drones

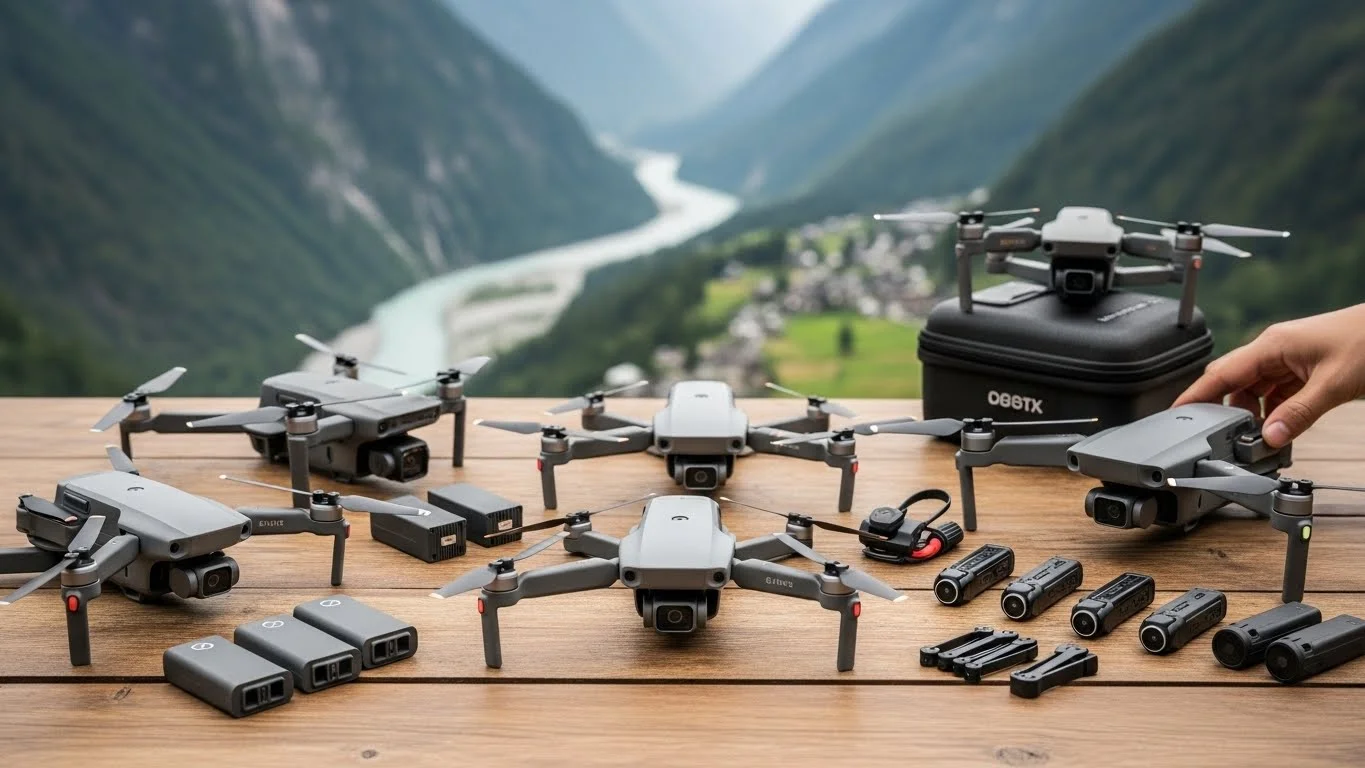
What is a Budget Drone?

When I first started exploring drones, I was overwhelmed by the variety available. A budget drone is typically defined as one that costs less than $500. These drones are designed to be accessible, offering essential features without the hefty price tag of their high-end counterparts. For me, a budget drone means I can experiment and learn without worrying about a massive investment. Often equipped with decent cameras, these drones can capture stunning photos and videos, making them ideal for travel photography.

Benefits of Using Drones for Travel Photography

Using a drone for travel photography has been a game-changer in my experience. One of the main benefits is the unique perspective it provides. Aerial shots can capture landscapes in ways that ground-level photography simply cannot. I remember my trip to the Grand Canyon; the drone allowed me to capture sweeping views of the canyon that made the experience all the more memorable.

Additionally, budget drones are usually lightweight and easy to carry, which is perfect for travelers. I often find myself hiking to remote locations, and having a drone that’s easy to pack makes all the difference. Plus, the technology has advanced significantly, so many budget drones now come equipped with features like GPS and stabilization, ensuring that your shots remain clear and steady even in windy conditions. You might also want to explore Best Compact Drones for Stunning Aerial Travel Shots for more insights.

Limitations of Budget Drones

While budget drones have their perks, they do come with limitations. I’ve encountered several that have subpar camera quality compared to more expensive models. For instance, the resolution might not be as high, which can affect the quality of your photos, especially if you plan to print them or use them for professional purposes. I learned this the hard way when I attempted to blow up a photo taken with a lower-quality drone, and it just didn’t hold up.

Another limitation is battery life. Many budget drones offer around 20-30 minutes of flight time, which can feel rushed when you’re trying to capture that perfect shot. I often found myself pacing my shots, making sure I didn’t run out of battery while still getting the footage I wanted. Moreover, budget drones may have a shorter control range, which can restrict how far you can fly them from your position. It’s important to keep these factors in mind when planning your shoots.

Key Features to Consider

Camera Quality and Resolution

One of the most important aspects to consider when choosing a budget drone for travel photography is the camera quality. I’ve seen drones that offer everything from 720p to 4K resolution. For me, 4K is the sweet spot because it allows for greater detail in my shots. It’s essential to look for a drone that balances quality with the price. I often check user reviews and sample footage to see how the camera performs in real-world conditions.

Battery Life and Flight Time

Battery life has always been a crucial factor for me. As mentioned earlier, most budget drones provide about 20 to 30 minutes of flight time. I recommend investing in extra batteries if possible, especially for day trips or when you’re traveling to picturesque locations. I’ve made the mistake of not checking battery levels before heading out, only to have my drone die mid-flight. It’s a bummer when you’re on the verge of getting that perfect shot!

Portability and Weight

When traveling, I learned that portability can make or break my experience. A heavier drone can be cumbersome, especially if I’m hiking or navigating busy airports. I prefer drones that fold up or have a compact design. This way, they easily fit in my backpack, leaving room for other gear I might need. Consider how you plan to travel and how much space you have when selecting your drone.

Range and Control Distance

The range of a drone is crucial, especially when I want to capture expansive landscapes. Budget drones usually have a control range of about 1,000 to 2,000 feet. I’ve found that staying within this range allows for better control and a more stable connection. It’s important to know the limitations of your drone so you can plan your shots accordingly without losing connection.

Stability and GPS Features

Stability is another vital feature I look for in a budget drone. Drones with built-in GPS can help maintain a steady flight path. I’ve experienced drones that drift during flight, making it difficult to get clear shots. GPS features help keep the drone steady and allow for easy return-to-home functions if you lose control or the battery runs low. This offers peace of mind, especially when flying in unfamiliar areas.

Top Budget Drones for Travel Photography

DJI Mini SE

The DJI Mini SE is one of my go-to choices when it comes to budget drones. Weighing just 249 grams, it’s incredibly lightweight and portable, making it perfect for travel. I remember taking it with me on a hiking trip in the Smoky Mountains, and it fit perfectly in my backpack. The camera shoots 12MP photos and 2.7K video, which is impressive for a drone at this price point. I found that the image quality was quite clear, allowing me to capture the lush landscapes beautifully. Plus, the 30-minute flight time was a real bonus, giving me ample opportunity to explore and capture different angles without feeling rushed.

Holy Stone HS720

The Holy Stone HS720 is another solid option that I’ve tried. This drone offers 4K camera capabilities, which is a big plus for anyone serious about getting quality shots. It has GPS-assisted flight features, which I found helpful when trying to maintain stability in windy conditions. One of the things I appreciate about the HS720 is its ability to perform various flight modes, including follow-me and waypoint flight, which makes capturing dynamic shots a breeze. I remember using the follow-me mode during a cycling trip, and it captured some fantastic footage of me riding through scenic trails.

Potensic D80

The Potensic D80 is another entry-level drone that I think is worth considering. It has a 1080p HD camera, which I found adequate for casual photography and social media sharing. One of the standout features for me was the dual GPS, which improved flight stability and made it easier to return home if needed. The D80 also boasts around 20 minutes of flight time, which is typical for a budget drone but still requires planning. During my travels, I used it to capture some stunning sunset shots over the ocean, and while the camera isn’t the highest resolution, the images still turned out quite nice.

Snaptain SP350

If you’re looking for something user-friendly, the Snaptain SP350 is a drone I would recommend for beginners. It features a 720p HD camera, which is decent for those just starting out. I remember flying this drone at a family picnic, and everyone had a blast watching it soar above us. The SP350 has a one-key takeoff and landing feature, which I found incredibly helpful for someone still getting accustomed to piloting. It’s not the most advanced option, but it’s perfect for casual users who want to have fun without the complexities of higher-end models.

Ryze Tello

The Ryze Tello is a little different from the others because it’s marketed as an educational drone. However, don’t let that fool you—this drone is surprisingly capable for its size and price. It captures 5MP photos and 720p videos, which I found perfectly adequate for sharing experiences online. The best part? This drone is extremely easy to fly and is a great option for kids or anyone new to the hobby. I’ve used the Tello for quick shots during urban outings, and it always sparked conversations about drones among onlookers. Plus, the ability to program simple flight paths made it a fun challenge to create cool aerial footage.

Comparing Price and Value

Price Range for Budget Drones

When we talk about budget drones, the price range typically falls between $100 and $500. I’ve seen so many options in this range, which allows us to find something that fits our needs and budget. The key is to define what features are most important to us. Are we looking for a better camera, longer flight time, or additional functionalities? This has helped me narrow down my choices and invest wisely in the right drone.

Cost vs. Features Analysis

It’s important to weigh the cost against the features you’re getting. Sometimes, I notice that spending just a bit more can lead to a significantly better product. For example, I found that drones priced around $300 often had better camera quality than those around $150. One time, I opted for a cheaper model thinking I was saving money, but I ended up disappointed with the photo quality. In my experience, investing in a slightly more expensive drone often pays off in the long run.

Where to Find Discounts and Deals

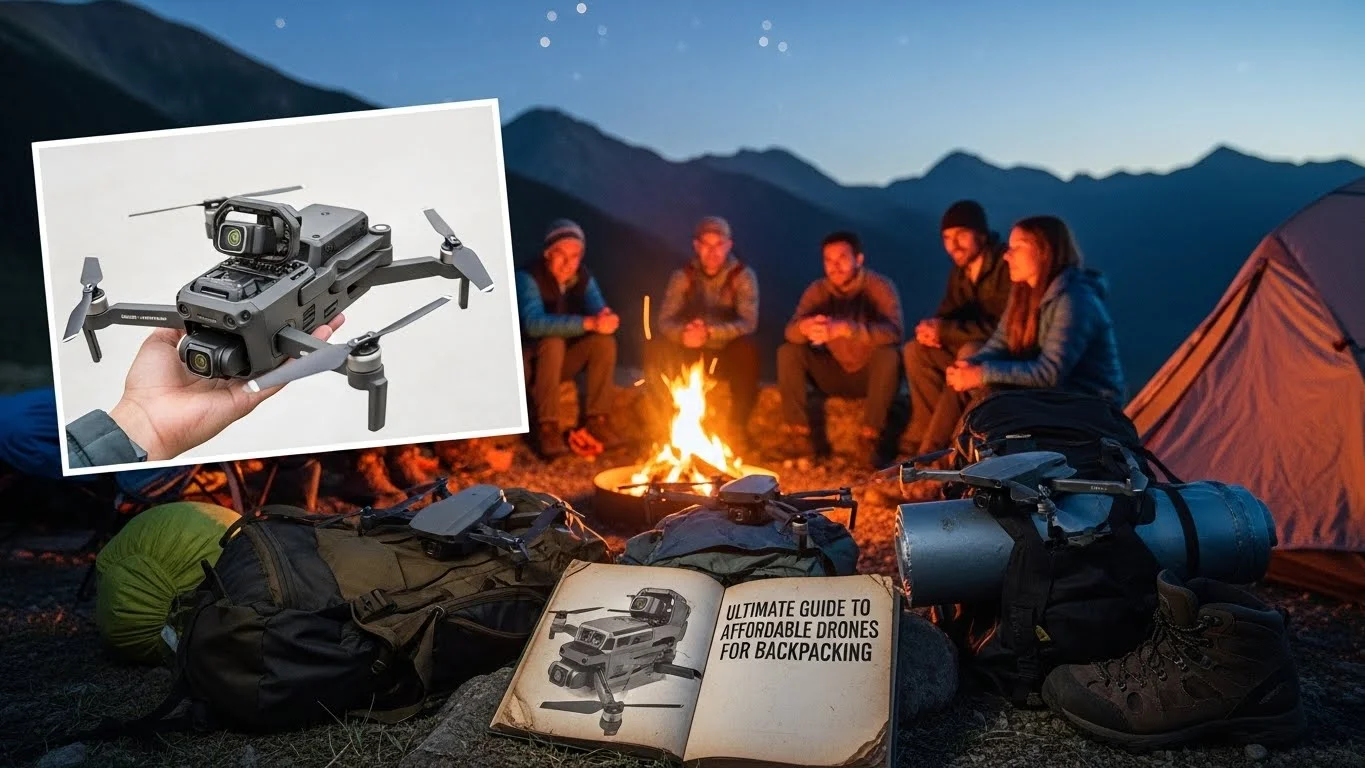
Finding discounts on drones can feel like a treasure hunt, but it’s worth it! I often check online retailers like Amazon, Best Buy, and specialized drone shops. I’ve discovered seasonal sales and even clearance items that offered great savings. Another tip I can share is to sign up for newsletters from drone manufacturers; they sometimes send exclusive deals and promotions. Additionally, keep an eye on social media. I’ve snagged some amazing deals through flash sales shared on platforms like Instagram or Facebook. If you’re into backpacking, consider reading the Ultimate Guide to Affordable Drones for Backpacking for more tips.

Legal Considerations for Drone Use

Understanding FAA Regulations

As I dove deeper into the world of drone photography, I quickly realized that understanding the regulations set forth by the Federal Aviation Administration (FAA) is crucial. The FAA has guidelines to ensure the safe and responsible use of drones, especially in populated areas. For instance, I learned that flying a drone for commercial purposes requires a Part 107 certification, which involves passing a knowledge test. Even though I primarily fly for fun, I still make it a point to familiarize myself with their rules, like keeping my drone within my line of sight and avoiding restricted airspace. It’s a good practice to check the FAA’s website for updates, as regulations can change frequently.

Drone Registration Requirements

One of the first things I did when I got my drone was register it with the FAA, which is a requirement for drones weighing over 0.55 pounds. The process is surprisingly easy and can be done online. I recall feeling a sense of responsibility once I completed the registration, knowing I was adhering to the law. The registration fee is minimal, and it lasts for three years, which is a small price to pay for peace of mind. Having the registration number displayed on my drone also ensures that, should it ever get lost, it can be returned to me, which is reassuring during my travels.

Local Laws and Restrictions

Beyond federal regulations, I discovered that many states and cities have their own laws concerning drone use. For example, I learned the hard way that flying a drone in national parks is prohibited, as I attempted to capture some stunning views of Yosemite and was turned away by a park ranger. Each area may have specific restrictions, so I always make it a habit to research local laws before heading out. Apps like B4UFLY can be incredibly helpful, as they provide real-time updates on where it’s safe to fly. Remember, it’s not just about following the rules; it’s also about being a good neighbor to those around us.

Best Practices for Travel Photography with Drones

Tips for Capturing Stunning Aerial Shots

Over the years, I’ve picked up quite a few tricks for making the most of my drone photography. One of my favorite tips is to shoot during the golden hour, which is that magical time just after sunrise or before sunset when the light is soft and warm. I remember my first attempt at capturing a sunset over the ocean—it turned out to be one of my favorite shots! Additionally, I find that using a variety of angles, such as high-altitude shots and lower perspectives, helps create more dynamic images. Experimenting with different settings and compositions can truly elevate your photography.

Post-Processing Drone Photos

After capturing stunning aerial shots, I love to spend time in post-processing to bring out the best in my photos. I typically use software like Adobe Lightroom or Photoshop, which allow me to enhance colors, adjust exposure, and sharpen details. One thing I’ve learned is to be careful not to overdo it; subtlety is key in maintaining a natural look. I remember editing a particularly vibrant shot from a forest hike and being amazed at how much more alive the colors appeared after a few tweaks. Post-processing can really transform a good photo into a great one!

Staying Safe While Flying

Safety is paramount when operating a drone, especially in unfamiliar territories. Before each flight, I always check the weather conditions. Wind can be a significant factor, and I’ve had moments where I had to cut my flight short due to unexpected gusts. I also make it a habit to inspect my drone before each use—checking the propellers, battery levels, and camera settings helps ensure everything runs smoothly. Moreover, I keep a safe distance from people and animals, as I want my drone experience to be enjoyable for everyone involved. I can’t stress enough how important it is to be aware of your surroundings while flying!

Travel Destinations Ideal for Drone Photography

National Parks and Natural Landscapes

Visiting national parks is one of my favorite ways to explore and photograph nature—and drones add an exciting new dimension. Places like Yellowstone and the Grand Canyon offer breathtaking vistas that are even more stunning from above. I was lucky enough to capture some stunning shots of the geothermal features in Yellowstone, and the aerial perspective truly highlighted the beauty of the landscape. Just remember to check the specific regulations for each park, as many have restrictions on drone usage.

Urban Landscapes and Architecture

Urban areas can also provide fantastic opportunities for drone photography. I’ve flown my drone over cities like San Francisco and New York, where the skyline views are simply breathtaking. Capturing the juxtaposition of nature and urban settings can create striking imagery. I enjoy experimenting with angles and heights to highlight interesting architectural features—like the sweeping curves of the Golden Gate Bridge from above. Just be sure to be mindful of people and buildings, as flying in crowded areas can be tricky.

Beaches and Coastal Areas

Beaches and coastal regions are perhaps my favorite places to fly. The combination of water, sand, and sky creates beautiful contrasts that are perfect for photography. I remember one trip to a secluded beach where I was able to capture the waves crashing against the rocks from a unique viewpoint. The colors of the ocean are often vibrant, and the reflections during sunrise or sunset can lead to some magical moments. Just like with any location, I make sure to respect the privacy of others and follow any local regulations regarding drone usage.

Frequently Asked Questions

What defines a budget drone?

A budget drone is typically defined as one that costs less than $500, designed to be accessible and equipped with essential features without the hefty price tag of high-end models.

What are the benefits of using drones for travel photography?

Drones provide a unique perspective for capturing aerial shots that ground-level photography cannot achieve. They are lightweight, easy to carry, and many come equipped with advanced features like GPS and stabilization.

What limitations do budget drones have?

Budget drones often have subpar camera quality compared to more expensive models, with lower resolution affecting photo quality. They typically have a battery life of around 20-30 minutes and a limited control range, which can restrict how far they can be flown from the operator.

What key features should I consider when choosing a budget drone?

Important features to consider include camera quality and resolution, battery life and flight time, portability and weight, control range, and stability with GPS features.

Which budget drones are recommended for travel photography?

Some recommended budget drones include the DJI Mini SE, Holy Stone HS720, Potensic D80, Snaptain SP350, and Ryze Tello, each offering various features suitable for different photography needs.

How can I find discounts on budget drones?

Discounts can often be found at online retailers like Amazon and Best Buy, during seasonal sales, or by signing up for newsletters from drone manufacturers. Social media platforms may also announce flash sales.

What are the FAA regulations regarding drone use?

The FAA has guidelines for safe drone use, including the requirement for a Part 107 certification for commercial flying and keeping the drone within the operator’s line of sight while avoiding restricted airspace.

What is required for drone registration?

Drones weighing over 0.55 pounds must be registered with the FAA, which can be done online for a minimal fee. The registration is valid for three years and helps in recovering lost drones.

What are some tips for capturing stunning aerial shots with a drone?

To capture stunning aerial shots, it’s recommended to shoot during the golden hour, experiment with various angles, and use different settings and compositions for dynamic images.

What travel destinations are ideal for drone photography?

Ideal travel destinations for drone photography include national parks and natural landscapes, urban areas with interesting architecture, and beaches or coastal regions that provide beautiful contrasts for photography.

Reviewing the Best Budget Drones for Travelers

Traveling is all about capturing memories, and what better way to do that than with a drone? Budget drones are perfect for travelers who want to document their adventures without breaking the bank. Read Interesting article: Top 5 Budget Drones for Stunning Travel Photos

Reviewing the Best Budget Drones for Travelers

Understanding Budget Drones

What Defines a Budget Drone?

When I think about budget drones, I picture lightweight, portable devices that are easy to use and won’t drain my wallet. Generally, a budget drone falls within the $100 to $500 range. They offer decent camera quality, reasonable flight times, and enough features to satisfy casual users like myself. These drones aren’t necessarily the top-of-the-line models, but they provide excellent value for money. For travelers, the best budget drones can be a great companion, allowing us to elevate our travel photography without the stress of expensive equipment. Best Compact Drones for Stunning Aerial Travel Shots can also provide valuable insights.

Benefits of Using Drones for Travel

From my experience, using a drone while traveling opens up a world of creative possibilities. Have you ever stood on a mountain overlook, gazing at the breathtaking view, and wished to capture it from a unique angle? That’s where drones come in. They allow us to take stunning aerial shots that can truly capture the essence of a location.

Moreover, drones can document your adventures in a way that traditional photography simply can’t. Whether it’s gliding over a pristine beach or swooping down into a bustling cityscape, these machines add a dynamic element to our travel stories. Plus, they’re a lot of fun! Flying a drone gives me a sense of adventure and excitement, making my trips feel even more memorable. Read Interesting article: Top Destinations for Affordable Wildlife Adventure Photography

Key Features to Look For

When searching for the ideal budget drone for travel, there are several key features I always consider. First, camera quality is essential. I want to capture high-resolution photos and videos, so I look for drones that offer at least 1080p video recording. I’ve learned that a good camera can make all the difference in how my travel experiences are documented.

Next up is flight time. I’ve faced the disappointment of my drone dying mid-flight, which can be frustrating when you’re trying to capture the perfect shot. Most budget drones offer flight times ranging from 20 to 30 minutes, which I find sufficient for most travel adventures. Battery life can vary, so I recommend investing in a couple of extra batteries for longer trips.

Portability is another crucial feature, especially for travelers like us. I prefer drones that are compact and lightweight, making them easy to pack in my backpack. Some models fold down, which is a massive bonus for saving space in my luggage.

Lastly, I always check the range and control options. A drone with a longer range allows for more exploration and creativity. I find it helpful when the controls are user-friendly, especially for beginners. Some drones even offer features like GPS follow-me modes and waypoints, which make flying easier and more intuitive.

Top Budget Drones for Travelers

DJI Mini SE

The DJI Mini SE has quickly become one of my favorite budget drones. It’s compact, lightweight, and offers impressive camera capabilities with 12MP photos and 2.7K video. The flight time is around 30 minutes, which is fantastic for capturing those glorious sunset shots. Plus, it’s easy to transport, making it a perfect travel companion.

Holy Stone HS720

I’ve also enjoyed using the Holy Stone HS720. It boasts a 4K camera, which is rare for a budget drone. The GPS-assisted features provide stability, and its 26-minute flight time is more than enough for most outings. Its foldable design allows it to fit neatly into my bag, ensuring I can take it anywhere.

Snaptain SP350

The Snaptain SP350 is another excellent choice, especially for beginners. It’s user-friendly and comes with a 720p camera. While the video quality isn’t as high as others, it’s perfect for casual use. The drone is lightweight and comes with features like altitude hold and headless mode, which makes flying super easy.

Potensic D80

The Potensic D80 surprised me with its features. It has a 1080p camera, 20 minutes of flight time, and an impressive range. The first time I flew it, I loved how stable it was, even in slightly windy conditions. It’s an excellent choice for anyone wanting to explore new places without spending a fortune.

Ryze Tech Tello

Lastly, the Ryze Tech Tello is perfect for tech enthusiasts. It’s incredibly affordable and offers a 720p camera with some cool programming features for those who love to code. While it’s not the best for high-quality footage, it’s perfect for learning and having fun. Its small size makes it easy to take along wherever I go.

Comparative Analysis of Features

Camera Quality and Capabilities

I’ve always believed that the camera is the heart of any drone, especially for travelers like us who want to capture stunning visuals. When comparing budget drones, I look closely at their camera capabilities. For instance, the DJI Mini SE, with its 12MP photos and 2.7K video, delivers sharp images that effectively showcase the beauty of a destination. On the other hand, the Holy Stone HS720 surprises many with its 4K camera, making it a standout in this price range.

It’s essential to consider not just resolution but also features like image stabilization. I remember the first time I flew a drone without stabilization—my footage looked shaky and unprofessional. The Potensic D80 has decent stabilization features, which I found useful when filming during slightly breezy conditions. Overall, I recommend focusing on the quality of the camera and its additional capabilities, like live streaming or panoramic shots, to enhance our travel storytelling.

Flight Time and Battery Life

Flight time is something I can’t stress enough. It’s so disappointing when you’re capturing that perfect sunset, and your drone’s battery dies. Most budget drones offer about 20 to 30 minutes of flight time, which I find adequate for short shoots. The Holy Stone HS720, with its 26-minute flight time, has been a lifesaver during my outings.

What I’ve learned is that it’s wise to invest in extra batteries. For example, when I traveled to a stunning beach location, I brought along two spare batteries for my DJI Mini SE. This allowed me to keep flying and capturing those gorgeous aerial views without worry. I recommend checking the battery life specifications before purchasing and always packing a few backups for longer adventures.

Range and Control Options

The range of a drone is another critical factor that can shape your flying experience. Having flown various models, I’ve noticed that a longer range opens up more creative possibilities. The DJI Mini SE boasts a range of up to 4 kilometers, which allows me to explore vast areas without losing connection. On the other hand, the Snaptain SP350 has a more modest range, but for beginners, it’s more than sufficient.

I appreciate drones that offer user-friendly controls. The Holy Stone HS720, with its GPS-assisted features, makes it easy to fly even for someone like me, who’s still learning the ropes. Some models even have intelligent features like “follow-me” modes or waypoints, which help make the flying process more intuitive. I love how these features enhance my creativity and allow me to focus more on capturing stunning footage without worrying too much about piloting.

Portability and Weight

For travelers, portability is a game-changer. I can’t tell you how many times I’ve crammed my backpack full of gear, making it tough to carry everything. I’ve found that compact, lightweight drones make a significant difference. The DJI Mini SE, for instance, is incredibly easy to pack, thanks to its foldable design. I remember hiking to a breathtaking viewpoint, and the fact that my drone didn’t weigh me down made all the difference.

The weight of the drone also affects flight performance. Heavier drones can be harder to control, especially in windy conditions. I noticed that the lighter Snaptain SP350 performs well in mild weather, making it a good choice for casual outings. If you’re planning on traveling frequently, I recommend looking for a drone that balances durability and portability, ensuring that it’s easy to bring along without compromising on performance.

Best Use Cases for Budget Drones

Traveling to National Parks

National parks are some of the most stunning places to fly a drone. I remember my trip to Yosemite, where the sweeping vistas and towering cliffs were begging to be captured from above. Budget drones like the DJI Mini SE are perfect for this kind of adventure because they’re lightweight and easy to maneuver. Plus, I found that these drones can help document some of the more remote areas of the parks that are hard to access on foot.

Capturing Cityscapes and Landmarks

Cityscapes present a different kind of beauty, and using a drone to capture iconic landmarks is incredibly rewarding. I had a fantastic time flying my Holy Stone HS720 over the skyline of Chicago, and the 4K camera made my footage look professional. I recommend timing your flights just before sunset for those golden hour shots—trust me, the lighting makes all the difference.

Documenting Outdoor Adventures

Outdoor adventures, like hiking or biking, are also great opportunities to use a drone. I’ve used my Potensic D80 to document a mountain biking trip, capturing the trails from the air as I rode. It adds a dynamic element to my adventures, allowing me to share experiences with friends and family in a more engaging way. I love how these budget drones can enhance our storytelling, turning simple outings into epic tales of adventure.

Legal Considerations for Drone Use

Understanding FAA Regulations

As I dove deeper into the world of drones, I quickly realized that knowing the legal landscape is just as important as mastering the flying skills. In the United States, the Federal Aviation Administration (FAA) has laid out specific regulations for drone operators. For anyone looking to fly a drone, including budget models, it’s crucial to understand these rules to avoid fines or other penalties.

One key regulation is that if your drone weighs more than 0.55 pounds (250 grams), you must register it with the FAA. Registration costs around $5 and is valid for three years. This was an important step for me; I wanted to ensure I was flying legally, especially when capturing stunning shots in public places.

Additionally, the FAA has established restrictions on where you can fly. Drones must not fly higher than 400 feet above ground level, and they need to remain within visual line of sight. I’ve found that these regulations help keep us safe and promote responsible flying. When planning my trips, I always check for any airspace restrictions in the areas I intend to visit, especially near airports or military bases.

Local Laws in Popular Travel Destinations

In my travels, I’ve discovered that drone laws can vary significantly from one place to another. While the FAA provides a foundation, many states and cities have their own rules that can affect where and how I can fly my drone. For example, some city parks and beaches have strict no-drone policies, while others may require a permit to operate.

Before heading out, I make it a habit to do a little research about local drone regulations. I remember a trip to California where I planned to shoot some amazing footage at a state park. After checking, I learned that I needed a permit to fly there! It was a bit of a hassle, but I appreciated the clarity and respect for nature that these regulations promote.

For international travelers, it’s even more crucial to understand the local laws regarding drones. Some countries have strict rules, and entering without proper knowledge can lead to confiscation of your drone or hefty fines. I recommend checking reliable sources or local drone communities to ensure compliance with the laws of the land.

Drone Registration Process

The drone registration process in the U.S. is straightforward, which was a relief for me. After purchasing my DJI Mini SE, I went online to the FAA’s website and registered within minutes. The process requires basic information like your name, email, and the drone’s unique serial number. After payment, I received a registration number that I printed and attached to my drone.

It’s important to keep your registration updated, especially if you get a new drone or change your address. I learned this the hard way when I forgot to update my registration after moving. Thankfully, the process to correct it was simple, but it served as a reminder to always stay on top of my responsibilities as a drone operator.

For travelers, ensuring that your drone is registered not only keeps you legally compliant but also adds a layer of peace of mind while exploring new places. I always carry a copy of my registration details when traveling, just in case I need to show proof of compliance.

Tips for Traveling with Drones

Packing and Transportation Tips

Packing my drone for travel has become an art form in itself. I’ve learned that the way I transport my drone can greatly affect its longevity and performance. First and foremost, I always use a dedicated carrying case. It protects the drone from bumps and drops that can easily happen when I’m on the go.

I also make sure to remove the propellers and any detachable parts before packing. This not only saves space but also prevents accidental damage. When I traveled to the mountains, I placed my drone in my backpack along with clothing to cushion it further. This method has worked wonders for me, allowing me to travel with peace of mind.

Maintaining Your Drone While Traveling

Keeping my drone in top shape while traveling is essential, especially when I want to capture amazing moments. I’ve learned to perform regular checks before and after flights. This includes inspecting the propellers for any damage and ensuring the battery is charged. I remember a trip where I neglected to check the propellers and ended up with a rough flight—lesson learned!

Additionally, I always carry a cleaning kit with me. Dust and debris can accumulate quickly, especially at outdoor locations. A quick clean can make a significant difference in how well the drone performs. I’ve found that taking a few minutes to clean my drone before flying ensures that I get the best footage possible.

Best Practices for Safe Flying

Safety is always my top priority when flying my drone. I’ve experienced some close calls and learned a few best practices along the way. Firstly, I always scout the area before flying. Checking for trees, power lines, and other obstacles can save me from potential crashes. I remember one time in a crowded park, I almost flew into a tree because I wasn’t paying attention to my surroundings.

I also make it a habit to check the weather before flying. Windy conditions can make flying difficult, especially for lighter drones. If it seems too windy, I’ve learned to hold off until conditions improve. Lastly, I always communicate with people nearby when I’m about to fly. A simple heads-up can prevent misunderstandings and ensure a smoother experience for everyone.

Frequently Asked Questions

What defines a budget drone?

A budget drone is typically a lightweight, portable device that is easy to use and falls within the $100 to $500 range. They offer decent camera quality, reasonable flight times, and features suitable for casual users, providing excellent value for money.

What are the benefits of using drones for travel?

Using a drone while traveling allows for creative aerial shots and dynamic documentation of adventures that traditional photography can’t capture. Drones add excitement to trips and help create memorable experiences by providing unique perspectives of locations.

What key features should I look for in a budget drone for travel?

When looking for a budget drone, consider camera quality (at least 1080p video), flight time (20 to 30 minutes), portability, and range. User-friendly controls and additional features like GPS follow-me modes can also enhance the flying experience.

Which budget drones are recommended for travelers?

Some recommended budget drones for travelers include the DJI Mini SE, Holy Stone HS720, Snaptain SP350, Potensic D80, and Ryze Tech Tello. Each offers unique features suitable for different user needs and preferences.

What is the flight time of budget drones?

Most budget drones offer flight times ranging from 20 to 30 minutes, which is generally sufficient for capturing short shoots. It is advisable to invest in extra batteries for longer trips.

What legal considerations should I be aware of when flying a drone?

In the U.S., the FAA requires drones over 0.55 pounds to be registered. Additionally, drones must not fly higher than 400 feet and should remain within visual line of sight. It’s essential to check local laws and regulations, especially in different states or countries.

How do I register my drone?

The drone registration process in the U.S. is straightforward. You can register online through the FAA’s website by providing basic information such as your name and the drone’s serial number. Registration costs around $5 and is valid for three years.

What tips can help in packing and transporting a drone for travel?

When packing a drone for travel, it’s best to use a dedicated carrying case, remove propellers and detachable parts to save space, and use clothing as cushioning. This helps protect the drone from damage during transport.

What are best practices for safely flying a drone?

Best practices for safe flying include scouting the area for obstacles, checking the weather conditions, and communicating with nearby people before flying. These measures help prevent accidents and ensure a smoother flying experience.

How can I maintain my drone while traveling?

To maintain your drone while traveling, perform regular checks on the propellers and battery, carry a cleaning kit to remove dust and debris, and ensure the drone is in good condition before each flight to achieve the best footage possible.

Best Compact Drones for Stunning Aerial Travel Shots

Compact drones have transformed the way we capture stunning aerial shots during our travels. With their lightweight design and powerful features, they allow us to explore the skies like never before. For those interested in budget-friendly options, be sure to check out the Ultimate Guide to Affordable Drones for Backpacking.

Best Compact Drones for Stunning Aerial Travel Shots

Understanding Compact Drones

What is a Compact Drone?

Compact drones are small, lightweight flying devices designed for easy transportation and usability without sacrificing performance. When I first got into drone photography, I quickly realized that compact drones offer a perfect blend of portability and capability. Unlike their larger counterparts, these drones can fit into a backpack or even a large pocket, making them ideal for travelers like us who want to capture breathtaking landscapes or cityscapes without the hassle of bulky equipment. I’ve found that many compact drones are designed to be user-friendly, with intuitive controls that make flying them a breeze, even for beginners.

Advantages of Compact Drones for Travel

One of the most significant advantages of using a compact drone during travel is convenience. I remember feeling overwhelmed at first, trying to figure out how to carry all my photography gear. But with a compact drone, I can easily toss it into my carry-on luggage, freeing up space for other essentials. The lightweight design also means I can hike up a mountain or walk through a bustling city without being weighed down.

Additionally, compact drones are often equipped with advanced technology that delivers stunning image quality. I’ve taken some of my best travel shots with these drones, capturing moments that would have been impossible otherwise. Whether it’s a sweeping view of a coastline or an intimate shot of a hidden waterfall, they deliver impressive results. If you’re looking for budget options, consider the Top 5 Budget Drones for Stunning Travel Photos.

Another perk is their battery efficiency. Many compact models come with longer flight times than expected, allowing for extended aerial adventures. I recall sitting on a cliff overlooking the ocean, capturing the sunset as my drone effortlessly soared, all thanks to its reliable battery life. This reliability gives me peace of mind while enjoying my travels.

Key Features to Look For

When I started researching compact drones, I quickly learned that not all models are created equal. There are several key features to consider that can significantly enhance your aerial photography experience. First, I recommend looking for a drone with a high-quality camera. A good sensor and lens can make all the difference in capturing stunning images and videos. I’ve always been drawn to drones with at least a 4K video capability. It gives my footage a professional touch that I cherish.

Next, consider the flight range and connectivity options. Drones that can maintain a solid connection with your remote or mobile device will allow you to explore further. I once had a heart-stopping moment when I lost connection with my drone, so I now prioritize models that boast reliable transmission technology. It’s also beneficial to have GPS capabilities for safe flying, especially in unfamiliar areas.

Battery life is crucial, as I’ve experienced the stress of running out of power mid-flight. Look for drones that offer at least 20-30 minutes of flight time per charge. Additionally, I like to ensure there are options for quick battery swapping or charging, which allows me to get back to flying without long waits.

Finally, consider portability features like foldable arms and lightweight materials. I’ve found that models that easily fold up save space and make it easier to carry. In my experience, compact drones can be an absolute game-changer for capturing those stunning travel shots. They open up a world of possibilities, allowing us to see our favorite destinations from a new perspective. I’ve come to appreciate the freedom that comes with flying a drone, and I believe you will too, especially when you’re out exploring. For families looking for premium options, don’t miss the Must-Have High-End Gear for Luxe Family Getaways.

Top Compact Drones for Aerial Travel Shots

DJI Mini 3 Pro

I can’t stress enough how much I love the DJI Mini 3 Pro. This drone has become a staple in my travel gear. With its impressive 4K camera and lightweight design, it checks all the boxes for someone like me who enjoys capturing stunning aerial views. The Mini 3 Pro boasts advanced features like obstacle avoidance and a range of up to 12 kilometers, which gives me the freedom to explore further without worrying about losing my drone. Plus, the battery life is exceptional, allowing for up to 34 minutes of flight time. I remember taking it to a national park, and the photos I got were breathtaking!

Autel EVO Lite+

The Autel EVO Lite+ caught my eye for its flexibility and high image quality. It has a large 1-inch CMOS sensor, which means it excels in low light conditions—perfect for those sunset shots I love to capture. What I appreciate is its adjustable aperture, giving me the ability to manipulate depth of field. When I traveled to a coastal town, I used the Lite+ to get some dramatic shots of the cliffs at dusk, and the clarity was just stunning. The flight time is around 40 minutes, so it gives me ample opportunity to experiment with different angles and compositions.

Parrot Anafi AI

The Parrot Anafi AI is another compact drone that has impressed me with its unique features. It’s lightweight and folds up nicely, which is a huge plus for travel. The 32x zoom capability is something I find incredibly useful, especially when I want to capture details from afar without disturbing the scene. I remember using it in a bustling market, where I could snap candid shots of locals without getting too close. The Anafi AI also has a 4K HDR camera, so the image quality is fantastic, even on cloudy days.

Holy Stone HS720E

If you’re on a budget, the Holy Stone HS720E is worth considering. It’s an affordable option that doesn’t skimp on features. I’ve had a great experience with its 4K camera and GPS-assisted flight features. The drone is sturdy and easy to fly, which makes it great for beginners. I once took it on a road trip and was pleasantly surprised by the quality of the footage. It’s not as compact as some higher-end models, but at around 500 grams, it’s still manageable to carry along on adventures.

DJI Mavic Air 2

The DJI Mavic Air 2 is often hailed as a go-to for travel enthusiasts, and I can see why. With its powerful camera that offers 48MP stills and 4K video at 60fps, it’s perfect for anyone looking to elevate their photography game. I took mine to a scenic overlook, and the level of detail in the images was just jaw-dropping. The Mavic Air 2 also features intelligent shooting modes, which means I can effortlessly capture cinematic shots without needing advanced skills. The flight time is approximately 34 minutes, which is fantastic for longer outings.

Camera Specifications and Image Quality

Sensor Size and Resolution

When it comes to aerial photography, the sensor size really does matter. I’ve learned that larger sensors typically produce better image quality, especially in challenging lighting conditions. In my experience, drones with at least a 1-inch sensor, like the Autel EVO Lite+, deliver significantly clearer images with more dynamic range. This means I can capture vibrant colors and intricate details in my travel photos, whether I’m shooting at sunrise or during the golden hour.

Lens Options and Focal Length

Lens options are another critical factor to consider. I’ve found that drones with variable focal lengths allow for more creative freedom. For instance, a wide-angle lens can help capture expansive landscapes, while a telephoto lens can hone in on distant subjects. I remember being able to shoot wide, sweeping vistas of mountains as well as close-ups of wildlife with the same drone. This versatility is invaluable for travel photography, where every scene has its own story to tell.

Video Recording Capabilities

I’ve always been a fan of capturing video during my travels, and the recording capabilities of compact drones have come a long way. Most models today can shoot in 4K, which is essential for achieving that cinematic quality I crave. I’ve also noticed that drones that offer higher frame rates—like 60fps—allow me to create smooth, slow-motion footage. This feature has been a game-changer for me, especially when documenting adventures like kayaking or hiking. The ability to slow down and highlight the beauty of a scene is something I cherish in my travel videos.

Flight Time and Battery Life

Average Flight Time of Top Models

One of the first things I check when considering a compact drone is its flight time. From my experience, there’s nothing more frustrating than running out of battery just as you’re about to capture that perfect shot. Most compact drones offer a range of flight times, usually between 20 to 40 minutes per charge. For instance, the DJI Mini 3 Pro boasts an impressive 34 minutes, which I have found to be more than enough for most of my adventures. I remember flying over the Grand Canyon, and knowing I had that extra time really allowed me to explore different angles and perspectives without the constant worry of landing early.

When I was using the Autel EVO Lite+, I appreciated its 40-minute flight time. It felt liberating to have that extended duration for creative exploration. I could take my time, switch between different settings, and really focus on what I wanted to capture. Of course, factors like wind speed and flying style can affect flight times, but having a drone that can last longer gives us more leeway to experiment.

Battery Charging Options

Battery charging options can also make a huge difference during travel. I’ve learned that having multiple batteries is a game-changer; that way, I can keep flying while one battery is charging. Most compact drones these days come with smart charging options, allowing batteries to be charged in sequence, which I find super convenient. The DJI Mini 3 Pro, for example, has a charging hub that can hold multiple batteries, and I often use that during layovers or downtime.

Moreover, some drones even offer fast-charging capabilities, letting you get back into the air quicker. I once found myself with a short window to grab some shots during a beautiful sunset, and I was so glad my drone had that feature. The ability to charge batteries quickly on the go is something I highly recommend looking for when choosing a drone.

Battery Maintenance Tips

Taking care of your drone’s battery can extend its life significantly. I’ve learned a few tricks along the way that I think you might find helpful. First, avoid letting the batteries drain completely before recharging them. Instead, try to keep them between 20% and 80% charged whenever possible. I remember when I first started flying drones, I didn’t think much about battery maintenance, and I ended up with significantly reduced flight times over the months.

Also, store your batteries in a cool, dry place when not in use. I keep mine in a protective case to avoid any accidental damage. During warmer months, I try to avoid exposing them to high temperatures, as heat can degrade battery capacity. I’ve found that investing in a good battery bag or case has really paid off in the long run, as it keeps them safe and organized while I’m traveling.

Lastly, regularly check the condition of your batteries. If you notice any swelling or damage, it’s best to replace them. As we all know, safety comes first, especially when it comes to flying. I’ve learned to be proactive about battery care, and it makes a real difference in my overall flying experience.

Portability and Design

Weight and Size Considerations

When it comes to travel, weight and size are paramount. I’ve found that the best compact drones are those that don’t compromise on performance while remaining lightweight and easy to carry. For me, a drone that weighs around 250 to 500 grams is ideal, as it strikes the perfect balance between portability and stability in the air. The DJI Mini 3 Pro, for example, impresses me not only with its capabilities but also with its lightweight design that makes it a breeze to carry during long hikes.

I remember trekking through the Rocky Mountains, and the last thing I wanted was a heavy drone weighing me down. A compact and lightweight drone made it so much easier to focus on enjoying the scenery rather than stressing about my gear. It’s amazing how much more I could explore when I wasn’t burdened by heavy equipment.

Foldable vs. Fixed Designs

Another design feature that I really appreciate is the foldability of a drone. I’ve had both fixed and foldable models, and I must say, foldable drones have become my go-to. The ability to collapse the arms and fit the drone into a small bag is incredibly convenient for travel. The DJI Mavic Air 2, for instance, folds up neatly, which makes it super easy to fit into a backpack alongside other gear.

On a recent trip to Europe, I had my foldable drone tucked away in my daypack, which made moving from city to city a lot more manageable. I could whip it out whenever I spotted an interesting vantage point without any hassle. I definitely recommend considering a foldable design if you plan on traveling frequently with your drone.

Carrying Cases and Accessories

Having the right carrying case can enhance your drone experience significantly. I’ve invested in a hard-shell case that not only protects my drone but also keeps my batteries and other accessories organized. When I travel, I can toss everything into one bag, making it easier to pack and unpack. There’s something satisfying about having an organized setup, especially when you’re on the go.

Additionally, I’ve found that using propeller guards and lens filters can protect my drone and enhance my photography. They don’t take up much space, and I always feel more secure knowing my drone is protected, especially in crowded or rugged areas. Carrying cases and accessories might seem like minor details, but they can make a significant difference in ensuring a smooth travel experience.

Regulations and Safety Tips for Traveling with Drones

Understanding FAA Regulations

As someone who enjoys flying my drone in various locations, I quickly learned that understanding regulations is crucial. The Federal Aviation Administration (FAA) has specific rules for flying drones in the United States that every drone operator must follow. For instance, I must always keep my drone within my line of sight, which is easier said than done when you’re trying to capture that perfect shot. I also discovered that flying above 400 feet can get you into trouble, so I make it a point to stay below that limit whenever possible.

Additionally, I registered my drone with the FAA because it weighs over 0.55 pounds. It was a simple process online, and it gives me peace of mind knowing that I’m complying with the law. I recommend checking the regulations in your local area before flying, as they may vary. It’s always better to be informed than to face potential fines or confiscation of your gear!

Local Drone Laws in Popular Travel Destinations

When I traveled to Europe, I found that each country had its own set of drone laws. For example, in some places, flying over populated areas is strictly forbidden, while others may require special permits. This was a learning experience for me, as I had to do a bit of research before my trip. I remember being in Spain, where I needed a permit to fly my drone in certain popular tourist spots. Thankfully, I had done my homework beforehand, which allowed me to enjoy capturing those stunning views without any legal hiccups.

Always check local laws and regulations before taking off. Apps and websites can provide up-to-date information on where you can and cannot fly. Understanding these laws not only keeps you out of trouble but also shows respect for the local community and environment.

Safety Tips for Aerial Photography

Safety is paramount when flying drones, especially in unfamiliar areas. I’ve learned a few essential safety tips that I think every drone enthusiast should keep in mind. First, always conduct a pre-flight check. I take a moment to inspect my drone for any damages or issues and ensure that the batteries are fully charged. I remember a time when I neglected this step, and it resulted in a less than ideal experience.

Weather conditions are vital to consider as well. I’ve been caught in unexpected winds before, and it can be nerve-wracking. I check the weather forecast and make sure it’s suitable for flying. Additionally, I avoid flying near airports, crowds, or wildlife to minimize risks and respect privacy. Keeping a safe distance from people and animals not only ensures safety but is also a responsible practice.

Editing Aerial Travel Shots

Best Software for Drone Footage

After capturing stunning aerial shots, the next step is editing, which can really enhance your travel videos. I’ve experimented with various editing software over the years and found a few that stand out. Adobe Premiere Pro is my go-to for comprehensive editing, allowing me to tweak every detail from color correction to sound design. However, if you’re looking for something more user-friendly, I recommend using apps like DaVinci Resolve or iMovie, which offer fantastic features for beginners.

Basic Editing Techniques for Stunning Results

In my experience, a few basic editing techniques can make a world of difference. I usually start by trimming clips to keep only the best shots, creating a more engaging flow. Adding transitions between clips can also help maintain the viewer’s interest. I’ve found that using slow-motion effects on breathtaking scenes, like waves crashing or birds soaring, adds a cinematic touch that leaves a lasting impression.

Color Grading and Filters

Color grading is where the magic happens. I love enhancing the colors in my footage to make them pop. Software like Adobe Lightroom can help me adjust specific colors and tones, making my travel videos feel more vibrant and true to life. I often use LUTs (Look-Up Tables) to apply a particular style quickly, which can give my videos a professional look with minimal effort.

Real-Life User Experiences and Reviews

Customer Testimonials and Ratings

Hearing from other drone users has been incredibly helpful in making my purchasing decisions. I often check reviews and testimonials to get a sense of how a drone performs in real-life situations. For example, I found a blog where someone shared their experience with the DJI Mini 3 Pro, and it confirmed my choice to invest in that model. The user highlighted its ease of use and fantastic image quality, which resonated with my own experiences.

Comparison of User Experiences Across Models

It’s fascinating to compare user experiences across different models. Some people rave about the Autel EVO Lite+ for its low-light capabilities, while others prefer the portability of the DJI Mavic Air 2. Reading these comparisons has allowed me to appreciate the unique features of each drone, helping me make more informed choices based on my specific needs and preferences.

Final Thoughts

Choosing the right compact drone can feel overwhelming, but it ultimately boils down to what fits your travel style and photography goals. I’ve learned that understanding regulations, safety practices, and editing techniques are just as crucial as finding the right model. Each adventure with my drone has taught me something new, and I’ve come to appreciate the unique perspectives and memories captured from above. I believe that with the right drone in hand, the skies truly are the limit, opening up a world of creative possibilities for all of us.

Frequently Asked Questions

What is a compact drone?

Compact drones are small, lightweight flying devices designed for easy transportation and usability without sacrificing performance. They can fit into a backpack or a large pocket, making them ideal for travelers looking to capture stunning aerial shots.

What are the advantages of using compact drones for travel?

Compact drones offer convenience, lightweight design, advanced technology for stunning image quality, and efficient battery life. They are easy to pack in carry-on luggage and allow for extended aerial adventures, making them perfect for capturing breathtaking landscapes or cityscapes.

What key features should I look for in a compact drone?

When choosing a compact drone, consider features such as a high-quality camera (preferably with 4K video capability), solid flight range and connectivity, at least 20-30 minutes of battery life per charge, and portability features like foldable arms and lightweight materials.

What are some recommended compact drones for aerial travel shots?

Some top compact drones for aerial travel shots include the DJI Mini 3 Pro, Autel EVO Lite+, Parrot Anafi AI, Holy Stone HS720E, and DJI Mavic Air 2, each offering unique features and capabilities suited for different photography needs.

How important is battery life for compact drones?

Battery life is crucial as it determines how long you can fly your drone and capture footage. Most compact drones offer flight times between 20 to 40 minutes. Longer flight times provide more opportunities for creative exploration without the stress of running out of power mid-flight.

What safety tips should I follow when flying drones?

Always conduct a pre-flight check for any damages, check weather conditions, and avoid flying near airports, crowds, or wildlife. Keeping your drone within line of sight and adhering to local regulations are also essential for safe flying.

What should I know about drone regulations while traveling?

Understanding FAA regulations and local drone laws is crucial when flying drones in different locations. Regulations can vary by country and may include restrictions on flying over populated areas or the need for special permits. Always check local laws before flying.

What are some basic editing techniques for drone footage?

Basic editing techniques include trimming clips to keep only the best shots, adding transitions between clips, and using slow-motion effects on breathtaking scenes. These techniques can enhance the flow and engagement of your travel videos.

How can I maintain my drone’s battery health?

To maintain battery health, avoid letting batteries drain completely, store them in a cool, dry place, and regularly check their condition for any damage. Keeping batteries between 20% and 80% charged can also help extend their lifespan.

What software is recommended for editing drone footage?

For comprehensive editing, Adobe Premiere Pro is recommended, while user-friendly options like DaVinci Resolve or iMovie are great for beginners. Each software offers features that can enhance your travel videos significantly.

Ultimate Guide to Affordable Drones for Backpacking

Backpacking adventures become even more thrilling with the addition of drones, capturing breathtaking aerial views of nature. In this guide, I’ll take you through everything you need to know about affordable drones for your next journey. Read Interesting article: Top 5 Budget Drones for Stunning Travel Photos

Ultimate Guide to Affordable Drones for Backpacking

Understanding Drones for Backpacking

What is a Drone?

I remember the first time I saw a drone in action during a hiking trip. It hovered gracefully above, capturing stunning shots of the landscape below. A drone is essentially an unmanned aerial vehicle (UAV) that can be controlled remotely. These devices come with varying features, but most allow you to take photos and videos from the sky, giving you a unique perspective of your surroundings. Whether you’re a seasoned photographer or just want to document your travels, a drone can be a game-changer for backpacking trips.

Types of Drones: Quadcopters vs. Fixed-Wing

When I first started exploring drones, I learned about the two main types: quadcopters and fixed-wing drones. Quadcopters, which are more common, have four rotors and are great for capturing footage at various altitudes and angles. They are usually easier to fly, which is a plus for beginners. In contrast, fixed-wing drones resemble traditional aircraft and can cover larger distances without needing to hover. While they might require a bit more flying skill, they can be excellent for long-distance exploration.

Benefits of Using Drones for Backpacking

Using a drone while backpacking has changed how I experience nature. First, the ability to capture breathtaking aerial photographs is one of the major perks. It’s like having a personal photographer that can showcase the beauty of landscapes from above. Additionally, drones can help scout ahead for safe routes or breathtaking spots that you might miss on foot. I’ve found that flying my drone has added an exciting layer to my trips, making each journey feel like an exploration of the unknown. Read Interesting article: Top Destinations for Affordable Wildlife Adventure Photography

Key Features to Consider in Affordable Drones

Camera Quality and Resolution

One of the first things I consider when choosing a drone is the camera quality. After all, if I’m going to take it on backpacking trips, I want my photos to look amazing! Look for drones that offer at least 1080p resolution for decent video and images. Some budget-friendly options even provide 4K capabilities. I’ve learned that having a good camera makes a huge difference in capturing the beauty of nature.

Flight Time and Battery Life

Another crucial feature is flight time. Nothing’s worse than your drone dying just when you’re about to capture the perfect sunset! Most affordable drones offer between 10 to 30 minutes of flight time, depending on the model. I usually carry an extra battery or two on my trips to maximize my flying time. This way, I can enjoy the breathtaking views without constantly worrying about recharging.

Weight and Portability

When backpacking, every ounce matters. I’ve learned the hard way that choosing a lightweight drone can make a significant difference. Most affordable drones weigh between 250 to 500 grams, making them easy to pack away. Some even fold up, which is fantastic for saving space in your backpack. Always check the weight before buying; it can save you a lot of hassle on the trail.

Durability and Weather Resistance

As outdoor enthusiasts, we know that the weather can be unpredictable. I remember a trip where I got caught in a sudden rainstorm, and I was grateful my drone had some level of water resistance. Look for drones that are built to withstand the elements, as this can prolong their life and usability during your adventures. A durable drone will also help you feel more confident flying it in varying conditions.

Range and Control Options

The range is another essential factor. Most affordable drones offer a control range of about 100 to 300 meters. I’ve found that having a good range allows me to explore without worrying about losing connection. Additionally, consider how easy the controls are to use. Some drones come with smartphone apps, while others have remote controllers. I prefer a good remote control, as it feels more intuitive for flying.

Best Affordable Drones for Backpacking

Top Picks Under $300

When I first started my journey into the world of drones, I quickly learned that you don’t have to break the bank to get a solid device. There are quite a few affordable options that perform well without costing a fortune. For anyone looking to capture their backpacking adventures, here are some of my top picks under $300.

  • Holy Stone HS720: This is a fantastic choice for beginners. It offers 4K camera quality and has a flight time of around 26 minutes. I love its GPS-assisted flight features, which make it easy to fly and capture stunning shots.
  • Snaptain SP350: This drone is perfect for those just getting started. It’s lightweight, easy to operate, and features a decent camera. The best part? It’s foldable, making it an excellent option for packing.
  • Potensic D80: With 1080p HD camera quality, this drone provides good performance at an affordable price. It also has a range of about 300 meters, giving me the freedom to explore without stressing over distance.

Best Drones Between $300 – $500

As I gained more experience, I became more interested in drones with advanced features. If you’re willing to invest a bit more, here are some excellent options in the $300 to $500 range. Trust me, they’re worth it.

  • DJI Mini SE: This drone is lightweight, compact, and offers impressive 2.7K camera quality. I find its 30-minute flight time particularly advantageous for longer trips, allowing me to capture more of nature without constant recharging.
  • Ruko F11 Pro: With a 4K camera and a whopping 30 minutes of flight time, this drone has quickly become one of my favorites. Its GPS features and follow-me mode make it easy to get great shots while I’m on the move.
  • Holy Stone HS720E: This upgraded version of the HS720 includes a 4K camera and improved battery life. I appreciate its user-friendly app, which makes editing and sharing my images a breeze.

Comparison of Features and Prices

As I explored different options, I found that comparing features and prices helps in making the best decision. Here’s a quick breakdown of what to consider when looking at drones in these price ranges:

  • Camera Quality: Higher resolution cameras can make a significant difference in your images and videos. Aim for at least 1080p in the lower range and 4K in the higher range.
  • Flight Time: Longer flight times mean more opportunities to capture great footage. Look for drones that offer over 20 minutes of flight time for the best experience.
  • Portability: Drones that fold up or are lightweight make backpacking much easier. I always look for options that can easily fit into my pack.
  • Durability: When you’re out in nature, you want a drone that can withstand some bumps and bruises. Pay attention to reviews regarding their build quality and resistance to the elements.

In my experience, spending a bit more on a quality drone often pays off in the long run. You’ll get better performance, which truly enhances the backpacking experience. It’s like investing in a good pair of hiking boots; the right gear can make all the difference.

Where to Buy Affordable Drones

Online Retailers

One of my favorite places to shop for drones is online. Websites like Amazon, Best Buy, and B&H Photo offer a wide selection of models, often at discounted prices. I love reading customer reviews and comparing specs side by side. Plus, the convenience of home delivery can’t be beaten, especially when I’m busy planning my next adventure.

Local Electronics Stores

Sometimes, I find it helpful to visit local electronics stores. This way, I can physically see the drones and ask questions from knowledgeable staff. It’s also nice to get a feel for how they operate. Stores like Best Buy or specialty shops often have demo units available for testing, which can help in making a decision. You might even find in-store promotions that save you some cash!

Second-Hand Marketplaces

If you’re looking to save money, don’t overlook second-hand marketplaces like eBay or Facebook Marketplace. I’ve had great luck finding gently used drones for a fraction of the retail price. Just ensure that you check the seller’s ratings and ask about the drone’s condition before making a purchase. It’s a great way to get a quality drone without the hefty price tag. Read Interesting article: Discover Sustainable Practices in Wildlife Tours

Drone Regulations for Backpacking

FAA Regulations on Drone Usage

As I’ve delved deeper into my drone adventures, I’ve realized that understanding regulations is crucial for a hassle-free experience. The Federal Aviation Administration (FAA) has specific rules for drone usage in the United States. For recreational flyers like us, one of the key regulations is that your drone must weigh less than 55 pounds. Additionally, you should always keep your drone within your line of sight while flying. I remember feeling a bit overwhelmed learning about these rules, but it was worth it to avoid legal issues while out in nature.

Another important aspect is that you need to register your drone if it weighs more than 0.55 pounds. Registration is straightforward and can be done online through the FAA’s website. It’s a small step that gives peace of mind when flying in public spaces. I’ve found that being aware of these regulations allows me to focus on enjoying my time outdoors without worrying about getting into trouble.

State and Local Laws

In addition to FAA regulations, I’ve learned that every state and local area may have its own laws governing drone use. Some places might have restrictions on flying near schools, airports, or populated areas. I always recommend checking local regulations before heading out. A quick online search or a visit to your local government website can provide the necessary information.

During one of my trips, I encountered a local ordinance that prohibited drone flying in a beautiful park I had been excited to explore. It was disappointing, but I appreciated that I had taken the time to research beforehand. This way, I could adjust my plans and still have a fantastic time without breaking any rules.

National Park Drone Policies

When it comes to national parks, the regulations get a bit stricter. I absolutely love visiting national parks; the breathtaking views are perfect for drone photography. However, I quickly discovered that, generally, flying drones in national parks is prohibited. The National Park Service aims to protect wildlife and preserve the serene experiences that visitors seek. It’s a rule that I completely understand, but it doesn’t make it any less disappointing.

That said, some parks do allow drone usage under specific circumstances, so it’s essential to check the park’s official website or visitor center for the latest information. I remember planning a trip to a park that allowed drones in designated areas, and it was such a thrill to capture the stunning landscapes from above while still respecting the rules. Following these regulations not only keeps us safe but also helps preserve the beauty of these natural spaces for future generations.

Tips for Using Drones While Backpacking

Planning Your Drone Flights

Before I head out on any backpacking trip, I take some time to plan my drone flights. This includes checking the weather conditions, as I’ve learned that strong winds or rain can make flying tricky and even dangerous. I also map out potential locations for flying my drone to ensure I can capture the best angles of the scenery. I even jot down a few shot ideas I want to try while I’m out there.

One time, I made the mistake of not planning ahead, and I ended up missing out on some fantastic photo opportunities. Now, I make it a point to scout the area beforehand, either by using satellite images or visiting the location prior to flying. It’s all about maximizing my time while ensuring safety and compliance with regulations.

Safety Tips and Best Practices

Safety is always a top priority for me when using my drone. I’ve learned to perform a pre-flight check every time before I take off. This involves checking the battery level, ensuring the propellers are secure, and confirming that the camera settings are correct. I also make sure to fly in open areas, away from people and buildings, to avoid accidents. I can’t stress enough how important it is to respect the airspace and the people around you.

I’ve had a few close calls, including almost crashing my drone into a tree, which taught me to always be aware of my surroundings. Flying with a friend can also be helpful—while one person pilots the drone, the other can keep an eye out for obstacles. It’s a fun way to share the experience, and I enjoy having someone to share those stunning views with!

How to Capture Stunning Aerial Shots

Capturing great aerial shots has become one of my favorite parts of using a drone while backpacking. I’ve learned a few techniques that have helped me take my photography to the next level. First, I always shoot in the golden hour, either early in the morning or just before sunset. The soft light adds a magical quality to the photos, and I find that the colors pop beautifully.

Another tip is to experiment with different angles and heights. Flying low to the ground can create a unique perspective, while higher altitudes can capture sweeping landscapes. I often try different compositions, like framing my subject with trees or mountains in the background. I keep experimenting until I find something that feels just right.

Lastly, don’t forget to have fun with it! Drones are an incredible tool for creativity, and I believe that the more I play around with them, the better my skills become. I always look forward to reviewing my footage after a trip and seeing what amazing shots I managed to capture. It’s like reliving the adventure all over again!

Common Drone Problems and Solutions

Battery Issues

One of the most frustrating experiences I’ve had with my drone involves battery life. I remember a trip where I was all set to capture the sunrise, only to find my battery wasn’t holding a charge. To avoid this, I make it a habit to fully charge my batteries the night before a trip. Also, carrying a couple of spare batteries is a game-changer. It’s like having a backup plan—if one battery runs low, I can quickly swap it out and continue filming without missing a moment. I often check reviews to find out how long batteries last under different conditions, as performance can vary depending on temperature and drone usage.

Signal Loss and GPS Problems

Signal loss can be another issue, especially in remote areas with limited connectivity. I’ve experienced my drone losing signal and going into “return to home” mode, which can be nerve-wracking. To mitigate this, I always ensure I’m flying within the recommended range. If I’m venturing further out, keeping an eye on the drone’s battery level and signal is crucial. I’ve also learned to scout out potential landing spots before flying, just in case. A clear line of sight between you and the drone significantly reduces the risk of losing connection.

Camera Malfunctions

Camera issues can be a real downer, especially if you’ve been looking forward to capturing some stellar footage. During one of my earlier trips, I noticed the camera wasn’t focusing properly. After some research, I discovered the importance of keeping the lens clean and free from debris. I recommend using a microfiber cloth for cleaning, and I always double-check the camera settings before taking off. If you encounter camera problems, a quick reset or reboot can often resolve minor bugs. Regular maintenance is key to ensuring everything functions smoothly during your adventures.

Drone Maintenance for Backpackers

Cleaning and Storing Your Drone

Taking care of my drone is something I prioritize after every trip. I’ve realized that keeping it clean can prolong its life and performance. After each outing, I carefully wipe down the drone to remove dirt, dust, and moisture. I also make sure to store it in a padded case to protect it from bumps while traveling. I always keep an eye out for any signs of wear and tear, especially on the propellers, as they can affect flight performance.

Regular Software Updates

I can’t stress enough how important it is to keep your drone’s software up to date. I’ve had instances where I was ready to fly, but my drone required an update. This can be frustrating, especially when you’re eager to capture some stunning views. I’ve learned to check for updates regularly and install them before heading out on a trip. Keeping the software current not only enhances performance but can also add new features that make flying even more enjoyable.

Pre-Flight Checks

Before I launch into the skies, I conduct a thorough pre-flight check. This routine has saved me from potential mishaps more times than I can count. I go through a checklist, ensuring the battery is charged, the propellers are secure, and the camera is functioning well. I also check whether the GPS is ready to go. It’s all about being prepared and making sure everything is in tip-top shape before taking to the skies. I’ve found that taking just a few extra minutes for these checks can lead to a much smoother flight experience.

Final Thoughts

Backpacking with a drone can truly elevate your outdoor adventure, providing incredible perspectives and memories that last a lifetime. By understanding the ins and outs of selecting, using, and maintaining your drone, we can make the most of our backpacking excursions. Whether you’re capturing breathtaking views or documenting your journey, the right drone can make all the difference. I encourage you to embrace the adventure, stay safe, and always respect the environment as you explore the great outdoors with your drone. Happy flying!

Frequently Asked Questions

What is a drone?

A drone is an unmanned aerial vehicle (UAV) that can be controlled remotely, allowing users to capture photos and videos from the sky for a unique perspective of their surroundings.

What are the main types of drones for backpacking?

The two main types of drones are quadcopters and fixed-wing drones. Quadcopters have four rotors and are generally easier to fly, making them suitable for beginners. Fixed-wing drones resemble traditional aircraft and can cover larger distances without hovering, but they require more flying skill.

What features should I consider when choosing an affordable drone?

Key features to consider include camera quality and resolution (at least 1080p), flight time (10 to 30 minutes), weight and portability (250 to 500 grams), durability and weather resistance, and range and control options (100 to 300 meters).

What are some top affordable drones for backpacking under $300?

Some top picks under $300 include the Holy Stone HS720, Snaptain SP350, and Potensic D80, each offering features like good camera quality, decent flight time, and portability.

What drones are recommended in the $300 to $500 range?

Recommended drones in the $300 to $500 range include the DJI Mini SE, Ruko F11 Pro, and Holy Stone HS720E, which provide advanced features like improved camera quality and longer flight times.

Where can I purchase affordable drones?

You can purchase affordable drones from online retailers like Amazon, Best Buy, and B&H Photo, visit local electronics stores for a hands-on experience, or check second-hand marketplaces like eBay or Facebook Marketplace for gently used options.

What are the FAA regulations for drone usage?

The FAA regulations state that recreational drones must weigh less than 55 pounds and should always be kept within the pilot’s line of sight. Drones over 0.55 pounds must be registered online through the FAA’s website.

Are there specific drone regulations for national parks?

Generally, flying drones in national parks is prohibited to protect wildlife and preserve visitor experiences. However, some parks allow drone usage under specific circumstances, so it’s essential to check the park’s official website for the latest information.

What safety tips should I follow when using drones while backpacking?

Important safety tips include performing a pre-flight check for battery levels and propeller security, flying in open areas away from people, and considering flying with a friend to help watch for obstacles.

How can I maintain my drone for backpacking trips?

To maintain your drone, clean it after each trip, keep the software updated, and conduct thorough pre-flight checks to ensure everything is functioning properly before takeoff.

Top 5 Budget Drones for Stunning Travel Photos

Traveling is all about capturing memories, and what better way to do that than with stunning aerial shots? Drones have made it easier than ever to elevate our travel photography, even on a budget! If you’re also interested in wildlife photography, check out our Top Destinations for Affordable Wildlife Adventure Photography.

Top 5 Budget Drones for Stunning Travel Photos

Understanding Drones: What to Look For

When I first decided to invest in a drone for my travel photography, I quickly realized there are several factors to consider. With so many options out there, it can feel overwhelming. I want to break down the essential features to look for, making it easier for you to choose the right drone for your next adventure.

Camera Quality and Specifications

The camera quality is probably the most critical aspect of a drone, especially for travel photography. I remember my first drone had a decent camera, but the images lacked detail. When choosing a drone, look for one with at least a 12MP camera, as this helps capture sharp and vibrant images. Also, consider the video resolution; drones that shoot in 4K will give you that extra edge when editing your travel vlogs. Many budget-friendly drones now come equipped with excellent cameras, so you don’t have to break the bank for quality shots.

Battery Life and Flight Time

I’ve had my fair share of frustrating moments when my drone battery died just before capturing a beautiful sunset. Most budget drones offer around 20 to 30 minutes of flight time, which is generally sufficient for capturing the scenery and getting those perfect shots. However, I recommend checking the battery life specifications before buying. Many manufacturers offer extra batteries, which I found to be a worthwhile investment for extended shooting sessions during trips. The last thing you want is to miss a great photo opportunity because your drone couldn’t stay airborne long enough!

Portability and Weight

As a frequent traveler, I’ve learned that portability is a game-changer. I remember lugging around a heavier drone, which made it tough to hike to those breathtaking viewpoints. A lightweight and compact design can make all the difference. Look for drones that fold up easily and can fit into your backpack. This way, you can carry it along on hikes or trips without feeling weighed down. I often look for drones that come with a carrying case—this not only protects the drone but also makes it easier to transport.

User-Friendly Features

When I first started flying drones, I quickly learned that user-friendly features are a must. For beginners, I recommend looking for drones with features like GPS positioning, one-key takeoff, and landing, and even follow-me modes. These functionalities can make your flying experience much smoother and more enjoyable. I remember trying to control my first drone without GPS, and it was a bit of a disaster! If you’re nervous about flying, investing in a drone with intuitive controls can help you gain confidence and capture stunning images with ease.

Top 5 Budget Drones for Travel Photography

Now that we’ve covered what to look for in a drone, let’s dive into some of my favorite budget options that excel at capturing breathtaking travel photos.

1. DJI Mini SE

Camera Features

The DJI Mini SE has quickly become one of my favorite budget drones. It boasts a 12MP camera and can record 2.7K video, which is fantastic for both photos and videos. I love how the camera captures vivid colors and sharp details, making my travel memories even more vibrant.

Flight Performance

This drone offers around 30 minutes of flight time, which is impressive for its price point. I’ve flown it in various conditions, and the stability in the air is superb. The Mini SE handles wind quite well, which is something I always keep in mind when flying in outdoor settings.

Portability and Design

What I really appreciate about the DJI Mini SE is its lightweight, foldable design. It easily fits into my travel bag, and I never feel like it’s an extra burden. It makes spontaneous trips and hikes a breeze, and I can whip it out whenever inspiration strikes!

2. Holy Stone HS720

Camera Quality

The Holy Stone HS720 is another excellent choice for budget-conscious travelers. With a 12MP camera that shoots 4K video, I’ve found it to be perfect for creating crisp, professional-looking travel content. The camera’s performance in low-light conditions is also surprisingly good, which is essential for those sunset shots.

Stability and Control

One of the standout features of the HS720 is its GPS-assisted flight, which makes flying feel much more manageable. I remember my first flight with it; the drone hovered steadily, and I felt confident controlling it. Its stability really adds to the quality of the photos, especially when capturing landscapes.

Additional Features

This drone comes equipped with a follow-me mode, which is perfect for capturing dynamic shots while you’re on the move. I’ve used this feature during hikes, and the results were fantastic! It’s like having your personal camera crew following you around.

3. Potensic D85

Camera Capabilities

The Potensic D85 is a powerful contender in the budget drone category. With a 1080P HD camera, I’ve found it does an excellent job of capturing clear images. The camera’s adjustable angle is a plus, allowing for more creative shots.

Flight Range and Control

One of the features I love about the D85 is its impressive flight range—up to 1,500 feet! This gives me the freedom to explore and capture shots from various distances without constantly worrying about losing connection.

Durability and Build Quality

I’ve taken the D85 on several trips, and its robust design has held up well against bumps and minor falls. I feel more secure knowing that it can handle a bit of rough treatment, especially when I’m out in nature.

4. Snaptain SP350

Camera Performance

The Snaptain SP350 is a great drone for those just starting out. It features a 720P HD camera, perfect for capturing good-quality photos without being overwhelming. I’ve found it to be user-friendly, making it a great choice for beginners.

Ease of Use

This drone comes with beginner-friendly features, like one-key takeoff and landing, which I always appreciate. I remember my first flight—it was so simple to launch! The controls are easy to grasp, making it perfect for anyone new to drone flying.

Battery Life

While the battery life is around 10-12 minutes, it’s still sufficient for quick shots and practice flights. Plus, it’s an affordable drone, so I didn’t mind carrying an extra battery or two during my trips.

5. Eachine E520S

Camera Quality

The Eachine E520S is a solid choice if you’re serious about aerial photography. With a 4K camera, I’ve captured stunning images that really pop. It’s great for both photos and videos, making it versatile for any travel adventure.

Flight Features

Featuring GPS positioning, the E520S offers robust flight features, including follow-me and waypoint modes. These functionalities have allowed me to capture unique angles and perspectives while I’m exploring a new place.

Portability

This drone’s foldable design makes it very travel-friendly. I’ve taken it on multiple trips, and it fits perfectly in my backpack without taking up too much space. It’s a great companion for any traveler.

Comparative Analysis of the Top Drones

Now that we’ve explored some fantastic budget drones for travel photography, it’s time to dive deeper into how they stack up against each other. I find that a comparative analysis helps me decide which drone is worth the investment based on my specific needs. Let’s break down several key areas: price, camera quality, flight time, and user reviews.

Price Comparison

When I first started looking at drones, price was a major factor. We all have a budget, and I remember feeling relieved when I found so many great options without sacrificing quality. Here’s how the drones we discussed compare in terms of cost:

  • DJI Mini SE: Typically priced around $299, this drone offers excellent value for money with its camera and flight capabilities.
  • Holy Stone HS720: Priced at about $299 as well, it’s a great choice for those wanting 4K video without a hefty price tag.
  • Potensic D85: Generally found for around $250, this drone is a great option for anyone looking for solid camera performance at a lower price.
  • Snaptain SP350: At about $120, it’s perfect for beginners looking to get started without spending a lot.
  • Eachine E520S: Priced around $200, it offers a great camera and features for its cost.

Seeing the price differences helped me realize that I could find a drone with the features I needed without overspending. It’s all about what you prioritize in your travel photography.

Camera Quality Comparison

Camera quality is crucial for anyone serious about photography, and I’ve learned that comparing specs directly can help you make an informed decision. Here’s a quick rundown of the camera capabilities of each drone:

  • DJI Mini SE: 12MP camera with 2.7K video recording.
  • Holy Stone HS720: 12MP camera that captures stunning 4K video.
  • Potensic D85: 1080P HD camera that’s perfect for clear images.
  • Snaptain SP350: 720P HD camera, good for beginners.
  • Eachine E520S: A robust 4K camera that’s ideal for high-quality shots.

For me, the difference between a 720P and a 4K camera is noticeable, especially when I’m editing my travel videos. If you’re serious about capturing high-quality content, I’d lean toward the HS720 or E520S for their superior video quality.

Flight Time Comparison

Flight time can make or break your experience when you’re out capturing those magical moments. I’ve had days where I wished my drone could stay airborne just a bit longer. Here’s how these models compare:

  • DJI Mini SE: Approximately 30 minutes of flight time.
  • Holy Stone HS720: Offers about 26 minutes of flight time.
  • Potensic D85: Around 20 minutes of flight time.
  • Snaptain SP350: About 10-12 minutes, which is shorter but still decent for quick shots.
  • Eachine E520S: Approximately 20 minutes of flight time.

For me, the longer flight times of the Mini SE and HS720 were game-changers. They allowed me to explore more without constant battery swaps, which is something I always appreciate during long shoots.

User Reviews and Ratings

Finally, I always look at user reviews before making a purchase. Hearing from others who’ve used the drone can provide insights I might not have considered. I often read reviews on sites like Amazon and drone forums to gauge overall satisfaction. Here’s what I found:

  • DJI Mini SE: Generally receives high praise for its camera quality and ease of use, with many users raving about its stability.
  • Holy Stone HS720: Users love its GPS features, making flying easier and more intuitive.
  • Potensic D85: Reviews often mention its robust build quality, perfect for travel.
  • Snaptain SP350: Highly recommended for beginners due to its user-friendly controls.
  • Eachine E520S: Praised for its excellent camera quality at a reasonable price, making it a favorite among travelers.

For me, user reviews have been invaluable in understanding which drone might suit my needs best. It’s like getting firsthand accounts of what I can expect, which always helps in making a confident decision.

Tips for Capturing Stunning Travel Photos with Drones

Now that we’ve chosen our drones and understand their features, it’s time to discuss how to make the most of them. I’ve gathered some tips that I’ve found helpful in capturing stunning travel photos from the sky. These strategies can take your aerial photography to the next level, ensuring that your travel memories are as breathtaking as the places you visit.

Best Practices for Aerial Photography

One of the first things I learned about aerial photography is that composition is everything. Just like on the ground, framing your shots can dramatically change the outcome. I often use the rule of thirds, which helps create balanced and interesting photos. I’ve found that placing the horizon line either in the upper or lower third of the frame gives a strong focal point to the landscape.

Another best practice is to shoot in RAW format whenever possible. This format retains more detail and provides flexibility in post-processing. I remember capturing a stunning sunset photo and later editing it to enhance colors and contrasts. The RAW format made a world of difference in the final result!

Don’t forget to experiment with different angles and perspectives. When I first started flying my drone, I stuck to the same height and angle for my shots. It wasn’t until I tried flying lower or higher that I discovered some unique compositions. Different heights can give a fresh perspective on familiar landscapes, making your photos stand out.

Optimal Times for Photography

Timing is crucial when it comes to photography. I’ve found that the golden hours—just after sunrise and before sunset—are the best times for capturing stunning aerial shots. The soft, warm light during these times enhances colors and creates beautiful shadows, making everything look magical. I remember one particular morning when I woke up before dawn to capture a sunrise over the mountains; the colors were surreal!

Additionally, keep an eye on the weather. I’ve learned that a bit of cloud cover can add texture to the sky and prevent harsh shadows. However, be mindful of strong winds, especially if you’re flying a lighter drone. I’ve had to postpone flights when wind conditions were unfavorable, but it’s always worth waiting for the right moment to get the perfect shot.

Editing Drone Photography

Editing is where the magic happens! After capturing my aerial photos, I usually spend some time enhancing them to bring out their full potential. I often use software like Adobe Lightroom or Photoshop to adjust exposure, contrast, and saturation. My experience has shown that a little editing can elevate a good photo to something truly spectacular.

I also recommend using presets or filters to maintain a consistent look across your travel photos. I’ve developed a few presets that give my images a cohesive feel, which is great for sharing on social media or creating albums. It’s like having my own style that people can recognize.

Don’t shy away from cropping either! Sometimes, the perfect shot might need a little trimming to focus on the main subject. I’ve cropped out distractions that took away from the beauty of the landscape, and the results were always worth it.

Legal Considerations for Drone Use While Traveling

As much as I love flying my drone, I’ve learned that it’s essential to stay informed about the legalities surrounding drone use in different locations. Regulations can vary greatly from one country to another, and even within regions of the same country. I’ve had to navigate this landscape a few times, and I want to share some vital tips to keep you compliant and safe while enjoying your aerial adventures.

Understanding Local Regulations

Before heading to a new destination, I always research the local drone regulations. Many countries have strict rules about where you can fly and how high you can go. I remember being surprised to find out that some popular tourist spots didn’t allow drone flights. Understanding these regulations ahead of time can save you from potential fines or having your drone confiscated. I usually check the official aviation authority website of the country I’m visiting for the most accurate information.

Required Permits and Licenses

In some cases, you may need specific permits or licenses to fly your drone legally. I’ve had experiences where I was required to apply for a temporary drone permit when traveling to certain national parks. It’s a straightforward process, but it can take time, so planning ahead is crucial. I recommend checking local laws and regulations a few weeks before your trip to ensure you have everything in order.

Safety Guidelines for Flying Drones

Safety should always be a priority when flying drones, especially in crowded areas or near wildlife. I always maintain a safe distance from people, animals, and private property. It’s also vital to keep your drone in sight at all times to avoid losing control. I’ve heard stories of drones getting lost or crashing because the pilot wasn’t paying attention, and I definitely don’t want that to be my story!

Moreover, I make it a practice to check my drone’s equipment before every flight. Making sure the batteries are charged, the propellers are in good condition, and the software is updated can prevent unexpected issues during flight. This small checklist has saved me from quite a few mishaps!

Frequently Asked Questions

What should I look for when choosing a drone for travel photography?

When choosing a drone for travel photography, consider factors such as camera quality (at least a 12MP camera), video resolution (preferably 4K), battery life (20 to 30 minutes of flight time), portability, and user-friendly features like GPS positioning and one-key takeoff.

Which budget drones are recommended for travel photography?

Some recommended budget drones for travel photography include the DJI Mini SE, Holy Stone HS720, Potensic D85, Snaptain SP350, and Eachine E520S. Each offers unique features suitable for capturing aerial shots.

What is the flight time for the DJI Mini SE?

The DJI Mini SE offers approximately 30 minutes of flight time, making it a reliable option for capturing various scenery without frequent battery changes.

How does the camera quality of the Holy Stone HS720 compare to other budget drones?

The Holy Stone HS720 features a 12MP camera that shoots 4K video, making it an excellent choice for those wanting high-quality video content compared to other budget options.

What are the best practices for capturing stunning aerial photos with a drone?

Best practices for aerial photography include using the rule of thirds for composition, shooting in RAW format for better editing flexibility, and experimenting with different angles and heights for unique perspectives.

When is the best time for aerial photography?

The best times for aerial photography are during the golden hours, just after sunrise and before sunset, when the soft light enhances colors and creates beautiful shadows.

What editing software is recommended for enhancing drone photography?

Adobe Lightroom and Photoshop are recommended for editing drone photography to adjust exposure, contrast, and saturation, allowing you to elevate your photos significantly.

What legal considerations should I be aware of when flying a drone while traveling?

It is essential to research local regulations regarding drone use, ensure you have the necessary permits or licenses, and adhere to safety guidelines when flying your drone in different locations.

How can I maintain safety while flying my drone?

To maintain safety while flying a drone, always keep it in sight, maintain a safe distance from people and wildlife, and check the drone’s equipment, including battery charge and propeller condition, before each flight.

What features should beginners look for in a drone?

Beginners should look for drones with user-friendly features such as GPS positioning, one-key takeoff and landing, and follow-me modes to enhance their flying experience and boost confidence.

Read Interesting article: Discover Sustainable Practices in Wildlife Tours

Read Interesting article: Must-Have High-End Gear for Luxe Family Getaways

Diving Deep: A Guide to Underwater Photography Techniques

Underwater photography opens a magical world beneath the waves, revealing stunning marine life and breathtaking landscapes. Join me as we dive deep into techniques that will elevate your underwater photography skills to new heights. Read Interesting article: Underwater Photography Techniques: Capture Vibrant Ocean Life

Diving Deep: A Guide to Underwater Photography Techniques

Understanding Underwater Photography

What is Underwater Photography?

Underwater photography is the art of capturing images beneath the surface of the water. It’s not just about taking pictures; it’s about storytelling through the lens, showcasing the beauty of underwater life and environments. When I first ventured into this realm, I was captivated by the vibrant colors and unique perspectives that underwater scenes offered. Every dive became an adventure, with each click of the shutter capturing moments that would otherwise remain hidden from the world.

History and Evolution of Underwater Photography

The journey of underwater photography is quite fascinating. It began in the mid-19th century, when pioneers like Louis Boutan created some of the earliest images using bulky equipment and long exposure times. As technology advanced, so did the possibilities for underwater photography. I remember reading about the introduction of waterproof cameras in the latter half of the 20th century, which revolutionized the way divers could document their experiences. Today, with the rise of digital cameras and advanced imaging technology, underwater photography has become more accessible to enthusiasts like us, transforming our ability to explore and share the underwater world.

Benefits of Underwater Photography

There are countless benefits to diving into underwater photography. For one, it allows us to connect with nature on a deeper level. As I floated weightlessly among schools of fish or explored colorful coral reefs, I felt a sense of tranquility and wonder that I had never experienced before. Additionally, underwater photography promotes awareness of marine conservation. By capturing stunning images of sea life, we can help raise awareness about environmental issues affecting our oceans. I’ve seen firsthand how powerful a single image can be in inspiring others to care about our planet.

Essential Equipment for Underwater Photography

Underwater Cameras

Choosing the right underwater camera is crucial for any aspiring underwater photographer. Personally, I recommend starting with a compact camera that can be easily handled and is compatible with underwater housing. I used a mirrorless camera for years, which provided fantastic image quality without the bulk of a DSLR. If you’re just starting out, consider a camera with good manual settings so you can experiment with exposure, aperture, and ISO underwater.

Camera Housing

Protecting your camera is essential when diving. Camera housings are designed to keep water out while allowing you to access all the camera functions. I remember the first time I fitted my camera into its housing; it felt like I was gearing up for an underwater adventure! Make sure to choose a housing that matches your camera model and is rated for the depths you plan to explore. A leak-proof housing is a must—trust me, you don’t want to find out the hard way that it isn’t waterproof!

Lenses Suitable for Underwater Photography

The choice of lenses can significantly impact your underwater photography. Wide-angle lenses are fantastic for capturing expansive seascapes and marine life in their environment, while macro lenses are perfect for getting up close to tiny creatures and intricate details. I’ve found that using a wide-angle lens really enhances the sense of depth in my images, making vibrant coral reefs come alive. Experimenting with different lenses has been one of the most enjoyable parts of my underwater photography journey.

Lighting Equipment: Flash and Video Lights

Underwater lighting is a game-changer for capturing stunning images. Natural light diminishes quickly as you descend, which can result in dull colors in your photos. I learned that using strobes or external flashes can dramatically enhance my shots by illuminating subjects and bringing out their vibrant colors. Video lights can also be useful if you’re diving in low-light conditions and want to capture video footage as well. I’ve been amazed by how the right lighting transformed my underwater images from ordinary to spectacular.

Accessories: Strobes, Filters, and Tripods

Don’t overlook the importance of accessories in underwater photography. Strobes can help balance the light in your images, while filters can help correct color loss that occurs underwater. I often use a red filter for shallow water shots to bring back the warm tones that can fade in deeper dives. Tripods, though less common in underwater photography, can be handy for capturing still subjects or landscapes. I’ve learned that stability is key when shooting in challenging conditions.

Techniques for Underwater Photography

Basic Composition Rules

When I first started underwater photography, I quickly realized that composition plays a huge role in creating stunning images. Just like on land, the rule of thirds is a great starting point. I often visualize a grid on my viewfinder and try to position my subject along these lines or at their intersections. This simple technique helps create balance and draws the viewer’s eye to the focal point of the photograph. I also learned about leading lines; whether it’s a school of fish or the natural lines of coral, these elements can guide the viewer through the image and add depth. It’s fun to experiment with different angles and perspectives, too. Sometimes, getting lower to the ground or shooting from above can create a completely different feel in the image.

Understanding Light and Color Underwater

Light behaves differently underwater, and understanding this can dramatically improve your photography. I remember the first time I dove deep; everything began to look blue and dull. The colors of marine life can fade quickly with depth, so I learned that it’s crucial to be aware of how light changes as you descend. The sunlight can penetrate water to varying degrees depending on the time of day and the water’s clarity. I often try to shoot during the golden hour—early morning or late afternoon—when the light is softer and warmer. This adds a magical glow to my images, making the underwater scene feel alive.

Utilizing Natural Light

Natural light can be your best friend when it comes to underwater photography. I find that shooting in shallow waters with plenty of sunlight can create vibrant images without needing additional lighting equipment. The trick is to be mindful of your positioning relative to the sun. If you can shoot with the sun behind you, it often results in well-lit subjects with a beautiful blue backdrop. I’ve had moments where I just floated there, waiting for the perfect light to hit my subject, and it was always worth the patience. I also noticed that shooting at angles rather than straight on can help reduce glare and enhance the colors.

Using Flash and Strobe Lighting Effectively

While natural light is fantastic, there are times when you need a little extra help, especially in deeper waters where light is scarce. I’ve learned how to use strobes effectively, and it can be a game changer. For me, the key is to position the strobe at a 45-degree angle to avoid backscatter, which can ruin an otherwise perfect shot. I remember the first time I experimented with flashes; the colors became so vibrant that it felt like I was seeing the underwater world for the first time. Just be careful not to overexpose your subjects; adjusting your flash output can make a big difference in getting that perfect shot.

Capturing Movement: Techniques for Dynamic Shots

Capturing movement underwater can be both challenging and rewarding. I’ve often found that getting a sharp image of a fast-moving subject, like a fish darting by, requires a bit of practice. I recommend using a faster shutter speed to freeze the action. But sometimes, a little motion blur can add a sense of dynamism to an image—like the graceful movement of a swimming turtle. I’ve experimented with panning to follow the movement of my subject; it’s a technique that can create beautiful, fluid images. Just be sure to keep your camera steady while tracking your subject to avoid unwanted blur.

Another technique I’ve enjoyed is getting close to the action. By reducing the distance between my camera and the subject, I can capture more detail and create a sense of intimacy in my photos. I often find myself in the middle of a school of fish, trying to get that perfect shot while they swim around me. It’s exhilarating and pushes me to adapt and hone my skills quickly.

These techniques have become second nature to me over time, and I get excited whenever I get a chance to apply them. Diving into underwater photography has been a journey of discovery, and I can’t wait to share more about the different types of underwater photography and how to prepare for a shoot next. Read Interesting article: Mastering Underwater Photography: Essential Genres to Try

Types of Underwater Photography

Marine Life Photography

One of the most exhilarating aspects of underwater photography is capturing marine life in its natural habitat. I remember my first dive where I encountered a vibrant coral reef teeming with fish. The colors were astonishing, and I felt like I was in another world. Marine life photography not only allows us to document the beauty of underwater creatures, but it also gives us insight into their behavior and interactions. I’ve learned that patience is key; sometimes, I’ve had to wait quietly to catch fish in action or observe the intricate movements of a sea turtle. This type of photography can be incredibly rewarding, especially when you manage to capture a unique moment, like a clownfish peering out from its anemone home.

Landscape and Environment Photography

While marine life photography is captivating, underwater landscapes can be equally breathtaking. I’ve enjoyed exploring underwater caves, shipwrecks, and vibrant coral gardens, each offering a unique perspective of the underwater world. Capturing the essence of these environments involves more than just wide-angle shots; it’s about conveying the atmosphere and scale. I’ve experimented with different angles, shooting upwards to incorporate the surface light filtering through the water, which often creates a dramatic effect. These landscape shots tell a story about the underwater environment, showcasing the beauty and fragility of these ecosystems.

Macro Photography Techniques

Macro photography has become one of my favorite niches within underwater photography. Getting close-up shots of tiny creatures like shrimp, nudibranchs, or the intricate patterns of coral can be incredibly satisfying. I remember the first time I spotted a vibrant nudibranch clinging to a rock; its colors were so vivid that I couldn’t resist. To excel in macro photography, I found that a dedicated macro lens is essential. It allows you to get extremely close to your subject while maintaining sharpness and detail. I also recommend using a focus light to help illuminate your tiny subjects and reduce the effects of backscatter. The thrill of finding a hidden gem in the ocean and capturing it in detail is an experience I cherish.

Wide-Angle Photography Tips

Wide-angle photography is fantastic for capturing sweeping underwater scenes, especially when you want to include both the marine life and the surrounding environment. I’ve learned that getting close to your subject while using a wide-angle lens can create a sense of depth in the image. One tip that has worked wonders for me is to include interesting foreground elements, like corals or rocks, which can lead the viewer’s eye into the composition. I also pay attention to my buoyancy; being stable in the water allows me to capture sharper images. Experimenting with different angles and perspectives has helped me create dynamic shots that feel immersive. The thrill of making the underwater world feel larger than life is one of the joys of wide-angle photography.

Preparing for an Underwater Shoot

Choosing the Right Location

Location can make or break an underwater photography session. I’ve found that the best spots often depend on the time of year, water clarity, and marine life activity. Before planning a dive, I do some research. I look for places that are known for rich biodiversity or stunning underwater landscapes. I remember a trip to a popular dive site known for its vibrant coral gardens and diverse fish species. The experience was incredible, and I captured some of my favorite shots there. Whether it’s a local reef or an exotic destination, choosing the right location is crucial for getting those breathtaking images.

Best Times for Underwater Photography

Timing plays a significant role in underwater photography. I’ve discovered that early mornings or late afternoons are often the best times for diving. The sunlight is softer during these hours, creating beautiful lighting conditions. Additionally, during these times, marine life is often more active, making it easier to capture dynamic shots. I remember one late afternoon dive where the sunlight created a magical glow as it filtered through the water, illuminating everything around me. These moments are the ones I live for as a photographer.

Planning Your Dive: Safety and Logistics

Planning is essential for a successful underwater shoot. I always make sure to check the weather and sea conditions before diving. Safety is my top priority, so I ensure my equipment is in good working order, and I never dive alone. I’ve learned the importance of having a dive buddy and discussing our dive plan beforehand. It’s also crucial to have a backup plan in case conditions change. I remember a time when we had to change our dive site last minute due to rough seas, but it turned out to be a fantastic decision as we discovered a hidden gem!

Understanding Marine Life Behavior

Understanding the behavior of marine life can give you an edge in capturing stunning underwater images. I’ve spent time observing how certain species react to divers and their surroundings. For example, I’ve noticed that some fish become curious and approach, while others are more skittish. Learning to read these behaviors helps me know when to hold still and wait for the perfect shot. Sometimes, I’ve had to spend time just floating quietly to allow nature to unfold around me. This connection with marine life not only enhances my photography but also deepens my appreciation for the underwater world.

Post-Processing Underwater Images

Editing Software and Tools

Once I’ve captured my underwater images, the next step is post-processing. I’ve found that using good editing software can elevate my photos to the next level. Programs like Adobe Lightroom and Photoshop have become my go-to tools. They offer a range of features that let me adjust exposure, contrast, and saturation. I remember my early days of editing; I was overwhelmed by all the options. But with practice, I learned to keep it simple and focused on enhancing the natural beauty of my shots. There’s something satisfying about transforming a raw image into a polished piece of art. Read Interesting article: Essential Editing Techniques for Underwater Photography

Color Correction Techniques

One of the significant challenges with underwater photography is color correction. As I mentioned earlier, colors fade as you dive deeper. I often use the color balance and temperature adjustments in my editing software to bring back those vibrant hues. I’ve found that sliders can be my best friend here. For instance, increasing the reds and yellows can help restore the warmth that’s often lost underwater. I also experiment with the vibrance and saturation settings, making sure not to overdo it. I’ve learned that subtlety is key; I want my images to reflect the true colors of the underwater world, not a cartoon version!

Enhancing Details and Contrast

Enhancing details is another crucial aspect of post-processing. I enjoy using sharpening tools to make the intricate textures of coral and the delicate features of marine life pop. I usually zoom in on my images while editing to ensure I don’t miss any important details. Increasing contrast can also help make the subjects stand out from the background, creating more dynamic images. I remember a time when I adjusted the contrast on a photo of a turtle; the difference was remarkable! Suddenly, the turtle seemed to leap off the page, and it felt so alive.

Common Mistakes in Post-Processing and How to Avoid Them

Even with the best intentions, it’s easy to make mistakes in post-processing. One common error I’ve encountered is over-editing. It’s tempting to push all the sliders to their limits, but I’ve learned that less is often more. I try to remember the original scene and stick to adjustments that feel natural. Another mistake is neglecting to save different versions of my edits. I’ve had instances where I accidentally overwrote a favorite image. Now, I always save multiple versions during my editing process, giving me the option to revert back if needed. It’s a simple step that saves me a lot of headaches later on.

Sharing and Showcasing Your Work

Building an Online Portfolio

Once I’ve edited my images, I love to share them. Building an online portfolio has been an exciting journey. I decided to use platforms like SmugMug and Adobe Portfolio to showcase my work. I remember the thrill of seeing my photos displayed in a clean, professional layout; it felt like a significant step forward. Having a portfolio not only allows me to present my best images but also makes it easier for potential clients or collaborators to find me.

Social Media Strategies for Photographers

Social media has become a powerful tool for connecting with other photographers and sharing my work. I’ve found platforms like Instagram to be particularly effective. I share my images there, along with stories about my underwater adventures. Engaging with my followers by responding to comments and sharing behind-the-scenes content has helped me build a community around my passion. I also participate in photography hashtags, which can boost visibility and connect me with fellow underwater photography enthusiasts.

Entering Competitions and Exhibitions

Participating in photography competitions has been both fun and rewarding. I remember entering my first contest; I was nervous but excited to showcase my work. Winning or even just being recognized can be incredibly validating. It’s a great way to gain exposure and connect with other photographers. I also look for local exhibitions to showcase my work. I’ve enjoyed meeting other artists and sharing experiences; it’s a wonderful way to celebrate our shared passion for underwater photography.

Networking with Other Underwater Photographers

Networking with other photographers has opened up so many opportunities for me. I’ve joined online forums and local photography clubs, where I can share tips, seek advice, and collaborate on projects. I believe that connecting with others in the field can lead to lifelong friendships and exciting projects. I remember attending a workshop hosted by a well-known underwater photographer; not only did I learn invaluable techniques, but I also made connections that have enriched my photography journey.

Challenges in Underwater Photography

Dealing with Water Conditions

One of the biggest challenges I face is dealing with varying water conditions. I’ve encountered everything from murky waters to strong currents. I’ve learned to adapt my techniques based on these conditions. For instance, in murky water, I focus on getting close to my subjects to avoid capturing too much of the hazy background. It’s taught me to be patient and resourceful, which has ultimately improved my skills as a photographer.

Managing Equipment Issues

Equipment issues can also arise, and I’ve had my fair share of mishaps. Whether it’s a lens that fogs up or a housing that leaks, I’ve learned the importance of being prepared. I always carry extra silica gel packs to prevent moisture buildup inside my housing, and I regularly check all seals before every dive. These small steps can save a lot of heartache and ensure I’m ready to capture the beauty below the surface.

Environmental and Ethical Considerations

As underwater photographers, it’s vital to be mindful of our impact on the environment. I always strive to practice ethical photography by respecting marine life and their habitats. I avoid touching corals or disturbing wildlife to capture a shot. Educating myself about marine conservation has made me more conscious of how I can contribute positively. I believe that our responsibility as photographers extends beyond the lens; we have to protect the beautiful environments we seek to capture.

Final Thoughts

Embarking on the journey of underwater photography has been one of the most fulfilling experiences of my life. From the thrill of capturing the vibrant life beneath the waves to the satisfaction of editing and sharing my work, every aspect has enriched my passion for the ocean. I hope my experiences and insights inspire you to dive into this incredible world. Remember, every click of the shutter is an opportunity to tell a story and connect with nature. So grab your gear, embrace the adventure, and let your underwater photography journey begin!

Frequently Asked Questions

What is underwater photography?

Underwater photography is the art of capturing images beneath the surface of the water, focusing on storytelling through the lens to showcase the beauty of underwater life and environments.

What are the benefits of underwater photography?

Underwater photography allows for a deeper connection with nature, promotes awareness of marine conservation, and provides a sense of tranquility and wonder while exploring vibrant underwater environments.

What type of camera is recommended for beginners in underwater photography?

For beginners, a compact camera that can be easily handled and is compatible with underwater housing is recommended. A mirrorless camera is also a good option for image quality without the bulk of a DSLR.

Why is lighting important in underwater photography?

Lighting is crucial in underwater photography because natural light diminishes quickly as you descend, which can result in dull colors in photos. Using strobes or external flashes can enhance shots by illuminating subjects and bringing out their vibrant colors.

What are some basic composition rules for underwater photography?

Basic composition rules include the rule of thirds, leading lines, and experimenting with different angles and perspectives to create balance and draw the viewer’s eye to the focal point of the photograph.

What types of photography can be done underwater?

Types of underwater photography include marine life photography, landscape and environment photography, macro photography, and wide-angle photography, each offering unique perspectives and challenges.

How can I prepare for an underwater photography shoot?

Preparation involves choosing the right location based on water clarity and marine life activity, planning the best times for diving, ensuring safety and logistics, and understanding the behavior of marine life.

What editing software is recommended for post-processing underwater images?

Adobe Lightroom and Photoshop are recommended for post-processing underwater images, as they provide features to adjust exposure, contrast, saturation, and color correction effectively.

What common mistakes should be avoided in post-processing underwater images?

Common mistakes include over-editing images by pushing sliders to their limits and neglecting to save different versions of edits. It’s important to maintain natural adjustments and save multiple versions to prevent loss of favorite images.

What challenges do underwater photographers face?

Challenges include dealing with varying water conditions, managing equipment issues, and being mindful of environmental and ethical considerations to protect marine life and their habitats.