Web Analytics

Recent Posts

Essential Editing Techniques for Underwater Photography

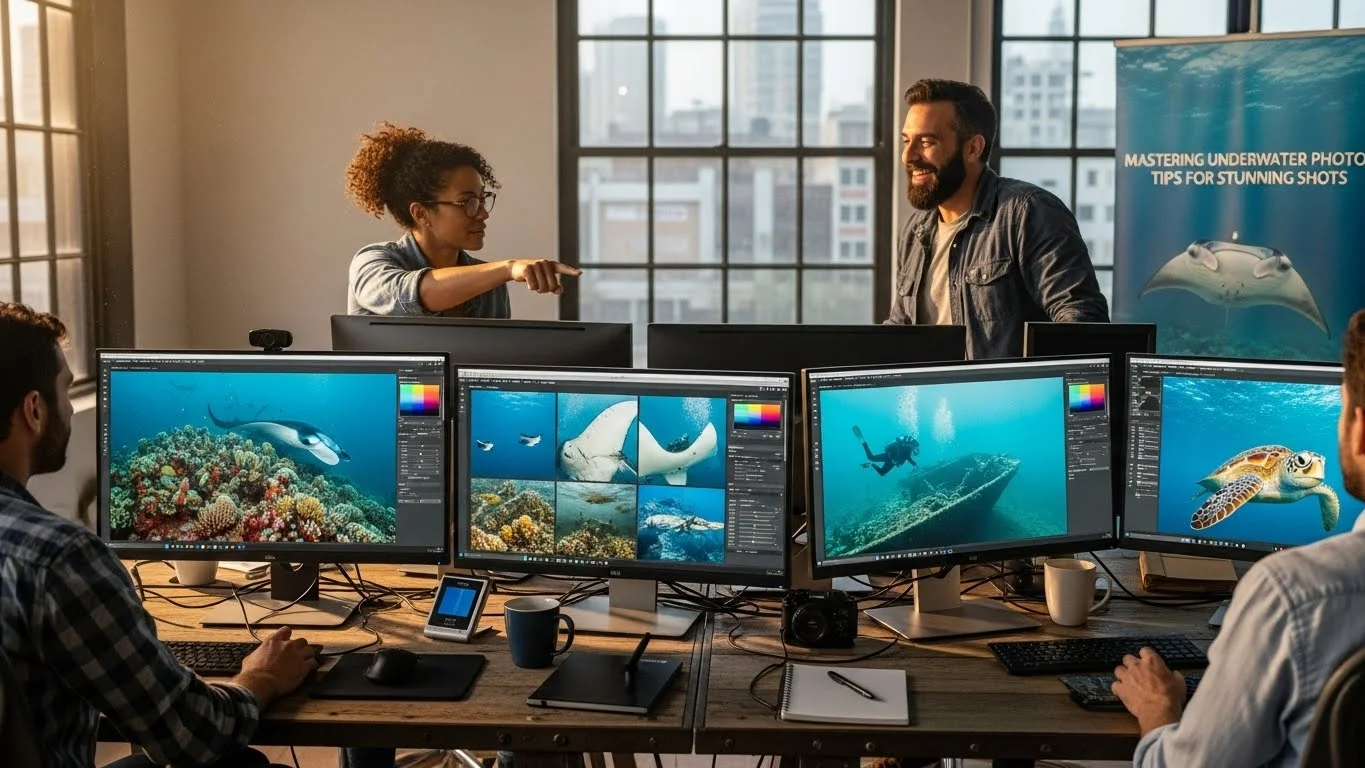
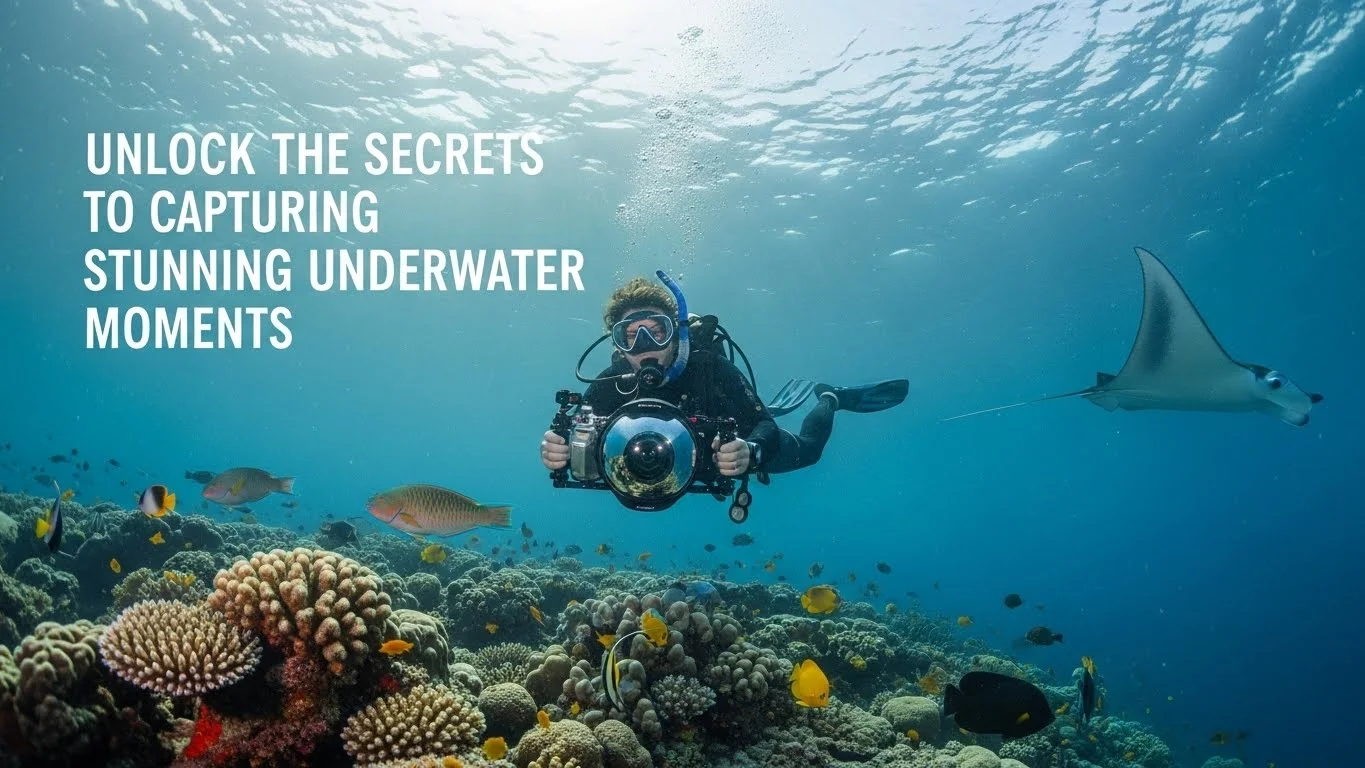
Editing underwater photos can transform your stunning captures into breathtaking visuals. Let’s dive into the essential editing techniques that can elevate your underwater photography skills! Read Interesting article: Mastering Underwater Photo Editing: Tips for Stunning Shots

Essential Editing Techniques for Underwater Photography

Understanding Underwater Photography Basics

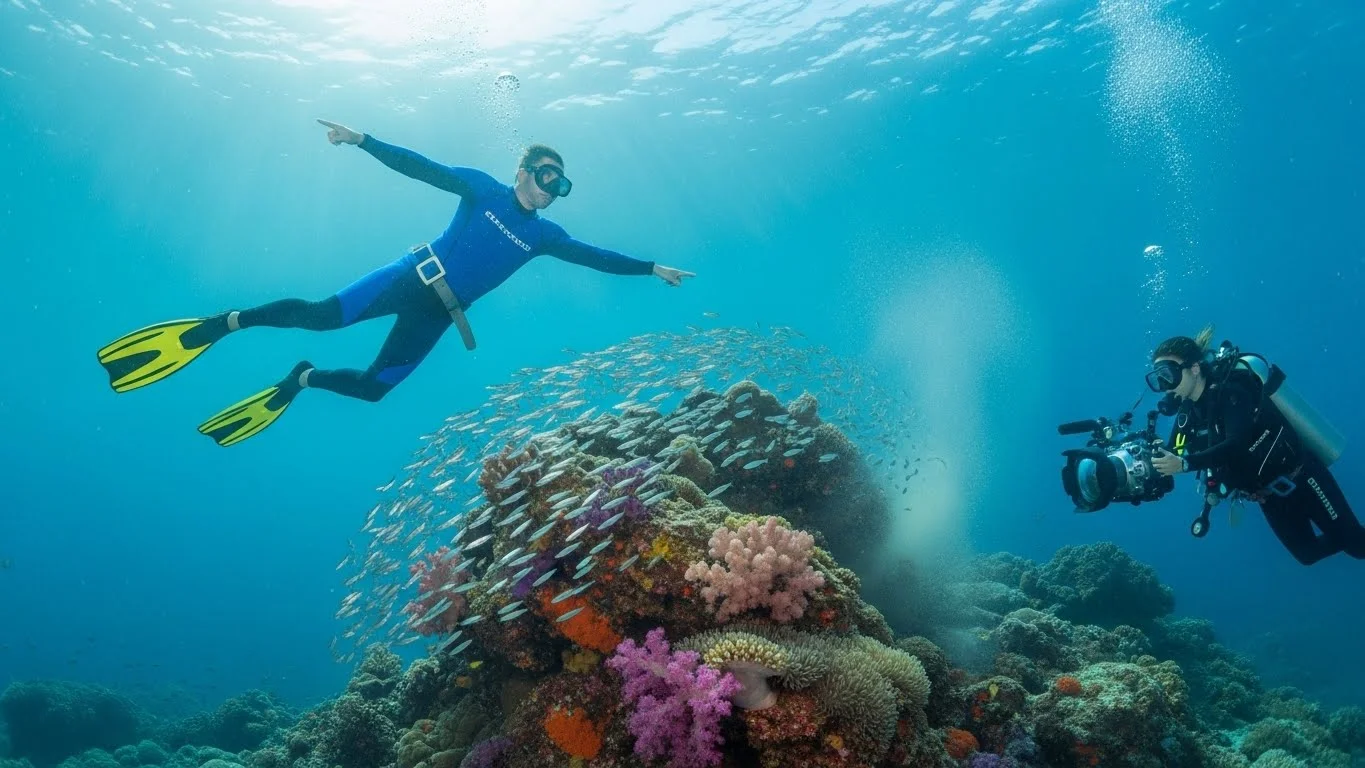
As I embarked on my underwater photography journey, I quickly learned that capturing the beauty beneath the waves involves a unique set of challenges. The underwater environment, while magical, poses specific difficulties that can affect the quality of our images. Understanding these challenges is the first step towards producing stunning underwater photos.

The Unique Challenges of Underwater Environments

From my experience, one of the biggest challenges in underwater photography is dealing with light. Water absorbs sunlight differently than air, leading to a significant loss of color and contrast as we dive deeper. I often found that reds and yellows were the first to disappear, leaving my images looking flat and blue. As I adjusted my shooting techniques, I realized the importance of shooting in shallow waters where natural light is more abundant.

Another challenge is the movement of the water itself. Even the slightest current can introduce motion blur, making it difficult to capture crisp images. To overcome this, I discovered that using faster shutter speeds helped to freeze the motion, but I had to find a balance to avoid underexposing my shots. Additionally, buoyancy and equipment weight can be tricky to manage, especially when trying to frame a shot with precision. I learned to practice my buoyancy control, which not only helped in capturing better images but also made my dives more enjoyable.

Essential Gear for Underwater Photography

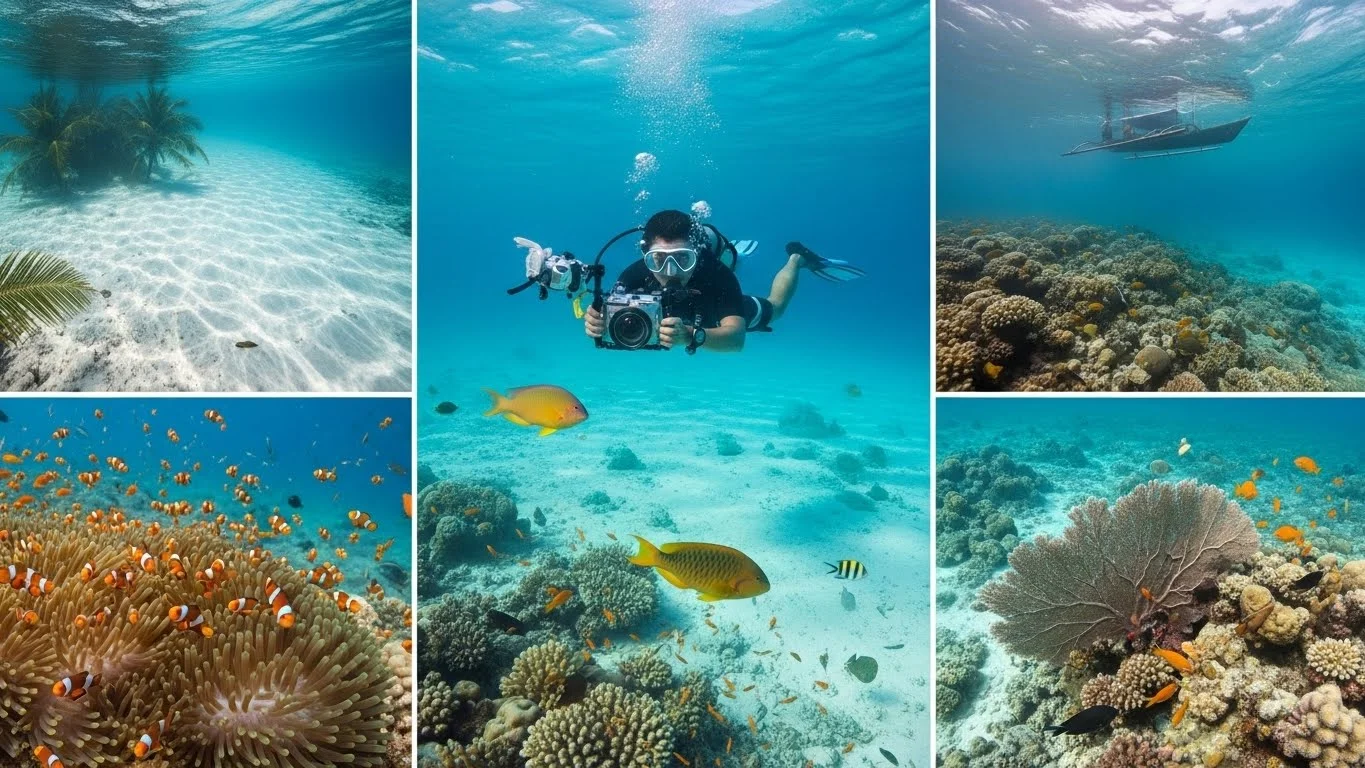
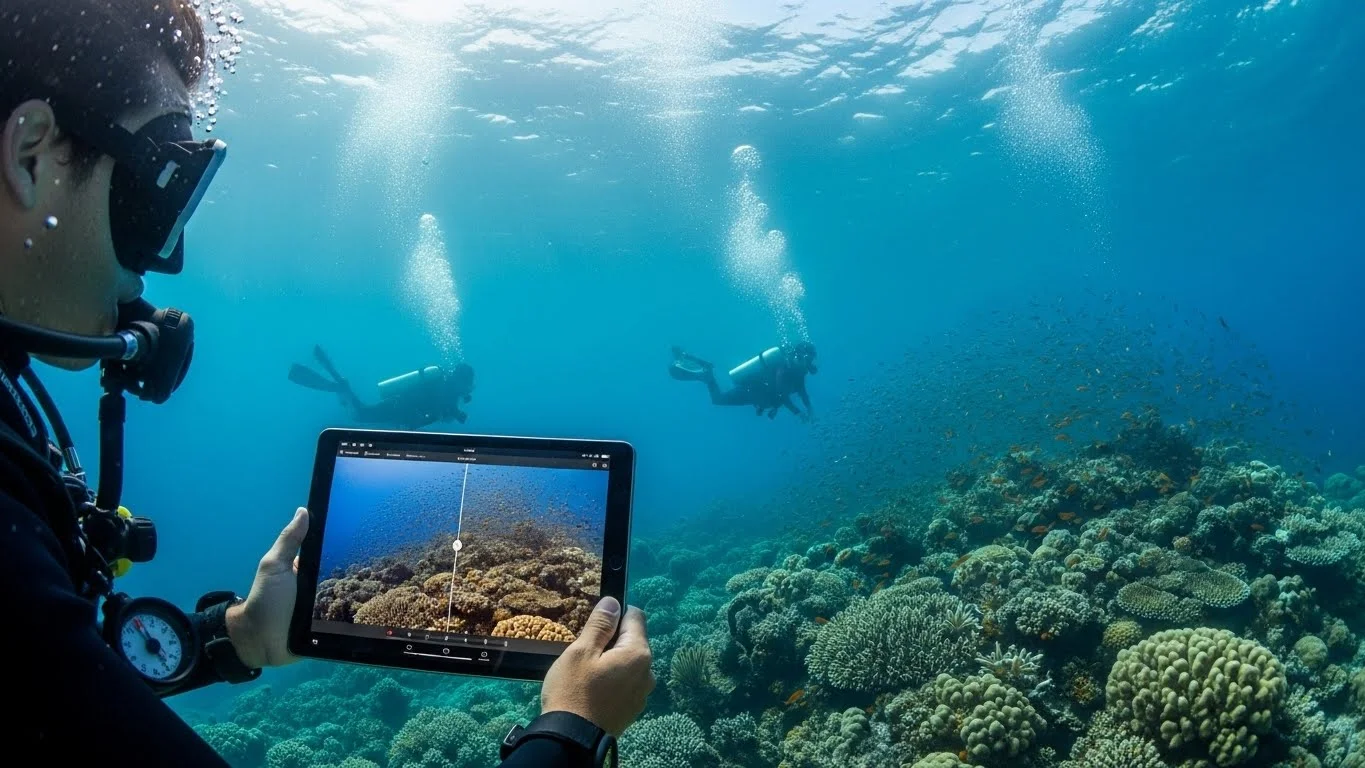
The right equipment is crucial for underwater photography. When I first started, I used a basic point-and-shoot camera, but I quickly realized that investing in a DSLR or mirrorless camera with underwater housing dramatically improved my results. In my opinion, a good lens is just as important; I recommend using wide-angle lenses for capturing expansive underwater scenes and macro lenses for those fascinating details. Read Interesting article: The Best Affordable Locations for Underwater Photography Adventures

Don’t overlook accessories, either. A reliable underwater housing is essential to protect your camera from water damage. I found that good lighting, either through external strobes or video lights, can enhance colors and reduce shadows. When I started using strobes, my images popped with life and vibrancy. Remember, every piece of gear contributes to the overall quality of your photographs, so choose wisely!

Core Editing Techniques for Underwater Photos

Once I conquered the basics of shooting underwater, I discovered that editing plays a crucial role in achieving that stunning final image. The editing process can enhance colors, improve clarity, and make our photos truly shine. Here are a few core editing techniques that I found invaluable for underwater photography.

Color Correction: Restoring Vibrancy

Color correction has become one of my favorite editing techniques. During my early editing attempts, I noticed my underwater photos often looked washed out. After some research, I learned about the importance of adjusting the white balance. Many editing software programs, like Adobe Lightroom and Photoshop, offer tools to correct color balance. I usually start by adjusting the temperature slider to warm up the image, bringing back those missing reds and yellows. It’s amazing how a simple adjustment can transform a dull photo into a vibrant masterpiece.

Another useful technique is to utilize HSL (Hue, Saturation, Luminance) sliders to enhance specific colors. For instance, I often boost the saturation of blues and greens to make the water come alive while being careful not to overdo it. I’ve seen how a little tweaking can bring out the beauty of the underwater world we captured.

Enhancing Contrast and Clarity

After adjusting the colors, I focus on enhancing contrast and clarity. Underwater photos can often lack depth, and I’ve found that increasing contrast helps draw the viewer’s eye to the subjects in the image. I usually adjust the contrast slider and fine-tune the clarity setting. Clarity enhances mid-tone contrast without affecting the overall brightness, which is perfect for underwater images where you want to maintain that ethereal quality.

In my experience, it’s essential to strike a balance; too much contrast can make the image look unnatural. I also play around with the shadows and highlights, ensuring that my subjects remain well-defined while keeping the water’s soft, flowing features intact.

Sharpening Images for Detail

Finally, sharpening is a critical step that I cannot overlook. Many underwater photos can appear soft due to water distortion, so applying a bit of sharpening can bring out the details in the marine life and textures in the environment. I typically use the sharpening tool in my editing software, being careful to zoom into the image to adjust the settings accurately. I’ve learned that a little goes a long way; over-sharpening can create unwanted noise and artifacts, which can detract from the overall quality of the photo.

By applying these basic editing techniques, I’ve watched my underwater photography evolve into something I’m genuinely proud of. Each image becomes a reflection of the beauty I experienced beneath the surface, and I can’t wait to share more insights with you in the following sections!

Advanced Editing Techniques

After mastering the core editing techniques, I found myself eager to explore more advanced methods that could further elevate my underwater photography. While the basics provided a solid foundation, these advanced techniques allowed me to fine-tune my images and push the boundaries of my creativity. I believe that every photographer should be open to experimenting with new tools and methods, so let’s dive into these advanced editing techniques!

Noise Reduction: Cleaning Up Your Images

No matter how careful I was while shooting, I often faced the issue of noise in my underwater images, especially in low-light conditions. Noise can be distracting, making it hard to appreciate the beauty of the underwater world I captured. That’s when I discovered noise reduction techniques. Many editing software programs, like Lightroom and Photoshop, come equipped with noise reduction tools that can help clean up those unwanted grains.

In my experience, I usually start by zooming into the image to see the noise clearly. I then adjust the luminance noise reduction slider, which smooths out the grain without losing too much detail. It’s important to be cautious here; applying too much noise reduction can lead to a plastic-like appearance that I try to avoid. I often find it beneficial to use the masking feature, which allows me to apply noise reduction selectively, preserving the sharpness of the main subjects while softening the noisy background.

Using Layers for Selective Adjustments

One of the most powerful features I’ve encountered in photo editing is the ability to use layers for selective adjustments. This technique is particularly useful for underwater photography because it allows me to tweak specific areas of the image without affecting the whole picture. For instance, if I have a beautiful coral reef that I want to highlight while keeping the background water soft, I can create a separate layer for that section.

When I edit using layers, I typically start by duplicating my original image layer. Then, I make adjustments like increasing brightness, contrast, or saturation just on the coral section. The layer mask feature is my go-to tool here; it lets me paint over the areas I want to adjust while keeping other parts intact. This method not only enhances the focal points in my images but also maintains a more natural look overall. It’s fascinating how a few selective adjustments can bring an entire scene to life!

Combining Multiple Exposures (HDR Techniques)

Another advanced technique I’ve embraced is combining multiple exposures to create high dynamic range (HDR) images. Underwater scenes often have a wide range of light, from bright sunlit surfaces to darker depths, making it challenging to capture everything in one shot. I discovered that by taking several exposures at different settings, I could blend them together to retain the details in both the highlights and shadows.

To create an HDR image, I usually shoot three or more images at different exposures: one for the highlights, one for the mid-tones, and one for the shadows. When I edit, I load these images into HDR software or use the HDR features in programs like Lightroom. The merging process preserves the vibrancy of the colors while ensuring that no detail is lost, whether it’s the soft textures of the water or the intricate patterns of marine life. From my experience, this technique has opened up a new world of possibilities, allowing me to create images that truly represent what I saw beneath the waves.

These advanced editing techniques have helped me refine my underwater photography even more. Each method adds a layer of flexibility and creativity that enhances my work and allows me to share the beauty of underwater life with others. I’m excited to continue exploring what these tools can do and can’t wait to share more about how to effectively use software tools in underwater editing!

Utilizing Software Tools for Underwater Editing

Popular Editing Software for Underwater Photography

With so many editing software options available today, I’ve spent quite a bit of time figuring out which ones work best for underwater photography. From my experience, Adobe Lightroom and Photoshop have been my go-to choices due to their powerful features and flexibility. Lightroom offers an intuitive interface that allows me to make quick adjustments, organize my photos, and create stunning presets that I can apply to future images.

Photoshop, on the other hand, is invaluable for more detailed editing tasks, especially when working with layers, masks, and advanced retouching. I’ve also heard great things about Capture One, particularly for its color grading capabilities, which can be a game-changer for underwater images. Each software has its strengths, and I recommend trying a few to see which one resonates with you. Read Interesting article: Explore Stunning Underwater Photography Spots on a Budget

Plugins and Presets to Enhance Workflow

As I delved deeper into editing, I discovered that plugins and presets can significantly enhance my workflow. Presets, in particular, have saved me countless hours, allowing me to apply consistent styles across a batch of images quickly. I often create my own presets based on the adjustments I find most effective for underwater photos, ensuring that my unique style shines through.

Plugins like Nik Collection and Topaz Labs offer additional tools that can help refine my images further. For example, Topaz DeNoise has been a lifesaver when it comes to cleaning up noise in low-light shots. I appreciate how these tools can seamlessly integrate into my editing software, providing me with more options to enhance my underwater photography.

Embracing these software tools and techniques has truly transformed my editing process. I’m excited to share more best practices for underwater photo editing in the next sections, as I believe that refining our editing skills is just as important as mastering our photography techniques.

Best Practices for Underwater Photo Editing

Maintaining Natural Look vs. Artistic Enhancements

While editing can dramatically improve our underwater photos, I’ve learned that striking the right balance between a natural look and artistic enhancements is crucial. In my early days of editing, I often got carried away with the sliders, creating images that, while striking, didn’t accurately represent the underwater experience. I believe it’s essential to keep the integrity of the original scene while enhancing its beauty. From my experience, I’ve discovered that subtle adjustments often yield the best results. For instance, when boosting colors, I aim to enhance the vibrancy without making the hues appear unnatural. I usually zoom out to see the image as a whole instead of getting lost in the details. This perspective helps me assess whether the edits align with the original feel of the underwater environment. I think it’s beneficial to have a reference image from my shoots to compare against, ensuring I retain the essence of what I observed underwater. I also enjoy playing with artistic enhancements, like adding a slight vignette to draw focus toward the center of the image or adjusting shadows for dramatic effect. However, I always ask myself if these tweaks enhance the photo or detract from its realism. This reflective practice has helped me grow as an editor and photographer, leading to images that resonate with viewers while capturing the true spirit of marine life.

Backup and File Management Strategies

As I dove deeper into underwater photography, I quickly realized that managing my files effectively is just as important as the editing process. With numerous high-resolution images from each dive, I found myself needing a solid backup strategy to prevent losing my treasured captures. I remember feeling anxious after a few close calls with hard drive failures and the panic of potentially losing my work. That’s when I decided to implement a robust file management system. I now utilize a multi-layered backup strategy. After each dive, I download my images to my computer and label the folders with specific dates and locations, which makes it easier to find them later. I also invest in external hard drives for additional storage. One of my favorite practices is to keep a cloud backup as well. Services like Google Drive or Dropbox provide extra peace of mind, ensuring my images are safe even if something happens to my physical drives. Additionally, I’ve learned to keep my editing files organized by creating separate folders for processed images, original RAW files, and any presets I’ve created. This organization has streamlined my workflow significantly, allowing me to focus more on creativity rather than hunting through disorganized files. I recommend developing a routine for backing up files regularly, as it can save a lot of stress in the long run.

Common Mistakes to Avoid in Underwater Photo Editing

Over-Editing: When Less is More

One of the biggest pitfalls I’ve encountered in underwater photo editing is over-editing. It can be tempting to go all out with color corrections, sharpening, and special effects, but I’ve found that less is often more. In my earlier edits, I sometimes pushed the sliders too far, resulting in images that looked overly processed and unnatural. I’ve learned to take a step back after making adjustments and evaluate my work. I often ask myself if the edits serve to enhance the photograph or if they detract from the original scene. Subtle adjustments can have a more significant impact than a heavy-handed approach. My advice is to be cautious with the saturation levels and keep an eye on the details. I often find it helpful to compare my edited images to the originals to ensure that I haven’t strayed too far from the natural beauty I aimed to capture.

Ignoring the Importance of Original Files

Another mistake I made early on was underestimating the importance of keeping original files intact. After processing and saving my edits, I often thought I could delete the originals to save space, only to regret that decision later. I’ve come to realize that original RAW files are invaluable; they contain more data than JPEGs and can be adjusted further without losing quality. Now, I never delete my original files. Instead, I create a structured archiving system where I store both original and edited versions. This way, I can always revert to the untouched images if I decide to re-edit or explore a different creative direction. I recommend anyone looking to improve their editing skills to prioritize preserving their original files, as they offer endless possibilities for future projects.

Showcasing Your Edited Underwater Photography

Building a Portfolio: Tips and Tricks

Creating a portfolio to showcase my underwater photography has been a thrilling experience. I’ve learned that a well-curated selection of images can tell a story and express my unique perspective of the underwater world. When I first started compiling my portfolio, I focused on including only my best shots, aiming for a balance of wide-angle scenes and macro details. I recommend curating a portfolio that reflects not just technical skill but also the emotions and stories behind the images. Selecting images that evoke feelings or convey a message can create a more profound connection with viewers. Additionally, I pay attention to the flow of the portfolio—arranging images in a way that guides the viewer through my underwater journey. It’s also essential to present your work professionally. I’ve invested time in creating a visually appealing website, where I can display my work and include information about my photography journey. This not only showcases my skills but also adds a personal touch that resonates with potential clients or followers. Remember, your portfolio is a reflection of you, so take the time to make it shine!

Sharing on Social Media: Best Formats and Practices

In today’s digital age, sharing my underwater photography on social media has opened up countless opportunities. Platforms like Instagram and Facebook are fantastic for connecting with fellow photographers and marine enthusiasts. I’ve found that tailoring my images to fit the best practices of each platform can significantly enhance visibility. For Instagram, I focus on high-quality images that capture attention quickly. I’ve learned that using the right hashtags and engaging captions can help my photos reach a wider audience. Experimenting with different formats, like carousel posts or stories, keeps my content fresh and engaging. On Facebook, I appreciate the ability to create albums, allowing me to group my underwater images by theme or location. I often share behind-the-scenes stories or insights about the dive experience, which helps create a connection with my audience. I also advocate for engaging with the community by commenting on others’ work and sharing tips. Building relationships through social media can lead to collaborations and even new opportunities in photography. I’ve learned that sharing my passion not only helps others but also enriches my journey as a photographer.

Frequently Asked Questions

What are some challenges faced in underwater photography?

Some challenges include dealing with light absorption in water, which leads to a loss of color and contrast, especially in deeper areas. Additionally, water movement can introduce motion blur, and managing buoyancy and equipment weight can be tricky.

What type of camera equipment is recommended for underwater photography?

Investing in a DSLR or mirrorless camera with underwater housing is crucial. A good lens is also important; wide-angle lenses are recommended for expansive scenes, while macro lenses are ideal for capturing details.

How can I enhance the colors in my underwater photos during editing?

Color correction is key. Adjusting the white balance, particularly the temperature slider, can restore vibrancy. Additionally, using HSL sliders to boost specific colors like blues and greens can make the underwater scene come alive.

What techniques can improve contrast and clarity in underwater images?

Increasing contrast helps to draw attention to subjects, while adjusting clarity enhances mid-tone contrast without affecting brightness. It’s important to find a balance to avoid unnatural results.

What is the significance of sharpening images in underwater photography?

Sharpening is critical as underwater images can appear soft due to water distortion. Applying a bit of sharpening can enhance details in marine life and textures, but it should be done cautiously to avoid noise and artifacts.

What advanced editing techniques can be used for underwater photography?

Advanced techniques include noise reduction to clean up images, using layers for selective adjustments, and combining multiple exposures to create high dynamic range (HDR) images, which help capture details in both highlights and shadows.

Which software is best for editing underwater photos?

Adobe Lightroom and Photoshop are popular choices for underwater photography editing due to their powerful features. Lightroom is great for quick adjustments, while Photoshop is invaluable for detailed editing tasks.

What are some best practices for managing underwater photography files?

Implementing a solid backup strategy is essential. This includes downloading images to a computer, labeling folders, using external hard drives, and maintaining a cloud backup for additional security.

What common mistakes should be avoided in underwater photo editing?

Common mistakes include over-editing, which can lead to unnatural images, and underestimating the importance of keeping original files intact for potential future edits.

How can I effectively showcase my underwater photography?

Building a well-curated portfolio that includes a balance of wide-angle and macro shots can tell a compelling story. Additionally, sharing on social media with tailored content and engaging with the community can enhance visibility and connections.

Mastering Underwater Photo Editing: Tips for Stunning Shots

Underwater photography is a mesmerizing blend of art and adventure. With the right editing techniques, you can turn your underwater shots into breathtaking images that capture the beauty of the ocean. If you’re looking for inspiration, check out The Best Affordable Locations for Underwater Photography Adventures.

Mastering Underwater Photo Editing: Tips for Stunning Shots

Understanding Underwater Photography Basics

When I first dipped my toes into underwater photography, I quickly realized that having a strong grasp of the basics was essential. Understanding the unique environment of underwater shooting can make a world of difference in the quality of your photos. Let’s dive into some of the foundational aspects of underwater photography.

Essential Gear for Underwater Photography

Choosing the right gear is paramount. I learned this the hard way; the first time I used a regular camera underwater, I ended up with blurry images and some serious regrets. Investing in specialized equipment can elevate your underwater photography experience. Here’s what I consider essential:

  • Underwater Camera: A camera built for underwater use is a must. There are many options, ranging from compact point-and-shoot models to advanced DSLRs with underwater housings.
  • Waterproof Housing: If you have a DSLR or mirrorless camera, a good waterproof housing is crucial. It keeps your camera safe while allowing you to adjust settings easily.
  • Underwater Strobe Lights: Natural light diminishes quickly underwater, so adding strobes can help illuminate your subjects and reduce shadows.
  • Filters: Using color correction filters can enhance the colors of your subject and reduce the blue/green cast common in underwater shots.
  • Buoyancy Control Device (BCD): Having good buoyancy control allows you to stabilize yourself while shooting, minimizing movement and blurriness.

This gear might seem like a lot at first, but I found that as I got used to it, it became second nature. Plus, each piece can greatly impact the quality of my photos.

Types of Underwater Cameras

When I started looking into cameras for underwater photography, I was amazed at the variety available. Here’s a summary of the main types that I found helpful:

  • Compact Cameras: These are lightweight and easy to use, making them perfect for beginners. Many are waterproof, eliminating the need for a housing.
  • DSLR Cameras: For those more serious about photography, DSLRs offer flexibility and superior image quality. The downside is they require more investment and bulkier equipment.
  • Mirrorless Cameras: These have become increasingly popular among underwater photographers. They combine the benefits of DSLRs with a smaller form factor, allowing for easier handling underwater.

Finding the right camera was a journey for me, and I recommend considering what you want to achieve and your level of experience before making a choice.

Lighting Techniques for Underwater Shots

One of the most challenging aspects of underwater photography is dealing with lighting. The deeper you go, the less light there is, which can affect color and clarity. Through trial and error, I’ve developed some techniques that work well:

  • Use Natural Light: When shooting close to the surface, take advantage of natural sunlight. The best times are during mid-morning or late afternoon when the sun is lower in the sky.
  • Strobes and Flash: When diving deeper, using strobes or flash can help recapture colors that water absorbs. It’s essential to angle the light correctly to avoid backscatter.
  • Diffusers: For softening the light from your strobes, I recommend using diffusers. They help spread the light evenly and reduce harsh shadows.

These lighting techniques have made a significant difference in my underwater shots, allowing me to capture vibrant colors and clear details, even in murky waters.

As I continue my journey in underwater photography, I realize that mastering the basics is just the first step. Understanding gear, camera types, and lighting techniques lays a solid foundation for creating stunning underwater images. Embracing these elements has transformed my experience and the beauty I can capture beneath the waves.

Common Challenges in Underwater Photography

As I continued my underwater photography journey, I quickly discovered that it’s not just about having the right gear or techniques; there are also some challenges that can really test your skills and patience. These challenges can be frustrating, but overcoming them can lead to some of your best work. Here are a few common hurdles I faced and how I tackled them.

Dealing with Color Loss and Water Absorption

One of the first challenges I encountered was the issue of color loss. I remember the first time I reviewed my underwater shots; they looked washed out and lacked the vibrant hues I had seen in person. This is due to the way water absorbs light—reds and yellows vanish quickly, leaving behind blues and greens. To combat this, I learned to use color correction filters while shooting, which helped bring back some of the warmth in my images.

Additionally, post-processing became my ally. I started experimenting with editing software to adjust the color balance and saturation. I found that even a slight increase in warmth could make a huge difference. I recommend taking the time to familiarize yourself with color correction tools in your editing software, as they can help you restore the true beauty of the underwater world. For those looking for inspiration, you might want to check out Explore Stunning Underwater Photography Spots on a Budget.

Managing Light and Visibility Issues

Another challenge I faced was managing light and visibility. I often found myself in murky waters, where the visibility was less than ideal. There were days when I couldn’t see my hand in front of my face! During these situations, I discovered the importance of positioning. I learned to get as close to my subject as possible to minimize the amount of water between me and the shot. This not only improved visibility but also added depth to my images.

Using strobes effectively was another game changer for me. I began to practice angling my strobes to avoid backscatter—a common issue when shooting in cloudy water. It took some trial and error, but I eventually found the right angles that illuminated my subjects without creating distracting particles in the frame. Understanding how light behaves underwater truly transformed my photography.

Avoiding Motion Blur and Distortion

Motion blur became a frequent companion during my underwater photography escapades. With currents and my own movements, it was easy to capture images that looked like abstract art rather than clear photographs. To address this, I made a conscious effort to stabilize myself while shooting. This involved controlling my buoyancy and finding solid points to grab onto when necessary. I remember the first time I got a crisp shot of a fish swimming by; it felt like a huge victory!

Another tip I picked up was using faster shutter speeds. This allowed me to freeze the action and avoid blur. When my subjects were darting around, I adjusted my settings to capture the moment better. Taking some time to understand the exposure triangle—shutter speed, aperture, and ISO—helped me make quick adjustments while underwater, leading to sharper images.

Each of these challenges taught me valuable lessons about patience, persistence, and creativity. I began to see underwater photography not just as a hobby, but as a complex art form that required both technical skill and a deep appreciation for the environment. With each dive, I felt like I was not only improving my photography skills but also gaining a deeper connection to the underwater world.

Fundamentals of Underwater Photo Editing

Once I started capturing better underwater images, I realized that the editing process was just as important as the shooting itself. Editing became my playground, allowing me to refine and enhance my photos to truly reflect the magic I experienced underwater. Here are some fundamentals I learned about underwater photo editing that I believe can help anyone looking to improve their images.

Choosing the Right Editing Software

Finding the right editing software was one of the first steps I took in my editing journey. I experimented with several programs, each with its own strengths and weaknesses. I found that Adobe Lightroom was a great starting point for its user-friendly interface and powerful editing tools. It allowed me to make global adjustments easily, like correcting exposure and white balance.

For more detailed work, I turned to Adobe Photoshop, which enabled me to dive deep into layer adjustments and fine-tuning. I recommend trying a couple of different programs to see what fits your style and needs best. Don’t be afraid to take advantage of free trials—they were invaluable for me!

Understanding RAW vs. JPEG for Underwater Images

Another key aspect of editing was understanding the difference between RAW and JPEG formats. Initially, I shot in JPEG because it allowed for quicker processing, but I soon realized that RAW files offered much more flexibility. They capture more detail and dynamic range, allowing for significant adjustments without compromising image quality. Switching to RAW made a noticeable difference in my images, giving me the ability to recover details in highlights and shadows that I had previously lost.

Basic Editing Techniques to Enhance Underwater Photos

As I delved into editing, I learned some basic techniques that could dramatically enhance my underwater photos. Adjusting exposure and contrast was often my first step, as it helped to bring out the vibrancy of colors. I also found that sharpening my images helped add detail, particularly in the textures of coral and the fins of fish.

Another technique I regularly applied was cropping to improve composition. Sometimes, the best shots needed just a little adjustment to focus on the subject. I often used the rule of thirds as a guide, placing my main subjects off-center to create a more dynamic image. These simple edits not only improved my photos but also made them more visually engaging.

As I explored underwater photography, I learned that every challenge was an opportunity for improvement. The more I practiced, the more I found joy in the process of capturing and editing my images. The underwater world is truly a magnificent place, and I feel lucky to share its beauty through my photography.

Advanced Editing Techniques for Stunning Underwater Shots

As I progressed in my underwater photography journey, I realized that editing was not just about fixing issues but also about enhancing the beauty of my images. Diving deeper into editing techniques opened up a new world of possibilities. Here are some advanced editing techniques that I found particularly helpful in creating stunning underwater shots.

Color Correction and Grading

Color correction became one of my favorite aspects of editing. I learned that achieving the right colors can completely transform an image. After shooting, I often noticed the blue and green hues overpowering the warmer tones. To address this, I started using color grading tools in my editing software. I would adjust the hues, saturation, and luminance of specific colors to restore the vibrancy I experienced underwater.

I often found myself playing with the color balance sliders to bring warmth back into the images without overdoing it. I remember one particular shot of a clownfish that initially appeared almost monochromatic. After a bit of tweaking, I was able to bring out the rich oranges and yellows, making the fish pop against the green anemone. Color grading not only enhanced individual images but also helped me develop a consistent style across my portfolio.

Adjusting Exposure and Contrast

Exposure and contrast adjustments were crucial in my editing toolbox. A well-exposed image can make all the difference, especially in the often dim underwater environments. I learned to carefully analyze the histogram of my photos to ensure I captured the right range of highlights and shadows.

In many cases, I found that adjusting exposure slightly higher brought out hidden details that were previously lost in the shadows. Conversely, lowering the exposure could help reduce any overexposed areas. Contrast adjustments allowed me to create depth in my images. By increasing contrast, I was able to make colors more vibrant and details more pronounced, enhancing the overall visual impact of my underwater shots.

Sharpening and Noise Reduction

Sharpness is vital in photography, and when it comes to underwater images, it can be the difference between a stunning shot and a blurry one. I discovered that applying sharpening techniques in post-processing could bring out the fine details of marine life, like the intricate patterns on a fish’s scales or the textures of coral. I preferred to use selective sharpening, focusing on the subject while keeping the background soft to maintain a natural look.

However, with sharpening often came noise, especially in low-light situations. I learned to use noise reduction tools to clean up my images without losing too much detail. Striking the right balance was key. I remember being particularly proud of a photo I took of a sea turtle; after careful sharpening and noise reduction, the details came to life without appearing overly processed.

Using Layers and Masks Effectively

The use of layers and masks became a game-changer in my editing workflow. I had initially found it intimidating, but once I wrapped my head around the concept, it opened up so many creative avenues. Layers allowed me to make non-destructive edits, meaning I could experiment without the risk of ruining my original image.

With masks, I could apply adjustments to specific areas of an image without affecting the whole photo. For instance, if I wanted to brighten just the subject while keeping the background darker, I could easily do this with a mask. I remember a particular instance where I captured a vibrant school of fish in a darker part of the reef. By brightening the fish and leaving the surrounding area untouched, I created a striking focal point that drew viewers’ eyes directly to the action.

These advanced editing techniques expanded my creativity and helped me refine my images beyond the basics. As I embraced these skills, I found my underwater photographs becoming more vibrant and telling compelling stories. They were not just images; they were reflections of the beauty I experienced beneath the waves.

Creative Enhancements for Underwater Photography

As I grew more comfortable with the basics of underwater photography and editing, I started exploring creative enhancements that could take my images to the next level. It’s amazing how a few thoughtful additions can transform a good photo into a great one. Here are some techniques I found particularly beneficial.

Applying Filters and Effects

One of the easiest ways to enhance my underwater photos was by experimenting with filters and effects. I discovered that using a subtle color filter could help bring back some of the warmth that often gets lost in underwater shots. For example, I often used a warming filter to infuse my images with a golden hue, which reminded me of the sun filtering through the water. This simple adjustment made a huge difference in the overall feel of my images.

Additionally, I experimented with vignette effects. Applying a slight vignette around the edges of my photos helped to draw the viewer’s eye toward the center, where the subject was usually located. I remember one particular shot of a diver exploring a coral reef. By adding a slight vignette, I felt that the image became more intimate, almost as if the viewer was right there with the diver.

Adding Textures and Overlays

Textures and overlays became another fun avenue for creativity. I experimented with adding textures like water ripples or bubbles to give my photos a more dynamic feel. Subtle overlays can provide depth and interest, especially when dealing with vast, open spaces in the ocean. I recall an image of a school of fish swimming through a sunlit patch of water; by adding a gentle bubble overlay, I was able to enhance the sense of movement and liveliness in the shot.

Another technique I found effective was using light leaks or lens flares to create an ethereal, dreamy quality. This worked especially well for images that featured sunbeams breaking through the water. I love how a little creativity can evoke emotions in my photography, making the viewer feel like they’re experiencing the magic of the underwater world firsthand.

Creating Composite Images from Multiple Shots

Creating composite images was a game-changer for me. I started combining multiple shots to tell a more comprehensive story or highlight different aspects of a scene. For instance, I would take several images of a single reef and blend them together to create a panoramic view that showcased the vibrant life and colors in that area. It was exciting to see how these composites could reveal details that a single image might miss.

Moreover, layering different images allowed me to experiment with various focal points. By blending close-up shots of marine life with sweeping views of the ocean floor, I created images that were visually rich and layered. This technique not only elevated my portfolio but also helped me develop a unique style that I felt proud of.

Specific Tips for Different Underwater Environments

As I continued my photography journey, I realized that different underwater environments call for specific editing strategies. Each environment presents unique challenges and opportunities. Here are some focused tips I learned while editing photos from various underwater settings.

Editing Coral Reef Photography

When editing coral reef photography, I found it essential to maintain the vibrancy of the colors. I often emphasized the reds, oranges, and yellows that make coral reefs come alive. Using color correction techniques to balance the blue cast that water introduces was key. I also focused on enhancing the details of the corals, adjusting sharpness to showcase their intricate textures.

Editing Marine Wildlife Shots

For marine wildlife shots, capturing the subject’s personality is vital. I made sure to highlight the unique features of each species. This often involved using selective adjustments to brighten the subject while keeping the background softer. I found that elevating the contrast on the wildlife could make them stand out against the ocean backdrop.

Editing Wreck Photography

When it came to wreck photography, mood was everything. I embraced a slightly cooler color palette to evoke a sense of mystery and history. I also applied some grain to mimic an old photograph, which added character. The nature of the wreck often called for a storytelling approach in editing; I aimed to capture the essence of decay and beauty in my images.

Best Practices for Exporting and Sharing Underwater Photos

After putting so much effort into capturing and editing my underwater images, I realized that how I shared them was equally important. Here are some best practices I adopted for exporting and sharing my photos.

Optimal File Formats for Online Sharing

For sharing online, I typically exported my images in JPEG format. This allowed for a good balance between quality and file size. I learned that keeping the resolution around 72 dpi was optimal for web use, ensuring my images loaded quickly while still looking sharp.

Preparing Images for Print

When it came to prints, I switched to TIFF or high-quality JPEG formats. I paid attention to the resolution, aiming for at least 300 dpi to ensure crisp details. I also made sure to adjust my color profiles, as prints can appear differently than on screens.

Social Media Best Practices for Underwater Photos

Sharing on social media became one of my favorite ways to showcase my work. I learned that hashtags could significantly increase my visibility, especially within photography communities. I also found that engaging with other photographers and participating in challenges was a great way to connect and inspire others. Additionally, you might want to read about how to Unlock the Secrets to Capturing Stunning Underwater Moments.

Final Thoughts

Through my journey in underwater photography, I’ve learned that it’s not just about capturing beautiful images but about sharing the stories of the underwater world. Every dive, every click, and every edit has deepened my appreciation for marine life and the environment. I believe that everyone can create stunning underwater photography with the right techniques and a little creativity. Whether you’re a beginner or looking to elevate your skills, I hope my experiences and tips inspire you to dive in and explore the beauty beneath the waves. Together, let’s celebrate the wonders of the ocean through our lenses and share them with the world.

Frequently Asked Questions

What is underwater photography?

Underwater photography is a captivating combination of art and adventure that involves capturing images beneath the ocean’s surface.

What essential gear is needed for underwater photography?

Essential gear includes an underwater camera, waterproof housing, underwater strobe lights, color correction filters, and a buoyancy control device (BCD).

What types of cameras are suitable for underwater photography?

There are three main types of cameras suitable for underwater photography: compact cameras, DSLR cameras, and mirrorless cameras.

How can I improve lighting in underwater photography?

To improve lighting, use natural light when close to the surface, employ strobes or flash when diving deeper, and use diffusers to soften the light from strobes.

What challenges might I face in underwater photography?

Common challenges include color loss due to water absorption, managing light and visibility issues, and avoiding motion blur and distortion.

How can I edit underwater photos effectively?

Effective editing involves choosing the right software, understanding RAW vs. JPEG formats, and applying basic techniques like adjusting exposure, contrast, and sharpness.

What are some advanced editing techniques for underwater photography?

Advanced techniques include color correction and grading, adjusting exposure and contrast, sharpening images, and using layers and masks for more precise edits.

What creative enhancements can I apply to my underwater photos?

Creative enhancements may include applying filters and effects, adding textures and overlays, and creating composite images from multiple shots.

What editing tips should I follow for different underwater environments?

For coral reef photography, emphasize vibrant colors; for marine wildlife shots, highlight unique features; and for wreck photography, focus on mood and storytelling.

What are the best practices for sharing underwater photos?

Best practices include exporting images in JPEG format for online sharing, using TIFF or high-quality JPEG for prints, and engaging with photography communities on social media.

The Best Affordable Locations for Underwater Photography Adventures

Underwater photography is a captivating way to explore the beauty beneath the waves. If you’re eager to dive into this stunning world without breaking the bank, you’re in the right place! To get started, you might want to check out some affordable underwater photography gear for backpackers.

The Best Affordable Locations for Underwater Photography Adventures

Understanding Underwater Photography

What is Underwater Photography?

Underwater photography is an art form that captures the mesmerizing beauty of the underwater world. I remember the first time I saw an underwater photo; it felt like peering into a different universe, filled with vibrant colors, graceful fish, and mysterious landscapes. This genre of photography can range from capturing close-ups of coral reefs to wide-angle shots of marine life in their habitats. Whether you’re an experienced photographer or just starting out, the thrill of documenting life beneath the surface is something I believe everyone should experience.

Essential Gear for Underwater Photography

When diving into underwater photography, having the right gear is essential. Over the years, I’ve learned that investing in quality equipment can make a significant difference in the final outcome of your images. Here are some gear essentials I’ve found helpful:

  • Waterproof Camera: A good waterproof camera is your best friend. There are many options available, from compact cameras to DSLRs with underwater housings. I started with a GoPro, which is user-friendly and affordable.
  • Underwater Housing: If you prefer using a DSLR or mirrorless camera, be sure to get a housing that fits your camera model. This keeps your valuable equipment safe from water damage.
  • Strobe or Flash: Underwater, light diminishes quickly, especially beyond 10 feet. A strobe or flash can help illuminate your subjects, making colors pop in your photos.
  • Wide-Angle and Macro Lenses: Wide-angle lenses are great for capturing expansive underwater scenes, while macro lenses allow for close-up shots of small marine life.
  • Buoyancy Control Device (BCD): A well-fitted BCD helps you control your position in the water, allowing you to compose your shots more effectively.

As I started my underwater photography journey, I quickly realized that while gear is important, understanding how to use it is even more crucial. For beginners, I recommend looking into affordable gear for underwater adventure photography beginners.

Basic Techniques for Beginners

Before you dive in, let’s talk about some fundamental techniques that helped me improve my underwater photography skills:

  • Practice Good Buoyancy: Maintaining neutral buoyancy is key for underwater photography. This allows you to hover in the right position without disturbing the marine life or stirring up sediment, which can ruin your shots.
  • Use Natural Light: Whenever possible, try to use natural light for your photos. The golden hour, either early in the morning or late in the afternoon, is magical. I’ve always found the colors to be richer and more vibrant during these times.
  • Get Close to Your Subject: Water absorbs color and reduces contrast, so getting close to your subject will help capture more detailed images. I learned this the hard way after taking numerous shots from too far away, only to be disappointed with the results.
  • Understand Marine Life: Spend some time observing marine life behavior before you start shooting. I noticed that some fish are more curious and will approach you, while others might be skittish. Knowing this can help you plan your shots better.
  • Experiment with Angles: Try different angles and perspectives to make your photos stand out. I often find that shooting from below the subject can create dramatic images that highlight the beauty of the water’s surface.

As I’ve continued to practice these techniques, I’ve found my confidence in underwater photography has grown immensely. It’s all about getting comfortable in the water and experimenting with various settings.

In my experience, the key to success in underwater photography lies in a combination of the right gear, essential techniques, and a willingness to learn from each dive. With this knowledge, we can start exploring the world’s best affordable locations for underwater photography adventures, enhancing our skills while capturing breathtaking images along the way.

Top Affordable Locations for Underwater Photography

The Caribbean

The Caribbean is often at the top of many underwater photographers’ lists, and for good reason. The crystal-clear waters, vibrant reefs, and diverse marine life make it a fantastic playground for capturing stunning images. I’ve spent hours wandering through the reefs, mesmerized by the sheer beauty. Here are a couple of standout spots that won’t break the bank:

Belize Barrier Reef

Belize Barrier Reef is the largest barrier reef in the Western Hemisphere and a UNESCO World Heritage site. I remember snorkeling along the reef and being surrounded by schools of colorful fish, playful nurse sharks, and even a few turtles. The visibility can be incredible, often exceeding 100 feet. Plus, there are plenty of affordable dive shops that offer guided tours, which can help you find the best photogenic spots without the stress of navigating on your own.

Cozumel, Mexico

Cozumel is another gem within the Caribbean. The island offers stunning coral reefs teeming with marine life, and it’s an easy trip from the mainland. I found that the dive sites here are well-maintained, with many options for all skill levels. The famous Palancar Reef was one of my favorite spots, full of vibrant coral formations and diverse fish. Plus, the local eateries provide delicious food at reasonable prices, making it an all-around great destination for underwater photography enthusiasts.

South East Asia

If you’re looking for some of the most beautiful underwater landscapes, South East Asia should definitely be on your radar. The region boasts incredible biodiversity and some of the most affordable diving experiences I’ve ever enjoyed. Here are two locations that really stood out during my travels:

Thailand (Koh Tao)

Koh Tao is a small island known for its dive sites and laid-back vibe. It’s a popular spot for beginners, and I was amazed at how many affordable dive schools were available. The waters around Koh Tao are rich in marine life, and I found plenty of opportunities for capturing vibrant shots of clownfish and stunning corals. The relaxed atmosphere of the island also allows for plenty of time to explore and practice your photography skills.

Indonesia (Bali)

Bali is not just famous for its culture and landscapes; the underwater world is equally breathtaking. I’ll never forget diving at Tulamben, where the USAT Liberty wreck lies. The wreck is home to a variety of marine species, making it a perfect spot for underwater photography. The visibility is usually great, and the vibrant coral gardens were simply stunning. What’s even better is that Bali has a range of affordable accommodations and eateries, making it easy to enjoy an extended stay without draining your wallet.

Australia

Australia offers some of the most iconic underwater photography spots in the world, particularly along its extensive coastlines. I was fortunate enough to explore a couple of these locations, and they left a lasting impression on me:

Great Barrier Reef

The Great Barrier Reef is a bucket-list destination for many underwater photographers, and I can understand why. While parts of it can be pricey, I found several budget-friendly day trips that provided amazing experiences. Swimming through the reef, I was in awe of the vibrant colors and the diversity of life. It’s a photographer’s dream, and I recommend timing your visit to coincide with the warmer months for the best conditions.

Whitsunday Islands

The Whitsunday Islands offer an incredible mix of beautiful beaches and exceptional dive sites. I enjoyed a day trip that allowed me to explore several dive spots, each with unique marine life. The underwater views were stunning, and the soft corals were unlike anything I had ever seen before. With options for both diving and snorkeling, this area is perfect for photographers of all skill sets, and there are budget options available for accommodations and meals.

Central America

Lastly, Central America offers some hidden treasures for underwater photography, often overlooked by many travelers. I was genuinely surprised by the beauty I discovered in these locations:

Roatan, Honduras

Roatan is known for its beautiful coral reefs and rich marine life. I was pleasantly surprised by the affordability of diving here. The island offers a range of diving experiences, from wall dives to shallow coral gardens. I remember spending an entire day diving around the West End and capturing the vibrant underwater scenes, all while enjoying the friendly local atmosphere. It’s a great place for both experienced and novice photographers to hone their skills.

Costa Rica (Coco Island)

Coco Island is a bit of a trek, but it’s a hidden paradise for adventurous photographers. The island is a national park, and the marine life here is spectacular, featuring everything from hammerhead sharks to manta rays. I found that there are liveaboard options that can be surprisingly affordable. The remoteness of Coco Island means pristine underwater environments, making every dive worth the journey.

Exploring these locations has been a fantastic way to capture the beauty of the underwater world while sticking to a budget. Each destination has its unique charm and marine life, providing endless opportunities for stunning photography. I can’t wait to hear about your underwater adventures!

Planning Your Underwater Photography Adventure

When to Visit Each Location

Planning the timing of your underwater photography trip can make a world of difference. I’ve learned that each destination has its own peak seasons and unique weather patterns that can affect visibility and marine life activity. For instance, when I visited Belize, I found that the best time to dive is between April and June. During these months, the water is typically calm, and visibility is at its finest. In contrast, the Caribbean can be prone to hurricanes from late summer into fall, so I always recommend checking the local weather patterns before booking a trip.

In Southeast Asia, particularly in Koh Tao, the dry season from December to April offers the best diving conditions. I remember experiencing the vibrant colors of coral and fish during this period. Bali, on the other hand, is great year-round, but I found the months of June to September to be particularly pleasant for diving, with clearer waters and less rain. It’s essential to do your research and pick the right time that aligns with your travel plans.

What to Pack for Underwater Photography Trips

Packing for an underwater photography adventure requires careful consideration. Over the years, I’ve developed a checklist that helps me remember the essentials without overloading my gear bag. Here’s what I typically take:

  • Camera and Housing: Obviously, your camera setup is a priority. I make sure my underwater housing is in good condition and has no leaks before each trip.
  • Extra Batteries and Memory Cards: I can’t emphasize this enough! Bring plenty of extras, as shooting underwater can drain batteries quickly, and you don’t want to miss capturing that perfect moment because of a full memory card.
  • Underwater Dive Computer: Keeping track of your dive time and depth is crucial. It’s easy to lose track of time when you’re having fun underwater!
  • Snorkeling Gear: If you plan to do some surface shooting or snorkeling between dives, having your own gear can be convenient.
  • Sun Protection: Don’t forget reef-safe sunscreen and a hat for when you’re out of the water—it’s easy to get sunburned while diving, and I’ve definitely learned this lesson the hard way!
  • Lightweight Dry Bag: This is perfect for keeping your gear safe from splashes or sudden downpours.

By packing smart, I ensure that I’m prepared for anything the underwater world throws at me.

Budgeting for Your Adventure

Budgeting is a key part of planning any trip, and underwater photography adventures are no different. My approach is to break it down into several categories to keep things organized.

Travel Costs

First, consider your travel costs. This includes flights, transfers, and any rental cars. I usually like to browse several travel websites to find the best deals. During my trip to Indonesia, I found that booking my flights several months in advance saved me a significant amount of money. Don’t forget to compare prices for different days of the week, as they can vary quite a bit!

Accommodation Options

Next up is accommodation. Depending on your destination, prices can range from budget hostels to luxurious resorts. I’ve had great experiences at mid-range hotels that offered excellent amenities without breaking the bank. For example, in Cozumel, I stumbled upon a cozy guesthouse that provided easy access to dive shops and local eateries, making my stay enjoyable and economical.

Equipment Rental vs. Purchase

Finally, consider whether you’ll rent or purchase your underwater photography equipment. If you’re just starting out or don’t dive frequently, renting might be the best option. I rented gear during my early trips, which helped me determine what I truly needed before investing in my own setup. However, if you’re planning regular dives, investing in quality gear can save money in the long run. Just remember to factor in maintenance and servicing costs for your equipment!

By carefully planning each aspect of your underwater photography adventure, you can maximize your experience while staying within your budget. I can’t wait to hear about your own adventures and the stunning images you’ll capture along the way!

Tips for Successful Underwater Photography

Choosing the Right Time of Day

Timing plays a significant role in capturing stunning underwater images. I’ve learned that the best times to shoot are typically during the early morning or late afternoon. During these hours, the sunlight penetrates the water at a more favorable angle, creating softer shadows and enhancing the colors of your subjects. I remember diving at sunrise and being amazed by how the light danced through the water, illuminating schools of fish and coral with a warm glow. If you can, try to plan your dives around these golden hours for better photographic opportunities.

Understanding Marine Life Behavior

Having a good grasp of marine life behavior can elevate your underwater photography. Every dive, I try to spend a few moments just observing my surroundings. I noticed that some species, like clownfish, are quite curious and will approach you if you remain calm and still. Others, like most larger fish, tend to be more skittish. This knowledge can help you position yourself for the best shots. For instance, I found that waiting patiently near a coral structure often rewards me with the chance to capture fish as they come in and out, creating dynamic images. Understanding their routines can also help you anticipate the right moments to click the shutter.

Lighting Techniques for Underwater Shots

Underwater lighting can be tricky due to the way water absorbs light. As I continued my photography journey, I realized that using natural light is often key, but having additional lighting options, like strobes, can dramatically enhance your images. One technique I love to use is to angle my strobe slightly away from my subject to avoid overexposing the colors. It’s all about balance; I often experiment with different positions and power settings until I find the right mix. I also recommend practicing with your light settings on land before you dive, so you’re familiar with how they work when you’re underwater.

Post-Photography Considerations

Editing Underwater Photos

After a great dive, the fun isn’t over yet! I’ve found that editing my underwater photos is a crucial part of the process. While I strive to capture the best images possible in-camera, I always take some time to enhance them afterward. I typically use software like Adobe Lightroom or Photoshop to adjust colors, contrast, and sharpness. Underwater images often benefit from a bit of color correction since the water can wash out some hues. I remember the first time I edited a photo of a vibrant reef; it was like bringing the image back to life! Don’t be afraid to experiment with different edits to find your style.

Sharing Your Underwater Photography

Once you’ve edited your photos, sharing them is a great way to celebrate your achievements and inspire others. I love posting my favorite shots on social media, especially in dedicated photography groups or forums where fellow underwater enthusiasts gather. It’s a wonderful feeling to connect with others who share the same passion and to see their beautiful work as well. Plus, receiving feedback can help us grow as photographers, and I’ve learned so much from constructive critiques over the years. Additionally, consider checking out affordable underwater wildlife photography tips for backpackers for more insights.

Getting Feedback and Joining Communities

Joining photography communities is another way I’ve expanded my skills. There are numerous online platforms where underwater photographers gather to share tips, ask questions, and showcase their work. Being part of these communities not only provides valuable insights but also a sense of belonging. I’ve made friends from all over the world, and it’s amazing how we inspire each other. Whether through local meet-ups or online discussions, connecting with others who share your interests can offer motivation and fresh perspectives.

Final Thoughts

Underwater photography has been an incredible journey for me, filled with challenges and rewards. Each dive offers a unique opportunity to capture the beauty of marine life, and I’ve learned that persistence, patience, and a willingness to learn are key. I encourage anyone interested in this captivating art form to take the plunge. Whether you’re exploring local waters or traveling to exotic locations, the underwater world is waiting for you. Remember, every shot is a chance to tell a story, and I can’t wait to see the adventures you capture beneath the waves!

Frequently Asked Questions

What is underwater photography?

Underwater photography is an art form that captures the beauty of the underwater world, including vibrant colors, marine life, and landscapes. It can involve close-ups of coral reefs or wide-angle shots of marine habitats.

What essential gear do I need for underwater photography?

Essential gear includes a waterproof camera, underwater housing for DSLRs or mirrorless cameras, a strobe or flash for lighting, wide-angle and macro lenses, and a buoyancy control device (BCD) for better positioning in the water.

What basic techniques should beginners learn for underwater photography?

Beginners should practice good buoyancy, use natural light, get close to subjects, understand marine life behavior, and experiment with different angles to improve their underwater photography skills.

What are some affordable locations for underwater photography?

Affordable locations for underwater photography include the Belize Barrier Reef, Cozumel in Mexico, Koh Tao in Thailand, Bali in Indonesia, the Great Barrier Reef in Australia, and Roatan in Honduras.

When is the best time to visit underwater photography locations?

The best time varies by location; for example, Belize is ideal from April to June, Koh Tao from December to April, and Bali is great year-round but particularly pleasant from June to September.

What should I pack for an underwater photography trip?

Pack your camera and housing, extra batteries and memory cards, an underwater dive computer, snorkeling gear, sun protection, and a lightweight dry bag to keep your gear safe.

How can I budget for my underwater photography adventure?

Budgeting involves considering travel costs, accommodation options, and whether to rent or purchase equipment. Planning in advance can help save money on flights and lodging.

What lighting techniques can enhance underwater photos?

Using natural light is key, but additional lighting like strobes can enhance images. Angling the strobe away from subjects can prevent overexposure, and experimenting with light settings is recommended.

How can I edit my underwater photos effectively?

Editing underwater photos typically involves using software like Adobe Lightroom or Photoshop to adjust colors, contrast, and sharpness, as water can wash out some hues.

How can I share and get feedback on my underwater photography?

Sharing photos on social media and joining photography communities can provide inspiration and feedback. Engaging with others in online forums or local meet-ups is a great way to connect and learn.

Explore Stunning Underwater Photography Spots on a Budget

Underwater photography can be a mesmerizing adventure, capturing the beauty of marine life while exploring stunning ocean depths. For those of us on a budget, there are incredible spots around the world where we can dive in without breaking the bank. Check out Top 7 Budget-Friendly Destinations for Underwater Photography for more insights.

Explore Stunning Underwater Photography Spots on a Budget

Understanding Underwater Photography

The Basics of Underwater Photography

Getting started with underwater photography can feel a bit overwhelming, but I believe it’s more accessible than many think. I remember my first dive with a camera; I was nervous yet excited. The key is to understand that underwater photography is not just about the camera but also about the environment. The water acts as a filter, altering colors and light. I learned that red hues fade quickly underwater, making it essential to use filters or external lights to bring those colors back to life in my photos.

When you’re underwater, everything moves differently. The water can create a layer of distortion, so I found that being patient and steady is crucial. You need to take your time to compose the shot and get the angle just right. Whether you’re shooting wide-angle scenes or close-ups of fish, learning to control your buoyancy will help keep your camera stable and your subjects in focus. I’ve learned that practicing buoyancy control while diving makes a world of difference in my photography.

Essential Equipment for Beginners

Starting with underwater photography doesn’t mean you need to invest in the most expensive gear. I began my journey with a basic DSLR camera, a good underwater housing, and a few essential accessories. If you’re on a budget, here are some items I recommend:

  • Camera: A DSLR or mirrorless camera is great, but even a good point-and-shoot camera can work with the right underwater housing.
  • Underwater Housing: Make sure to invest in a durable housing that fits your camera. I found a used one that saved me quite a bit.
  • Wide-Angle Lens: This will help capture the expansive beauty of underwater scenes. I started with a basic lens before upgrading.
  • Lighting: If you can, add a strobe or video light. I learned the hard way that natural light only goes so far in bringing out colors.
  • Accessories: Don’t forget about a good float strap and a macro lens for close-up shots of smaller creatures!

While it might seem like a lot, I started small and gradually added to my gear. I found that focusing on mastering my current equipment was just as important as any new addition.

Top Budget-Friendly Underwater Photography Locations

1. Florida Keys, USA

Best Dive Sites for Photography

The Florida Keys is one of my favorite places to dive and snap photos. With its warm waters and diverse marine life, it’s a paradise for underwater photographers. Places like John Pennekamp Coral Reef State Park and the famous Spiegel Grove wreck provide stunning backdrops. I remember my first dive at the Molasses Reef; the coral formations were breathtaking, and I captured some of my best shots there.

Cost-Effective Accommodation Options

Finding a place to stay in the Keys doesn’t have to be expensive. I often opt for local motels or campgrounds, which can be much cheaper than luxury resorts. If you’re willing to camp, the Biscayne National Park offers beautiful spots right by the water. I also discovered some great Airbnb options that cater to divers, often providing discounts for extended stays.

2. Cozumel, Mexico

Unique Marine Life to Capture

Cozumel is another gem for underwater photography. The coral reefs here are alive with color, and the chance to capture sea turtles, vibrant fish, and even the occasional shark is thrilling. I was lucky enough to dive at the Palancar Reef, where I experienced a diverse marine ecosystem. The clarity of the water made it easy to capture stunning shots.

Affordable Dive Shops and Tours

There are numerous budget-friendly dive shops in Cozumel. I found that booking my dives directly with local operators instead of through my hotel saved me quite a bit. Many shops offer packages that include multiple dives at discounted rates. Plus, they often have knowledgeable guides who can help you find the best spots for photography. For more tips on capturing those moments, check out Unlock the Secrets to Capturing Stunning Underwater Moments.

3. Bonaire, Caribbean

Shore Diving versus Boat Diving

Bonaire is known for its excellent shore diving, which is a fantastic way to save money while getting great underwater shots. I spent a week there, diving right from the beach with only my camera and gear. The convenience of shore diving meant I could explore at my own pace without the added costs of boat trips.

Budget-Friendly Stay Recommendations

Accommodations in Bonaire range from budget guesthouses to more upscale resorts. I stayed at a friendly dive lodge that offered affordable rates, and they even had a dive shop on-site. It made my life easier since I could rent gear and get tips on the best local dive sites right from my doorstep!

4. Great Barrier Reef, Australia

Best Times to Visit for Photography

The Great Barrier Reef is undeniably a dream destination for underwater photographers. I learned that the best time to visit is during the Australian winter (June to October) when the weather is cooler and the water visibility is at its peak. I remember diving during this season and being in awe of the vibrant corals and marine life.

Affordable Liveaboards and Day Trips

While some tours can be pricey, I found that booking a liveaboard trip can actually save money in the long run. I enjoyed my experience on a budget liveaboard, which allowed me to dive multiple sites in a few days. Day trips are also available, and by researching beforehand, I found some great deals that included meals and gear rental.

5. Azores, Portugal

Stunning Natural Landscapes

The Azores offer a unique underwater experience. I was blown away by the underwater landscapes and the chance to photograph species not found anywhere else. The water can be chilly, but the stunning visibility and diverse marine life make it worth it.

Cost-Effective Local Guides

Local dive shops in the Azores often provide guided tours at reasonable prices. I connected with a small, family-run operation that offered personalized tours. They were knowledgeable and helped me find the best spots to capture everything from dolphins to fascinating rock formations.

Planning Your Underwater Photography Trip

When is the Best Time to Visit?

Planning the timing of your underwater photography trip can make a significant difference in what you capture. From my experience, the best months vary depending on the location. For instance, in the Florida Keys, I found that summer months offer warm waters and vibrant marine life, but I also learned that winter can provide clearer visibility. Meanwhile, in Cozumel, I noticed the best visibility and calm waters between March and June. It’s all about doing your homework! I often check dive forums and local weather reports to get insights on marine conditions before I book my trip.

In the Great Barrier Reef, visiting during the Australian winter, as I mentioned earlier, can lead to stunning shots. However, I also learned that visiting in spring, particularly around October, can provide a unique opportunity to capture the coral spawning phenomenon. I recommend reaching out to local dive shops in advance to find out what events might be happening during your visit. Each season has its unique charm, and planning around that can bring your underwater photography to life.

How to Choose the Right Equipment on a Budget

Choosing the right equipment doesn’t have to cost a fortune. I remember feeling overwhelmed by the choices available, but I realized that it’s about finding what suits your needs. For me, starting with a budget-friendly camera system was essential. I initially used a compact camera with a housing, which was lightweight and easy to handle. As I progressed, I gradually upgraded, always keeping my budget in mind.

One of the biggest lessons I learned was the importance of investing in a good underwater housing. I found that spending a little more on a high-quality housing can protect my gear and ensure I get the best shots possible. I also recommend looking for second-hand equipment. Many divers upgrade their gear frequently, and I’ve snagged some fantastic deals on used lenses and lighting systems.

When it comes to accessories, consider purchasing a red filter for your camera instead of investing in expensive lighting right away. In many cases, I found that natural light combined with a red filter helped me achieve some vibrant colors without breaking the bank. I also suggest focusing on basic editing software to enhance your photos after your dives. Learning how to edit can really bring your underwater photography to the next level! For additional tips, check out Top Tips for Photographing Marine Life Underwater Like a Pro.

Cost-Saving Tips for Travel and Accommodation

Travel costs can add up quickly if you’re not careful, but I’ve discovered several strategies to save money. First, I always try to book flights in advance. I’ve found that being flexible with travel dates can lead to significant savings as well. Sometimes, flying mid-week or during off-peak times can cut costs dramatically.

For accommodations, I love exploring hostels or budget hotels that cater to divers. During my trip to Bonaire, I found a charming guesthouse that not only offered great rates but also provided a communal kitchen. This allowed me to cook some meals, saving both money and giving me more time to bond with fellow divers. I often check platforms like Airbnb or local dive forums for recommendations on affordable lodging with dive packages.

Additionally, I learned that joining a dive club can lead to discounted rates on trips and accommodations. After joining a local dive group, I discovered many members were willing to share their travel tips and recommendations. It’s a win-win: you get to connect with fellow diving enthusiasts and save money at the same time!

Techniques for Stunning Underwater Photography

Using Natural Light Effectively

One of the most exciting aspects of underwater photography is the way natural light interacts with water. I’ve learned that shooting in the early morning or late afternoon often provides the best lighting conditions. The golden hours not only illuminate the water beautifully, but they also create stunning reflections and shadows. I’ve gotten some of my favorite shots during those times!

However, I’ve also experienced challenges while relying solely on natural light, especially in deeper waters. In these cases, I found that using a strobe or video light could help illuminate my subjects and bring out vivid colors. I recommend experimenting with different lighting techniques to see what works best for your style. It’s all about finding that perfect balance between natural and artificial light to create captivating images.

Composition Tips for Underwater Shots

Composition can make or break an underwater photograph. I learned early on that following the rule of thirds can help create balanced, engaging images. Placing your main subject off-center can add depth and interest to your shots. I often take my time to observe my surroundings before snapping pictures, ensuring that I’m capturing the scene in the best way possible.

Don’t be afraid to get creative with angles and perspectives. I’ve found that shooting from below or above my subject can provide unique viewpoints. Focusing on the lines and shapes created by marine life or coral formations can also lead to striking compositions. I think of every dive as an opportunity to tell a story, and I try to capture that narrative in my photographs.

Editing and Enhancing Your Photos

Editing my underwater photos has become one of my favorite steps in the process. I’ve found that even minor adjustments can dramatically enhance the quality of my images. Simple edits like adjusting contrast, saturation, and sharpness can really make colors pop. I started with basic editing software, which was user-friendly and perfect for beginners.

With time, I ventured into more advanced programs, but I always keep in mind that less is often more. I aim to maintain the natural beauty of the underwater world while enhancing my photos. I’ve discovered that sometimes just correcting the color can bring back the vibrancy that the water tends to wash away. Don’t shy away from experimenting with different editing techniques to find your style!

Safety Considerations for Underwater Photography

Essential Safety Gear

When diving for underwater photography, safety should always be a top priority. I’ve learned that having the right safety gear can make a significant difference in having a trouble-free experience. First and foremost, investing in a reliable dive computer was essential for me. This tool helps monitor my depth and time underwater, ensuring I stay within safe limits. I remember feeling much more relaxed knowing I had this information at my fingertips.

Another important item is a buoyancy control device (BCD). This piece of equipment allows me to adjust my buoyancy easily, which is vital when trying to hover near a subject for that perfect shot. I also recommend a dive knife; while it might seem a bit extreme, I’ve heard stories of divers needing to cut themselves free from entanglements. Having a knife can offer peace of mind.

Additionally, I always carry a surface marker buoy (SMB). This becomes especially useful when diving in busy areas or strong currents, as it signals my presence to boats above. I also make sure to wear a wetsuit or drysuit appropriate to the water temperature. Not only does it provide thermal protection, but it also offers some buoyancy assistance when I’m diving.

Diving Certifications and Training

Before I embarked on my underwater photography journey, I realized the importance of having proper diving certifications. I took the time to enroll in a PADI Open Water Diver course, which provided me with essential skills and knowledge about diving safety. During the course, I learned how to handle potential issues underwater, like equalizing pressure and responding to emergencies.

Once I became comfortable with the basics, I pursued further certifications, including Advanced Open Water Diver and Specialty courses focused on underwater photography. These additional classes not only improved my skills but also gave me the confidence to explore more challenging dive sites. I recommend that anyone serious about underwater photography consider investing in similar training. It opens up opportunities to dive in various conditions and enhances your overall experience.

Understanding Marine Life Interactions

Another aspect of safety that I believe is crucial in underwater photography is understanding marine life interactions. I’ve had some incredible encounters with creatures like sea turtles and dolphins, but I also learned that respect for marine life is paramount. Before my dives, I researched the local species to know which ones to approach carefully and which ones to admire from a distance.

For instance, I remember my first encounter with a curious moray eel. Initially, I was eager to get close for a photo, but I quickly realized that these eels can be surprisingly defensive. Instead of rushing in, I took a step back, observing its behavior before attempting to photograph it. This not only kept me safe but also allowed me to capture more natural, candid shots.

It’s also essential to be aware of your surroundings and avoid touching or disturbing coral and other marine habitats. I have come across divers who unintentionally damaged coral while trying to get the perfect angle for a shot. This taught me the importance of maintaining a respectful distance and being conscious of my movements. Being a responsible photographer means protecting the underwater environment while creating beautiful images.

Incorporating these safety considerations into my underwater photography adventures has made every dive not only enjoyable but also enriching. By prioritizing safety gear, training, and respecting marine life, we can all have memorable and responsible underwater experiences that we cherish forever.

Sharing and Showcasing Your Work

Best Platforms for Displaying Underwater Photography

Once I started capturing stunning underwater images, I wanted to share them with the world. I discovered that there are various platforms available to showcase my work, each with its unique advantages. Social media is a popular choice, and I’ve found that Instagram is particularly effective for visual storytelling. By using relevant hashtags, I’ve connected with fellow photographers and divers, creating a community that inspires me to keep improving my skills.

Another platform I recommend is Flickr. It allows for high-quality uploads and provides a space for photographers to receive feedback from peers. I appreciate how I can join groups dedicated to underwater photography, where members share tips and critiques. This sense of community has been invaluable in my growth as a photographer.

For those looking to take a more professional route, creating a personal website or portfolio can be a great move. I’ve enjoyed the process of building my site, where I can curate my best work and share my experiences. It also serves as a platform for potential clients or collaborators to see my style and reach out for inquiries. Plus, it’s a great way to document my journey over the years.

Networking with Other Photographers

Networking with other underwater photographers has been one of the most rewarding aspects of my journey. I’ve attended workshops and dive expos, where I met talented individuals who were eager to share their knowledge and experiences. It was inspiring to hear their stories and learn techniques that had worked for them in similar conditions.

Another fantastic opportunity I stumbled upon was joining online forums and local diving clubs. These platforms allow for discussions on gear, dive sites, and photography techniques. I’ve benefited from the collective wisdom of experienced divers who generously share their insights. Connecting with others in the field not only provides support but also opens doors to collaborative projects and opportunities that I might not have encountered otherwise.

Entering Photography Contests and Exhibitions

Participating in photography contests has been a thrilling way to showcase my work and gain exposure. I remember entering my first contest and the excitement that came with submitting my images. Winning or being featured in these contests can significantly boost confidence and visibility. I found that many contests focus on different themes, which allows for creativity and experimentation in my photography.

Exhibiting my work in local galleries or community events has also been rewarding. I enjoyed curating a collection of my best underwater photographs and sharing my passion with others. The feedback and appreciation from viewers were uplifting and motivated me to continue pursuing my underwater photography journey.

Sharing and showcasing my work has become an essential part of my experience as an underwater photographer. Each platform, connection, and opportunity has enriched my journey, and I look forward to continuing to grow and learn through these shared experiences.

Frequently Asked Questions

What are the basics of underwater photography?

Underwater photography is about more than just the camera; it’s also about understanding the underwater environment. The water acts as a filter, altering colors and light, which means that red hues fade quickly. Patience and steady buoyancy control are essential to compose shots effectively.

What equipment do I need to start underwater photography on a budget?

You can start with a basic DSLR or mirrorless camera, underwater housing, a wide-angle lens, and some lighting options like a strobe or video light. Accessories like a float strap and a macro lens for close-ups can also be beneficial without breaking the bank.

What are some budget-friendly locations for underwater photography?

Top budget-friendly locations include the Florida Keys in the USA, Cozumel in Mexico, Bonaire in the Caribbean, the Great Barrier Reef in Australia, and the Azores in Portugal. Each location offers unique marine life and diving experiences at affordable rates.

When is the best time to visit for underwater photography?

The timing varies by location. For instance, the Florida Keys are great in summer, while Cozumel offers the best visibility between March and June. The Great Barrier Reef is best visited during the Australian winter (June to October) for optimal conditions.

How can I save money on travel and accommodation for underwater photography trips?

Booking flights in advance, being flexible with travel dates, and exploring budget accommodations like hostels or guesthouses can save money. Using platforms like Airbnb and joining dive clubs for discounts can also be effective strategies.

What composition techniques should I use for underwater shots?

Following the rule of thirds can help create balanced images. Getting creative with angles and perspectives, and focusing on the lines and shapes of marine life can lead to striking compositions. Taking your time to observe the surroundings before shooting is also crucial.

What safety gear is essential for underwater photography?

Essential safety gear includes a reliable dive computer, a buoyancy control device (BCD), a dive knife, and a surface marker buoy (SMB). Wearing an appropriate wetsuit or drysuit is also important for thermal protection and buoyancy assistance.

Why is diving certification important for underwater photography?

Having proper diving certifications provides essential skills and knowledge about diving safety. Certifications like PADI Open Water Diver and specialized courses in underwater photography enhance your confidence and ability to explore various dive sites safely.

How can I showcase my underwater photography work?

You can showcase your work on social media platforms like Instagram and Flickr, where you can connect with other photographers. Creating a personal website or portfolio is also a great way to document your journey and attract potential clients.

What are the benefits of networking with other underwater photographers?

Networking allows for knowledge sharing, collaboration, and gaining insights into photography techniques and dive sites. Attending workshops, joining online forums, and participating in local diving clubs can provide valuable connections and opportunities in the field.

Top 7 Budget-Friendly Destinations for Underwater Photography

Underwater photography opens up a vibrant world beneath the waves that few get to experience. If you’re like me and love capturing stunning marine life without breaking the bank, I’ve got some budget-friendly destinations just for you!

Top 7 Budget-Friendly Destinations for Underwater Photography

Understanding Underwater Photography

What is Underwater Photography?

Underwater photography is a unique art form that brings together the beauty of the ocean and the skill of the photographer. It’s not just about snapping pictures; it’s about capturing the essence of marine life and underwater landscapes. I remember the first time I dove into the ocean with my camera—my heart raced as I saw schools of fish darting around coral reefs. Each click felt like a new discovery. This magical experience can be yours too, especially when you choose the right locations.

Essential Gear for Underwater Photography

To dive into this fascinating world, having the right gear is crucial. When I first started, I invested in a waterproof housing for my camera, which was a game-changer. There are also specialized underwater cameras that are compact and easy to use. If you’re looking for a budget-friendly option, I recommend checking out top budget cameras for stunning underwater photography. They’re usually lightweight and user-friendly, perfect for beginners. Don’t forget to bring along extra batteries and memory cards, as you’ll want to capture as much as possible.

Basic Techniques for Capturing Stunning Images

When you’re ready to take the plunge, there are a few techniques that can significantly enhance your underwater photography experience. One of the first things I learned was about lighting. Natural light diminishes quickly underwater, so I often find that early morning or late afternoon dives result in the best photos. Using a strobe could also help illuminate your subjects, especially in deeper waters.

Additionally, composition plays a vital role. I’ve found that the rule of thirds works just as well underwater as it does above. Positioning your subject off-center often creates a more engaging image. I also try to get close to my subjects—this not only fills the frame but reduces the amount of water between my camera and the subject, which can often distort the image. Finally, patience is key. Sometimes the best photos come when you’re still and let the marine life come to you.

Criteria for Budget-Friendly Destinations

Cost of Living

When I’m planning a trip for underwater photography, one of my top considerations is the cost of living in that destination. It’s essential to find places where food, accommodations, and local services won’t empty my wallet. I’ve discovered that Southeast Asia, for example, often has lower costs compared to the Caribbean, allowing for a more extended stay and more dives.

Accessibility and Travel Costs

Accessibility is another critical factor for me. I look for destinations that are easy to reach with direct flights or affordable public transportation options. I remember one trip where I chose a location that required multiple layovers, which not only added to my travel time but also my expenses. Researching flight deals and local transport can save you a lot, allowing us to spend more on diving and exploring.

Available Diving Services and Equipment Rentals

Before I set off, I always check what diving services are available at my destination. I like knowing that I can rent equipment locally, which saves me the hassle of carrying everything. Many budget-friendly destinations offer guided dives and rental gear at reasonable prices, making diving accessible for more people. I’ve found that local dive shops often have knowledgeable staff who can guide you to the best spots and help you avoid any common pitfalls. For more information on essential gear, check out essential underwater photography accessories on a budget.

By considering these factors, I’ve managed to find some incredible spots that not only offer stunning underwater photography opportunities but are also easy on the wallet. I can’t wait to share my top seven budget-friendly destinations with you! These places have given me some of my most cherished underwater photographs, and I hope they inspire you to dive into this beautiful world too.

Top 7 Budget-Friendly Destinations for Underwater Photography

1. Cozumel, Mexico

Overview of Cozumel

Cozumel has a special place in my heart; it’s one of those destinations that feels like a hidden gem. Located off the Yucatan Peninsula, this island is surrounded by stunning coral reefs and boasts crystal-clear waters. The vibrant marine life here is simply breathtaking, and the island’s laid-back vibe makes it a perfect getaway for underwater photography enthusiasts. I remember my first dive here, surrounded by colorful fish and intricate coral formations; it was like stepping into another world.

Best Dive Sites

The dive sites in Cozumel are abundant and varied. My favorite spots include Palancar Reef and Columbia Reef. Both locations are teeming with life and offer stunning underwater landscapes. I was also pleasantly surprised by the visibility, which often reaches over 100 feet. It’s perfect for capturing those sharp, vibrant images that showcase the beauty of marine life.

Affordability and Local Costs

One of the best parts about Cozumel is how affordable it can be. You can find budget accommodations ranging from hostels to small hotels that cater to divers. Dining options are plentiful, with many local eateries offering delicious and inexpensive meals. I often enjoyed fresh seafood tacos while chatting with local divers, which added to my overall experience. The dive shops here also provide competitive rates for guided dives and equipment rentals, making it easy to stick to a budget while still enjoying the beauty of the ocean.

2. Bonaire, Caribbean

Overview of Bonaire

Bonaire, known for its eco-conscious approach to diving, is another top destination for budget-friendly underwater photography. This small island is part of the ABC islands and is famous for its excellent shore diving. I was amazed at how accessible the dive sites were; I could literally walk off the beach into the water and find myself surrounded by vibrant coral and fish.

Best Dive Sites

Some of the must-visit dive sites include 1000 Steps and Karpata. Each site has its unique charm and host of marine life. I remember diving at Karpata and being greeted by a friendly sea turtle that swam alongside me for a bit; it was an unforgettable experience! The shore diving here means you save on boat fees, making it a more budget-friendly option.

Affordability and Local Costs

Bonaire’s pricing is quite reasonable compared to other Caribbean destinations. I found that accommodations ranged from budget guesthouses to more upscale options, allowing for flexibility based on your budget. Plus, the local markets offer fresh produce and affordable dining options, which I enjoyed during my stay. The dive shops often have package deals that include multiple dives and equipment rentals, which can save you some cash.

3. Utila, Honduras

Overview of Utila

Utila is often touted as one of the most budget-friendly diving destinations in the Caribbean. This small island in Honduras is not only affordable but also offers an incredible variety of marine life. I remember stepping off the boat after a day of diving and feeling like I had just discovered a treasure trove of the ocean’s wonders. The local culture is friendly and welcoming, making it a fantastic place to immerse yourself.

Best Dive Sites

The dive sites here are simply breathtaking, with sites like The Black Hills and the infamous Whale Shark dive (seasonal). I had the opportunity to swim alongside a whale shark during my visit, and it was a surreal moment I will never forget. The diving conditions are usually favorable, and the visibility is good, which makes capturing those underwater shots a joy.

Affordability and Local Costs

Utila’s low cost of living is a huge draw for budget travelers. I found that my expenses for accommodations, food, and diving were significantly lower than many other locations I’ve visited. The island has plenty of affordable hostels, and local restaurants serve delicious meals at a fraction of the price you’d expect to pay elsewhere. Many dive shops offer all-inclusive packages that include accommodation, meals, and dives, which can further help you save money.

4. Gili Islands, Indonesia

Overview of Gili Islands

The Gili Islands, consisting of Gili Trawangan, Gili Meno, and Gili Air, are absolutely stunning. I was captivated by the natural beauty and vibrant underwater ecosystems. The islands are known for their relaxed vibe and lack of motor vehicles, which add to their charm. I loved the ease of getting around by bicycle or on foot, allowing me to explore all three islands at my leisure.

Best Dive Sites

The diving around the Gilis is world-renowned. My personal favorites are Turtle Heaven and Meno Wall, where I encountered various turtles and beautiful coral gardens. The underwater visibility here is often excellent, making it perfect for photography. I was particularly drawn to the vibrant colors of the reef, which made for some incredible shots.

Affordability and Local Costs

What surprised me most about the Gili Islands was how budget-friendly they were. Accommodations range from quaint bungalows to more upscale resorts, but you can easily find affordable options. Dining is also reasonable, with lots of local warungs serving tasty meals. Dive packages are competitively priced, and many shops offer discounts for multiple dives or group bookings.

5. Dahab, Egypt

Overview of Dahab

Dahab is often referred to as the “diving paradise” of Egypt, and for a good reason. This charming coastal town on the Sinai Peninsula is renowned for its laid-back atmosphere and stunning dive sites. I was instantly drawn to the colorful markets and friendly locals, which made my diving experience even more enjoyable.

Best Dive Sites

One of the most famous dive sites, the Blue Hole, is a must-visit for any diver. I remember the thrill of exploring this underwater sinkhole filled with diverse marine life. Other notable sites include The Canyon and the Lighthouse, both of which offer incredible underwater landscapes. The visibility here is remarkable, allowing for some breathtaking photographs.

Affordability and Local Costs

Dahab is known for being budget-friendly, with plenty of options for accommodations and dining. I found that many guesthouses and hostels cater to divers at reasonable prices. Eating out is also affordable, with delicious local cuisine available at various price points. The dive shops in Dahab are well-equipped and offer competitive rates for both guided dives and equipment rentals.

6. Fiji

Overview of Fiji

Fiji is often synonymous with paradise, and during my visit, I found that it truly lives up to the hype. The islands are surrounded by beautiful reefs and an abundance of marine life. The warm waters and friendly locals made my experience unforgettable. I was especially touched by the sense of community among divers, which made diving here feel like a shared adventure.

Best Dive Sites

Some of the top dive sites include Rainbow Reef and the Great White Wall, which are known for their stunning coral formations and vibrant fish populations. I was in awe of the underwater gardens I encountered, and the clarity of the water made capturing images a breeze. I also had the chance to dive with manta rays, which was one of the highlights of my trip!

Affordability and Local Costs

While Fiji can be perceived as expensive, I discovered many budget-friendly accommodations and diving options. Guesthouses and backpacker lodges offered comfortable stays at reasonable prices. Dining at local markets allowed me to enjoy delicious Fijian food without breaking the bank. Many dive operators also provide package deals that can help keep costs down.

7. The Philippines

Overview of the Philippines

The Philippines is an archipelago with over 7,000 islands, making it a dream destination for divers. Each island has its unique charm and diverse marine ecosystems. I was blown away by the rich biodiversity and vibrant underwater scenes during my dives here. The friendly locals and rich culture added to the incredible experience.

Best Dive Sites

Some of the best dive sites include Tubbataha Reefs Natural Park and Apo Island. I was fortunate to dive at Tubbataha and was mesmerized by the pristine coral reefs and large schools of fish. The marine life here is diverse, with opportunities to see everything from colorful reef fish to large pelagic species. Every dive presented a new adventure!

Affordability and Local Costs

The cost of living in the Philippines is relatively low, which makes it an excellent destination for budget travelers. I found that accommodations range from budget hostels to more luxurious resorts. Dining options are plentiful, with street food and local eateries serving delicious meals at affordable prices. Many dive shops offer packages that include accommodation, meals, and diving, ensuring you can enjoy your underwater adventures without overspending.

When to Visit These Destinations

Seasonal Considerations

When planning my underwater photography trips, timing is crucial. Each destination has its peak seasons and off-peak periods that can dramatically affect my experience. For example, I’ve found that diving in Cozumel is best between December and April when the water is clear, and marine life is abundant. Conversely, I visited Utila during the off-season, which gave me the chance to avoid the crowds and still enjoy excellent visibility and warm waters. Understanding these seasonal nuances can help us choose the best time to visit and maximize our underwater adventures.

Weather Patterns

Weather plays a significant role in underwater photography, and I’ve learned to keep a close eye on forecasts. For instance, in the Caribbean, hurricane season runs from June to November, and while some destinations might still be diveable, weather can be unpredictable. I remember diving in Dahab during the winter months, enjoying calm waters and vibrant sea life, while avoiding the heavy winds typical in summer. In tropical locations like Fiji, the dry season from May to October offers clearer skies and calmer waters, which translates to better visibility for photography. Knowing the weather patterns can help us plan better and ensure more successful dives.

Best Times for Underwater Photography

In my experience, the best times for underwater photography often align with both the seasonal and weather considerations. Early mornings and late afternoons typically provide the softest light for capturing colors. Whether I’m diving in the Gili Islands or the Philippines, I’ve noticed that the golden hour can truly transform underwater scenes, highlighting the vibrant hues of coral and marine life. Additionally, understanding the migration patterns of marine species can be beneficial. For example, I’ve learned that diving in Utila during the whale shark season in March and April can lead to unforgettable encounters. By planning my trips around these optimal times, I’ve been able to capture stunning images that I cherish.

Where to Stay: Budget Accommodations

Types of Accommodations

Finding the right place to stay is a big part of the adventure. I’ve experienced everything from budget hostels to cozy guesthouses—each with its own charm. In places like Bonaire, I opted for a simple guesthouse that offered a dive package. This not only saved money but also created a sense of community among fellow divers. Hostels often provide a social atmosphere, making it easy to meet other travelers and share stories. I love the idea of staying somewhere that feels like home while still being close to the ocean.

Recommended Budget Hotels and Hostels

During my travels, I’ve come across some fantastic budget accommodations. In Cozumel, I found a charming little hostel that offered dormitory-style rooms as well as private rooms, perfect for meeting fellow divers. In Dahab, I stayed at a guesthouse renowned for its friendly staff and proximity to dive sites. I often recommend checking online platforms like Booking.com or Airbnb for user reviews and pictures. These insights have helped me find hidden gems that enhance my overall experience. Remember that sometimes, the best spots aren’t the most advertised, so a little research can go a long way.

Proximity to Dive Sites

One of the key factors I consider when choosing accommodation is its proximity to dive sites. I’ve made the mistake of staying too far from the action and ended up wasting valuable diving time on commutes. In the Gili Islands, I found a guesthouse just minutes away from a popular dive shop, which made early morning dives a breeze. Staying close to the dive sites ensures I can maximize my diving experience and allows for spontaneous adventures, like an impromptu sunset dive. I recommend checking maps and asking locals or dive shop staff for recommendations on the best places to stay that offer easy access to the water.

Local Cuisine and Dining Options

Must-Try Local Dishes

One of the joys of traveling, for me, is indulging in local cuisine. Each destination has its culinary delights, and I often find that trying local dishes enhances my overall experience. In Cozumel, I couldn’t get enough of the fresh ceviche—its tangy flavors were a perfect complement to my beachside dives. In Fiji, I was introduced to kokoda, a delicious fish dish marinated in coconut cream and lime, which quickly became a favorite of mine. I love asking locals for their recommendations, as they often point me to hidden gems that I might not find on my own.

Affordable Restaurants and Street Food

Street food has often been my go-to for experiencing authentic flavors without breaking the bank. In Utila, I discovered a small taco stand run by a friendly local that served mouth-watering fish tacos. Not only was it affordable, but it also offered a genuine taste of island life. Similarly, in Dahab, I found local eateries where I could enjoy hearty meals while soaking in the vibrant atmosphere. I believe that eating where the locals do not only saves money but also immerses me in the culture, making each meal an adventure in itself.

Travel Tips for Budget-Friendly Underwater Photography

Saving on Travel Expenses

Traveling on a budget doesn’t mean sacrificing quality experiences. I’ve learned some tips along the way that have helped me stretch my travel funds further. Booking flights during the off-peak season can yield significant savings, and I often set fare alerts to catch the best deals. Additionally, I’ve found that considering alternative airports or nearby destinations can lead to lower airfare. When I traveled to Bonaire, I flew into a neighboring island and took a short ferry ride, saving money while enjoying the scenic route.

Tips for Renting Equipment

If you don’t want to lug around heavy gear, renting equipment is an excellent option. Many dive shops offer rental services at reasonable prices. When I first started diving, I decided to rent gear in Cozumel, which allowed me to test different equipment before making a purchase. I recommend communicating with the dive shop about your experience level and what you’re looking for. They can help you find the right fit and ensure that you have a successful dive without the added stress of transporting your own gear.

Best Practices for Planning Your Trip

Planning is essential for a successful trip. I like to create a rough itinerary that includes dive sites, accommodations, and local attractions. Researching dive conditions and entry requirements can help avoid any surprises. I also find that booking accommodations that include dive packages can simplify logistics and save money. Keeping an open mind and being flexible with plans is important; sometimes, the best experiences come from spontaneous adventures. This approach has led me to unforgettable dives and incredible friendships along the way.

Safety Considerations for Underwater Photography

General Safety Tips

Safety is a top priority for me when I’m underwater. I always make sure to check my equipment before diving and ensure that everything is in good working order. Following dive safety protocols is essential; I always dive with a buddy and keep a close eye on my air supply. It’s crucial to communicate clearly with your dive partner and to be aware of your surroundings. I’ve found that taking a few moments to review safety guidelines before each dive can make all the difference in ensuring a safe and enjoyable experience.

Health Precautions

Health considerations are also important, especially when diving in different locations. I always check for any health advisories related to water quality or local diseases. Hydration is key for me, especially in warmer climates, and I try to drink plenty of water before and after dives. Additionally, I make sure to give my body time to adjust to new environments and seek medical attention if I feel unwell. Listening to my body has helped me avoid any serious issues during my travels.

Understanding Local Regulations

Every destination has its own set of regulations regarding diving and marine conservation. I believe that respecting these rules is crucial for protecting the underwater environment and ensuring sustainable diving practices. Before I dive in a new location, I always take the time to learn about specific regulations, such as restricted areas and protected species. Many dive shops offer briefings that cover these topics, which I find incredibly helpful. By being informed, I can enjoy my underwater photography while also contributing to the preservation of these beautiful ecosystems.

Frequently Asked Questions

What is underwater photography?

Underwater photography is a unique art form that captures the beauty of marine life and underwater landscapes. It involves skillfully snapping pictures to convey the essence of the ocean, creating a magical experience for both the photographer and the viewer.

What essential gear do I need for underwater photography?

Key gear for underwater photography includes a waterproof housing for your camera or a specialized underwater camera. For beginners, point-and-shoot cameras designed for underwater use are recommended due to their lightweight and user-friendly features. Extra batteries and memory cards are also important to capture as much as possible. For more tips, check out best budget-friendly underwater photography equipment tips.

What techniques can enhance underwater photography?

To enhance your underwater photography, consider the following techniques: use natural light effectively, especially during early morning or late afternoon, and apply composition rules such as the rule of thirds. Get close to your subjects to reduce distortion from water and practice patience to let marine life come to you.

What factors should I consider when choosing budget-friendly destinations for underwater photography?

When selecting budget-friendly destinations, consider the cost of living, accessibility and travel costs, and the availability of diving services and equipment rentals. These factors can significantly affect your overall experience and expenses during your trip.

What are some recommended budget-friendly destinations for underwater photography?

Some recommended budget-friendly destinations include Cozumel (Mexico), Bonaire (Caribbean), Utila (Honduras), Gili Islands (Indonesia), Dahab (Egypt), Fiji, and the Philippines. Each destination offers unique diving opportunities and affordable options for accommodations and dining.

When is the best time to visit these underwater photography destinations?

The best time to visit varies by location, but generally, diving is best during peak seasons when water clarity and marine life abundance are optimal. For example, Cozumel is ideal between December and April, while Utila is great during the whale shark season in March and April.

What types of accommodations are recommended for budget travelers?

Budget travelers can find various accommodations, including hostels, guesthouses, and budget hotels. Choosing places that offer dive packages can save money and foster a sense of community among fellow divers.

What local dishes should I try while traveling for underwater photography?

Must-try local dishes vary by location. In Cozumel, fresh ceviche is a popular choice, while in Fiji, kokoda, a fish dish marinated in coconut cream and lime, is recommended. Exploring street food and local eateries enhances the travel experience.

What travel tips can help save on expenses during underwater photography trips?

To save on travel expenses, consider booking flights during off-peak seasons, setting fare alerts, and exploring alternative airports. Renting equipment locally instead of carrying your own can also reduce costs significantly.

What safety considerations should I keep in mind for underwater photography?

Safety is crucial when diving. Always check your equipment, follow dive safety protocols, stay hydrated, and be aware of local regulations concerning diving and marine conservation. Understanding these aspects will help ensure a safe and enjoyable underwater photography experience.

Unlock the Secrets to Capturing Stunning Underwater Moments

Have you ever wanted to dive into the depths of the ocean and capture mesmerizing underwater moments? From vibrant coral reefs to mysterious marine creatures, underwater photography opens up a world of stunning visuals waiting to be explored. Read Interesting article: Underwater Photography Techniques: Capture Vibrant Ocean Life

Unlock the Secrets to Capturing Stunning Underwater Moments

Understanding Underwater Photography

What is Underwater Photography?

Underwater photography is a unique art form that involves taking photographs below the water’s surface. I remember the first time I submerged my camera, the thrill of capturing the vibrant colors and dynamic movements beneath the waves was exhilarating. This type of photography allows us to document marine life, underwater landscapes, and the incredible biodiversity our oceans offer. Whether you’re shooting in a pool or diving into the open ocean, the options for creativity and exploration are endless.

Importance of Underwater Photography in Marine Conservation

Underwater photography isn’t just about beautiful images; it plays a crucial role in marine conservation. I’ve learned that these photographs can raise awareness about the delicate ecosystems that exist beneath the waves. They showcase the beauty of marine life and highlight the threats these species face from pollution, climate change, and overfishing. By sharing our underwater experiences, we can inspire others to appreciate and protect our oceans. Every stunning shot can tell a story and motivate action for conservation efforts.

Types of Underwater Photography

There are several types of underwater photography, each offering a different perspective on the underwater world. I’ve tried my hand at a few and have found each one to be a unique challenge:

  • Wildlife Photography: This focuses on capturing marine animals in their natural habitat. It requires patience and a good understanding of animal behavior. I once spent hours waiting for a turtle to swim by, but the shot was worth it!
  • Wide-Angle Photography: This style captures larger scenes, such as coral reefs or shipwrecks. I love how it can show the scale and beauty of the underwater environment.
  • Macro Photography: This involves getting up close to small subjects like tiny fish or intricate corals. I found macro photography to be incredibly rewarding, as it reveals details often overlooked.

Essential Equipment for Underwater Photography

Choosing the Right Camera

When it comes to underwater photography, having the right camera can make all the difference. I started with a simple point-and-shoot, but I quickly learned that a more advanced DSLR or mirrorless camera offers better control over settings and image quality. Look for a camera that performs well in low light, as underwater environments can be dim. I personally love my mirrorless camera for its compact size and versatility.

Underwater Housing Options

No matter how good your camera is, it won’t help if it can’t withstand water! That’s where underwater housings come in. These protective casings keep your gear safe from water damage while allowing you to operate the camera normally. I learned the hard way that not all housings are created equal. Choose one that fits your camera model perfectly and has easy access to controls. I recommend renting different housings if you’re unsure which one to buy first.

Essential Accessories

There are a few accessories that can significantly enhance your underwater photography experience. Here are some of my favorites:

Underwater Strobes and Lighting

Lighting is vital for underwater photography. Natural light can only reach so far, so using strobes or video lights can help illuminate your subjects and bring out their colors. I remember my first underwater shoot without proper lighting; the images turned out dull and gray. Adding strobes changed everything!

Macro Lenses vs. Wide-Angle Lenses

Depending on what you want to capture, the choice between macro and wide-angle lenses is essential. Macro lenses are fantastic for close-ups of small creatures, while wide-angle lenses can capture expansive underwater scenes. I switch between the two based on my shooting location and subject. Read Interesting article: Essential Underwater Photography Accessories on a Budget

Buoyancy Control Devices (BCD)

Having proper buoyancy control is essential for underwater photography. It allows you to hover in place without disturbing marine life or the environment. A good Buoyancy Control Device (BCD) helps me maintain my position and focus on getting the perfect shot without the worry of floating away.

In my experience, getting started in underwater photography can feel overwhelming, but it’s incredibly rewarding. With the right knowledge, equipment, and a sense of adventure, we can all unlock the secrets to capturing stunning underwater moments. The vibrant life beneath the surface is waiting for us to explore, and every shot we take is a piece of the ocean’s story shared with the world.

Techniques for Capturing Stunning Underwater Moments

Understanding Water Conditions

Water conditions can significantly impact underwater photography, and I learned this firsthand on my diving adventures. Factors like visibility, current, and the time of day can all affect how my images turn out. For instance, I remember one trip where the visibility was less than 10 feet due to plankton blooms. While it made capturing wide-angle shots challenging, I decided to focus on macro photography instead. Understanding these conditions helps us adapt our approach and increase our chances of getting great shots.

Mastering Composition Underwater

Composition is just as important underwater as it is on land. I often find myself thinking about how to frame my subjects creatively. It’s fascinating to see how even slight adjustments can change the whole mood of a photograph. Here are a couple of composition techniques that I’ve found helpful:

Rule of Thirds in Underwater Photography

Applying the rule of thirds can dramatically enhance your underwater images. I try to imagine my frame divided into nine equal sections with two vertical and two horizontal lines. Placing my main subject along these lines or at their intersections often creates a more balanced and engaging photo. For example, I captured a stunning shot of a clownfish nestled in its anemone by positioning it off-center, which added depth to the image.

Framing and Perspective

Exploring different angles can lead to some truly unique underwater shots. I often swim around my subject to find the best perspective, whether it’s shooting from below to capture the sun’s rays filtering through the water or getting close to my subject for a more intimate feel. I’ve discovered that varying my perspective can reveal details and stories that I might have missed otherwise, making my photography more dynamic.

Using Natural Light Effectively

Natural light can be a powerful tool in underwater photography, but it’s essential to know how to use it to your advantage. I’ve found that the best times to shoot are during the golden hour—early morning or late afternoon—when the light is softer and warmer. These times can create beautiful, ethereal images as the sunlight dances through the water. When shooting, I often adjust my position to capture the light hitting my subject just right, enhancing the colors and textures in the photos.

Tips for Shooting in Different Depths

Shooting at various depths presents unique challenges. I’ve learned that the color of the water changes as I go deeper, with reds disappearing first, followed by oranges and yellows. This is something I keep in mind when planning my shots. For deeper dives, I often rely on strobes to bring back some of the lost colors. One memorable dive was at a depth of 80 feet where I used my strobes to illuminate a vibrant coral garden. The images turned out to be some of my favorites, revealing colors that would have otherwise faded.

Choosing the Perfect Location for Underwater Photography

Best Destinations for Underwater Photography

Choosing the right location can make a world of difference in the success of our underwater photography adventures. I’ve been fortunate to explore some incredible spots, each offering unique experiences:

Coral Reefs

Coral reefs are often considered the jewels of the ocean. I can’t express how mesmerizing it is to swim among them, surrounded by vibrant fish and intricate corals. Places like the Great Barrier Reef in Australia or the Caribbean reefs are perfect for capturing diverse marine life and stunning underwater landscapes. I remember one dive where I spent hours photographing clownfish darting in and out of their anemones, each shot bursting with color and life.

Wreck Diving Sites

Diving at wreck sites offers a unique blend of history and marine life. I’ve explored several wrecks, and each one has its own story to tell. The way marine life reclaims these structures creates an eerie yet beautiful atmosphere. I recall exploring a sunken ship where sea turtles had made it their home; it allowed me to capture incredible interactions between the creatures and the wreck. The contrast of the rusting metal against the vibrant marine flora was a photographer’s dream.

Freshwater Lakes and Rivers

Freshwater locations can be surprisingly rewarding for underwater photography. I’ve found beautiful spots in lakes and rivers where I could capture unique aquatic plants and creatures that I wouldn’t find in the ocean. There’s something special about the stillness of freshwater that creates a peaceful environment for shooting. I remember one lake dive where the visibility was pristine, allowing me to photograph schools of fish swimming among submerged logs and rocks.

Understanding Marine Life Behavior

Observing marine life behavior is crucial for capturing the perfect shot. I’ve spent countless hours learning about the creatures I photograph, which has improved my chances of getting those once-in-a-lifetime images. Understanding their habits and movements helps me anticipate their actions and position myself for the best shot. One experience that stands out is when I waited patiently for a seahorse to turn its head—sometimes, it’s all about being in the right place at the right time and having the patience to wait for nature to unfold. Engaging with the underwater world has deepened my appreciation for its beauty and fragility, which I believe is reflected in my photography.

Post-Processing Techniques for Underwater Photos

Basic Editing Tools and Software

Once I’ve captured my underwater images, the next step involves post-processing, which can significantly enhance the final outcome. I’ve experimented with various editing software, and I found that programs like Adobe Lightroom and Photoshop are fantastic for this purpose. They offer a range of tools that allow us to adjust exposure, contrast, and sharpness. I remember the first time I used Lightroom; I was amazed at how I could bring out the vibrant colors of a coral reef that looked washed out in the original shot. It’s like breathing new life into my photos! I recommend starting with basic adjustments before diving deeper into more advanced techniques. Read Interesting article: Mastering Underwater Photography: Tips for Stunning Marine Shots

Color Correction and Enhancements

Color correction is vital for underwater photography since the underwater environment can distort colors. As I’ve mentioned before, reds and oranges tend to disappear quickly as depth increases, leaving us with blues and greens. During post-processing, I often adjust the white balance to restore those missing colors. I usually set it to a warmer tone to mimic the natural hue of the light that was lost. I remember editing a shot of a lionfish that initially appeared too blue. After some color correction, it transformed into a stunning image that truly reflected the vibrant colors I witnessed underwater. Enhancing saturation and vibrance can also help, but I try to be careful not to overdo it—keeping it natural is key!

Removing Backscatter and Noise

Backscatter, those little particles that reflect light and create distracting speckles, is something I’ve always had to deal with in my underwater photos. It can be frustrating, especially when you’ve captured a beautiful moment. Fortunately, there are techniques for minimizing this during editing. I often use the spot removal tool in Lightroom to carefully eliminate backscatter. Noise can also be an issue in low-light conditions, and I’ve learned that applying a noise reduction filter helps smooth out the graininess without losing too much detail. In one of my favorite shots of a shark, I had to do some serious noise reduction to make the image pop while keeping the details intact.

Showcasing Your Underwater Photography

Creating an Online Portfolio

Once I’ve edited my underwater photos, the next exciting step is showcasing them. I believe having an online portfolio is essential for any photographer looking to share their work. Platforms like Adobe Portfolio or SmugMug allow us to create a beautiful gallery that highlights our best shots. I remember spending hours curating my portfolio, selecting images that not only displayed my skills but also told a story about my underwater adventures. It’s a great way to connect with other photographers and marine enthusiasts. Plus, having a dedicated space for our work can lead to opportunities we might not expect!

Sharing on Social Media Platforms

Social media has become an incredible tool for photographers to share their work and connect with a broader audience. I’ve found platforms like Instagram to be particularly effective for showcasing underwater photography. The visual nature of the platform allows us to share striking images that catch the eye. I often use relevant hashtags like #UnderwaterPhotography or #MarineLife to reach enthusiasts and potential followers. Engaging with the community is also vital; I love commenting on others’ work and collaborating with fellow photographers. It’s amazing how a simple post can lead to conversations about marine conservation and photography techniques!

Entering Photography Competitions

For those of us looking to gain recognition for our underwater photography, entering competitions can be a fantastic way to showcase our work. I’ve participated in several contests, and it’s always thrilling to put my best images out there. I often look for competitions that focus on marine life and conservation. Not only can winning a contest give us a sense of achievement, but it can also help increase visibility. I remember a competition where I submitted a photo of a vibrant reef; while I didn’t win, the feedback I received was invaluable, and I connected with many other passionate photographers. It’s all about growing and sharing our love for the underwater world!

Safety Tips for Underwater Photography

Understanding Diving Safety Protocols

Diving safely should always be a priority when pursuing underwater photography. I’ve learned the importance of familiarizing myself with diving safety protocols, especially when exploring new locations. It’s crucial to dive with a buddy, check equipment thoroughly, and be aware of local marine life and conditions. I remember my first dive trip; I spent time reviewing safety guidelines and practicing skills to ensure I felt confident and prepared. Knowing how to handle unexpected situations can be a lifesaver, literally!

Gear Maintenance and Care

Taking care of my gear is essential for successful underwater photography. I’ve experienced the heartbreak of water damage, so I’ve become diligent about maintaining my equipment. After every dive, I rinse my camera housing and accessories in fresh water to remove any salt or debris. I also recommend checking O-rings regularly for any signs of wear and tear. It’s these little steps that can extend the life of our gear and ensure that it’s ready for the next adventure. I remember one time my housing leaked during a dive, and it taught me a valuable lesson about proper maintenance!

Environmental Considerations and Ethics

As underwater photographers, we have a responsibility to protect the environments we love to shoot. I always keep in mind the impact of our actions on marine ecosystems. When diving, I avoid touching corals or disturbing wildlife. I’ve seen firsthand how fragile these ecosystems can be, and I believe it’s crucial to advocate for their preservation. By being mindful of our surroundings and promoting responsible practices, we can enjoy underwater photography while helping to safeguard the beauty of our oceans for future generations. I often share my experiences on social media, encouraging others to respect and protect marine life.

Frequently Asked Questions

What is underwater photography?

Underwater photography is a unique art form that involves taking photographs below the water’s surface, allowing us to document marine life, underwater landscapes, and the incredible biodiversity of our oceans.

Why is underwater photography important for marine conservation?

Underwater photography plays a crucial role in marine conservation by raising awareness about delicate ecosystems, showcasing the beauty of marine life, and highlighting the threats these species face from pollution, climate change, and overfishing.

What are the types of underwater photography?

There are several types of underwater photography, including wildlife photography, wide-angle photography, and macro photography, each offering different perspectives and challenges in capturing the underwater world.

What essential equipment is needed for underwater photography?

Essential equipment for underwater photography includes a suitable camera (preferably a DSLR or mirrorless), underwater housing to protect the camera, and accessories like strobes or lighting, macro lenses, wide-angle lenses, and buoyancy control devices (BCD).

How does water condition affect underwater photography?

Water conditions significantly impact underwater photography, influencing visibility, current, and lighting. Understanding these factors helps photographers adapt their approach for better results in capturing images.

What are some composition techniques for underwater photography?

Composition techniques for underwater photography include applying the rule of thirds for balanced images and exploring different perspectives to create unique shots that capture the underwater environment dynamically.

What are the best locations for underwater photography?

Some of the best locations for underwater photography include coral reefs, wreck diving sites, and freshwater lakes and rivers, each offering unique experiences and photographic opportunities.

What post-processing techniques are recommended for underwater photos?

Post-processing techniques for underwater photos include basic editing with software like Adobe Lightroom or Photoshop, color correction to restore lost hues, and removing backscatter and noise to enhance image quality.

How can photographers showcase their underwater photography?

Photographers can showcase their underwater photography by creating an online portfolio, sharing images on social media platforms like Instagram, and entering photography competitions focused on marine life and conservation.

What safety tips should be followed for underwater photography?

Safety tips for underwater photography include understanding diving safety protocols, maintaining gear properly, and being mindful of environmental considerations and ethics to protect marine ecosystems.