Web Analytics

Recent Posts

Mastering Underwater Photography: Essential Genres to Try

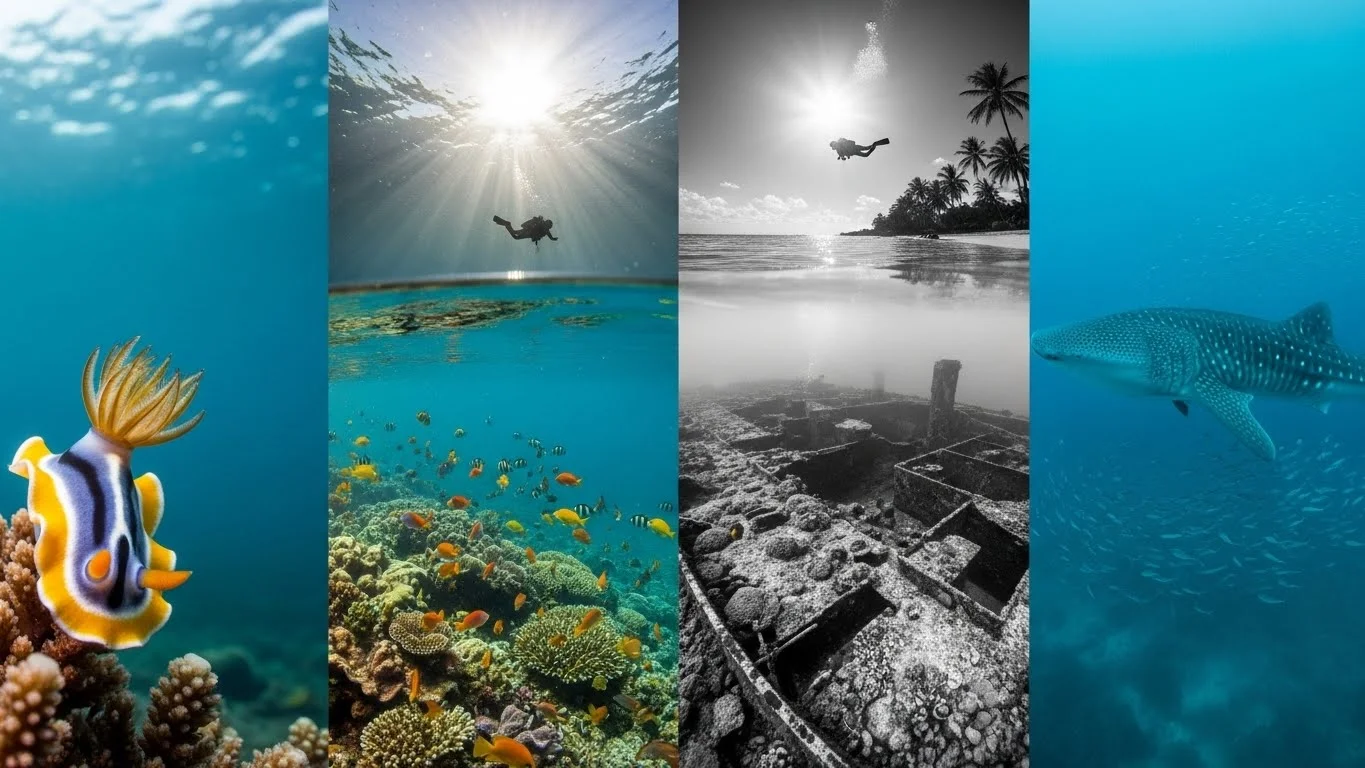
Underwater photography is a captivating journey that invites us to explore a hidden world beneath the waves. Whether you’re a beginner or an experienced diver, mastering this art can open up endless possibilities for creativity and adventure. To dive deeper into this fascinating topic, you might want to explore the depths: top underwater photography styles.

Mastering Underwater Photography: Essential Genres to Try

Understanding Underwater Photography

What is Underwater Photography?

Underwater photography is the practice of taking pictures while submerged in water, most commonly in oceans, lakes, or even swimming pools. I remember my first underwater photo session; the moment I slipped beneath the surface, a whole new realm unfolded before my eyes. Colorful fish darted around coral formations, and I felt like I had entered a vibrant, living painting. This genre of photography allows us to document marine life, underwater landscapes, and even human interactions with water, capturing moments that often go unnoticed by the average observer.

Importance of Underwater Photography

The importance of underwater photography goes beyond just capturing pretty images. It plays a crucial role in marine conservation and education. I’ve seen firsthand how stunning underwater images can raise awareness about the fragility of marine ecosystems. These photos often inspire others to appreciate and protect our oceans. By sharing what we discover, we contribute to a greater understanding of the underwater world and the challenges it faces, such as pollution, climate change, and overfishing. For those of us who love the ocean, being able to document and share its beauty feels like a responsibility and a privilege.

Essential Equipment for Beginners

Starting out in underwater photography can feel a bit overwhelming due to the range of equipment available. I remember my initial confusion when I stood in a camera store, trying to decide what I needed. Here’s a breakdown of some essential gear that I’ve found helpful in my underwater adventures:

  • Underwater Camera Housing: If you already own a camera, an underwater housing is crucial. It protects your camera from water damage while allowing you to shoot in various depths. I opted for a housing compatible with my DSLR, which has served me well.
  • Waterproof Compact Cameras: For beginners, waterproof compact cameras are a great starting point. They’re often more affordable and easier to manage. I’ve seen friends capture amazing images with these, making them perfect for those just getting their feet wet.
  • Strobes and Lighting: Natural light can limit your underwater photography, especially in deeper water. I found that adding a strobe light not only brightens my images but enhances colors that would otherwise look muted. It’s a game changer!
  • Red Filters: These are handy for correcting color underwater. Since colors fade with depth, I often use red filters to bring back the vibrancy in my photos.
  • Buoyancy Control Device: Proper buoyancy control is essential for underwater photography. I learned that mastering buoyancy with a good BCD (buoyancy control device) allows me to stay still while capturing my shots, which is critical for sharp images.

Once I invested in the right gear, I realized how much easier it became to focus on capturing stunning images rather than worrying about my equipment. The right tools make a significant difference in the quality of your work and your overall experience. For more tips on staying safe during your underwater photography adventures, check out Stay Safe: Top Tips for Underwater Photography Adventures.

Essential Genres of Underwater Photography

Marine Life Photography

Marine life photography is perhaps the most popular genre among underwater photographers. It involves capturing the beauty of fish, dolphins, and other sea creatures in their natural environments. I found that patience is key here; many times, I’ve had to wait quietly to get that perfect shot as a curious fish approached. The thrill of that moment makes all the waiting worthwhile.

Capturing Fish and Other Sea Creatures

When it comes to capturing fish and other sea creatures, it’s essential to understand their behaviors. I’ve noticed that certain species are more curious and will swim close, while others might shy away. I recommend taking your time to observe their movements before attempting to snap a photo. Using a longer focal length can also help you maintain distance without scaring them away, resulting in more natural images.

Best Locations for Marine Life Photography

There are countless ideal locations for marine life photography around the globe. Some of my favorites include:

  • Great Barrier Reef, Australia: This UNESCO World Heritage site is teeming with colorful fish and coral formations.
  • Galápagos Islands, Ecuador: Known for its unique wildlife, you can capture everything from sea lions to hammerhead sharks.
  • Coastal waters of Belize: The Belize Barrier Reef offers rich biodiversity and clear waters, perfect for spotting marine life.

These places not only provide incredible photographic opportunities but also allow us to connect with nature in a profound way. I feel grateful every time I dive into these vibrant ecosystems.

Underwater Landscapes

Underwater landscapes are another fascinating genre that allows us to capture the breathtaking beauty of our oceans and lakes. From coral reefs to mysterious shipwrecks, these underwater vistas tell stories of their own. I always find myself in awe of how different each underwater landscape is and how they each have their unique charm.

Coral Reefs

Coral reefs are often referred to as the “rainforests of the sea” due to their incredible biodiversity. Swimming through a reef feels like entering a colorful, bustling city. I love photographing the intricate patterns of coral formations, which often serve as homes for various fish and marine life. Early morning or late afternoon light can create stunning effects, so timing your dives can make all the difference.

Shipwrecks and Artificial Reefs

Exploring shipwrecks and artificial reefs offers a unique combination of history and marine life. I remember diving at a famous shipwreck where I was able to see how nature has taken over, with fish now calling the wreck home. These sites often create great photo opportunities, and I’ve found that capturing the contrast between human-made structures and nature can lead to striking images.

Underwater photography is an adventure that can change the way we see the world beneath the waves. As we explore different genres, we discover unique perspectives and challenges that enrich our experience. Whether you’re drawn to marine life, landscapes, or the stories told by shipwrecks, each dive offers a chance to capture something extraordinary. I can’t wait to share more about the different genres and techniques in my next section!

Essential Genres of Underwater Photography

Underwater Portraits

Underwater portraits are an exciting genre that blends the beauty of human subjects with the enchanting underwater environment. I remember the first time I tried capturing portraits underwater; it felt like a dance between the model and the water. The fluidity creates an ethereal effect, and the results can be stunning.

Techniques for Portraits in the Water

When it comes to underwater portrait photography, there are a few techniques that I’ve discovered help create mesmerizing images. First, I focus on buoyancy control. It’s essential to remain stable while shooting to avoid motion blur. I often practice holding my breath to remain still, which allows me to capture the expression of my subject without distortion. Additionally, using a wide-angle lens can help to incorporate more of the underwater environment, adding depth to the portrait.

Lighting plays a crucial role, too. Natural light can be beautiful, especially during mid-day when the sun is high, but to get the best results, I sometimes use strobes. They help illuminate the subject and bring out vibrant colors. I also try to find a spot with interesting light patterns—like those created by sunlight filtering down through the water’s surface—to enhance the overall composition. The interplay of light and shadow adds an extra layer of intrigue to the portraits.

Working with Models and Subjects

Communication is key when working with models underwater. I’ve learned that discussing poses and expressions before getting in the water helps break the ice and ease any nerves. I encourage my subjects to relax and move gracefully, as the water can create a beautiful flow that adds to the shot. It’s fascinating to see how natural movements can translate into artful images.

For me, it’s also important to consider the wardrobe. Bright swimsuits or flowing fabrics can create stunning contrasts against the blue water, making the portrait pop. I often recommend my models wear something that reflects their personality and that makes them feel confident. When they’re comfortable, it shines through in the photos!

Macro Underwater Photography

Macro underwater photography is another rewarding genre, allowing us to focus on the tiny, often overlooked details of marine life. I find it incredible how much beauty can be found in the smallest creatures. From intricate patterns on a nudibranch to the delicate features of a shrimp, macro photography invites us to look closely at the underwater world.

Focusing on Small Marine Life

One of the biggest challenges with macro photography is getting close enough without disturbing the subject. I’ve learned that patience is essential here as well. I often take my time, moving slowly and quietly, allowing small creatures to become accustomed to my presence. Using a zoom lens or a macro lens helps me get those detailed shots without needing to invade their space too much.

A good trick I’ve found is to focus on the eyes of the subject. Capturing that detail can bring the creature to life in the image. It’s amazing how expressing emotion through tiny marine life can tell a bigger story. I try to create a narrative in each shot, whether it’s showing a seahorse clinging to a piece of seagrass or a crab peeking out from its shell.

Best Gear for Macro Shots

When it comes to gear for macro photography, having the right tools can make a world of difference. I recommend investing in a dedicated macro lens if you’re serious about this genre. They allow for incredible detail and clarity. Also, consider using extension tubes to achieve greater magnification with your existing lenses. I’ve found that a good quality diopter filter can also improve the sharpness of my macro images.

Additionally, a focus light can help when working in deeper water where natural light fades quickly. I learned that a bright, focused beam can help me see fine details better and ensure that I’m capturing the best shots possible. Macro photography is all about the little things, and having the right gear can help you showcase those hidden treasures.

Blackwater Photography

Blackwater photography is an emerging and exhilarating genre that allows photographers to capture bioluminescent creatures in the open ocean at night. I remember the first time I tried this; it was like stepping into a dream. The darkness of the water contrasted with the glowing organisms created a surreal atmosphere.

What is Blackwater Photography?

In essence, blackwater photography involves floating in the ocean at night, usually tethered to a boat, and capturing images of marine life that rise from the depths to feed. I found this technique unique because it offers a glimpse into the lives of creatures that are rarely seen during the day. From jellyfish to larval fish, the diversity of life in the depths is incredible.

Planning is important for blackwater photography. I’ve learned to pay attention to the tides and currents, as these can affect what creatures are present. I often go out on moonless nights when the water is darkest, creating the perfect backdrop for capturing that bioluminescent magic.

Techniques and Tips for Success

For successful blackwater photography, I recommend using a fast lens with a wide aperture. This allows for more light to enter the camera, capturing those stunning details of glowing creatures. I often set my camera to continuous shooting mode, which enables me to capture multiple frames quickly as the subjects drift by.

Lastly, don’t forget to have fun! The thrill of capturing these elusive creatures adds to the excitement of underwater photography. Each dive into the blackwater is an adventure, and I can’t wait to see what incredible sights await me next.

Technical Skills and Techniques

Understanding Underwater Lighting

Lighting is one of the most critical aspects of underwater photography, and I quickly learned that it can make or break a shot. Water absorbs light differently than air, meaning colors and details fade as you go deeper. I remember my first few dives where I was disappointed with the results because the images turned out too blue or dull. It took some trial and error, but I eventually figured out how to work with lighting underwater.

One of the key techniques I’ve discovered is to maximize the use of natural light. I often dive in shallow waters during the golden hours—early morning or late afternoon—when the sun is low. The angles of the sunlight create beautiful patterns and enhance colors, making everything pop. I’ve also noticed that shooting upwards toward the surface can allow for dramatic backlighting, giving my photos a dreamy quality.

When natural light isn’t enough, additional lighting sources come into play. I typically use strobes or underwater lights to illuminate my subjects. These not only brighten the scene but also help bring out the vibrant colors that can get lost in the depths. I learned the importance of positioning the lights to avoid harsh shadows while still achieving a well-lit subject. It’s a delicate balance, but once I got the hang of it, the improvement in my images was remarkable.

Camera Settings for Underwater Photography

Getting the right camera settings underwater can be a bit daunting, especially with all the variables at play. I’ve spent countless hours experimenting with different settings to find what works best in various conditions. In my experience, a good starting point is to set the ISO higher—usually around 400 to 800—since light diminishes quickly underwater.

I often use a wide aperture (like f/8 or f/4) to create a shallow depth of field, which nicely isolates my subject while softening the background. This technique helps draw the viewer’s attention to the main focus of the image. Additionally, I’ve found that adjusting the shutter speed is crucial. A faster shutter speed can help freeze motion, especially when capturing fish or other marine life that might dart away unexpectedly.

Manual focus is another skill I recommend mastering. Autofocus can struggle in low-light conditions, and I’ve had moments where I missed great shots simply because the camera couldn’t lock onto the subject. By using manual focus, I can ensure that I’m capturing exactly what I want. It does take some practice, but once you get comfortable, it truly pays off.

Composition Techniques

Composition is the art of arranging elements in a frame, and it plays a huge role in underwater photography. I remember feeling overwhelmed by all the possibilities when I first started. However, over time, I’ve come to appreciate a few basic principles that have helped me create more compelling images.

Leading lines are one of my favorite techniques. I often look for natural lines in the water, such as the edges of coral formations or the trails left by fish. They guide the viewer’s eye through the image and can create a sense of depth. I also focus on the rule of thirds, which involves dividing the frame into a grid and placing key elements along these lines or at their intersections. This technique can make an image feel more balanced and dynamic.

Another composition tip I’ve found useful is to include an element of scale. Adding a diver or a piece of equipment into the frame can provide context and show the vastness of the underwater world. This not only enhances the storytelling aspect of the image but also makes it relatable to viewers who may not have experienced underwater life themselves.

Finally, I always remind myself to be mindful of my surroundings. The underwater world is full of unexpected beauty, and sometimes the best shots come from being flexible and open to different perspectives. Whether it’s capturing a tiny shrimp hiding in a coral crevice or a wide shot of a diver exploring a shipwreck, embracing spontaneity can lead to some of the most memorable images.

Post-Processing Underwater Images

Editing Software Options

Once I’ve captured my underwater images, the next step is post-processing. I’ve found that editing is just as important as taking the original shot, especially since underwater photos can often benefit greatly from a little enhancement. There are several software options I’ve explored, each offering unique features that cater to different editing needs.

Adobe Lightroom is my go-to for basic adjustments like exposure, contrast, and color correction. It’s user-friendly and allows for batch editing, which has saved me a lot of time when sorting through hundreds of images. I also enjoy using Photoshop for more advanced edits, such as retouching and compositing. The ability to manipulate images at a pixel level opens up endless creative possibilities. To refine your skills, consider checking out Essential Editing Techniques for Underwater Photography.

For those who are looking for free options, I recommend exploring software like GIMP or online tools like Pixlr. While they may not have all the bells and whistles of paid software, they can still get the job done for basic editing tasks.

Common Editing Techniques

In my experience, a few key editing techniques can significantly enhance the quality of underwater photos. First, I often start with adjusting the white balance to remove any unwanted color casts, particularly the blue or green tones that can dominate underwater images. By correcting this, I can bring back the natural colors that I witnessed during my dive.

Next, I love to play with contrast and saturation. Increasing the contrast helps the details pop, while a bit of saturation brings vibrancy back into the image without making it look unnatural. I’ve learned to be careful with these adjustments, ensuring that the final image still feels authentic to what I experienced underwater.

Sharpening the image is another crucial step, especially for macro photography where fine details matter. I usually apply selective sharpening to the subject while keeping the background softer to maintain depth and focus.

Lastly, I sometimes add a vignette effect to draw the viewer’s eye toward the center of the image. This technique can create a more intimate feel and enhance the overall composition. Post-processing has transformed my underwater photography, allowing me to present my images in the best light possible.

Frequently Asked Questions

What is underwater photography?

Underwater photography is the practice of taking pictures while submerged in water, commonly in oceans, lakes, or swimming pools. It allows us to document marine life, underwater landscapes, and human interactions with water.

Why is underwater photography important?

Underwater photography plays a crucial role in marine conservation and education by raising awareness about the fragility of marine ecosystems and inspiring others to appreciate and protect our oceans.

What essential equipment do beginners need for underwater photography?

Beginners should consider investing in underwater camera housing, waterproof compact cameras, strobes and lighting, red filters, and a buoyancy control device to enhance their underwater photography experience.

What are the popular genres of underwater photography?

Some popular genres include marine life photography, underwater landscapes, underwater portraits, macro underwater photography, and blackwater photography.

What techniques are recommended for underwater portraits?

To create mesmerizing underwater portraits, focus on buoyancy control, use a wide-angle lens, leverage natural light, and communicate effectively with models regarding poses and expressions.

What challenges are associated with macro underwater photography?

Macro underwater photography requires patience and careful movement to avoid disturbing small marine life while getting close enough to capture intricate details. Utilizing a zoom or macro lens is also beneficial.

What is blackwater photography?

Blackwater photography involves floating in the ocean at night, tethered to a boat, and capturing images of marine life that rise from the depths, showcasing bioluminescent creatures in a unique and surreal setting.

What are some key camera settings for underwater photography?

Key camera settings include using a higher ISO (400 to 800), a wide aperture (f/4 to f/8) for shallow depth of field, and manual focus to ensure sharp images in low-light conditions.

What editing software options are recommended for underwater photography?

Recommended editing software includes Adobe Lightroom for basic adjustments, Photoshop for advanced edits, and free options like GIMP or Pixlr for basic editing tasks.

What common editing techniques can enhance underwater photos?

Common editing techniques include adjusting white balance, increasing contrast and saturation, applying selective sharpening, and adding a vignette effect to draw attention to the image’s center.

Explore the Depths: Top Underwater Photography Styles

Diving into the world of underwater photography opens up a realm of stunning visuals and unique experiences. Whether you’re a beginner or a seasoned pro, there’s always something new to explore beneath the waves.

Explore the Depths: Top Underwater Photography Styles

Understanding Underwater Photography

What is Underwater Photography?

Underwater photography is the art of capturing images below the surface of the water. It’s not just a technical challenge; it’s also a creative expression that allows us to document the beautiful, often hidden world of marine life. I remember the first time I submerged my camera, the thrill of seeing the underwater world through the lens was both mesmerizing and a little intimidating. The colors, textures, and movements all come to life in ways that are hard to describe. The challenge lies not only in the technical aspects of shooting underwater but also in understanding the unique environment in which we work. Read Interesting article: Top Tips for Photographing Marine Life Underwater Like a Pro

History and Evolution of Underwater Photography

The journey of underwater photography is quite fascinating. It began in the mid-19th century with some pioneers who used bulky equipment to capture images underwater. I often think about how those early photographers were able to see what lay beneath the waves long before the technology we have today. Over the years, advancements in camera technology, including the introduction of waterproof housings and compact digital cameras, have made underwater photography more accessible to hobbyists and professionals alike. Now, we have tools that allow us to dive deeper and capture more vibrant images than ever before.

In my experience, learning about the history of underwater photography adds depth to my own practice. It connects me to the photographers who paved the way, reminding me of the passion and dedication it took to capture those first images. I find inspiration in their stories and try to incorporate their spirit of exploration into my own work.

Importance of Underwater Photography in Marine Conservation

Underwater photography plays a crucial role in marine conservation. By capturing the beauty of marine life, we not only raise awareness about the issues our oceans face but also inspire others to take action. I’ve witnessed firsthand how impactful a single photograph can be in conveying the urgency of protecting fragile ecosystems. When I share my underwater images, I aim to tell a story that resonates with viewers, encouraging them to care about our oceans as much as I do.

Marine conservation organizations often use underwater photography to document species and habitats, making it an essential tool for research and advocacy. I remember volunteering with a local conservation group, where we used underwater images to highlight the impact of pollution on coral reefs. The response was overwhelming, and it reaffirmed my belief that photography can be a powerful catalyst for change.

Essential Equipment for Underwater Photography

Underwater Cameras: Compact vs. DSLR

Choosing the right camera is one of the first steps in underwater photography. I started with a compact camera because it was easier to handle while diving. These cameras are lightweight, portable, and often come with underwater housings, making them perfect for beginners. As I gained more experience, I transitioned to a DSLR, which allowed me greater control over settings and resulted in higher-quality images. The trade-off is that DSLRs are bulkier and require more practice to use effectively underwater.

Lenses and Filters for Underwater Shots

The choice of lens can significantly impact your underwater images. Wide-angle lenses are fantastic for capturing expansive scenes and schools of fish, while macro lenses allow you to get up close with the tiny details of marine life. I’ve had incredible experiences photographing vibrant coral formations and the intricate textures of nudibranchs, all thanks to the right lens. Additionally, using filters can help correct color loss due to water absorption, enhancing the vibrancy of your photos.

Lighting: Strobes and Continuous Lights

Underwater lighting is another critical factor. Natural light can only reach so deep, and as you descend, colors fade quickly. I often use strobes to illuminate my subjects, which helps bring out the colors and details that would otherwise be lost. Continuous lights are also a great option for video and can help you gauge how the light will fall on your subject. Experimenting with different lighting setups has been one of the most rewarding parts of my photography journey.

Other Accessories: Buoyancy Compensators and Tripods

Staying buoyant and stable underwater can be tricky, so a buoyancy compensator is a must-have. It helps you maintain your position while shooting, allowing you to focus on composition and capturing the moment. I also find that using a tripod can be beneficial, especially for macro photography, as it stabilizes your shots and allows for better precision. While I sometimes prefer the flexibility of shooting handheld, having a sturdy tripod can make a significant difference in the final image quality.

Top Underwater Photography Styles

Wide-Angle Underwater Photography

When it comes to underwater photography, wide-angle shots have a special place in my heart. These images have the power to capture vast ocean landscapes, schools of fish, and majestic marine creatures in their natural habitats. I remember my first attempt at wide-angle photography; the thrill of fitting an entire coral reef into the frame was exhilarating. To get those perfect shots, I learned that positioning myself closer to the subject while allowing the background to stretch out creates a sense of depth. The colors pop, and the vibrant life underwater becomes truly mesmerizing. I recommend practicing this style in locations with clear water and abundant marine life for the best results.

Macro Underwater Photography

On the flip side, macro photography has its own charm that draws me in. This style focuses on the tiny details of marine life, like the intricate patterns on a nudibranch or the delicate features of a shrimp. I can’t help but feel a sense of wonder when I capture these small wonders that often go unnoticed. The first time I photographed a sea horse, I was captivated by its delicate beauty. To excel in macro photography, patience is key. I find that getting the right focus and lighting can be challenging, but the payoff is worth it. Investing in a good macro lens can open up a whole new world of photography, allowing you to tell stories through the smallest subjects.

Behavioral Underwater Photography

Behavioral underwater photography fascinates me because it reveals the interactions and activities of marine creatures. Capturing a dolphin in mid-leap or a clownfish darting in and out of its anemone feels like a privilege. I remember spending hours observing the behavior of sea turtles, waiting for the perfect moment to click the shutter. This style requires not just technical skills but also an understanding of marine animal behavior. I’ve found that doing research on the species you’re photographing can lead to more compelling images, as you anticipate their actions and capture them in the best light.

Abstract Underwater Photography

There’s something incredibly artistic about abstract underwater photography. This style allows me to break the rules of traditional photography and focus on shapes, patterns, and colors instead of recognizable subjects. I often find myself experimenting with light refraction and surface reflections to create stunning artworks. One of my favorite experiences was capturing the way sunlight danced through water, creating beautiful, abstract shapes. It’s about seeing the underwater world differently and experimenting with your camera settings to achieve a unique look. If you’re feeling creative, I encourage you to try this style; you might discover a new passion!

Underwater Portraits

Underwater portraits combine the beauty of the marine world with human expression, and they have become one of my favorite styles to explore. Capturing a model submerged in water, surrounded by bubbles and light, creates an ethereal effect that’s hard to replicate on land. I remember a shoot I did with a friend who wanted to do something different for her portrait. The result was breathtaking; the way the water flowed around her created a dreamlike quality. If you’re considering underwater portraits, it’s essential to communicate with your model and ensure they’re comfortable. The experience can be magical for both photographer and subject.

Underwater Landscapes

Underwater landscapes are like capturing a whole new world beneath the waves. This style emphasizes the beauty of underwater terrains, from coral reefs to kelp forests. I enjoy exploring these environments and showcasing their intricate details. The first time I shot a vibrant coral reef ecosystem, I felt like I was documenting something truly precious. I recommend using wide-angle lenses and getting low to the ocean floor for dramatic perspectives. The key is to pay attention to composition and lighting, reflecting the stunning diversity of life that exists beneath the surface.

Techniques for Capturing Stunning Underwater Images

Mastering Composition in Underwater Photography

Composition is crucial in underwater photography, just as it is on land. I often think about the rule of thirds when framing my shots. By placing my subject off-center, I create a more dynamic image. I’ve learned to be mindful of my surroundings and the way I position myself relative to the light and my subject. Experimenting with angles can lead to surprising results. Sometimes, I find that getting low to the ground or shooting from above offers a fresh perspective. I also pay attention to leading lines and natural frames within the underwater environment to draw the viewer’s eye to the subject.

Dealing with Light and Color Underwater

Light behaves differently underwater, and understanding this has been essential in my photography journey. As I dive deeper, I notice colors fade, especially reds and oranges. To combat this, I often use strobes or artificial lighting to illuminate my subjects. I’ve found that shooting in shallow water during the golden hour can yield stunning results, with natural light casting beautiful hues on my subjects. I recommend experimenting with different lighting setups to see how they affect your images. It’s all about finding the right balance to bring out the colors and details that make underwater photography so magical.

Understanding Underwater Currents and Movement

One challenge I’ve faced in underwater photography is dealing with currents and movement. I’ve learned to adapt my shooting technique based on the conditions. When the water is calm, I can focus more on composition, but when currents are strong, I have to be quick and strategic. I often look for natural features like rocks or coral to anchor myself and stabilize my shots. Understanding how to use the movement of the water to my advantage can create dramatic images, especially if I can capture the fluidity of marine life as they swim with the current.

Tips for Shooting in Different Water Conditions

Every dive is different, and I’ve discovered that being adaptable to varying water conditions is crucial for capturing great underwater images. In murky waters, I focus on getting closer to my subjects to avoid distractions in the background. In crystal-clear water, I take advantage of the visibility to experiment with wider shots. I’ve also learned to adjust my settings based on the conditions—lowering my ISO and adjusting my shutter speed can help me get the best results. Being prepared and flexible allows me to make the most of whatever situation I encounter while diving.

Post-Processing Underwater Images

Editing Software: Lightroom, Photoshop, and Others

Once I’ve captured my underwater images, the next step is post-processing, which can truly elevate my photography. I often turn to Adobe Lightroom for its user-friendly interface and powerful tools. It allows me to make essential adjustments like exposure, contrast, and cropping quickly. For more advanced edits, I sometimes switch to Photoshop. I remember the first time I used layers and masks; it felt like unlocking a new dimension of creativity. There are also other software options out there, like Capture One and Affinity Photo, which offer unique features. I encourage you to explore different tools to find what works best for your editing style. Read Interesting article: Essential Editing Techniques for Underwater Photography

Color Correction Techniques for Underwater Photos

One of the most significant challenges I face with underwater photography is color correction. As I mentioned earlier, colors can fade as I dive deeper, especially reds and oranges. In post-processing, I often use the HSL (Hue, Saturation, and Luminance) sliders in Lightroom to bring those lost colors back to life. I’ve learned to be careful not to over-saturate, as that can make the image look unnatural. Sometimes, I adjust the white balance to counteract the blue-green cast that comes from the water. I find that a slight tweak can make a big difference, giving my images that vibrant, underwater feel. It’s all about finding the right balance to enhance the beauty without losing the essence of the underwater world.

Enhancing Details and Textures

In addition to color correction, enhancing details and textures is a vital part of my editing process. I love how post-processing allows me to bring out the intricate patterns of coral or the delicate features of marine life. Using tools like clarity and sharpness adjustments in Lightroom helps me highlight the textures that I captured underwater. However, I’ve learned to be subtle with these edits; too much clarity can create a harsh look. I often zoom in on my images to ensure the details remain soft and inviting. I also use the noise reduction feature, especially for shots taken at higher ISOs in darker waters, to keep my images clean and crisp.

Challenges of Underwater Photography

Safety Considerations for Underwater Photographers

Every dive comes with its own set of safety considerations, and I’ve learned that being prepared is crucial. I always check my gear before heading into the water, making sure everything is functioning properly. I remember a time when I didn’t secure my camera housing well enough; I ended up with a flooded camera. It was a tough lesson, but it taught me the importance of double-checking my equipment. Additionally, being aware of my surroundings is vital. Strong currents, marine life, and depth can all pose risks. I’ve made it a habit to dive with a buddy and communicate regularly, which makes the experience safer and more enjoyable. Read Interesting article: Stay Safe: Top Tips for Underwater Photography Adventures

Environmental Impact of Underwater Photography

As much as I love underwater photography, I also recognize the environmental impact we can have on marine ecosystems. I’ve seen firsthand how sensitive some marine habitats are. When I’m out shooting, I always strive to minimize my footprint. This includes avoiding contact with corals and other delicate structures, and I’m careful not to disturb marine life. I also make an effort to educate others about the importance of conservation and responsible photography practices. It feels rewarding to know that my passion can contribute to raising awareness about the fragility of our oceans.

Overcoming Equipment Limitations

Equipment limitations can be a real challenge in underwater photography. I remember when I first started, my compact camera was great, but I quickly felt restricted by its capabilities. As I transitioned to a DSLR, I encountered a new set of challenges, such as bulkiness and the need for additional accessories like strobes and filters. I’ve learned to adapt to these limitations, often finding creative solutions. For instance, I’ve used natural light creatively by shooting during the golden hour or utilizing the available light in shallow waters. Each limitation I face pushes me to think outside the box and discover new techniques that enhance my photography.

Resources for Aspiring Underwater Photographers

Online Courses and Workshops

For anyone looking to dive deeper into underwater photography, I highly recommend exploring online courses and workshops. Platforms like Udemy and Skillshare offer a range of classes, from basics to advanced techniques. I took a workshop focused on underwater lighting, and it completely changed my approach to shooting in different environments. Learning from experienced photographers can provide insights that are hard to gain from just trial and error. If you have the chance, attending an in-person workshop can also be incredibly beneficial, as you get to practice hands-on and receive immediate feedback.

Books and Guides on Underwater Photography

Books have been a great resource in my journey as an underwater photographer. I’ve found that guides specifically focused on underwater photography can offer valuable tips and techniques. One of my favorites is “The Underwater Photographer” by Martin Edge, which covers everything from gear to composition. These resources not only deepen my understanding of techniques but also inspire creativity. I often refer back to these guides when I’m seeking new ideas or solutions to challenges I face while shooting.

Photography Communities and Forums

Connecting with other photographers has been invaluable for my growth. I’ve joined several online communities and forums dedicated to underwater photography, where I can share my work, seek advice, and learn from others’ experiences. Platforms like Facebook and Reddit have groups specifically for underwater enthusiasts. Engaging with fellow photographers allows me to gain new perspectives, get feedback on my images, and keep up with the latest trends and technology in the field. It’s a supportive network that I encourage anyone pursuing underwater photography to join.

Frequently Asked Questions

What is underwater photography?

Underwater photography is the art of capturing images below the surface of the water. It serves as both a technical challenge and a creative expression that documents the beautiful, often hidden world of marine life.

How has underwater photography evolved over time?

Underwater photography began in the mid-19th century with bulky equipment. Over time, advancements in camera technology, such as waterproof housings and compact digital cameras, have made it more accessible to both hobbyists and professionals.

What role does underwater photography play in marine conservation?

Underwater photography is crucial for marine conservation as it raises awareness about ocean issues and inspires action. It is used by organizations to document species and habitats, helping to advocate for the protection of fragile ecosystems.

What type of cameras are recommended for underwater photography?

Beginners often start with compact cameras because they are lightweight and portable, while seasoned photographers may prefer DSLRs for greater control over settings and higher-quality images, albeit with more bulk and complexity.

What are the different styles of underwater photography?

Some popular styles include wide-angle photography for vast ocean landscapes, macro photography for capturing small details, behavioral photography to observe marine interactions, abstract photography for artistic expression, underwater portraits, and underwater landscapes that showcase terrains like coral reefs.

What are some tips for mastering composition in underwater photography?

Key tips include using the rule of thirds, paying attention to surroundings, experimenting with different angles, and utilizing leading lines and natural frames to create dynamic images.

How can light and color be managed in underwater photography?

Understanding that light behaves differently underwater is essential. Photographers often use strobes or artificial lighting to combat color loss and may shoot during the golden hour for the best results.

What are some common challenges faced in underwater photography?

Common challenges include safety considerations, the environmental impact on marine ecosystems, and equipment limitations. Photographers must also adapt their techniques to varying water conditions and currents.

What resources are available for aspiring underwater photographers?

Aspiring photographers can explore online courses, read books and guides focused on underwater photography, and join communities and forums to connect with others in the field for advice and support.

What editing software is recommended for post-processing underwater images?

Adobe Lightroom is commonly used for its user-friendly interface and powerful tools, while Photoshop is useful for more advanced edits. Other options include Capture One and Affinity Photo, which offer unique features.

Stay Safe: Top Tips for Underwater Photography Adventures

Underwater photography is an exhilarating adventure that captures the beauty of the ocean’s depths. With the right tips and precautions, you can explore this vibrant world safely and creatively. Read Interesting article: Mastering Underwater Photography: Tips for Stunning Marine Shots

Stay Safe: Top Tips for Underwater Photography Adventures

Understanding Underwater Photography

What is Underwater Photography?

Underwater photography is a unique art form that involves taking pictures beneath the water’s surface. I remember the first time I tried it; the moment I submerged my camera, I felt like I had entered another realm. It’s not just about snapping photos; it’s about capturing the intricate details of marine life and the stunning underwater landscapes. This type of photography can range from exciting close-ups of small creatures to sweeping wide-angle shots of expansive coral reefs.

Types of Underwater Photography

There are several types of underwater photography that cater to different interests and skill levels. Here are some that I’ve found particularly fascinating:

  • Wide-Angle Photography: This type captures expansive scenes and is perfect for showcasing large marine habitats. I’ve had incredible experiences shooting vast coral reefs or schools of fish moving together in harmony.
  • Macro Photography: If you enjoy photographing small creatures like seahorses or nudibranchs, macro photography is for you. It requires specialized equipment and a steady hand, but the results can be stunning.
  • Ambient Light Photography: Utilizing natural light creates a different atmosphere in your photos. I love experimenting with the sun’s rays filtering through the water, creating ethereal images.
  • Night Diving Photography: This can be thrilling and challenging. Underwater life behaves differently at night, and capturing it requires careful planning and specific lighting techniques. I remember my first night dive; it felt like exploring an alien world!

Essential Equipment for Underwater Photography

Getting started in underwater photography requires some essential gear. I’ve learned the hard way that having the right equipment can make all the difference in capturing great shots. Here’s a list of what I consider must-haves:

  • Underwater Camera: While some people use DSLRs with underwater housings, I’ve found that compact cameras designed for underwater use are user-friendly and effective. They often come with built-in features that make underwater shooting easier.
  • Housing: If you decide to use a DSLR or mirrorless camera, investing in a good underwater housing is crucial. It protects your camera from water damage and allows you to access the controls easily.
  • Strobe Lights/Flash: Natural light can be limited underwater, especially at greater depths. Adding an underwater strobe can help illuminate your subjects and bring out their colors.
  • Filters: Using color correction filters can enhance your photos by compensating for the color loss that occurs underwater. I always keep a red filter handy for my dives.
  • Tripod: Stability is important, especially for longer exposures or macro shots. I often bring a lightweight tripod to help steady my camera.
  • Safety Gear: Don’t forget about safety equipment like a buoyancy control device, dive computer, and safety knife. These are essential for ensuring your safety while capturing stunning images. Read Interesting article: Best Budget-Friendly Underwater Photography Equipment Tips

Safety Precautions for Underwater Photography

Personal Safety Tips

Before embarking on an underwater photography adventure, I always keep safety at the forefront of my mind. Here are some essential personal safety tips I’ve learned over time:

Understanding Diving Basics

Before diving into underwater photography, it’s important to have a solid understanding of diving principles. I took a basic diving course that taught me about buoyancy, equalizing pressure, and dive tables. These skills are essential for ensuring a safe dive experience. Always dive with a buddy, as there’s safety in numbers. Plus, having someone to share the experience with makes it even more enjoyable.

Checking Equipment Before Diving

There’s nothing worse than realizing your equipment is malfunctioning once you’re underwater. I always conduct a thorough pre-dive check to ensure my camera, housing, and safety gear are in working order. I recommend testing all your gear in shallow water first to avoid any surprises during the actual dive.

Environmental Safety Considerations

We should also pay attention to the environment while capturing underwater beauty. Here are some considerations I’ve learned to keep in mind:

Awareness of Marine Life

Understanding the marine life you may encounter is crucial. Some creatures can be dangerous, while others are simply fascinating to observe. I always do a bit of research on local species before diving in. Remember to respect wildlife and give them space; capturing a moment is great, but the safety of both you and the creatures comes first.

Understanding Water Conditions

Water conditions can vary greatly depending on the location and time of year. I’ve experienced everything from crystal-clear waters to strong currents. Before diving, I always check local conditions and forecasts. If the water looks too rough or visibility is low, I choose to wait for a better day. Safety should always come before the perfect shot.

Choosing the Right Location

Popular Underwater Photography Destinations

Choosing the right location can truly make or break your underwater photography experience. I’ve been fortunate to explore some of the world’s most stunning underwater landscapes, and each destination offers its own unique charm. Here are a couple of my favorites that I think every underwater photographer should consider:

Great Barrier Reef, Australia

The Great Barrier Reef is often at the top of many photographers’ lists, and for good reason. I remember my first dive there; it felt like swimming through a vibrant, living painting. The variety of marine life is astounding, from colorful corals to playful turtles and even majestic manta rays. The reef is massive, so you can find a range of environments to suit your photography style, whether you’re into wide-angle shots of the reef itself or macro photography of the tiny critters hiding among the corals. I always suggest visiting during the warmer months for the best visibility and to see the reef teeming with life.

Blue Hole, Belize

The Blue Hole in Belize is another stunning location that I can’t recommend enough. This underwater sinkhole is famous for its deep blue waters and unique geological formations. I found it mesmerizing to capture the contrasting colors of the deep blue against the lighter shades of the coral reefs surrounding it. The marine life here is also remarkable, with opportunities to photograph everything from sharks to vibrant fish schools. However, I would advise making sure you’re comfortable with deeper dives, as the Blue Hole plunges to about 400 feet!

Local Regulations and Permits

Before diving in any location, it’s essential to understand local regulations and whether you need any permits. I’ve learned this the hard way in some places where I was caught off guard by strict rules. Some areas have guidelines to protect the marine environment, so it’s crucial to respect these regulations. Always check if you need a permit for underwater photography or if there are specific rules about where you can dive. I usually contact local dive shops or check official websites for the latest information. This helps me feel confident that I’m diving responsibly and ethically.

Techniques for Capturing Stunning Underwater Shots

Lighting Techniques for Underwater Photography

Lighting can be a tricky aspect of underwater photography, but it can also elevate your images to another level. I’ve found that natural light works beautifully for shallow dives, especially when the sun is high. The rays can create stunning patterns and highlights on the ocean floor. However, for deeper dives or when visibility is low, I recommend using strobes. I remember the first time I added a strobe to my setup; it transformed my photos by bringing out the vibrant colors that often get lost underwater. Experimenting with different lighting angles can create dramatic effects, so don’t hesitate to play around.

Composition Tips for Underwater Photos

Composition is crucial in any type of photography, and underwater shots are no exception. I often remind myself to think about the rule of thirds and framing. One tip I like to use is to include something in the foreground to create depth in my images. For example, if I’m photographing a school of fish, I’ll try to include some coral or rocks in the foreground. This can draw viewers into the scene and make them feel part of the underwater world. Additionally, I pay attention to the background, ensuring it’s not too cluttered, which can distract from the main subject.

Using Filters and Housing

Using filters is another technique I’ve found beneficial, especially for color correction. The deeper you go, the more color you lose due to water absorption. A red filter can help restore those vibrant colors that are often muted underwater. I always keep a few filters in my gear bag and switch them out depending on the depth and conditions. Moreover, using proper housing for your camera is essential. I learned early on that having a sturdy, well-sealed housing not only protects my investment but also allows me to access all the controls easily while underwater. It’s all about making sure I’m comfortable so I can focus on capturing the beauty around me.

Post-Shooting Safety and Best Practices

Caring for Your Equipment

After a dive, taking care of your equipment is just as important as preparing it beforehand. I always rinse my gear with fresh water to remove salt or chlorine, which can damage the seals and electronics over time. I remember the first time I neglected this, and I regretted it when my camera started showing signs of wear. Make sure to dry everything properly and store it in a cool, dry place. Regular maintenance can extend the life of your gear significantly. I also suggest checking the seals and O-rings before each dive. It’s a simple step that can save you from potential disasters.

Managing Your Images After the Dive

Once I’m back on dry land, I find that managing my images is just as important as capturing them. I always back up my photos as soon as I can; I usually keep copies on an external hard drive and in cloud storage. This way, I feel secure knowing that my hard work is safe. I also like to take time to go through my images, editing them to enhance colors and contrast while staying true to the original scene. It’s a great way to relive the experience and share my adventures with friends and family. Read Interesting article: Essential Tips for Budget Underwater Adventure Photography

Environmental Responsibilities in Underwater Photography

Lastly, I believe that with the beauty of underwater photography comes a responsibility to protect the environments we explore. I always make a conscious effort to minimize my impact. This includes not touching coral or marine life, avoiding stirring up sediment, and being mindful of my buoyancy to avoid damaging delicate ecosystems. I encourage fellow photographers to adopt similar practices. We have the power to inspire others to protect the oceans through our images, so let’s make sure we’re doing our part.

Resources for Underwater Photography Enthusiasts

Online Communities and Forums

As I dove deeper into underwater photography, I discovered the incredible value of connecting with others who share the same passion. There are numerous online communities and forums that can provide support, tips, and inspiration. I found places like Wetpixel and DivePhotoGuide to be fantastic resources where photographers of all levels gather to share their work and experiences. It’s amazing to see different styles and techniques, and I often find myself learning something new every time I visit these sites.

Social media platforms like Instagram and Facebook also have dedicated groups where photographers post their stunning underwater shots and discuss their gear, settings, and experiences. I remember joining a Facebook group focused on underwater photography, and it’s been such a joy to interact with fellow enthusiasts. We share our challenges and successes, and it feels great to receive feedback on my work from people who understand the unique aspects of underwater photography.

Books and Courses on Underwater Photography

If you’re looking to deepen your knowledge, there are many books and online courses specifically focused on underwater photography. I remember picking up a copy of “The Underwater Photographer” by Martin Edge; it became my go-to reference. The book covers everything from gear selection to advanced techniques, and I often find myself flipping through it before a dive to refresh my memory. The way Martin explains complex concepts in simple terms makes it accessible, regardless of your skill level.

Online platforms like Udemy and Skillshare offer courses in underwater photography as well. I took a course focused on post-processing underwater images, which opened my eyes to new editing techniques. It’s one thing to capture stunning images underwater, but it’s another to enhance them and make them pop in post-production. I think investing in a good course can save you a lot of trial and error time and help you grow faster as a photographer.

Additionally, many local diving schools offer workshops and courses specifically for underwater photography. I attended one at a dive shop near my home, and it was instrumental in building my confidence. Combining diving lessons with photography training helped me learn how to manage my buoyancy while focusing on capturing great shots.

Inspiration and Motivation in Underwater Photography

Following Influential Underwater Photographers

Finding inspiration is crucial in any creative endeavor, and underwater photography is no exception. I’ve followed several prominent underwater photographers whose work continually motivates me. For instance, I admire the stunning imagery of David Doubilet, who has an incredible ability to capture the majesty of the ocean’s depths. I follow him on social media, and seeing his latest projects always ignites my enthusiasm to grab my camera and dive in.

There’s also Cristina Mittermeier, a conservation photographer whose work highlights both the beauty and fragility of marine life. Her stunning compositions have inspired me to think more about the stories behind the images I capture. I realized that photography can be a powerful tool for raising awareness about marine conservation, and I want my work to reflect that mission.

Participating in Photography Contests and Exhibitions

Another great way to stay motivated is by entering photography contests or showcasing your work in exhibitions. I remember entering my first underwater photography contest; it was nerve-wracking but exhilarating. It pushed me to focus on my best shots and refine my editing skills. Even if I didn’t win, receiving feedback from judges and fellow participants was invaluable.

Exhibitions provide an opportunity to share your passion with others and connect with like-minded individuals. I found that presenting my work in a local gallery not only helped boost my confidence but also opened doors to new friendships and collaborations. It feels amazing to see your images on display and to inspire others to explore the underwater world.

Staying Motivated and Setting Goals

Lastly, I believe that setting personal goals can keep the passion alive. I often set challenges for myself, like trying to capture a specific marine species or mastering a new technique. It keeps my photography journey exciting and encourages me to continue learning. I’ve also joined photo walks or group dives specifically focused on underwater photography, which can be a fantastic way to stay motivated while enjoying the thrill of diving with friends.

Whether it’s through online communities, books, or personal goals, there are endless resources available to help us grow as underwater photographers. Let’s embrace the journey, keep learning, and continue capturing the beauty of our oceans.

Frequently Asked Questions

What is underwater photography?

Underwater photography is a unique art form that involves taking pictures beneath the water’s surface, capturing the intricate details of marine life and stunning underwater landscapes.

What types of underwater photography are there?

There are several types of underwater photography, including wide-angle photography, macro photography, ambient light photography, and night diving photography, each catering to different interests and skill levels.

What essential equipment do I need for underwater photography?

Essential equipment for underwater photography includes an underwater camera, housing, strobe lights/flash, filters, tripod, and safety gear such as a buoyancy control device and dive computer.

What safety precautions should I take before diving?

Before diving, it’s important to have a solid understanding of diving principles, check your equipment thoroughly, and be aware of the marine life and water conditions you may encounter.

What are some popular underwater photography destinations?

Popular underwater photography destinations include the Great Barrier Reef in Australia, known for its vibrant marine life, and the Blue Hole in Belize, famous for its deep blue waters and unique geological formations.

How can lighting affect underwater photography?

Lighting can significantly affect underwater photography; natural light works well for shallow dives, while strobes are recommended for deeper dives or low visibility to bring out vibrant colors.

What composition tips can improve my underwater photos?

To improve composition in underwater photos, consider the rule of thirds, include foreground elements for depth, and ensure the background is not too cluttered to distract from the main subject.

What should I do to care for my equipment after a dive?

After a dive, rinse your gear with fresh water to remove salt or chlorine, dry it properly, store it in a cool, dry place, and regularly check seals and O-rings to maintain your equipment.

How can I find inspiration for underwater photography?

Finding inspiration can involve following influential underwater photographers, participating in photography contests and exhibitions, and setting personal goals to keep your passion alive.

What resources are available for underwater photography enthusiasts?

Resources for underwater photography enthusiasts include online communities and forums, books and courses on underwater photography, and local diving schools offering workshops and training.

Essential Safety Tips for Underwater Photographers

Underwater photography is a thrilling adventure, but safety should always be your top priority. By following essential safety tips, you can capture breathtaking images while keeping yourself and the marine environment safe. Read Interesting article: Explore Stunning Underwater Photography Spots on a Budget

Essential Safety Tips for Underwater Photographers

Understanding Underwater Photography Safety

The Importance of Safety in Underwater Photography

As an avid underwater photographer, I’ve learned that safety is not just a guideline; it’s a necessity. Every dive offers a unique opportunity to capture extraordinary images, but it also comes with its own set of risks. I remember my first dive with a camera; the excitement was palpable, but I quickly realized how crucial it was to stay vigilant. Understanding safety protocols helps ensure that we can enjoy this beautiful experience without compromising our well-being.

Common Risks Faced by Underwater Photographers

Underwater photographers face various risks that can turn a beautiful dive into a dangerous situation. Here are a few common risks I’ve encountered and learned to navigate:

  • Equipment Failure: I’ve had my fair share of equipment mishaps. A flooded camera or malfunctioning gear can ruin a dive and pose safety hazards.
  • Decompression Sickness: This condition can occur when divers ascend too quickly. I learned the hard way how vital it is to follow proper ascent rates and safety stops.
  • Marine Life Encounters: While many marine creatures are harmless, some can be aggressive or venomous. I try to maintain a respectful distance and avoid provoking them.
  • Visibility Issues: Poor underwater visibility can lead to disorientation. I always check the water conditions before diving and adjust my plans accordingly.
  • Strong Currents: Diving in strong currents can be challenging. I’ve found it’s best to familiarize myself with the dive site and understand how to navigate these conditions safely.

Recognizing these risks has helped me prepare better and enjoy my underwater adventures more fully. By keeping safety at the forefront of my diving, I can focus on capturing stunning images without unnecessary worry.

Essential Equipment for Underwater Safety

Waterproof Camera Gear

The right camera gear is crucial for underwater photography. I always use waterproof housing for my camera, even if it’s labeled as water-resistant. The ocean can be unpredictable, and I’ve seen too many photographers lose their gear due to a small oversight. When choosing waterproof gear, ensure it is rated for the depths you plan to dive, as this will give you peace of mind while you’re submerged.

Buoyancy Control Devices (BCD)

Having a Buoyancy Control Device (BCD) is essential for any underwater photographer. I remember my first dive without a BCD; I struggled to maintain stability while trying to capture images. A BCD allows you to control your buoyancy effectively, helping you stay at your desired depth. It also acts as a flotation aid if you need to surface quickly. I recommend practicing with your BCD in controlled environments to get comfortable before diving into more challenging waters.

Dive Computers and Depth Gauges

Investing in a good dive computer has made my underwater experiences much safer. These devices track your depth, time, and ascent rates, helping you avoid decompression sickness. I rely on my dive computer to monitor my dive profile, ensuring I don’t exceed my limits. It’s a crucial tool that provides real-time data, allowing me to focus on my photography rather than counting minutes or estimating depth.

Safety Equipment: Floatation Devices and Whistles

For added safety, I always carry a flotation device and a whistle. A flotation device can be a lifesaver in emergencies, allowing you to stay afloat while signaling for help. I’ve used a whistle to signal my dive buddy when visibility was low. It’s a small but effective piece of equipment that can make a big difference in an emergency. Along with these tools, consider having a surface marker buoy (SMB) to alert boats to your presence when surfacing.

As an underwater photographer, the thrill of capturing the hidden beauty of the ocean motivates me to improve my skills. However, I’ve learned that taking the right precautions is what truly allows me to enjoy those breathtaking moments safely. By understanding the risks and equipping myself with the right gear, I can focus on what I love most—photographing the wonders beneath the waves. Read Interesting article: Top 7 Budget-Friendly Destinations for Underwater Photography

Pre-Dive Safety Preparations

Checking Equipment Functionality

Before every dive, I make it a point to thoroughly check my equipment. This step is non-negotiable for me. I remember a time when I skipped this part in my excitement, only to find out halfway through my dive that my camera battery was dead. That moment taught me a valuable lesson about the importance of preparation. I go through my gear systematically: ensuring my camera housing is sealed, checking the O-rings for any wear, testing my dive computer, and verifying that my BCD inflates and deflates properly. These simple checks can save you from a lot of stress and potential hazards underwater.

Understanding Dive Conditions

Knowing the dive conditions can significantly enhance our safety and enjoyment. I always check the weather forecast, water temperature, and current conditions before heading out. If I notice that the conditions are less than ideal, I weigh my options carefully. For instance, strong currents can be challenging, especially if I’m focusing on getting that perfect shot. I’ve learned that it’s better to postpone a dive than to risk my safety. Additionally, I try to find information on local dive sites, as conditions can vary widely even in the same area.

Planning Your Dive Site

Planning is key to a successful dive, and I always create a mental or written plan before jumping in. I take into account the depth, entry and exit points, and any notable features I wish to photograph. I also consider how long I expect to be underwater. For me, having a dive plan means I can communicate my intentions clearly to my buddy. I remember a dive where we both had different ideas about what to explore, leading to some confusion. Now, I make sure we’re on the same page before we even enter the water.

Buddy System: Importance and Best Practices

The buddy system is a fundamental rule in diving, and for good reason. Diving with a partner not only enhances safety but also enriches the experience. I always dive with a buddy I trust, and we routinely check in with each other. Before every dive, we discuss our plan and set clear signals for how we’ll communicate underwater. I’ve found that sharing responsibilities, like watching each other’s backs or alternating who leads, builds a strong sense of teamwork. If I ever feel uneasy during a dive, I know I can rely on my buddy to help me navigate any challenges we face.

In-Water Safety Practices

Maintaining Proper Buoyancy

Once I’m in the water, maintaining proper buoyancy becomes my next priority. I’ve had experiences where I either sank too quickly or floated to the surface too fast, both of which can be distracting and stressful. To combat this, I focus on small adjustments with my BCD. I developed a habit of taking slow, deep breaths; this helps me control my buoyancy naturally. I also try to keep my body horizontal in the water, which makes it easier to stay stable while I’m composing shots.

Awareness of Surroundings and Marine Life

Staying aware of my surroundings is crucial while I’m underwater. I always take a moment to soak in the environment before I start shooting. This practice helps me spot potential hazards or interesting subjects to photograph. I’ve learned that keeping an eye on marine life is equally important. I remember a time when I was so focused on capturing a beautiful clownfish that I didn’t notice a larger fish approaching. Thankfully, it was just curious, but I realized then how easily distractions can lead to unsafe situations. Respecting marine life and observing their behavior can also enhance our photography.

Signs of Decompression Sickness

Being aware of the signs of decompression sickness has become a part of my diving routine. I’ve had friends who experienced symptoms like dizziness or joint pain after ascending too quickly. It’s a reminder that we should always adhere to safe ascent rates and make safety stops. I keep an eye on my dive computer and remind my buddy to do the same. If I ever feel anything unusual during or after a dive, I know to take it seriously and seek help immediately.

Using Hand Signals for Communication

Communication underwater is vital, and using hand signals has become second nature for me. I make sure to review common signals with my buddy before diving, as it can get easy to forget them when you’re focused on snapping pictures. I’ve found that being able to communicate effectively can prevent misunderstandings and enhance safety. Simple signals like “OK” and “What’s wrong?” can tell you a lot in a matter of seconds.

Post-Dive Safety Considerations

Decompression Procedures

After every dive, I make it a point to focus on proper decompression procedures. It’s a crucial aspect of diving that I’ve learned to respect deeply. I remember my instructor emphasizing the importance of ascending slowly and making safety stops. If you’ve ever experienced a dive where you didn’t adhere to these practices, you’ll know just how serious it can be. I usually plan my ascent to include a three-minute safety stop at about 15 feet. This gives my body time to release nitrogen safely, minimizing the risk of decompression sickness. It’s a simple step, but it makes all the difference for my overall well-being post-dive.

Post-Dive Equipment Care

Once I’m back on the surface, I immediately turn my attention to my gear. I’ve learned that taking care of my equipment after a dive is just as important as checking it before. I rinse my camera gear and dive equipment in fresh water to remove salt and debris. I remember the first time I neglected this step, and it led to corrosion on my camera housing. Now, I make it a ritual to inspect and clean everything thoroughly. I also check for any signs of wear or damage. If I find anything concerning, I address it right away rather than waiting until my next dive. Keeping my gear in top shape ensures that I’m ready for my next underwater adventure.

Recognizing Symptoms of Dive-Related Illness

Being aware of dive-related illnesses is crucial. I’ve come across divers who ignored early symptoms of issues like decompression sickness, thinking it would go away. I always remind myself to listen to my body. Some symptoms can include fatigue, joint pain, or dizziness. If I ever feel anything out of the ordinary, I don’t hesitate to seek help. I’ve found that it’s better to err on the side of caution. Additionally, after a dive, I spend some time resting and hydrating. This helps my body recover and flush out any nitrogen build-up. Taking care of myself post-dive is an essential part of my routine.

Special Situations and Emergency Protocols

Handling Equipment Failures Underwater

Equipment failure is one of those things that can happen to anyone, and I’ve had my fair share of unexpected moments. Once, during a dive, my camera flooded because I hadn’t secured the housing properly. I remember the panic that set in, but I quickly took action. I’ve learned that keeping calm is vital in these situations. If my gear fails, I prioritize my safety first—if necessary, I’ll abort the dive and signal my buddy to surface with me. Having a backup plan, like knowing how to use my dive computer or buoyancy device in emergencies, has made me more confident in handling these moments.

Emergency Ascents and Safety Stops

In case of an emergency ascent, I know that remaining calm and following proper procedures is essential. I’ve practiced emergency ascents during training, and I keep them in mind whenever I dive. If I ever feel the need to ascend quickly, I focus on a controlled ascent, even if it’s not ideal. I remember a dive where strong currents made it challenging to maintain depth, and I had no choice but to ascend. I kept my eyes on my dive computer and made sure to stop at 15 feet for my safety stop. It’s moments like these that reinforce the importance of preparation and knowledge of emergency protocols.

Responding to Marine Life Encounters

While underwater photography brings me joy, encounters with marine life can be unpredictable. I’ve had moments where I found myself too close to curious creatures, and I quickly learned to respect their space. If I see a potentially aggressive marine animal, I calmly back away and observe from a distance. It’s crucial to remain composed and avoid sudden movements that could provoke them. I also remind myself to keep my camera ready but not at the cost of my safety. Understanding marine behavior has improved my ability to photograph wildlife without putting myself or the creatures in danger.

First Aid for Underwater Accidents

Having basic first aid knowledge is something I consider essential in my diving journey. I took a first aid course specifically for divers, and it has equipped me with the skills to handle emergencies. From knowing how to treat an injury to recognizing the signs of hypoxia, I’ve found that this knowledge gives me an extra layer of confidence. I always carry a small first aid kit in my dive bag, including items like band-aids, antiseptic wipes, and a pocket mask for CPR. Being prepared for any incident, no matter how small, ensures that I can continue enjoying my underwater adventures with peace of mind. Read Interesting article: Unlock the Secrets to Capturing Stunning Underwater Moments

Resources for Underwater Photographers

Training Courses and Certifications

One of the best investments I’ve made in my underwater photography journey is taking specialized training courses. These courses not only enhance my photography skills but also deepen my understanding of diving safety. Organizations like PADI and NAUI offer courses tailored for underwater photographers, focusing on both the technical aspects of diving and photography techniques. I remember taking a course that emphasized buoyancy control while shooting; it transformed the way I approach my dives. I highly recommend looking for local dive shops or schools that provide these certifications. The knowledge gained and the confidence built from these courses can truly set you up for success in the water.

Online Communities and Forums

Connecting with fellow underwater photographers has been invaluable for me. I’ve found that online communities and forums are great places to share experiences, ask questions, and seek advice. Websites like Wetpixel and various Facebook groups dedicated to underwater photography provide a wealth of information and support. I’ve learned about new techniques, gear recommendations, and even local dive spots through these platforms. Engaging with others who share the same passion can inspire us to push our limits and improve our craft. Plus, it’s always comforting to know that I’m part of a community that understands the challenges and joys of underwater photography.

Recommended Safety Gear and Equipment Suppliers

Investing in quality safety gear is crucial for any underwater photographer. Over the years, I’ve come to trust specific brands and suppliers for my diving equipment. Some of my favorites include Scubapro for BCDs, Suunto for dive computers, and Ikelite for underwater housings. I always check reviews and seek recommendations from experienced divers before making a purchase. Additionally, I’ve found it helpful to visit dive expos and shops, where I can see the gear firsthand and often get demonstrations. Building a relationship with local dive shops has also allowed me to access advice and support tailored to my needs. Having reliable equipment not only enhances my safety but also boosts my confidence underwater.

Final Thoughts

Reflecting on my underwater photography journey, I realize how intertwined safety and creativity are in this beautiful pursuit. Each dive is filled with excitement and discovery, but it’s the safety practices that allow me to explore with peace of mind. I’ve learned countless lessons along the way, from the importance of preparation to the value of community support. It’s essential to prioritize our safety and that of the marine environment while capturing the stunning world beneath the waves. I hope that by sharing my experiences, I inspire fellow photographers to dive safely and enjoy all that underwater photography has to offer. Let’s continue to explore, create, and protect our oceans together!

Frequently Asked Questions

What is the importance of safety in underwater photography?

Safety is a necessity for underwater photographers. Every dive presents unique risks, and understanding safety protocols helps ensure that photographers can enjoy their experience without compromising their well-being.

What are some common risks faced by underwater photographers?

Common risks include equipment failure, decompression sickness, encounters with aggressive marine life, visibility issues, and strong currents. Being aware of these risks can help photographers prepare better for their dives.

What essential equipment is recommended for underwater safety?

Essential equipment includes waterproof camera gear, buoyancy control devices (BCDs), dive computers, depth gauges, flotation devices, whistles, and surface marker buoys (SMBs) to enhance safety during dives.

What are some pre-dive safety preparations to consider?

Pre-dive safety preparations include checking equipment functionality, understanding dive conditions, planning the dive site, and using the buddy system to enhance safety and communication.

How can I maintain proper buoyancy while underwater?

Maintaining proper buoyancy involves making small adjustments with your BCD, taking slow, deep breaths, and keeping your body horizontal in the water to stay stable while photographing.

What should I do if I experience signs of decompression sickness?

If you experience signs of decompression sickness, such as dizziness or joint pain, it is crucial to take it seriously, adhere to safe ascent rates, and seek help immediately.

What are recommended practices for handling equipment failures underwater?

In the event of equipment failure, prioritize safety, remain calm, and if necessary, abort the dive and signal your buddy to surface with you. Having a backup plan can enhance your confidence in managing these situations.

What first aid knowledge is beneficial for divers?

Basic first aid knowledge, including injury treatment and recognizing signs of hypoxia, is essential for divers. Carrying a small first aid kit and knowing how to respond to underwater accidents can provide additional safety.

How can I enhance my understanding of underwater photography and diving safety?

Taking specialized training courses from organizations like PADI and NAUI can enhance both photography skills and diving safety knowledge. Engaging in online communities and forums also provides support and learning opportunities.

Why is post-dive equipment care important?

Post-dive equipment care is crucial to prevent corrosion and ensure that gear remains in top shape for future dives. Rinsing equipment in fresh water and inspecting for wear or damage can prolong the lifespan of diving gear.

Step-by-Step Guide to Editing Underwater Photos Like a Pro

Editing underwater photos can transform your snapshots into stunning works of art. Whether you’re a beginner or have some experience, this guide will help you navigate the process like a pro. Read Interesting article: Transform Your Underwater Photos with These Editing Tricks

Step-by-Step Guide to Editing Underwater Photos Like a Pro

Understanding Underwater Photography

Underwater photography has a unique charm that captivates many of us. I remember the first time I plunged beneath the waves with my camera. The vibrant colors of coral and the graceful movements of fish were mesmerizing, yet I quickly realized that capturing those moments was more challenging than I anticipated. Understanding the ins and outs of underwater photography is crucial for anyone wanting to make their photos pop. This section will delve into the peculiarities of shooting underwater, the equipment you’ll need, and common pitfalls to avoid.

The Unique Challenges of Underwater Photography

One of the first things I learned about underwater photography is that it presents specific challenges. The underwater environment is vastly different from shooting on land. The water absorbs light, leading to a color shift that often results in images looking blue or green. Additionally, the movement of water can create ripples and distortions that can affect clarity. I remember a particularly frustrating experience where I thought I had captured a stunning scene, only to find that backscatter from particles floating in the water ruined the image. These challenges require a different approach to both shooting and editing.

Essential Equipment for Underwater Photography

Having the right equipment can make a world of difference in your underwater photography journey. I started with a basic waterproof camera, but as I gained experience, I found that investing in a DSLR with an underwater housing was worth it. Here are some essentials I recommend:

  • Underwater Housing: This is a must if you’re using a DSLR or mirrorless camera. It protects your gear from water damage and allows you to control settings easily.
  • Underwater Lighting: Natural light can be unreliable. Adding a strobe or video light can help illuminate your subjects and enhance colors.
  • Wide-Angle Lens: This is great for capturing expansive scenes and allows you to get close to your subjects without losing detail.
  • Float Strap or Lanyard: Keeping your camera safe and secure is essential. A float strap helps prevent accidental drops.

Choosing the right equipment can significantly impact your photography experience. I remember feeling more confident once I upgraded my gear, leading to better results in my shots.

Common Mistakes in Underwater Shooting

As with any skill, there are common mistakes that many beginners, including myself, tend to make. One of the biggest mistakes is not paying attention to buoyancy. I’ve seen too many divers struggle to stabilize their cameras, resulting in blurry images. Another mistake is not getting close enough to the subject. The water can distort colors and details, so I’ve learned that being as close as possible is crucial. I also used to underestimate the importance of composition. Just because I’m underwater doesn’t mean I should ignore the principles of good photography. I now always try to frame my shot thoughtfully, considering the rule of thirds and leading lines.

Preparing Your Underwater Photos for Editing

Once you’ve captured your underwater photos, the next step is preparing them for editing. I’ve found that this phase can be just as important as the shooting itself. Proper preparation can streamline your editing process and help you achieve the best results. Read Interesting article: Essential Editing Techniques for Underwater Photography

Choosing the Right Software for Editing

Deciding on the right editing software can feel overwhelming, but it’s a crucial step. I started with free options like GIMP, but as my skills improved, I switched to Adobe Lightroom and Photoshop for more advanced features. These programs offer a wide range of tools that can enhance your underwater photos. There are also specialized programs like Capture One that cater to photographers looking for professional results. I recommend trying out a few options to see which one feels right for you.

Organizing Your Photos for Efficient Editing

After a dive, I always find myself with countless photos. To avoid chaos, I suggest establishing a system for organizing your images. I create folders categorized by date or location, which makes it easier to find specific shots later. I also tag my images with keywords related to the subject or conditions. This practice has saved me a lot of time when I’m searching for particular images down the line.

Initial Review and Selection of Photos

Before diving into the editing process, I go through an initial review of my photos. This step is crucial. I like to use a star rating system to identify the best shots. By doing this, I can focus my editing efforts on the images that truly stand out. I also keep an eye out for any potential issues, like overexposure or backscatter, which I can address during the editing phase. This method not only streamlines my workflow but also helps me stay organized and focused.

Basic Editing Techniques for Underwater Photos

Now that we’ve prepped our underwater photos, it’s time to dive into editing! I’ve found that mastering a few basic techniques can really elevate my underwater shots. These techniques help bring out the beauty that often gets lost in the water’s embrace. Here’s how I approach editing my underwater photos, starting with adjusting exposure and contrast.

Adjusting Exposure and Contrast

One of the first things I look at when editing is exposure. Underwater, it’s common for images to appear darker than expected due to the water absorbing light. I remember my early days of editing, where I would struggle to bring out details in my photos. The key for me has been to use the exposure slider in my editing software. Increasing the exposure slightly can make a significant difference in revealing hidden details. However, I’ve learned to be cautious; pushing it too far can wash out my colors.

After adjusting exposure, I focus on contrast. This is crucial because underwater photos often lack the punch that images taken on land have. Increasing the contrast helps to define shapes and create depth. I usually experiment with the contrast slider until I find a balance that enhances the image without making it look unnatural. In my experience, a little goes a long way!

Enhancing Colors and White Balance

Colors are one of the most enchanting aspects of underwater photography, yet they can often appear muted or distorted. That’s why enhancing colors is one of my favorite parts of the editing process. I typically start by adjusting the white balance. I’ve noticed that many underwater images have a bluish tint, which can be fixed by shifting the temperature slider towards the warmer side. This simple adjustment can instantly revive the colors, making the coral and marine life pop.

Next, I like to boost the vibrance and saturation a bit. Vibrance adjusts the less saturated colors without affecting the already vivid ones, which is perfect for underwater images. I tend to be careful with saturation, as too much can lead to unnatural-looking colors. I often toggle between the two sliders, looking for that sweet spot where the colors look lively yet realistic. I remember my excitement when I first discovered this technique; it felt like I was bringing the ocean to life on my screen!

Removing Backscatter and Noise

Backscatter can be a real nuisance in underwater photography. It occurs when particles in the water reflect light back towards the camera, resulting in distracting specks in your images. I’ve had my fair share of encounters with backscatter, and removing it has become an essential part of my editing routine. Many editing programs offer tools for reducing noise and backscatter, which I find incredibly helpful.

When encountering backscatter, I often use the clone or healing brush tool to manually remove the unwanted spots. This requires a bit of patience, as I zoom in to get the details just right. I also make use of noise reduction features, which help smooth out grainy areas that can occur in underwater photos, especially when shooting in low light. I’ve learned that reducing noise not only cleans up the image but also enhances the overall quality.

Through trial and error, I found a rhythm that works for me. I started to enjoy the process of refining my images, transforming my initial captures into something truly special. With these basic editing techniques in my toolkit, I feel more confident in producing vibrant, stunning underwater photographs. Now, let’s take a step further and explore some advanced editing techniques to really make our photos shine!

Advanced Editing Techniques for Professional Results

As I continued to refine my underwater photography, I discovered that diving into advanced editing techniques could elevate my images even further. These methods allow for greater control and creativity, enabling me to produce photos that not only capture the beauty of the underwater world but also convey my unique perspective. Here’s how I approach some of these advanced techniques. Read Interesting article: Mastering Underwater Photo Editing: Tips for Stunning Shots

Using Layers and Masks for Precision

One of the most powerful tools in photo editing is working with layers and masks. When I first learned about this technique, I felt like I had unlocked a new level of creativity. By using layers, I could make adjustments to specific parts of my image without affecting the entire photo. For instance, if I wanted to brighten the coral in a shot while keeping the background darker, I would create a new layer for the coral and adjust its brightness individually.

Masks come into play when I want to control exactly where my adjustments take effect. I often use a soft brush to paint over the areas I want to modify, ensuring a smooth transition between the edited and unedited areas. This technique has helped me achieve a more natural look in my photos, avoiding the harshness that can come from blanket edits. I remember being so pleased the first time I applied a mask to emphasize a school of fish without altering the beautiful blue background. It felt rewarding to see my creative vision come to life!

Creating a Vibrant Color Palette

Underwater images can sometimes appear muted, so I’ve found that creating a vibrant color palette during editing can make a huge difference. I often start by selecting a few dominant colors from my image using the color picker tool. This allows me to establish a cohesive color scheme that aligns with my vision for the image. I then use adjustment layers to boost those colors selectively while ensuring they stay true to the underwater environment.

One technique I’ve enjoyed is adjusting the hue and saturation of specific colors to create more impact. For example, enhancing the orange hues of clownfish against green anemones can make the entire scene pop! It’s important to balance these adjustments, though. I’ve learned the hard way that oversaturation can lead to an unrealistic look, so I always refer back to the original image to ensure I’m not straying too far.

Applying Filters and Effects

Filters can be a fun way to add a unique touch to my underwater photos. I often experiment with different filters to see how they can enhance the mood of an image. For instance, applying a slight vignette can draw the viewer’s eye toward the center of the photo, where the main subject often resides. I also enjoy using soft focus filters to create a dreamy effect around certain elements, such as a diving silhouette against a sunbeam. It adds a magical quality that reflects the wonder I feel underwater.

However, I’ve learned to use filters judiciously. The key is to enhance the photo rather than mask it. I often adjust the opacity of the filter to find that perfect balance where it enhances without overwhelming. I remember one specific instance where I applied a filter that added a warm glow to a sunset shot, and it transformed the entire image into a captivating scene that truly felt like I was back in that moment. It’s these little editing touches that can turn a good photo into a great one.

Specialized Edits for Underwater Images

Fixing Distortion and Perspective

Underwater photography can sometimes lead to distortion, especially when shooting through a dome port or using wide-angle lenses. I remember the first time I looked at an image and noticed the edges were warped — it was a bit disheartening. Thankfully, I found that many editing programs have tools to help correct distortion. Using the lens correction feature allows me to adjust the perspective and straighten lines in my images, making the final product look much cleaner.

For instance, if I have a photo of a reef where the edges curve outward, I can apply a correction that adjusts those curves back into straight lines. It’s essential to keep an eye on how these corrections affect the overall image, as I’ve found that too much distortion correction can lead to unnatural results. Taking my time here has helped ensure my final images look both realistic and visually appealing.

Sharpening Details in Underwater Photos

Underwater images often lack the sharpness that I find in my terrestrial shots due to the water’s diffusive qualities. To combat this, sharpening is one of the last steps I take during editing. I find that applying a subtle amount of sharpening can help bring out the details in fish scales or the texture of coral, enhancing the overall impact of the image.

I usually zoom in to 100% while sharpening to see how it affects the finer details. I’ve learned to be cautious; too much sharpening can introduce noise or create an unnatural appearance. A little goes a long way, and I often toggle the sharpen slider back and forth to find that happy medium where the details pop without compromising the image quality.

Combining Multiple Exposures (HDR Techniques)

When diving in high-contrast situations, like bright sunlight filtering through the water, I’ve found that combining multiple exposures can produce stunning results. This technique, known as HDR (High Dynamic Range), allows me to capture a broader range of light and detail in my images. I typically take several shots at different exposures, then merge them in my editing software.

By blending these exposures, I can maintain detail in both the highlights and shadows, creating a more balanced image. I remember the first time I successfully used this technique on a shot of a vibrant reef bathed in sunlight; the result was breathtaking. It felt like I had captured the full essence of the underwater environment, showcasing both the bright colors and the intricate shadows. It’s a powerful method that I now often incorporate into my workflow, especially in tricky lighting conditions.

Final Touches Before Exporting

Crop and Frame Your Image Effectively

Once I’ve polished my underwater photos, I move on to cropping and framing. I realize how crucial this step is in enhancing the overall composition of an image. I often find that cropping can help eliminate distractions and focus the viewer’s attention on the main subject. There have been times when I zoomed in to frame a fish perfectly, only to find that the background elements were competing for attention. By cropping strategically, I can create a more compelling narrative within the image.

I also consider the rule of thirds during this process. When I place the main subject off-center, it often creates a more dynamic and engaging photo. I love experimenting with different crop ratios to see how they affect the overall feel of the image. Sometimes, I’ll even crop to a square format for social media, which can give the photo a fresh look. It’s an easy way to take my image from good to great!

Choosing the Right File Format for Export

After I’ve finalized my edits, I face the decision of which file format to use for exporting. This choice can impact how my images are shared and displayed, so I take it seriously. For sharing online or social media, I usually opt for JPEG because it strikes a good balance between quality and file size. I remember my excitement when I first realized how optimizing a JPEG could keep my images looking sharp while loading quickly.

However, for prints, I lean towards TIFF or PNG formats since they preserve more detail and color information. I’ve learned that these formats are especially important when enlarging images for display. I like to keep a master copy in the highest quality possible, so I always have a pristine version to work from if needed in the future.

Saving for Web vs. Print

Understanding the differences between saving for web and print is crucial. When I save for the web, I focus on reducing the file size to ensure quick loading times while maintaining a good visual quality. I often adjust the quality settings in my editing software to find the right balance. On the other hand, when preparing images for print, I always ensure I’m working at a higher resolution, typically 300 DPI, to ensure crisp details. I’ve made the mistake of assuming my web-quality images would be fine for print, and I learned the hard way that the results were less than ideal.

Ultimately, I save different versions suited for each purpose. This practice not only helps me stay organized but also ensures that I’m ready for any situation—whether showcasing my work online or producing stunning prints for exhibitions.

Showcasing Your Edited Underwater Photos

Best Practices for Sharing on Social Media

Having great images is just the beginning; getting them seen is another challenge! When I share my underwater photos on social media, I’ve found that it’s important to engage with my audience. I usually write a little story or share insights about the dive experience alongside the photo. This personal touch often resonates with viewers and draws them in.

I’ve also learned about the importance of hashtags. Using relevant hashtags can help my work reach a wider audience. I like to mix popular tags with niche ones to connect with fellow underwater photography enthusiasts. Additionally, I often post during peak times for better visibility, which has significantly increased engagement on my posts.

Creating an Online Portfolio

An online portfolio has become an invaluable tool for showcasing my work. I’ve taken the time to build a website where I can display my favorite underwater photographs. This space allows me to curate my collection thoughtfully, highlighting my best work and narrating the stories behind them. I recommend keeping the layout clean and user-friendly, as it reflects my style and professionalism.

I also ensure to group my images by themes or locations, making it easier for visitors to navigate. A good portfolio not only showcases my photography but also serves as a platform for potential clients or collaborators to connect with me.

Submitting to Photography Competitions and Exhibitions

Lastly, submitting my images to photography competitions and exhibitions has been an exhilarating experience. I remember the thrill of seeing my work displayed publicly for the first time. It’s not only a chance to gain recognition but also to connect with other photographers and receive constructive feedback. I recommend researching competitions that resonate with your style and theme; it can open doors to opportunities I never expected. I’ve made lifelong connections through these avenues, which continue to inspire my photography journey.

Final Thoughts

Editing underwater photos is a journey filled with learning and creativity. I’ve found that each step, from capturing the initial image to the final touches before sharing, is a chance to express my vision and passion for the underwater world. I encourage everyone to embrace this process, as it not only improves technical skills but also fosters a deeper appreciation for the beauty beneath the waves. As we continue to explore and refine our craft, let’s celebrate the vibrant stories our photos can tell!

Frequently Asked Questions

“`html

What are the unique challenges of underwater photography?

Underwater photography presents specific challenges such as light absorption, which leads to color shifts often resulting in blue or green images. Additionally, water movement can create ripples and distortions that affect clarity, and backscatter from particles can ruin images.

What essential equipment is recommended for underwater photography?

Essential equipment includes underwater housing for DSLRs or mirrorless cameras, underwater lighting to enhance colors, a wide-angle lens for expansive scenes, and a float strap or lanyard to keep the camera secure.

What common mistakes do beginners make in underwater photography?

Common mistakes include not paying attention to buoyancy, not getting close enough to the subject, and underestimating the importance of composition. Beginners often forget to apply good photography principles even when underwater.

How should I prepare my underwater photos for editing?

Preparing underwater photos for editing involves choosing the right software, organizing images into folders by date or location, and conducting an initial review to select the best shots using a star rating system.

What basic editing techniques can enhance underwater photos?

Basic editing techniques include adjusting exposure and contrast to reveal hidden details, enhancing colors and white balance to fix bluish tints, and removing backscatter and noise for clearer images.

What advanced editing techniques can be used for professional results?

Advanced techniques include using layers and masks for targeted adjustments, creating a vibrant color palette, applying filters and effects judiciously, and correcting distortion and perspective issues in underwater images.

What final touches should I consider before exporting my underwater photos?

Final touches include cropping and framing to enhance composition, choosing the right file format for exporting based on intended use (JPEG for web and TIFF or PNG for print), and understanding the differences between saving for web versus print.

How can I effectively share my underwater photos on social media?

When sharing on social media, engage your audience with stories about the dive, use relevant hashtags to reach a wider audience, and post during peak times for better visibility.

What should I include in an online portfolio for my underwater photography?

An online portfolio should display favorite underwater photographs, be organized by themes or locations, and maintain a clean and user-friendly layout to reflect professionalism.

Why is submitting photos to competitions and exhibitions beneficial?

Submitting photos to competitions and exhibitions provides opportunities for recognition, connecting with other photographers, receiving constructive feedback, and creating potential professional opportunities.

“`

Transform Your Underwater Photos with These Editing Tricks

Underwater photography has a magical allure, but transforming those stunning shots into captivating images takes more than just great composition. Join me as we explore some essential tricks to enhance your underwater photos and showcase their true beauty. Read Interesting article: Essential Editing Techniques for Underwater Photography

Transform Your Underwater Photos with These Editing Tricks

Understanding the Challenges of Underwater Photography

When I first delved into underwater photography, I was fascinated by the vibrant colors and intricate marine life. However, I soon realized that capturing the perfect shot was only half the battle. The underwater world presents unique challenges that can make even the best photos look flat or dull. Let’s take a closer look at some of these challenges.

Common Issues: Color Loss and Distortion

One major hurdle I encountered was color loss. Underwater, light behaves differently, causing colors to fade and distort. For instance, reds and oranges vanish quickly as you descend, often leaving behind a blue or green hue. I remember my first few attempts to capture coral reefs; they appeared muted and lifeless. It was a stark contrast to the vibrant scene I had witnessed. Understanding this color loss is crucial for anyone wanting to capture the underwater world in its true brilliance.

Lighting Conditions Underwater

Lighting is another challenge that can make or break an underwater shot. As sunlight penetrates the water, it loses intensity and shifts toward the blue spectrum. This results in contrast issues, often leaving images lacking depth and clarity. There were times when I found myself fighting against this – trying to capture the play of light on the ocean floor or the shimmer of fish scales. I learned that the best times to shoot are during midday when the sun is high, allowing more light to penetrate the water.

Equipment Limitations

Let’s not forget about equipment limitations. While there are many fantastic underwater cameras and housings out there, I’ve found that not all gear is created equal. Some cameras struggle with focusing in low light, while others don’t handle color correction well. I remember investing in a camera that promised stunning underwater shots, only to be frustrated by its performance in those challenging conditions. It’s essential to choose equipment that aligns with the demands of underwater photography.

In my experience, investing in a good quality camera housing and lenses can make a significant difference. Wide-angle lenses are especially useful for capturing expansive underwater scenes, while macro lenses help in revealing the intricate details of marine life. I recommend doing thorough research to find the right gear that suits your photography style and the environments you plan to explore.

Essential Editing Software for Underwater Photos

Once I managed to capture those elusive underwater shots, I quickly discovered that editing was just as crucial as shooting. The right software can work wonders in bringing your photos to life. Here are some of my favorites.

Popular Editing Tools: Lightroom and Photoshop

Adobe Lightroom has become my go-to for editing underwater photos. Its user-friendly interface and powerful features allow me to enhance colors, adjust lighting, and fine-tune details with ease. I love using its color correction tools to tackle the blues and greens that often dominate my underwater images. For more advanced edits, I turn to Photoshop. The layering and masking features provide me with endless possibilities to create stunning images. I’ve found that combining both tools gives me the best results. Read Interesting article: Mastering Underwater Photo Editing: Tips for Stunning Shots

Mobile Apps for Quick Edits

For those moments when I’m on the go, mobile apps like Snapseed and Lightroom Mobile have been lifesavers. I often find myself editing photos right after a dive, and these apps allow me to make quick adjustments without the need for a computer. I appreciate the convenience of being able to enhance my photos while still reliving the experience.

Plugins and Filters for Underwater Photography

Plugins can also be a powerful addition to my editing toolkit. I’ve experimented with various plugins designed specifically for underwater photography, which help me tackle color correction and enhance sharpness. Filters can also be beneficial, especially when trying to bring out the hidden details in my photos. I remember applying a specific underwater filter to a shot of a vibrant coral reef, and the difference was astounding; it truly brought the colors to life.

Editing underwater photos can be an exciting journey. Each challenge we face in capturing those stunning scenes can be transformed into an opportunity for creativity and expression. With the right tools and techniques, we can indeed transform our underwater images into breathtaking works of art.

Basic Editing Techniques to Enhance Underwater Photos

Once I’ve got my underwater shots ready for editing, I dive right into some basic techniques that can significantly enhance their quality. These are the bread and butter of editing, and I’ve found that mastering them can really elevate my photography.

Adjusting Exposure and Contrast

One of the first things I do is adjust the exposure. Underwater images often require a little boost because the water can dull the brightness. I like to play with the exposure slider, and I usually aim to brighten the overall image without losing detail. I remember the first time I adjusted an image that felt too dark; it was like unveiling a hidden world. Contrast is another essential adjustment. By increasing contrast, I can make the colors pop and add depth to the image, helping it feel more vibrant. I’ve learned to be cautious, though, because too much contrast can result in loss of detail, especially in the shadows.

Correcting White Balance

White balance correction has been a game-changer for my underwater photography. I’ve often struggled with images that had an unnatural blue or green tint. To combat this, I use the white balance tool to neutralize those colors and bring the image back to its true colors. It’s fascinating how a simple adjustment can transform an image from looking cold and lifeless to warm and inviting. I usually set the white balance by choosing a neutral area in the photo or using the temperature slider to warm up the photo. It’s all about finding that perfect balance.

Enhancing Color Saturation

After fixing exposure and white balance, enhancing color saturation is one of my favorite steps. Underwater scenes can lose their vividness, so a little saturation boost can breathe life back into the image. I like to increase saturation carefully, ensuring that the colors don’t look overly processed. There’s something satisfying about seeing the coral reefs and marine life come alive with just a few adjustments. I’ve experienced that a subtle increase often yields stunning results, making the blues of the ocean and the colors of the fish pop beautifully.

Advanced Editing Tricks for Stunning Results

Once I’ve nailed the basics, I like to explore some advanced editing tricks that can take my underwater photos to the next level. These techniques require a bit more finesse, but the payoff can be worth it.

Applying Gradient Filters for Depth

Gradient filters have become a vital tool in my editing toolkit. These filters help create depth in underwater shots by darkening the top of the image while keeping the bottom lighter. I often found that this technique allows me to mimic the way light filters through water, adding a more immersive feel to my photos. When I apply a gradient, I typically start from the top and gradually blend it downwards, ensuring that the transition feels natural and unobtrusive. The result? A photo that feels three-dimensional and inviting.

Using Noise Reduction Techniques

Noise can be a pesky issue in underwater photography, especially in low-light conditions. I’ve encountered grainy images that seemed unfixable. However, I learned that noise reduction tools in my editing software can significantly improve the quality of my images. It’s crucial to strike a balance, as too much noise reduction can lead to a loss of detail. I usually apply a gentle touch to smooth out the noise, particularly in the darker areas of the photo, and then fine-tune the sharpness to retain the essential textures. This technique has transformed many of my images from looking amateurish to more polished.

Blending Multiple Exposures

Blending multiple exposures has been one of the most rewarding techniques I’ve learned. I often shoot several images at different exposures, especially in challenging lighting conditions. By blending these exposures, I can create a final image that captures the full dynamic range of the scene. I remember one memorable dive when I captured a stunning underwater cave, and by blending the exposures, I was able to showcase both the dark shadows and the bright patches of light filtering through. It’s like painting with light, and the results can be truly breathtaking.

Specific Adjustments for Common Underwater Subjects

As I continued to refine my underwater photography skills, I realized that different subjects require specific adjustments during editing. Each type of underwater scene has its unique characteristics and challenges. By tailoring my editing techniques, I’ve been able to highlight the beauty of various underwater subjects, from vibrant coral reefs to elusive marine life.

Editing Coral Reefs: Color and Detail Enhancements

Coral reefs are some of the most colorful and dynamic environments I’ve had the pleasure of photographing. However, capturing their true vibrancy can be tricky due to the color loss underwater. When editing coral reef photos, I focus on enhancing both color and detail. First, I usually start with boosting the saturation and vibrancy. I’ve learned that this helps bring out the stunning hues of coral that often appear washed out in my initial shots. But I have to be careful not to overdo it; natural-looking colors are always my goal.

Next, I like to use selective editing tools to sharpen specific areas of the image. I zoom in on the coral structures and apply some clarity to enhance textures. This technique often reveals the intricate patterns and details that make coral reefs so fascinating. Sometimes, I might even apply a vignette effect to draw attention to the center of the image, making the coral stand out even more. The combination of these adjustments can transform a flat photo into a vibrant portrayal of life beneath the waves.

Editing Marine Life: Focus and Sharpness

Photographing marine life, whether it’s a curious fish or a graceful sea turtle, poses its own set of challenges. I’ve found that focus and sharpness are the key elements to prioritize when editing these types of shots. It’s crucial to ensure that the subject stands out against the often busy underwater background. I typically start by enhancing the sharpness of the subject using the sharpening tools in my editing software, making sure to apply it selectively to avoid introducing noise in the surrounding areas.

Another important adjustment I focus on is the use of a subtle blur effect on the background. This helps isolate the subject and ensures that the viewer’s attention is directed where I want it. Sometimes I experiment with a slight Gaussian blur to soften the background, allowing the detail in the fish or marine creature to pop. I also pay close attention to the eyes of the marine life; bringing out the detail in the eyes can create a connection between the viewer and the subject, making the photo even more engaging.

Editing Underwater Landscapes: Composition and Tone

When it comes to editing underwater landscapes, composition and tone play a significant role in conveying the atmosphere of the scene. I’ve discovered that using leading lines and natural frames can enhance the overall composition of my images. During editing, I often crop my photos to improve the framing, ensuring that the viewer’s eye is guided smoothly through the image. I remember one instance where I captured a beautiful underwater cave. By cropping it strategically, I was able to emphasize the stunning rock formations and the light filtering through.

In terms of tone, I like to experiment with the overall mood of the image. Adjusting the warmth and coolness of the tones can alter the viewer’s perception significantly. For instance, I might warm up an image of a sandy seabed to give it a more inviting feel or cool down the tones of a deeper shot to convey a sense of mystery. I also play with the clarity and texture sliders to add depth, ensuring that the underwater landscape feels immersive and captivating. These adjustments allow me to create a sense of place that truly represents the underwater world.

In my experience, understanding the specific needs of each underwater subject can enhance my editing process tremendously. By tailoring my approach, I not only improve the aesthetic quality of my photos but also capture the essence of the vibrant life and stunning landscapes beneath the surface.

Preserving the Natural Beauty of Underwater Photos

As I continued my journey in underwater photography, I realized that while editing can enhance an image, preserving the natural beauty of the underwater world is equally important. It’s a delicate balance that I strive to achieve with every photo I edit. Here are some of the ways I make sure to keep the authenticity of my underwater shots intact.

Avoiding Over-Editing: When Less is More

One of the most valuable lessons I’ve learned is the importance of restraint during editing. It’s so tempting to push all the sliders to their limits, thinking that more is better. However, I’ve found that over-editing can lead to images that feel unnatural, losing the essence of the underwater world I experienced. I remember one photo of a beautiful sea turtle that I was eager to enhance. I cranked up the saturation and contrast, but when I looked at it afterward, the turtle no longer looked like the graceful creature I had seen. Instead, it felt like a cartoon version of itself. Now, I focus on making subtle enhancements that elevate rather than overpower the original beauty of my images.

Maintaining Authentic Colors

Color accuracy is critical in underwater photography. I often aim to reflect the true colors of the marine environment, as I believe this helps convey a more genuine experience for the viewer. During editing, I pay special attention to the color correction tools, ensuring that the hues I enhance remain true to the original scene. I’ve developed a habit of frequently comparing my edited photos with my RAW files to ensure I’m not straying too far from reality. Keeping that authenticity allows my audience to feel a connection to the underwater world as I experienced it.

Creating a Cohesive Look Across Your Portfolio

As I built my collection of underwater photographs, I noticed the importance of having a cohesive look across my portfolio. This doesn’t mean that all my images should look the same, but rather that they should share a common feel or vibe. To achieve this, I’ve developed a signature editing style that balances vibrant colors with natural tones. I tend to use similar color grading techniques across my images, which helps create a harmonious flow. It’s fascinating how a consistent style can turn a series of individual shots into a compelling story that captures the beauty of underwater life.

Exporting and Sharing Your Edited Underwater Photos

Once I’ve fine-tuned my underwater images, the next step is sharing them with the world. It’s another exciting part of the process, but it comes with its own set of considerations.

Optimal File Formats for Different Platforms

When it comes to exporting my photos, choosing the right file format is key. I typically save my edited images as JPEGs for social media; they offer a good balance between quality and file size. However, for prints or a photography portfolio, I prefer using TIFF or PNG formats, as they preserve more detail and color depth. I’ve learned that selecting the appropriate format can greatly impact how my images are displayed, ensuring they look their absolute best.

Best Practices for Social Media Sharing

Social media platforms are fantastic for showcasing my underwater photography, but I’ve found that each platform has its own quirks. For instance, Instagram favors square or vertical images, so I often adjust my crop to fit those dimensions. I also pay attention to the optimal resolution; sharing high-quality photos helps them stand out. Additionally, I make sure to use relevant hashtags to reach a wider audience and connect with fellow enthusiasts. I enjoy engaging with others who share my passion, and social media has been an excellent avenue for that.

Creating a Photography Portfolio: Tips and Tricks

Building a photography portfolio is essential for showcasing my work to potential clients or galleries. I’ve learned that simplicity is key. I aim to select a diverse range of images that highlight my skills and personal style. Each photo I choose tells a story, and I make sure to include a mix of subjects, from vibrant coral reefs to intriguing marine life. I also ensure that my portfolio is well-organized and easy to navigate. It’s all about making a strong impression and inviting viewers to explore the underwater world through my lens.

Final Thoughts

Underwater photography has taught me so much about patience, creativity, and the beauty of the natural world. Each dive is an adventure, and every photo is a unique representation of that experience. I believe that using the right editing techniques can enhance our work without overshadowing the authenticity of what we capture beneath the waves. As I continue to explore this fascinating field, I look forward to sharing my journey and the wonders of the underwater world with others. Read Interesting article: The Best Affordable Locations for Underwater Photography Adventures

Frequently Asked Questions

What are the common challenges faced in underwater photography?

Common challenges in underwater photography include color loss and distortion due to light behavior under water, lighting conditions that affect image clarity, and equipment limitations that can hinder focusing and color correction.

Why is lighting important in underwater photography?

Lighting is crucial in underwater photography because as sunlight penetrates the water, it loses intensity and shifts towards the blue spectrum, leading to contrast issues that can leave images looking flat and lacking depth.

What types of editing software are recommended for underwater photos?

Adobe Lightroom and Photoshop are recommended for editing underwater photos. Lightroom is user-friendly for color and lighting adjustments, while Photoshop offers advanced editing features like layering and masking.

How can mobile apps assist in editing underwater photography?

Mobile apps like Snapseed and Lightroom Mobile allow for quick edits on the go, enabling photographers to make adjustments immediately after a dive without needing a computer.

What basic editing techniques are essential for enhancing underwater photos?

Essential basic editing techniques include adjusting exposure and contrast, correcting white balance, and enhancing color saturation to bring life back to underwater images.

What advanced editing techniques can improve underwater photos?

Advanced editing techniques include applying gradient filters for depth, using noise reduction techniques for grainy images, and blending multiple exposures to capture a full dynamic range of the scene.

How should coral reef photos be edited for the best results?

When editing coral reef photos, focus on enhancing color and detail by boosting saturation and vibrancy, sharpening specific areas, and possibly applying a vignette effect to draw attention to the coral.

What adjustments are important when editing marine life photographs?

For marine life photographs, prioritizing focus and sharpness is key. Enhancing the sharpness of the subject and applying a subtle blur effect to the background helps isolate the subject and draw attention to it.

How can underwater landscapes be effectively edited?

Editing underwater landscapes involves improving composition through cropping and adjusting tones to convey the desired atmosphere, using clarity and texture sliders to add depth to the image.

What should be considered when exporting and sharing underwater photos?

When exporting underwater photos, choose the right file format—JPEG for social media and TIFF or PNG for prints. Additionally, consider platform-specific dimensions and optimal resolutions for sharing on social media.