Web Analytics

Recent Posts

Top Tips for Photographing Marine Life Underwater Like a Pro

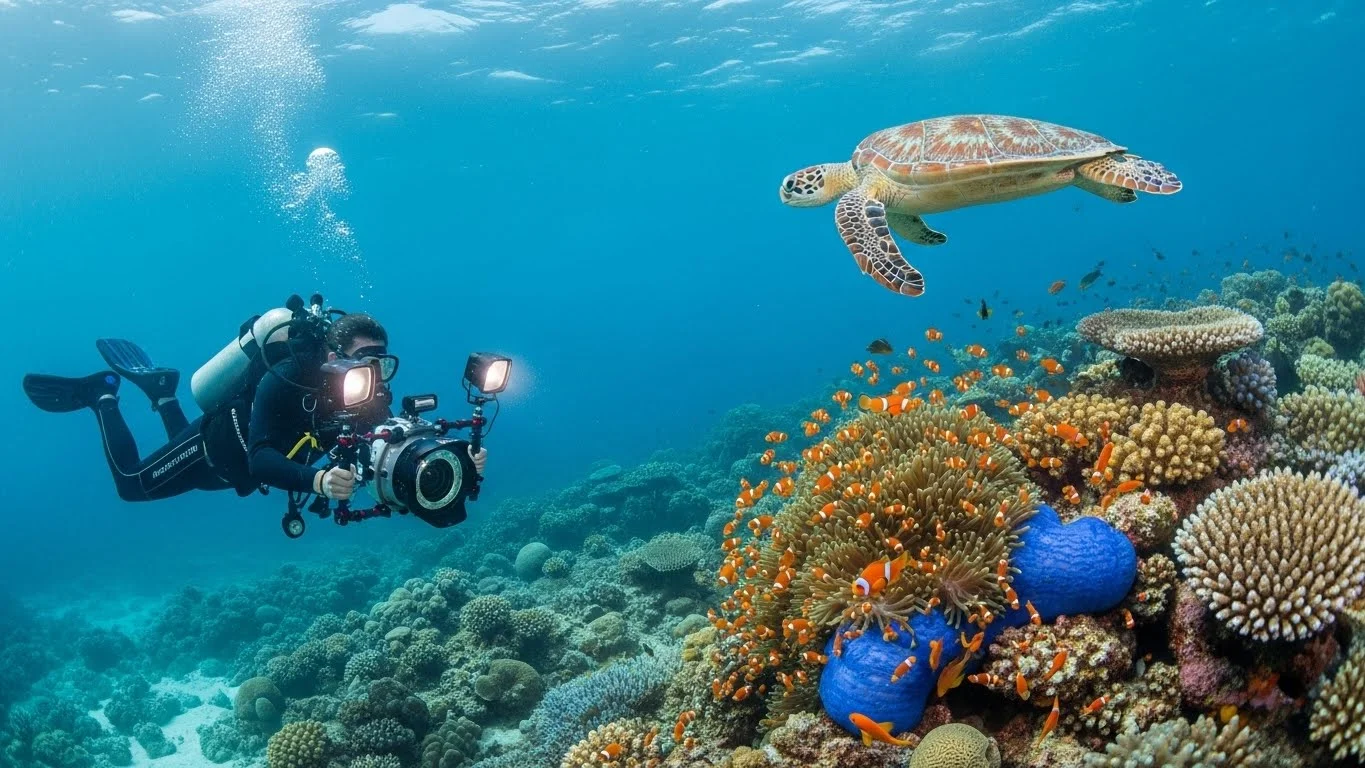
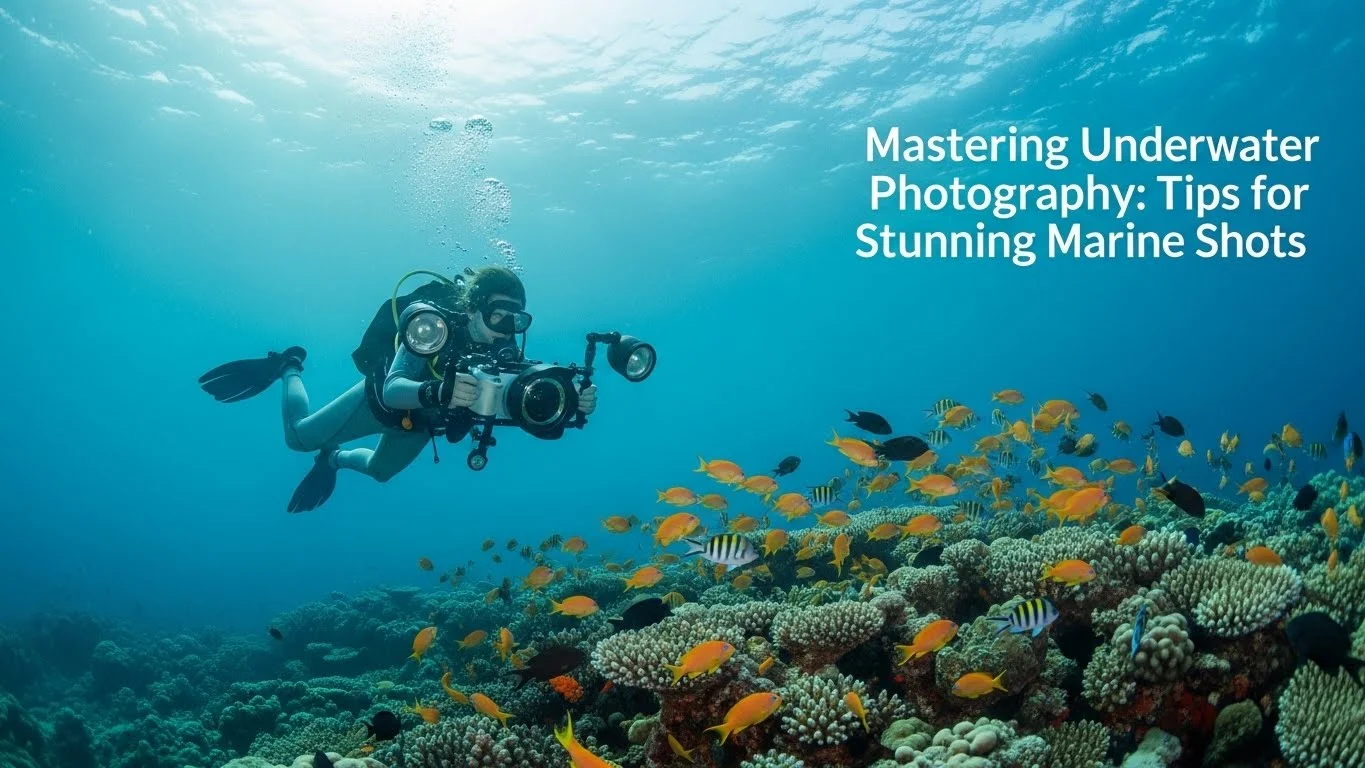
Capturing the beauty of marine life underwater can feel like a dream come true. With the right tips and techniques, you can transform your underwater photography from ordinary to extraordinary. Read Interesting article: Mastering Underwater Photography: Tips for Stunning Marine Shots

Top Tips for Photographing Marine Life Underwater Like a Pro

Understanding Underwater Photography

When I first dipped my toes into underwater photography, I quickly learned it’s not just about having a camera and a love for the ocean. There’s a whole world of understanding that goes into this art form. One of the first things I realized is that the unique environment underwater presents both challenges and opportunities that are unlike anything on land.

The Importance of Lighting in Underwater Photography

Lighting is a critical aspect of underwater photography. Above water, we often rely on natural sunlight, but underwater, that sunlight diminishes quickly as you go deeper. I remember my first few dives where I struggled with murky images, realizing that without sufficient light, colors would wash out and details would be lost. The deeper you go, the more the colors fade, losing reds and yellows first, which is why I invested in external strobes. These add vibrant colors back to my images and help illuminate the underwater world, making it come alive. I recommend practicing with different lighting setups to see how they affect your images. Sometimes, a little adjustment can yield stunning results.

Types of Underwater Photography

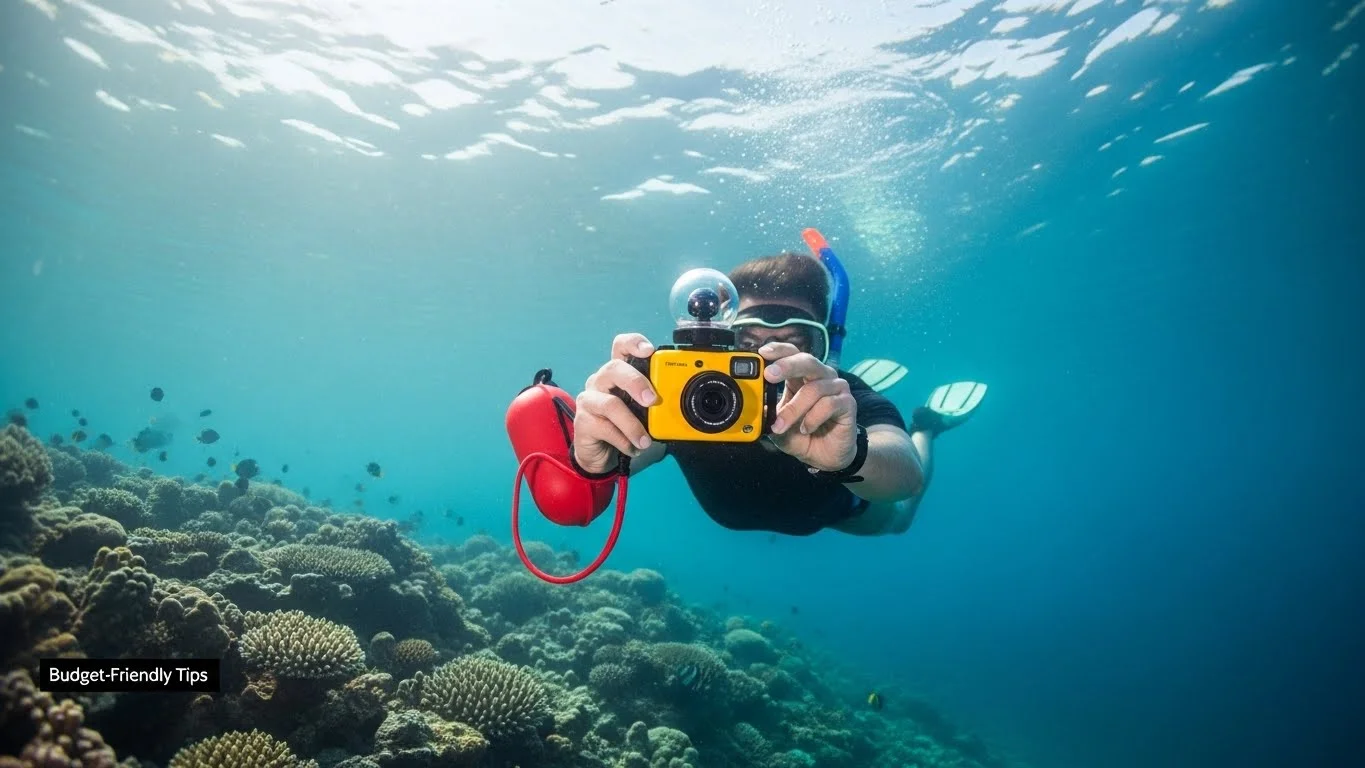
There are various types of underwater photography, each offering its own unique perspective and challenges. For me, I love capturing the vibrant world of coral reefs and the fascinating behaviors of marine life. However, there’s also macro photography that focuses on tiny creatures and details; I’ve spent hours trying to get the perfect shot of a tiny shrimp or a nudibranch. Wide-angle photography is perfect for capturing larger marine animals or sweeping vistas of coral gardens. I often switch styles depending on my location and what I want to convey. Understanding these types will help you choose the right approach for your shoots. Read Interesting article: Best Budget-Friendly Underwater Photography Equipment Tips

Essential Equipment for Capturing Marine Life

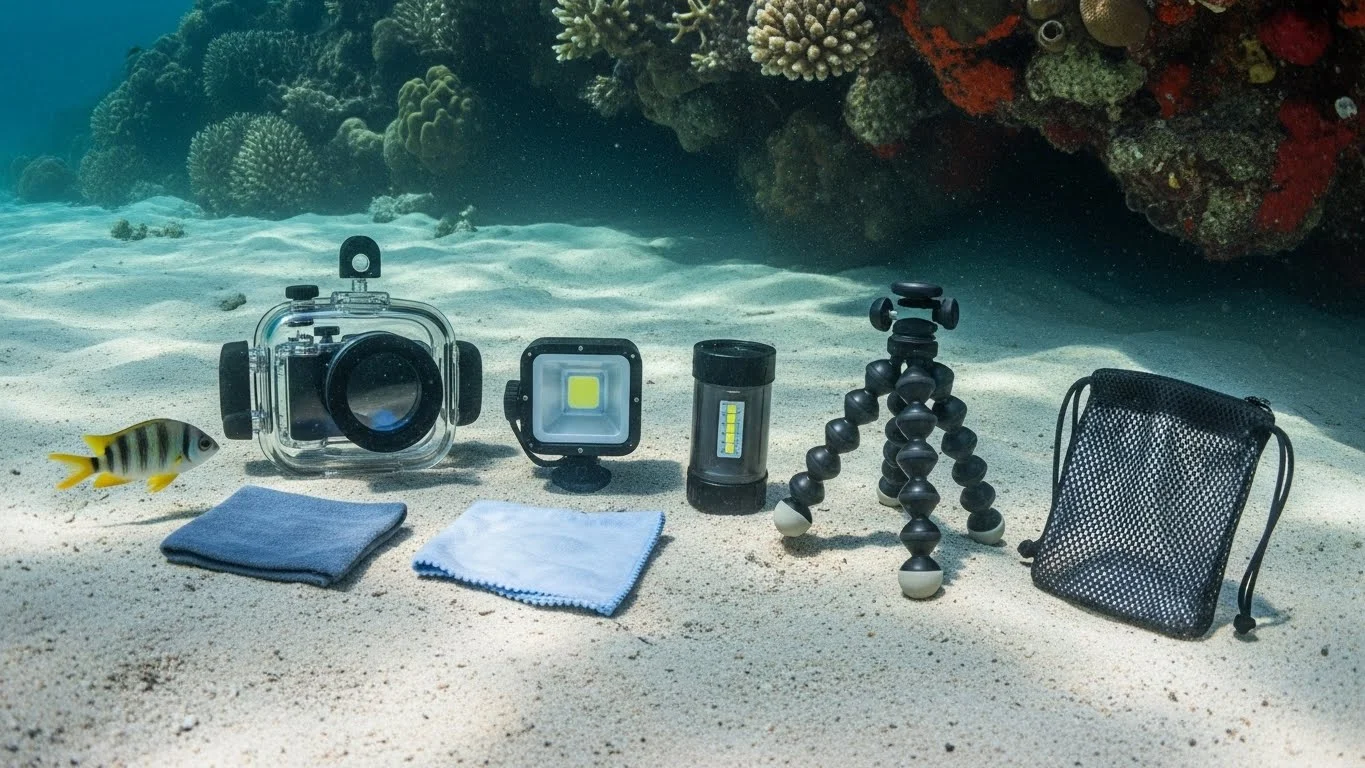
The right equipment can make a huge difference in your underwater photography experience. I started with a basic waterproof camera, but I quickly realized I wanted more control over my shots. Investing in a DSLR camera with a housing unit was a game-changer for me. It’s essential to ensure that your camera is properly sealed and rated for the depths you plan to explore. Additionally, a good lens will enable you to capture sharp images at various distances. I recommend a versatile zoom lens for flexibility, allowing you to transition between wide-angle and macro shots without needing to change lenses underwater.

Other essential gear includes a sturdy underwater housing, float straps, and possibly a dive light for low-visibility conditions. Don’t forget about your safety equipment: a dive computer, proper buoyancy control devices, and a wetsuit to keep you comfortable. Remember, safety first; the underwater world is beautiful, but it can also be unpredictable. From my experience, being well-prepared allows you to focus on capturing those breathtaking moments instead of worrying about your gear.

Preparing for Your Underwater Shoot

Preparation is key when it comes to underwater photography. I can’t stress enough how much research and planning have improved my shoots. Knowing what to expect can make your experience much more enjoyable and productive.

Selecting the Right Location for Marine Life Photography

Choosing the right location can significantly impact your photography. Some of my favorite spots have been coral reefs teeming with life, while other times I’ve found beauty in shipwrecks or kelp forests. I usually look for places known for rich biodiversity, as this increases your chances of encountering interesting marine life. Websites and forums dedicated to diving often provide insights into the best locations based on marine seasons and sightings. I’ve made some amazing discoveries by connecting with local divers and photographers who share their favorite spots.

Best Times for Underwater Photography

Timing your dives can also make a big difference. I’ve noticed that marine life is often more active during specific times of the day, such as early mornings or late afternoons. Additionally, certain times of the year are more favorable for specific species. For example, if you want to photograph whale sharks, planning your trip around their migration season is crucial. Through trial and error, I’ve found that diving during the right conditions can lead to some of my most memorable shots.

Understanding Tides and Currents

Tides and currents can be both a friend and foe for underwater photographers. I’ve had experiences where strong currents made it challenging to stay in position for that perfect shot, while other times, gentle currents helped me glide effortlessly alongside marine life. I always check the tide tables and current forecasts before planning a dive. Understanding these factors not only helps me choose the best times to dive but also ensures my safety while capturing stunning images. It’s all about knowing how the ocean behaves!

Camera Settings and Techniques

Choosing the Right Camera for Underwater Use

When I first started underwater photography, the choice of camera was a big deal for me. I quickly learned that not all cameras are created equal when it comes to capturing the underwater world. I began with a compact waterproof camera, which was great for beginners, but as my skills improved, I felt the need to upgrade. I now use a DSLR camera with a robust housing that can withstand the pressures of deep dives. For anyone serious about underwater photography, I recommend looking for a camera that not only offers manual controls but also has a good autofocus system and can shoot in RAW format. This gives you more flexibility when editing your photos later. There’s something exciting about having the right gear that makes me feel ready to explore and capture stunning moments.

Settings: ISO, Aperture, and Shutter Speed

Understanding camera settings can feel overwhelming at first, but it’s essential for achieving great underwater shots. I remember my initial confusion with ISO, aperture, and shutter speed; it took some time for me to find the right balance. In my experience, I usually set my ISO between 100 and 400, depending on the lighting conditions. A lower ISO helps reduce noise, which is crucial in the often murky waters where I shoot.

Aperture is another key setting. I often use a wider aperture (like f/4 or f/5.6) to let in more light and create that beautiful bokeh effect in my images. However, if I’m shooting a wide-angle scene, I might switch to a smaller aperture for greater depth of field.

Shutter speed is equally important; I’ve found that a faster shutter speed is really helpful when photographing moving subjects like fish or turtles. A speed of 1/125 or faster usually does the trick, but I always adjust based on the situation. Experimenting with these settings has helped me find the sweet spot for various underwater conditions, making a noticeable difference in the final images.

Using Manual Focus vs. Autofocus

For me, the choice between manual focus and autofocus has been a journey. In the beginning, I relied heavily on autofocus, thinking it would simplify the process. However, I soon learned that underwater, autofocus can struggle with low light or turbulent water. I’ve had moments where I missed the shot because my camera couldn’t lock onto the subject. Now, I often switch to manual focus, especially when I want to photograph a specific creature. I get to position my camera just right, focusing on the subject and composing the shot exactly how I want it. It requires a bit more patience, but the results are usually worth it. I recommend practicing both techniques to see which works best for you in different scenarios.

Techniques for Capturing Marine Life

Approaching Marine Animals Respectfully

One of the most important lessons I’ve learned while photographing marine life is the value of respect for the animals and their environment. I’ve had the privilege of swimming alongside creatures like sea turtles and colorful fish, but I always remember to approach them gently. I try to minimize my movements, allowing them to adjust to my presence. Sometimes, I’ll even sit still and let them come to me. This not only helps me get better shots, but it also ensures that I’m not stressing them out. I feel a sense of responsibility to capture these beautiful moments without disrupting their natural behaviors.

Framing and Composition Tips

Framing and composition have become vital aspects of my underwater photography. I remember the thrill of discovering the rule of thirds and how it could transform my images. Now, I always try to position my subjects along the intersecting lines or within the grid. I also enjoy experimenting with leading lines, like the natural curves of coral or the way light filters down through the water. These techniques can draw the viewer’s eye into the image and create a more dynamic composition. Additionally, I often include a bit of the surrounding environment in my shots, providing context to the subject and telling a more complete story. The more I play around with different compositions, the more I find that thoughtful framing can elevate my images significantly.

Using Natural Light and Flash Effectively

Natural light vs. flash has been a significant topic of discussion in my underwater photography journey. I’ve learned that natural light can create beautiful, soft images, especially if I’m shooting closer to the surface during the golden hour. However, as I dive deeper, I often find that using a flash or strobe is necessary to bring out the colors that can get muted underwater. I’ve had moments where I used both techniques in one dive, depending on the depth and light conditions. Using flash effectively involves learning how to balance it with ambient light, which can take some practice. I typically start with a lower flash power and gradually increase it until I get the desired effect. In my opinion, mastering this balance can significantly enhance the vibrancy of my underwater photos.

Post-Processing Your Underwater Photographs

Editing Software Recommendations

Once I’ve captured my underwater images, the next exciting step is post-processing. This is where I really get to shape my photos into something that reflects the vibrant underwater world I experienced. There are several editing programs out there, but I’ve found a few that work particularly well for my needs. Adobe Lightroom and Photoshop are my go-to choices. They offer a fantastic mix of user-friendly interfaces and powerful tools that allow for detailed adjustments. I remember feeling overwhelmed with all the options at first, but after some practice, I found my rhythm. For those new to editing, I recommend starting with Lightroom; it’s perfect for beginners and great for batch processing. I also like using Capture One for its incredible color grading features. It’s all about finding the software that feels right for you and suits your editing style.

Common Adjustments for Underwater Images

When it comes to editing underwater photographs, there are a few common adjustments I typically make. First, I often start with exposure and contrast. Underwater images can sometimes look a bit flat due to the way light behaves underwater, so I like to boost the contrast to give the photos more depth. I also pay close attention to the white balance. The colors underwater can be tricky, especially if you’re diving at different depths. I’ve found that adjusting the temperature and tint can really bring out the natural colors of the marine life. I’ve spent time experimenting with sliders to find the perfect balance, and it has made a significant difference in how my photos look.

Another adjustment I frequently make is cropping and straightening my images. I’ve learned the importance of keeping the horizon level, especially in underwater shots where it can be easy to lose perspective. Cropping also allows me to focus on the subject better, eliminating any distractions from the edges of the frame. I believe these simple tweaks can elevate an image from good to great.

Enhancing Colors and Reducing Noise

One of the most enjoyable parts of post-processing for me is enhancing the colors in my underwater shots. I love how a little adjustment can bring the vibrant marine life back to life. I usually increase saturation and vibrance, being careful not to overdo it. In my experience, it’s easy to end up with images that look unnatural if you push the colors too far. I also find that using selective color adjustments can help emphasize specific areas of my image, like the bright colors of a coral or the subtle hues of a fish’s scales. It’s all about drawing the viewer’s eye to the focal point.

Noise reduction is another aspect I pay attention to, especially since I often shoot at higher ISOs in low-light conditions. I remember my initial frustration with grainy images, but learning how to use noise reduction settings in my editing software has been a game-changer. I usually find a good balance between preserving detail and reducing noise, which enhances the overall quality of my images.

Post-processing is like the icing on the cake for my underwater photography. It allows me to share the beauty and wonder of the ocean in a way that feels true to my experience. I encourage you to spend time learning these techniques, as they can be the difference between a good photograph and a stunning one. Read Interesting article: Essential Tips for Budget Underwater Adventure Photography

Safety Considerations for Underwater Photographers

Understanding Basic Diving Safety

As much as I love underwater photography, safety is always my top priority. Before every dive, I go through a checklist to ensure I have everything I need and that I’m prepared for the conditions ahead. I’ve learned that understanding basic diving safety is crucial, especially when you’re focused on capturing that perfect shot. One of the first things I always check is my equipment. I make sure my gear is functioning well, with no leaks or malfunctions. I also verify my air supply and double-check my dive plan with my buddy. Diving with someone else not only enhances safety but also makes the experience much more enjoyable.

Another important aspect is understanding my limits. I’ve had moments where the excitement of diving has pushed me beyond what I was comfortable with. It’s essential to know when to surface and when to stick to shallower depths, especially if I’m feeling fatigued or if conditions change unexpectedly. I keep my dive computer handy to monitor my depth and time, ensuring I adhere to safe diving practices.

Equipment Safety Tips

Alongside personal safety, I’ve learned that taking care of my equipment is vital. I remember the first time I took my DSLR underwater; I was nervous about the housing. I make it a point to rinse my gear with fresh water after every dive to remove salt and sand. I also inspect the O-rings on my housing for any signs of wear and tear. Regular maintenance can prevent leaks and extend the life of my equipment. I find that being diligent about my gear not only protects my investment but also gives me peace of mind while I’m underwater.

Finally, I always stay aware of my surroundings. The ocean can be unpredictable, and I’ve had moments where strong currents or unexpected marine life interactions caught me off guard. I try to stay calm and collected, assessing the situation before taking action. I’ve learned that by combining safety practices with my passion for photography, I can have fulfilling and safe underwater adventures.

Frequently Asked Questions

What is the significance of lighting in underwater photography?

Lighting is critical in underwater photography as sunlight diminishes quickly with depth. Without sufficient light, colors wash out and details are lost. Using external strobes can add vibrant colors back to images and illuminate the underwater world effectively.

What types of underwater photography exist?

There are various types of underwater photography including macro photography, which focuses on tiny creatures, and wide-angle photography, which captures larger marine animals or sweeping vistas of coral gardens. Each type offers its own unique perspective and challenges.

What essential equipment is needed for underwater photography?

Essential equipment includes a waterproof camera, a sturdy underwater housing, float straps, and possibly a dive light for low-visibility conditions. A good lens, preferably a versatile zoom lens, is also crucial, along with safety equipment like a dive computer and buoyancy control devices.

How important is preparation for underwater photography?

Preparation is vital for underwater photography. Researching and planning your dives can significantly enhance the experience, making it more enjoyable and productive by knowing what to expect.

When is the best time to go underwater photography?

Best times for underwater photography often include early mornings or late afternoons when marine life is more active. Additionally, certain times of the year are better for specific species, like planning around whale shark migration for optimal photography opportunities.

What camera settings are recommended for underwater photography?

For underwater photography, setting the ISO between 100 and 400 is common, using a wider aperture (like f/4 or f/5.6) for more light, and a faster shutter speed (1/125 or faster) for moving subjects is recommended. Experimenting with these settings can yield better results.

Should I use manual focus or autofocus underwater?

While autofocus can simplify the process, it may struggle in low light or turbulent water. Many underwater photographers switch to manual focus to have better control over their shots, especially for specific subjects, though it requires practice and patience.

What are some common adjustments made during post-processing of underwater photographs?

Common adjustments in post-processing include enhancing exposure and contrast, adjusting white balance for accurate colors, cropping for better composition, and straightening images to ensure a level horizon. These tweaks can elevate the overall quality of the images.

What safety considerations should underwater photographers keep in mind?

Safety considerations include checking equipment for functionality, verifying air supply, and adhering to a dive plan. Understanding personal limits and maintaining awareness of surroundings are also crucial for safe underwater photography experiences.

How can I enhance the colors and reduce noise in my underwater images during editing?

Enhancing colors often involves increasing saturation and vibrance while being careful not to overdo it. Noise reduction is also important, especially when shooting at higher ISOs. Finding the right balance between preserving detail and reducing noise can significantly improve image quality.

Underwater Photography Techniques: Capture Vibrant Ocean Life

Have you ever dreamed of diving into the ocean’s depths to capture its vibrant, colorful life? Underwater photography allows us to explore and share the beauty of the underwater world like never before.

Underwater Photography Techniques: Capture Vibrant Ocean Life

Understanding Underwater Photography

The Basics of Underwater Photography

Underwater photography is a blend of two incredible worlds: photography and marine exploration. When I first dipped my toes into this fascinating hobby, I quickly learned that taking pictures underwater is not as straightforward as it might seem. The moment you submerge, everything changes—the light, the colors, even the way we perceive movement. It’s like entering a different universe. I remember my first few photos were disappointing; they lacked color and clarity. I realized then that understanding the basics would be my first step towards improvement.

One of the first things I discovered was the importance of light. Underwater, colors begin to fade, with reds disappearing at just a few meters deep. This means that I had to adapt my approach to capturing vibrant scenes. I learned to look for contrasts and bright subjects that would stand out against the blue backdrop. Furthermore, the movement of water can distort images, so stability became a key focus. Practicing buoyancy control helped me reduce blurriness in my shots, which I found incredibly rewarding. Read Interesting article: Essential Techniques for Capturing Breathtaking Marine Life

Importance of Equipment

Having the right equipment is crucial for underwater photography. When I started out, I didn’t invest much in gear, thinking it wasn’t necessary. However, as I gained experience, I realized that good equipment can make all the difference. My first camera was a basic point-and-shoot, and while it served its purpose, I quickly found myself frustrated with its limits. I upgraded to a DSLR, which vastly improved my image quality and control over settings.

It’s not just the camera body that matters; the lenses you use can also dramatically affect your images. I found that wide-angle lenses are fantastic for capturing expansive scenes, while macro lenses excel at showcasing the intricate details of small marine creatures. Each lens opened up new creative possibilities for my underwater adventures. Best Budget-Friendly Underwater Photography Equipment Tips

Types of Underwater Photography

Underwater photography encompasses several different styles, each offering a unique way to showcase ocean life. During my journey, I’ve experimented with various types, including wide-angle, macro, and ambient light photography. I found that wide-angle photography is perfect for capturing the grandeur of underwater landscapes, such as coral reefs or shipwrecks. It immerses the viewer in the scene, making you feel as though you’re swimming alongside the marine life.

On the other hand, macro photography allows for detailed close-ups of tiny creatures, revealing the intricate patterns and colors that often go unnoticed. I remember coming across a vibrant nudibranch one day and being mesmerized by its beauty. Capturing it with a macro lens was a thrilling challenge, and it taught me to appreciate the smaller inhabitants of the ocean.

Another approach I found intriguing was ambient light photography, which relies on natural light rather than additional strobes. This technique can create soft, ethereal images, particularly during the golden hours of sunrise or sunset. I often used this method to create dreamy shots of swimming dolphins or playful turtles silhouetted against the sunlit surface.

Essential Equipment for Underwater Photography

Camera Types: DSLR vs. Mirrorless vs. Compact

Choosing the right camera for underwater photography depends on your level of expertise and the type of shots you want to achieve. I started with a compact camera, which was lightweight and easy to use for beginners. However, as I grew more passionate, I transitioned to a mirrorless system. I found mirrorless cameras to be lighter and more versatile than DSLRs, especially when diving. They offer excellent image quality and the ability to change lenses, which is essential for underwater photography.

Underwater Housing Options

Regardless of the camera type, investing in a quality underwater housing is vital. I learned this the hard way when I accidentally submerged my first camera without proper protection. There are various housing options available, ranging from budget-friendly to professional-grade. Choosing the right one can keep your equipment safe and dry while allowing you to access all the necessary controls under the water.

Lenses for Underwater Photography

Having the right lenses can enhance your underwater photography experience significantly. I mainly use wide-angle lenses for capturing grand scenes and macro lenses for those incredible tiny details. Wide-angle lenses help you capture the vastness of the ocean while showcasing the colorful fish and stunning coral formations in the foreground. Conversely, macro lenses let you explore the hidden wonders of the ocean, like the delicate patterns on a sea star.

Lighting: Strobes and Video Lights

Underwater lighting is another critical aspect I had to learn about. When I first started, I relied solely on natural light, but I quickly noticed that colors were still washed out deeper in the water. Adding strobes or video lights can illuminate your subjects and restore the vibrant colors that the ocean tends to swallow. I remember my first time using a strobe; the difference was astonishing! Suddenly, I could see the vivid reds and oranges of the coral I had been missing.

Accessories: Buoyancy Control Devices and Tripods

Lastly, don’t underestimate the power of accessories. Buoyancy control devices (BCD) help you maintain your position in the water without your hands, allowing you to focus on capturing that perfect shot. I also found tripods helpful for stabilizing my camera when photographing stationary subjects, especially in murky waters. These small adjustments made a world of difference in my underwater photography, giving me more control over my shots.

Techniques for Capturing Vibrant Ocean Life

Composition Techniques

When I first started underwater photography, I quickly learned that composition plays a crucial role in creating captivating images. The way I framed my shots could either enhance the beauty of the scene or distract from it. One technique that I found incredibly useful was the rule of thirds. By dividing my image into a 3×3 grid, I could place important subjects along the lines or at their intersections, which often resulted in more visually appealing photos. I experimented with this technique during a dive at a reef, and it transformed my images from ordinary to extraordinary.

Leading lines have also become a favorite of mine. I noticed that the natural formations of coral or the way fish swim in schools can guide the viewer’s eye through the photo. This technique helped me capture the sense of movement and life in the ocean. Additionally, I’ve learned to play with perspective. Sometimes, getting low to the sand or shooting from above can create a dramatic effect and provide unique insights into underwater life.

Using Natural Light Effectively

Natural light can be both a friend and a foe in underwater photography. I remember my first dives where I relied heavily on sunlight. I quickly discovered that as I descended, the intensity of light changed, and colors began to fade. To make the most of natural light, I learned to shoot upwards towards the surface during daytime dives, capturing the sun’s rays filtering through the water. This technique created stunning beams of light that added depth and drama to my images.

Timing is also essential. I’ve found that the golden hours—just after sunrise and before sunset—provide the most beautiful lighting conditions. The warm tones during these times not only enhance colors but also create a magical atmosphere. I try to plan my dives around these periods, making the extra effort to wake up early or stay out late to capture those golden moments.

Mastering White Balance Underwater

Mastering white balance underwater was another game changer for me. I remember struggling with images that appeared overly blue or green due to the water’s natural colors. It became clear that adjusting the white balance was vital for maintaining accurate colors. While some cameras have an automatic white balance setting, I found that using manual settings often yielded better results. I started experimenting with different white balance presets, and I even learned how to adjust it in post-processing to restore the true colors of the underwater world.

During a dive, I would take a few test shots and adjust my settings accordingly. I often brought a white slate or a piece of light-colored coral with me to help set my white balance accurately. This little trick made a significant difference in my photos, allowing me to capture the vibrant hues of marine life that I had initially overlooked.

Macro Photography Techniques

Macro photography has become one of my absolute favorite styles for underwater shooting. I was astonished at the intricate details of marine creatures that I’d missed in wider shots! To excel in macro photography, I learned the importance of getting close to my subjects while maintaining a steady hand. I often practiced my buoyancy control to avoid disturbing the sand or coral, which could cloud the water and ruin a potential shot.

Using manual focus was another technique that I adopted. Autofocus can sometimes struggle with close-up shots, so by manually focusing on my subject, I could ensure I captured the intricate details, like the tiny hairs on a shrimp or the delicate textures of a starfish. I also found that using a smaller aperture enhanced the depth of field, allowing me to keep more of my subject in focus, which was especially helpful for photographing small creatures.

Wide-Angle Photography Techniques

Wide-angle photography has its own set of challenges and rewards. I learned that capturing expansive underwater scenes requires a different approach than macro photography. I began to focus on creating a sense of depth in my wide-angle shots. To do this, I would try to include both foreground and background elements. For example, I’d position colorful coral or a diver in the foreground while capturing the vastness of the ocean behind them. This layering technique often resulted in stunning images that conveyed the scale and beauty of underwater environments.

Additionally, I experimented with different angles and perspectives. Shooting from below the subject looking up often produced dramatic images, especially when the sun was shining above. I also found that incorporating leading lines, like the edges of a reef or the curves of a school of fish, helped guide the viewer’s eye through the composition and added an engaging dynamic to my photos.

Best Practices for Underwater Photography

Maintaining Equipment Safety

One of the most important lessons I learned in my underwater photography journey is the significance of keeping my gear safe. The underwater environment can be harsh and unpredictable, and I quickly discovered that one small mistake could lead to a ruined camera. I remember my first dive, excitedly taking pictures, only to realize I hadn’t properly secured my underwater housing. Water began to seep in, and I was heartbroken. Since then, I’ve made it a priority to always check seals and closures before each dive.

I also invested in a good quality float strap. This simple accessory can be a lifesaver. It keeps your camera from sinking to the ocean floor if you accidentally let go of it. Plus, I’ve found that using a dive bag specifically designed for underwater photographers can help keep everything organized and safe during transport. Regular maintenance is key too; rinsing my gear in fresh water after each dive helps prevent salt buildup and ensures longevity.

Understanding Ocean Currents and Conditions

Understanding the conditions of the ocean is crucial for successful underwater photography. I remember my first dive in a location known for strong currents. I felt overwhelmed as I struggled to maintain my position while trying to capture images. Since then, I’ve learned to take time to familiarize myself with the area before diving. Checking local tide charts and understanding how currents work can help ensure a safer and more enjoyable experience.

It’s also important to consider visibility. Sometimes, I’ve found that diving early in the morning or later in the afternoon provides better light and clearer water. I’ve often planned my dives around these times to increase my chances of capturing stunning images. Additionally, being mindful of weather conditions can help. If I notice that the ocean is choppy or that there’s a storm brewing, I’ve learned to rethink my plans for the day.

Respecting Marine Life and Environment

As underwater photographers, we have a responsibility to respect the marine life and environments we explore. During my early days, I didn’t fully grasp the impact of our actions on delicate ecosystems. I remember one time inadvertently disturbing a nesting sea turtle while trying to take a photograph. The incident opened my eyes to the importance of maintaining a respectful distance from wildlife. I’ve since adopted a “look, don’t touch” philosophy. This approach allows us to enjoy the beauty of the ocean while ensuring that we don’t disrupt the natural behaviors of its inhabitants.

Additionally, I make it a point to educate myself about local regulations and conservation efforts in the areas I dive. Many locations have specific guidelines aimed at protecting marine life, and adhering to these rules is crucial. I often support local conservation initiatives and participate in beach cleanups whenever possible. It’s a small way to give back to the ocean that has given me so much joy and inspiration.

Post-Processing Tips for Underwater Photography

Editing Software Options

Post-processing is where I really get to enhance my underwater images and bring them to life. After I upload my photos, I dive into editing software. I’ve experimented with several options over the years, but Adobe Lightroom and Photoshop have become my go-to tools. They offer a range of features that allow me to adjust colors, contrast, and sharpness effectively.

For those just starting, I recommend exploring free software like GIMP or even mobile apps like Snapseed. They might not have all the bells and whistles, but they are user-friendly and can help you learn the basics of photo editing without feeling overwhelmed.

Color Correction Techniques

Color correction is one of the most crucial aspects of editing underwater photos. I’ve often found that my images can appear too blue or green, a common issue caused by the natural colors of the water. To fix this, I use the white balance tool in my editing software, adjusting the temperature and tint to bring out the true colors of the marine life. Sometimes I’ll even use the HSL (Hue, Saturation, Lightness) sliders to enhance specific colors, like the vibrant oranges of coral or the deep blues of the ocean.

Another technique I’ve found useful is adjusting the vibrance and saturation selectively. This means I can boost colors without making the entire image look unnatural. It’s all about finding that perfect balance to make the scene pop while still looking realistic.

Enhancing Details and Sharpness

One of my favorite parts of post-processing is enhancing details and sharpness. I’ve learned that subtle adjustments can make a world of difference. Using the clarity slider helps to bring out the textures in coral and the fine details of fish scales. I also apply a slight sharpening filter, but I’m careful not to overdo it; too much sharpening can lead to artifacts that detract from the overall quality of the image.

Lastly, cropping can be a powerful tool. I often find that a little crop can help to focus attention on the subject and eliminate distractions from the background. By experimenting with different compositions in post-processing, I can create images that truly capture the beauty and essence of the underwater world.

Frequently Asked Questions

What is underwater photography?

Underwater photography is a blend of photography and marine exploration that allows individuals to capture and share the beauty of the underwater world.

Why is lighting important in underwater photography?

Lighting is crucial because colors begin to fade underwater, with reds disappearing at just a few meters depth. Understanding how to adapt to these changes is essential for capturing vibrant images.

What types of cameras are recommended for underwater photography?

Choosing between DSLR, mirrorless, or compact cameras depends on your expertise and the type of shots you want. For beginners, compact cameras are lightweight and easy to use, while mirrorless systems offer more versatility as you gain experience.

What types of lenses are best for underwater photography?

Wide-angle lenses are excellent for capturing expansive underwater scenes, while macro lenses are ideal for detailed close-ups of small marine creatures. Each lens type enhances different aspects of underwater photography.

How can I improve my underwater photography composition?

Utilizing techniques like the rule of thirds, leading lines, and varying perspectives can enhance composition. Framing your shots thoughtfully can either enhance or distract from the beauty of the scene.

What is the importance of buoyancy control in underwater photography?

Buoyancy control is vital for maintaining stability and reducing blurriness in underwater shots. Practicing buoyancy helps photographers avoid disrupting the water and their subjects.

How can I effectively use natural light underwater?

To maximize natural light, shoot upwards towards the surface during daytime dives and aim to dive during golden hours for the best lighting conditions, which enhance color and atmosphere.

What are some best practices for maintaining underwater photography equipment?

Always check seals and closures before each dive, use a float strap to prevent loss, and rinse equipment in fresh water after each dive to prevent salt buildup. Regular maintenance is crucial for longevity.

How can I respect marine life while underwater photography?

Photographers should maintain a respectful distance from wildlife, avoid disturbing habitats, and educate themselves about local regulations and conservation efforts. Adopting a “look, don’t touch” philosophy is important for protecting marine ecosystems.

What software is recommended for post-processing underwater photos?

Adobe Lightroom and Photoshop are popular choices for editing underwater photos. For beginners, free options like GIMP or mobile apps like Snapseed can help you learn basic editing skills.

Essential Techniques for Capturing Breathtaking Marine Life

Capturing the beauty of marine life can be one of the most rewarding experiences for any photographer. Whether you’re snorkeling in a coral reef or diving in deep waters, the underwater world offers endless opportunities for breathtaking imagery. To truly excel, consider mastering underwater photography techniques.

Essential Techniques for Capturing Breathtaking Marine Life

Understanding Marine Life Photography

When I first dipped my toes into marine life photography, I realized it wasn’t just about having a good camera. It was about understanding the environment and the creatures that inhabit it. The thrill of capturing a fleeting moment, like a school of fish darting through the water, is exhilarating. Knowing how to navigate the underwater landscape and the unique behaviors of marine animals is key to creating stunning images.

The Importance of Marine Life Photography

Marine life photography does more than just capture pretty pictures; it plays a vital role in raising awareness about our oceans and the creatures living within them. Personally, I feel that every photograph tells a story. Whether it’s a close-up of a delicate sea turtle or a sweeping shot of a vibrant coral reef, these images can evoke emotions and ignite a passion for conservation. I’ve experienced moments where a simple photo sparked conversations about marine preservation, and that’s incredibly powerful.

Types of Marine Life to Capture

From my experience, there are countless species to photograph, each with its own charm and challenges. I’ve found some of my favorite subjects include:

  • Fish: Schools of fish can create dynamic compositions, especially when they move in sync. The challenge is to anticipate their movements.
  • Mammals: Dolphins and whales offer incredible opportunities, but their size and speed can make capturing them tricky.
  • Corals: The colors and textures of coral reefs are astonishing. I love photographing them up close to show their intricate details.
  • Invertebrates: Creatures like octopuses and seahorses can be elusive but rewarding subjects. Their unique shapes and colors can make for eye-catching photography.

Every type of marine life presents its own set of challenges and rewards, and I think that’s part of what keeps me coming back for more.

Essential Equipment for Marine Life Photography

Having the right gear can make a significant difference in your underwater photography. I remember feeling overwhelmed by the choices when I started, but over time, I’ve narrowed down the essentials that have worked best for me. If you’re looking for budget-friendly options, check out essential underwater photography accessories on a budget.

Camera Types and Features

The type of camera you use can vary widely depending on your budget and preferences. I personally use a mirrorless camera because it’s compact and versatile. Here are a few features I recommend considering:

  • Waterproof Housing: Investing in a good-quality housing is crucial if you’re using a DSLR or mirrorless camera. It protects your gear and allows you to shoot at depth.
  • Manual Controls: I find that having manual settings gives me more control over my shots, especially in varying light conditions underwater.
  • Fast Autofocus: Marine life can be unpredictable, so a camera with quick autofocus can help you capture those split-second moments.

Lenses for Underwater Photography

The lens you choose can make or break your underwater photos. Wide-angle lenses are my go-to for capturing expansive reef scenes and large marine animals. I also keep a macro lens handy for those close-up shots of smaller creatures. I remember the first time I used a macro lens to photograph a nudibranch; the details were simply mesmerizing.

Accessories: Lights, Filters, and More

Lighting underwater can be challenging due to the water’s natural filtration of light. I often use external strobes to illuminate my subjects, which helps bring out their colors. Additionally, color correction filters can be beneficial, especially when shooting in deeper waters where colors tend to wash out. I’ve learned the hard way that without proper lighting, even the most vibrant subjects can look dull and lifeless.

In my journey as a marine life photographer, I discovered that having the right equipment and understanding how to use it is foundational. As I continue to explore the depths of the ocean, I feel more prepared with every dive, and I can’t wait to see what beauty awaits beneath the waves. For those looking for affordable options, consider checking out affordable underwater photography gear for backpackers.

Techniques for Capturing Stunning Images

As I’ve spent more time underwater, I’ve come to realize that having the right equipment is only part of the equation. The techniques we employ can truly elevate our marine life photography. I remember the first few dives I took, feeling like I was just pointing and shooting. It wasn’t until I started focusing on specific techniques that I saw a real improvement in my images.

Composition Tips for Marine Photography

Composition is one of those elements that can make or break a photograph. I learned early on that the rule of thirds applies just as much underwater as it does on land. Positioning my subject along the lines or at the intersections of the grid can create a more balanced and engaging image. I often try to include leading lines, like coral formations or schools of fish, that guide the viewer’s eye through the photograph. One of my favorite techniques is to shoot from below marine life; it can create a dramatic perspective, especially when sunlight filters down through the water.

Another tip I’d recommend is to pay attention to the background. I’ve spent time adjusting my angle to avoid distracting elements in the frame. A clean background can make your subject pop, and using negative space effectively can add depth to the composition. I’ve found that even a slight shift in position can significantly change the overall feel of the image.

Understanding Lighting Underwater

Lighting is often the biggest challenge in underwater photography. I remember my first few attempts where I thought I could rely solely on natural light, only to surface with dull, lifeless images. I learned that the deeper you go, the more colors get filtered out. That’s when I decided to invest in external strobes. These lights can help illuminate my subjects, bringing back the vibrant colors that water tends to wash away.

I also discovered the importance of shooting during the golden hours—just before sunrise or just after sunset. The soft, diffused light can create a magical atmosphere, enhancing the details in the water and giving my images a warm glow. I try to plan my dives around these times, and the results have consistently amazed me.

Using Color and Contrast Effectively

Color is one of the most fascinating aspects of underwater photography. I believe it’s essential to think about how colors interact in your frame. Vibrant marine life against a contrasting background can create striking images. For instance, I’ve found that shooting a bright clownfish against the deep blues of an anemone can create a captivating contrast that draws the viewer in.

Paying attention to the color palette can also help convey the mood of the image. Cooler tones can evoke a sense of calmness, while warmer tones might suggest vibrancy and energy. I often experiment with different angles and distances to see how the colors shift in different lighting conditions. This exploration has helped me create more dynamic and engaging photographs.

Planning Your Dive or Snorkel Session

After learning techniques for capturing stunning images, I found that planning my dive or snorkel sessions became equally important. A little preparation can make a world of difference in the outcomes of my photography adventures. I remember heading out without much thought, only to find myself in less-than-ideal conditions. Now, I take the time to plan my outings carefully.

Choosing the Right Location

The location can heavily influence the types of marine life I encounter and the quality of my images. I’ve visited various spots, from bustling coral reefs to serene kelp forests, and each has its own unique charm. I recommend researching locations known for their biodiversity. Online forums, local dive shops, and social media can be great resources for finding hidden gems.

In my experience, some locations are better during certain seasons. For example, I’ve found that certain areas might be teeming with marine life during particular migration seasons. I always keep an eye on the local marine calendars to maximize my chances of encountering interesting subjects.

Best Times for Marine Life Activity

I’ve noticed that different marine species have varying levels of activity at different times of the day. Early mornings often yield more action, as many creatures are just starting their day. Conversely, I’ve found that some species, like certain fish and nocturnal creatures, are more active during dusk and dawn. I’ve adjusted my dive schedules to align with these patterns and have been rewarded with more dynamic shots.

Additionally, tide changes can impact visibility and marine life behavior. I’ve learned to check tide charts to plan my dives accordingly, aiming for times when the currents are at their gentlest. This not only makes for a safer dive but helps me maintain stability while capturing images.

Safety Precautions and Guidelines

Safety is paramount when exploring the underwater world. I’ve had my share of close calls, and those experiences taught me the importance of being well-prepared. Before any dive or snorkel, I ensure I have all necessary gear, including a dive computer, safety float, and a buddy system in place. Keeping communication open with my dive partner is essential, and we always establish signals for various scenarios.

Additionally, I’m always mindful of my surroundings. I’ve learned the hard way that marine life can be unpredictable. Maintaining a respectful distance from creatures, especially potentially dangerous ones like sharks or jellyfish, is crucial for both my safety and theirs. Understanding our environment helps create a more enjoyable experience and leads to better photography outcomes.

Editing Techniques for Marine Life Photography

Once I started capturing stunning underwater images, I realized that editing is just as essential as shooting. The post-processing stage allows us to enhance our photos and create the desired mood or atmosphere. I remember feeling a bit intimidated when I first opened editing software, but with practice, I’ve found it to be an exciting part of the creative process.

Post-Processing Software Options

There are several software options out there, and choosing the right one can make a difference in your editing experience. I’ve tried various programs, but I keep coming back to Adobe Lightroom and Photoshop for my editing needs. Lightroom is fantastic for organizing and making global adjustments, like exposure and color balance, while Photoshop offers more advanced editing features for retouching and fine-tuning.

If you’re looking for something more budget-friendly, I’ve also heard great things about Capture One, which some photographers swear by for its color grading capabilities. For mobile editing, apps like Snapseed have done wonders for my photos when I’m on the go. It’s amazing how a few adjustments can elevate an image to the next level, especially when it comes to underwater photography.

Enhancing Colors and Details

Underwater photos often need a little love to bring out the colors that might have been lost due to the water’s filtering effect. One technique I love is adjusting the white balance to make the colors pop. I typically increase the vibrancy and saturation slightly to enhance the natural hues of marine life without overdoing it. I remember the first time I adjusted the colors of a coral reef shot—I was stunned at how much more alive it looked!

Sharpening is another key step in my editing process. I’ve learned that a little bit of sharpening can go a long way in bringing out the details of fish scales or the textures of coral. It’s important to be cautious, though; too much sharpening can lead to an unnatural look. I usually zoom in on my images while sharpening to ensure everything looks crisp but not overly processed.

Common Editing Mistakes to Avoid

Editing can be tricky, and there are a few common pitfalls I’ve encountered on my journey. One of the biggest mistakes is over-editing. It’s easy to get carried away with sliders, but I’ve found that keeping things natural often yields the best results. I remind myself to take breaks during editing sessions to return with fresh eyes and a clearer perspective.

Another mistake is neglecting the importance of cropping. I used to ignore this step, but cropping can significantly improve composition and overall impact. I always check my image for any distracting elements at the edges and adjust the crop accordingly. This simple step can make a world of difference.

Lastly, I’ve learned to save my edits in non-destructive formats. This way, I can revisit my original images and make changes later if needed. It gives me the flexibility to experiment without the fear of permanently altering my precious shots. Keeping an organized workflow has been a game-changer for me, allowing for smoother editing sessions and more time to enjoy my photography.

Ethical Considerations in Marine Life Photography

As I’ve delved deeper into marine life photography, I’ve also become increasingly aware of the ethical responsibilities that come with this passion. The ocean is a delicate ecosystem, and I believe it’s our duty to respect it while pursuing our artistic endeavors. I remember feeling a mix of excitement and anxiety during my first few dives, knowing that my actions could impact the very subjects I was there to capture.

Respecting Wildlife and Their Habitat

One of the core principles I adhere to is minimizing disturbance to marine life. I’ve seen how stressed creatures can become when approached too closely. It’s crucial to maintain a respectful distance and observe their behaviors without intruding on their space. I often remind myself that I’m a guest in their home, and just like in our own lives, we wouldn’t want strangers invading our personal space.

Additionally, I’ve learned to be mindful of the environment around me. I avoid touching corals or marine creatures, as even a gentle touch can cause harm. I’ve heard horror stories about divers damaging fragile ecosystems, and I always strive to leave no trace behind. Every time I dive, I make it a point to pick up any trash I see, ensuring that I contribute positively to the ocean’s health.

Best Practices for Minimizing Impact

Education plays a significant role in ethical marine photography. I’ve found that learning about local ecosystems and species helps me understand their needs and vulnerabilities. This knowledge has guided my decisions about when and where to dive. I often participate in local workshops that focus on marine conservation, as they deepen my appreciation for the underwater world.

Joining organizations dedicated to marine protection has also been a rewarding experience. I’ve met like-minded individuals who share my passion for photography and conservation, and together, we work toward raising awareness about marine issues. I believe that our photographs can be powerful tools for change, and I strive to use my work to advocate for the protection of our oceans.

As I continue my journey in marine life photography, I remain committed to both capturing the beauty of the underwater world and preserving it for future generations. Each dive is a reminder of the responsibility I carry as a photographer and an advocate for marine life.

Sharing Your Marine Life Photography

Now that I’ve discussed the importance of ethics and the editing process, let’s talk about sharing our marine life photography with the world. I’ve found that showcasing our work can open up new opportunities and help inspire others to appreciate and protect our oceans.

Online Platforms for Showcasing Your Work

When I first started sharing my underwater photos, I was amazed by how many platforms were available to showcase my work. Social media channels like Instagram and Facebook have become my go-to places for sharing images and connecting with fellow photographers. I love how these platforms allow me to engage with people who share my passion for marine life.

Besides social media, I’ve also explored photography websites and blogs. Many of these platforms encourage submissions from photographers, providing a space to gain exposure. Participating in online contests has also been a fun way to challenge myself and receive constructive feedback on my work.

Engaging with the Marine Photography Community

Connecting with fellow marine photographers has enriched my journey immensely. I often join online forums and groups where we share tips, experiences, and critiques of one another’s work. I’ve learned so much from others, and the support within this community is truly inspiring. I remember the first time I received feedback on my work—it motivated me to improve and experiment with new techniques.

Attending photography exhibitions and local meet-ups has also helped me forge connections with others who share my interests. I’ve discovered that collaborating on projects can lead to incredible opportunities, whether it’s co-hosting workshops or participating in conservation initiatives. These experiences remind me that our passion for marine life photography can be a powerful force for good.

Frequently Asked Questions

What is marine life photography?

Marine life photography is the art of capturing images of the underwater world, including its creatures and ecosystems. It involves understanding the environment and the behaviors of marine animals to create stunning imagery.

Why is marine life photography important?

Marine life photography raises awareness about ocean conservation and the creatures living within it. Each photograph tells a story and can evoke emotions that spark conversations about marine preservation.

What types of marine life can be photographed?

Photographers can capture a variety of marine life, including fish, mammals (like dolphins and whales), corals, and invertebrates (such as octopuses and seahorses). Each type presents unique challenges and rewards.

What essential equipment is needed for marine life photography?

Essential equipment includes a good-quality camera (preferably a mirrorless or DSLR with waterproof housing), lenses (wide-angle for expansive scenes and macro for close-ups), and accessories like external strobes and color correction filters.

What techniques can improve marine life photography?

Key techniques include understanding composition (like the rule of thirds), managing lighting conditions, utilizing color and contrast effectively, and planning dive or snorkel sessions for optimal outcomes.

How can lighting affect underwater photography?

Lighting is crucial in underwater photography because water filters colors. Using external strobes can help illuminate subjects, while shooting during golden hours can enhance the atmosphere of the images.

What are common editing mistakes in marine life photography?

Common editing mistakes include over-editing images, neglecting to crop for better composition, and failing to save edits in non-destructive formats, which can hinder flexibility in the editing process.

What ethical considerations should photographers keep in mind?

Photographers should minimize disturbance to marine life, avoid touching corals or creatures, and engage in sustainable practices to protect the delicate ecosystems they are capturing.

How can photographers share their marine life photography?

Photographers can share their work on social media platforms like Instagram and Facebook, photography websites, and blogs. Participating in online contests and engaging with the marine photography community can also enhance visibility.

What is the significance of joining marine conservation organizations for photographers?

Joining marine conservation organizations allows photographers to meet like-minded individuals, participate in workshops, and advocate for marine protection, enhancing both their photography journey and their commitment to conservation.

Mastering Underwater Photography: Tips for Stunning Marine Shots

Underwater photography opens up a mesmerizing world beneath the waves, capturing the beauty of marine life like nothing else. If you’re ready to dive in and take stunning shots, let’s explore the essential elements of this exciting art form!

Mastering Underwater Photography: Tips for Stunning Marine Shots

Understanding Underwater Photography

What is Underwater Photography?

Underwater photography is the art of taking pictures while submerged in water, typically in oceans, lakes, or rivers. I remember the first time I donned my diving gear and slipped beneath the surface; the vibrant colors and dynamic creatures blew my mind. This form of photography can range from capturing small, intricate marine organisms to sweeping landscapes of coral reefs. The thrill of freezing a moment in time while underwater is exhilarating, and every shot tells a unique story about life beneath the waves.

The Importance of Underwater Photography

Underwater photography plays a crucial role in raising awareness about marine ecosystems and conservation. I’ve seen how powerful images can evoke emotions and inspire action. By showcasing the beauty and fragility of underwater life, photographers help advocate for the protection of these environments. Plus, with over 70% of our planet covered by water, there’s an entire world to explore and document. Every photograph can serve as a reminder of what is at stake and why we should care about preserving it. Best Budget-Friendly Underwater Photography Equipment Tips can also help aspiring photographers get started without breaking the bank.

Essential Equipment for Underwater Photography

Underwater Cameras: Types and Features

Choosing the right camera is fundamental to underwater photography. I’ve used various types, from compact point-and-shoots to DSLRs, each with its own strengths. Compact cameras are great for beginners due to their portability and ease of use, while DSLRs offer more control and superior image quality. Mirrorless cameras are another fantastic option, providing the benefits of DSLRs without the bulk. When selecting a camera, I always look for features like a fast autofocus system and good low-light performance — both crucial for capturing sharp images in often challenging conditions.

Housing for Cameras: Importance and Choices

Once you’ve picked your camera, you need a reliable housing to protect it underwater. I can’t stress this enough: having a good housing is essential for ensuring your gear stays dry and functional. There are two main types of housings: plastic and aluminum. Plastic is lightweight and affordable, making it a good option for casual photographers. On the other hand, aluminum housings are sturdier and often provide better controls for advanced users. I recommend investing in a quality housing as it can significantly affect your underwater experience.

Lenses for Underwater Shots

The right lens can make all the difference in your underwater photography. I’ve experimented with various lenses, and I find that wide-angle lenses are fantastic for capturing expansive underwater landscapes and schools of fish, giving a sense of the environment. For more detailed shots of tiny creatures, macro lenses are essential. They allow you to get up close and personal with small subjects, showcasing their details beautifully. I learned that having a good versatile lens setup can significantly enhance the way I capture the underwater world.

Lighting Equipment: Strobes and Video Lights

Underwater environments can be quite dark, especially below the surface where natural light diminishes rapidly. I’ve been in situations where I couldn’t quite get the colors to pop, and that’s when I realized the importance of lighting equipment. Strobes are a photographer’s best friend, as they provide a powerful burst of light to illuminate your subjects and bring out their vivid colors. Video lights are also great for continuous lighting, especially if you’re capturing video footage alongside stills. I recommend experimenting with both to see what works best for your style and subjects.

Accessories: Filters, Tripods, and More

Don’t overlook the importance of accessories in underwater photography. I’ve found that color correction filters can help enhance the natural hues of underwater scenes, especially in deeper dives where colors can fade. A tripod can also be incredibly useful for stabilizing your shots, particularly in low-light conditions or when capturing slow-moving subjects. Other accessories like spare batteries, memory cards, and lens cleaning kits are essential for a smooth shooting experience. When I first started, I made a checklist of all my gear to ensure I didn’t forget anything essential before each dive. For those looking for cost-effective solutions, Essential Tips for Budget Underwater Adventure Photography can be very helpful.

Mastering Techniques for Stunning Marine Shots

Understanding Water Conditions: Currents and Visibility

Before diving into the water, I always check the conditions — currents and visibility can make or break a dive. I learned this the hard way on one of my early adventures. The visibility was poor, and I struggled to capture clean shots of stunning coral formations. Strong currents can also sway you and your camera, making it difficult to frame your subject properly. I recommend always researching the dive site beforehand and even talking to local divers or guides for insights. It’s amazing how much a little prep can enhance your experience and the quality of your images.

Composition Techniques: Rule of Thirds and Leading Lines

Composition is a vital part of photography, and underwater shots are no exception. I often find myself using the rule of thirds to frame my subjects. This technique helps create a more balanced and engaging photo. Instead of placing the subject in the center, I position it along one of the grid lines, which often leads to a more dynamic shot. I’ve also used leading lines to draw the viewer’s eye into the image. For instance, a school of fish swimming in a line can guide the eye deeper into the underwater landscape. I feel that being mindful of composition can elevate your underwater photography significantly.

Color and Light in Underwater Photography

When I first started diving, one thing that struck me was how quickly colors fade underwater. The deeper you go, the less color you see. I remember taking a photo of a beautiful coral reef only to find it looked dull in my camera. I learned that using strobes or video lights can help bring back those vibrant colors. Also, I’ve found that shooting in shallow water, where natural light is more abundant, often yields better results. I recommend adjusting your white balance settings on your camera to compensate for the blue-green cast that can occur underwater. It makes a huge difference!

Getting Close: Macro vs. Wide-Angle Shots

One of the most exciting aspects of underwater photography is the choice between macro and wide-angle shots. I’ve had great experiences with both, but they require different techniques. Macro photography is all about getting up close and personal with small subjects like nudibranchs or tiny fish. I remember the rush I felt when I captured an intricate detail of a seahorse. Wide-angle shots, on the other hand, allow you to capture the grandeur of underwater landscapes. When I want to showcase a vibrant reef or a school of fish, I opt for a wide-angle lens. I suggest experimenting with both styles — you might find your passion lies in one over the other.

Capturing Motion: Techniques for Dynamic Shots

Underwater life is full of movement, and I’ve learned that capturing it can be both challenging and rewarding. When I first tried to photograph swimming fish, it felt like an exercise in frustration! I realized that using a faster shutter speed can help freeze the action, especially in low light. However, I’ve also played around with slower shutter speeds to create a sense of motion, blurring the fins of a fish as it swims by. This technique can add a beautiful dynamic feel to the image. I recommend practicing these techniques until you find the right balance for your style and the subjects you’re photographing.

Choosing the Best Locations for Underwater Photography

Top Diving Destinations for Photographers

Over the years, I’ve had the pleasure of diving at some incredible locations that are perfect for underwater photography. One of my favorites is the Great Barrier Reef in Australia. The vibrant coral and diverse marine life are a photographer’s dream. I’ve also fallen in love with the clear waters of the Maldives, where you can capture stunning shots of manta rays and whale sharks. Another hidden gem I discovered is the cenotes in Mexico, where the light filtering through the surface creates magical underwater scenes. I believe selecting the right location can inspire creativity and lead to some of your best shots.

Marine Protected Areas: Responsible Photography

As I’ve journeyed through various underwater environments, I’ve come to realize the importance of marine protected areas. These locations are vital for conserving marine ecosystems, and I feel a strong responsibility as a photographer to respect and protect these habitats. When diving in these areas, I make sure to follow guidelines and avoid touching or disturbing marine life. By doing so, we can help ensure that these beautiful places remain intact for future generations to enjoy and photograph.

Seasonal Considerations: When to Go

The timing of your dive can greatly impact your underwater photography. I’ve noticed that certain seasons bring unique opportunities for capturing marine life. For example, many species of fish spawn at specific times of the year, creating a lively spectacle. I remember being lucky enough to witness a massive gathering of fish during a seasonal migration, and the photos I took that day are some of my favorites. Researching the best times to visit a destination can make a significant difference in the variety and quantity of subjects you’ll encounter.

Post-Processing for Underwater Images

Editing Software: Options and Tips

After capturing those stunning underwater shots, the next step is putting the finishing touches on them through post-processing. I remember feeling overwhelmed by the number of software options available at first. However, I found that programs like Adobe Lightroom and Photoshop are fantastic for editing underwater images. Lightroom is great for making quick adjustments, like exposure and color balance, while Photoshop offers more advanced features like layer manipulation and retouching. I recommend starting with Lightroom to get a feel for basic edits before diving into the more complex tools in Photoshop. It’s amazing how much a little tweaking can bring a photo to life!

Color Correction and Enhancing Details

One of the biggest challenges I faced was dealing with the color loss that often occurs underwater. In my experience, the deeper you dive, the more colors fade. I learned that color correction tools in editing software can help restore those vibrant hues. I usually start by adjusting the white balance; this simple change can drastically improve an image. Additionally, I use the saturation and vibrance sliders to enhance colors without making them look unnatural. I’ve also discovered that sharpening the details, especially in macro shots, can help highlight the intricate textures of marine life. The right adjustments can turn a good shot into a breathtaking one!

Managing Noise and Improving Clarity

Sometimes, when I pull my images from my camera, I notice a bit of noise, especially in low-light situations. Noise can be a real downer, but I’ve learned to manage it during editing. Programs like Lightroom have noise reduction features that can help smooth out grainy images. I typically apply a little noise reduction, but I’m careful not to overdo it, as it can lead to a loss of detail. Improving clarity is another key aspect of post-processing. I usually adjust the clarity slider to enhance the mid-tones in my images, which helps in making the subject pop against the background. It’s all about finding that perfect balance to showcase the beauty I witnessed underwater!

Common Challenges in Underwater Photography

Dealing with Low Light Conditions

Low light underwater can be a significant hurdle, and I’ve faced this challenge numerous times. I remember one dive where the sun was setting, and I found myself struggling to capture any decent shots. When faced with low light, I’ve learned that using a wider aperture can help let in more light. Additionally, increasing the ISO can make a difference, but I have to be cautious about introducing noise into the images. I often find that using my strobes or video lights can provide the necessary illumination to bring out colors and details. It took some trial and error, but mastering low-light techniques has improved my underwater photography dramatically.

Handling Equipment Issues Underwater

Let’s be honest: equipment issues can arise at the most inconvenient times, especially underwater. I’ve had moments where my camera housing developed a leak or my strobe wouldn’t fire just when I spotted a stunning sea turtle. When I first started, I didn’t realize how important it was to check my gear before each dive. Now, I make it a habit to test everything on the surface and ensure all seals are secure. I also carry backup gear, like extra batteries and memory cards, to avoid missing out on those once-in-a-lifetime shots. Learning to troubleshoot quickly underwater has saved me more than once, so I suggest practicing those skills before heading out.

Overcoming Fear and Anxiety While Diving

Diving itself can be an intimidating experience, and I’ve had my fair share of anxiety before heading underwater. I remember feeling anxious about the depths and what lies beneath. What helped me was taking my time and gradually getting comfortable with diving environments. I also connected with fellow divers who shared their experiences and tips, which made a huge difference in my confidence. Finding ways to relax before a dive, like deep breathing or visualizing the adventures ahead, can help ease those nerves. In my opinion, building comfort in the water enhances not only your diving experience but also your ability to capture stunning underwater images.

Tips for Beginners in Underwater Photography

Starting Small: Techniques for New Photographers

For anyone just starting in underwater photography, I recommend beginning with simple techniques. I remember my first dives with a compact camera; I focused on getting comfortable with my surroundings rather than stressing about perfect shots. I found that practicing basic composition, like the rule of thirds, and simply observing marine life helped me improve my skills. Don’t be afraid to take lots of photos; shooting in burst mode can increase your chances of getting that perfect shot, especially when the subjects are moving. I believe that starting small and gradually building up to more complex techniques can help any beginner develop their style.

Learning from Others: Workshops and Courses

One of the best decisions I made was enrolling in underwater photography workshops. Learning from experienced photographers allowed me to gain valuable insights and feedback on my work. I also enjoyed the opportunity to ask questions and share experiences with fellow enthusiasts. There are many online courses too, which can be a great way to learn at your own pace. I encourage new photographers to seek out these resources; they can provide different perspectives and techniques that may resonate with your own style.

Building a Portfolio: Showcasing Your Work

As I progressed in my underwater photography journey, I realized the importance of building a portfolio. I started by selecting my best images, focusing on a variety of subjects and techniques. I created an online gallery to showcase my work, which not only helped me track my progress but also allowed me to share my passion with others. I recommend taking time to curate your portfolio thoughtfully, as it can open doors to opportunities like exhibitions or collaborations. Sharing your work can be a great way to connect with others who share your love for underwater photography! Affordable Underwater Wildlife Photography Tips for Backpackers can also inspire you to create a stunning portfolio.

Frequently Asked Questions

What is underwater photography?

Underwater photography is the art of taking pictures while submerged in water, typically in oceans, lakes, or rivers. It captures the beauty of marine life and can range from intricate organisms to expansive coral reefs.

Why is underwater photography important?

Underwater photography raises awareness about marine ecosystems and conservation. It showcases the beauty and fragility of underwater life, advocating for the protection of these environments, which cover over 70% of our planet.

What types of cameras are best for underwater photography?

Compact cameras are great for beginners due to their portability, while DSLRs offer more control and superior image quality. Mirrorless cameras are also a good option, providing the benefits of DSLRs without the bulk.

What is the significance of camera housing in underwater photography?

A reliable housing is essential to protect your camera underwater. There are plastic housings, which are lightweight and affordable, and aluminum housings, which are sturdier and offer better controls for advanced users.

What types of lenses are recommended for underwater shots?

Wide-angle lenses are excellent for capturing expansive underwater landscapes, while macro lenses are essential for detailed shots of small creatures. Having a versatile lens setup significantly enhances underwater photography.

How can lighting equipment improve underwater photography?

Lighting equipment, such as strobes and video lights, can help illuminate subjects and bring out their colors, especially in dark underwater environments where natural light is limited.

What composition techniques should be used in underwater photography?

Using the rule of thirds to frame subjects can create more balanced and engaging photos. Leading lines can also draw the viewer’s eye into the image, enhancing the composition.

What are some top diving destinations for underwater photography?

Some top destinations include the Great Barrier Reef in Australia, the clear waters of the Maldives, and the cenotes in Mexico, each offering unique opportunities for stunning underwater shots.

What editing software is recommended for post-processing underwater images?

Adobe Lightroom and Photoshop are recommended for editing underwater images. Lightroom is great for quick adjustments, while Photoshop offers more advanced features for detailed editing.

What are common challenges faced in underwater photography?

Common challenges include low light conditions, equipment issues, and overcoming fear and anxiety while diving. It’s important to prepare and practice techniques to manage these challenges effectively.

Essential Underwater Photography Accessories on a Budget

Underwater photography can seem like an expensive hobby, but it doesn’t have to break the bank. With the right budget-friendly accessories, we can capture stunning images beneath the waves without emptying our wallets. Read Interesting article: Best Budget-Friendly Underwater Photography Equipment Tips

Essential Underwater Photography Accessories on a Budget

Understanding Underwater Photography

The Basics of Underwater Photography

When I first dipped my toes into underwater photography, I was amazed at how different the underwater world looked through my lens. The colors pop, the textures come alive, and the creatures are unlike anything I’d seen above water. However, I quickly learned that underwater photography has unique challenges. Light behaves differently underwater; colors fade as depth increases, and the water can distort my shots. That’s why understanding the basics is crucial. I remember spending hours researching how to manage buoyancy, framing my shots, and adjusting my settings to suit the lighting conditions. It took practice, but those early experiences shaped my love for capturing the beauty of the underwater world.

Why Accessories Matter

As I dove deeper into this hobby, I realized that accessories played a significant role in enhancing my photography. They can make a world of difference in the quality of our images. For instance, a reliable waterproof housing protects my camera from water damage, allowing me to focus on capturing that perfect shot. Underwater filters help bring back the vibrant colors that often get washed out, while external lighting equipment illuminates dark scenes that would otherwise remain hidden. I found that investing in the right accessories not only improved my photography but also boosted my confidence while shooting underwater. Affordable Underwater Photography Gear for Backpackers can also provide great insights into accessible options.

It’s also about comfort and convenience. For instance, using a stabilizing grip helped me steady my camera, reducing blur in my photos while I was floating around. When I first started, I made the mistake of thinking I could get by without these accessories, but I quickly learned that they are essential to truly enjoy and excel in underwater photography. So, whether you’re just starting or looking to upgrade your gear, let’s explore some of the must-have accessories that won’t break the bank.

Essential Underwater Photography Accessories

Waterproof Housing

The first accessory I recommend is waterproof housing. This is non-negotiable for anyone serious about underwater photography. Even if you have a rugged camera, it’s vital to invest in a housing unit designed for your specific camera model. I remember my first experience with a budget-friendly housing option; it was a game-changer. Not only did it protect my camera, but it also allowed me to dive deeper without worrying about water damage. Look for options that have good reviews and are known for their durability. Ensure they’re rated for the depths you plan to explore.

Underwater Camera Filters

Next up is underwater camera filters. If you’ve ever taken photos underwater, you know how quickly colors can fade. The deeper I went, the more I noticed that vibrant blues and greens turned into murky gray. Investing in filters can help restore these colors, making your photos pop. I found that red filters work wonders when shooting at depths of around 10 to 30 feet, while magenta filters are great for freshwater environments. There are budget options available that clip directly onto your camera’s housing and can make a massive difference in your images.

External Flash and Lighting Equipment

Lighting can be tricky underwater, especially in darker environments. I often found myself frustrated by the lack of natural light in deeper waters. That’s when I discovered the importance of external flash and lighting equipment. Having a reliable underwater flash allowed me to illuminate subjects and capture the fine details of marine life. There are affordable strobe lights and LED options that won’t stretch your budget too far. I recommend looking for lights that are compact and have adjustable settings so you can adapt to different conditions.

Stabilizing Equipment: Tripods and Grips

Stability is key in photography, and this is especially true underwater, where even the slightest movement can lead to blurry shots. I learned the hard way that a good stabilizing grip can make a significant difference. I initially used a simple hand grip that helped me steady my camera while floating. Eventually, I invested in a lightweight tripod that I could use when I was shooting from a stationary position. There are many affordable options out there, so keep an eye out for collapsible models that are easy to carry.

Wetsuits and Weight Belts

Comfort in the water is just as important as the gear we carry. A good wetsuit keeps us warm and allows for greater mobility, while a weight belt helps us achieve neutral buoyancy. I remember feeling so much more relaxed in the water once I had the right gear. While it’s easy to go for the expensive brands, there are many budget-friendly wetsuits that offer great insulation and flexibility. When it comes to weight belts, I found that even the simplest ones were effective, and they didn’t cost a fortune. It’s all about finding the right balance that suits our diving style.

Budget-Friendly Alternatives

DIY Waterproof Solutions

As I explored the world of underwater photography, I realized that not everyone can afford high-end gear right away. That’s when I discovered the joy of DIY solutions! I remember my first attempt at creating a waterproof case for my camera using a plastic bag and some duct tape. While it wasn’t the most elegant solution, it did the job for shallow dives. I felt a sense of accomplishment knowing I had improvised something that allowed me to capture moments I otherwise would have missed. Over the years, I’ve learned there are various DIY tricks out there, such as using a Tupperware container with foam padding for added protection. Just be sure to test these solutions in a controlled environment before taking them into the ocean. It’s all about getting creative and finding a solution that fits your needs and budget.

Affordable Lighting Options

Finding affordable lighting options was a game-changer for me. I initially hesitated to invest in expensive flash systems, thinking they would be out of my budget. But then I stumbled upon some compact, battery-powered LED lights that were surprisingly effective. I remember the first time I used one; it illuminated a colorful coral reef beautifully! It’s all about finding lights that are versatile and easy to use. I suggest looking for options that come with different color filters so you can adapt your lighting to various underwater scenarios. There are also some excellent budget strobe lights available that can give your photos a professional edge without costing a fortune. Experimenting with these lighting tools can really elevate your underwater photography without draining your bank account.

Second-Hand and Rental Gear

Another fantastic way to save money on underwater photography gear is by exploring second-hand options and rentals. I remember my first experience buying second-hand; I found a gently used underwater housing that was half the price of a new one. It was like finding treasure! There are a plethora of places to look, from online marketplaces to local dive shops. Rentals are also a smart choice, especially if you’re just starting out or planning on a short trip. Many dive shops offer rental gear, allowing you to try out high-quality equipment without making a hefty investment. I often take advantage of rentals when I travel to new dive destinations. It’s a great way to experiment with different setups and see what works best for me. Top 5 Budget Cameras for Stunning Underwater Photography is also a great resource for exploring options.

Accessories for Different Skill Levels

Beginners: Simple Tools

If you’re just starting in underwater photography, keep it simple. I remember feeling overwhelmed by all the options available when I first began. The best advice I received was to focus on a few essential tools. A reliable waterproof housing, a basic underwater filter, and a good grip can go a long way. I suggest starting with these items and gradually upgrading as you gain more experience and confidence in your skills. You don’t need to invest in everything at once. Instead, take your time to learn what works best for you and your style. It’s about building your kit one piece at a time, ensuring that each addition enhances your photography experience.

Intermediate: Enhancing Your Setup

As you gain confidence and start to develop your own style, you might want to enhance your setup. For me, this was the time I began exploring external lighting options and stabilizers. A good external flash allowed me to capture more details and create stunning contrasts in my images. I also found that a more advanced stabilizing grip helped me achieve clearer shots, particularly in currents or deeper waters. At this stage, consider investing in higher-quality filters or even a tripod if you haven’t already. The goal is to expand your capabilities without going overboard on expenses. Remember, it’s about enhancing your skills and enjoying the process.

Advanced: Professional-Grade Accessories on a Budget

For those who have honed their skills and are looking to take their photography to the next level, investing in professional-grade accessories can be tempting. However, I’ve learned that it’s still possible to find budget-friendly options. For instance, I found an excellent used strobe light and a high-quality underwater housing at a reasonable price. Research is key here; read reviews and seek recommendations from fellow photographers. Join online communities where you can gain insights into the best budget-friendly options. You’ll be surprised at how much you can achieve without spending a fortune. The right gear can make a significant difference in your shots, and it’s worth taking the time to find what suits your advanced needs without sacrificing your budget.

Maintenance and Care for Your Accessories

Cleaning and Storage Tips

Once I started investing in my underwater photography gear, I quickly realized that taking care of my accessories was just as important as choosing the right ones. Cleaning my gear after each dive became a ritual for me. Saltwater, sand, and even freshwater can wreak havoc on our equipment if we’re not careful. I remember the first time I neglected to rinse my housing and lens after a dive; I ended up with salt deposits that were tough to remove later. Now, I always make sure to rinse everything in fresh water as soon as I’m done diving.

For storage, I learned that keeping my gear in a cool, dry place was essential. I use a soft cloth to wipe down all my equipment before storing it away. For my camera and housing, I keep them in padded cases to prevent any accidental bumps or scratches. It’s also a good idea to keep silica gel packets in your storage case to absorb moisture. I’ve found this simple step really helps in keeping everything dry and in top condition.

Preventing Damage and Leaks

One of the biggest fears underwater photographers face is the dreaded leak. I can’t tell you how many articles I read about people losing their cameras due to poor sealing or forgotten maintenance. To prevent this from happening, I make it a habit to check the O-rings and seals on my waterproof housing every time before I dive. A little silicone grease goes a long way in ensuring everything is properly sealed and functioning.

I also learned to be cautious when changing batteries or memory cards underwater; I take my time to ensure everything is tightly closed before submerging again. It’s easy to overlook these small details in the excitement of capturing that perfect shot, but trust me, a few extra moments of care can save us from a world of heartache later.

Where to Buy Affordable Underwater Photography Gear

Online Retailers vs. Local Stores

When I first started looking for underwater photography gear, I debated whether to shop online or visit local stores. I found that both options have their pros and cons. Shopping online gave me access to a wider range of products and often better prices. I remember discovering some fantastic deals on websites that specialized in dive gear. Plus, reading reviews from other photographers helped me make informed decisions.

On the other hand, visiting local dive shops allowed me to get a feel for the equipment in person. I appreciated being able to ask questions and get advice from experienced staff. I still frequent my local dive shop because they sometimes have sales on discounted gear, and I love supporting small businesses in my area. It’s all about finding a balance; I often check online prices first and then see if I can find similar deals locally.

Comparison of Pricing and Options

As I navigated my way through various retailers, I learned to compare pricing and options carefully. I often made a spreadsheet to keep track of different products, their prices, and reviews. It was eye-opening! For instance, I discovered that some budget brands offered great quality without the hefty price tag of the big-name companies. I remember finding a pair of underwater filters that were half the price of the leading brand but received excellent reviews from fellow photographers.

Additionally, I realized that some retailers have price-matching policies. So, if I found a better price elsewhere, I could often get the same deal at a local store. This was a great way to support local businesses while still getting the best value for my money. I recommend taking the time to research and compare; it can pay off significantly in the long run.

Frequently Asked Questions

What should I look for in budget underwater photography accessories?

In my experience, when searching for budget underwater photography accessories, I focus on durability, reviews, and practical functionality. I always check for user feedback and make sure the product has a solid reputation. Look for accessories that offer essential features without unnecessary extras that can drive up the price. It’s also helpful to consider compatibility with your existing gear to ensure a good fit.

Can I use my regular camera for underwater photography?

Absolutely! Many people use their regular cameras for underwater photography, but it’s important to have the right protective housing. I started with a point-and-shoot camera and found a compatible waterproof housing. With the proper precautions, it’s possible to capture stunning underwater shots without needing a specialized underwater camera. Just remember that the depth rating of your housing is crucial.

How do I ensure my accessories are safe underwater?

To keep my accessories safe underwater, I always double-check seals, O-rings, and any locking mechanisms before I dive. I’ve made it a habit to test my housing in shallow water before going deeper, just to ensure everything is functioning properly. A good practice is to always dive with a buddy who can help keep an eye on your gear as well.

What are the best budget brands for underwater photography gear?

There are several budget-friendly brands that I’ve come to trust over the years. For instance, brands like Fantasea and SeaLife offer quality underwater gear without breaking the bank. I’ve also seen good reviews for some of the budget filters and lighting options from brands like Neewer and Aqualung. It’s all about doing your research and finding what works best for your needs and budget.

Frequently Asked Questions

What are the essential accessories for underwater photography?

The essential accessories for underwater photography include waterproof housing, underwater camera filters, external flash and lighting equipment, stabilizing equipment (like tripods and grips), and wetsuits with weight belts for comfort and buoyancy.

How can I restore colors in my underwater photos?

Investing in underwater camera filters can help restore the vibrant colors that fade with depth. Red filters work well at depths of 10 to 30 feet, while magenta filters are ideal for freshwater environments.

What DIY solutions can I use for underwater photography?

You can create DIY waterproof solutions, such as using a plastic bag and duct tape or a Tupperware container with foam padding for protection. Just ensure to test these solutions in a controlled environment before using them in the ocean.

How important is lighting in underwater photography?

Lighting is crucial in underwater photography, especially in darker environments. External flash and lighting equipment can illuminate subjects and capture fine details that might otherwise be lost in low light conditions.

What should I consider when purchasing underwater photography gear?

When purchasing underwater photography gear, consider durability, compatibility with your camera, user reviews, and the specific features that meet your needs without unnecessary extras that can increase costs.

How can I ensure my underwater gear is properly maintained?

To maintain your underwater gear, rinse it in fresh water after each dive, store it in a cool, dry place, and regularly check the O-rings and seals on your waterproof housing for any signs of wear.

Can I rent underwater photography gear instead of buying it?

Yes, renting underwater photography gear is a smart choice, especially if you’re just starting out or planning a short trip. Many dive shops offer rental equipment, allowing you to try high-quality gear without a significant investment.

What are some budget-friendly brands for underwater photography gear?

Budget-friendly brands for underwater photography gear include Fantasea and SeaLife for quality equipment. Additionally, brands like Neewer and Aqualung offer affordable filters and lighting options that have received good reviews.

How can I prevent leaks in my underwater housing?

To prevent leaks in your underwater housing, always check the seals and O-rings before diving, use silicone grease for proper sealing, and take your time when changing batteries or memory cards underwater to ensure everything is securely closed.

Is it possible to use a regular camera for underwater photography?

Yes, you can use a regular camera for underwater photography as long as you have the appropriate waterproof housing. Many photographers start with point-and-shoot cameras and find compatible housings to capture great underwater images.

Best Budget-Friendly Underwater Photography Equipment Tips

Underwater photography is an exciting adventure that allows us to explore the mesmerizing world beneath the surface. With the right equipment and a bit of creativity, capturing stunning images doesn’t have to break the bank. Read Interesting article: Top 5 Budget Cameras for Stunning Underwater Photography

Best Budget-Friendly Underwater Photography Equipment Tips

Understanding Underwater Photography

The Basics of Underwater Photography

When I first dipped my toes into underwater photography, I quickly realized that it’s not just about snapping pictures. There’s a whole world of techniques and principles to learn. The first thing I noticed was how different the underwater environment is compared to above water. Light behaves differently, colors change, and the surroundings can be unpredictable. Understanding the basics of composition, exposure, and lighting is key. I learned to focus on simple things like framing my shots, keeping my camera steady, and being aware of my surroundings. This foundational knowledge has been invaluable in improving my skills.

Importance of Choosing the Right Equipment

Choosing the right equipment is crucial in underwater photography. I remember feeling overwhelmed by the choices available when I started. From cameras to lighting, each piece of gear plays a vital role in achieving great results. I learned that while high-end equipment can yield fantastic images, there are plenty of budget-friendly options that can deliver impressive results. The goal is to find gear that fits your needs and your budget. I found that investing in the right equipment, even at a lower price point, can significantly enhance my underwater images. Read Interesting article: Essential Tips for Budget Underwater Adventure Photography

Essential Budget-Friendly Underwater Photography Equipment

Underwater Cameras

When it comes to underwater cameras, I discovered that there are many options that won’t drain your wallet. I started with a compact waterproof camera, which was easy to use and affordable. These cameras are designed to withstand underwater conditions, making them perfect for beginners. I found that models like the Fujifilm FinePix XP series or the Olympus Tough series are great for capturing vibrant underwater scenes without a steep investment. As I gained confidence, I later upgraded to a DSLR with a waterproof housing, but I still treasure those early days where everything was simpler.

Waterproof Camera Housings

If you already have a camera that you love, consider investing in a good waterproof housing. This allows you to take your existing camera underwater without the need for a new one. I remember shopping around and finding affordable housings from brands like Ikelite or Sea & Sea. These housings often come with features like buttons that replicate your camera’s functions, so you can easily adjust settings while underwater. Just make sure to test the housing in a controlled environment before your dive; I learned that lesson the hard way!

Lens Options for Underwater Photography

Lenses can significantly impact your underwater photography. I experimented with wide-angle lenses, which are fantastic for capturing the grandeur of underwater landscapes. For me, a fisheye lens opened up a whole new world of creative possibilities. However, I also found that using the right dome ports with my lenses was essential for image clarity. There are budget-friendly options available that still provide good quality, so don’t feel pressured to purchase the most expensive lenses right away. I recommend renting or borrowing different lenses to see what works best for your style.

Lighting Equipment: Strobes and Video Lights

Lighting can make or break your underwater shots. I quickly learned that natural light can be limited underwater, especially in deeper waters or murky conditions. Investing in a good underwater strobe or video light can completely transform your images. I started with a simple LED video light, which was affordable and allowed me to experiment without a large investment. Strobes are great for freezing motion and illuminating specific subjects, while video lights provide a softer, more natural look. You don’t need to purchase top-tier lights; even mid-range options can yield stunning results.

Tripods and Stabilizers for Underwater Use

Stability is crucial for getting sharp images underwater. I found that using a tripod or stabilizer can help immensely, especially in calm waters. While I didn’t want to overpack my gear, I discovered that a lightweight tripod was a great addition. There are also handheld stabilizers designed specifically for underwater use, which I found helpful for video work. Keeping your camera steady helps avoid blurry shots, and investing in a good stabilizer can be a game changer as you improve your skills.

Affordable Accessories for Underwater Photography

Filters and Lens Adapters

When I began my underwater photography journey, I quickly learned about the importance of filters. Underwater, colors can shift dramatically due to water absorption. For example, reds and oranges can disappear at just a few feet. I discovered that using color correction filters can help restore those hues, especially when shooting in deeper water. I started with a simple red filter that attached easily to my camera housing. It made a noticeable difference in the vibrancy of my images. Lens adapters can also expand your creative options, allowing you to attach different filters or even different lens types. I found this versatility to be incredibly helpful as I experimented with my shots.

Buoyancy Control Devices

One thing I didn’t think about initially was buoyancy. I remember struggling to keep my camera steady as I floated around, trying to get the perfect shot. That’s when I realized the value of buoyancy control devices. These accessories help keep your camera neutral in the water, making it easier to achieve stability while shooting. I experimented with different types, from simple buoyancy floats that attach to your camera to more complex systems. Having good buoyancy control not only improved my images but also made my overall experience underwater much more enjoyable. It felt like I had better control over my movements and could focus on capturing great shots.

Underwater Camera Bags and Cases

Protecting my gear was a priority for me. I learned the hard way about the importance of a good underwater camera bag. I once took my camera on a day trip without a proper case, and I ended up with a soaked camera after a rogue wave hit! Since then, I’ve always made sure to invest in a reliable underwater camera bag. There are many options available, from soft cases to hard-shell designs. I recommend looking for something that offers good padding and is waterproof. It’s worth it for peace of mind when you’re out diving or snorkeling. A sturdy bag not only keeps your gear safe but also makes it easier to transport everything to and from the water.

Cleaning Kits for Underwater Equipment

After each dive, I realized how important it was to take care of my equipment. Saltwater, sand, and other elements can wreak havoc on your gear. I got myself a basic cleaning kit specifically for underwater photography. It usually includes a soft brush, microfiber cloth, and a blower to remove any debris. I’ve learned that taking the time to properly clean my camera after every outing has saved me from potential damage. It’s a simple step that ensures my gear stays in top condition for years to come. I also make it a habit to rinse everything with fresh water after using it in the ocean, which has really helped prolong the life of my equipment.

Best Budget Brands for Underwater Photography

Entry-Level Cameras and Housings

Finding budget-friendly options for cameras and housings was a game changer for me. I remember being overwhelmed by the sheer number of brands and models available. However, I quickly discovered some reliable entry-level options that delivered great performance without breaking the bank. Brands like SeaLife and Canon offer solid cameras and housings that are well-suited for beginners. For instance, the SeaLife Micro 3.0 is a fantastic affordable option that’s completely waterproof and easy to use. It’s been perfect for my early dives and has helped me build confidence in my photography skills.

Mid-Range Options for Enthusiasts

As I progressed in my underwater photography journey, I started exploring mid-range options. I found that brands like Nikon and GoPro provide excellent cameras that offer more features and image quality than entry-level models. I particularly enjoyed using a GoPro for its versatility; it’s not only great for underwater photography but also for capturing everyday adventures. The ability to change settings on the fly and its compact size made it a favorite of mine. Investing in mid-range gear has allowed me to grow as a photographer while still keeping costs manageable. Read Interesting article: Explore Underwater Wildlife: Budget Backpacking Photography Guide

Affordable Lighting Solutions

Lighting is essential for great underwater photography, and I was thrilled to find brands like Ikelite and Sea & Sea offering budget-friendly lighting solutions. Their strobes and lights are known for their quality and performance. I started with a basic strobe from Ikelite, which made a huge difference in my images. It was cost-effective and provided the extra light I needed to capture stunning underwater scenes. I learned that having the right lighting can elevate your photos significantly, and I encourage anyone starting out to explore these affordable options.

Tips for Saving Money on Underwater Photography Equipment

Buying Used or Refurbished Gear

One of the best decisions I made early on was to explore the possibility of buying used or refurbished gear. I know how tempting it is to want the latest and greatest, but many photographers sell their equipment after only a few uses. I found websites dedicated to used gear, as well as local shops that offer refurbished items at a fraction of the original cost. I once snagged a gently used underwater housing that was practically brand new! Just make sure to do your research and check for any warranties or return policies. It’s a great way to save money while still getting high-quality equipment.

Utilizing Rental Services for Equipment

Renting equipment has been a lifesaver for me, especially when I wanted to try something new without a hefty price tag. Before a big dive trip, I would often rent specialized gear that I wasn’t ready to buy, like certain lenses or lighting equipment. Local dive shops and online rental services often have a wide selection of underwater photography gear available. I remember renting a high-quality strobe for a week-long diving adventure and was blown away by the difference it made in my photos. Renting can also give you the chance to test out different equipment, helping you decide what to invest in later.

Comparing Prices and Finding Discounts

It may sound simple, but I can’t stress enough how important it is to shop around and compare prices before making a purchase. I learned this the hard way after buying a camera only to find it cheaper at another store a week later. Now, I always check multiple retailers, both online and in-store. I also keep an eye out for seasonal sales, clearance events, and special discounts, especially during holidays. Signing up for newsletters from photography shops can also alert me to special promotions. This practice has saved me a good amount of money and allowed me to invest in additional accessories.

Maintenance Tips for Your Underwater Photography Gear

Cleaning and Care of Equipment

Taking care of my underwater photography gear has been essential to prolonging its life. After every dive, I’ve made it a habit to rinse my equipment with fresh water. Saltwater can be incredibly damaging, and I learned that a thorough rinse helps remove any residue. Using a soft cloth to wipe down my camera and housing has also prevented scratches and maintained their functionality. I keep a cleaning kit handy, which includes a soft brush and microfiber cloth, making the process quick and easy. Regular cleaning not only keeps my equipment in good condition but also ensures that I capture clear, vibrant images.

Storing Your Gear Properly

Proper storage has become a top priority for me. After realizing how humidity and temperature can affect my gear, I started using airtight cases for my underwater equipment. I’ve also invested in silica gel packs to help absorb moisture. When I’m not using my gear, I make sure it’s stored in a cool, dry place. I even have a designated area in my home specifically for my photography equipment. This simple step helps me avoid potential damage and keeps my gear ready for my next adventure.

Regularly Checking for Damage or Wear

I can’t emphasize enough how important it is to regularly check my equipment for any signs of damage or wear. Before each dive, I do a thorough inspection of my camera, housing, and all accessories. I look for cracks, leaks, or any loose components. I learned this lesson the hard way when I didn’t notice a tiny crack in my housing before a dive, leading to a flooded camera. Now, I take the time to ensure everything is in perfect condition, which not only gives me peace of mind but also helps avoid costly repairs or replacements later on.

Common Mistakes to Avoid in Underwater Photography

Overlooking Lighting Conditions

Lighting can make or break an underwater shot, and I’ve had my fair share of mistakes in this area. I quickly realized that I needed to be mindful of the natural light available during my dives. For instance, diving deeper means less light, which can lead to darker images. I learned to adjust my settings accordingly and consider using strobes or video lights to enhance my shots. I remember one dive where I didn’t account for the lighting and ended up with murky, flat images. Now, I always evaluate the light conditions and adjust my approach accordingly to capture the best possible photos.

Ignoring Equipment Limits

In my excitement to dive into underwater photography, I sometimes pushed my equipment to its limits. I’ve learned that it’s essential to understand the capabilities and limitations of my gear. For example, knowing the depth limits of my camera housing and the effective range of my lights has saved me from disappointing results. I make it a point to research and familiarize myself with every piece of equipment I use. This knowledge has helped me make informed decisions during my shoots and ultimately improved the quality of my work.

Neglecting to Practice Before a Dive

Practice makes perfect, and I can’t stress how vital it is to familiarize myself with my gear before heading underwater. I used to skip this step, thinking I could just wing it, but I learned that it often led to missed opportunities. I now spend time practicing my settings and techniques in controlled environments, like pools or shallow waters. This preparation helps me feel more confident and allows me to focus on creativity rather than fumbling with equipment when I’m underwater.

Final Thoughts

Underwater photography has been one of the most rewarding experiences of my life. It’s not just about capturing beautiful images; it’s about connecting with a world that feels so alien yet extraordinarily peaceful. As I’ve navigated through my journey, I’ve learned that it’s essential to embrace both the challenges and the triumphs that come with this art form. I think the key is to have fun and allow yourself to grow, both as a photographer and as a diver.

Every dive has its own story, and being able to tell those stories through images is something very special. I remember a dive where I encountered a school of fish that seemed to dance around me. I felt like I was part of their world for a brief moment. Capturing that experience was magical, and it reminded me why I fell in love with underwater photography in the first place. It’s these moments of connection that make all the effort worthwhile.

As you embark on your own underwater photography journey, remember to be patient with yourself. It’s okay to make mistakes; in fact, I believe that’s where the best learning happens. Each photo you take is a step toward improving your skills. Celebrate your successes, no matter how small, and don’t hesitate to seek inspiration from other photographers. I’ve found that sharing experiences with fellow enthusiasts has enriched my understanding and passion for this craft.

Finally, keep experimenting and pushing your boundaries. Whether that means trying out new techniques, exploring different locations, or using equipment you’ve never tested before, every experience will add to your growth as a photographer. I encourage you to dive deep, both literally and figuratively, into this fascinating world. You may discover something beautiful in ways you never expected.

So gear up, take a deep breath, and immerse yourself in the wonder of underwater photography. The ocean is waiting, and I can’t wait to see the stunning images you create!

Frequently Asked Questions

What is the importance of understanding the basics of underwater photography?

Understanding the basics of composition, exposure, and lighting is key to capturing stunning images underwater. The underwater environment is different from above water, affecting how light behaves and how colors appear.

What type of underwater camera is recommended for beginners?

For beginners, compact waterproof cameras like the Fujifilm FinePix XP series or the Olympus Tough series are recommended as they are affordable and easy to use.

How can I use my existing camera for underwater photography?

Investing in a good waterproof housing allows you to take your existing camera underwater without needing to buy a new one. Make sure to test the housing in a controlled environment before your dive.

What role do lenses play in underwater photography?

Lenses significantly impact underwater photography. Wide-angle lenses are great for capturing landscapes, and using the right dome ports with the lenses is essential for image clarity. Budget-friendly options are available, and renting can help you find what works best for your style.

Why is lighting important in underwater photography?

Lighting can make or break your underwater shots. Natural light is often limited underwater, so investing in strobes or video lights can transform your images, providing better illumination and enhancing your shots.

What are some affordable accessories for underwater photography?

Affordable accessories include filters for color correction, buoyancy control devices to stabilize your camera, underwater camera bags for protection, and cleaning kits for maintenance after each dive.

What are some budget-friendly brands for underwater photography equipment?

Brands like SeaLife, Canon, Nikon, and GoPro offer reliable budget-friendly options for cameras and housings. For lighting solutions, Ikelite and Sea & Sea provide quality equipment at a lower cost.

How can I save money on underwater photography equipment?

Consider buying used or refurbished gear, utilizing rental services for specialized equipment, and comparing prices across different retailers to find discounts and deals.

What maintenance tips should I follow for my underwater photography gear?

After each dive, rinse your equipment with fresh water, store it properly in airtight cases with silica gel packs, and regularly check for any signs of damage or wear to prolong its life.

What common mistakes should I avoid in underwater photography?

Avoid overlooking lighting conditions, ignoring your equipment’s limits, and neglecting to practice with your gear before diving to ensure you capture the best possible images.