Web Analytics

Recent Posts

Explore Coastal Wonders: Budget-Friendly Photography Guide

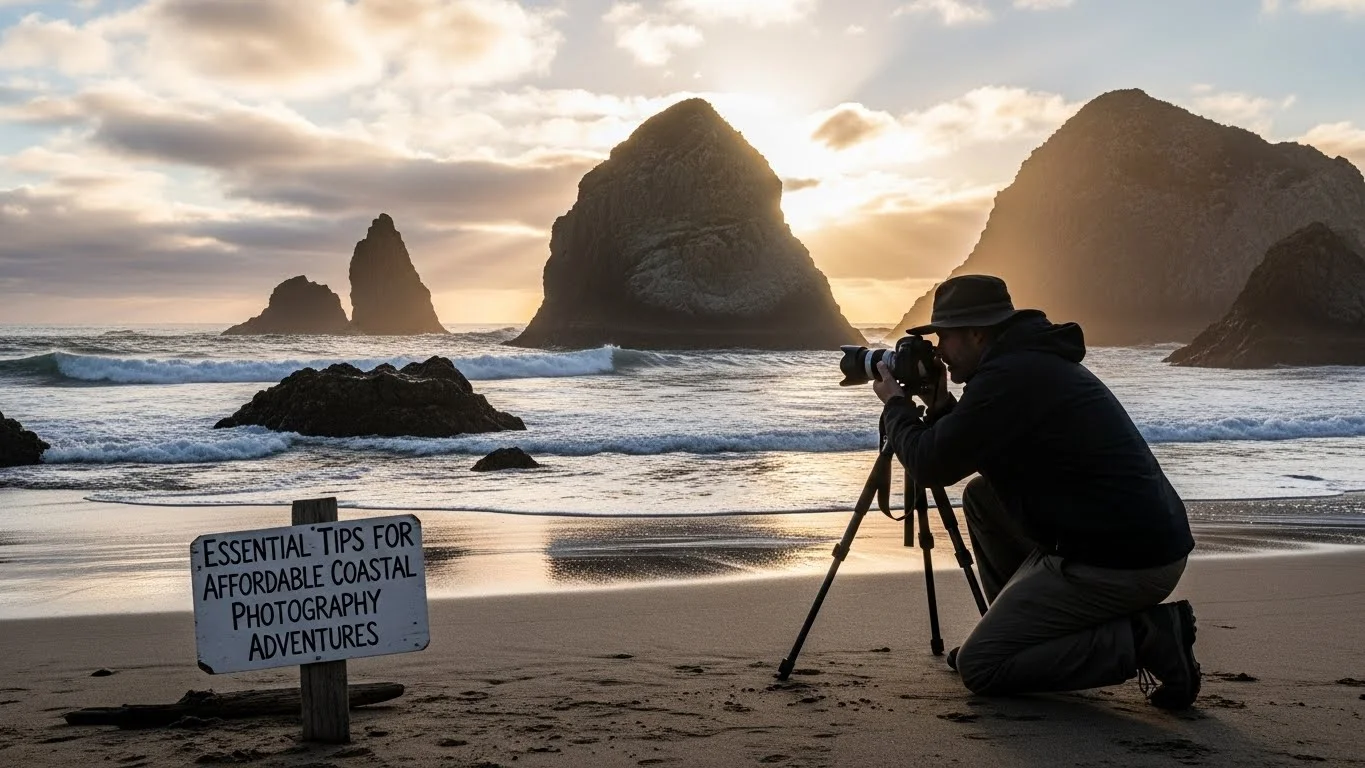
Capturing the beauty of coastal landscapes doesn’t have to break the bank. With the right tips and techniques, we can explore stunning shorelines and create breathtaking photographs on a budget. Read Interesting article: Essential Tips for Affordable Coastal Photography Adventures

Understanding Coastal Photography

What is Coastal Photography?

Coastal photography is all about capturing the dynamic beauty of shorelines, oceans, and everything that comes with them. I remember the first time I stood at the edge of a cliff, watching the waves crash against the rocks below. It was mesmerizing! Coastal photography can encompass a variety of scenes—from sweeping beach vistas to intimate shots of tide pools filled with colorful sea creatures. Whether it’s the golden hues of sunrise or the dramatic skies during a storm, coastal photography invites us to explore and document the ever-changing nature of our coastlines.

Explore Coastal Wonders: Budget-Friendly Photography Guide

Importance of Budget-Friendly Options

When I started my journey into photography, I quickly realized that high-quality gear and travel costs can add up. I wanted to capture the beauty of our coastlines without emptying my wallet. That’s why I believe finding budget-friendly options is vital for aspiring photographers like us. Not only does it keep our passion accessible, but it also encourages creativity. By exploring affordable gear and locations, we can focus on honing our skills rather than stressing about expenses. I found that some of my best shots came from spontaneous adventures rather than meticulously planned trips. The freedom to explore without financial constraints opens up a world of possibilities. Read Interesting article: Capture Stunning Coastal Landscapes on a Budget

Essential Photography Gear for Coastal Wonders

Cameras: DSLR vs. Mirrorless

Choosing the right camera can feel daunting, especially when you’re on a budget. I’ve owned both DSLR and mirrorless cameras, and I’ve learned a lot about their pros and cons. DSLRs are typically more affordable if you’re looking for a good entry-level option. They have a robust build and an extensive selection of lenses. On the other hand, mirrorless cameras are generally lighter and more compact, which is a huge advantage when hiking to those stunning coastal spots. For me, the choice really depends on my shooting style. If I’m going for longer hikes or need something portable, I lean towards mirrorless. But for rugged conditions where durability is key, I often grab my DSLR. Whichever you choose, just remember that it’s the skill behind the camera that really makes the difference.

Lenses: Wide-Angle vs. Telephoto

When it comes to lenses, having a variety on hand can enhance our coastal photography. Wide-angle lenses are fantastic for capturing expansive landscapes—think sweeping beach views or vast rocky cliffs. I often use my wide-angle lens when I want to include both the foreground and the dramatic sky in one shot. On the flip side, telephoto lenses allow us to zoom in on distant subjects, like seabirds or surfers riding the waves. I remember capturing a family of dolphins from a distance with my telephoto lens, and it was one of the highlights of my photography journey. If you’re just starting out, consider investing in a versatile zoom lens that covers both ranges. It’s a great way to get more bang for your buck.

Tripods: Choosing the Right One for Stability

Stability is key in coastal photography, especially in windy conditions or when capturing long exposures of waves. I can’t stress enough how important a good tripod is. I once tried to shoot a sunset without one and ended up with blurry images. Investing in a sturdy, lightweight tripod made a world of difference for me. There are plenty of budget-friendly options that won’t break the bank, and they can easily be packed for hikes. Look for one that’s adjustable and can handle your camera’s weight. This way, we can shoot long-exposure shots of the crashing waves or the starry night sky above the coast without worrying about stability.

Accessories: Filters, Bags, and More

Accessories can elevate our coastal photography experience. Neutral density filters, for instance, are fantastic for shooting long exposures during the day. They allow us to capture that silky-smooth water effect while maintaining proper exposure. I remember experimenting with filters during a sunrise shoot, and the results were breathtaking. Additionally, a good camera bag is essential for protecting our gear from sand and water. I’ve learned the hard way that a waterproof bag can save my equipment during unexpected splashes or rain showers. Remember, it’s the little things that can make our adventures smoother and more enjoyable.

Best Coastal Locations for Photography

National Parks with Coastal Views

When it comes to capturing coastal magic, national parks are often my go-to destinations. They offer stunning landscapes, diverse ecosystems, and, best of all, they usually have well-maintained trails that make it easy to get to the best spots. One of my favorites is Acadia National Park in Maine. The rugged coastline, granite cliffs, and breathtaking sunrises are just begging for a photograph. I remember waking up before dawn, the air crisp and cool, and hiking to Cadillac Mountain to catch the first light of the day. It was utterly worth it, and my photos from that morning are some of my most cherished.

Another spectacular national park is Point Reyes in California. The dramatic cliffs and rolling hills provide unique vantage points to capture everything from crashing waves to sweeping vistas. I love how diverse the landscapes are there, and I’ve always found something new each time I visit. Whether it’s capturing the famous lighthouse or wandering through the fog along the coastline, the park is a treasure trove of photographic opportunities.

Iconic Beaches and Shorelines

There’s something special about iconic beaches that draws me in time and again. One such spot is the stunning Waikiki Beach in Hawaii. The golden sands, turquoise waters, and majestic Diamond Head in the background make it a picture-perfect location. I’ve spent countless evenings there, watching surfers catch waves while the sun sets in a blaze of color. It’s an ideal spot for both wide-angle shots and intimate portraits of beach life.

Don’t overlook the beaches along the Oregon coast, either. Places like Cannon Beach, with its famous Haystack Rock, offer dramatic landscapes that can change with the tides and weather. I remember one evening being caught in a sudden rainstorm but then witnessing the most stunning rainbow arching over the beach. Those unexpected moments often yield my favorite photographs. Plus, the coastal towns nearby provide plenty of quaint backdrops for capturing local life.

Coastal Towns with Scenic Backdrops

Coastal towns are often bursting with character, making them perfect for photography. One town that captured my heart is Bar Harbor, Maine. The charming streets lined with colorful shops and cozy cafes against the backdrop of the sea create a picturesque setting. I love wandering around, capturing candid moments of locals and visitors alike. There’s something about the atmosphere that feels alive.

Then there’s the enchanting town of Cape May, New Jersey. Known for its Victorian architecture, the beautifully preserved houses offer a different kind of coastal charm. I remember strolling along the beach, the sound of waves crashing behind me, while snapping photos of the stunning homes. The blend of historic architecture and ocean views makes for fantastic photography opportunities, especially during the golden hour.

Unique Geological Features: Cliffs and Caves

Coastal photography isn’t just about beaches; it’s also about capturing unique geological features that tell the story of the land. I’ve always been fascinated by sea caves and cliffs, like those found in Big Sur, California. The rugged coastline there offers dramatic cliffs that plunge into the ocean, creating stunning contrasts. I once spent an entire day exploring the area, taking photos of the cliffs at varying angles and lighting. The textures and colors are simply mesmerizing.

Another incredible spot is the Cliffs of Moher in Ireland. Standing at the edge, feeling the wind whip through my hair while gazing down at the crashing waves below was exhilarating. Each shot I took there felt like I was capturing a piece of nature’s raw power. I recommend bringing a wide-angle lens to capture the full grandeur of these cliffs—they truly are a sight to behold.

There are countless coastal locations waiting for us to explore and photograph. Each destination has its own unique charm and story to tell, and I find that embracing the adventure of discovering these places often leads to the most rewarding experiences behind the lens.

When to Visit Coastal Areas for the Best Photos

Seasonal Considerations: Spring, Summer, Fall, Winter

Choosing the right season to visit coastal areas can dramatically affect our photography experience. I’ve found that each season brings its own unique charm to coastal landscapes. Spring is a fantastic time to visit as wildflowers bloom along the cliffs, adding vibrant colors to the scenery. I once visited the California coast in early spring, and the contrast between the blooming flowers and the deep blue ocean was simply breathtaking.

Summer, with its long days and warm weather, is perfect for capturing golden hour sunsets. Beaches come alive during this season, filled with activity and energy. However, I also noticed that summer can attract larger crowds, which might make it challenging to get that perfect shot without people in the frame. I remember one summer evening at a popular beach; I struggled to find an angle that didn’t include a dozen beachgoers. But patience often pays off—waiting until dusk can yield quieter moments.

Fall is a personal favorite of mine. The soft golden light and the rich colors of autumn foliage create an extraordinary backdrop along the coasts. I’ve captured some of my best images during this season, especially in places where the trees meet the shoreline. Finally, winter can offer dramatic, moody landscapes, especially during storms. I recall photographing crashing waves on a chilly winter day, feeling invigorated by the elements. Just remember to dress warmly and be cautious of slippery rocks!

Optimal Times of Day for Lighting

Lighting plays a crucial role in photography, and I’ve learned that the time of day can make or break a shot. The golden hour—just after sunrise and before sunset—is magical. I can’t tell you how many times I’ve woken up early to catch the first light, and it’s always worth it. The soft, warm tones during this time create a dreamy quality in photographs. I remember one morning at the beach, where the light reflected off the water creating a shimmering effect that made my heart race.

Midday light can be harsh, casting strong shadows and washing out colors. However, I’ve found that with the right techniques, it can still be used creatively. For instance, shooting under cloudy skies can produce wonderfully diffused light, which is ideal for capturing details without harsh contrasts. I often adjust my filming style according to the light, and experimenting with different times of day has helped me grow as a photographer.

Weather Conditions and Their Impact on Photography

Weather can be unpredictable, but I’ve come to embrace it as part of the adventure. I’ve learned that cloudy or stormy weather often leads to some of the most dramatic and moody photographs. I recall a day spent at the Oregon coast when dark clouds rolled in, and I captured breathtaking images of waves crashing against the rocks with stormy skies overhead. The tension in the atmosphere added a layer of emotion to my photographs that bright, sunny days simply couldn’t replicate.

On the other hand, clear blue skies can provide beautiful backdrops for coastal photography as well, especially when shooting vibrant beach scenes. The key is to remain flexible and adapt to changing conditions. Sometimes I’ve had to shift plans last minute due to rain, but often those spontaneous changes lead to unexpected gems. I always check the weather forecast before heading out, but I never let it deter me from exploring. Each condition offers unique opportunities.

Photography Techniques for Coastal Landscapes

Composition Tips: Rule of Thirds and Leading Lines

When it comes to composing coastal images, I’ve found that the rule of thirds is a fantastic guideline. By placing key elements off-center, I can create a more balanced and engaging photograph. I remember standing on a rocky outcrop while composing a shot of the sunset, consciously placing the horizon along the upper third. The result was a stunning image that drew the viewer’s eye into the scene.

Leading lines are another powerful technique that I enjoy using. They guide the viewer’s eye through the photograph, creating a sense of depth. Whether it’s the curve of a beach or a path leading to a lighthouse, I try to find lines that draw attention to the main subject. I once captured a winding path leading to a cliffside view, and it transformed an ordinary shot into something extraordinary.

Capturing Motion: Waves and Wind

Coastal photography is all about movement—the crashing waves, the swaying grass, and the fluttering flags. I often experiment with shutter speed to either freeze motion or create a sense of flow. For instance, using a fast shutter speed allows me to freeze a wave in mid-crash, capturing all its intricate details. Conversely, using a slower shutter speed can impart a dreamy, silky effect on the water. I’ve spent hours at the shore, adjusting my settings to find the perfect balance. Each technique offers a different perspective on the coastal experience.

Long Exposure Techniques for Water Effects

Long exposure photography has become one of my favorite techniques for capturing the essence of coastal scenes. With a sturdy tripod and the right filters, I can create stunning images of flowing water that look almost ethereal. I remember one evening at the beach, setting up my camera to capture the waves over several seconds, resulting in a soft, dreamy effect that made the water appear like silk. It’s a magical process, and I encourage everyone to experiment with this technique; the results can be truly breathtaking.

Using Natural Light to Your Advantage

Natural light is a photographer’s best friend, and I’ve learned to take full advantage of it. Whether it’s the soft glow of early morning or the warm hues of sunset, understanding how to use light can elevate our coastal photography. I often look for interesting shadows and highlights that can add depth to my images. Shooting into the light can create beautiful silhouettes, while backlighting can illuminate subjects in a stunning way. I recall a moment capturing a surfer against the setting sun, the silhouette stark and powerful. Using natural light creatively has truly transformed my photography.

Budget-Friendly Tips for Coastal Photography

Finding Affordable Accommodation Near Coastal Areas

When planning a coastal photography trip, finding a place to stay that’s easy on the wallet can make a big difference. I’ve learned that staying in budget accommodations like hostels, motels, or even campsites can save us a ton of money. I remember my trip to the Oregon coast, where I found a cozy little cabin that was a fraction of the price of hotels. Not only did it give me a place to rest my head, but it also provided direct access to the beach for those early morning shoots. I recommend checking sites like Airbnb or looking for local inns that offer off-peak rates. Sometimes, even a bit of research can uncover hidden gems that don’t sacrifice comfort for cost.

Transportation Options: Public Transit vs. Car Rentals

Next up is transportation. Depending on where you’re heading, public transit can be an excellent budget-friendly option. During my last visit to a coastal city, I relied on buses that connected various scenic spots. It was a fun way to meet locals and fellow travelers. However, if the locations are spread out, renting a car might give us the flexibility we need to explore at our own pace. I’ve often split rental costs with friends, which keeps it affordable while allowing us to hit those less accessible beaches or cliffside viewpoints. Just remember to look for deals and book in advance!

Free or Low-Cost Photography Workshops and Tours

One exciting way to enhance our skills without spending a fortune is by participating in free or low-cost photography workshops. Many coastal regions offer community events or local photographers who are willing to share their knowledge. I once joined a workshop at a nearby beach that focused on sunset photography. Not only did I learn valuable techniques, but I also got to connect with other photography enthusiasts. I suggest checking local tourism websites or community boards for upcoming events. It’s a great way to grow our skills and have fun while doing it! Read Interesting article: Explore Wildlife Photography Tours: Budget-Friendly Guide

Utilizing Local Resources for Gear Rentals

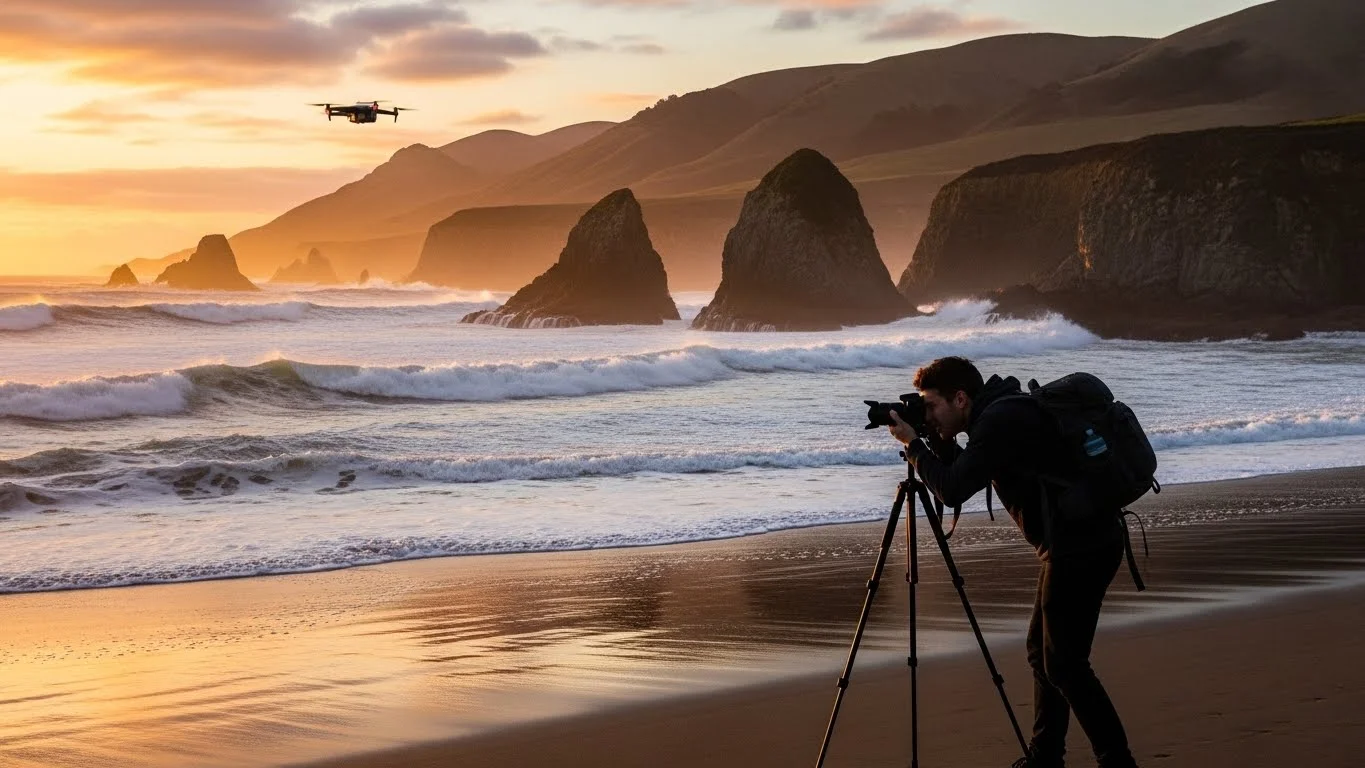
If you find yourself needing additional gear, consider renting instead of buying. Many coastal towns have shops that offer camera gear rentals at reasonable prices. During my travels, I rented a drone for one of my beach shoots, which added a completely different perspective to my photos. This option allows us to experiment with different equipment without the hefty price tag. Plus, some stores even provide discounts for long-term rentals. Always ask about deals—they might surprise us!

Editing Your Coastal Photos on a Budget

Best Free and Low-Cost Editing Software

Once we’ve captured those stunning coastal shots, the fun doesn’t stop! Editing is where we can really bring our photos to life, and thankfully, there are fantastic free or low-cost editing software options available. For beginners, I recommend trying programs like GIMP or Darktable. I started with GIMP, and it allowed me to learn the basics of editing without feeling overwhelmed. For those looking for something more user-friendly, software like Adobe Lightroom offers a subscription plan that’s quite affordable. It’s worth checking out trial versions to see what fits our needs best.

Basic Editing Techniques for Beginners

Editing doesn’t have to be complicated. I’ve found that simple adjustments can make a huge difference. Basic techniques like cropping for better composition, adjusting brightness and contrast, or straightening horizons can significantly improve our images. I remember when I first started editing; I was amazed at how a slight tweak in brightness transformed an otherwise dull photo into something vibrant and alive. The key is to enhance the photo without overdoing it. Sometimes, less is more!

Enhancing Colors and Contrast for Coastal Images

Coastal landscapes are all about color and contrast, and I’ve learned some nifty tricks to enhance these elements. One of my favorite techniques is using the saturation and vibrance tools to make the blues of the ocean pop or to highlight the golden tones of a sunset. I often play with the contrast slider to add depth to the images, making them more visually striking. Just be cautious not to go overboard; maintaining a natural look is essential. After all, we want our photos to reflect the beauty we experienced in person!

Showcasing Your Coastal Photography

Online Platforms for Sharing Your Work

Once we’ve edited our photos, it’s time to share them with the world! There are many online platforms where we can showcase our coastal photography. Social media sites like Instagram and Facebook are great for immediate feedback and connecting with other photographers. I’ve had the pleasure of sharing my work on these platforms, and I love seeing other artists’ interpretations of coastal scenes. Additionally, platforms like Flickr and 500px cater specifically to photographers, providing a space to share and gain inspiration.

Creating a Photography Portfolio on a Budget

Building a portfolio doesn’t have to be expensive. I’ve created mine using free website builders like Wix or WordPress, which allow us to showcase our work beautifully without a significant investment. It’s important to curate our best images and present them thoughtfully. I suggest including a variety of styles—like landscapes, close-ups of marine life, and candid shots of coastal towns—to show our versatility. Plus, sharing our photography journey through a blog can attract attention and even open up opportunities!

Networking with Other Coastal Photographers

Networking is crucial in the photography world. I’ve found that connecting with other photographers, whether through social media groups or local meet-ups, can lead to new friendships and collaboration opportunities. Engaging in online forums or attending local photography clubs can help us learn from others, share tips, and even discover local spots we might have missed. I remember bonding with fellow photographers over shared stories and experiences, which ultimately enriched my photography journey.

Safety Tips for Coastal Photographers

Understanding Tides and Currents

Safety is paramount when we’re out capturing the beauty of coastal landscapes. One of the first things I learned was the importance of understanding tides and currents. It’s easy to get swept away in the moment, but I always check tide schedules before heading to the beach. I’ve experienced moments where I didn’t realize how quickly the tide was coming in, and it taught me to always be aware of my surroundings. Knowing when to be on the shore and when to retreat can keep us safe while still allowing for incredible photo opportunities.

Wildlife Encounters: What to Know

Another aspect of safety is being prepared for wildlife encounters. Coastal areas are often home to various species, and while they can make for stunning photography, it’s essential to respect their space. I’ve had close encounters with seals and seabirds, and I always keep a safe distance and use a telephoto lens to avoid disturbing them. I recommend doing a bit of research on local wildlife to understand their behavior and how to interact safely. It’s all about enjoying nature while keeping both ourselves and the animals safe.

Protecting Your Gear from Water and Sand

Lastly, protecting our gear is critical. I’ve learned the hard way that water and sand can wreak havoc on cameras. I always carry a waterproof bag or case to shield my equipment from splashes and unexpected rain. Using lens caps and protective filters has saved my lenses from scratches and debris. I also make it a point to clean my gear after sandy beach days, ensuring that everything remains in top condition for our next adventure.

Final Thoughts

Coastal photography is a beautiful journey that combines creativity, adventure, and the sheer joy of exploring nature’s wonders. I’ve learned that with the right mindset, gear, and techniques, we can capture stunning images without breaking the bank. From finding budget-friendly accommodations to utilizing local resources, every step of the process can be fulfilling and enriching. I hope my experiences inspire you to grab your camera, explore the coastlines, and create your own breathtaking portfolio of coastal photography. Remember, it’s not just about the destination; it’s about the stories we tell through our images and the connections we make along the way. Happy shooting!

Frequently Asked Questions

What is coastal photography?

Coastal photography is the art of capturing the dynamic beauty of shorelines, oceans, and everything associated with them. It includes a variety of scenes, from sweeping beach vistas to intimate shots of tide pools filled with sea creatures, often showcasing the ever-changing nature of coastlines.

Why are budget-friendly options important for aspiring photographers?

Budget-friendly options are vital for aspiring photographers as they help keep the passion for photography accessible. They encourage creativity by allowing photographers to focus on honing their skills without the stress of high costs associated with gear and travel.

What type of camera is better for coastal photography, DSLR or mirrorless?

Both DSLR and mirrorless cameras have their pros and cons. DSLRs tend to be more affordable for entry-level options and are durable, while mirrorless cameras are lighter and more compact, making them convenient for hiking. The choice depends on the photographer’s shooting style and needs.

What is the benefit of using wide-angle lenses in coastal photography?

Wide-angle lenses are beneficial in coastal photography as they capture expansive landscapes, allowing photographers to include both the foreground and dramatic skies in one shot. They are ideal for photographing sweeping beach views and vast rocky cliffs.

How can a tripod enhance coastal photography?

A good tripod is essential for stability in coastal photography, especially in windy conditions or for long exposures. It helps prevent blurry images and allows photographers to capture detailed shots of waves and other coastal elements without worrying about camera shake.

What are some recommended coastal photography locations?

Recommended coastal photography locations include national parks like Acadia National Park in Maine and Point Reyes in California, iconic beaches such as Waikiki Beach in Hawaii and Cannon Beach in Oregon, and charming coastal towns like Bar Harbor, Maine, and Cape May, New Jersey.

What seasonal considerations should photographers keep in mind?

Photographers should consider that each season brings unique charm to coastal landscapes. Spring offers blooming flowers, summer provides long days for capturing sunsets, fall showcases rich autumn colors, and winter can present dramatic, moody scenes, especially during storms.

How can photographers use natural light to their advantage in coastal photography?

Photographers can use natural light creatively by taking advantage of the golden hour, which provides soft, warm tones. Shooting into the light can create beautiful silhouettes, while backlighting can illuminate subjects effectively, enhancing the overall quality of coastal images.

What are some budget-friendly tips for planning a coastal photography trip?

Budget-friendly tips include finding affordable accommodations like hostels or campsites, using public transit for transportation, participating in free or low-cost photography workshops, and considering gear rentals instead of purchases to save money while still accessing quality equipment.

What safety precautions should photographers take while shooting on the coast?

Photographers should understand tides and currents to ensure safety, be prepared for wildlife encounters by maintaining a safe distance, and protect their gear from water and sand by using waterproof bags and lens caps. These precautions help keep both photographers and their equipment safe while enjoying coastal adventures.

Essential Tips for Affordable Coastal Photography Adventures

Coastal photography is an exhilarating adventure that captures the beauty of shorelines and seascapes. Whether you’re a seasoned pro or just starting out, I’m excited to share essential tips for capturing stunning coastal moments without breaking the bank. Read Interesting article: Capture Stunning Coastal Landscapes on a Budget

Essential Tips for Affordable Coastal Photography Adventures

Understanding Coastal Photography

What is Coastal Photography?

Coastal photography is a captivating genre that focuses on capturing the beauty of oceans, beaches, and coastal landscapes. I remember my first time standing on a sandy shore, camera in hand, trying to freeze the magic of the waves crashing against the rocks. Each shot tells a story—whether it’s the serene calm of a sunset over the horizon or the chaotic energy of crashing waves during a storm. This type of photography invites us to explore nature’s artistry, revealing textures, colors, and moods that are unique to coastal environments.

Why Choose Coastal Photography?

There’s something truly special about coastal photography that draws many of us in. Personally, I find the combination of water, light, and landscape to be incredibly inspiring. The interplay of elements creates endless opportunities for creativity. Choosing coastal photography means embracing the thrill of the unknown; you never know how the weather might change or what unexpected beauty you might encounter. For me, every trip to the coast feels like a fresh adventure, filled with discoveries that can lead to breathtaking shots. Plus, coastal locations often offer diverse scenes—think rugged cliffs, sandy beaches, rocky shores, and bustling piers—each presenting unique photographic opportunities.

Essential Gear for Coastal Photography

Cameras for Coastal Photography

Choosing the right camera can significantly impact your coastal photography experience. I’ve experimented with both DSLRs and mirrorless cameras, and I can confidently say that either can produce stunning results. For my coastal adventures, I prefer a camera with weather sealing. This feature provides peace of mind, especially when capturing shots during unpredictable coastal weather. A camera with a good autofocus system is also vital, as it helps ensure that you can catch those fleeting moments, like a seagull taking flight or a wave crashing just right.

Recommended Lenses

The lenses you choose can make a world of difference. I’ve found that a wide-angle lens is incredibly useful for capturing expansive landscapes. It allows me to include more of the scene in one shot, making it perfect for those dramatic beach vistas. A telephoto lens also comes in handy when I want to zoom in on wildlife or distant details in the landscape. I recommend having at least one versatile zoom lens in your kit to handle various situations. I often switch between my wide-angle for landscapes and my zoom for specific details, and it’s made my photography so much more dynamic.

Tripods and Stabilizers

Stability is crucial in coastal photography, especially when working with long exposures or in windy conditions. I always pack a sturdy tripod for my trips. It allows me to capture those silky smooth water shots and keeps my camera steady during long exposure times. I also discovered that using a tripod can help me take more thoughtful compositions. It forces me to slow down, think about my framing, and really engage with the scene in front of me. For those days when I’m on the move, a lightweight travel tripod is a great option to ensure I don’t miss any opportunities.

Accessories: Filters and Waterproof Cases

Filters are fantastic tools for coastal photography. I often use a polarizing filter to reduce glare and enhance the colors of the sea and sky. It’s amazing how a simple filter can elevate a photo, making the colors pop and the water look crystal clear. Additionally, investing in a good waterproof case or cover for my camera has been a game-changer. I’ve found that the coast can be unpredictable, and having that extra layer of protection gives me the confidence to shoot without fear of damaging my gear.

Incorporating these essential gear pieces into my coastal photography trips has made a significant difference in my results. Each item serves a purpose, helping me to capture the beauty of the coast in all its forms. Whether you’re just starting out or looking to enhance your photography skills, understanding the right equipment can set you on the path to stunning coastal images. So, as you think about your next adventure, consider how these tips might help you capture the beauty of the coast like never before. Read Interesting article: Discover Affordable Sustainable Stays Around the World

Best Coastal Locations for Photography

Top Coastal Destinations

When it comes to coastal photography, choosing the right location can make all the difference. I’ve had the pleasure of visiting many stunning coastal destinations, each offering its own unique beauty. One of my absolute favorites is Big Sur in California. The dramatic cliffs, sweeping ocean views, and vibrant sunsets create a perfect backdrop for capturing mesmerizing images. I remember standing at McWay Falls, feeling the cool mist from the waterfall while snapping photos of the turquoise water below.

Another gem is the Outer Banks in North Carolina, where the vast stretches of sandy beaches and wild dunes provide endless opportunities for creativity. I often found myself wandering along the beaches during low tide, capturing reflections in the water and unique shell patterns left behind.

Then there’s the rugged coastline of Acadia National Park in Maine. The rocky shores and the colorful lighthouses offer a dramatic contrast that makes for captivating shots. I loved hiking to the top of Cadillac Mountain for sunrise; the view of the sun rising over the Atlantic was simply unforgettable. Each of these destinations has its own charm, providing a rich canvas for coastal photography.

Hidden Gems Along the Coast

While popular locations are stunning, I’ve discovered that some hidden gems can be just as rewarding. For instance, have you ever heard of Cape Disappointment in Washington? It’s an underrated spot that features both the Pacific Ocean and the Columbia River, along with breathtaking landscapes and lush forests. I stumbled upon a secluded beach there that felt like my little paradise, perfect for capturing intimate coastal moments.

Another hidden treasure is the coastal town of Cannon Beach in Oregon. While the iconic Haystack Rock is well-known, I found that the quieter spots along the shore provided the most enchanting photography opportunities. I spent hours wandering the tide pools during sunset, capturing the colors reflected in the water while the tide gently rolled in.

Don’t be afraid to veer off the beaten path! Some of my most cherished photographs have come from little-known beaches and coastal areas. Exploring less-traveled locations often leads to discovering unique perspectives and compositions.

National Parks and Coastal Reserves

National Parks and coastal reserves are often the crown jewels of coastal photography. I highly recommend visiting Olympic National Park in Washington. The park’s diverse ecosystems range from lush rainforests to rugged coastlines, providing a stunning variety of scenes to photograph. I enjoyed capturing the ethereal beauty of the Hoh Rain Forest and then heading to the coast to shoot the dramatic sea stacks at La Push. Each environment offers its own unique light and atmosphere, which keeps my creative juices flowing.

Another must-visit is Point Reyes National Seashore in California. The mix of coastal cliffs, rolling hills, and wildlife creates a dynamic setting for photography. I once spent an entire day photographing the lighthouse, trying to capture the light beams cutting through the fog. It was an experience I’ll never forget!

Don’t overlook reserves like the Cape Cod National Seashore in Massachusetts. The pristine beaches and charming coastal villages are perfect for capturing that classic New England vibe. I remember chasing the light during a late afternoon along the dunes, and it was magical. The contrast of the soft sands against the vibrant sky made for some of my favorite shots.

Whether you seek iconic spots or hidden treasures, the coast offers a wealth of photographic opportunities. Each location brings its own personality, inviting us to explore and capture the unique stories of our shorelines. So, as you plan your next coastal photography adventure, think about where you might want to go. The best part is that there’s a whole world out there waiting to be documented through our lenses, and I can’t wait for you to discover it!

Timing Your Coastal Photography Adventure

Best Seasons for Coastal Photography

Timing can significantly alter the mood and beauty of your coastal photography. From my experience, spring and fall are some of the best seasons for capturing stunning coastal images. In spring, the beaches are often less crowded, and the wildflowers along the coast can add vibrant splashes of color to your shots. The air feels fresh, and I’ve noticed that the light can be softer, which is perfect for photographing the coastline.

Fall, on the other hand, brings its own charm. The golden hues of autumn can create a warm atmosphere, and in many locations, the sunsets become more dramatic. I remember visiting the coast during October and being captivated by the way the light interacted with the changing leaves, creating a breathtaking backdrop for my photos. Winter can also be magical with its stark landscapes, especially if you’re willing to brave the chill for some unique shots of frosty beaches or stormy seas.

Golden Hour and Blue Hour: Timing Your Shots

Let’s talk about the magic of golden hour and blue hour. I’ve always found that the best times to shoot are just after sunrise and just before sunset. During golden hour, the sunlight is soft and warm, casting a beautiful glow over the landscape. This is when my coastal photos truly come to life; the colors of the sky and sea blend harmoniously, and shadows become softer, creating a dreamlike quality.

Blue hour, which occurs right after the sun sets and before it rises, has a different kind of beauty. The deep blues and purples of the sky can create an ethereal atmosphere, especially when reflecting off calm waters. I remember capturing a shot of a lighthouse during blue hour, where the light from the building contrasted beautifully against the deepening sky. It’s one of my favorite memories from my coastal photography adventures, and I encourage you to experiment with these two times of day to see how they can transform your images.

Weather Considerations and Their Impact on Photography

Weather can be unpredictable at the coast, and I’ve learned to embrace it over the years. Each weather condition brings its own unique photographic opportunities. For instance, overcast days can create soft, diffused light that’s perfect for capturing the textures of rocks and waves. I used to shy away from taking photos when it was cloudy, but now I see it as an opportunity to portray the coast in a different light.

On stormy days, I’ve found that capturing the energy of crashing waves can produce some of the most dramatic shots. It’s thrilling to be out there, feeling the wind and the spray of the ocean while I shoot. Just remember to keep safety in mind! I always make sure to stay at a safe distance from the water and be aware of changing tides.

When the sun breaks through the clouds after a storm, the resulting light can be absolutely stunning, creating vibrant rainbows or glistening droplets on surfaces. I’ve had some of my best coastal shots come from moments like these, when the weather changes unexpectedly and creates a scene I couldn’t have anticipated.

In essence, being adaptable with your photography plans based on the weather can lead to unforgettable experiences and striking images. So, as you plan your coastal photography adventure, keep in mind the best seasons, the magical hours of the day, and how various weather conditions can enhance your work. With a little bit of preparation and an open mind, you’ll be well on your way to capturing coastal moments that truly resonate.

Techniques for Capturing Stunning Coastal Shots

Composition Tips for Coastal Photography

Composition is key when it comes to capturing stunning coastal shots. I’ve learned that using the rule of thirds can help create more engaging images. By placing the horizon line in the upper or lower third of the frame, I can draw attention to either the sky or the foreground. I often find myself looking for interesting foreground elements like rocks, driftwood, or seaweed to frame my shots. This not only adds depth but also creates a leading line that guides the viewer’s eye into the scene.

Another technique I love is incorporating natural frames. I’ve used overhanging branches or rock formations to frame my subject, which can really make a photo pop. Don’t be afraid to experiment with different angles, too! I remember getting low to the ground and shooting up towards the sky, which gave my images a dramatic perspective that I hadn’t captured before. The more you play with composition, the more you’ll discover what works best for you.

Using Natural Light Effectively

Natural light can be incredibly transformative in coastal photography. I’ve found that understanding how the light interacts with the environment can elevate my images. For example, during the golden hour, I pay close attention to how the light casts shadows and highlights textures in the sand and water. I often find that the best shots come when I’m aware of how the light changes as it moves across the landscape.

On overcast days, I embrace the softer light, which is perfect for capturing the intricate details of shorelines. I also learned that backlighting can create a beautiful glow in waves and even in sea oats or grasses. Just keep an eye on your histogram to ensure you’re exposing correctly, especially in those tricky backlit situations. The magic of natural light is that it’s ever-changing, so being adaptable and observant will help you make the most of it.

Long Exposure Techniques for Waves and Skies

Long exposure photography has become one of my favorite techniques for coastal shots. There’s something mesmerizing about the way long exposures can flatten waves and create a dreamlike quality in the sky. I usually start by setting my camera on a tripod, ensuring stability while using a low ISO and a small aperture to allow for longer shutter speeds.

Neutral density (ND) filters have been a game changer for me in this process. They let me reduce the amount of light entering the lens, allowing for those smooth, silky water effects even in brighter conditions. I remember one evening at the beach, using a 10-stop ND filter to capture the waves rolling in at sunset. The result was a stunning blend of colors, and the smooth water created a serene feel that I absolutely loved.

When capturing the sky, I often experiment with longer exposures to create movement in the clouds, resulting in dynamic compositions. I’ve seen that patience is key here; waiting for the right moment when the sky is filled with dramatic clouds can really enhance those long exposure shots. It’s one of those techniques that can elevate your coastal photography to a whole new level.

Affordable Travel Tips for Coastal Photography Adventures

Budget-Friendly Transportation Options

Traveling to coastal locations doesn’t have to be expensive. I’ve found that using public transportation or rideshare services can save a lot of money compared to renting a car. In many coastal towns, you can also find bike rentals, which can be a fun way to explore while capturing photos along the way. I remember biking along the coast in Santa Monica, stopping whenever I saw an interesting shot, and it made for a fantastic day of photography.

Finding Affordable Accommodations Near the Coast

When it comes to places to stay, I’ve had great luck with budget-friendly options like hostels or camping near the coast. I remember one trip where I camped at a beach in Oregon, and waking up to the sound of waves was an experience I’ll never forget! Airbnb can also be a great resource for finding unique and affordable lodging options. Just be sure to book in advance, especially during peak seasons.

Cost-Effective Dining and Local Cuisine

Eating out can quickly add up during a photography trip, but I’ve discovered that local markets and food trucks often offer delicious, affordable options. I love trying fresh seafood and local specialties, but I also make it a point to pack snacks and drinks for long days of shooting. One of my favorite meals was picking up some fresh fish tacos from a food truck in California and enjoying them on the beach while watching the sunset—it was the perfect end to a day of photography! Read Interesting article: Discover Japan: A Backpacker’s Guide to Affordable Adventures

Editing Your Coastal Photography

Basic Editing Techniques for Coastal Images

Editing is where the magic happens for many of my coastal shots. I’ve learned that basic adjustments like cropping, straightening horizons, and tweaking exposure can make a world of difference. I often start with adjusting the contrast to make the colors pop and then move on to fine-tuning shadows and highlights. I remember one image of a sunset that looked flat until I boosted the contrast; it transformed the entire feel of the shot!

Recommended Editing Software

For editing, I typically use Adobe Lightroom and Photoshop. Lightroom is fantastic for batch processing and making global adjustments, while Photoshop allows for more intricate edits when needed. I’ve found that using presets can speed up my workflow, especially when I’m working with a lot of images from one shoot. Plus, experimenting with different styles can help develop my own editing voice.

Enhancing Colors and Textures in Coastal Photos

When it comes to enhancing colors and textures, I love using saturation and vibrance adjustments. Adding a bit of clarity can also bring out the details in waves and rocks, giving my images that extra punch. I usually pay special attention to the blues and greens in my coastal shots, making sure the ocean looks inviting and vibrant. I remember one photo where I enhanced the colors, and it felt like the ocean was literally calling to the viewer to come and dive in!

Sharing and Showcasing Your Coastal Photography

Best Platforms for Displaying Your Work

Once I’ve edited my coastal photography, I love sharing it with others. Social media platforms like Instagram and Pinterest are fantastic for showcasing my work and connecting with fellow photographers. I’ve gained so much inspiration from others and found a community that shares my passion. Creating a dedicated photography page allows me to focus on my coastal images and engage with an audience that appreciates the beauty of the ocean.

Engaging with the Photography Community

Engaging with the photography community has been incredibly rewarding for me. I’ve participated in local photo walks and online forums, where I can exchange tips and ideas with other photographers. Connecting with others not only helps me improve my skills but also allows me to discover new locations and techniques that I hadn’t considered before. I believe that sharing experiences enriches our journey as photographers.

Creating a Portfolio or Blog

Finally, I’ve found that creating a portfolio or blog to showcase my coastal photography not only helps me reflect on my growth but also provides a platform to share my stories. Writing about my experiences can inspire others to explore coastal photography themselves. I recommend that anyone passionate about photography consider starting a blog or portfolio—it’s a beautiful way to document your journey and connect with others who share the same passion.

Final Thoughts

Coastal photography has been a journey of discovery for me, filled with breathtaking sights and unforgettable moments. Each trip to the coast offers new opportunities to connect with nature and express creativity through my lens. With the right techniques, gear, and a sense of adventure, I believe anyone can capture stunning coastal images. So whether you’re just starting out or looking to refine your skills, remember to embrace the beauty around you and let your passion guide your photography. Adventure awaits, and I can’t wait to see what you’ll create!

Frequently Asked Questions

What is coastal photography?

Coastal photography is a captivating genre that focuses on capturing the beauty of oceans, beaches, and coastal landscapes, revealing unique textures, colors, and moods characteristic of coastal environments.

Why should I choose coastal photography?

Coastal photography offers endless opportunities for creativity due to the interplay of water, light, and landscape. Each trip to the coast can lead to unexpected beauty and fresh adventures, making it a thrilling experience for photographers.

What type of camera is best for coastal photography?

Both DSLRs and mirrorless cameras can produce stunning results for coastal photography. A camera with weather sealing and a good autofocus system is recommended for capturing fleeting moments in unpredictable coastal weather.

What lenses are recommended for coastal photography?

A wide-angle lens is ideal for capturing expansive landscapes, while a telephoto lens is useful for zooming in on wildlife or distant details. Having at least one versatile zoom lens can enhance your photography experience.

What accessories should I consider for coastal photography?

Filters, such as polarizing filters, can reduce glare and enhance colors. Additionally, a good waterproof case for your camera can protect your gear from unpredictable coastal conditions.

What are some top coastal destinations for photography?

Some top coastal destinations include Big Sur in California, the Outer Banks in North Carolina, and Acadia National Park in Maine, each offering unique beauty and photographic opportunities.

What are hidden gems for coastal photography?

Hidden gems like Cape Disappointment in Washington and Cannon Beach in Oregon can provide enchanting photography opportunities away from the crowds, often revealing unique perspectives and compositions.

What is the best time of year for coastal photography?

Spring and fall are considered the best seasons for coastal photography due to less crowded beaches and beautiful light. Golden hour and blue hour are also ideal for capturing stunning images.

What editing software is recommended for coastal photography?

Adobe Lightroom is great for batch processing and global adjustments, while Photoshop allows for more intricate edits. Using presets can also speed up the editing workflow.

How can I share and showcase my coastal photography?

Social media platforms like Instagram and Pinterest are excellent for showcasing your work. Engaging with the photography community through local photo walks and online forums can also enhance your skills and connections.

Capture Stunning Coastal Landscapes on a Budget

Capturing stunning coastal landscapes doesn’t have to drain your wallet. With the right tips and tricks, you can create breathtaking images while sticking to a budget. Let’s explore how to make the most of your coastal photography experience. Read Interesting article: Top Destinations for Nature Photography on a Budget

Capture Stunning Coastal Landscapes on a Budget

Understanding Coastal Landscapes

Coastal landscapes are some of the most breathtaking sights on our planet. From rugged cliffs to tranquil beaches, these areas offer diverse and dramatic scenery that can mesmerize any photographer. As I embarked on my own journey to capture these stunning vistas, I quickly realized that understanding the types of coastal landscapes and their unique features is essential for anyone looking to take beautiful photos.

Types of Coastal Landscapes

Coastal landscapes come in various forms, each presenting unique opportunities for stunning photography. Here are some of the most common types I’ve encountered:

  • Beaches: Sandy shores with gentle waves are often the most popular spots. I love capturing the interplay of light on the water and the texture of the sand.
  • Cliffs and Bluffs: These dramatic formations create stunning backdrops. The sheer drop often results in incredible views, especially during sunrise or sunset.
  • Rocky Coastlines: With tide pools, boulders, and rugged terrain, rocky coastlines are perfect for capturing the raw beauty of the ocean.
  • Estuaries and Marshlands: These environments provide a different perspective with lush greenery and wildlife. I found that they can be particularly rich in texture and color.

Unique Features of Coastal Photography

Coastal photography is not just about the landscape; it also involves unique features that can enhance your images. I noticed a few key elements that make coastal photography particularly interesting:

  • Light Variations: The light changes dramatically near the coast. The way sunlight reflects off the water creates mesmerizing patterns that I love to capture.
  • Weather Conditions: Coastal weather can be unpredictable. I’ve learned to embrace storms and fog, as they can add drama to my photos.
  • Movement: The constant motion of waves and tides brings life to photos. I often try to capture that movement, whether it’s a wave crashing or the gentle lapping of water.

Understanding these aspects not only helps in planning my shots but also in finding creative ways to tell a story through my images. Each coastal landscape presents its own set of challenges and opportunities, which I find thrilling and inspiring.

Essential Gear for Coastal Photography on a Budget

With a clear understanding of what coastal landscapes offer, the next step is gear. When I first got into photography, I was overwhelmed by the amount of equipment available. However, I’ve learned that you can still take fantastic photos without spending a fortune. Here’s what I recommend based on my own experiences.

Camera Options: DSLR vs. Mirrorless vs. Smartphone

Choosing the right camera is crucial, but it doesn’t have to be expensive. I started with a basic DSLR, but as I got comfortable, I explored other options:

  • DSLR Cameras: They offer great image quality and flexibility with lenses. While they can be pricey, you can find good used options.
  • Mirrorless Cameras: These are compact and lightweight with similar quality to DSLRs. I’ve found that they’re easier to carry when hiking along the coast.
  • Smartphones: Don’t underestimate your phone! Modern smartphones have powerful cameras. I’ve taken some of my favorite coastal shots with my phone when traveling light.

Essential Accessories: Tripods, Filters, and Lenses

Accessories can significantly enhance your photography. I’ve invested in a few key items that have made a noticeable difference:

  • Tripod: A stable tripod is invaluable, especially for long exposure shots at the coast. I always bring mine for those dreamy water photos.
  • ND Filters: Neutral Density filters help reduce light entering the lens, allowing for longer exposures even in bright conditions. They’ve helped me create stunning silky water effects.
  • Wide-Angle Lens: A good wide-angle lens is essential for capturing expansive coastal scenes. It allows you to showcase the grandeur of the landscape.

Budget-Friendly Photography Apps

In this digital age, apps can be fantastic tools for photographers. I’ve found several that are budget-friendly and incredibly useful:

  • Photo Editing Apps: Apps like Snapseed and Lightroom Mobile are free and offer powerful editing tools that can enhance your coastal photos.
  • Weather Apps: Knowing the weather conditions is crucial. Apps like Weather Underground help me plan my shoots around the best lighting.
  • Photography Community Apps: Joining platforms like Instagram or 500px allows me to connect with fellow photographers and get inspired by their work.

By investing in the right gear and utilizing budget-friendly options, I’ve been able to capture stunning coastal landscapes without breaking the bank. It’s all about finding what works for you and embracing creativity in your photography journey. Read Interesting article: Capture Nature’s Wonders: Budget-Friendly Photography Tips

Best Times to Capture Coastal Landscapes

Timing can make a world of difference in coastal photography. Over the years, I’ve learned that not only the hour of the day but also the season can dramatically influence the look and feel of my photos. Here’s what I’ve discovered about the best times to capture those breathtaking coastal landscapes.

Golden Hour: Timing Your Shots

One of my favorite times to shoot is during the golden hour, which is the hour after sunrise and the hour before sunset. There’s something magical about the quality of light during this time. The sun hangs low in the sky, casting a warm, golden hue that enhances colors and creates long shadows. I remember my first experience catching the sunrise over a rocky coastline; the way the light danced on the water made it feel like I was witnessing a masterpiece unfold before my eyes.

When I plan my shoots around these times, I often find that the soft light creates stunning contrasts between the waves and the land. If you’re not familiar with the term, the “golden hour” is named for the warm tones it produces, making it perfect for capturing the essence of coastal landscapes. I recommend checking sunrise and sunset times in your area and arriving a little early to set up your shot.

Seasonal Considerations for Coastal Photography

Each season brings its own unique beauty to coastal landscapes. I’ve found that spring and fall are my favorite times for coastal photography. In spring, the flowers bloom, and the landscapes are vibrant and alive. I’ve captured some of my best photos with wildflowers in the foreground against a backdrop of crashing waves.

Fall, on the other hand, offers a different set of colors and moody skies. The changing foliage can create stunning contrasts with the blue ocean. I once visited a coastal area in early October, and the combination of the ocean’s blue and the warm autumn colors was breathtaking. The cooler weather also means fewer crowds, allowing for a more peaceful shooting experience.

Summer is popular for beachgoers, and while it brings bright and lively scenes, I find that the harsh midday sun can be challenging. I recommend avoiding peak hours and instead focusing on early morning or late afternoon light for the best results. Winter can be equally rewarding, with dramatic skies and the potential for snow along coastal areas. I’ve seen some impressive winter scenes where the ocean meets frost-covered land, creating a serene and ethereal atmosphere.

Top Coastal Locations for Stunning Photography

Having explored various coastlines, I’ve come across some truly spectacular spots that are perfect for photographic adventures. Whether you’re looking for iconic locations or hidden gems, I’ve compiled a list of places worth visiting.

Iconic U.S. Coastal Spots

When it comes to iconic coastal photography locations in the U.S., a few places stand out based on my experiences:

  • Big Sur, California: The dramatic cliffs and breathtaking ocean views make this stretch of coast unforgettable. I often find myself stopping multiple times just to capture the changing light.
  • Acadia National Park, Maine: This park offers rugged coastlines and stunning views of the Atlantic. The variety of landscapes, from rocky shores to serene lakes, is perfect for diverse photo opportunities.
  • Key West, Florida: Known for its beautiful sunsets, I’ve enjoyed capturing the vibrant colors as the sun dips below the horizon. The relaxed atmosphere adds to the charm of photography here.

Hidden Gems: Less Crowded Coastal Areas

If you’re like me and prefer avoiding the crowds, there are many lesser-known spots that can provide equally stunning images:

  • Point Reyes National Seashore, California: This area features rugged coastlines and stunning photography opportunities without the tourist traffic.
  • Ocracoke Island, North Carolina: A quieter option in the Outer Banks, Ocracoke offers pristine beaches and charming coastal scenery.
  • Tybee Island, Georgia: This laid-back beach town has beautiful shorelines and a historic lighthouse, perfect for unique coastal shots.

International Coastal Destinations on a Budget

If you’re up for a bit of travel, there are incredible coastal destinations around the world that won’t break the bank:

  • Portugal’s Algarve Region: With stunning cliffs and gorgeous beaches, I’ve found that this area offers incredible value for the views you get.
  • Amalfi Coast, Italy: While it can be touristy, I discovered that there are many less-visited towns along the coast that provide stunning backdrops for photos.
  • Balearic Islands, Spain: Islands like Menorca offer stunning coastlines with fewer crowds. The clear waters are perfect for capturing underwater shots, too!

Exploring these locations has enriched my photography portfolio and provided countless memories. Planning your visit around the right time and knowing where to go can enhance your coastal photography experience significantly. Read Interesting article: Affordable Wildlife Photography Adventures You Can’t Miss

Photography Techniques for Coastal Landscapes

As I delved deeper into the world of coastal photography, I discovered that having the right techniques can make a significant difference in the quality of my images. Each technique has its own charm and can help convey the beauty of the coast in different ways. Here are some of the techniques I’ve found particularly useful.

Using Natural Light to Your Advantage

Natural light is a game-changer in photography, especially when capturing coastal landscapes. I’ve learned to be mindful of how light interacts with the environment. For instance, during early mornings or late afternoons, the light is softer and more flattering, making everything look more vibrant. I find that shooting with the sun behind me often creates the best results, illuminating the subjects beautifully.

Reflective surfaces, like water or wet sand, can also enhance the lighting in my photos. I often position myself to capture the reflections, which add an interesting layer to the composition. I remember one occasion where the sun was setting behind me, and the water reflected a kaleidoscope of colors; it was a moment I felt lucky to witness and capture.

Long Exposure Techniques for Water Shots

Long exposure photography is one of my favorite techniques to use for coastal shots. It allows me to create that dreamy, silky effect of moving water, which I think adds a sense of calm to my images. To achieve this, I usually set my camera on a tripod to avoid any shake, especially when using slower shutter speeds.

I often play around with ND filters to make this technique work during the day. They reduce the amount of light getting into the camera, allowing me to use longer exposure times even when the sun is bright. I once set up my tripod at a beach during sunset, using a 10-second exposure to capture the gentle waves rolling over the rocks. The result was stunning, with a soft, flowing effect that brought the image to life.

When experimenting with long exposures, I recommend starting with 1-2 seconds and gradually increasing the time until you’re satisfied with the look. I find that each environment reacts differently, so it’s all about trial and error!

Framing and Composition Tips

Good composition can elevate a photo from ordinary to extraordinary. I’ve discovered a few framing techniques that consistently help me create more compelling coastal images. One of my favorites is the rule of thirds. By placing key elements along the grid lines or at their intersections, I can create balance and draw the viewer’s eye into the photo.

Leading lines are another technique I often utilize. Natural lines like pathways, shorelines, or cliffs can guide the viewer’s gaze through the image. I remember wandering along a winding coastal path, using it to lead the eye toward the distant horizon in my photograph. It added depth and context, making the viewer feel like they were walking alongside me.

Don’t be afraid to fill the frame with a particular subject, whether it’s a rock formation or a dramatic sky. Sometimes, getting closer to a subject can reveal intricate details that tell a story. I’ve captured the textures in weathered rocks and the delicate patterns of sand that might go unnoticed from a distance.

Lastly, always be open to experimenting with angles. I’ve crouched down low to catch the shoreline from a new perspective or climbed a small hill to get an aerial view. Each angle can offer a fresh take on a well-known scene.

Editing Your Coastal Landscape Photos

After capturing my coastal images, the editing process becomes another exciting part of my photography journey. It’s during this stage that I can enhance the colors, contrast, and overall mood of my photos. I’ve learned that some basic editing techniques can truly elevate my work without the need for expensive software.

Free and Affordable Editing Software Options

When I first started editing my photos, I found several free or low-cost software options that provided powerful tools for enhancing images. Programs like GIMP and Paint.NET are great alternatives to pricey software, offering a range of editing features.

Adobe Lightroom is another favorite of mine, especially its mobile version, which is budget-friendly. It’s user-friendly and perfect for quick edits on the go. I love that I can easily adjust exposure, contrast, and colors to make my coastal shots pop!

Another tool I’ve recently discovered is Canva. While usually associated with graphic design, it has some excellent photo editing features and templates that can help showcase my coastal images beautifully.

Basic Editing Techniques for Coastal Images

Editing doesn’t have to be complicated; I often focus on a few key adjustments. One of the first things I do is adjust the exposure. Sometimes my shots come out a bit too dark or overly bright, and a simple adjustment can make a world of difference.

I also pay attention to color saturation and vibrance. Coastal landscapes are often rich in color, and enhancing those hues can bring out the beauty of the scenery. I’ve noticed that a bit of contrast can help create depth, especially in photos with both sky and water.

Lastly, cropping can significantly improve composition. I often crop out distractions or adjust my framing to follow the rule of thirds. A little tweak here and there can transform an average shot into something truly stunning.

Editing is a personal touch that allows us to express our unique vision. I encourage you to find your editing style and let your creativity shine through!

Frequently Asked Questions

What are some common types of coastal landscapes for photography?

The most common types of coastal landscapes include beaches, cliffs and bluffs, rocky coastlines, and estuaries and marshlands. Each type offers unique opportunities for stunning photography.

What is the golden hour and why is it important for coastal photography?

The golden hour is the period shortly after sunrise and before sunset when the light is soft and warm. It’s important for coastal photography because it enhances colors and creates long shadows, making the landscape more visually appealing.

What essential gear do I need for coastal photography on a budget?

Essential gear for coastal photography on a budget includes a camera (DSLR, mirrorless, or smartphone), a stable tripod, ND filters, and a wide-angle lens. These items can significantly enhance your photography without breaking the bank.

How can I utilize natural light effectively in coastal photography?

To utilize natural light effectively, shoot during early mornings or late afternoons when the light is softer. Position yourself to capture reflections from water or wet sand, which can add depth and interest to your photos.

What are some recommended photography apps for budget-friendly editing?

Budget-friendly photography apps include Snapseed and Lightroom Mobile for editing, and Weather Underground for checking weather conditions. These apps can enhance your photos and help you plan your shoots effectively.

What techniques can I use to create long exposure shots of water?

To create long exposure shots, use a tripod to avoid shake and ND filters to reduce light entering the camera. Experiment with exposure times starting from 1-2 seconds to achieve the desired silky effect of moving water.

What composition tips can help improve my coastal landscape photos?

To improve composition, use the rule of thirds to balance key elements, incorporate leading lines to guide the viewer’s gaze, fill the frame with subjects for detail, and experiment with different angles for fresh perspectives.

Which coastal locations are recommended for stunning photography in the U.S.?

Recommended U.S. coastal locations for stunning photography include Big Sur, California; Acadia National Park, Maine; and Key West, Florida. These spots offer iconic views and diverse landscapes ideal for photography.

What basic editing techniques should I focus on for coastal images?

Basic editing techniques for coastal images include adjusting exposure, enhancing color saturation and vibrance, increasing contrast for depth, and cropping to improve composition. These adjustments can significantly elevate your images.

What are some international coastal destinations that are budget-friendly?

Budget-friendly international coastal destinations include Portugal’s Algarve Region, the Amalfi Coast in Italy, and the Balearic Islands in Spain. These areas offer stunning views and photography opportunities without high costs.

Mastering Landscape Photography in the Mountains on a Budget

Capturing the breathtaking beauty of mountain landscapes doesn’t have to drain your wallet. With a little creativity and strategic planning, you can master this art on a budget. If you’re looking for inspiration, check out Top Budget-Friendly Destinations for Mountain Photography.

Mastering Landscape Photography in the Mountains on a Budget

Understanding Landscape Photography

What is Landscape Photography?

Landscape photography is more than just snapping pictures of pretty views. It’s a way to connect with nature and share its beauty with others. I remember my first attempts at landscape photography; I was captivated by the vastness of the mountains and the way the light danced over them. It’s about capturing the essence of a place, the mood of the moment, and often, it’s about storytelling. A great landscape photo can evoke emotions and transport viewers to that specific location, making them feel as if they were there alongside you.

Different Types of Landscape Photography

When it comes to landscape photography, there are several styles to explore. I found that each type offers unique challenges and rewards:

  • Classic Landscapes: These are broad vistas that showcase a wide view of the mountains, valleys, or seascapes.
  • Close-Up Landscapes: This style involves focusing on specific features like rocks, trees, or flowers. I often find that these intimate shots reveal details that larger landscapes might overlook.
  • Abstract Landscapes: Here, the focus is on shapes, colors, and textures rather than recognizable scenes. This approach can lead to some striking, artistic images.
  • Adventure Landscapes: Capturing landscapes while engaging in outdoor activities like hiking or climbing adds a dynamic element to your photography.

Exploring these different types helped me discover what resonates with me most, and I encourage you to experiment with each to find your style.

The Importance of Composition

Composition is the backbone of any great photograph. I learned early on that arranging elements within the frame can drastically change the impact of an image. Using techniques like the rule of thirds, leading lines, and framing can elevate a simple landscape into something extraordinary. For example, when I started using the rule of thirds, I noticed how placing the horizon line in the upper third of the frame added depth and interest to my photos. I often take time to scout my locations, looking for natural lines in the landscape, such as rivers or paths, that can draw the viewer’s eye into the scene.

Another tip I picked up is to include foreground elements. Adding something in the foreground can create depth in your images, making the viewer feel more immersed in the scene. I once shot a photo of a mountain range with wildflowers in the foreground, and the depth it added made the shot feel much more alive and engaging.

Choosing the Right Gear on a Budget

Essential Camera Equipment for Landscape Photography

When I first got into landscape photography, I thought I needed the most expensive equipment to get good shots. But I quickly realized that it’s more about understanding how to use what you have. A decent DSLR or mirrorless camera can do wonders, even if it isn’t the latest model. I often recommend starting with a camera that allows you to manually adjust settings. This way, you can play around with exposure, aperture, and ISO to achieve the desired effect.

If you’re really on a tight budget, you might also consider using an older model or even a second-hand camera. I’ve found that many photographers sell their gear to upgrade, and you can often get a great deal on perfectly functional equipment. It’s amazing how much beauty can be captured with just the basics!

Affordable Lenses for Mountain Photography

When it comes to lenses, I’ve learned that a good zoom lens can be incredibly versatile. A 24-70mm lens is a fantastic option for landscape photography, allowing you to capture wide vistas as well as details up close. For budget-conscious photographers, looking for third-party lenses from brands like Tamron or Sigma can save a lot of money without compromising on quality. I’ve used these lenses, and they’ve performed beautifully in various conditions.

Tripods and Accessories: Budget-Friendly Options

A sturdy tripod is a must-have for landscape photography, especially in the mountains where stability is key for long exposure shots. I remember investing in a budget tripod that I thought would be flimsy, but it surprisingly held up well against the wind. Look for tripods that are lightweight yet durable, as you’ll want something easy to carry on hikes. Additionally, consider getting a remote shutter release to minimize camera shake—this addition can make a significant difference in clarity.

Smartphone Photography: Capturing Stunning Landscapes

Don’t overlook your smartphone! I’ve captured some of my favorite landscape shots with my phone, especially when I didn’t want to lug around my camera gear. Modern smartphones come equipped with impressive cameras and editing tools. I recommend using apps like Snapseed or Adobe Lightroom Mobile to enhance your images right from your phone. It’s a great way to experiment with composition and editing without spending a fortune. For more tips, check out Essential Tips for Budget Mountain Photography Adventures.

Mastering landscape photography in the mountains on a budget is entirely possible with the right approach and mindset. By understanding the basics of photography, choosing the right gear, and tapping into the power of creativity, we can all capture the stunning beauty of the great outdoors without breaking the bank.

Planning Your Mountain Photography Trip

Best Locations for Mountain Photography

When it comes to mountain photography, choosing the right location can make all the difference. I’ve traveled to various mountain ranges, and each has its unique charm. Some of my favorite spots include the Rocky Mountains in Colorado, where the jagged peaks create dramatic backdrops, and the Sierra Nevada in California, with its stunning alpine lakes. I remember hiking to the top of a ridge in the Tetons and being blown away by the panoramic views. Researching locations ahead of time is crucial; I often use websites like AllTrails to find popular trails that lead to breathtaking viewpoints.

National parks are also fantastic places for landscape photography. They often have well-marked trails and accessible viewpoints. For instance, Glacier National Park in Montana offers incredible scenery and diverse landscapes. I’ve found that the beauty of a location can also vary depending on the time of year, so it’s worth considering seasonal changes. Spring wildflowers, autumn foliage, or winter snows can dramatically alter the mood of your photographs. Additionally, check out Capture Stunning Mountain Landscapes on a Budget for more insights.

Researching Weather Conditions and Time of Day

Weather can make or break a photography trip. I always check the forecast before heading out, as the right conditions can dramatically enhance my shots. For example, I’ve experienced fog rolling in over mountains, which created an ethereal atmosphere in my photos. I make it a habit to plan my outings during the golden hours—early morning or late afternoon—when the light is soft and warm. This golden hue can bring landscapes to life in ways that harsh midday sun simply cannot.

Additionally, I often consider how weather patterns might affect lighting. For example, a stormy sky can add drama to a landscape, while clear skies can bring out vibrant colors. Apps like Weather Underground and The Weather Channel can help me stay updated on real-time conditions, ensuring I’m in the right place at the right time.

Permits and Regulations for Mountain Photography

Before embarking on a photography adventure, I’ve learned that it’s essential to research any permits or regulations that might be in place. Many national parks and protected lands require permits for commercial photography or drone usage. I remember my excitement turning to disappointment when I found out I couldn’t use my drone in a specific area because I hadn’t checked the regulations beforehand.

It’s always best to check the official website of the location you plan to visit. Some places may have specific guidelines to protect wildlife and natural resources. Understanding these rules not only helps us stay compliant but also shows respect for the environment we’re enjoying and photographing.

How to Create a Photography Itinerary

Creating a photography itinerary is something I find incredibly helpful. It allows me to map out the locations I want to visit and the times I want to shoot. I typically start by listing the spots I want to capture, then I plot them on a map. This helps me visualize the distances between locations and plan my travel times accordingly. I try to group nearby locations together to maximize my shooting time, especially since the best light doesn’t last long.

In my experience, flexibility is key. Weather and light can change quickly, and sometimes the best photos come from spontaneous decisions. I remember planning to shoot the sunrise at one location, but when I got there, I was captivated by the light hitting a nearby mountain instead. Having a general plan is great, but being willing to adapt can lead to even better images. I also make sure to leave time for breaks and meals—trust me, shooting in nature can be exhausting!

Once my itinerary is set, I make sure to pack accordingly, bringing along any gear I might need for specific locations. Keeping track of everything helps me stay organized and ensures I don’t miss any opportunities to capture the beauty around me.

Techniques for Capturing Stunning Mountain Landscapes

Understanding Light and Its Impact on Photography

Light is arguably the most important element in photography, and I’ve spent a lot of time learning how to use it to my advantage. The way light interacts with a landscape can completely change the mood of a photo. I remember hiking up a mountain at dawn, and as the sun began to rise, the landscape transformed before my eyes. The soft, golden light illuminated the peaks and valleys, creating a magical atmosphere. I’ve learned to pay attention to how the quality of light varies throughout the day. Early mornings and late afternoons offer the best chances for capturing dramatic shadows and vibrant colors.

One technique I often use is to look for backlighting, where the sun shines from behind the subject. This creates a soft glow that can add a beautiful halo effect around trees or mountain ridges. Additionally, I’ve experimented with different weather conditions—cloudy days can provide diffused light that brings out the richness in colors, while stormy skies can create a more intense and moody feel. I always recommend keeping an eye on the sky and adjusting your plans accordingly, as the best light can sometimes appear unexpectedly!

Using Leading Lines and Framing Techniques

Creating a strong composition is key to drawing viewers into your landscape photos. One technique I love is using leading lines. These are natural lines in the landscape, like rivers, trails, or fence lines, that guide the viewer’s eye toward the main subject. I once photographed a breathtaking mountain scene where a winding river led directly to the peaks in the background. It not only added depth but also created a sense of journey within the image.

Framing, on the other hand, involves using elements within the scene to create a ‘frame’ around your subject. This could be overhanging branches, rock formations, or even an archway. I find that framing can make the photograph feel more intimate and focused. I often look for opportunities to incorporate these techniques when I’m out shooting. They help create a more engaging visual story and can elevate an image from good to great.

Long Exposure Photography in the Mountains

Long exposure photography is a technique that I’ve become quite fond of, especially in mountain landscapes. It allows me to capture the movement of clouds or the effect of flowing water in a way that adds a sense of tranquility to my images. To achieve this, I generally use a tripod to keep my camera steady and a neutral density (ND) filter to reduce the amount of light entering the lens, allowing for longer shutter speeds.

I remember one evening at a lake in the mountains, where I set my camera up to take a long exposure shot of the sunset reflecting off the water. As the sky turned vibrant shades of pink and orange, the stillness of the lake created a perfect mirror effect, and the long exposure smoothed out any ripples. It was a magical moment that I was thrilled to capture. Long exposures can really transform how we perceive motion in landscapes, making them a powerful tool in our photography arsenal.

Tips for Shooting in Different Weather Conditions

Mountain weather can be unpredictable, but I’ve learned to embrace it rather than shy away from it. Each weather condition offers unique opportunities for stunning photographs. On rainy days, for instance, I often find that clouds rolling over the mountains can create a dramatic backdrop. I’ve captured some of my favorite shots during light rain, with droplets on leaves adding an extra layer of interest to my images.

When shooting in foggy conditions, I find the ethereal quality it brings can be incredibly captivating. I remember a morning hike when the fog enveloped the mountains, creating a mystical scene that felt almost otherworldly. The key is to adjust your camera settings accordingly: I often increase the ISO to compensate for lower light levels and use a wide aperture to let in as much light as possible.

On sunny days, I make sure to be aware of harsh shadows and blown-out highlights. I’ve learned to seek out shaded areas or to shoot during the golden hour to avoid these issues. Additionally, I’ll often look for interesting foreground elements to include, as this can help balance out the bright sky. Adapting to various weather conditions not only challenges us as photographers but also can lead to some of the most memorable shots of our adventures.

Post-Processing on a Budget

Free and Affordable Photo Editing Software

Once I started capturing my mountain landscapes, I quickly realized the importance of post-processing. It’s like the icing on the cake! Thankfully, there are plenty of free and affordable editing software options available that can help enhance my photos without breaking the bank. For instance, I discovered GIMP, which is a powerful open-source program that rivals much more expensive software. I enjoy using it for detailed edits and adjustments.

Another fantastic option is Adobe Lightroom, which often offers a subscription model that can be more budget-friendly than buying standalone software. I find that the mobile version is particularly handy for editing on the go. Even apps like Snapseed, which is free on smartphones, provide a surprising amount of control and flexibility when editing images. These tools have helped me take my photography to the next level, proving that great editing doesn’t have to come with a hefty price tag.

Basic Editing Techniques for Landscape Photos

When I dive into editing, I like to start with the basics. Cropping is usually my first step; it helps me focus on the main elements of the photo and can dramatically improve composition. I often adjust the exposure to brighten or darken images based on the mood I want to convey. I’ve found that playing around with shadows and highlights can add depth, especially in mountainous scenes where contrast is key.

Another technique I use is adjusting the white balance. Sometimes, photos can appear too warm or cool based on the lighting conditions at the time of capture. By tweaking the white balance, I can bring out the true colors of the landscape. Additionally, I love applying clarity and vibrance to enhance details and make colors pop, creating a more striking final image. These simple adjustments can make a world of difference!

Enhancing Colors and Contrast in Your Images

Color is one of the most exciting aspects of landscape photography. I often take advantage of saturation and vibrance adjustments to make the hues in my photos leap off the screen. It’s amazing how a little enhancement can transform a dull image into something vivid and lively. I remember editing a photo of a sunrise over the mountains, where a slight boost in saturation made the oranges and pinks sing.

Contrast is another vital element. Increasing contrast can help separate the foreground from the background, adding depth and dimension to the scene. I often use the curves tool to fine-tune contrast, allowing me to create more dramatic effects. These enhancements not only help my images stand out but also capture the feelings I experienced while shooting. It’s like giving life back to the moments I witnessed.

Showcasing Your Work without Breaking the Bank

Creating a Photography Portfolio on a Budget

Once I built up a collection of landscape photos, I wanted to share my work with others. Creating a photography portfolio doesn’t need to be expensive. I recommend using free website builders like Wix or WordPress, which allow us to create visually appealing portfolios without any coding skills. I started with a simple layout that showcased my favorite images and included a brief bio. It’s a great way to share my passion and connect with others.

Social Media Platforms for Sharing Your Work

Social media has become a powerful tool for photographers, and I’ve found platforms like Instagram to be incredibly effective for showcasing my landscape photography. Sharing my images there has not only allowed me to reach a wider audience but also connect with fellow photographers. I enjoy using relevant hashtags to increase my reach, and I’ve even discovered photography communities that provide support and feedback on my work. It’s amazing how many opportunities can arise from simply sharing our passion online!

Participating in Photography Contests and Communities

Another way I showcase my work is by participating in photography contests. Many organizations and online platforms host competitions that can be entered for free or with a small fee. I’ve entered a few, and while I may not always win, the experience of sharing my work and receiving feedback is invaluable. Plus, it’s a great way to connect with the photography community and find inspiration in others’ work.

Learning and Improving Your Skills

Online Resources and Tutorials for Landscape Photography

The learning never stops in photography, and I’ve found countless online resources that have helped me improve. Websites like YouTube are treasure troves of tutorials on everything from basic camera settings to advanced editing techniques. I remember binge-watching videos on landscape photography tips and picking up a few tricks that I immediately tried on my next outing.

Joining Photography Clubs and Groups

Joining local photography clubs has been another rewarding experience for me. These groups often organize meet-ups and photo walks, providing opportunities to learn from more experienced photographers. I’ve made friends who share my passion for photography, and we often exchange tips and critiques. It’s a supportive environment that fosters growth and creativity.

Finding Affordable Workshops and Courses

If you’re looking for more structured learning, consider affordable workshops or online courses. I’ve participated in a few that were budget-friendly and packed with valuable information. Often, local photographers offer workshops that focus on specific techniques or locations, which can be a fantastic way to dive deeper into the craft while networking with fellow enthusiasts.

Budget Tips for Mountain Photography

Finding Affordable Travel Options

Traveling to stunning mountain locations doesn’t have to be a financial burden. I’ve learned to be resourceful when planning trips, often booking flights and accommodations during off-peak seasons to save money. Websites like Skyscanner and Google Flights have been helpful tools for finding the best deals. Additionally, I sometimes consider carpooling with fellow photographers to share travel costs, which turns out to be both economical and a chance to make new friends!

Camping vs. Lodging: Cost-Effective Accommodation

When it comes to accommodation, camping can be a great way to save money while immersing myself in nature. I’ve had some of my best photography experiences while camping near breathtaking mountain landscapes. National parks often have campgrounds that are affordable and conveniently located near popular trails. However, if camping isn’t an option, I look for budget-friendly lodges or hostels that provide a cozy place to rest after a long day of shooting.

Pack Smart: Essential Gear without Extra Weight

Packing smart is essential for mountain photography. I’ve learned to take only the gear I need to avoid carrying unnecessary weight on hikes. A lightweight camera bag helps me stay organized and makes it easier to reach my equipment quickly. I prioritize bringing versatile lenses, a sturdy tripod, and essential accessories like extra batteries and memory cards. This way, I’m prepared for any situation while keeping my load manageable.

Utilizing Local Resources and Knowledge

Finally, I always tap into local resources when planning my photography trips. Talking to locals can provide invaluable insights on hidden gems and the best times to shoot. I remember speaking with a ranger in a national park who pointed me to a secluded viewpoint that turned out to be one of my favorite spots. Connecting with local photographers can also lead to collaborations or opportunities to learn about the area’s unique features.

Final Thoughts

Photography in the mountains offers endless opportunities for creativity and connection with nature, and it doesn’t have to come with a hefty price tag. By approaching it with careful planning and creative strategies, we can capture stunning landscapes without breaking the bank. From understanding the intricacies of light and composition to utilizing budget-friendly gear and post-processing techniques, our photography journeys can be fulfilling and financially accessible. I’ve found that the experiences and memories made while capturing these beautiful landscapes are what truly matter, and I hope you find the same joy in your own photography adventures.

Frequently Asked Questions

What is landscape photography?

Landscape photography is an art form that involves capturing the beauty of nature, often focusing on the essence of a place and storytelling. It seeks to evoke emotions and transport viewers to specific locations.

What are the different types of landscape photography?

There are several styles of landscape photography, including classic landscapes, close-up landscapes, abstract landscapes, and adventure landscapes. Each style presents unique challenges and rewards, allowing photographers to explore various aspects of the landscape.

How can I improve my composition in landscape photography?

Improving composition involves techniques such as the rule of thirds, leading lines, and including foreground elements. These methods help create depth and interest in photographs, enhancing the overall impact of the image.

What essential camera equipment do I need for landscape photography on a budget?

A decent DSLR or mirrorless camera that allows manual settings is essential. Additionally, consider using older models or second-hand cameras, as well as a versatile zoom lens like a 24-70mm for diverse shots.

What tips are there for smartphone photography in landscapes?

Modern smartphones come equipped with impressive cameras and editing tools. Using apps like Snapseed or Adobe Lightroom Mobile can enhance images taken with your phone, allowing for creativity without the need for expensive gear.

What should I consider when planning a mountain photography trip?

When planning, research the best locations, weather conditions, and any necessary permits or regulations. Creating a photography itinerary can help maximize shooting time and ensure you capture your desired landscapes.

How can weather conditions affect landscape photography?

Weather can dramatically influence photography outcomes. Different conditions, like fog or clouds, can create unique atmospheres, while golden hours offer the best lighting for capturing vibrant landscapes.

What are some budget-friendly post-processing tools for landscape photography?

Free and affordable photo editing software options include GIMP and Adobe Lightroom. Apps like Snapseed also offer editing capabilities on smartphones, allowing photographers to enhance their images without high costs.

How can I showcase my photography work without spending much?

Creating a photography portfolio can be done using free website builders like Wix or WordPress. Additionally, using social media platforms like Instagram for sharing work and participating in photography contests can help gain visibility.

What budget tips are there for traveling to mountain photography locations?

Traveling on a budget can involve booking during off-peak seasons, considering camping for accommodation, and packing only essential gear to reduce weight. Utilizing local resources can also provide insights into cost-effective travel options.

Top Budget-Friendly Destinations for Mountain Photography

If you’re like me, the thought of capturing breathtaking mountain landscapes can be exhilarating. Luckily, there are plenty of budget-friendly destinations that offer stunning views without breaking the bank. For more insights, check out Capture Stunning Mountain Landscapes on a Budget.

Top Budget-Friendly Destinations for Mountain Photography

Overview of Budget-Friendly Mountain Photography Destinations

Importance of Budget Travel for Photographers

When I first started my photography journey, I quickly realized that I wanted to explore beautiful locations without spending a fortune. Budget travel is essential for photographers because it allows us to allocate more resources toward gear and experiences rather than just travel expenses. I learned that with a little research, it’s entirely possible to find stunning spots that won’t drain my wallet. Being a budget traveler also means you can visit more locations, giving you a varied portfolio that showcases different landscapes and cultures. For more tips, refer to Essential Tips for Budget Mountain Photography Adventures.

Types of Mountain Photography: Landscape, Wildlife, Adventure

Mountain photography is diverse, and I’ve experienced various styles that each bring their own excitement. Landscape photography captures the majestic beauty of mountain ranges, valleys, and lakes, often during golden hour for that magical light. Wildlife photography, on the other hand, is about patiently waiting for the perfect moment to snap a picture of an eagle soaring above or a deer grazing in the early morning mist. Then there’s adventure photography, which documents activities like hiking, climbing, or skiing amidst stunning backdrops. Experiencing all three types of photography has not only enriched my skills but also my appreciation for nature. If you’re interested in wildlife photography, don’t miss out on Budget-Friendly Wildlife Photography Tours You Can’t Miss.

Top Budget-Friendly Mountain Destinations

1. Rocky Mountain National Park, Colorado

Best Times to Visit

I found that the best time to visit Rocky Mountain National Park is in late spring through early fall. The weather is generally mild, and the wildflowers burst into color, creating spectacular scenes to photograph. I remember visiting in June, and the snow-capped peaks contrasted beautifully with the vibrant meadows below. Fall is also an amazing time, as the foliage transforms into brilliant shades of red and gold.

Photography Hotspots

There are several must-see spots in the park. Bear Lake is a personal favorite of mine, especially at sunrise when the still water reflects the mountains perfectly. Another spot I highly recommend is Trail Ridge Road, which offers breathtaking views and numerous pull-offs for photography. From the alpine tundra to the stunning vistas, every stop is a photo opportunity.

Accommodation Options

For accommodation, I’ve found that there are plenty of budget options around Estes Park. Campgrounds are available for those who enjoy a more rustic experience, and they’re often less expensive than hotels. I stayed at a cozy little inn that offered great deals during the off-peak season, making it easy to enjoy my photography trip without overspending.

2. Banff National Park, Canada

Seasonal Considerations

Banff National Park is another gem I’ve had the pleasure of visiting. The best time for photography is typically from late spring to early fall. However, winter offers a unique charm and fewer crowds, making it easier to capture the serene beauty of the snow-covered landscapes.

Iconic Photography Locations

Lake Louise is iconic for a reason. I remember standing by the turquoise waters, with the stunning Fairmont Hotel in the background and the mountains towering over me. Moraine Lake, with its vibrant blue waters, is another breathtaking spot that I simply couldn’t get enough of. Both places have their own magic, especially during sunrise or sunset.

Budget-Friendly Lodging

While Banff can be pricey, I’ve found that staying in nearby towns like Canmore can save you quite a bit. Hostels and motels in these areas often offer more affordable rates while still being close enough to the park to make day trips easy.

3. Great Smoky Mountains, Tennessee/North Carolina

Optimal Seasons for Photography

The Great Smoky Mountains have a charm that’s hard to resist. I believe the best times to visit are in spring and fall. Spring brings blooming wildflowers, while fall showcases the vibrant foliage. The mist that often blankets the mountains adds a mystical quality to your photos, especially in the early morning.

Must-See Sites for Photographers

One of my favorite spots is Clingmans Dome, the highest point in the park. The panoramic views from the observation tower are stunning, especially during sunrise. Cades Cove is another must-visit, where you can capture historical buildings amidst stunning mountain backdrops. I suggest going early in the morning to avoid crowds and capture the best light.

Cost-Effective Staying Options

For lodging, I recommend checking out the park’s campgrounds or staying in Gatlinburg or Pigeon Forge, which often have budget-friendly hotels and cabins. I’ve also enjoyed the local charm of some bed-and-breakfasts that offer great deals during certain seasons.

4. Mount Rainier National Park, Washington

Best Times for Capturing the Landscape

Mount Rainier National Park is a photographer’s paradise. I found that summer is the ideal time to visit, as the wildflowers bloom and the weather is generally pleasant. However, early fall can also provide stunning views as the foliage begins to change.

Photogenic Locations

Paradise is aptly named, offering some of the most photogenic vistas I’ve ever seen. The view of the mountain with wildflower meadows in the foreground is something I always think about. Another spot that should not be missed is Sunrise, where you can witness breathtaking sunrises that light up the mountain.

Affordable Accommodation Choices

While there are lodges within the park, camping is the most budget-friendly option. I really enjoyed my time camping at one of the campgrounds, where I could wake up surrounded by towering trees and stunning views. For those who prefer a roof over their heads, there are also budget hotels in nearby towns.

5. Catskill Mountains, New York

Ideal Times for Photography

The Catskills are often overlooked, but they have so much to offer. I recommend visiting during the fall for incredible foliage or during spring when the waterfalls are at their best. Each season reveals a different side of the mountains, making it a worthwhile trip year-round.

Photography Highlights

One of my favorite spots is Kaaterskill Falls, where I captured some stunning images of the cascading water. The views from the tops of the mountains are also breathtaking, providing multiple angles for unique photos.

Inexpensive Places to Stay

There are many budget-friendly options in the area, from camping sites to local motels. I particularly enjoyed staying at a small inn that offered a cozy atmosphere and was friendly on the wallet.

Essential Tips for Mountain Photography on a Budget

Choosing the Right Gear

When I first started my mountain photography journey, I felt overwhelmed by the sheer amount of gear available. I remember spending hours researching the best cameras, lenses, and accessories, which can be quite costly. Over time, I learned that I didn’t need to have the latest and greatest equipment to capture stunning images. I recommend focusing on a versatile camera that suits your style, whether it’s a DSLR or a mirrorless option. A good lens can make all the difference, so I suggest investing in a wide-angle lens for landscapes and a telephoto lens for wildlife shots.

Also, think about the accessories that can enhance your photography experience without breaking the bank. A sturdy tripod is essential for long exposures and stability, especially in windy conditions. I’ve found that a good quality tripod can make a world of difference in my landscape shots. And don’t forget about extra batteries and memory cards! The last thing you want is to miss capturing a breathtaking moment because your gear failed you.

Finding Affordable Travel Options

Traveling on a budget means getting creative with your transportation. I often rely on a mix of public transportation and car rentals when exploring mountain destinations. Many parks have shuttle services that can take you to popular hiking trails, which is not only budget-friendly but also allows you to relax and enjoy the scenery without worrying about parking.

For those looking to save even more, I’ve discovered that booking flights and accommodations during the off-peak season can lead to significant savings. If you’re flexible with your travel dates, use fare comparison websites to find the best deals. I remember booking a trip to the Rockies in early September, and the prices were much lower than during the summer months. Plus, the scenery was still stunning!

Utilizing Local Resources and Guides

One of the best ways to enhance your photography experience without spending a lot of money is to connect with local resources. I’ve found that many national parks offer free ranger-led programs that provide valuable insights into the area’s natural beauty and photography tips. These programs often highlight lesser-known spots that are perfect for capturing unique images.

Another great option is to join local photography groups or forums. I’ve met some incredible photographers who shared their favorite hidden gems and even invited me to local meet-ups. Engaging with the photography community not only helps you discover new locations but also allows you to exchange tips and techniques, enriching your own photography journey.

Timing Your Shots: Golden Hour and Seasonal Changes

Timing is everything in photography, especially when it comes to capturing the perfect shot in the mountains. I’ve learned that the golden hour—just after sunrise and before sunset—offers the most magical light for photography. The soft, warm glow transforms landscapes and brings out colors in a way that harsh midday sun simply can’t match.

Seasonal changes also play a crucial role in the type of shots you can capture. I remember visiting the Great Smoky Mountains in the fall, and the vibrant foliage created stunning backdrops for my photos. Each season brings a different personality to the landscapes, so I recommend revisiting your favorite spots throughout the year to see how they change.

Don’t forget to keep an eye on the weather forecast too! Sometimes unexpected weather can lead to dramatic and beautiful photographs. I once hiked up to a viewpoint just as a storm rolled in, and the moody skies added a whole new level of drama to my shots. Being adaptable and ready to capture the moment is key!

Local Food and Culture to Enhance Your Experience

Must-Try Local Cuisine in Each Destination

Food is not only essential for energy while hiking, but it also adds to the cultural experience of your photography trip. I’ve always made it a point to try local dishes wherever I go. For instance, in the Rocky Mountains, I couldn’t resist indulging in bison burgers and local craft beers after a long day of shooting. I found these meals not only satisfying but also a great way to connect with the local culture.

In Banff, I discovered the joy of poutine—a delicious dish of fries topped with cheese curds and gravy. It’s the perfect comfort food after a chilly day in the mountains! Each region has its own unique flavors, so I encourage you to explore local eateries and markets. You might even find some hidden gems that offer affordable meals packed with flavor.

Engaging with Local Communities and Photographers

Connecting with local communities can greatly enhance your photography experience. I love attending local art shows or photography exhibitions when I visit new areas. It’s a fantastic way to meet fellow photographers and gain insights into their perspectives and techniques. I even made some lasting friendships this way, which has led to amazing photography adventures in the mountains.

Many towns near national parks often host events or workshops, where you can learn from seasoned photographers and gain insider tips on the best locations for shooting. I once attended a photography workshop in a quaint mountain town, and the knowledge I gained from the local experts was invaluable. They shared secret spots that weren’t in any guidebook, and I ended up with some of my favorite shots from that trip.

Safety Tips for Mountain Photography

Essential Safety Gear

When I first started venturing into the mountains for photography, I quickly realized that safety should always be a top priority. The stunning vistas can often come with unpredictable conditions, so I recommend investing in some essential safety gear. A good pair of hiking boots is non-negotiable. I’ve learned the hard way that comfortable, sturdy footwear can make a world of difference, especially on rugged trails. I remember one particularly muddy hike where my trusty boots kept me steady and safe.

Another crucial item is a reliable backpack to carry all your gear. I’ve used a backpack that’s both lightweight and equipped with enough compartments to keep my camera, lenses, and snacks organized. It’s also important to have a first aid kit handy—simple supplies like band-aids, antiseptic wipes, and pain relievers can be lifesavers in case of minor injuries.

Don’t forget about a reliable water bottle or hydration system. Staying hydrated is essential, especially when you’re hiking in higher altitudes. I’ve found that carrying water with me keeps my energy up and helps me focus on capturing the beauty around me without feeling fatigued.

Weather Considerations

The weather can change rapidly in mountainous regions, so being prepared is key. I often check the forecast before heading out, but I also learned to be ready for surprises. Layered clothing is my go-to approach; wearing a moisture-wicking base layer topped with an insulating layer and a waterproof shell has served me well. I’ve been caught in unexpected rainstorms, and having good rain gear kept me dry and able to keep shooting.

In addition, I always bring a weather app on my phone to track conditions while I’m on the trail. Knowing what’s coming can help me make decisions about whether to continue on a hike or seek shelter. I remember one time in Banff, where the forecast was clear, only to be met with a sudden snowstorm. I was grateful to have an extra layer and a plan to retreat to a nearby lodge until the storm passed.

Wildlife Encounters: What to Avoid

One of the incredible aspects of mountain photography is the chance to encounter wildlife. I’ve had some unforgettable experiences photographing deer, bears, and various birds, but it’s essential to approach these encounters with caution and respect. I always keep a safe distance and use a telephoto lens to capture shots without disturbing the animals. I remember coming across a mother bear and her cubs in the Great Smoky Mountains; I was amazed but stayed at a respectful distance, using my long lens to get the shot instead of risking an up-close encounter.

It’s also vital to educate myself about the wildlife in the area I’m visiting. Knowing what to do in case of an encounter can be the difference between a memorable experience and a dangerous situation. Most national parks provide guidelines on how to behave around wildlife, and I always make it a point to follow them. I’ve read countless stories about hikers who inadvertently got too close to animals, leading to frightening situations. Always remember, we are visitors in their home, and our responsibility is to respect their space.

Additionally, I recommend keeping food and scented items secured in bear-proof containers or in my vehicle when camping or hiking. It’s a simple step that can prevent unwanted wildlife encounters and keep both us and the animals safe.

Budgeting for Your Mountain Photography Trip

Cost Breakdown: Transportation, Lodging, and Food

Budgeting for a mountain photography trip can feel a bit daunting, but I’ve found that breaking down costs by category makes it more manageable. First, I usually start with transportation. If I’m driving, I calculate gas and any potential tolls. I’ve discovered that carpooling with fellow photographers can also help cut down on fuel costs, not to mention it makes for great company on the road.

Next up is lodging. I always try to find budget-friendly options, like campgrounds or hostels, as mentioned before. In my experience, it’s often a good idea to book in advance to secure the best rates, especially during peak seasons.

Food is another essential category to consider. I prefer to bring some of my own supplies, like granola bars and trail mix, to save money while exploring. Eating out can add up quickly, especially in touristy areas, so I also look for local grocery stores where I can pick up affordable meals to prepare at my lodging.

By planning and keeping a close eye on these expenses, I’ve managed to enjoy my trips without overspending. It’s all about finding that balance so I can focus on capturing those breathtaking mountain vistas.

Finding Discounts and Deals

One of my favorite ways to save money while traveling is to hunt for discounts and deals. I’ve discovered that many national parks offer annual passes that can be a great investment if you plan to visit multiple parks. I remember purchasing a national park pass that allowed me entry to several parks over a year—it paid for itself after a couple of visits!

I also keep an eye out for local deals on lodging websites. Sometimes, I’ve found amazing last-minute deals on hotels or lodges, especially if I’m flexible with my travel dates. Additionally, I subscribe to travel deal newsletters, which often share discounts on accommodations and activities that can help stretch my budget even further.

Don’t underestimate the power of social media either! I’ve seen various travel and photography accounts sharing special promotions or giveaways that can help save money on trips. Following these accounts has led me to some fantastic opportunities and budget-saving tips I might otherwise have missed.

Managing Expenses While Traveling

Once I’m on the road, I try to keep track of my expenses to avoid any surprises later. I often use a budgeting app on my phone to log my spending in real-time, which helps me stay within my planned budget. It’s easy to lose track when I’m caught up in the excitement of exploring new places, so having this system in place keeps me grounded.

Another strategy I’ve found effective is setting a daily budget for my expenses. This includes transportation, food, entrance fees, and any souvenirs I might want to buy. By allocating a specific amount each day, I feel more in control of my spending and can enjoy the experience without stressing about finances.

Finally, I always remind myself to prioritize experiences over material items. The memories I create while photographing stunning landscapes and connecting with nature are worth far more than any souvenir I could bring home. By focusing on the journey, I find that my adventures become more enriching and fulfilling without the burden of overspending.

Frequently Asked Questions

What are some budget-friendly mountain photography destinations?

Some budget-friendly mountain photography destinations include Rocky Mountain National Park in Colorado, Banff National Park in Canada, Great Smoky Mountains in Tennessee/North Carolina, Mount Rainier National Park in Washington, and the Catskill Mountains in New York.

What is the best time to visit Rocky Mountain National Park for photography?

The best time to visit Rocky Mountain National Park for photography is from late spring through early fall, particularly in June when wildflowers are in bloom and during the fall when foliage changes to vibrant colors.

What are key photography hotspots in Banff National Park?

Key photography hotspots in Banff National Park include Lake Louise and Moraine Lake, both of which are especially stunning during sunrise or sunset.

What are some essential tips for mountain photography on a budget?

Essential tips for mountain photography on a budget include choosing versatile gear, finding affordable travel options, utilizing local resources and guides, and timing your shots around golden hour and seasonal changes.

How can I save money on lodging while visiting the Great Smoky Mountains?

You can save money on lodging by staying in the park’s campgrounds or in nearby towns like Gatlinburg or Pigeon Forge, which often have budget-friendly hotels and cabins.

What should I consider when budgeting for a mountain photography trip?

When budgeting for a mountain photography trip, consider breaking down costs into categories such as transportation, lodging, and food. Look for budget-friendly options and plan your expenses in advance.

How can engaging with local communities enhance my photography experience?

Engaging with local communities can enhance your photography experience by allowing you to meet fellow photographers, attend local art shows or photography exhibitions, and gain insights into the best shooting locations and techniques.

What safety gear is recommended for mountain photography?

Recommended safety gear for mountain photography includes sturdy hiking boots, a reliable backpack for gear, a first aid kit, and a water bottle or hydration system to stay hydrated while hiking.

What are some must-try local cuisines in mountain destinations?

Must-try local cuisines include bison burgers and local craft beers in the Rocky Mountains, and poutine in Banff, which is a comforting dish of fries topped with cheese curds and gravy.

How can I find discounts and deals for my mountain photography trips?

You can find discounts and deals for mountain photography trips by looking for annual national park passes, keeping an eye on lodging websites for last-minute deals, subscribing to travel deal newsletters, and following travel and photography accounts on social media for promotions.

Essential Tips for Budget Mountain Photography Adventures

Mountain photography is a thrilling adventure that allows us to capture breathtaking moments in nature. With the right tips and tricks, we can explore stunning landscapes without breaking the bank. For those looking to enhance their skills, check out this guide on how to Capture Stunning Mountain Landscapes on a Budget.

Essential Tips for Budget Mountain Photography Adventures

Understanding Mountain Photography

What is Mountain Photography?

Mountain photography is all about capturing the beauty of mountainous landscapes. I remember the first time I hiked to a peak with my camera in hand, filled with excitement and anticipation. There’s something magical about how the light plays on rugged cliffs, the way clouds drift around towering summits, and how the colors of nature change throughout the day. It’s more than just taking pictures; it’s about telling the story of the mountains and our experiences within them. Whether it’s a panoramic view or an intimate shot of flora, mountain photography allows us to express our connection to these stunning environments.

The Importance of Budgeting in Photography Adventures

When I first started my journey in mountain photography, I quickly realized that budgeting is crucial. Adrenaline can sometimes lead to impulsive decisions, whether it’s buying the latest gear or booking an expensive guided tour. However, I learned that with careful planning and budgeting, we can enjoy our adventures without feeling financially strained. In my experience, setting a budget helps prioritize essential gear, travel costs, and other necessities, ensuring that we can have an incredible experience while keeping our finances in check.

Every adventure can become more fulfilling when we’re not stressed about money. I’ve found that being mindful of expenses opens up opportunities for more trips, allowing me to explore various landscapes and improve my skills as a photographer. By planning ahead and sticking to a budget, I’ve learned to appreciate the journey just as much as the destination.

Essential Gear for Mountain Photography on a Budget

Camera Options for Budget-Friendly Photographers

Choosing the right camera is one of the most important decisions we make as mountain photographers. I remember starting out with an entry-level DSLR that I found at a great price. While it wasn’t the most advanced model, it had all the features I needed to get stunning shots. There are also excellent mirrorless options that are lightweight, making them perfect for hiking up those steep trails. Brands like Canon, Nikon, and Sony often have models that are budget-friendly but still offer great image quality.

For those who are really looking to save, consider purchasing used or refurbished cameras. I’ve had great luck finding quality gear at a fraction of the price. Websites like KEH, B&H, and Adorama often have a selection of used cameras that can fit anyone’s budget. Just be sure to check the return policy and warranty options!

Lens Recommendations for Mountain Landscapes

The lens can make a huge difference in mountain photography. I found that a wide-angle lens became my best friend when capturing sweeping landscapes. A lens with a focal length of 10-18mm or something similar is perfect for showcasing the vastness of the mountains. Remember, you don’t need to have every lens available; starting with a versatile zoom lens can provide a good range for various scenes.

When I want to focus on details, such as a unique flower or the texture of a rock, I switch to a macro lens. I recommend looking for lenses that fit your camera’s mount and have good reviews. Sometimes, there are affordable third-party options available, like those from Sigma or Tamron, that perform well.

Tripods and Stabilizers: Affordable Choices

A sturdy tripod is a must-have for mountain photography, especially if you’re planning to shoot in low light during sunrise or sunset. I invested in a lightweight tripod that’s easy to carry but also sturdy enough to handle windy conditions. Look for tripods made from aluminum or carbon fiber, which can be found at different price points. I suggest checking out brands like Manfrotto or Joby for reliable budget options.

Accessories: Filters, Batteries, and More

Accessories can enhance our mountain photography without costing a fortune. I always carry a polarizing filter with me. It helps reduce glare from water and enhances the colors of the sky and foliage. These filters are relatively inexpensive and can make a significant difference in image quality.

Extra batteries are another essential item. I’ve learned the hard way that running out of battery power means missing out on incredible shots. I recommend investing in a couple of high-capacity batteries for those long hikes. Additionally, don’t forget memory cards! Having a few spares ensures we won’t miss capturing a moment because of a full card.

Ultimately, while it can be tempting to splurge on high-end gear, I found that with smart choices and a little research, we can assemble a solid kit on a budget. It’s all about prioritizing what we need, being resourceful, and choosing quality over quantity.

Planning Your Mountain Photography Adventure

Choosing the Right Location for Stunning Shots

When it comes to mountain photography, selecting the right location can make all the difference. I remember my excitement the first time I visited the Rocky Mountains; the sheer scale and beauty took my breath away. I believe that the best locations are often ones that resonate with us personally. Whether it’s a local trail or a renowned national park, finding a place that inspires you is key.

In my experience, it helps to explore less-traveled paths. Some of my most cherished photographs come from hidden gems that aren’t crowded with tourists. Apps like AllTrails or even Google Maps can be great resources for discovering trails and viewpoints that might not be on everyone’s radar. I often find that the best shots come when we venture a little off the beaten path. For those interested in exploring more, consider Experience Nature: Budget-Friendly National Park Tours.

Researching Weather Conditions

Weather can be unpredictable in the mountains, and I’ve definitely had my share of sunburns and rain-soaked gear. Before heading out, I recommend checking the forecast to ensure you’re prepared for any conditions. Mountain weather can change rapidly, so having a plan can make a huge difference.

Using apps like Weather Underground or Mountain Forecast can give you detailed information on temperature, wind speed, and precipitation. I’ve learned that it’s best to be prepared for anything, so I always pack a lightweight rain jacket, even if the forecast looks clear. I also keep a close eye on the golden hours—sunrise and sunset—when the lighting for photography is often at its best.

Best Times of Year for Mountain Photography

Timing is everything in mountain photography. I’ve found that spring and fall offer some of the most striking landscapes. In spring, the melting snow creates beautiful waterfalls, and wildflowers begin to bloom, adding vibrant colors to the scenery. In contrast, fall brings a stunning array of warm colors as the leaves change, and the landscape transforms into a breathtaking palette of oranges and reds.

I also try to plan my trips during weekdays when popular spots are less crowded. This way, I can capture the beauty of the landscape without the distraction of other visitors. Midweek adventures have often resulted in some of my favorite photographs, as I’ve been able to connect more intimately with the environment.

Permits and Regulations: What You Need to Know

Before heading out to shoot, I always check if the location requires any permits. Many national parks and protected areas have specific regulations regarding photography, especially if you’re using professional equipment. I’ve learned this the hard way when I showed up at a park without the necessary documentation, only to be turned away.

Researching in advance can save a lot of time and frustration. Websites for national parks or local land management offices typically provide information on permits and regulations. I’ve also found that some areas offer special photography permits for a small fee, which can be worth it if it means I get to capture amazing shots without worrying about legalities.

Budget-Friendly Travel Tips

Finding Affordable Accommodations

When planning my mountain photography trips, I always look for ways to stretch my budget, especially when it comes to accommodations. I’ve discovered that camping can be a fantastic way to save money while immersing myself in nature. Many national parks offer campgrounds at low rates, and waking up to a mountain sunrise is an experience like no other.

If camping isn’t your thing, consider budget-friendly lodging options like hostels or motels. I’ve had great experiences staying in cozy lodges that offer shared amenities. Websites like Airbnb can also have affordable options, and sometimes local homeowners offer rooms at a fraction of hotel prices. I always prioritize places that provide easy access to trails and stunning views.

Transportation Options: Saving on Travel Costs

Getting to the mountains can be one of the more expensive parts of the trip, but there are ways to save. Carpooling with friends or fellow photographers not only cuts down on gas costs but also makes the journey more enjoyable. I remember a road trip where we shared not just the fuel expenses but also great conversations and laughter.

If you’re traveling solo, consider public transportation or shuttles that service popular mountain areas. I’ve found this to be a great way to relax and soak in the scenery, rather than stressing about driving and parking in crowded areas. It can also be helpful to research any available discounts or deals on transportation services.

Dining on a Budget While Adventuring

Food can quickly add up when you’re on the road, but I’ve learned some tricks to keep costs down without sacrificing satisfaction. I often pack meals and snacks for my trips, which not only helps save money but also allows me to enjoy a meal surrounded by nature. Simple sandwiches, fruits, and trail mix make for easy-to-carry options.

If dining out is on the agenda, I usually search for local diners or cafes instead of tourist traps. I’ve found that local eateries often provide delicious meals at reasonable prices. Plus, they usually have a vibe that reflects the spirit of the area, which enriches the experience. Sometimes, it’s the small, homey places that have the best food and stories to tell.

Photography Techniques for Capturing Mountain Landscapes

Understanding Lighting for Outdoor Photography

Lighting is a crucial element in photography, and mountain landscapes offer some of the most stunning natural light I’ve ever seen. I’ve learned that the time of day can dramatically change the mood and appearance of a scene. For instance, I remember standing atop a ridge during sunrise, watching as the first warm rays of sunlight kissed the peaks, turning them golden. This is what photographers call the “golden hour,” which occurs shortly after sunrise and before sunset. The soft, diffused light during these times creates a magical atmosphere that enhances the beauty of any landscape.

On the flip side, midday light can be harsh and create strong shadows, which isn’t always flattering for mountain shots. I’ve often found that if I’m out during the day, finding shaded areas or waiting for clouds to diffuse the sunlight can help improve my photos. If you can, try to plan your shooting times around these golden hours for the best results.

Composition Tips for Mountain Scenes

Composition can make or break a photograph, and I’ve spent a lot of time honing my skills in this area. One of my favorite techniques is using the “rule of thirds.” I remember a time when I captured a breathtaking mountain lake. By placing the horizon along the top third of the frame and the lake in the bottom third, I created a more dynamic image. It’s amazing how such a simple adjustment can transform a photo.

I also encourage you to experiment with leading lines. Trails, rivers, or even the edges of mountains can draw the viewer’s eye through the image. When I shot a winding trail leading up a mountain, it created a sense of journey and discovery. Also, don’t forget to include interesting foreground elements, like rocks or wildflowers, to add depth to your images. This technique can make your landscape photos feel more immersive and inviting.

Using Natural Elements for Impactful Shots

Nature provides a wealth of elements that can enhance our mountain photography. I often look for unique trees, boulders, or even wildlife to incorporate into my compositions. For instance, I remember capturing a lone tree standing against a backdrop of towering mountains. The tree added a striking contrast and a sense of scale to the photo, making it more engaging.

Weather can also play a significant role in how we capture mountain scenes. A dramatic sky filled with clouds can add intensity to an image, while a clear blue sky may evoke a different mood. I’ve found that capturing storms rolling in can create powerful, atmospheric images. Don’t shy away from unpredictable weather; instead, embrace it and see how it can enhance your storytelling.

Additionally, I recommend taking multiple shots of the same scene from different angles and distances. This practice allows you to explore different perspectives and discover unique compositions you might not have considered initially. Who knows? The best shot could be just a slight shift away!

Post-Processing Tips for Mountain Photography

Free and Budget-Friendly Editing Software

Once we’ve captured those stunning mountain photos, the next step is to enhance them through post-processing. I’ve found that editing can really bring out the best in our images. Thankfully, there are plenty of free and budget-friendly editing software options available. For instance, I love using GIMP, which is a powerful, open-source program that rivals many paid options. It took me a little time to learn, but I found plenty of tutorials online that made the process smoother.

Another great option is Darktable. It’s designed specifically for photographers and offers a range of features for managing and editing images. Adobe also offers a free trial for Lightroom, which I found useful for quick edits. I often use it to adjust exposure and color balance, and it’s user-friendly enough that I didn’t feel overwhelmed as a beginner. These tools allow us to fine-tune our photos without spending a lot of money.

Basic Editing Techniques to Enhance Photos

In my experience, there are a few basic editing techniques that can significantly improve our mountain photography. One of my favorites is adjusting the contrast and brightness. I’ve seen how a slight increase in contrast can make the mountains pop and add depth to the shot. It’s amazing what a little tweak in brightness can do to bring out the details in shadows and highlights.

Another technique I often use is cropping. I remember a particular shot of a mountain range that felt cluttered. By cropping, I focused on the most striking peaks and created a more impactful image. I also play around with saturation to make colors more vibrant, especially for those beautiful sunsets. However, I try to keep it natural; overdoing it can lead to unrealistic results. A little goes a long way, and keeping the essence of the scene is key.

Preserving the Natural Look of Your Images

While editing is essential, I always strive to preserve the natural look of my mountain photography. I believe it’s important to maintain the authenticity of the environment. I usually avoid heavy filters that can alter the true colors of the landscape. Instead, I focus on bringing out the natural beauty that was captured in-camera.

Another tip is to shoot in RAW format whenever possible. This file type retains much more detail than JPEGs, allowing for more flexibility during editing. I’ve appreciated how RAW files enable me to make significant adjustments without compromising image quality. Ultimately, I want my photographs to reflect the breathtaking beauty I experienced in the mountains, and careful editing helps me achieve that goal.

Sharing Your Mountain Photography

Best Platforms for Showcasing Your Work

Once we’ve polished our mountain photography, it’s time to share it with the world! I’ve discovered that social media platforms like Instagram and Facebook are great for showcasing our work. I love how Instagram, in particular, is visually driven, making it easy to connect with fellow photographers and nature lovers. I often use relevant hashtags to reach a broader audience and discover other photographers’ incredible work.

For those looking for a more formal way to present their photography, creating a blog or using portfolio sites like Behance can be rewarding. I started a simple blog to share my adventures and photos, and it’s been a great way to connect with others who share my passion. Plus, it’s fun to look back at my journey and see how much I’ve grown as a photographer.

Engaging with the Photography Community Online

Engagement is crucial in the photography community. I’ve found that commenting on others’ posts and participating in photography challenges can lead to valuable connections. Platforms like Reddit and dedicated photography forums are excellent places to seek advice, share experiences, and receive constructive feedback. I remember posting one of my photos on a forum and receiving tips that helped me improve my work. It’s a supportive community, and I love being part of it.

Tips for Creating an Online Portfolio on a Budget

Creating an online portfolio doesn’t have to break the bank. I started mine using free website builders like Wix or WordPress. They offer templates that are easy to customize, allowing us to showcase our photography beautifully without needing advanced tech skills. I recommend curating a selection of our best work to keep the portfolio focused and impactful. Remember to include an “About Me” section where we can share our journey and passion for mountain photography. This personal touch can resonate with viewers, making our work more relatable.

Safety and Preparedness for Mountain Photography Adventures

Essential Safety Gear for Mountain Environments

Safety is paramount when we’re out in the wild, especially in mountainous areas. I always pack essential safety gear like a first-aid kit, a multi-tool, and a reliable flashlight. I remember a hike where I relied on my headlamp as the sun set earlier than expected. It allowed me to navigate safely back to my car without panicking. I also suggest wearing sturdy hiking boots to prevent slips and falls on rugged terrain.

Staying Safe While Capturing the Perfect Shot

When taking photographs in the mountains, I’ve learned to be mindful of my surroundings. It’s easy to get lost in capturing the perfect shot, but I always make it a point to keep an eye on my footing and the weather conditions. I try to stay aware of the trail and avoid getting too close to steep edges. I also share my plans with a friend or family member before heading out, so someone knows where I am—safety in numbers, right?

Emergency Preparedness: What to Pack

Finally, being prepared for emergencies can make a world of difference. I pack extra food and water, as well as a map and compass in case my phone loses signal. I’ve experienced the frustration of getting turned around in unfamiliar terrain, and having a physical map has saved me more than once. Additionally, I carry emergency blankets and a whistle, just in case I ever find myself in a tough spot. It’s better to be overprepared than to regret not having what I need.

Final Thoughts

Mountain photography is not just about capturing beautiful images; it’s a journey filled with adventure, creativity, and connection to nature. I’ve shared countless moments in the mountains, from breathtaking sunrises to the thrill of discovering hidden trails. Through this journey, I’ve learned the importance of budgeting, planning, and safety. Each photograph tells a story, and I believe that with the right mindset and tools, anyone can embark on their own mountain photography adventure. So grab your camera, hit the trails, and let the mountains inspire you!

Frequently Asked Questions

What is mountain photography?

Mountain photography is about capturing the beauty of mountainous landscapes, telling the story of the mountains and our experiences within them. It allows photographers to express their connection to stunning environments through various types of shots, from panoramic views to intimate close-ups of flora.

Why is budgeting important in mountain photography?

Budgeting is crucial in mountain photography to avoid impulsive spending on gear or tours. With careful planning, photographers can prioritize essential gear and travel costs, ensuring they can enjoy their adventures without financial strain and allowing for more trips to improve their skills. For those interested, check out Budget-Friendly Wildlife Photography Tours You Can’t Miss.

What camera options are suitable for budget-friendly mountain photography?

Budget-friendly options include entry-level DSLRs or lightweight mirrorless cameras from brands like Canon, Nikon, and Sony. Purchasing used or refurbished cameras from websites like KEH, B&H, and Adorama can also provide quality gear at lower prices.

What type of lens is recommended for mountain landscapes?

A wide-angle lens with a focal length of 10-18mm is ideal for capturing sweeping landscapes. Starting with a versatile zoom lens can provide a good range for various scenes, and a macro lens can be used for focusing on details like flowers or textures.

What accessories should I consider for mountain photography?

Essential accessories include a polarizing filter to reduce glare and enhance colors, extra high-capacity batteries to avoid running out of power, and spare memory cards to ensure you can capture all moments without interruptions.

How do I choose the right location for mountain photography?

Selecting the right location is key to capturing stunning shots. Exploring less-traveled paths and using apps like AllTrails or Google Maps can help find hidden gems that inspire. Personal resonance with the location often leads to the best photographs.

What should I know about weather conditions when planning a mountain photography trip?

Weather in the mountains can be unpredictable, so it’s important to check forecasts before heading out. Using apps like Weather Underground or Mountain Forecast can provide detailed information, and packing a lightweight rain jacket is advisable even if the forecast looks clear.

What are budget-friendly travel tips for mountain photography adventures?

Consider camping to save on accommodation costs, carpooling with friends to reduce gas expenses, and packing meals to keep dining costs down. Searching for local diners rather than tourist traps can also offer satisfying meals at reasonable prices.

What basic editing techniques can enhance mountain photography?

Basic editing techniques include adjusting contrast and brightness to make mountains pop, cropping to focus on striking elements, and carefully adjusting saturation to make colors vibrant while maintaining a natural look.

What safety measures should I take while mountain photography?

Pack essential safety gear like a first-aid kit, a multi-tool, and a reliable flashlight. Always stay aware of your surroundings while shooting, share your plans with someone, and prepare for emergencies by packing extra food, water, and a physical map.