Web Analytics

Recent Posts

Top 10 Affordable Travel Clothing Items for Backpackers

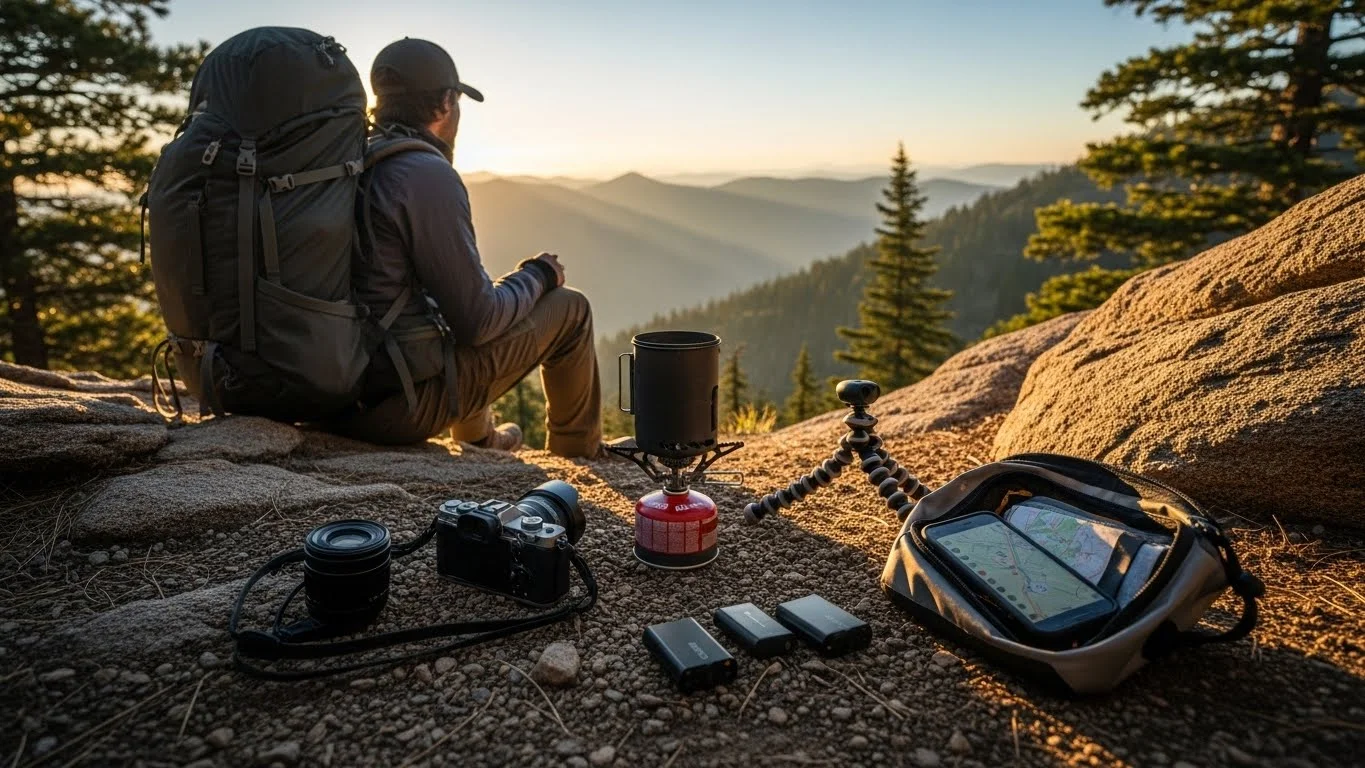
Backpacking is a thrilling adventure, but it comes with its own set of challenges, especially when it comes to packing. Choosing the right travel clothing can make or break your journey. Let’s explore why this choice is crucial for every backpacker. For those looking for stylish options, consider checking out Affordable Designer Travel Clothing for Stylish Adventures.

Top 10 Affordable Travel Clothing Items for Backpackers

Why Choosing the Right Travel Clothing is Essential for Backpackers

When I first started my backpacking journeys, I quickly realized that what I wore had a significant impact on my comfort and overall experience. The right clothing can elevate your trip, making it easier to move, adapt to different environments, and stay comfortable. Here’s why I believe choosing the right travel clothing is essential for every backpacker.

Comfort and Mobility

Comfort is key when you’re on the road. I remember one trip where I wore a pair of jeans that seemed like a good idea at the time. After a few hours of walking, I was regretting that decision. The right travel clothing should allow for easy movement, especially if you plan on hiking or exploring. Fabrics that stretch and fit well can make a huge difference. I’ve learned to prioritize comfort over style, opting for breathable and lightweight materials that let me move freely.

Weather Adaptability

Weather can change in an instant, especially when you’re traveling in the mountains or visiting areas with unpredictable climates. I’ve been caught in downpours without a rain jacket, and it wasn’t fun. Having clothing that can adapt to different weather conditions is crucial. I often pack items that can be layered, which gives me the flexibility to either cool down or stay warm. For instance, a lightweight long-sleeve shirt can be rolled up during the day and layered under a jacket when it gets chilly.

Packability and Weight

One aspect that often gets overlooked is how easily clothing can be packed. I’ve tried to bring my favorite bulky items, only to find they took up way too much space in my backpack. The weight of your gear matters, especially if you’re hiking long distances. I recommend choosing travel clothing that can be packed down small and won’t weigh you down. Fabrics like nylon or polyester often offer a great balance of weight, durability, and packability, making them my go-to choices. To maximize your packing space, you might want to explore the best packing cubes for budget travelers.

Key Features to Look for in Travel Clothing

As I’ve gone through my backpacking experiences, I’ve discovered that certain features make travel clothing more functional and beneficial. Here are some key features that I always look for when shopping for travel apparel.

Moisture-Wicking Fabrics

One of the best features I’ve found in travel clothing is moisture-wicking properties. These fabrics pull sweat away from your skin, keeping you cool and dry during those hot days or intense hikes. I still remember a particularly sweaty trek where my moisture-wicking shirt saved me from feeling like a soggy sponge. Investing in clothing that manages moisture effectively is worth it.

Durability and Resistance

Travel can be rough on clothing, and I’ve had my fair share of rips and tears from rugged adventures. That’s why durability is essential. Look for clothes that can withstand wear and tear. I’ve found that tightly woven fabrics tend to last longer and resist abrasions better. Plus, features like UV resistance are a bonus, especially when exploring sunny destinations.

Quick-Drying Properties

After a long day of exploring, there’s nothing more convenient than quick-drying clothing. Whether you find yourself caught in the rain or just need to wash something in a sink, quick-drying fabrics mean you won’t be waiting forever for your clothes to be wearable again. I always pack a couple of quick-dry shirts; they’ve saved me during unexpected rain showers and made laundry day a breeze.

Multipurpose Use

Travel clothing that can serve multiple purposes is a lifesaver. I love items that can transition from a hiking trail to a casual dinner. For example, a nice pair of versatile pants can look great for a night out while being functional during the day. I’ve found that having multipurpose clothing reduces the amount I need to pack, which is always a win in my book.

As I dive deeper into my travels, I’ve found that being thoughtful about what I pack makes a world of difference. The right affordable travel clothing not only enhances my comfort but also gives me the freedom to explore without worries. In the next sections, I’ll share some of my favorite affordable travel clothing items for backpackers. These are the essentials that have made my adventures more enjoyable and manageable. Stay tuned!

Top 10 Affordable Travel Clothing Items for Backpackers

As I’ve trekked through various landscapes and climates, I’ve built a list of essential clothing items that have proven to be reliable companions on my journeys. They are comfortable, functional, and, best of all, affordable. Here’s my rundown of the top ten travel clothing items that every backpacker should consider packing.

1. Lightweight Hiking Pants

Lightweight hiking pants have become a staple in my travel wardrobe. They’re breathable, durable, and often come with features like zip-off legs that can convert them into shorts. I remember hiking in a national park when the weather turned unexpectedly warm. Having those zip-off pants allowed me to adapt quickly and comfortably. Look for pants made from quick-drying materials, so if you encounter rain or decide to take a dip, you won’t be stuck in wet clothing for long.

2. Breathable T-Shirts

When it comes to t-shirts, I always opt for breathable, moisture-wicking fabrics. My favorite ones feel soft against my skin and dry quickly if I sweat or if they get caught in the rain. I usually pack a few in different colors to mix and match with my hiking pants or shorts. I’ve learned that having breathable t-shirts makes long days of exploring much more comfortable. Plus, they’re light enough to pack several without adding much weight.

3. Packable Rain Jacket

A good packable rain jacket is a must-have for any backpacker. I can’t tell you how many times I’ve been grateful for mine on unexpected rainy days. These jackets are designed to be lightweight and can easily be stuffed into a small pouch, making them perfect for travel. I remember one trip where I was caught in a downpour, and having my packable jacket saved me from getting soaked. It’s not just about staying dry; a good rain jacket can also provide warmth when the temperature drops.

4. Versatile Dresses or Skirts

For the ladies, a versatile dress or skirt can be a game-changer. I love dresses that can easily transition from day hikes to an evening out. Find one that’s made from a stretchy, quick-drying fabric, and you’ll feel comfortable no matter the activity. I’ve worn mine while exploring cities and also paired it with hiking boots for a more rugged look. Having a multipurpose piece like this cuts down on the number of items I need to pack.

5. Comfortable Travel Shoes

Your choice of footwear can make or break your travel experience. I’ve made the mistake of packing stylish shoes that weren’t comfortable for long walks. Now, I prioritize comfort and support in my travel shoes. I recommend lightweight hiking shoes or trail runners that provide good traction. I’ve worn mine on city streets, rocky trails, and everything in between, and they’ve never let me down. Remember to break them in before hitting the road to avoid blisters!

6. Quick-Dry Underwear

Quick-dry underwear might sound like a minor detail, but trust me, it makes a big difference. I always carry a few pairs for my travels. They dry quickly after washing in a sink, and they’re typically made from lightweight materials that don’t take up much space in my pack. I remember a time when I needed to wash my underwear on a trip, and having quick-dry options meant I could wear them again the next day without waiting forever.

7. Layering Long-Sleeve Shirt

A lightweight, layering long-sleeve shirt is perfect for varying temperatures. I often wear mine as a base layer when it’s chilly or as a standalone piece when it warms up. I’ve discovered that this type of shirt is not only practical for temperature regulation but also offers some sun protection during long days outdoors. Look for ones that are breathable and have roll-up sleeves for added versatility.

8. Travel-Friendly Shorts

Comfortable travel-friendly shorts are essential for warm-weather adventures. I always choose ones with pockets and a stretchy waistband for maximum comfort. They should be versatile enough to wear during hikes or casual outings. I’ve found that having a good pair of shorts allows me to stay cool and comfortable, which is especially important on hot days filled with activities.

9. Compact Travel Toiletry Bag

While not clothing, a compact travel toiletry bag is essential for keeping your clothing fresh. I’ve learned to keep mine organized and lightweight, with just the basics like travel-sized shampoo, conditioner, and soap. Having a good toiletry bag means that I can keep my clothes clean and smelling nice, even after a long day on the road. Plus, it makes packing and unpacking much easier!

10. Insulated Jacket

An insulated jacket is crucial for those colder nights or unexpected chilly days. I’ve found that a lightweight, packable insulated jacket can easily fit into my backpack without taking up too much space. It provides warmth without the bulk, and I appreciate being able to layer it over my long-sleeve shirt when temperatures drop. It’s one of those items that I never regret bringing along.

These ten items have become staples in my backpacking wardrobe, and I truly believe they can enhance your travel experience. By choosing clothing that is comfortable, functional, and affordable, we can focus more on the adventure ahead rather than worrying about our outfits. For more tips on travel accessories, check out Essential Travel Accessories for Backpacking on a Budget.

Budgeting for Your Travel Clothing

One of the most important aspects of preparing for a backpacking trip is budgeting for your travel clothing. I’ve learned that it’s easy to get carried away, especially when you see all the amazing gear out there. However, being smart about your spending can help you get the best gear without breaking the bank. Here’s how I approach budgeting for my travel clothing.

Setting a Clothing Budget

Before I start shopping, I always set a clothing budget. This helps me stay focused and avoid impulse buys. I look at how much I can realistically afford to spend without cutting into other travel expenses, like flights or accommodations. I like to break my budget down into categories, such as tops, bottoms, and outerwear. This way, I can keep track of my spending and ensure that I’m getting all the essentials I need.

In my experience, it’s helpful to prioritize items based on what I already have and what I genuinely need. If I need to replace a worn-out item, that takes precedence over buying something new just because it looks cool. By being disciplined with my budget, I can invest in quality pieces that will last through multiple trips.

Where to Shop for Affordable Options

One of the best parts of being a budget-conscious traveler is discovering where to find affordable clothing. I’ve had great luck at outlet stores and discount retailers that specialize in outdoor gear. Websites like REI Outlet and Backcountry often have great deals on quality travel apparel. I love browsing clearance sections and comparing prices to find the best deals.

Thrift stores and second-hand shops can also be gold mines for finding travel clothing. I’ve scored some fantastic pieces that were barely worn. Plus, shopping second-hand is a sustainable choice that I feel good about. You never know what you might find, and it can be fun to hunt for hidden gems.

Seasonal Sales and Discounts

Timing can be everything when it comes to shopping for travel clothing. I’ve learned to keep an eye on seasonal sales and discounts, especially at the end of summer or winter when outdoor retailers often clear out their inventory. Signing up for newsletters from my favorite brands has also helped me stay informed about upcoming sales and exclusive discounts. It’s like having a secret weapon in my backpacking arsenal!

Another tip is to use apps or websites that track price drops. I’ve used these to score some great deals on items I had my eye on for a while. Being patient and watching for sales has saved me a lot of money in the long run. Ultimately, it’s about finding a balance between quality and affordability, ensuring I get the best bang for my buck.

Care and Maintenance of Travel Clothing

Once I’ve selected my travel clothing and set my budget, the next step is understanding how to care for and maintain these items. I’ve learned that taking good care of my gear not only extends its lifespan but also ensures it remains functional throughout my travels. Here are some tips I’ve picked up over the years.

Washing and Drying Tips

Washing travel clothing correctly is essential. I often hand wash my items in a sink when I have the chance, especially if they’re made from delicate or moisture-wicking fabrics. I use a gentle detergent to keep the fabrics in good shape. If I need to use a washing machine, I make sure to wash on a gentle cycle and avoid fabric softeners, as they can damage moisture-wicking properties.

Drying is just as important. I prefer air-drying my clothes whenever possible. It’s gentler on the fabric and helps prevent shrinkage. I’ve found that hanging clothes in a well-ventilated area speeds up the drying process. If I must use a dryer, I always set it on low heat to minimize damage. Taking these extra steps has really paid off, as my travel clothes have lasted much longer.

Storing and Packing Techniques

How I store and pack my travel clothing can also impact their longevity. I’ve discovered that rolling my clothes instead of folding them helps save space in my backpack and minimizes wrinkles. Using packing cubes has been a game-changer for me; they keep my items organized and make it easy to find what I need without digging through my bag.

When I’m not traveling, I make sure to store my clothing in a cool, dry place to prevent any moisture or mildew buildup. I also try to keep them out of direct sunlight to prevent fading. By taking these simple care and storage measures, I’ve been able to keep my travel clothing looking fresh and ready for the next adventure.

Additional Accessories to Consider

As I’ve traveled, I’ve come to realize that the right accessories can enhance my experience just as much as my clothing. Packing a few thoughtful items can make a big difference in comfort and convenience. Here are some accessories I always make room for in my backpack.

Travel Scarves

Travel scarves are incredibly versatile. I love using mine not just for warmth but also for added style. They can double as a blanket on chilly flights or a wrap when visiting sacred sites. I remember one evening in a foreign city when the temperature dropped unexpectedly; my scarf became my go-to accessory, keeping me cozy while adding a pop of color to my outfit. Look for lightweight options that are easy to pack and can be used in multiple ways.

Sun Hats

A good sun hat is essential, particularly when I’m exploring in warmer climates. I’ve learned the hard way that sun protection is vital, and a wide-brimmed hat can shield my face and neck from harmful rays. I love hats that are breathable and packable, as they maintain their shape and don’t take up much space in my pack. Plus, they add a bit of charm to my travel look!

Compression Socks

Compression socks are a game-changer, especially during long flights or hikes. I never thought much of them until I tried a pair on a long-distance hike. They helped reduce swelling and fatigue in my legs, making my travels far more enjoyable. I recommend looking for lightweight options that are easy to pack. Trust me, your legs will thank you.

Common Mistakes to Avoid When Choosing Travel Clothing

Overpacking vs. Underpacking

One of the biggest challenges I’ve faced is striking the right balance between overpacking and underpacking. I remember a trip where I packed way too many clothes, thinking more options meant more fun. But lugging around a heavy backpack quickly became exhausting. I’ve since learned that it’s better to pack versatile pieces that can be mixed and matched. Conversely, underpacking can lead to discomfort if I don’t have the essentials. I now focus on finding that sweet spot—bringing just what I need while keeping my pack light.

Ignoring Local Climate and Culture

Before heading out, I always check the weather forecast, but I’ve also learned to consider local culture. On one trip, I packed shorts for a destination known for its conservative dress norms. This resulted in some awkward situations! I now research cultural expectations and dress codes, ensuring I’m respectful and comfortable throughout my journey.

Choosing Style Over Functionality

Let’s be honest; it’s easy to get caught up in looking fashionable while traveling. I’ve made the mistake of prioritizing style over comfort and function, only to regret it later. I’ve come to realize that practical clothing can be stylish too. It’s important to find pieces that work for both my comfort and my aesthetic. I recommend seeking out brands that blend fashion with functionality, so you don’t have to sacrifice one for the other.

Final Thoughts

As I look back on my travels, I see how choosing the right travel clothing and accessories has enriched my experiences. The lessons I’ve learned about comfort, adaptability, and practicality have been invaluable. I feel that by taking the time to plan what I wear, I can focus on the exploration and adventure of each journey, rather than worrying about what I’m wearing. Whether you’re a seasoned backpacker or just starting out, I hope these insights and tips help you pack smart and travel confidently. Remember, the right clothing can enhance not just your comfort but also your ability to truly enjoy the beauty of the world around you.

Frequently Asked Questions

Why is choosing the right travel clothing important for backpackers?

Choosing the right travel clothing is essential for backpackers because it significantly impacts comfort, mobility, and overall experience. Proper clothing can make it easier to move, adapt to different environments, and stay comfortable while traveling.

What features should backpackers look for in travel clothing?

Backpackers should look for features such as moisture-wicking fabrics, durability, quick-drying properties, and multipurpose use in travel clothing. These features enhance functionality and help ensure comfort during various activities.

What are the top affordable travel clothing items recommended for backpackers?

The top affordable travel clothing items for backpackers include lightweight hiking pants, breathable t-shirts, packable rain jackets, versatile dresses or skirts, comfortable travel shoes, quick-dry underwear, layering long-sleeve shirts, travel-friendly shorts, insulated jackets, and compact travel toiletry bags.

How can backpackers effectively budget for travel clothing?

Backpackers can effectively budget for travel clothing by setting a clothing budget before shopping, prioritizing needs over wants, and breaking down the budget into categories. This helps avoid impulse buys and ensures essential items are covered.

Where can backpackers find affordable travel clothing?

Backpackers can find affordable travel clothing at outlet stores, discount retailers specializing in outdoor gear, thrift stores, second-hand shops, and by taking advantage of seasonal sales and discounts from outdoor retailers.

What care and maintenance tips should backpackers follow for their travel clothing?

Backpackers should wash their travel clothing correctly, preferably hand washing delicate items and using gentle detergents. They should also air-dry clothes when possible and store them in a cool, dry place to prevent moisture buildup and fading.

What accessories are recommended for backpackers?

Recommended accessories for backpackers include travel scarves, sun hats, and compression socks. These items enhance comfort and convenience during travels, providing warmth, sun protection, and reducing leg fatigue.

What are common mistakes to avoid when choosing travel clothing?

Common mistakes to avoid include overpacking or underpacking, ignoring local climate and culture, and prioritizing style over functionality. It’s essential to find a balance between having enough versatile clothing and respecting cultural norms while ensuring comfort.

How can backpackers manage clothing weight and packability?

Backpackers can manage clothing weight and packability by choosing lightweight, packable fabrics like nylon or polyester, and selecting versatile items that can be mixed and matched. This helps keep the backpack light and organized.

What role does weather adaptability play in travel clothing choices?

Weather adaptability is crucial in travel clothing choices as conditions can change rapidly, especially in mountainous areas. Clothing that can be layered provides flexibility to stay cool or warm, ensuring comfort regardless of the weather.

Top Packing Cubes: Essential Gear for Every Backpacker

Packing cubes are a game-changer for every backpacker out there. These simple yet effective tools can transform the chaos of luggage into a well-organized travel experience. Read Interesting article: Maximize Space: The Best Packing Cubes for Budget Travelers

Top Packing Cubes: Essential Gear for Every Backpacker

Understanding Packing Cubes: What Are They?

Definition and Purpose of Packing Cubes

When I first stumbled upon packing cubes, I was honestly skeptical. I thought, “How could something so simple make a difference?” But once I tried them, my perspective changed completely. Packing cubes are basically small fabric containers that help you organize your clothes and gear inside your backpack or suitcase. They come in various sizes and designs, and the main purpose is to keep everything tidy and easy to find. Instead of digging through a jumbled mess of clothes, I can simply pull out a cube specific to what I need, whether it’s my shirts, pants, or even my socks.

How Packing Cubes Enhance Organization

One of the biggest frustrations I faced while backpacking was finding that one shirt buried at the bottom of my bag. It was a hassle, and often I ended up unpacking my entire bag just to get to it. With packing cubes, that nightmare turned into a thing of the past. Each cube can hold different categories, so I can group my items by type or even activity. For instance, I might have one cube for outdoor gear, another for casual clothing, and yet another for my toiletries. This way, when I need something, I simply pull out the relevant cube. It saves time, reduces stress, and makes packing and unpacking much more enjoyable.

Benefits of Using Packing Cubes for Backpackers

Space Optimization

One thing I quickly learned during my travels is that space is a precious commodity in any backpack. Packing cubes help me maximize that space. By compressing my clothing into these cubes, I can fit more into my backpack than I ever thought possible. I often roll my clothes tightly before placing them into the cubes, which not only saves space but also minimizes wrinkles. It’s amazing how much room I can create for other essentials, like snacks, a water bottle, or even a travel pillow.

Easy Access to Clothing and Gear

Have you ever been on a trip and spent half an hour looking for a specific item? I certainly have. With packing cubes, I avoid that hassle completely. Instead of rummaging through a pile of clothes, I can easily grab the cube I need. This makes getting dressed in the morning or finding my hiking gear a breeze. Plus, if I’m staying in multiple places, I can simply take out the cubes that correspond to my activities—easy peasy!

Weight Distribution

Another aspect I appreciate is how packing cubes allow me to distribute weight more evenly in my backpack. I used to throw everything in haphazardly, which resulted in an awkward and uncomfortable carry on my back. Now, with packing cubes, I can place heavier cubes at the bottom and lighter ones on top, making my backpack balanced and easier to carry. I’ve noticed a big difference in how my back feels during long hikes, and I’m sure you would too!

Protection and Compression

When I’m traveling, I often worry about my delicate items, such as a favorite shirt or my toiletries. Packing cubes provide an extra layer of protection. The fabric is typically sturdy, and some cubes even offer water-resistant features. This means that even if my bag gets a little wet, my items stay safe. Plus, the compression aspect helps keep everything snug and secure, reducing the chance of items shifting around and getting damaged.

Types of Packing Cubes

Standard Packing Cubes

Standard packing cubes are what most people think of when they hear the term. They come in various sizes and are perfect for organizing general clothing items. I usually opt for a mix of sizes, which allows me to customize my packing based on the trip and the season.

Compression Packing Cubes

Compression packing cubes are a lifesaver for those looking to save even more space. They have a zippered design that allows you to compress the contents after packing. I love using these for bulky items like jackets or sweaters, especially during colder months. The extra compression helps me fit everything I need into my backpack without feeling like I’m carrying a boulder.

Specialty Packing Cubes (e.g., for shoes, toiletries)

I’ve found that specialty packing cubes are also great for certain items. For example, I have a cube just for my shoes. This keeps them separate from my clothes, preventing any dirt from transferring and making it easier to find them when I’m in a hurry. There are also cubes specifically designed for toiletries, which can prevent leaks and spills. These specialty cubes make packing feel less overwhelming and more organized.

Top Packing Cube Brands for Backpackers

eBags Packing Cubes

When it comes to packing cubes, eBags is a brand that consistently pops up in conversations among seasoned travelers. I remember hearing about them from a fellow backpacker who swore by their durability and design. eBags offers a variety of sizes and colors, which allows me to mix and match based on my needs. The fabric feels sturdy, and the zippers are smooth, making it easy to pack and unpack. Plus, they’re reasonably priced, which is always a plus for a budget traveler like me!

Osprey Ultralight Packing Cube Set

If you’re looking for lightweight options, I highly recommend checking out the Osprey Ultralight Packing Cube Set. These cubes are perfect for minimizing weight in your backpack without sacrificing organization. I’ve used them on several trips, and their breathable mesh tops allow for ventilation, which is great for clothes I’ve worn. They come in a few sizes, and I love how easily they fit into the nooks and crannies of my pack, making every little space count.

AmazonBasics Packing Cubes

For those just starting out with packing cubes or looking for an economical option, the AmazonBasics Packing Cubes are a fantastic choice. I was pleasantly surprised by how well these worked for me during my last trip. They are simple but effective, and the fabric holds up surprisingly well. They come in a variety of colors, so you can easily coordinate them with your backpack, which I find adds a bit of fun to my packing routine.

Samsonite Packing Cubes

Samsonite is a household name in luggage, and their packing cubes live up to that reputation. I recently purchased a set and was impressed by the quality and design. They have a sleek look, and the organization features are top-notch. I loved the idea of having designated cubes for different types of clothing, which made my packing feel more structured. Plus, the ability to compress items slightly with their design was an added benefit that I didn’t know I needed!

REI Co-op Packing Cubes

The REI Co-op Packing Cubes are another option that I can’t recommend enough. These cubes are designed with the outdoor enthusiast in mind, which makes them perfect for backpackers. I appreciate the rugged construction and the fact that they come in fun colors. They hold up well to the rigors of travel, and I’ve found that they help keep my gear organized, especially when I’m switching between camping and city exploration. I really enjoy how they blend style with function. Read Interesting article: Essential Travel Accessories for Backpacking on a Budget

How to Choose the Right Packing Cubes

Size and Dimensions

Choosing the right size packing cubes is crucial for an efficient packing experience. I often find myself standing in front of my open suitcase or backpack, trying to determine what sizes I need. I’ve learned to measure my bag and consider the dimensions of the cubes. It’s important to have a variety of sizes—some larger ones for bulky items like jackets and smaller ones for underwear or accessories. This mix helps me make the most of every inch of my luggage.

Material and Durability

Material matters when it comes to packing cubes. I’ve experienced some cubes that felt flimsy, and they didn’t last long at all. Look for cubes made from durable materials that can withstand the rigors of travel. I prefer cubes that are water-resistant, especially for trips where rain is a possibility. This added feature gives me peace of mind that my belongings are protected, which is something I’ve learned to prioritize after a few close calls!

Weight and Portability

The weight of the packing cubes themselves can add up, especially when you’re trying to keep your backpack light. I always check the weight of potential packing cubes before purchasing. Lightweight options are available, and they don’t compromise on quality. The key is to find a balance between durability and lightweight design. I’ve found that investing in lighter cubes makes a big difference on long hikes, where every ounce counts.

Design and Color Options

While functionality is my primary concern, I also appreciate a good design. I’ve noticed that packing cubes come in various colors and patterns, which can make packing feel a bit more fun! I tend to lean towards vibrant colors because they make it easier to spot my cubes at a glance. Plus, if you’re traveling with someone else, having different colors can help each person identify their items quickly. It’s a small detail, but it definitely enhances my packing experience.

How to Use Packing Cubes Effectively

Organizing by Category (Clothing, Accessories, Toiletries)

One of the best strategies I’ve discovered for using packing cubes is to organize by category. I like to group my items into different cubes—one for clothes, another for accessories, and a separate one for toiletries. This method not only streamlines packing but also makes unpacking a breeze. I can simply grab the cube I need without having to sift through everything. It’s like having mini-suitcases within my larger bag!

Maximizing Space with Compression Techniques

To make the most of my packing space, I’ve learned some compression techniques. Rolling clothes tightly before placing them in the cubes has been a game-changer for me. I also try to fill every little gap in my bag, using smaller items to fill spaces around the cubes. This way, I maximize every inch of my backpack and ensure I have room for all my essentials.

Labeling and Color Coding for Quick Access

Labeling my packing cubes has also been a tip that I’ve found incredibly helpful. While it’s not always necessary, I sometimes write down what’s inside each cube using a small label maker or even masking tape and a marker. This way, I can quickly locate what I need without opening every single cube. Color coding can also work wonders. If I assign certain colors to certain categories, I can spot what I need in mere seconds. It’s all about making the process smoother and more efficient for myself!

Common Mistakes to Avoid When Using Packing Cubes

Overpacking and Underpacking

One of the biggest challenges I faced when I first started using packing cubes was figuring out how much to pack. It’s so tempting to think that these cubes magically create more space, leading to overpacking. I remember stuffing my cubes to the brim, thinking I could fit an entire wardrobe for a weekend trip! But I quickly learned that overpacking means more weight and less flexibility when I’m on the move. On the flip side, underpacking can also be a pitfall. I once went on a trip with just one cube of clothes, only to find I had nothing suitable to wear for a surprise fancy dinner. So, I recommend evaluating the length of your trip and knowing what activities you’ll be doing. This way, you can strike the right balance and avoid either extreme.

Ignoring Weight Limits

When I first started backpacking, I didn’t pay much attention to weight limits, thinking I could handle whatever I packed. However, I learned the hard way that weight distribution and overall backpack weight are crucial, especially on long hikes. I once lugged around a bag that was way too heavy, and by the end of the day, my back was screaming for relief. It’s essential to check the weight of your packed cubes regularly. Utilizing a travel scale can help you keep tabs on how heavy your backpack is becoming. I aim for a maximum of 20-30% of my body weight in my pack, which has made a world of difference in my comfort while traveling.

Not Considering Accessibility

Accessibility is something I didn’t think much about at first. I would just shove my packing cubes into my backpack without considering how often I’d need certain items. I made this mistake on a hiking trip where I buried my snacks and water bottle deep in my bag. When hunger struck, I spent way too much time digging through layers of clothes just to find a granola bar. To avoid this, I’ve learned to keep items I know I’ll need often, like snacks, a rain jacket, or my toiletries, in easily accessible cubes or pockets. This little adjustment has made my travels much smoother and less stressful.

Real Backpacker Experiences with Packing Cubes

User Reviews and Testimonials

It’s always interesting to hear how others have benefited from packing cubes. I remember chatting with a fellow traveler who shared her experience using them on a month-long trip across Europe. She swore by her compression cubes, saying they allowed her to fit everything she needed without feeling like she was carrying a suitcase on her back. I’ve read countless reviews online, and many travelers echo her sentiments about how packing cubes reduce stress and streamline the packing process. No more digging and digging! Hearing these stories has only reinforced my love for packing cubes, as they’ve transformed my travel experience in similar ways.

Before and After Organization Comparisons

Another fun aspect of packing cubes is the before-and-after organization style that many travelers showcase online. I remember scrolling through social media and coming across a post where someone shared their packing transformation. The “before” picture showed a chaotic, overflowing backpack, while the “after” revealed a beautifully organized setup with neatly stacked packing cubes. It was inspiring! I decided to try this method myself, and I took a picture of my own packing setup before using the cubes and another after. The difference was astonishing—everything looked so tidy, and I could actually see all of my items at a glance. This visual comparison motivated me to keep my packing organized, and I now frequently share my own transformations with friends and fellow travelers. Read Interesting article: Ultimate Guide to Budget Backpacking Adventure Hotspots

Additional Packing Tips for Backpackers

Layering Clothes for Versatility

One trick I’ve picked up over the years is layering my clothes. It’s not only a space-saver but also allows for versatility in different weather conditions. I like to pack items that I can mix and match, creating multiple outfits from just a few pieces. For instance, I’ll bring a lightweight jacket that can be layered over a t-shirt or a long-sleeve top. This way, I can adapt to changing temperatures without overpacking. I find that packing versatile clothing options enhances my packing experience, and I feel better prepared for any situation.

Utilizing Other Packing Accessories (e.g., dry bags, compression sacks)

In addition to packing cubes, I’ve discovered other accessories that really complement my packing strategy. Dry bags are a lifesaver, especially when I’m heading to more adventurous destinations. I love how they keep my clothes dry during unexpected rain or water activities. Compression sacks have also become a favorite of mine, particularly for bulkier items like sleeping bags or jackets. They work wonders for maximizing space while keeping everything organized. Combining these accessories with my packing cubes has created a well-rounded packing system that I swear by.

Travel Checklists for Backpacking Trips

Finally, I can’t recommend having a travel checklist enough. I’ve created a personal checklist based on my typical trips, which helps me stay organized and ensures I don’t forget anything essential. I include categories like clothing, toiletries, tech gear, and even snacks. This way, I can tick things off as I pack into my cubes. It’s such a relief to know that I have everything I need before I head out the door. Plus, it saves me from those last-minute packing mishaps that can throw a wrench into my travel plans!

Frequently Asked Questions

What are packing cubes?

Packing cubes are small fabric containers that help organize clothes and gear inside a backpack or suitcase. They come in various sizes and designs, allowing travelers to keep their belongings tidy and easily accessible.

How do packing cubes enhance organization while traveling?

Packing cubes allow travelers to group items by type or activity, making it easy to find specific items without rummaging through a jumbled bag. This organization saves time and reduces stress during packing and unpacking.

What are the benefits of using packing cubes for backpackers?

Packing cubes help optimize space by compressing clothing, provide easy access to items, allow for better weight distribution in the backpack, and offer protection for delicate items, thanks to their sturdy fabric and potential water-resistant features.

What types of packing cubes are available?

There are standard packing cubes, compression packing cubes that allow for extra space savings, and specialty packing cubes designed for specific items such as shoes or toiletries, helping to keep everything organized and separate.

What are some top brands of packing cubes recommended for backpackers?

Some recommended brands include eBags for their durability, Osprey Ultralight for lightweight options, AmazonBasics for economical choices, Samsonite for quality and design, and REI Co-op for outdoor enthusiasts.

How should I choose the right packing cubes for my needs?

Consider the size and dimensions of the cubes to match your bag, the material and durability for travel conditions, the weight of the cubes, and the design and color options for easy identification and personalization.

What is an effective way to use packing cubes?

Organizing items by category (clothing, accessories, toiletries), maximizing space using compression techniques, and labeling or color-coding the cubes for quick access are effective strategies for utilizing packing cubes.

What common mistakes should I avoid when using packing cubes?

Avoid overpacking or underpacking, ignoring weight limits, and not considering accessibility when placing items in your packing cubes. These mistakes can lead to discomfort and inefficiency during travel.

How can packing cubes improve my travel experience based on user experiences?

Many travelers report that packing cubes reduce stress and streamline the packing process, allowing for better organization and ease of access to items. Before-and-after organization comparisons often showcase significant improvements in packing efficiency.

What additional packing tips can enhance my travel experience?

Layering clothes for versatility, utilizing other packing accessories like dry bags and compression sacks, and creating a travel checklist can further optimize your packing strategy and ensure you have everything you need for your trip.

Maximize Space: The Best Packing Cubes for Budget Travelers

Are you ready to transform your travel packing game? Packing cubes might just be the nifty solution you need to maximize every inch of your suitcase while staying organized on a budget! Read Interesting article: Essential Travel Accessories for Backpacking on a Budget

Maximize Space: The Best Packing Cubes for Budget Travelers

Understanding Packing Cubes

What Are Packing Cubes?

When I first heard about packing cubes, I was a bit skeptical. I thought, “How can these little fabric boxes really change the way I pack?” But once I tried them, I was amazed. Packing cubes are lightweight fabric containers designed to help you organize your belongings within your suitcase or backpack. They come in various sizes and shapes, making it easy to categorize your items—think of them as drawers for your luggage. You can use one cube for clothes, another for toiletries, and maybe a third for electronics or shoes. It’s like having a mini dresser on the go!

Benefits of Using Packing Cubes

From my experience, the benefits of packing cubes are numerous. First and foremost, they keep everything organized. No more digging through a pile of clothes to find that one shirt you want to wear. Instead, I can simply pull out the cube that contains my tops. Additionally, they help compress your clothing, which means you can fit more into your luggage. I’ve found that using packing cubes allows me to maximize space, and who doesn’t love that? Beyond organization and space-saving, packing cubes also make unpacking a breeze. I can easily transfer them from my suitcase to hotel drawers, keeping everything in its designated spot.

How Packing Cubes Help Budget Travelers

For budget travelers like me, packing efficiently can lead to significant savings. When you maximize space with packing cubes, you can often avoid checked baggage fees by fitting everything into a carry-on. I remember a trip to Europe where I successfully packed two weeks’ worth of clothes into a single carry-on suitcase, thanks to packing cubes. This not only saved me money but also made navigating through crowded airports so much easier! Plus, being able to pack more efficiently means I can bring back souvenirs without worrying about space constraints. Read Interesting article: Must-Have Travel Gear: Budget Accessories for Every Trip

Key Features to Look For in Packing Cubes

Material Durability

When searching for packing cubes, I always check the material. The last thing I want is for my cubes to rip or wear down during my travels. Look for cubes made of durable, high-quality fabrics like nylon or polyester. They should be lightweight yet sturdy enough to withstand the rigors of travel. After trying out several brands, I realized that investing in well-made packing cubes can save you money in the long run, as they won’t need to be replaced frequently.

Size and Dimensions

Finding the right sizes is crucial. Some trips require more clothing, while others might need just a few essentials. I recommend looking for a set that includes a variety of sizes. This allows you to customize your packing based on the length of your trip. I often use smaller cubes for undergarments and larger ones for bulkier items like jackets or shoes. The flexibility in sizes helps me adapt to different packing scenarios.

Weight and Portability

Weight is another factor to consider. Since many airlines have strict weight limits for carry-on luggage, I prefer packing cubes that are lightweight. They should provide structure without adding unnecessary heft to my bags. I’ve noticed that some packing cubes weigh hardly anything, which is perfect for budget travelers who need to maximize every ounce of their luggage.

Design and Organization

Design matters, too. I love packing cubes that offer organizational features like mesh panels or handles. Mesh panels allow me to see what’s inside each cube without opening it, which saves time when I’m in a hurry. Handles are also a bonus, making it easy to pull cubes out of my bag. Many packing cubes also come with zippers that glide smoothly, which is something I appreciate when I’m trying to pack quickly.

Price Range and Value

Finally, consider the price range. As a budget traveler, I’m always on the lookout for the best value. Packing cubes can range from very affordable to quite pricey. I’ve found that many mid-range options provide excellent quality without breaking the bank. It’s worth investing in a set that fits your budget while still meeting all your needs. Sometimes, spending a little more can lead to better durability and functionality, which will pay off in the long run.

Top Packing Cubes for Budget Travelers

Best Affordable Packing Cubes

When I started my journey with packing cubes, I wanted to find options that wouldn’t break the bank. I discovered that there are some fantastic affordable choices out there. One of my favorites is the AmazonBasics Packing Cube Set. This set comes in various sizes and is budget-friendly without skimping on quality. The fabric is durable, and the zippers are surprisingly smooth for such an affordable option. I remember packing for a weekend trip with these cubes and being impressed by how much I could fit without feeling like my suitcase was overflowing.

Best Lightweight Packing Cubes

If you’re like me and try to keep your luggage as light as possible, lightweight packing cubes are a must. I found the Eagle Creek Pack-It Specter Compression Cube Set to be a game changer. These cubes are not only lightweight but also made from a translucent fabric that allows you to see what’s inside without opening them up. When I used these on a recent trip, I felt like I had a weightless packing solution. They made it easy for me to stay within airline weight limits while packing efficiently.

Best Compression Packing Cubes

Compression packing cubes are fantastic for those who want to maximize every inch of their luggage. I remember trying the Gonex Compression Packing Cubes and being blown away by their ability to save space. These cubes have a two-way zipper that compresses your clothes down, making it easy to pack more items. On one occasion, I managed to fit a week’s worth of clothing into a single cube, which was a huge win for me as a traveler. If you’re planning a longer trip, these are definitely worth considering.

Best Packing Cubes with Organizational Features

For those of us who thrive on organization, packing cubes with added features can make all the difference. The Osprey Ultralight Packing Cube Set caught my eye for its thoughtful design. Not only are they lightweight, but they also come with a mesh top that helps with breathability and visibility. I love being able to see what’s inside without having to rummage through my suitcase. These cubes made my last trip much smoother since I could easily find what I needed without any hassle.

How to Maximize Space with Packing Cubes

Efficient Packing Techniques

Over the years, I’ve learned a few techniques that help me pack efficiently with packing cubes. One of my go-to methods is rolling my clothes instead of folding them. I find that rolling not only saves space but also reduces wrinkles. When I roll my clothes and then place them in the cubes, I can fit so much more in. I typically start by placing the bulkiest items at the bottom of the cube and layering smaller items on top. This way, I can maximize the space and keep everything in order.

Using Compression for Extra Space

If you opt for compression packing cubes, you’ll want to make the most of that feature. I’ve discovered that it helps to pack the cubes tightly, ensuring that you fill every available space. I often start by placing heavier items at the bottom and lighter items on top, which helps the compression work more effectively. When I zipped up my Gonex cubes, I was always amazed at how much room I saved. It’s like having a magic trick in my suitcase!

Organizing by Outfits vs. Categories

Another technique I’ve experimented with is organizing my packing cubes by outfits instead of categories. This method has worked wonders for me, especially on shorter trips. I’ll pack individual cubes for each day’s outfit, including accessories and undergarments. This way, when I arrive at my destination, I can simply grab a cube for the day’s outfit, which makes getting ready a breeze. I remember one trip where I was able to quickly get dressed for dinner without digging through my suitcase, and it felt fantastic!

Tips for Choosing the Right Packing Cubes

Assessing Your Travel Needs

Before buying packing cubes, it’s important to assess your travel needs. I’ve found that not everyone needs the same types of cubes. For a weekend getaway, I prefer smaller sets, while for longer trips, I lean towards larger cubes. Think about how often you travel and what kinds of trips you take. This will help you determine the size and number of packing cubes you’ll need. Reflecting on my own experiences, I can say that having the right cubes can make a significant difference in your packing efficiency.

Reading Reviews and Recommendations

When I’m in the market for something new, I always turn to reviews. I often read multiple reviews and try to focus on the ones that align with my needs. If a packing cube has a lot of positive feedback regarding durability and functionality, I’m more likely to give it a shot. I remember purchasing a set based on rave reviews, and they exceeded my expectations. Hearing from others can give you a clearer picture of what to expect.

Understanding Return Policies and Warranties

Finally, it’s vital to understand the return policies and warranties for packing cubes. I once bought a set that I thought would be perfect, but they didn’t work out for me. Thankfully, the store had a generous return policy, and I was able to exchange them without any hassle. Knowing that you have the option to return or exchange if necessary can give you peace of mind when trying new products.

Real-Life Experiences and User Testimonials

Case Study: A Weekend Getaway

Reflecting on my own travels, I can’t help but think about that one unforgettable weekend getaway to the beach. It was spontaneous, and I had limited time to pack. I decided to give packing cubes a serious try. I started with a medium-sized cube for my clothes and a smaller one for my swimwear and accessories. What surprised me the most was how quickly I was able to pack. I rolled my clothes into the cubes and tossed in a few pairs of flip-flops. When I arrived at the hotel, I simply lifted the cubes out and placed them directly into the dresser. No mess, no hassle! I remember feeling so accomplished and stress-free because I didn’t have to rummage through a disorganized suitcase while trying to find my favorite beach cover-up.

One of the best parts of that trip was how easily I could switch from beach mode to dinner mode. I had packed an outfit for each occasion in separate cubes, which made changing for dinner a breeze. I didn’t waste any time searching through my belongings. Just grab the right cube and I was ready to go. This experience solidified my love for packing cubes, as they made a quick weekend escape organized and enjoyable.

Case Study: A Long-Term Travel Adventure

Now, let’s switch gears and talk about a more extended travel adventure I embarked on—a month-long trip through Southeast Asia. With so many different climates and activities planned, I knew I had to be strategic in my packing. I used several packing cubes of varying sizes to keep my essentials organized. I had a cube dedicated to lightweight clothes, another for my hiking gear, and a smaller cube for toiletries. I also packed a compression cube for bulkier items like jackets and shoes.

During my travels, I often found myself hopping from one destination to another within a day or two. The packing cubes not only kept my suitcase organized but also made it easy to access what I needed quickly. One time, I arrived at a new destination only to realize I had forgotten to pack an extra pair of sandals. Instead of digging through my entire suitcase, I just pulled out the specific cube with my shoes. It felt like a small victory, and I was able to grab what I needed without turning my entire bag upside down.

Additionally, I learned that keeping my packing cubes organized according to activity really paid off. For instance, when I knew I was going on a multi-day trek, I could easily grab the cube with my hiking gear without having to sift through my entire suitcase. This saved me time and kept my stress levels down as I navigated through bustling markets and crowded buses. The packing cubes truly became my travel companions, helping me stay organized throughout the entire journey.

Alternatives to Packing Cubes

Compression Bags

If packing cubes aren’t quite your style, compression bags are another fantastic option I discovered. They work by removing air from the bag, allowing you to save even more space. I remember using compression bags on a winter trip where I needed to pack bulky jackets and sweaters. By squeezing the air out, I was able to fit everything into my suitcase much more efficiently. However, I did find that once you take items out, they can get a bit wrinkled, so it’s a trade-off. Still, for maximizing space, they’re definitely worth considering.

Travel Organizers

Travel organizers are another alternative I’ve come across. They come in various forms, such as pouches for electronics, toiletry bags, and even shoe bags. I’ve used these for organizing my chargers, cables, and makeup. They help keep small items separate and easy to access. The only downside is that they don’t necessarily compress like packing cubes, but they can be a great complement to your packing strategy. For example, I often use a travel organizer for my tech gear while still keeping my clothing in packing cubes.

DIY Packing Solutions

If you’re feeling crafty, DIY packing solutions can also be a fun and budget-friendly option. I’ve seen travelers use large ziplock bags for clothing. While they may not be as sturdy as packing cubes, they can be a temporary solution for organizing clothes and keeping them wrinkle-free. I’ve done this when I was in a pinch, and it worked out surprisingly well for short trips. It’s all about finding what works best for you and your travel style.

Where to Buy Packing Cubes

Online Retailers

When it comes to purchasing packing cubes, I often find that online retailers offer the most variety. Websites like Amazon, eBay, and even specialized travel gear stores have a plethora of options. I appreciate the convenience of shopping online, especially when I can read reviews and compare different brands. I remember browsing for my first set and being overwhelmed by the choices, but the customer reviews guided me to a solid selection.

Physical Stores

If you prefer to see and feel the product before buying, visiting physical stores can be beneficial. Stores like Target, Walmart, and outdoor retailers like REI often carry packing cubes. I’ve liked visiting these stores because I could check the durability and size in person. Plus, it’s always nice to get instant gratification by walking out with my purchase!

Comparison of Prices Across Platforms

Regardless of where you decide to buy, I recommend comparing prices across different platforms to ensure you’re getting the best deal. I’ve found that prices can vary significantly from one retailer to another. Sometimes, online stores have sales or discounts that aren’t available in physical locations, and vice versa. Keeping an eye out for seasonal sales can also lead to great savings on packing cubes. I’ve snagged some fantastic deals during Black Friday and back-to-school sales, so it’s worth the effort!

Frequently Asked Questions

What are packing cubes?

Packing cubes are lightweight fabric containers designed to help you organize your belongings within your suitcase or backpack. They come in various sizes and shapes, allowing you to categorize items like clothes, toiletries, electronics, or shoes, making your packing more organized and efficient.

How do packing cubes benefit budget travelers?

Packing efficiently with packing cubes can help budget travelers avoid checked baggage fees by fitting all belongings into a carry-on. This not only saves money but also simplifies navigating crowded airports. For instance, one user managed to pack two weeks’ worth of clothes into a single carry-on suitcase thanks to packing cubes.

What key features should I look for in packing cubes?

When choosing packing cubes, consider material durability, size and dimensions, weight and portability, design and organization features, and price range. Look for durable fabrics like nylon or polyester, a variety of sizes for customization, lightweight options, and organizational features like mesh panels and handles.

What are some recommended packing cubes for budget travelers?

Some highly recommended packing cubes for budget travelers include the AmazonBasics Packing Cube Set for affordability, the Eagle Creek Pack-It Specter Compression Cube Set for lightweight packing, Gonex Compression Packing Cubes for maximizing space, and the Osprey Ultralight Packing Cube Set for organizational features.

What packing technique can maximize space when using packing cubes?

One effective packing technique is rolling clothes instead of folding them. This method saves space and reduces wrinkles. By placing the bulkiest items at the bottom of the cube and layering smaller items on top, you can maximize space and keep everything organized.

What are alternatives to packing cubes?

Alternatives to packing cubes include compression bags, which remove air to save space, travel organizers for keeping small items separate, and DIY packing solutions like large ziplock bags for temporary organization. Each option has its benefits depending on your packing style and needs.

Where is the best place to buy packing cubes?

Packing cubes can be purchased from online retailers like Amazon and eBay, which offer a wide variety of options. Physical stores such as Target, Walmart, and outdoor retailers like REI also carry packing cubes, allowing you to see the products in person before buying.

How can I ensure I get the best price for packing cubes?

To get the best price on packing cubes, compare prices across different platforms, both online and in physical stores. Look for seasonal sales, discounts, and promotions. Online retailers may have sales not available in stores, so it’s worth monitoring prices before making a purchase.

How can I organize my packing cubes effectively?

One effective way to organize packing cubes is by outfits instead of categories, which works well for shorter trips. Packing individual cubes for each day’s outfit, including accessories, allows for easy access and quick dressing upon arrival at your destination.

What should I consider about return policies when purchasing packing cubes?

Understanding return policies and warranties is important before purchasing packing cubes. Knowing you can return or exchange items if they don’t meet your needs provides peace of mind. Reading product reviews can also help ensure you’re choosing a reliable product.

Backpacking with a Budget: Camera Gear You Need

Backpacking on a budget doesn’t mean sacrificing quality—especially when it comes to photography. Let’s explore how to capture stunning travel moments without breaking the bank.

Backpacking with a Budget: Camera Gear You Need

Understanding the Basics of Backpacking with a Budget

Why Choose Budget Backpacking?

When I first started my backpacking journey, I quickly realized that keeping my expenses low allowed me to travel more often and explore new places. Budget backpacking is not just about saving money; it’s about experiencing the world authentically. I believe that there’s something truly special about traveling on a budget. It forces us to find creative solutions and discover hidden gems that many tourists overlook. I remember stumbling upon a small local café in a quiet alley, all because I was looking for a cheaper meal instead of a tourist hotspot. Those moments are priceless.

Benefits of Traveling Light

Traveling light is one of the best decisions I made as a backpacker. It didn’t just save me money on baggage fees; it also made my journey more enjoyable. Carrying less gear means I could move freely, navigate crowded markets, and hop on and off public transport without feeling weighed down. I learned to prioritize what I really needed, which often resulted in a richer experience. For example, instead of bringing every piece of clothing I owned, I packed versatile items that could be mixed and matched. This not only lightened my load but also made packing and unpacking a breeze.

Essential Camera Gear for Backpackers

Camera Types: DSLR vs. Mirrorless vs. Point-and-Shoot

When it comes to choosing a camera for backpacking, I’ve tried them all—DSLRs, mirrorless cameras, and point-and-shoots. Each has its pros and cons. DSLRs are fantastic for high-quality images and offer great manual control, but they can be bulky and heavy. I used to lug around my DSLR, and while I got some stunning shots, I often regretted the extra weight on long hikes.

On the other hand, mirrorless cameras strike a balance between quality and portability. They are lighter than DSLRs and still provide excellent image quality. I eventually switched to a mirrorless camera, and it has been a game-changer for my backpacking trips. Point-and-shoot cameras, while not as versatile, can fit in your pocket and are incredibly user-friendly. For casual photography, I think they are a solid choice. I’ve seen friends capture amazing travel photos with their compact cameras, proving that great photography doesn’t always require professional gear. If you’re interested in learning more, check out my article on How to Choose the Right Camera for Backpacking Trips.

Best Budget-Friendly Cameras for Backpacking

Finding a budget-friendly camera can be daunting, but there are plenty of great options out there. I’ve had great success with models like the Canon EOS M50 and the Fujifilm X-T200. These cameras offer excellent image quality and are lightweight, making them perfect for backpackers. They also have a range of lenses available, allowing you to expand your photography as you grow. If you’re more into point-and-shoots, the Sony RX100 series is worth considering. They’re compact, reliable, and produce impressive images without the need for extensive setup. For more recommendations, you can refer to my post on Best Budget-Friendly Cameras for Travel Photography.

Smartphone Photography: Pros and Cons

Let’s not forget about smartphone photography! In my experience, smartphones have come a long way and are often underrated. I’ve captured some of my best travel moments using just my phone. They’re always at hand, easy to use, and often include editing features right in the gallery. However, the downside is that they may not perform as well in low light and can lack the versatility of a dedicated camera.

That said, I believe smartphones are a fantastic option for budget backpackers. They allow for spontaneous captures that you might miss with a bulky camera. Plus, you can easily share your adventures on social media or with friends and family in real time. For me, the key is finding the right balance—sometimes I carry both my smartphone and my mirrorless camera, depending on the trip’s demands.

As I prepared for my last backpacking adventure, I reflected on the importance of choosing the right camera gear. It’s not just about the equipment; it’s about how we use it to tell our story. Each piece of gear should enhance our experience and help us create memories that last a lifetime. By understanding the different camera options and what works best for my style, I felt ready to capture the beauty of the world around me. If you’re looking for a comprehensive guide, be sure to check my article on Essential Camera Gear for Backpacking Adventures.

Accessories to Enhance Your Photography

Tripods: Lightweight Options for Stability

One of the best investments I made for my photography was a lightweight tripod. I used to think tripods were just for professional photographers, but I quickly learned their value during my travels. A sturdy tripod allows for longer exposure shots, especially in low light or for capturing stunning sunrises and sunsets. I remember being in a remote location in the mountains, and I wanted to shoot the stars. Without a tripod, that shot would have been impossible.

There are many portable tripods available that won’t weigh you down. I found that compact travel tripods, like the Joby GorillaPod, are perfect for backpackers. They’re flexible, lightweight, and can be wrapped around objects for unique angles. I often set mine up on uneven surfaces, and it held my camera steady while I captured breathtaking views. If you’re planning to take nighttime shots or long exposures, I highly recommend investing in a reliable tripod.

Lenses: Versatile Choices for Different Scenarios

When I first started exploring photography, I didn’t think much about lenses. However, I quickly learned that having the right lens can drastically change the outcome of my photos. A versatile lens is essential, especially for backpackers who want to capture a range of images without carrying a bag full of gear. I often use a zoom lens, like a 24-70mm, which allows me to capture both wide landscapes and close-up details without needing to switch lenses constantly.

Another fantastic option is a prime lens, like a 50mm. They’re typically lighter and offer better low-light performance, which I found invaluable during my evening explorations. I’ve taken incredible portraits and street shots with my 50mm lens, and it has helped me improve my composition skills. For anyone just starting out, I recommend investing in a couple of good-quality lenses that suit your photography style, as they can open up a world of creative possibilities.

Camera Bags: Protecting Your Gear on the Move

When I first began backpacking, I made the mistake of using a regular backpack for my camera gear, and it was a disaster. My equipment was unprotected, and I worried constantly about damaging my camera while hiking. After a few close calls, I decided to invest in a dedicated camera bag. It’s one of the best purchases I’ve made.

I found that a backpack-style camera bag was perfect for me. It offered comfort and ample space for my gear while being easy to carry. Look for one with padded compartments, so everything stays safe during your travels. I also love that many camera bags come with weather-resistant materials, which is crucial when you’re out in nature. I’ve trekked through rain and dust, and my gear emerged unscathed. Choosing the right camera bag is essential, as it can make a huge difference in protecting your investment while on the go.

Memory Cards: Storage Solutions for Travelers

With the incredible experiences we capture, having enough storage is vital. I’ve learned this the hard way when I ran out of memory on my card while exploring a beautiful market in Marrakech. It was a panic-inducing moment, and I vowed to never let it happen again. I now carry multiple memory cards to ensure I never miss a moment.

When selecting memory cards, I recommend looking for those with a high write speed, especially if you’re shooting in burst mode or capturing video. I typically carry 32GB or 64GB cards, as they provide ample storage for thousands of photos. Plus, I’ve learned to keep a backup card in a safe place, just in case. It’s a small investment that can save you from heartache during your travels.

Portable Chargers and Power Banks

In our tech-driven world, keeping our devices charged is crucial. I can’t tell you how many times I’ve been out exploring when my camera’s battery level dropped low, leaving me anxious and frustrated. That’s when I discovered the importance of portable chargers. They have become a staple in my backpack.

There are many compact power banks available that can charge multiple devices at once. I’ve found that a power bank with at least 10,000 mAh capacity is ideal for backpacking. This way, I can recharge my camera and phone without worrying about finding an outlet. I remember one evening in Barcelona when I was out late capturing the city lights, and my phone battery was draining fast. Thanks to my portable charger, I could keep snapping shots without having to cut my adventure short. Having reliable power on the go keeps my creativity flowing, and I know I can capture those spontaneous moments without fear.

Budgeting for Camera Gear

Cost-Effective Gear Buying Tips

As a backpacker, I know how important it is to stick to a budget, especially when it comes to camera gear. I’ve learned a few tricks along the way that help me save money while still getting quality equipment. One of my favorite strategies is to buy used or refurbished gear. Many websites and stores offer pre-owned equipment at significantly lower prices. I once found a gently used lens that was still in mint condition for nearly half the retail price. It felt like a win-win; I got great gear and saved money!

Another tip is to invest in versatile equipment. Instead of buying multiple lenses, I focused on getting a high-quality zoom lens that covered various focal lengths. This decision not only saved me money but also lightened my load while traveling. I recommend doing thorough research before making any purchases—reading reviews and watching comparison videos helped me find the best options that fit my budget and needs.

Renting vs. Buying Camera Equipment

Renting camera gear can be a fantastic alternative to buying, especially if you’re heading to a specific destination where you want to capture high-quality images. I remember preparing for a trip where I wanted to try out a new lens that I wasn’t ready to purchase yet. Renting allowed me to test it on my travels without the long-term commitment. Plus, it saved me the hassle of carrying extra weight on my backpacking journey.

There are many companies that provide rental services for camera gear, either locally or online, and you’ll often find a wide variety of options. If you’re planning on a short trip or just want to experiment, I think renting is a smart way to go. It’s cost-effective and gives you the chance to use high-end equipment without breaking the bank.

Where to Find Discounts and Deals

Finding discounts on camera gear can feel like a treasure hunt, but it’s worth the effort! I’ve had great success by signing up for newsletters from photography websites and local camera shops. They often send out promotions, and I’ve snagged some amazing deals this way. Online retailers like B&H, Adorama, and Amazon frequently have sales, especially during holiday seasons. I keep an eye on their websites and social media for flash sales or exclusive discounts.

Another method I’ve found useful is checking out local photography clubs or forums. Members often sell their gear at lower prices because they’re upgrading or no longer need certain items. I even joined a Facebook group devoted to photography gear swaps, which has led to some fantastic finds. Don’t hesitate to reach out and ask for advice—photography enthusiasts are usually more than willing to share their tips on where to snag the best deals!

Photography Tips for Backpackers

Capturing Landscapes and Nature

When it comes to capturing breathtaking landscapes, I’ve learned that timing is everything. Early mornings and late afternoons, known as the golden hours, provide the best natural light for photography. I still remember waking up before dawn to catch the sunrise over a stunning mountain range. The way the light transformed the landscape into vibrant colors was something I’ll never forget. It took some effort to wake up early, but the results were worth it!

Another tip is to experiment with different angles and perspectives. I often try to find a foreground element to add depth to my landscape shots. Whether it’s a rock, a flower, or even another traveler, it helps make the photo more interesting. I’ve found that getting down low or climbing up for a higher viewpoint can dramatically change the composition of my images. The more angles I explored, the more unique my photos became.

Street Photography on a Budget

Street photography is one of my favorite ways to capture the essence of a place. I’ve realized that it’s best to blend in with the environment to capture authentic moments. I often use a smaller camera or my smartphone to avoid drawing too much attention. This way, I can capture genuine interactions and emotions without being intrusive. I remember wandering through the bustling streets of Tokyo, capturing candid moments of locals going about their daily lives. The more discreet I was, the better the shots turned out.

Additionally, I think it helps to build a rapport with the locals. A simple smile or a friendly nod can open up opportunities for candid shots. I’ve even asked people if I could take their photo, and I was surprised at how often they said yes! This approach not only resulted in stunning portraits but also connected me with the culture on a personal level, enriching my travel experience.

Using Natural Light Effectively

Natural light is a backpacker’s best friend when it comes to photography. I’ve learned to be mindful of how it changes throughout the day. For example, shooting during overcast days can result in soft, diffused light that’s perfect for portraits. Conversely, harsh sunlight can create strong shadows and contrasts. I remember one time in Greece, I took some stunning seaside shots during the golden hour, and the warm tones transformed the entire scene.

When shooting in direct sunlight, I often look for shaded areas or use backlighting to create a dramatic effect. Experimenting with light has opened up a new world of creativity for me, allowing me to capture stunning images that evoke the mood of the moment. Learning how to harness natural light has truly enhanced my photography skills, and I believe it’s a vital part of capturing compelling travel memories.

Editing and Sharing Your Travel Photos

Best Free Editing Software for Travelers

Once I began capturing incredible moments during my travels, I quickly realized that editing plays a massive role in showcasing those experiences. There are several free editing tools available that I’ve found to be super helpful. One of my favorites is Adobe Lightroom Mobile. It’s user-friendly and offers a range of features that allow you to enhance your photos beautifully. The ability to adjust exposure, contrast, and colors right from my phone has made a huge difference in the final results.

Another great option is Snapseed, which provides powerful editing capabilities and a variety of filters. I remember using it after a long day of exploring a vibrant market in India, where the colors were just begging to be enhanced. The selective editing feature allowed me to highlight specific areas of my photo, bringing the whole scene to life. I believe that editing can be just as important as taking the photo itself, as it helps to convey the emotions and stories behind our travel experiences.

How to Share Your Photos on Social Media

Sharing our travel photos has become a significant part of the journey itself. I love using platforms like Instagram and Facebook to showcase my adventures. When I post, I try to include engaging captions that tell a story about the moment captured. I remember posting a photo of a breathtaking sunset in Santorini, and I shared the story behind it—how I had stumbled upon the perfect spot after a long day of exploring.

Using hashtags is another strategy I’ve found effective. They help my photos reach a wider audience and connect with fellow travelers. I often use a mix of popular travel hashtags along with more specific ones related to the location. Engaging with other travelers by liking and commenting on their posts has also created a wonderful sense of community and inspiration. It’s incredible how sharing our experiences can inspire others to embark on their own adventures!

Creating a Travel Photography Blog

If you’re passionate about photography, I genuinely recommend starting a travel photography blog. It’s a great way to document your experiences and share them with a larger audience. I decided to create my own blog after a particularly memorable trip to South America, where I had captured so many stunning photos and stories that I wanted to share. Building a blog allowed me to combine my love for writing and photography in one space.

Platforms like WordPress and Wix made it easy for me to set up my blog without needing advanced technical skills. I focus on writing about my travels, photography tips, and gear reviews, and I’ve loved connecting with readers who share my interests. Blogging has not only enhanced my writing and photography skills, but it has also opened up opportunities for collaborations and partnerships with brands. If you have a passion for travel and photography, I think starting a blog could be a rewarding experience!

Final Thoughts

Backpacking on a budget while capturing beautiful photographs is not only possible but also incredibly fulfilling. Throughout my journey, I’ve learned that the right mindset, gear, and techniques can elevate our experiences and the memories we create. Whether it’s choosing the right camera, finding the perfect lighting, or connecting with locals to capture authentic moments, every part of the journey adds to the story we tell through our images.

Remember, it’s not just about the gear we use; it’s how we engage with the world around us that truly matters. I encourage you to embrace the challenges and joys that come with budget backpacking and photography. With a little creativity and resourcefulness, you can create stunning visuals that bring your travel stories to life. I can’t wait to see the adventures you embark on and the beautiful moments you capture along the way!

Frequently Asked Questions

What is the main benefit of budget backpacking?

The main benefit of budget backpacking is that it allows travelers to explore more often and experience the world authentically. It encourages creative solutions and helps discover hidden gems that tourists might overlook.

Which type of camera is recommended for backpackers?

Mirrorless cameras are recommended for backpackers as they strike a balance between quality and portability. While DSLRs are great for high-quality images, they can be bulky and heavy. Point-and-shoot cameras are also a good option for casual photography.

Can smartphones be used effectively for travel photography?

Yes, smartphones can be very effective for travel photography. They are always accessible, easy to use, and often include editing features. However, they may not perform as well in low light compared to dedicated cameras.

What are some essential accessories for enhancing photography while backpacking?

Essential accessories include lightweight tripods for stability, versatile lenses for different scenarios, a protective camera bag, and multiple memory cards for storage. Portable chargers and power banks are also important for keeping devices charged.

How can I save money when buying camera gear?

To save money on camera gear, consider buying used or refurbished equipment, investing in versatile items like zoom lenses, and doing thorough research before making any purchases.

Is renting camera equipment a good option for travelers?

Yes, renting camera equipment can be a cost-effective alternative to buying, especially if you want to try out high-quality gear for a specific trip without the long-term commitment or added weight.

What are some good editing software options for travelers?

Some good free editing software options for travelers include Adobe Lightroom Mobile and Snapseed. These tools offer user-friendly features to enhance photos effectively.

What strategies can be used to share travel photos on social media?

When sharing travel photos on social media, include engaging captions that tell a story, use relevant hashtags to reach a wider audience, and engage with other travelers by liking and commenting on their posts.

Why is natural light important in photography?

Natural light is crucial in photography as it affects the quality and mood of the images. Learning to use natural light effectively can greatly enhance the overall results of the photographs taken during travels.

How can starting a travel photography blog be beneficial?

Starting a travel photography blog can be beneficial as it allows you to document experiences and share them with a larger audience. It also enhances writing and photography skills and opens opportunities for collaborations and partnerships with brands.

How to Choose the Right Camera for Backpacking Trips

Choosing the right camera for backpacking trips can feel overwhelming with so many options available. However, with a little guidance, you can find the perfect camera to capture your adventures in stunning detail. Read Interesting article: Top 5 Affordable Cameras for Budget Backpackers

How to Choose the Right Camera for Backpacking Trips

Understanding Your Backpacking Needs

When I first started backpacking, I realized that choosing the right camera was just as important as selecting the right gear. Each trip is unique, and understanding my specific needs helped me make the best choice. I began to think about the types of trips I would take, the environments I would encounter, and what I wanted to capture through my lens. Let’s explore these considerations together.

Types of Backpacking Trips

Backpacking trips can vary widely, from short weekend hikes to extended treks across rugged terrain. Some trips are focused on reaching a summit, while others involve leisurely walks through beautiful landscapes. For instance, I once embarked on a multi-day hike through the Rockies where the scenery was breathtaking. In contrast, a recent weekend trip to a nearby forest was all about the tranquility of nature. Each scenario required a different approach to photography.

Think about the type of backpacking trips you plan to undertake. Are they primarily focused on challenging hikes, where weight and portability are key? Or are you more interested in capturing the beauty of serene landscapes? Understanding the nature of your trips will help you determine what features you need in a camera. Stay Safe While Solo Backpacking: Top Safety Strategies can also provide useful insights for your adventures.

Duration and Environment Considerations

The duration of your trip and the environment you’ll be in play a significant role in your camera choice. If you’re going on a long trek, weight becomes a critical factor. I remember carrying a bulky camera on a week-long hike, and it quickly became a burden. Now, I opt for lightweight options that won’t weigh me down.

Consider the environment as well. For example, if you’re hiking through wet or humid conditions, you’ll want a camera that can withstand the elements. I learned this the hard way when I didn’t protect my gear during a sudden rainstorm. A weather-resistant camera made all the difference on my next trip.

Photography Goals: Landscape vs. Wildlife

What do you want to photograph? Your goals can significantly influence your camera choice. If you’re into landscape photography, you might focus on cameras with excellent dynamic range and wide-angle lens options. I’ve found that a good landscape shot often requires a sturdy tripod and a camera that can handle low light, especially during sunrise or sunset.

On the other hand, if wildlife photography is your passion, you’ll want a camera with fast autofocus and a decent zoom lens. I’ve had countless moments where I wish I had a telephoto lens to capture a distant animal without scaring it away. Think about what you’ll want to capture most, and let those goals guide your decision.

Key Camera Features to Consider

Now that we’ve established your needs, let’s explore the key features to look for in a camera for backpacking. Knowing what to prioritize will help you in making an informed decision.

Weight and Portability

Weight and portability are paramount for any backpacker. I’ve learned from experience that every ounce counts when you’re carrying your gear for miles. A heavier camera might be worth it for the image quality, but I always ask myself if it’s worth the strain on my back. Compact and lightweight options are often the best for backpacking.

Durability and Weather Resistance

Backpacking means exposure to the elements, so durability is crucial. I’ve seen too many friends struggle with fragile cameras that couldn’t handle a little mud or moisture. Look for cameras that are built to withstand tough conditions. For me, a rugged design and weather sealing have become non-negotiable features.

Battery Life and Storage Capacity

Battery life is another consideration we often overlook. When I’m out in the wilderness, I want a camera that lasts through long days of shooting. It’s disappointing to miss out on capturing a beautiful moment because my battery died. I recommend checking reviews for battery performance and carrying extra batteries, just in case.

Storage capacity is equally important. I remember one trip where I ran out of space midway through my hike, and it was such a bummer! Ensure that your camera allows for expandable storage, and consider bringing multiple memory cards so you never miss a shot.

Image Quality and Sensor Size

Image quality is something every photographer should prioritize. A larger sensor typically provides better image quality, especially in low light. I’ve found that my best photos come from cameras with larger sensors, so it’s worth looking into those options. Just remember, bigger isn’t always better if it adds too much weight to your pack.

Lens Options and Versatility

Finally, consider the lens options available for your camera. A versatile camera body that can accommodate various lenses gives you the flexibility to shoot anything from sweeping landscapes to close-up wildlife shots. I’ve often switched lenses on the go, and having that adaptability has allowed me to capture some of my favorite moments on the trail.

Types of Cameras for Backpacking

When it comes to choosing the right camera for backpacking, understanding the different types of cameras available is essential. Each type has its own strengths and weaknesses, and knowing these can help you make a choice that aligns with your needs and preferences. I’ve had the chance to experiment with various types of cameras over the years, and here’s what I’ve learned.

DSLR Cameras

DSLR cameras have long been a favorite among photographers, and for good reason. They offer exceptional image quality, a robust selection of lenses, and superior manual controls. I remember my first DSLR, and how excited I was to capture stunning landscapes with it. However, they can be bulky and heavy, which is something to consider for backpacking trips. If you’re planning to hike for several days, the weight might become a factor. But if you’re looking for high-quality images and don’t mind carrying a bit more weight, a DSLR could be a great fit.

Mirrorless Cameras

Mirrorless cameras have grown in popularity in recent years, and for good reason. They combine high-quality imaging with a compact design, making them a fantastic option for backpackers. These cameras are often lighter than DSLRs, which I’ve found to be a major advantage on long treks. I’ve enjoyed using a mirrorless camera because it still allows for interchangeable lenses while being more versatile and less cumbersome. If you’re looking for a balance between quality and portability, I highly recommend exploring mirrorless options.

Compact Cameras

Compact cameras are another excellent choice for backpacking. They are incredibly lightweight and easy to carry, which is a big plus when you’re trying to minimize your pack weight. While they may not deliver the same image quality as DSLRs or mirrorless systems, I’ve been pleasantly surprised by how well some premium compact cameras perform. They often come with good zoom capabilities and can handle various shooting scenarios. For casual photography and quick snapshots, a compact camera can be a fantastic companion on the trail.

Action Cameras

If you’re into adventure sports or want to capture your hiking experiences in a dynamic way, action cameras could be your go-to option. These little powerhouses are designed to withstand rough conditions and are highly portable. I took an action camera on a white-water rafting trip, and it captured some of the most exhilarating moments without any hassle. They’re typically waterproof, shockproof, and can be mounted on helmets or gear, which adds to their versatility. For anyone looking to add some fun to their photography, action cameras are worth considering.

Smartphone Cameras

Let’s not forget about the cameras that most of us carry every day – our smartphones. Modern smartphones have impressive camera technology, and I’ve found them incredibly convenient for backpacking. While they may not replace dedicated cameras for more serious photography, they are perfect for spontaneous shots and sharing experiences in real-time. Just be mindful of battery life, as heavy use can drain your phone quickly. I often bring a portable charger to ensure I can keep snapping pictures throughout the day.

Budget Considerations

Now that we’ve covered the types of cameras, it’s time to talk about budget considerations. Choosing a camera can be a significant investment, so it’s crucial to understand what you’re comfortable spending and what features are most important to you. Ultimate Guide to Packing Light for Family Trips on a Budget can help you plan your expenses effectively.

Understanding Price Ranges

Cameras come in a wide range of prices, from budget-friendly compact options to high-end DSLRs and mirrorless systems. I’ve had experiences where I splurged on a high-end camera only to realize that it was overkill for my needs. On the flip side, I’ve also found great value in mid-range cameras that performed beautifully without breaking the bank. Set a budget and stick to it, while considering what features are most important for your backpacking adventures.

Cost vs. Value: What to Prioritize

When thinking about your budget, it’s essential to weigh the cost against the value. I always ask myself: What do I really need? Sometimes paying a bit more for durability or better image quality can save you money in the long run. For instance, investing in a weather-resistant camera can prevent damage from unexpected rain, which I learned the hard way. Focus on features that matter most for your photography goals and backpacking style.

Accessories that Fit Your Budget

Don’t forget to factor in the cost of accessories when budgeting for your camera. Extra batteries, memory cards, and a reliable camera bag can add up quickly. I remember skimping on memory cards once and regretting it halfway through a trip when I ran out of storage. To stay within budget, consider prioritizing essential accessories that will enhance your photography experience without overspending. Sometimes, an inexpensive tripod can make a significant difference in getting the shots you want.

Essential Accessories for Backpacking Photography

When it comes to capturing those breathtaking moments on your backpacking trips, the right camera is only part of the equation. I’ve learned the importance of having essential accessories that enhance my photography experience and make life on the trail a little easier. Let’s dive into the must-have accessories that every backpacker should consider.

Tripods and Stabilizers

A good tripod or stabilizer can be a game-changer for your photography. I remember my first backpacking trip where I tried to capture a stunning sunset without one. The results were less than satisfying—blurry images that didn’t do justice to the scene before my eyes. Investing in a lightweight, portable tripod has been one of the best decisions I made. There are many options available that are compact enough to fit into my backpack without adding too much weight.

When choosing a tripod, I recommend looking for one that offers good stability and can handle varying terrains. I often use mine not just for landscapes but also for night photography, where longer exposure times are essential. A stabilizer can also help to improve video quality if you’re capturing your adventures in motion. Remember, the right support can elevate your photography game significantly.

Camera Bags and Protection

Your camera deserves the best protection while you’re out and about. I’ve had my fair share of close calls with my gear, like when I accidentally dropped my camera bag while scrambling over rocks. Thankfully, I had a padded camera bag that cushioned the fall. Choosing the right bag is crucial—it should be both functional and comfortable.

I recommend looking for a backpack specifically designed for cameras, with customizable compartments to fit your gear snugly. Some bags even come with weather-resistant features, which is a significant bonus for backpacking. I also always carry a rain cover, just in case the weather takes an unexpected turn. Protecting your gear not only ensures it stays safe but also allows you to focus on what really matters: capturing those unforgettable moments.

Extra Batteries and Memory Cards

Battery life can be a photographer’s nightmare on long trips. I remember a time when I was out in the wilderness, excited to capture some stunning views, only to have my camera battery die on me. It was a lesson I learned the hard way. Now, I always bring extra batteries, especially for long hikes. I keep them in a separate pocket in my bag to ensure they stay charged and ready for action.

Memory cards are just as critical. I’ve run out of storage mid-excursion, and it’s a frustrating experience that I do my best to avoid. I like to carry multiple cards and keep them in a protective case. It’s also wise to format your cards before heading out to make sure you have plenty of space for new photos. These small steps can save you from missing out on capturing beautiful moments.

Filters and Lens Cleaning Kits

Filters can transform your photography, especially when you’re shooting landscapes. I’ve found that a polarizing filter helps to reduce glare and enhances the colors of the sky and foliage. It’s amazing how a simple filter can make the blues of the sky pop and the greens of the trees look more vibrant. If you’re into long exposure shots, consider bringing a neutral density filter to create that dreamy effect on water or clouds.

Additionally, keeping your lenses clean is crucial. Dust and smudges can spoil an otherwise perfect shot. I always carry a lens cleaning kit with a microfiber cloth and a brush to keep my gear spotless. It may seem minor, but taking a moment to clean your lens can lead to much clearer photos.

In my experience, having these accessories not only improves the quality of my photos but also enhances my overall backpacking experience. Being prepared with the right gear allows me to focus on the beauty of nature and the joy of exploration, rather than worrying about my equipment. As you plan your next adventure, consider what accessories might help elevate your photography game and make your journey more enjoyable.

Tips for Choosing the Right Camera

Do Your Research: Reviews and Comparisons

When it comes to choosing a camera, I can’t stress enough how important it is to do your homework. Before I made any purchases, I dove deep into online reviews and comparisons. I learned that different cameras have unique strengths and weaknesses. Websites, forums, and YouTube channels dedicated to photography are treasure troves of information. I often found side-by-side comparisons that showcased how different cameras performed in various situations, which helped me make an informed choice. Hearing from fellow backpackers and photographers about their experiences could also save you from making a regrettable purchase.

Test Before You Buy: Hands-On Experience

There’s something about holding a camera in your hands that really helps with the decision-making process. I remember going to a local camera store and testing out several models. The feel of the camera, how it fit in my hands, and the ease of accessing the controls made a huge difference for me. I could also see firsthand the weight and portability, which are crucial for backpacking. If possible, try out the cameras you’re considering to see how they feel in real-life scenarios. It can be a game-changer.

Consider Renting Before Committing

If you’re uncertain about a camera purchase, renting could be a smart option. I’ve tried out several cameras on a rental basis before deciding which one suited my needs best. It allowed me to test the camera in real-world conditions, especially during a weekend trip. I was able to see how it held up against the elements and whether it fit well with my photography style. Renting gives you the chance to experience different cameras without the commitment of a full purchase, which can be a real lifesaver when you’re still figuring out what’s best for you.

Maintaining Your Camera While Backpacking

Cleaning and Protecting Your Gear

Taking care of your camera while on the trail is just as important as choosing the right one. I learned the hard way that dirt and moisture can wreak havoc on your gear. I always carry a microfiber cloth to wipe my lens and keep it clean from dust and smudges. A small brush can help clear any debris out of the crevices, too. Additionally, while I love capturing spontaneous moments, I also make it a habit to store my camera in a protective case when I’m not actively taking pictures. This way, I’m protecting it from any accidental drops or bumps while navigating tricky terrain.

Storing Your Camera Safely on the Trail

When backpacking, I’ve found that how I store my camera can make a significant difference in its longevity. I always make sure to have it packed away securely in my backpack, ideally in a compartment that’s padded. If I’m stopping for lunch or taking a break, I set my bag down on a flat surface rather than on rocky or uneven ground. I’ve seen friends take their cameras out only to accidentally drop them when they weren’t paying attention! Keeping the camera in a stable spot helps avoid those close calls.

Handling Extreme Weather Conditions

No one wants to miss capturing a stunning view because of unexpected weather. I remember one trip where I was caught in a downpour, and my camera almost didn’t survive the ordeal. Now, I always ensure my camera is in a weather-sealed bag or I use a rain cover when I suspect rain could happen. I’ve also learned to be cautious when transitioning from cold to warm environments, as condensation can build up on the lens and within the camera body. Taking a few extra precautions can help you keep your gear safe and ensure that you’re always ready to capture beautiful moments.

Final Thoughts

Choosing the right camera for backpacking is a journey in itself, filled with learning experiences and discoveries. I’ve shared my personal insights and the lessons I’ve learned along the way, and I hope they resonate with you as you make your decision. Remember that the best camera is the one that fits your needs and inspires you to capture the beauty of the world around you. Whether it’s the stunning landscapes you encounter or the wildlife that crosses your path, the memories you create on your adventures are what truly matter. So gear up, hit the trails, and let your photography tell your story!

Frequently Asked Questions

What factors should I consider when choosing a camera for backpacking?

When choosing a camera for backpacking, consider factors such as the types of trips you’ll take, the environments you’ll encounter, your photography goals (landscape vs. wildlife), and key camera features like weight, durability, battery life, and image quality.

Why is weight and portability important for a backpacking camera?

Weight and portability are crucial for backpackers because every ounce counts when carrying gear for miles. A bulky camera can become a burden on long treks, so compact and lightweight options are often preferred.

What type of camera is best for landscape photography?

For landscape photography, cameras with excellent dynamic range and wide-angle lens options are ideal. A sturdy tripod and a camera that performs well in low light conditions are also beneficial for capturing landscapes, especially during sunrise or sunset.

How does the environment affect my camera choice?

The environment plays a significant role in your camera choice. If hiking in wet or humid conditions, a weather-resistant camera is essential to protect against the elements, as exposure to rain can damage non-protected gear.

What are some recommended camera types for backpacking?

Recommended camera types for backpacking include DSLRs for their image quality, mirrorless cameras for high-quality imaging in a compact design, compact cameras for lightweight convenience, action cameras for dynamic shots during adventure sports, and smartphone cameras for spontaneous photography.

How important is battery life for a backpacking camera?

Battery life is very important for backpacking cameras, especially on long trips. A camera with long battery performance helps ensure you can capture moments without running out of power, and carrying extra batteries is advisable.

What accessories should I bring for backpacking photography?

Essential accessories for backpacking photography include tripods, camera bags for protection, extra batteries, multiple memory cards, filters for enhancing images, and lens cleaning kits to maintain camera cleanliness.

How can I protect my camera while backpacking?

To protect your camera while backpacking, store it in a padded compartment within your backpack, use a protective case when not in use, and ensure it is secured against moisture and dirt. A rain cover is also advisable during wet conditions.

Why is it beneficial to test a camera before purchasing?

Testing a camera before purchasing allows you to feel its weight, ergonomics, and ease of use, which are crucial for backpacking. It helps ensure that the camera fits comfortably in your hands and meets your needs in real-life scenarios.

What should I do if I’m unsure about a camera purchase?

If you’re uncertain about a camera purchase, consider renting one before committing. This allows you to test the camera in real-world conditions, ensuring it fits your photography style and performs well in the environments you’ll encounter.

Best Budget-Friendly Cameras for Travel Photography

Traveling and capturing memories shouldn’t break the bank. With the right budget-friendly camera, you can take stunning photos without overspending. Let’s explore how to choose the perfect camera for your travel adventures. Read Interesting article: Top 5 Affordable Cameras for Budget Backpackers

Best Budget-Friendly Cameras for Travel Photography

Understanding Travel Photography Needs

When I first started traveling, I felt overwhelmed by the sheer number of cameras available. With so many options, how do you know what you really need? Understanding your travel photography needs is crucial for picking the right camera. I’ve learned that it’s not just about the price; it’s about what you really want from your photography experience.

Importance of Portability

One of the biggest lessons I’ve learned is that portability is key. When you’re exploring a new city or hiking through breathtaking landscapes, the last thing you want is to lug around a heavy camera. I remember dragging a bulky DSLR on a trip only to find myself using my phone for most pictures because it was just easier. A lightweight camera allows you to be spontaneous and capture those beautiful moments without feeling burdened.

Image Quality vs. Budget

While I wanted a camera that was easy to carry, I also craved quality images. I often found myself weighing the balance between image quality and budget. From my experience, you can find budget-friendly cameras that still deliver impressive results. I’ve seen some compact and mirrorless cameras produce stunning shots that rival those of more expensive models. It’s all about doing some research and knowing what specs matter most to you.

Essential Features for Travelers

Throughout my travels, I discovered a few essential features that make a camera truly travel-friendly. First, I always look for a good zoom range. Capturing distant landmarks or wildlife up close is a thrill, and a camera that offers a decent zoom can help you achieve that without sacrificing quality. I also prioritize battery life; there have been times I wished for an extra charge when I was out exploring all day. Lastly, I find that having built-in Wi-Fi or Bluetooth is a game-changer for quick uploads and sharing my adventures with friends.

In addition, I’ve realized that a camera with good low-light performance opens up a world of possibilities. Whether it’s a dimly lit restaurant or a sunset over the beach, having the ability to take great photos in less-than-ideal lighting can make a huge difference. I’ve been pleasantly surprised at how some budget cameras handle low-light situations, allowing me to capture memories I’d otherwise miss.

Another feature I consider essential is weather resistance. Having a camera that can withstand a bit of rain or dust has saved me on multiple occasions. I remember one trip to the mountains where a sudden storm hit. I was grateful my camera could handle a little moisture, allowing me to continue shooting without worry.

Overall, knowing what features are essential for travel photography has helped me narrow down my options. I always keep in mind my personal preferences and what types of photography I enjoy, whether it’s landscapes, portraits, or street photography. By identifying my needs, I’ve been able to find cameras that complement my travel style and budget.

As I dove deeper into the world of travel photography, I found that understanding my photography needs shaped my choices. It’s not just about the camera; it’s about what you want to capture and the experiences you want to have. Keeping my travel photography needs in mind has allowed me to enjoy my adventures even more, knowing I have the right tools to document them beautifully.

Top Budget-Friendly Cameras for Travel Photography

Finding the right camera can feel like searching for a needle in a haystack, especially when budget constraints come into play. I’ve spent a good amount of time researching various camera types and brands, and I’m excited to share some great options that won’t break the bank. Let’s dive into some of my favorite budget-friendly cameras that are perfect for travelers.

Mirrorless Cameras

Mirrorless cameras have become my go-to choice for travel photography. They’re lightweight and compact but still offer impressive image quality. I love that they combine the benefits of a DSLR with the portability of a point-and-shoot. If you’re in the market for a mirrorless camera, consider these options.

Best Mirrorless Cameras Under $500

  • Canon EOS M200: This camera is user-friendly and offers impressive image quality. I’ve used it to capture stunning landscapes and vibrant city scenes.
  • Sony Alpha a6000: Known for its fast autofocus, this camera has been a lifesaver for capturing moving subjects. I appreciate the compact design, making it easy to carry around all day.
  • Fujifilm X-T200: I love the retro design and excellent color reproduction. This camera is great for both photos and videos, which is a bonus for me.

Features to Consider in Mirrorless Options

When looking at mirrorless cameras, I recommend focusing on a few key features. First, consider the sensor size; larger sensors usually mean better image quality, especially in low light. Also, check for interchangeable lenses, as this flexibility allows you to adapt to different shooting scenarios. Lastly, having a decent battery life is crucial. There’s nothing worse than running out of power in the middle of an adventure!

DSLR Cameras

While I’ve gravitated towards mirrorless options, I still have a soft spot for DSLRs. They offer great performance and battery life, and many models come at affordable prices. If you prefer the traditional feel and operation of a DSLR, here are some excellent choices.

Best DSLR Cameras Under $600

  • Nikon D3500: This camera is a fantastic entry-level option. I found it easy to use, and the image quality is outstanding for the price.
  • Canon EOS Rebel T7: With built-in Wi-Fi, this camera makes sharing photos a breeze. I loved using it for travel portraits and scenic shots.
  • Pentax K-70: This camera stands out for its weather-sealing, making it perfect for outdoor adventures. I appreciate knowing I can shoot in varying conditions.

Key Features of Budget DSLR Cameras

When choosing a budget DSLR, look for features that enhance your travel photography experience. A good autofocus system is essential, especially if you’re capturing fast-moving subjects. Additionally, the camera should have a decent burst shooting mode to help you snap multiple shots in quick succession. Finally, consider the weight; a lighter DSLR will make it easier to carry for long periods.

Compact Cameras

Compact cameras are the ultimate travel companion for those who prioritize portability. They’re small enough to fit in a pocket, yet they often deliver surprising image quality. I’ve been pleasantly surprised by how well some compact models perform.

Best Compact Cameras for Travelers

  • Canon PowerShot G7 X Mark III: This camera is a favorite for vlogging and travel photography alike. It’s compact, with a fast lens and excellent image stabilization.
  • Sony RX100 VII: Known for its exceptional autofocus and image quality, I’ve used it during trips and was amazed at the results.
  • Panasonic Lumix TZ90: With a versatile zoom lens and good low-light performance, this camera has been a reliable option for my travels.

Advantages of Compact Cameras

One of the biggest advantages of compact cameras is their size. They’re incredibly easy to carry around, making them perfect for spontaneous shots. Additionally, many compact cameras come with built-in Wi-Fi or Bluetooth, allowing for easy sharing. I love being able to quickly upload photos to social media when I’m on the go. Plus, they often have manual settings, giving me the flexibility to experiment with my shots.

Action Cameras

If you’re an adventure seeker or love capturing fast-paced activities, action cameras are a must-have. I’ve used them on hikes, during water sports, and even for everyday moments, and I can’t recommend them enough for their durability and versatility.

Top Affordable Action Cameras

  • GoPro HERO9 Black: This model offers stunning 5K video quality and is rugged enough for any outdoor adventure. I’ve used it for everything from hiking to snorkeling.
  • DJI Osmo Action: With dual screens and excellent stabilization, this camera has been a fun addition to my travels.
  • Akaso Brave 7 LE: For a budget-friendly option, this camera provides solid performance and features like voice control, which I find super convenient.

Usage Scenarios for Action Cameras

Action cameras are perfect for capturing experiences that might be challenging for traditional cameras. Whether you’re skiing down a mountain, surfing, or biking through rugged trails, these cameras are built to withstand the elements. Plus, their wide-angle lenses allow you to capture stunning scenery while staying focused on the action. I’ve cherished the videos and photos I’ve taken with my action camera, as they really bring my adventures to life!

Key Features to Look for in Budget Cameras

As I continued my journey through travel photography, I realized that not all budget cameras are created equal. While researching, I found several key features that can significantly affect your photography experience. Knowing what to look for has been a game-changer for me, and I want to share these insights with you.

Sensor Size and Quality

One of the first things I learned was the importance of sensor size. A larger sensor usually means better image quality, especially in low-light conditions. I remember when I upgraded to a camera with an APS-C sensor; the difference in image clarity was striking. It allowed me to shoot in dimly lit environments without getting too much noise in my photos. So, if you can, opt for a camera with a larger sensor. From my experience, it’s worth the investment.

Lens Compatibility and Options

The flexibility of lens options can greatly enhance your photography. I’ve found that having a camera that supports interchangeable lenses opens up new creative possibilities. For instance, I love using a wide-angle lens for landscapes and a prime lens for portraits. When I was stuck with a fixed lens, I often felt limited in my creative expression. If you’re considering a camera, check if it has good lens compatibility. It can really expand your ability to capture diverse scenes during your travels.

Video Capabilities

In today’s world, being able to capture videos along with photos is essential. Many of my favorite travel moments have been beautifully documented in video. I’ve seen how a camera that shoots in 4K can bring those memories to life, especially when shared with friends and family. If you are like me and enjoy vlogging or simply want to capture videos of your trips, pay attention to the video capabilities of the camera you’re considering. A camera that can shoot in high resolution will give you more options for sharing your adventures.

Battery Life and Storage

Battery life is something that can make or break a travel day. I can’t tell you how many times I’ve been out exploring, only to find my camera battery dead. It’s a huge letdown! I’ve learned to check the battery ratings and always carry an extra battery just in case. When you’re out capturing stunning landscapes or vibrant street scenes, the last thing you want is to miss a shot because of a dead battery. Additionally, look for cameras that support SD cards with higher storage; this way, you won’t have to worry about running out of space when you’re deep into your travels.

Durability and Weather Resistance

Being outdoors often means dealing with unexpected weather changes. I’ve had my fair share of downpours and sandstorms, and I can’t stress enough how important it is to have a durable camera. I remember during a beach trip, my camera got splashed with saltwater, but because it was weather-sealed, I continued shooting without any issues. If you’re an adventurous traveler like me, consider a camera that offers weather resistance and is built to withstand various elements. It will give you peace of mind while capturing your travels.

Accessorizing Your Budget Camera for Travel

While having the right camera is essential, I’ve found that the right accessories can elevate your photography game even further. Over the years, I’ve picked up several accessories that have made a significant difference in my travel photography experience. Here are some must-haves that I recommend to fellow travelers.

Essential Lenses for Different Scenarios

As I mentioned earlier, having interchangeable lenses can be a game-changer. I often carry a couple of lenses that cater to different shooting situations. A good zoom lens is fantastic for capturing wildlife or distant landmarks, while a prime lens works wonders for portraits. When I went on a wildlife safari, having a telephoto lens allowed me to capture stunning shots from afar without disturbing the animals. Look for a lens that suits your travel style, and you’ll be amazed at how much it enhances your photos.

Tripods and Stabilizers

Investing in a lightweight tripod has been one of the best decisions I’ve made. I was often frustrated when trying to capture long-exposure shots, especially during sunset or at night. A good tripod allows for stability, ensuring crisp images. I also discovered gimbals and stabilizers that are great for video shooting. They help eliminate shaky footage, which is especially useful when you’re on the move. I’ve appreciated how these tools can make a noticeable difference in the quality of my work.

Camera Bags and Protection

Finding the right camera bag is another essential part of the process. I’ve learned that a good bag not only protects my gear but also makes it easy to transport. I’m a big fan of backpacks that have padded compartments for my camera, lenses, and accessories. This way, I can keep everything organized while having hands-free movement. If you plan to take your camera on hikes or long walks, investing in a durable, comfortable bag is a must.

Extra Batteries and Memory Cards

Finally, having extra batteries and memory cards is crucial. I always carry at least one spare battery and a couple of high-capacity memory cards. It’s so frustrating to miss a great shot because I ran out of storage or power. I remember one trip where I captured an incredible sunset, but my battery died just before the colors peaked. Since then, I’ve made it a point never to let that happen again. Trust me; being prepared will allow you to focus on enjoying your travels without any stress.

Tips for Maximizing Your Travel Photography on a Budget

Using Natural Light Effectively

One of the most valuable lessons I’ve learned in my travel photography journey is the importance of natural light. I used to struggle with lighting, especially when trying to capture moments during harsh midday sun. Over time, I discovered that the golden hours—shortly after sunrise and before sunset—are the best times for photography. The soft, warm light during these times can make even the most ordinary scenes look magical. I remember waking up early in Greece to catch the sunrise over the Acropolis, and the stunning colors transformed my photos into something truly special. So, if you’re on a budget, utilize natural light to enhance your shots without needing expensive equipment.

Composing Shots like a Pro

Good composition can elevate your photos significantly, and it doesn’t require a fancy camera. I’ve found that following a few basic rules can help improve my images. The rule of thirds is a classic technique I often use. By dividing the frame into a grid and placing the subject along these lines or at their intersections, I create more balanced and engaging photos. I also experiment with different angles and perspectives. Sometimes, getting low to the ground or shooting from above can completely change the feel of a photo. I’ve even climbed onto a small ledge to get a unique view of a bustling street scene. Being creative with composition can make all the difference!

Post-Processing for Better Results

After a day filled with capturing beautiful shots, post-processing has become an essential part of my workflow. I’ve learned that even budget photos can look professional with a little editing. Using free or affordable editing software, I often adjust the brightness, contrast, and saturation to enhance my images. I remember a photo I took in Iceland—it was a bit dull straight out of the camera, but with some minor tweaks, it transformed into a vibrant scene that truly reflected the experience. There are plenty of user-friendly apps and software options available, making it easy for anyone to improve their photos without breaking the bank. Read Interesting article: Capture Nature’s Wonders: Budget-Friendly Photography Tips

Comparing Camera Models: Pros and Cons

Mirrorless vs. DSLR

When I was deciding between a mirrorless camera and a DSLR, I took the time to weigh the pros and cons of each. Mirrorless cameras are incredibly lightweight and compact, which is perfect for travel. They often offer faster shooting speeds and better video capabilities. On the downside, battery life can be shorter, which is something I had to consider. DSLRs, on the other hand, tend to have longer battery life and a more extensive selection of lenses, which I appreciated. However, they can be bulkier and heavier, which was a drawback for me on long trips. Ultimately, the choice between the two comes down to personal preference and how I planned to use the camera on my travels.

Compact vs. Action Cameras

Compact cameras and action cameras serve different purposes, and I’ve found both to have their advantages. Compact cameras are great for everyday use and travel, offering versatility and decent image quality in a small package. I love how easy they are to carry around, capturing everything from urban scenes to family gatherings. Action cameras, however, are built for adventure—they’re durable and can withstand extreme conditions. I’ve captured epic moments while hiking, biking, and snorkeling with mine. When trying to choose between them, consider what type of photography will dominate your travels. If you’re mainly doing outdoor activities, an action camera might be the way to go. For general travel photography, a compact camera is a fantastic option.

Where to Buy Budget-Friendly Cameras

Online Retailers and Marketplaces

One of my favorite places to shop for budget-friendly cameras is online. Retailers like Amazon, B&H Photo, and Adorama often have great deals and customer reviews that help me make informed decisions. I love the ease of comparing different models and reading about others’ experiences. Plus, during sales events or holiday seasons, I’ve scored some amazing discounts!

Second-Hand Options and Refurbished Cameras

If you’re looking to save even more, don’t overlook second-hand options. I found a fantastic deal on a refurbished camera from a reputable seller and was pleasantly surprised by its condition. Websites like KEH and MPB specialize in used camera gear, and they offer warranties, making the purchase feel secure. Buying second-hand has allowed me to upgrade my gear without stretching my budget too thin. Read Interesting article: Budget-Friendly Wildlife Tours: Travel Green on a Dime

Local Camera Shops and Deals

Sometimes, nothing beats the experience of visiting a local camera shop. I love being able to hold cameras and ask questions to knowledgeable staff. Many shops offer used gear and can provide valuable insights based on your photography needs. I’ve also discovered that they sometimes have exclusive deals or bundles that you won’t find online, so it’s worth checking out your local options.

User Reviews and Recommendations

What Travelers Are Saying

When deciding on a camera, I always make sure to read reviews from other travelers. I’ve found forums and travel blogs to be gold mines of information. Real-world experiences help me gauge how a camera performs in various situations. I remember finding a review about a specific compact camera that highlighted its amazing low-light performance, which ultimately influenced my purchase. Hearing about other travelers’ successes and challenges can provide perspective that specs alone can’t offer.

Expert Recommendations

In addition to user reviews, I also seek out expert recommendations from photography websites and professionals. Often, they provide in-depth comparisons that highlight the strengths and weaknesses of different models. I appreciate their insights, especially when they break down technical aspects in a way that’s relatable. Their recommendations have helped guide me toward some of my favorite gear, ensuring that I make informed choices that fit my travel photography style.

Final Thoughts

Through my journey in travel photography, I’ve learned that capturing memories doesn’t have to come at a steep price. With the right budget-friendly camera and accessories, anyone can take stunning photos that reflect their adventures. It’s all about understanding your needs, exploring your options, and making informed choices. Whether you’re drawn to the compactness of mirrorless cameras, the reliability of DSLRs, or the adventure-ready action cameras, there’s something out there for everyone. Remember to maximize your photography by utilizing natural light, composing your shots thoughtfully, and exploring post-processing to enhance your images. With these tips and a bit of creativity, you can embark on your travels with confidence, knowing you have the tools to document your experiences beautifully.

Frequently Asked Questions

What should I consider when choosing a camera for travel photography?

When choosing a camera for travel photography, consider factors such as portability, image quality, budget, zoom range, battery life, low-light performance, and weather resistance. Understanding your personal photography needs is crucial for selecting the right camera.

Why is portability important in travel photography?

Portability is important because it allows you to easily carry your camera while exploring new places. A lightweight camera enables spontaneity and helps you capture beautiful moments without the burden of heavy equipment.

What are some essential features to look for in a travel camera?

Essential features for a travel camera include a good zoom range for capturing distant subjects, long battery life for all-day use, built-in Wi-Fi or Bluetooth for easy sharing, good low-light performance, and weather resistance to withstand various environmental conditions.

What types of cameras are recommended for travelers on a budget?

Recommended types of budget-friendly cameras for travelers include mirrorless cameras, DSLRs, compact cameras, and action cameras. Each type offers unique advantages that cater to different photography styles and needs.

What are some of the best mirrorless cameras under $500?

Some of the best mirrorless cameras under $500 include the Canon EOS M200, Sony Alpha a6000, and Fujifilm X-T200. These models are lightweight, user-friendly, and offer impressive image quality.

What are the advantages of using compact cameras for travel?

Compact cameras are advantageous for travel due to their small size, making them easy to carry. They often provide good image quality, built-in Wi-Fi or Bluetooth for quick sharing, and manual settings for creative control.

Why should I consider an action camera for my trips?

Action cameras are ideal for adventure seekers as they are durable, can capture fast-paced activities, and are built to withstand extreme conditions. They are great for documenting outdoor experiences such as hiking, biking, and water sports.

What factors should I consider when comparing mirrorless and DSLR cameras?

When comparing mirrorless and DSLR cameras, consider factors like weight, battery life, image quality, shooting speed, lens options, and how you plan to use the camera during your travels. Each type has its pros and cons based on personal preference.

Where can I find budget-friendly cameras?

You can find budget-friendly cameras through online retailers such as Amazon, B&H Photo, and Adorama, as well as second-hand options from websites like KEH and MPB. Local camera shops may also offer used gear and exclusive deals.

How can I improve my travel photography without expensive equipment?

You can improve your travel photography by utilizing natural light effectively, composing your shots thoughtfully using techniques like the rule of thirds, and enhancing your images through post-processing using affordable editing software.