Web Analytics

Recent Posts

Essential Gear for Macro Wildlife Photography on a Budget

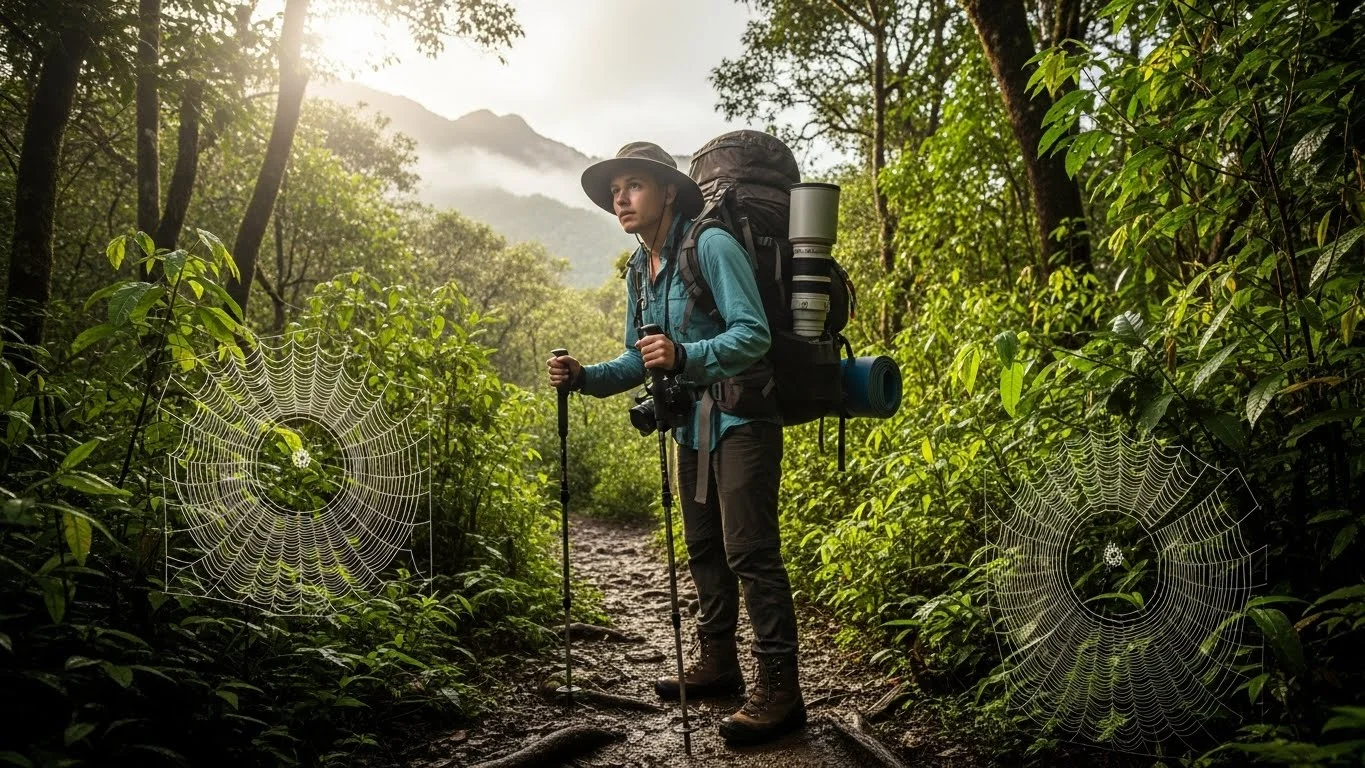
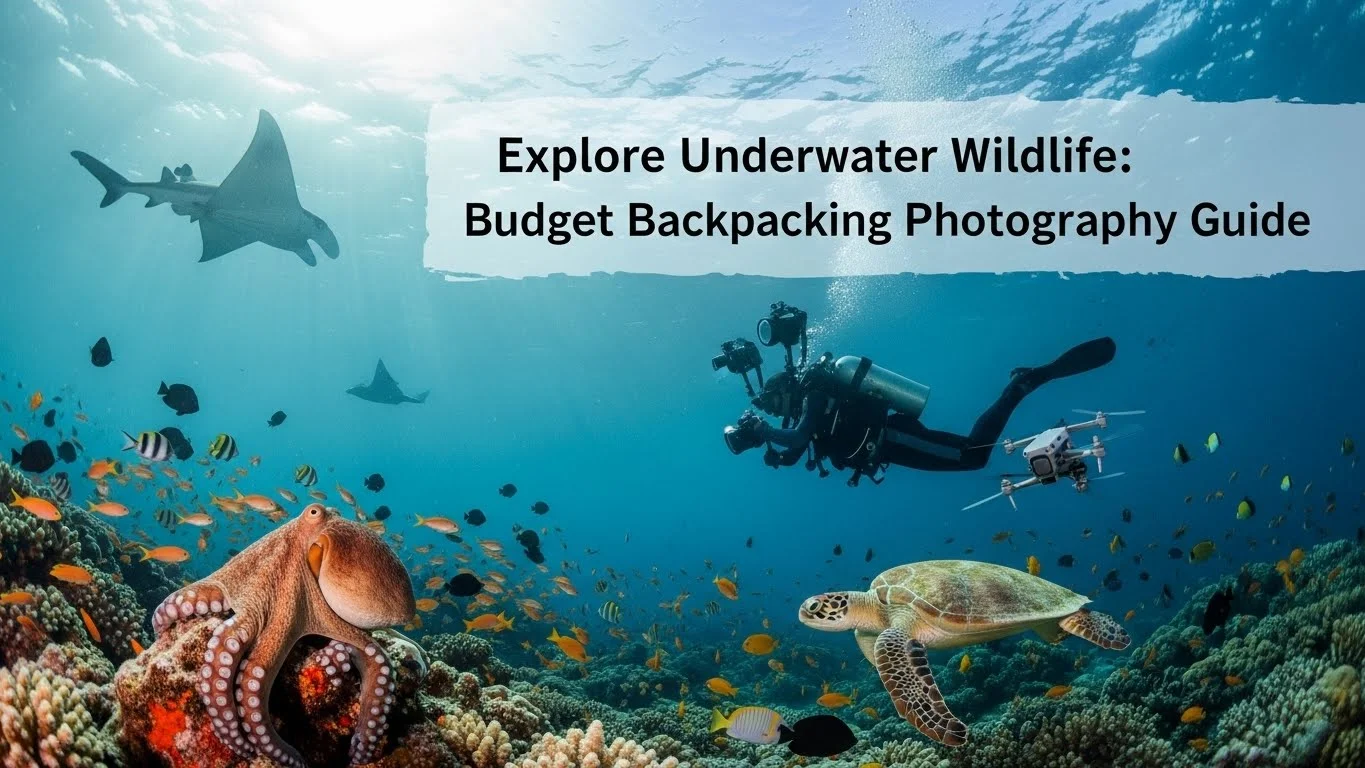
Macro wildlife photography opens up a fascinating world of tiny details in nature, allowing us to capture the beauty often overlooked. On a budget? Don’t worry! There’s plenty you can do without breaking the bank. For great tips on affordable options, check out Budget Backpacking for Macro Wildlife Photography Lovers.

Essential Gear for Macro Wildlife Photography on a Budget

Understanding Macro Wildlife Photography

What is Macro Wildlife Photography?

Macro wildlife photography is the art of capturing small subjects in great detail. Think of insects, flowers, or small animals, often taken at a close distance. I remember the first time I got up close to a butterfly, and the intricate patterns on its wings felt like a secret world unveiling before my eyes. This style of photography allows us to explore and appreciate the beauty of nature that often goes unnoticed. For me, it’s about finding the small stories in the everyday, transforming ordinary moments into extraordinary images.

Importance of Gear in Macro Photography

Having the right gear can make a significant difference in macro photography. While I believe creativity can make up for a lack of expensive equipment, certain tools help elevate the quality of our work. Gear plays a crucial role in achieving sharp focus, managing lighting, and stabilizing our shots. I once tried capturing close-up images of bees with just my smartphone; while the results were decent, I quickly realized that investing in specialized equipment would allow me to capture the vivid colors and delicate textures that make macro photography truly magical. Understanding what gear is essential can help you get started without overspending. For more information on the best locations for macro photography, see Top Destinations for Stunning Macro Wildlife Photography.

Essential Gear for Macro Wildlife Photography

Camera Options for Macro Photography

When it comes to selecting a camera for macro photography, there are several options available that cater to different budgets. I started my journey with a DSLR, and I found it to be a reliable choice for capturing high-quality images. Mirrorless cameras have also become increasingly popular. They’re lightweight and often offer fantastic autofocus capabilities, which is crucial when you’re trying to focus on a moving subject.

If you’re on a tighter budget, don’t overlook compact cameras with macro settings. I often see beginners using point-and-shoot cameras with macro functions, and while they might not have all the bells and whistles, they can still produce stunning results. It’s essential to choose a camera that feels comfortable in your hands and fits your photography style.

Macro Lenses: Choosing the Right One

The lens you use can make or break your macro photography experience. I learned this the hard way when I tried to use a standard lens for close-ups—my images were soft and lacked the detail I wanted. Macro lenses allow for higher magnification, and there are many options available, even at reasonable prices. I recommend looking for a lens with a 1:1 magnification ratio, which means that the subject is captured at its actual size on the sensor.

You can also consider extension tubes, which are relatively inexpensive and can be added to your existing lenses to enable closer focusing. This was a game-changer for me and allowed me to experiment without making a hefty investment. Researching reviews and comparing options online can help you find what works best for your camera setup.

Tripods and Stabilizers for Sharp Images

Stability is paramount in macro photography. I can’t tell you how many times I’ve ended up with blurry images due to shaky hands. A good tripod is worth its weight in gold. There are budget-friendly options available that provide excellent stability without emptying your wallet. I’ve found that a tripod with adjustable legs helps me position the camera perfectly for those low-angle shots, especially when photographing flowers or insects on the ground.

Additionally, consider using a remote shutter release or the timer function on your camera. This small tool can help eliminate camera shake, allowing for sharper images, especially in low-light conditions. I remember how frustrated I felt trying to capture a dragonfly perched on a leaf, only to realize that slight movements were ruining my shots. Since then, I always make sure to have a reliable tripod and remote shutter with me.

Lighting Equipment: Natural vs. Artificial Light

Lighting is another key element in macro photography. I often rely on natural light, especially during the golden hours—early mornings or late afternoons—when the light is soft and warm. However, sometimes, you need to supplement with artificial light, especially on cloudy days or in shaded areas. I’ve experimented with various lighting options, like ring lights and portable flash units. Ring lights can wrap around your lens, providing even illumination, while flash units can help highlight details that otherwise might be lost in shadow.

When using artificial light, it’s important to diffuse it to avoid harsh shadows. I often use simple items like a white sheet or a piece of cloth to soften the light. The balance between natural and artificial light can transform your images, making the tiny details pop.

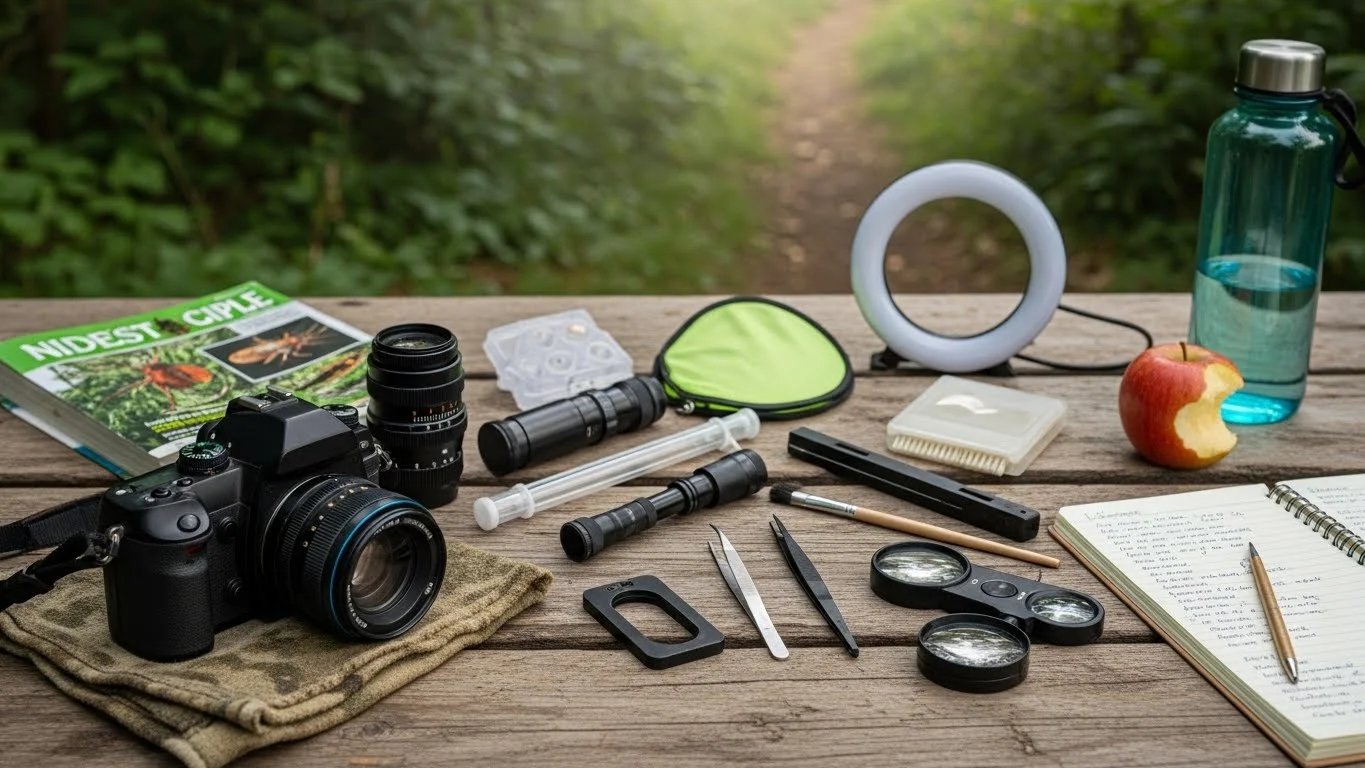
Field Accessories: Essential Tools for Macro Shoots

Beyond the camera and lenses, there are some field accessories that I believe are essential for macro photography. A good insect net can be handy for capturing moving subjects without harming them. I also keep a small notebook and pen to jot down notes about the subjects I encounter, which helps me remember settings and conditions for future shoots.

Additionally, a small set of tools like tweezers or a small brush can assist in arranging subjects or cleaning up distractions in the frame. These little details can greatly enhance the quality of your images. Preparing for your shoot with the right accessories can make all the difference in how your experience unfolds in the field.

Budget-Friendly Alternatives for Macro Photography Gear

Used Equipment: Where to Find Deals

When I first started diving into macro wildlife photography, my budget was tight. I quickly discovered that purchasing used equipment could be a game-changer. There are so many platforms out there where you can find lightly used gear at a fraction of the price. Websites like eBay, Craigslist, and dedicated photography forums often have listings from fellow photographers looking to upgrade or downsize their collections.

In my experience, I found that checking local camera shops can also yield great results. Some shops offer trade-in programs or sell refurbished items that come with a warranty. I remember stumbling upon a fantastic deal on a macro lens that had been used only a handful of times. Not only did it save me money, but I also felt good about giving a piece of equipment a new life. Just make sure to inspect the gear carefully and ask questions about its condition before making a purchase.

Renting Gear: Pros and Cons

If buying used isn’t appealing, renting gear can be a smart option. I’ve rented lenses and cameras from local rental shops and online services, which allowed me to try out high-end equipment without the hefty price tag. It’s perfect for testing a specific lens before deciding to invest in it. I once rented a high-end macro lens for a weekend shoot in a beautiful garden, and it greatly enhanced my photography experience.

However, there are pros and cons to consider. On the positive side, renting allows you to access gear you might not otherwise be able to afford. It’s also great for specific projects where you need specialized equipment. On the flip side, rental fees can add up if you’re not careful, especially if you decide to keep the gear for longer than planned. I learned the hard way to read the rental terms carefully and to plan my shoots around the rental period to avoid extra charges.

DIY Solutions for Macro Photography Gear

Another fantastic way to save money while still being creative is to incorporate DIY solutions into your macro photography setup. I’ve seen some amazing makeshift equipment that photographers have crafted from everyday items. For example, using a cardboard tube as a lens hood can help reduce glare and improve image quality. I also created a simple diffuser using a white plastic container, which I cut to size and attached to my flash to soften light.

There are plenty of tutorials online for building a macro rail or focusing slider at home, which can help you achieve precise adjustments without spending a fortune. I remember how proud I felt after assembling my own focusing rail from scrap materials. It worked like a charm and offered more versatility in my macro shots. The sense of accomplishment that comes from creating your gear adds another layer of enjoyment to the photography process.

Techniques for Effective Macro Wildlife Photography

Understanding Depth of Field

Depth of field (DoF) is crucial in macro photography, and it’s something I had to experiment with to fully understand. When you’re shooting close-up, even the smallest adjustment in focus can yield very different results. I learned that a shallow depth of field can create beautiful bokeh effects, isolating your subject from the background and drawing the viewer’s attention right where you want it. This technique became one of my favorites for making flowers and insects pop in my images.

On the other hand, a deeper depth of field is beneficial when you want to capture more details throughout the entire image, especially in situations where the subject has intricate features. I often shoot at apertures like f/8 to f/16 to ensure that I capture all the important details, particularly when photographing groups of flowers or a cluster of insects. Understanding how to manipulate depth of field has transformed my approach to composition.

Focusing Techniques in Macro Photography

Focusing can be one of the biggest challenges in macro photography. I often find myself battling the natural movement of my subjects and the tiniest camera shakes. One technique that has worked wonders for me is using manual focus. While autofocus can be fast and convenient, I’ve found that manually adjusting my focus allows for greater precision, especially when I’m trying to capture a specific detail on an insect or flower.

Another technique I’ve adopted is focus stacking. This involves taking multiple images at different focus points and then combining them in post-processing to create an image with incredible detail throughout. It sounds complex, but I’ve found that it’s easier than it seems, and my results have been well worth the effort. Focus stacking can elevate my photos to an entirely new level, and I recommend giving it a try!

Utilizing Natural Light and Flash Effectively

Over the years, I’ve learned that the way I use light can make or break my macro photos. Natural light is my go-to for most of my outdoor shoots. I love the way it adds warmth and dimension to my subjects. However, when the light isn’t ideal, or I’m shooting in the shadows, I’ve found that using flash can be a lifesaver. The key is to use it subtly; I often bounce my flash off nearby surfaces or diffuse it with a softbox to avoid harsh lighting.

Experimenting with both natural and artificial light has opened up new creative avenues for me. I remember capturing a stunning close-up of a ladybug perched on a leaf using a mix of natural light and a bit of flash—it was magical! Learning to balance these elements has become one of my favorite aspects of macro photography, and I think it’s something every photographer should explore.

Best Practices for Macro Wildlife Photography on a Budget

Planning Your Shots: Time and Location Considerations

When I first started with macro photography, I didn’t realize how much planning could enhance my results. Time of day and location can dramatically influence the quality of your photos. Early mornings or late afternoons, often referred to as the “golden hours,” provide that soft, warm light that makes everything look magical. I remember my excitement when I discovered a nearby garden that was teeming with life just as the sun was rising. The dew on the flowers and the busy insects created such stunning scenes that I couldn’t help but snap away.

Choosing the right location is equally important. I’ve found that areas with diverse flora and fauna, such as botanical gardens or local parks, often yield the best results. Observing the behavior of insects in their natural habitat can also lead to unexpected opportunities. For instance, I noticed that certain butterflies are more active in specific flowers during certain times of the day. This knowledge made my planning sessions so much more fruitful. I highly recommend scouting locations ahead of time to see what subjects you might capture and to plan your visits around their peak activity.

Maximizing Your Gear’s Potential

Even if you’re on a budget, maximizing the potential of your current gear can lead to great results. I’ve learned that understanding your camera settings is crucial. Each time I head out to shoot, I take the time to familiarize myself with my camera’s features. From adjusting ISO to playing with shutter speeds, getting to know what works best in different environments has been a game-changer for my photography.

For example, I’ve found that shooting in aperture priority mode allows me to control the depth of field without worrying too much about shutter speed. This setting can be particularly helpful when the light changes quickly, like when clouds drift over the sun. I also practice using manual focus to get that sharp detail on my subjects, especially when dealing with busy backgrounds. It’s about working within your gear’s limits while pushing your creativity. I believe that with a little patience and practice, even basic equipment can produce stunning results.

Editing and Post-Processing Tips

Post-processing can be just as important as the photography itself. I remember when I first started editing my macro photos; I felt overwhelmed by all the options. However, I soon realized that even simple adjustments could greatly enhance my images. For me, the key is to maintain the integrity of the shot while bringing out the best details.

I tend to start by adjusting exposure and contrast to make the colors pop. Sometimes, adding a bit of sharpness can bring out intricate patterns that are otherwise subtle. I’ve also found that cropping can significantly improve composition by eliminating distractions around the edges. One of my favorite tools is the clarity slider, which helps enhance the textures of my subjects without making them look over-processed.

Another technique I find beneficial is correcting colors. Adjusting white balance can make a huge difference, especially in macro photography, where subtle color variations can be pronounced. I sometimes play around with saturation, but I try to keep it natural. The goal is to enhance the image without losing its authenticity. Sharing my edited photos with friends, they often remark on the details they didn’t notice in the original shots, which is incredibly satisfying!

Resources for Macro Wildlife Photography Enthusiasts

Online Communities and Forums

As I delved deeper into macro wildlife photography, I found that connecting with fellow enthusiasts enriched my experience. Online communities and forums have been invaluable for sharing tips, asking questions, and even receiving constructive criticism. Platforms like Reddit and dedicated photography forums are filled with passionate photographers who are more than willing to help each other out.

One of my favorite communities is a Facebook group focused on macro photography. The diversity of styles and techniques shared there inspires me. I often browse through others’ photos, and I’ve learned a great deal just by observing the discussions about gear choices and shooting techniques. Plus, participating in photo challenges hosted by these communities has helped me step outside my comfort zone and try new things.

Recommended Books and Courses

Books and courses can provide structured learning in areas where I wanted to improve. I remember picking up “Understanding Exposure” by Bryan Peterson, which was a revelation for me. It helped me grasp the relationship between aperture, shutter speed, and ISO, which is crucial in macro photography. There are also specialized books focused on macro techniques that offer great insights into the world of close-up photography.

Online courses have become another favorite resource of mine. Websites like Udemy and Skillshare have courses specifically tailored to macro photography, taught by experienced photographers. These courses often provide practical exercises that allow you to apply what you learn directly to your shoots. I find that the combination of reading and hands-on practice really helps solidify my skills.

Websites for Gear Reviews and Comparisons

Finding the right gear can be tricky, especially when you’re on a budget. I’ve turned to several websites for honest gear reviews and comparisons before making a purchase. Websites like DPReview and Photography Life offer thorough reviews that break down the pros and cons of various cameras and lenses, helping me make informed decisions.

Another helpful resource is YouTube, where countless photographers share their personal experiences with gear. Watching reviews and tutorials gives me a better sense of how different equipment performs in real-world scenarios. I remember watching a detailed review of a macro lens that helped me decide on my next purchase. The visual aspect of seeing the lens in action made all the difference! I encourage exploring these resources to gain confidence in your gear choices and expand your photography toolkit.

Frequently Asked Questions

What is macro wildlife photography?

Macro wildlife photography is the art of capturing small subjects in great detail, such as insects, flowers, or small animals, often taken at a close distance. It allows us to explore and appreciate the beauty of nature that often goes unnoticed.

What type of camera is best for macro photography?

There are several options for cameras in macro photography, including DSLRs, mirrorless cameras, and compact cameras with macro settings. DSLRs are reliable, while mirrorless cameras are lightweight and often have great autofocus capabilities. Compact cameras can also produce stunning results for beginners.

Why is gear important in macro photography?

The right gear can significantly enhance macro photography by achieving sharp focus, managing lighting, and stabilizing shots. While creativity can compensate for a lack of expensive equipment, specialized tools can elevate the quality of your work.

What lens should I use for macro photography?

Macro lenses with a 1:1 magnification ratio are ideal for capturing close-ups as they allow for higher magnification. Extension tubes can also be added to existing lenses to enable closer focusing at a lower cost.

How important is lighting in macro photography?

Lighting is crucial in macro photography. Natural light is often preferred, especially during golden hours, but artificial light can also be used when necessary. Diffusing artificial light helps avoid harsh shadows and enhances image quality.

What are some budget-friendly options for macro photography gear?

Budget-friendly options include purchasing used equipment from platforms like eBay or Craigslist, renting gear, and using DIY solutions to create your own photography tools from everyday items.

What is focus stacking in macro photography?

Focus stacking is a technique that involves taking multiple images at different focus points and combining them in post-processing to create an image with incredible detail throughout, overcoming challenges of depth of field.

What time of day is best for macro photography?

Early mornings and late afternoons, known as the golden hours, provide soft, warm light that enhances macro photography results. Planning your shoots around these times can lead to stunning images.

How can I enhance my macro photos during post-processing?

Simple adjustments in post-processing can greatly enhance macro photos. Key techniques include adjusting exposure, contrast, and sharpness, cropping for better composition, and correcting colors to maintain the authenticity of the image.

Where can I find resources to improve my macro photography skills?

Resources include online communities and forums, recommended books, and courses focused on macro photography. Websites for gear reviews and comparisons also help in making informed decisions about equipment.

Budget Backpacking for Macro Wildlife Photography Lovers

For those passionate about macro wildlife photography, exploring the great outdoors on a budget can be thrilling. Imagine capturing the intricate details of tiny creatures while embracing nature’s beauty—all without breaking the bank! Read Interesting article: Explore Underwater Wildlife: Budget Backpacking Photography Guide

Budget Backpacking for Macro Wildlife Photography Lovers

Understanding Macro Wildlife Photography

What is Macro Photography?

When I first dove into macro photography, I was both amazed and intimidated. Macro photography is the art of capturing stunning close-up images of small subjects, often revealing details that the naked eye simply cannot see. Think of the delicate textures of a butterfly’s wings or the captivating patterns on a beetle’s shell. This type of photography enables you to tell a story about nature’s smallest wonders. I remember my first macro shot of a ladybug; it felt like I was peeking into a hidden world where every little detail mattered.

The Appeal of Wildlife Photography

Wildlife photography has always held a special place in my heart. It combines adventure, patience, and artistry. The thrill of waiting for the perfect moment—when a hummingbird hovers near a flower or a frog leaps into view—is unmatched. For many of us, it isn’t just about capturing images; it’s about connecting with nature and experiencing the wild in a way that few others can. I feel a sense of peace and fulfillment when I’m out in nature, camera in hand, observing the life that surrounds me.

Essential Gear for Macro Wildlife Photography

When it comes to macro wildlife photography, having the right gear can make a world of difference. I quickly learned that I didn’t need to invest in the most expensive equipment to get great shots. Here’s what I found essential:

  • Camera: A DSLR or mirrorless camera with a macro lens is ideal. However, I’ve also had great success using compact cameras with macro capabilities.
  • Macro Lens: A dedicated macro lens allows for extreme close-ups. I love using a 100mm macro lens—it gives me the flexibility to shoot from a distance without scaring the wildlife.
  • Tripod: Stability is key for macro photography. A lightweight tripod makes it easier to capture sharp images, especially in low light.
  • Lighting: Natural light is fantastic, but I often carry a small flash or LED light for those darker environments.
  • Reflectors: These can help bounce light onto your subject, enhancing those intricate details I love to capture.

As I explored more, I realized that investing in a good lens can elevate your photography game without needing every piece of high-end gear on the market.

Budget Backpacking Essentials

Choosing Affordable Destinations for Wildlife Photography

Finding the right destination is crucial for budget backpacking. I’ve discovered that some of the best spots for macro wildlife photography are often in less touristy areas. National parks, wildlife reserves, and even local nature trails can provide endless opportunities. Places like the Great Smoky Mountains or the Florida Everglades have diverse ecosystems teeming with life—and they don’t require an extravagant budget. I remember hiking through a local park and stumbling upon a vibrant patch of wildflowers, where I was able to capture the most stunning shots of bees and butterflies. Sometimes the best places are right in our own backyards! Top Tips for Backpacking to Seasonal Landscape Wonders

Backpacking Gear on a Budget

When packing for a backpacking trip focused on wildlife photography, I always aim to keep my gear light and affordable. Here are some tips I’ve learned along the way:

  • Camera Bag: Invest in a good camera bag that fits your gear comfortably. I found a budget-friendly, lightweight backpack that accommodates my camera and essentials.
  • Clothing: Wear durable, weather-appropriate clothing. I often layer my clothes so I can adapt to changing weather conditions without carrying extra items.
  • Food and Water: Bringing snacks and a refillable water bottle saves money. I always pack energy bars and nuts, which are light and nutritious.

Tips for Packing Light

Overpacking is something I’ve struggled with, but I learned to streamline my packing list over time. Here are my go-to tips for keeping my backpack light:

  • Stick to the essentials: Only take the gear you know you will use.
  • Use multi-purpose tools: A lens cleaning kit often doubles as a small tripod for stabilization.
  • Plan your outfits: Bring clothes that can be mixed and matched, reducing the number of items needed.

By being thoughtful about what I carry, I can focus more on capturing incredible moments in nature rather than lugging around unnecessary weight. There’s something freeing about being light on my feet, especially when I’m chasing that perfect shot!

Best Locations for Macro Wildlife Photography on a Budget

National Parks and Reserves

National parks are like the holy grail for macro wildlife photography, and the best part is that many of them are quite affordable to visit. I’ve had some of my most memorable experiences in places like Yellowstone and Yosemite, where nature is at its finest. The diverse ecosystems offer a range of subjects, from tiny insects to beautiful flowers. I remember one day in Yosemite, I came across a patch of wildflowers with bees buzzing all around. With my macro lens, I was able to capture the delicate wings and the pollen-covered bodies of those little creatures. It was a joy to be so close to a vibrant part of nature.

Also, many national parks offer discounted entry fees during certain seasons or free days throughout the year. I’ve made it a point to check their websites before planning my trips, ensuring I can enjoy all that beauty without spending a fortune.

Affordable Wildlife Sanctuaries

Wildlife sanctuaries are another fantastic option for budget-friendly macro photography. Places like these are often less crowded than national parks, which gives you a better chance to capture the perfect shot without distractions. I visited a local wildlife sanctuary recently, and I was blown away by the variety of insects and small animals I found. The staff there was knowledgeable and shared tips on where to find the most interesting subjects. They even offered guided tours that were budget-friendly, allowing me to learn while shooting.

Many sanctuaries also run programs that might cost a little but offer a wealth of benefits, like workshops and photography classes. Even if you don’t want to spend much, just being in these safe habitats can yield incredible macro photography opportunities. Ultimate Guide to Budget Safaris: Experience Wildlife Cheap

Urban Areas with Rich Biodiversity

It might surprise you, but urban areas can be goldmines for macro wildlife photography! I’ve discovered that city parks, gardens, and even the edges of urban neighborhoods often host a surprising variety of wildlife. On a recent stroll through my city’s botanical garden, I found an abundance of butterflies, dragonflies, and unique plants. I spent hours getting shots that felt like they belonged in a nature documentary.

It’s also worth noting that urban areas often have community gardens or green spaces that attract wildlife. I remember setting up my tripod near a patch of blooming flowers and capturing a stunning close-up of a ladybug crawling on a petal. The urban environment can provide unique opportunities to see how nature adapts and thrives, even in bustling cities. Don’t underestimate the beauty of what’s around you!

Planning Your Trip

When to Go: Seasonal Considerations

Timing is everything when it comes to macro wildlife photography. I’ve learned that different seasons can dramatically change what you might see in nature. Spring is typically my favorite time to go. It’s when flowers bloom, and insects come out of hibernation. I remember one spring trip where I was able to capture the emergence of caterpillars and butterflies that were just waking up after a long winter. It felt like witnessing a beautiful transformation right before my eyes.

Summer can also be great, but it sometimes brings harsher sunlight. I’ve found that early mornings or late afternoons are the best times to shoot, as the light is softer, and many creatures are more active during these cooler times. Fall offers unique colors and the chance to capture different species preparing for winter. I think every season has its charm, and being adaptable can lead to some unique and stunning shots.

Finding Affordable Accommodations

When I’m planning a trip, accommodation can be one of the biggest expenses. I’ve found that searching for budget-friendly options like hostels, campgrounds, or even local Airbnb rentals can significantly lower costs. Camping, in particular, has been a game changer for me. It allows me to stay close to nature, and I often set up my tent near excellent shooting spots.

Another tip I’ve found useful is to check for lodging deals or last-minute discounts. Websites often run promotions during off-peak seasons that can save you a bundle. Plus, if you’re traveling with friends or fellow photographers, sharing a space can cut costs even further while making the trip more fun!

Budget-Friendly Transportation Options

Getting to your destination shouldn’t be a financial burden. I’ve learned that planning my transportation early can lead to significant savings. For instance, I often use public transportation when available, as it can be much cheaper than renting a car. If I’m venturing into the wilderness, I usually consider carpooling with fellow photographers or friends to share the costs.

Additionally, using apps to compare travel costs can help find the best deals. On my last trip, I was able to snag a great deal on a bus ticket to a nearby national park, which left me with more funds for food and photography gear. Traveling on a budget is all about being resourceful, and I love the thrill of finding new ways to save money while still exploring the great outdoors!

Capturing Stunning Macro Wildlife Photos

Techniques for Macro Photography

As I ventured deeper into the world of macro photography, I quickly realized that technique plays a vital role in capturing stunning images. One technique that has significantly improved my shots is focusing on the eyes of my subjects. Whether it’s an insect or a flower, sharp eyes create a connection with the viewer that can be captivating. I remember a moment when I was photographing a dragonfly, and as I focused on its multifaceted eyes, the image transformed. It felt like I was capturing not just a bug but a character with its own story.

Another technique I’ve found useful is practicing patience. In macro photography, the perfect moment can often be fleeting. I’ve spent hours in the same spot, waiting for a butterfly to land just right or a bee to hover in a sunbeam. Breathing deeply and immersing myself in the experience has often resulted in some of my best shots. I learned to embrace the stillness and let nature unfold, trusting that the perfect moment would eventually present itself.

Finally, experimenting with different angles has become one of my favorite ways to add depth to my photographs. I enjoy getting low to the ground or positioning my camera from above to capture unique perspectives. I recall a time when I shot a close-up of dew on a spider web from below, and the resulting image was a mesmerizing play of light and texture. The more angles you explore, the more opportunities you find to tell a story through your lens.

Lighting and Composition Tips

Lighting can make or break a macro shot, and I’ve learned to work with natural light to my advantage. Early mornings and late afternoons are my go-to times. The soft golden hour light creates a warm glow that enhances the details of my subjects. I remember a morning in the garden, where the dew glistened on petals, and the light perfectly illuminated a cluster of tiny insects. The colors popped, and the intricate textures were beautifully defined.

For composition, I often refer to the rule of thirds. I believe it brings balance and interest to my photos. When I frame a subject off-center, it tends to create a more dynamic image. I’ve also learned to include surrounding elements, like leaves or flowers, to add context to my shots. For example, when photographing a bee, I often include the flower it’s visiting to give a sense of place and action. These thoughtful compositions can elevate a simple close-up into a storytelling photograph that resonates with viewers.

Lastly, don’t be afraid to break the rules! Some of my favorite images have come from spontaneous moments where I focused on what felt right rather than what I thought I should do. Allowing myself that freedom has led to creative discoveries and unique shots I might have missed otherwise.

Post-Processing on a Budget

After the excitement of snapping photos, I find that post-processing is where the magic continues. However, I don’t believe you need to spend a fortune on software to enhance your images. I’ve had great success with free or low-cost editing tools like GIMP and Lightroom Mobile. These platforms offer sufficient features for basic adjustments, and I’ve found them user-friendly enough for someone just starting.

One of the first things I do when editing my macro photos is to adjust the exposure and contrast to make the colors pop more vibrantly. I remember editing a photo of a butterfly, and a small tweak in brightness brought out details in the wings that were previously hidden. Cropping is also essential; I often trim away distractions from the edges of my images to focus on the subject, which can dramatically improve the overall composition.

I also like to experiment with sharpening tools to enhance the intricate details of my subjects. A little bit can go a long way, and I’ve learned to apply sharpening selectively, focusing on the eyes and other critical areas to draw attention. Finally, I often play with color balance to ensure that my images reflect the true beauty I experienced in the field. These small adjustments can transform a good shot into something truly striking!

Connecting with Other Photographers

Online Communities and Forums

Connecting with fellow photographers has been an incredibly rewarding experience for me, especially in the macro wildlife photography realm. I’ve discovered that online communities and forums, such as Facebook groups and photography websites, are treasure troves of inspiration and support. I remember joining a macro photography group where members shared tips, critiques, and their stunning images. It felt like being part of a family that understands the excitement of capturing the minute details of nature.

One of the best things about these online platforms is the ability to learn from others’ experiences. I’ve seen posts about techniques, gear recommendations, and even travel tips that have helped me refine my skills. Plus, participating in challenges or themed photo contests can push me out of my comfort zone and encourage creativity. Just the other day, I joined a “bug of the week” challenge, which motivated me to explore different areas and look for unique insects.

Local Photography Groups and Workshops

Beyond the digital realm, I’ve found local photography groups and workshops to be invaluable. Meeting other photographers in person not only enhances my skills but also builds friendships. I remember attending a macro photography workshop at a nearby nature reserve. It was an eye-opening experience where I learned new techniques and received hands-on guidance from an experienced photographer. The camaraderie was uplifting, and sharing our experiences while shooting together made the day unforgettable.

Many communities host regular meetups where photographers of all skill levels can gather, share tips, and explore new locations together. I’ve made some great friends this way, and having a buddy to shoot with makes those long waits for the perfect shot feel much shorter. Plus, the exchange of ideas and constructive feedback is always beneficial for growth. Whether I’m at a local park or a distant wilderness, knowing I have a support network makes my photography journey all the more enjoyable.

Frequently Asked Questions

What is macro photography?

Macro photography is the art of capturing stunning close-up images of small subjects, revealing details that the naked eye cannot see. It allows photographers to tell a story about nature’s smallest wonders.

What essential gear is needed for macro wildlife photography?

Essential gear for macro wildlife photography includes a DSLR or mirrorless camera with a macro lens, a tripod for stability, lighting options like a small flash, and reflectors to enhance light on subjects.

Where are some affordable destinations for wildlife photography?

Affordable destinations for wildlife photography include national parks like Yellowstone and Yosemite, wildlife reserves, and local nature trails, which often provide diverse ecosystems without high costs.

What tips are there for packing light for a photography backpacking trip?

To pack light, stick to essential gear, use multi-purpose tools like a lens cleaning kit that doubles as a small tripod, and plan outfits that can be mixed and matched to reduce the number of clothing items needed.

When is the best time to go for macro wildlife photography?

Spring is often the best time for macro wildlife photography as flowers bloom and insects emerge. Early mornings and late afternoons are ideal for softer light, while fall offers unique colors and opportunities for different species.

How can one find budget-friendly accommodations while traveling for photography?

Budget-friendly accommodations can be found by searching for hostels, campgrounds, or local Airbnb rentals. Camping can be particularly advantageous as it allows photographers to stay close to nature.

What transportation options can help save money on photography trips?

Using public transportation can be cheaper than renting a car, and carpooling with fellow photographers can help share costs. Comparing travel costs with apps can also lead to significant savings.

What techniques can improve macro photography shots?

Focusing on the eyes of subjects, practicing patience while waiting for the perfect moment, and experimenting with different angles can significantly enhance macro photography shots.

What are some post-processing tips for macro photography?

Post-processing tips include using free or low-cost editing tools for basic adjustments, enhancing exposure and contrast, cropping distractions from images, and selectively sharpening details to draw attention to key areas.

How can photographers connect with others in the macro photography community?

Photographers can connect with others through online communities and forums, as well as local photography groups and workshops, which offer opportunities for skill enhancement and friendship-building.

Top Destinations for Stunning Macro Wildlife Photography

If you’re captivated by the tiny wonders of the natural world, macro wildlife photography is a thrilling adventure waiting for you. Let’s explore the essence of this art form and how to get started! Read Interesting article: Capture Nature’s Wonders: Macro Wildlife Photography Tips

Top Destinations for Stunning Macro Wildlife Photography

Understanding Macro Wildlife Photography

What is Macro Wildlife Photography?

Macro wildlife photography is all about capturing the beauty of small creatures and intricate details in nature that often go unnoticed. I remember the first time I peered through my macro lens and discovered a whole new world. Suddenly, a simple ant became a marvel with its tiny hairs glistening in the sunlight. This art form typically involves photographing subjects at a 1:1 magnification ratio or greater, allowing us to see details like the delicate patterns on a butterfly’s wing or the vibrant colors of a flower’s pollen. It’s a unique blend of patience, skill, and an eye for extraordinary moments.

Essential Equipment for Macro Photography

When diving into macro photography, having the right gear is crucial. My journey began with a good quality macro lens, which can make all the difference. These lenses are specifically designed for close-up work, allowing for sharp focus and stunning detail. I often recommend using a lens with a magnification of at least 1:1, like the Canon EF 100mm f/2.8L or the Nikon AF-S VR Micro-NIKKOR 105mm.

In addition to a macro lens, a sturdy tripod is essential. Trust me; it can be a game-changer for maintaining stability when shooting at close distances. I learned the hard way, often ending up with blurry shots due to camera shake. A tripod allows you to experiment with different angles and lighting without worrying about holding the camera steady.

Don’t forget about lighting! Natural light can be beautiful, but it can also be harsh. I often bring along a reflector or a ring flash to help illuminate my subjects without creating harsh shadows. A remote shutter release can also be a handy tool, letting you trigger the camera without touching it, which minimizes vibrations.

Techniques for Capturing Stunning Macro Shots

Mastering macro photography techniques takes time, but I’ve found a few tricks that can significantly enhance your shots. First, try to get as low as possible to the ground or your subject. This perspective creates depth and allows for a more intimate view of your subject. I often lay flat on my stomach, which not only helps capture unique angles but also connects me more with my surroundings.

Focus stacking is another technique I’ve enjoyed experimenting with. This involves taking several photos at different focus points and later combining them in post-processing. It’s particularly useful when photographing subjects with intricate details, like the delicate lines on a leaf or the fine hairs on an insect. While it may take more time, the results can be breathtaking. Read Interesting article: Mastering Safari Photography: Techniques for Amazing Wildlife Shots

Don’t overlook the importance of composition. I’ve learned that using the rule of thirds can make a significant difference in my photos. Breaking the frame into a grid and placing the subject along these lines or at their intersections often creates a more balanced and engaging photo. I also enjoy experimenting with negative space, allowing my subject to stand out against a soft background.

Finally, practice patience. Wildlife can be unpredictable. I’ve spent hours waiting for the perfect moment when a dragonfly lands just right or when the sunlight catches a dew drop on a leaf. Sometimes, it’s about being in the right place at the right time, and other times, it’s about waiting for nature to gift you that perfect shot.

Macro wildlife photography is an incredibly rewarding experience. It’s not just about the photos; it’s also about connecting with nature in a way that many miss. I encourage everyone to grab a camera, step outside, and see what tiny wonders await. Whether it’s the intricate details of your backyard or the exotic creatures of far-off lands, there’s a whole world to explore through the lens.

Top Destinations for Macro Wildlife Photography

The Amazon Rainforest

Unique Species to Photograph

The Amazon Rainforest is a treasure trove for macro wildlife photography. I remember feeling a rush of excitement when I first entered this vibrant ecosystem. The sheer variety of life is astounding; you can find everything from iridescent butterflies to bizarre insects that look like they’re from another planet. One of my favorite subjects to photograph was the Leafcutter Ant. Watching them carry pieces of leaves back to their colony made for some captivating shots. The rainforest also hosts an array of colorful frogs, like the Blue Poison Dart Frog, which pops brilliantly against the lush green backdrop. I recommend keeping an eye out for the exquisite details in their skin patterns, too—they tell a story all on their own.

Best Time to Visit

When planning a trip to the Amazon, I found that the dry season, which usually runs from June to November, is the best time for macro photography. The weather is more predictable, and the lower water levels make it easier to access some of the more remote areas. Plus, with fewer mosquitoes, you can focus on your photography without constantly swatting bugs away! However, I also enjoyed the rainforest’s unique vibrancy during the wet season, when everything seems to come alive.

Photography Tips for the Amazon

While exploring the Amazon, I learned that timing is crucial. Early mornings often provide the best lighting and increased animal activity. I also recommend wearing neutral colors to blend in with your surroundings. Using a macro lens with a close focusing distance is essential, as many creatures may be quite small. I found that patience is key; sometimes, just sitting quietly can yield incredible opportunities. Bringing a rain cover for your camera is also a wise idea, given the unpredictable weather.

Galápagos Islands

Iconic Wildlife and Their Habitats

The Galápagos Islands hold a special place in my heart. This archipelago is not only famous for its diverse wildlife but also offers some unique macro photography opportunities. From the iconic Galápagos tortoises to the vibrant marine iguanas, there’s so much to capture. I particularly enjoyed photographing the Galápagos finches; their varying beak shapes and colors provide fascinating detail. The unique flora, such as the giant prickly pear cactus and the colorful marine plants, also make for stunning backgrounds.

When to Experience the Best Conditions

For optimal conditions, I suggest visiting during the warm season, which runs from December to May. The weather is mild, and many species are more active during this time. I loved being out in the field during the early morning light, when the colors seemed to pop and the wildlife was just waking up. While the islands are accessible year-round, this season offers the best chance for capturing the rich biodiversity that the Galápagos are known for.

Recommended Photography Spots

One of my favorite spots in the Galápagos was Española Island. The contrast between the blue-footed boobies and the rugged cliffs made for stunning compositions. Another great location is Santa Cruz, where you can find the Charles Darwin Research Station. Not only can you photograph the animals, but you can also learn about conservation efforts. I found that walking slowly and quietly in these areas allowed me to get closer to the wildlife without startling them, leading to some of my best shots.

Yellowstone National Park

Flora and Fauna for Macro Photography

Yellowstone National Park is a haven for nature lovers and photographers alike. My trips there have been filled with stunning landscapes and a plethora of macro subjects. While the park is famous for its large mammals, like bison and elk, I found that the smaller creatures often stole the show. Wildflowers in the spring offer a burst of color, while insects like dragonflies and butterflies emerge in the summer months. Capturing the details of dew-covered spider webs in the early morning light was one of the highlights of my photography adventures there.

Seasonal Highlights for Photographers

Visiting Yellowstone in the spring, from late April to early June, is magical. The wildflowers bloom, and the wildlife is more active, providing ample opportunities for captivating shots. I also enjoyed late summer and fall, when the colors begin to change, creating a stunning backdrop for macro photography. The golden hues of autumn foliage paired with the delicate details of insects or flowers can lead to breathtaking images.

Camera Settings for Yellowstone

When photographing in Yellowstone, I often set my camera to a higher aperture, like f/8 or f/11, to achieve a greater depth of field. This helps ensure that even small subjects are sharp and in focus. I also found that shooting in RAW format gives me more flexibility during post-processing. Lastly, don’t forget to adjust your ISO depending on the lighting conditions; keeping it low in bright sunlight helps maintain image quality.

Madagascar

Endemic Species Worth Capturing

Madagascar is another dream destination for macro photographers. The island is home to many endemic species, meaning you won’t find them anywhere else in the world. I was amazed by the unique chameleons, some of which can change color right before your eyes. The lemurs are also a joy to photograph, but don’t overlook the smaller creatures! Leaf insects and various species of orchids are just waiting to be captured through your lens.

When to Plan Your Visit

The best time to visit Madagascar for macro photography is during the dry season from April to October. I found that the weather is mild, making it perfect for exploring the diverse landscapes. Spring is particularly beautiful when many plants are in bloom, offering vibrant colors and a variety of subjects to photograph.

Local Tips for Macro Photography

While in Madagascar, I learned that hiring a local guide can greatly enhance your experience. They know the best spots and can help you find hidden gems that you might miss on your own. I also found that using a circular polarizer filter helped reduce glare and enhance colors, especially when photographing lush foliage. Lastly, be prepared for a bit of trekking—some of the most rewarding shots come from venturing off the beaten path!

Great Barrier Reef

Underwater Macro Photography Opportunities

The Great Barrier Reef is a dream come true for underwater macro photography. I was blown away by the vibrant underwater world, filled with colorful fish, coral, and other marine life. Photographers can capture incredible details, like the intricate patterns on a clownfish or the delicate textures of coral. There’s just something magical about the way the light filters through the water, creating stunning backgrounds for your subjects.

Best Dive Spots for Macro Shots

Some of my favorite dive spots included Cod Hole and the Ribbon Reefs. These areas are known for their rich biodiversity and often have excellent visibility. I found that diving in the early morning or late afternoon offered the best lighting conditions, enhancing the colors of the underwater world. If snorkeling is more your speed, look for spots like the Agincourt Reef, where you can still find plenty of macro opportunities.

Equipment Considerations for Underwater Photography

When it comes to underwater macro photography, having the right gear is crucial. I recommend investing in an underwater housing for your camera to protect it from saltwater. A good macro lens is also essential to capture close-up details. I learned to use a strobe light for additional lighting, which can help illuminate subjects that may be shrouded in shadow. Remember, practice makes perfect! Getting comfortable in the water with your gear will lead to more successful shots.

Planning Your Macro Photography Trip

Best Times of Year to Travel

When I started planning my macro photography trips, I quickly realized that timing is everything. Each destination has its peak seasons, and understanding these nuances can lead to an incredible experience. For example, I found that spring and early summer are ideal for many locations, as flora and fauna are often at their most vibrant. In places like Yellowstone, late spring brings a burst of wildflowers, while in Madagascar, the dry season from April to October offers many blooming plants and active wildlife. I recommend researching specific species you want to photograph and aligning your travel dates with their peak activity periods.

In the Amazon, for instance, visiting during the dry season not only makes travel easier, but it also reveals a world of macro opportunities. I learned that some insects and amphibians are more active at certain times of the year, which could make all the difference in capturing that perfect shot. Each destination has its rhythm, and tapping into that can make your photography much more rewarding.

What to Pack for Macro Photography

Packing for a macro photography trip can be a bit of a balancing act. I always start with my camera gear. Beyond my macro lens, I make sure to bring a lightweight, portable tripod. It’s surprising how often I need it, even in the field. I also pack extra batteries and memory cards; there’s nothing worse than running out of power or space when you’re about to capture something incredible!

For clothing, I opt for lightweight, breathable fabrics that are comfortable for long hours outdoors. I also bring along a hat and sunscreen to protect myself from the sun, especially in tropical locations where I might be out for hours. A good insect repellent is a must-have too; I’ve learned that mosquitoes and other bugs can be relentless in certain areas, like the Amazon. A small first-aid kit comes in handy as well, just in case of minor scrapes or bites.

Don’t forget to bring a water bottle, too! Staying hydrated while shooting is crucial for both comfort and focus. Lastly, I always include a few plastic bags or cases to protect my gear in case the weather turns unexpectedly. After all, nature can be unpredictable!

Travel and Accommodation Tips

Finding the right accommodations can greatly enhance your macro photography experience. I’ve had my share of adventures, from camping in national parks to staying in eco-lodges in the Amazon. I’ve found that staying close to your shooting locations can save time and give you more opportunities to capture that golden hour light. In my experience, early mornings and late afternoons are often the best times for macro photography, so being nearby can be a game-changer.

When planning your travel, look for local guides who specialize in wildlife photography. They can be invaluable resources, helping you find the best spots and offering insights that can lead to incredible shots. I remember hiring a guide in Madagascar who took me to secluded areas filled with unique species I would never have found on my own.

While booking flights, I always try to arrive a day or two early to acclimate and scout the area. This time allows me to familiarize myself with the environment and plan my shooting locations. I also recommend checking online forums or social media groups for recent updates on conditions and wildlife activity in the area you’re visiting. Connecting with other photographers can provide you with tips and even inspire new ideas.

Ethics and Conservation in Wildlife Photography

Respecting Wildlife and Their Habitats

As I’ve delved deeper into macro wildlife photography, I’ve become increasingly aware of the importance of ethics and conservation. It’s vital to respect the creatures and ecosystems we’re photographing. I always strive to prioritize the well-being of my subjects. This means keeping a safe distance from wildlife, avoiding disturbance during breeding seasons, and being mindful of the habitats I am entering.

For instance, while photographing a delicate flower or a resting insect, I always make sure not to trample the surrounding vegetation. I’ve learned that a little caution can go a long way in preserving the beauty of our natural world. I’ve also found that educating myself about the species I’m photographing helps me understand their behaviors and needs, leading to more thoughtful and ethical photography.

Photography Guidelines to Follow

There are some general guidelines I like to follow to ensure my photography aligns with ethical practices. First, I always seek permission if I’m shooting in someone’s private property or protected areas. It’s not just about being courteous; it also helps in creating positive relationships with local communities and conservation efforts.

I also think about the ‘Leave No Trace’ principles. When I’m out in nature, I make sure to pack out everything I bring in and leave the environment as I found it. This way, I can enjoy the beauty of the outdoors while ensuring future generations can do the same. I’ve found that being a responsible photographer adds a rewarding layer to my experience.

Frequently Asked Questions

What is macro wildlife photography?

Macro wildlife photography focuses on capturing the beauty of small creatures and intricate details in nature that often go unnoticed, typically involving photographing subjects at a 1:1 magnification ratio or greater.

What essential equipment do I need for macro photography?

Essential equipment includes a good quality macro lens (recommended ones are the Canon EF 100mm f/2.8L and Nikon AF-S VR Micro-NIKKOR 105mm), a sturdy tripod, a reflector or ring flash for lighting, and a remote shutter release to minimize vibrations.

What techniques can enhance my macro photography?

To enhance your macro photography, try getting low to your subject for a unique perspective, experiment with focus stacking, use the rule of thirds for composition, practice patience, and be prepared to wait for the perfect moment.

When is the best time to visit the Amazon Rainforest for macro photography?

The best time to visit the Amazon for macro photography is during the dry season, which runs from June to November, as the weather is more predictable, and lower water levels make remote areas easier to access.

What are some recommended photography spots in the Galápagos Islands?

Recommended photography spots in the Galápagos Islands include Española Island, known for its blue-footed boobies and rugged cliffs, and Santa Cruz, where the Charles Darwin Research Station is located.

What is the ideal time to visit Yellowstone National Park for macro photography?

The ideal time to visit Yellowstone for macro photography is during the spring from late April to early June, as wildflowers bloom and wildlife becomes more active, offering ample opportunities for captivating shots.

When is the best time to visit Madagascar for macro photography?

The best time to visit Madagascar for macro photography is during the dry season from April to October, when the weather is mild and many plants are in bloom, providing vibrant colors and various subjects to photograph.

What should I pack for a macro photography trip?

When packing for a macro photography trip, include your camera gear, a lightweight tripod, extra batteries and memory cards, comfortable clothing, a hat, sunscreen, insect repellent, a water bottle, and plastic bags for gear protection.

How can I ensure ethical practices in wildlife photography?

To ensure ethical practices in wildlife photography, respect wildlife and their habitats, maintain a safe distance, avoid disturbing breeding seasons, follow ‘Leave No Trace’ principles, and seek permission if shooting on private property or protected areas.

What are some tips for finding the best macro photography locations?

To find the best macro photography locations, stay close to shooting sites for easy access during golden hour, hire local guides who know the area, arrive early to acclimate and scout locations, and connect with other photographers for updates and tips.

Capture Nature’s Wonders: Macro Wildlife Photography Tips

Macro wildlife photography opens up a world of stunning details often overlooked. Capturing the intricate beauty of nature’s tiny creatures can be incredibly rewarding and thrilling. Read Interesting article: Capture Underwater Wonders: A Budget Guide to Wildlife Photography

Capture Nature's Wonders: Macro Wildlife Photography Tips

Understanding Macro Wildlife Photography

What is Macro Wildlife Photography?

When I first dove into macro wildlife photography, I was fascinated by the sheer detail and beauty that I could capture through the lens. Macro photography focuses on taking extreme close-up shots of small subjects, typically at a 1:1 magnification ratio or greater. This means that the size of the subject on the camera sensor is equal to or larger than its actual size. I remember my first attempt at photographing a butterfly resting on a flower; the way I could see the tiny scales on its wings was mesmerizing. That’s the magic of macro photography—it reveals a hidden world right under our noses.

The Importance of Close-Up Shots in Wildlife Photography

Close-up shots can transform the way we perceive wildlife. While traditional wildlife photography captures animals in their habitats, macro photography exposes their intricate details, textures, and colors. I’ve found that these close-up shots tell a more personal and intimate story about the subjects. For instance, when photographing a ladybug, I noticed not just its bright red shell but also the delicate hairs on its legs and the tiny specks on its back. This level of detail can evoke emotions and create a deeper connection with the viewer. It’s a unique way to showcase the beauty of nature that often goes unnoticed.

Essential Equipment for Macro Wildlife Photography

Choosing the Right Camera

Picking the right camera for macro wildlife photography is crucial, and I’ve learned that not all cameras are created equal. A camera with a larger sensor typically provides better image quality and low-light performance. I started with a DSLR, which allowed me to change lenses and experiment. Mirrorless cameras have also become popular because they are lighter and often have excellent autofocus systems. I recommend trying out various cameras in-store to find what feels right for you, as comfort and usability can greatly impact your shooting experience.

Macro Lenses: Types and Recommendations

When it comes to lenses, macro lenses are a must. I remember the excitement of purchasing my first dedicated macro lens. They come in various focal lengths, typically ranging from 50mm to 200mm. A 90mm or 100mm lens is often a sweet spot for versatility and ease of use, allowing for comfortable working distances. I learned that longer lenses let you shoot from a distance, which is especially helpful for skittish subjects. Don’t forget to consider the aperture; a lens with a wider aperture (like f/2.8) can create beautiful background blur, making your subject pop even more.

Tripods and Stabilization Techniques

Stability is key in macro photography, where even the slightest shake can ruin a shot. I found that a sturdy tripod is invaluable, especially when shooting at slower shutter speeds. A tripod allows you to compose your shot carefully and focus on the details without worrying about camera shake. Additionally, using a remote shutter release can further enhance stability. I also experimented with handheld photography, using my body as a stabilizer by pressing my elbows against my sides. This technique works well but requires a steady hand and practice.

Lighting Equipment for Macro Photography

Lighting can make or break a macro photograph. Natural light can be beautiful, but it often isn’t reliable. I’ve learned that using external flash units or ring lights can provide the necessary illumination, especially in shaded areas or during cloudy days. A ring light, for example, wraps around your lens, providing even lighting that minimizes harsh shadows. I found that experimenting with different lighting setups helped me create images with depth and clarity, enhancing the intricate details of my subjects.

Other Essential Accessories (e.g., extension tubes, reflectors)

There are a few accessories that I consider must-haves for macro photography. Extension tubes allow you to get even closer to your subjects without investing in expensive macro lenses. I found that they work by increasing the distance between the lens and the camera sensor, which magnifies the image. Additionally, reflectors can help redirect light onto your subject, softening harsh shadows and illuminating details. I often carry a small, portable reflector in my camera bag for those spontaneous shooting opportunities in the field.

Best Techniques for Capturing Macro Wildlife

Focus Stacking for Greater Depth of Field

One of the most fascinating techniques I learned in macro wildlife photography is focus stacking. I remember feeling frustrated when I couldn’t capture the entire detail of a subject because my depth of field was too shallow. Focus stacking involves taking multiple photos of the same subject at different focus points and then merging them in post-processing. This way, you can achieve a greater depth of field, allowing every intricate detail to shine through. I’ve used this technique to photograph flowers where I wanted the petals and the stamen to be perfectly sharp, and it made a world of difference. The final image not only looked more professional but also captured the beauty of nature in a way that a single shot couldn’t.

Using Natural Light vs. Artificial Light

When I first started, I was mainly using natural light, thinking it would always give me the best results. However, I quickly learned that both natural and artificial light have their pros and cons. Natural light can create beautiful, soft images, especially during golden hour—just after sunrise or before sunset. I’ve taken some of my favorite shots during this time. On the flip side, artificial light, like a flash or LED panels, can help illuminate shadows and highlight details that might get lost in the dark. It can also be essential when shooting in thick forests or on cloudy days. I often find myself switching between the two, depending on the subject and the mood I want to convey.

Understanding Composition in Macro Shots

Composition is something I’ve had to really think about in macro photography. It’s easy to get lost in the details and forget about the overall image. I’ve found that using the rule of thirds can help create more dynamic compositions. Placing my subject off-center can lead to a more engaging image. Additionally, I often use leading lines—like the curve of a leaf or a branch—to draw the viewer’s eye towards the subject. Another tip I picked up is to include some negative space; this can highlight the subject and create a sense of calm in the image. I remember one instance where I captured a dragonfly perched on a twig with a blurred background that allowed the viewer to focus solely on the dragonfly’s vibrant colors.

Utilizing Backgrounds and Foregrounds Effectively

In macro photography, the background can make or break a shot. I learned that a cluttered background can distract from the main subject, so I often look for clean, simple backgrounds. Sometimes, I’ll even change my position or angle to find a better backdrop. Conversely, including interesting foreground elements can add depth to the image. I once shot a ladybug on a leaf, and the leaves in front added a beautiful layer to the composition. It felt like a little glimpse into its world, enhancing the story I wanted to tell. I recommend experimenting with different backgrounds and foreground elements to see how they change the feel of your photograph.

Fast Shutter Speed and Its Importance

Capturing fast-moving subjects in macro photography can be a challenge. I’ve had my fair share of blurry images, especially when photographing insects like bees or dragonflies that flit about quickly. I learned that a fast shutter speed is crucial here. I typically aim for at least 1/500 of a second or faster when shooting these lively little creatures. This allows me to freeze the action and capture those split-second moments. I remember the thrill of capturing a hummingbird mid-flight, its wings a blur but the body perfectly in focus. It’s all about being prepared and anticipating the action. I often set my camera to continuous shooting mode, which helps me capture a burst of images as the subject moves.

Choosing the Right Locations for Macro Wildlife Photography

Best Habitats for Macro Wildlife

Location is everything in macro wildlife photography. I’ve discovered that diverse habitats often yield the best subjects. Wetlands, gardens, and forests are fantastic spots where you can find a variety of insects and plants. I remember visiting a local botanical garden, and the abundance of colorful flowers attracted numerous pollinators. It’s amazing how certain locations can be teeming with life if you know where to look. I also enjoy exploring the edges of ponds and streams; the variety of life there—from tiny frogs to delicate flowers—can provide endless opportunities for macro shots.

Seasonal Considerations for Wildlife Photography

Seasons play a significant role in what you can capture. I’ve learned that spring is often the most vibrant time for macro photography, with flowers blooming and insects emerging. I find it incredibly rewarding to document the life cycles of these small creatures. Summer can be great too, but sometimes the heat can cause insects to be less active during the day. I often head out early in the morning or later in the evening to catch them at their most active. Autumn brings a new set of colors and textures, making it another fantastic season for macro work. I’ve enjoyed photographing the dew on spider webs in the early mornings of fall; the way the light catches those tiny droplets is simply magical.

Choosing the Right Locations for Macro Wildlife Photography

Popular Locations for Macro Photography (e.g., wetlands, forests)

Finding the right location for macro wildlife photography can dramatically enhance your chances of capturing stunning images. I’ve spent countless hours exploring various habitats, and I can confidently say that some places are simply teeming with life. Wetlands are one of my favorite spots to shoot. The rich biodiversity found there—from vibrant dragonflies to delicate water lilies—offers endless opportunities for close-ups. I once spent an afternoon crouching by a pond, and I was amazed at how many tiny creatures I found, including frogs that seemed to appear out of nowhere.

Forests are another fantastic option, especially for capturing insects and unique plant life. I remember stumbling upon a hidden grove filled with wildflowers swaying gently in the breeze. There were butterflies flitting from flower to flower, and I was thrilled to capture their intricate patterns and colors. When shooting in forests, I often look for areas where sunlight filters through the trees; the dappled light creates beautiful contrasts, making the subjects pop against a lush green backdrop.

Don’t overlook gardens, whether they’re public botanical gardens or your own backyard. I’ve found that these spaces can be incredibly rich in detail and diversity. When I started photographing my own garden, I was surprised by how many different species of insects I could find. Bees, moths, and even the occasional ladybug became regular subjects for my camera. I also found that the colors and arrangements of the flowers provided great opportunities to create stunning compositions. Read Interesting article: Mastering Safari Photography: Techniques for Amazing Wildlife Shots

Ethics of Wildlife Photography: Respecting Nature

As I’ve explored various locations for macro photography, I’ve become increasingly aware of the ethical considerations that come with it. It’s essential to respect the habitats and creatures we photograph. I often remind myself to leave no trace—this means not disturbing the environment or the wildlife that call it home. For example, when photographing insects, I make sure to approach slowly and quietly, so I don’t scare them away. I’ve learned that patience is key; sometimes, just standing still and waiting allows the subject to come back to a comfortable spot.

Furthermore, it’s essential to be mindful of the ecosystem. I avoid stepping on delicate plants or disturbing nests. I’ve witnessed firsthand how easily disturbed some creatures can be, especially when they feel threatened. When photographing in natural settings, I try to ensure that I’m not causing stress to the wildlife. This respect for nature not only helps protect our environment but also allows for more authentic interactions with the subjects I love to capture.

Common Wildlife Subjects for Macro Photography

Insects: Capturing the Beauty of Butterflies and Beetles

Insects are undoubtedly among my favorite subjects in macro photography. The variety of colors, shapes, and textures they display is simply breathtaking. I remember my first encounter with a butterfly; its wings were like living stained glass. Capturing that moment, I was struck by how intricate its wing patterns were. I often find myself getting lost in the details—like the tiny scales that form the wings or the delicate legs of a beetle. I’ve discovered that spending time in gardens or meadows during warmer months yields a treasure trove of insect subjects. I highly recommend setting up near flowering plants, as they attract a wide range of pollinators.

Plants and Flowers: A Macro Perspective

Photographing plants and flowers is another rewarding aspect of macro photography. I’ve found that each flower has its unique character, and capturing these details can be incredibly fulfilling. I love focusing on the intricate structures of petals and the delicate veins that run through them. When I shoot flowers, I often try to highlight the droplets of dew that cling to their surfaces in the early morning light; it adds an ethereal quality to the images. I also enjoy experimenting with different angles. Sometimes, a low angle can completely change the feel of a shot, making the flower appear larger than life.

Amphibians and Reptiles: Unique Macro Shots

Amphibians and reptiles can offer some unique macro photography opportunities. I have had some memorable experiences photographing frogs and snakes. The textures on their skin, especially the bumps and ridges, create fascinating details. I remember spotting a tiny tree frog perched on a leaf; its vibrant colors and reflective skin were a joy to capture. Patience is crucial when working with these creatures, as they can be quite skittish. I try to blend into my surroundings and wait quietly for them to reveal themselves. Each encounter is a reminder of the diverse life forms that share our world.

Birds: Capturing Details in Feathers and Feet

While I often focus on smaller subjects, I occasionally venture into photographing birds, especially when they’re perched or feeding. Macro photography allows for stunning detail capture of their feathers and feet. I remember a moment when I took a close-up shot of a hummingbird sipping nectar. The iridescent colors of its feathers were incredibly vibrant, and I was amazed by the detail I could capture. To photograph birds effectively, I often use longer lenses and ensure I keep my distance to avoid scaring them off. The challenge of capturing these beautiful creatures adds another layer of excitement to my macro adventures.

Post-Processing Tips for Macro Wildlife Photography

Editing Software Options

Post-processing can really elevate your macro wildlife photographs, and I’ve found that the right software makes all the difference. While there are many options out there, I often turn to Adobe Lightroom and Photoshop for their versatility and powerful features. Lightroom is fantastic for organizing my photos and making basic adjustments, while Photoshop allows for more intricate edits, like retouching or focus stacking. I remember when I first started; it felt overwhelming, but now I appreciate how these tools can truly enhance my images and give them a professional touch.

Basic Editing Techniques for Enhancing Macro Photos

When it comes to basic editing techniques, I’ve learned a few tricks that have significantly improved my work. First, I adjust exposure and contrast to make the details pop. I often increase the clarity slightly to enhance textures, and I play around with highlights and shadows to bring out the subtle details in my subjects. Cropping is also essential; I sometimes find that a close crop can eliminate distractions and focus the viewer’s attention on the subject. I remember one instance where cropping a photo of a dragonfly revealed the intricate details of its wings that I hadn’t noticed before.

Color Correction and Sharpening for Detail

Color correction is another crucial aspect of post-processing. I often tweak the white balance, especially if I shot in shaded areas or during overcast conditions. This adjustment can transform a dull image into one that vibrates with life. Sharpening is equally important in bringing out the fine details that macro photography is all about. I usually apply selective sharpening to ensure that I highlight the most important parts of my image without creating noise in the background. I remember how amazed I was during my first attempts; the difference was like night and day!

Creating Stunning Prints from Macro Images

Once I’ve edited my macro photographs, I love the idea of sharing them as prints. There’s something special about holding a physical copy of your work. I recommend using high-quality paper to ensure that the colors and details shine through. I often choose a glossy finish for my macro images, as it enhances the vibrancy and sharpness. I learned that the size of the print can also affect how the details are perceived; larger prints allow viewers to immerse themselves in the intricate beauty of the subjects. After printing, I enjoy framing and displaying my work—it’s incredibly rewarding to see my images on the wall.

Learning and Improving Your Macro Photography Skills

Online Courses and Workshops

One of the best ways I’ve improved my macro photography skills is through online courses and workshops. There are countless resources available, from free YouTube videos to comprehensive workshops hosted by experienced photographers. I remember attending a workshop specifically focused on macro techniques, where I learned new tips and tricks that transformed my approach. The hands-on experience and immediate feedback were invaluable, and I highly recommend seeking out similar opportunities.

Joining Photography Communities and Forums

Connecting with other photography enthusiasts can also be incredibly beneficial. I’ve joined several online communities and forums where people share their work, offer critiques, and exchange advice. It’s inspiring to see what others are creating, and I often find myself motivated to try new techniques. Engaging with fellow photographers has not only expanded my knowledge but also helped me establish valuable friendships in the photography world.

Participating in Macro Photography Challenges

I’ve found that participating in photography challenges is a fun way to push my creative boundaries. Many online communities host these challenges, where specific themes or subjects are set for participants to capture. It’s amazing how a little prompt can ignite my creativity. I remember one challenge focused on capturing insects in their natural habitat; it inspired me to explore new locations and experiment with different angles. Read Interesting article: Best Destinations for Unforgettable Safari Photography

Analyzing and Critiquing Your Work

Lastly, analyzing and critiquing my own work has been a crucial part of my growth. After each shoot, I take time to go through my images, noting what worked well and what didn’t. I sometimes ask for feedback from friends or fellow photographers, which can bring new perspectives to my work. I’ve learned that constructive criticism is an essential part of the learning process, helping me identify areas for improvement and fostering my growth as a photographer.

Showcasing Your Macro Wildlife Photography

Building a Portfolio: Tips and Best Practices

Creating a cohesive portfolio is essential for showcasing my macro wildlife photography. I’ve learned that it’s important to curate my best work, selecting images that reflect my style and the diversity of my subjects. I try to keep in mind the flow of the portfolio, ensuring a balance between colors, subjects, and techniques. I remember the sense of pride I felt when I put my first portfolio together; it was a milestone in my photography journey.

Sharing on Social Media Platforms

Social media has been a game-changer for sharing my work. I often post my macro images on platforms like Instagram and Facebook, where I’ve found a supportive community of fellow photographers and nature lovers. Engaging with my audience, sharing my process, and receiving feedback has been incredibly rewarding. I’ve also discovered that using relevant hashtags can help my work reach a broader audience, which has led to some exciting opportunities.

Entering Photography Competitions

Entering photography competitions is another way I showcase my work. I’ve participated in both local and international contests, and each experience has taught me something new. Winning or even just getting recognized can be a huge confidence boost. I remember the thrill of receiving an honorable mention in a nature photography competition; it motivated me to keep pushing my boundaries and exploring new subjects.

Publishing Your Work: Articles and Blogs

Lastly, I’ve found that writing articles and blogs about my experiences and techniques not only helps me reflect on my journey but also shares my passion with others. I enjoy documenting my adventures, sharing tips, and inspiring fellow photographers. It’s incredibly fulfilling to contribute to the photography community and connect with others who share my enthusiasm for macro wildlife photography.

Final Thoughts

Macro wildlife photography has been a transformative journey for me. It has taught me to appreciate the tiny wonders of nature and has pushed me to refine my skills continuously. Each photograph tells a story, revealing a world that often goes unnoticed. I encourage anyone interested in this art form to explore, learn, and express their creativity. Remember, the beauty lies not just in the final image but in the experience of capturing it. Let your passion guide you, and who knows what incredible moments you’ll discover along the way!

Frequently Asked Questions

What is macro wildlife photography?

Macro wildlife photography focuses on taking extreme close-up shots of small subjects, typically at a 1:1 magnification ratio or greater, revealing intricate details and beauty that often go unnoticed.

Why are close-up shots important in wildlife photography?

Close-up shots transform our perception of wildlife by exposing intricate details, textures, and colors, creating a more personal and intimate story about the subjects.

What type of camera is recommended for macro wildlife photography?

A camera with a larger sensor is recommended for better image quality and low-light performance. Both DSLRs and mirrorless cameras can be suitable, depending on personal comfort and usability.

What lens is best for macro wildlife photography?

Macro lenses, typically ranging from 50mm to 200mm, are essential. A 90mm or 100mm lens is often ideal for versatility and comfortable working distances.

How important is lighting in macro photography?

Lighting is crucial in macro photography. Natural light can be beautiful but unreliable, so using external flash units or ring lights can provide necessary illumination, especially in shaded areas.

What is focus stacking in macro photography?

Focus stacking involves taking multiple photos of the same subject at different focus points and merging them in post-processing to achieve greater depth of field and detail.

What are some best habitats for capturing macro wildlife?

Wetlands, gardens, and forests are excellent habitats for macro wildlife photography, as they often host a variety of insects and plants.

How do seasons affect wildlife photography opportunities?

Seasons influence what can be captured; spring is vibrant with blooming flowers and active insects, while autumn offers new colors and textures for macro work.

What are some common subjects for macro wildlife photography?

Common subjects include insects, plants and flowers, amphibians and reptiles, and occasionally birds, each offering unique details and opportunities for stunning macro shots.

What are some recommended post-processing techniques for macro photography?

Basic editing techniques include adjusting exposure and contrast, color correction, and sharpening details. Software like Adobe Lightroom and Photoshop are commonly used for these tasks.

Explore Underwater Wildlife: Budget Backpacking Photography Guide

Imagine gliding through crystal-clear waters, a vibrant world of marine life unfolding before your eyes. If this sounds like your dream adventure, then diving into underwater wildlife photography might be just the ticket! For those interested in capturing stunning images while being budget-conscious, Affordable Underwater Wildlife Photography Tips for Backpackers is a fantastic resource.

Explore Underwater Wildlife: Budget Backpacking Photography Guide

Understanding Underwater Wildlife Photography

What is Underwater Wildlife Photography?

Underwater wildlife photography is a captivating way to document the beauty of marine ecosystems. It combines the thrill of exploration with the art of photography, allowing us to capture stunning images of creatures that most people never get to see in their natural habitat. When I first ventured into this realm, I was struck by how different everything looked beneath the surface. Fish glided gracefully through the water, corals bloomed in vibrant colors, and the light danced in mesmerizing patterns. Each dive felt like stepping into a dream.

Importance of Underwater Ecosystems

Underwater ecosystems are some of the most biodiverse environments on our planet. They play crucial roles in maintaining ecological balance, supporting everything from the tiniest plankton to the largest whales. I’ve learned that coral reefs, for instance, are often called the “rainforests of the sea” due to their incredible variety of life. As photographers, we have a unique opportunity to raise awareness about these fragile ecosystems through our images. Every shot I take is a reminder of what we stand to lose if we don’t protect our oceans. For more insights on this subject, check out Eco-Conscious Adventures: Best Wildlife Conservation Trips.

Common Types of Underwater Wildlife

As I began my underwater photography journey, I was amazed at the variety of wildlife I encountered. Here are a few common types I often see:

  • Fish: From the vibrant clownfish hiding among anemones to the majestic parrotfish munching on coral, the diversity is astounding.
  • Marine Mammals: Dolphins and seals often grace us with their presence, adding an exciting dynamic to any dive.
  • Coral Reefs: These living structures are not only beautiful but also home to countless species.
  • Invertebrates: Creatures like octopuses, sea stars, and jellyfish showcase incredible designs and behaviors.

During my dives, I’ve found that each encounter tells a story. The playful dolphins I swam with one day and the shy seahorses hiding in the seagrass the next—these moments stay with me long after I’ve emerged from the water.

Essential Gear for Budget Backpacking

Underwater Cameras: Choosing the Right One

When it comes to capturing underwater wildlife, your camera is your lifeline. On a budget, I recommend starting with a good quality point-and-shoot camera that’s waterproof. I once used a simple compact camera with an underwater case, and I was pleasantly surprised by the results. If you want to invest a bit more, consider a mirrorless camera with a dedicated underwater housing. The key is finding something that fits your needs without breaking the bank.

Accessories: Lenses, Lights, and Filters

To enhance your underwater photography, think about the accessories you’ll need. For me, a wide-angle lens was a game changer. It allowed me to capture sweeping shots of coral reefs and schools of fish. I also found that a good underwater light is essential, especially for deeper dives where light diminishes. I invested in a budget-friendly dive light, and it transformed my photos, making colors pop in ways I hadn’t imagined. For more tips on capturing underwater wonders, visit Capture Underwater Wonders: A Budget Guide to Wildlife Photography.

Protective Housing and Maintenance

Protective housing is crucial for any camera used underwater. I learned this the hard way when my first dive nearly ended in disaster because of a leaky case. Always check seals and gaskets before you dive, and rinse your gear with freshwater after each use. Keeping everything in good shape will save you money in the long run.

Budget-Friendly Alternatives

If you’re looking for budget-friendly alternatives, consider renting gear instead of buying it outright. Many dive shops offer rental options, and it’s a great way to try different equipment before making a commitment. I’ve also seen many photographers using smartphone housings, which can yield impressive results, especially if you’re just starting out. Technology has come a long way, and some smartphones take stunning underwater photos!

Embarking on an underwater photography adventure is not just about capturing breathtaking images; it’s about connecting with nature in a way that few get to experience. Every dive has taught me something new, whether it’s about the creatures I encountered or the gear that helped me document it all. With the right mindset and equipment, we can all share the beauty of our oceans, one photograph at a time.

Best Locations for Underwater Photography on a Budget

Top Budget-Friendly Destinations

As I began to explore underwater photography, I quickly realized that the right location can make all the difference. Some of my most memorable dives have taken place in budget-friendly spots that offered incredible marine life without breaking the bank. One of my favorite destinations is the Caribbean. Places like Bonaire and Cozumel are well-known for their vibrant coral reefs and diverse marine life. I remember swimming alongside schools of colorful fish while enjoying the warm, crystal-clear waters. Plus, many dive shops offer affordable packages that include rental gear and guided tours.

Another fantastic location is Southeast Asia, particularly Thailand and Indonesia. The cost of living is relatively low, allowing for affordable accommodation and diving experiences. I found that many dive centers offer packages that cater to photographers, which can be a great way to connect with like-minded individuals. During a trip to Komodo National Park, I was blown away by the underwater scenery—pristine reefs and a vast array of marine life made every dive unforgettable.

National Parks and Marine Reserves

Visiting national parks and marine reserves can also provide stunning underwater photography opportunities. I’ve had great success in places like the Florida Keys National Marine Sanctuary. The diverse ecosystems here are easily accessible and often have low entry fees. I remember diving in the John Pennekamp Coral Reef State Park and was amazed at how much life thrived in the protected waters. The park is known for its clear visibility, allowing for some of the best underwater photography I’ve ever captured.

Another excellent option is the Great Barrier Reef in Australia. While it can be a bit pricier, many tours are available that cater to budget travelers. I found that booking in advance can help reduce costs significantly. Diving in the reef was a dream come true; the sheer diversity of marine life and the breathtaking coral formations made it worth every penny.

Local Dive Shops and Tours

Don’t underestimate the power of local dive shops! They often have the best insight into affordable diving spots and can connect you with small group tours that won’t break the bank. I’ve stumbled upon some of my best experiences by chatting with locals. For example, while diving in Hawaii, I visited a small dive shop on the Big Island and discovered a hidden gem of a dive site that was relatively unknown to tourists. It turned out to be one of the most vibrant marine environments I’ve ever seen, filled with colorful fish and even a few sea turtles!

Another tip I’ve learned from my travels is to look for dive shop specials during off-peak seasons. This can significantly lower costs while still offering fantastic diving experiences. I’ve often found that diving in the shoulder seasons—just before or after the major tourist rush—can yield beautiful underwater experiences and fewer crowds on the boats.

Planning Your Trip

When to Visit: Seasonal Considerations

Timing can have a huge impact on your underwater photography experience. I’ve learned that different locations have specific seasons that are best for diving. For example, if you’re planning a trip to the Caribbean, the dry season, typically from December to April, is ideal. The visibility is usually better, and you can expect calmer seas. However, I’ve also found that traveling during the off-peak season can offer some unique opportunities, such as fewer divers and the chance to see migratory marine life.

In contrast, places like Thailand are best visited between November and April when the weather is cooler and less rainy. I made the mistake of diving in the monsoon season once, and let me tell you, it was not my best experience. The visibility was poor, and the conditions were challenging. So, researching the seasonal patterns for your chosen destination can make a significant difference in the quality of your dives.

Budgeting for Travel: Costs to Consider

When planning your underwater photography adventure, budgeting is key. I’ve learned the hard way that it’s essential to account for more than just flights and accommodation. Think about diving costs, equipment rentals, food, and transportation. I usually set aside a certain amount specifically for diving, as it tends to be one of the pricier aspects of the trip. I also recommend using apps or websites that help track your expenses so you don’t overspend.

Additionally, booking flights well in advance can save you a lot of money. I remember finding an incredible deal on flights to Bali by being flexible with my travel dates. This saved me enough to splurge a bit on a guided dive trip, which was worth every penny!

Accommodation Options: Where to Stay

Finding the right place to stay can greatly influence your experience. I often seek out dive resorts that cater specifically to divers. They usually offer package deals that include accommodation, meals, and diving. I once stayed at a charming dive lodge in Belize, and it turned out to be a fantastic decision. Not only did I have easy access to boats, but the staff was incredibly knowledgeable and passionate about marine conservation, which made my experience even richer.

For budget travelers, hostels or guesthouses can be a great option. I’ve met so many fellow photographers and divers in these settings, leading to some unforgettable shared experiences. Plus, they often provide tips and recommendations that can enhance your diving adventures.

Transportation: Getting Around on a Budget

Lastly, consider how you’ll get around your chosen destination. I’ve found that local transportation options such as buses, shuttles, or even bike rentals can be both economical and convenient. In places like Thailand, I often used tuk-tuks or shared taxis to save money while exploring nearby dive sites. Just be sure to ask locals about the best ways to get around; they often have the best recommendations for navigating without breaking the bank.

Photography Techniques for Underwater Wildlife

Understanding Water Conditions and Light

One of the first things I learned when diving into underwater photography is how crucial water conditions are for capturing great images. The clarity of the water can make or break your shots. During my dives, I’ve often found that the best visibility comes in the early morning or late afternoon when the sun is lower in the sky. This softer light creates a magical glow that’s perfect for photography. However, I also discovered that diving after rain can lead to murky waters, so planning around weather patterns is vital.

Another aspect I noticed is how water absorbs colors. In deeper depths, reds and oranges tend to disappear first, while blues and greens remain. I’ve experimented with this by adjusting my settings to compensate for these changes. Sometimes, I even play with white balance settings to bring back the reds and yellows in my images. Understanding these nuances has helped me take more vibrant and engaging photos.

Composition Tips for Underwater Shots

Composition is everything in photography, and underwater photography is no different. I remember my early days when I would focus too much on the subjects and forget about the background. I’ve learned that creating a balanced composition can transform an ordinary shot into something spectacular. One technique I love is the rule of thirds. By positioning my subject off-center, I find that the image feels more dynamic.

Another tip I swear by is framing my shots. I often use natural elements like coral formations or rock structures to frame my subjects. This not only adds depth but also guides the viewer’s eyes to where I want them to look. I’ve also found that getting low and shooting upwards can create a dramatic perspective, highlighting my subjects against the surface light. Every dive opens up a new opportunity to experiment with composition, and that’s part of the excitement!

Using Natural Light vs. Flash Photography

In my journey, I’ve experimented with both natural light and flash photography, and each has its own advantages and challenges. When I first started, I relied mostly on natural light, especially in shallower waters. The sunlight filtering through the surface creates an ethereal quality in my images. I particularly love shooting during the golden hours—around sunrise or sunset—when the light is warm and inviting. However, I’ve noticed that as I dive deeper, natural light diminishes quickly, making it difficult to capture the vibrant colors of marine life.

This is where flash photography comes in. I decided to invest in a strobe light, and it was a game changer. It allows me to illuminate my subjects in deeper waters, bringing out colors that would otherwise seem dull. I’ve learned to be cautious with my flash usage, though, as it can startle some marine animals. By using it sparingly and at a distance, I can capture stunning images without disrupting the wildlife.

Best Practices for Capturing Movement

Capturing movement underwater is both challenging and rewarding. I often find that the ocean is alive with action—fish darting, rays gliding, and even the gentle sway of coral. To effectively capture this movement, I’ve learned to adjust my shutter speed accordingly. A faster shutter speed helps freeze the action, while a slower one can create beautiful motion blur, giving a sense of fluidity to my shots.

I also try to anticipate movement. For example, when I see a school of fish, I focus on where they’re heading and position myself accordingly. Patience is key. I’ve spent long minutes waiting for the perfect moment, and it’s always worth it when I finally get that shot of a fish swimming gracefully through the water. I also find that capturing subjects in their natural behavior—like a sea turtle swimming or a dolphin playing—adds life to my photos, making them more engaging.

Ethical Considerations in Underwater Photography

Respecting Marine Life and Their Habitats

As I’ve delved deeper into underwater photography, I became increasingly aware of the need to respect marine life and their habitats. Every dive reminds me that we are visitors in their world. I always strive to minimize my impact on the environment. One rule I follow is to never touch or disturb the wildlife or coral. I once witnessed a photographer trying to coax a turtle closer by reaching out, and it made me realize how important it is to maintain a respectful distance.

I also advocate for responsible photography practices, such as avoiding flash photography near sensitive species like jellyfish or certain fish that may be easily startled. By doing so, we help protect the delicate balance of the ecosystems we cherish. I believe that our goal as photographers should be to showcase the beauty of marine life while promoting conservation efforts.

Responsible Diving Practices

Alongside respecting marine life, I’ve learned the importance of responsible diving practices. I always make sure to follow the guidelines set by dive operators and marine parks. For instance, I avoid diving in protected areas unless permitted, ensuring I’m not contributing to any potential harm. I also carry a mesh bag to collect any trash I find underwater, doing my part to keep the ocean clean. It’s a small effort, but I’ve seen how collective actions can lead to positive change.

Additionally, I always check my buoyancy to avoid accidentally damaging the coral or stirring up sediment. It took me a while to master buoyancy control, but it’s essential for both my safety and the health of the underwater environment. I often remind myself that we are not just there to take photos; we’re there to appreciate and protect these amazing ecosystems.

Legal Regulations and Permits

Before I head out on a dive trip, I always research the local regulations regarding underwater photography. Some areas require permits for photography or diving, especially in national parks or marine reserves. I remember when I visited a protected area in Belize and learned that certain species were off-limits for photography. Understanding these rules is crucial not only to avoid fines but also to ensure that I’m contributing positively to conservation efforts.

Staying informed about local laws also helps me support sustainable tourism. By choosing operators who follow ethical guidelines and contribute to conservation, I feel more connected to the places I visit. I often share this information with fellow photographers, as I believe that raising awareness can lead to a more responsible diving community.

Frequently Asked Questions

What is underwater wildlife photography?

Underwater wildlife photography is a captivating way to document the beauty of marine ecosystems, combining exploration with photography to capture stunning images of marine creatures in their natural habitat.

Why are underwater ecosystems important?

Underwater ecosystems are among the most biodiverse environments on Earth, playing crucial roles in maintaining ecological balance and supporting a wide range of marine life, from plankton to whales.

What types of wildlife can be commonly found when underwater photography?

Common types of wildlife encountered in underwater photography include fish, marine mammals, coral reefs, and invertebrates like octopuses and jellyfish.

What essential gear is recommended for budget underwater photography?

A good quality point-and-shoot waterproof camera is recommended for budget underwater photography, along with accessories like wide-angle lenses, dive lights, and protective housing for the camera.

What are some budget-friendly destinations for underwater photography?

Budget-friendly destinations for underwater photography include the Caribbean (like Bonaire and Cozumel) and Southeast Asia (particularly Thailand and Indonesia), where diving experiences and accommodations are affordable.

What should divers consider regarding seasonal timing for diving?

Divers should consider seasonal patterns, as certain locations have specific seasons that are ideal for diving, such as the dry season in the Caribbean from December to April or the cooler months in Thailand from November to April.

How can one budget effectively for an underwater photography trip?

Effective budgeting for an underwater photography trip involves accounting for diving costs, equipment rentals, food, and transportation, and booking flights well in advance to save money.

What are some composition tips for underwater photography?

Composition tips for underwater photography include using the rule of thirds, framing shots with natural elements like coral, and experimenting with angles such as shooting from a low perspective upwards.

What ethical considerations should underwater photographers keep in mind?

Underwater photographers should respect marine life and their habitats, avoid disturbing wildlife, follow responsible diving practices, and stay informed about local regulations and permits for underwater photography.

How can one capture movement effectively in underwater photography?

To capture movement effectively, adjust shutter speed based on the subject’s motion, anticipate movements, and be patient to wait for the perfect moment to photograph marine life in action.

Affordable Underwater Wildlife Photography Tips for Backpackers

Underwater wildlife photography can be a thrilling adventure for backpackers, combining the beauty of nature with the thrill of exploration. With the right tips and tricks, capturing stunning underwater images doesn’t have to break the bank. Read Interesting article: Capture Underwater Wonders: A Budget Guide to Wildlife Photography

Affordable Underwater Wildlife Photography Tips for Backpackers

Understanding Underwater Wildlife Photography

What is Underwater Wildlife Photography?

Underwater wildlife photography is a captivating art form that focuses on capturing images of marine life in their natural habitats. From vibrant coral reefs teeming with life to the graceful movements of fish, this type of photography allows us to witness the underwater world like never before. I remember my first dive, filled with excitement and a hint of nervousness as I descended beneath the waves. I wanted to capture the beauty surrounding me, and every click of the shutter felt like a small triumph. It’s more than just taking pictures; it’s about telling a story and sharing the wonders of the ocean with others.

Importance of Underwater Photography for Conservation

One of the most important aspects of underwater wildlife photography is its role in conservation. Through our images, we can raise awareness about the fragility of marine ecosystems and the challenges they face. I’ve seen how a powerful photograph can spark interest and concern, inspiring people to take action for the protection of these environments. By showcasing the beauty of underwater life, we encourage others to appreciate and advocate for the oceans. I feel a sense of responsibility as a photographer to not only capture these moments but to also promote the conservation efforts that are so crucial for our planet. Read Interesting article: Top Tips for Eco-Friendly Wildlife Conservation Tours

Essential Gear for Backpackers

Waterproof Cameras

Having the right gear is essential for underwater photography. For backpackers, I recommend investing in a waterproof camera. There are many affordable options available that provide excellent quality without weighing you down. I personally use a compact waterproof camera that fits easily into my backpack. It’s lightweight yet durable, and it doesn’t require a big investment. If you’re unsure which camera to choose, do some research and read reviews. There are plenty of options that cater to both beginners and more experienced photographers.

Housing and Filters

If you already own a camera that isn’t waterproof, don’t worry! You can buy a waterproof housing to protect it while you dive. I found that housing can be a bit pricey, but it’s worth every penny for the peace of mind it offers. Filters are also essential for underwater photography because they help adjust the colors that can get distorted underwater. A red filter, for example, can help bring back the vibrant colors of your surroundings. I learned this the hard way after taking my first underwater shots, which turned out to be overly blue and dull.

Lighting Equipment

Good lighting can make or break your underwater photos. Natural light is often limited below the surface, so consider bringing along a small, affordable dive light. I found that even a simple LED dive light can greatly enhance my images by illuminating the subject without creating harsh shadows. The key is to experiment with different angles and distances to see how the light interacts with the water.

Other Accessories (e.g., buoyancy control, lens cleaning tools)

In addition to your camera and lighting, there are a few other accessories that every underwater photographer should consider. Buoyancy control devices help you maintain your position in the water, which is crucial for getting that perfect shot. I learned this the hard way during a dive where I struggled to stay still while trying to capture a curious octopus. Also, don’t forget lens cleaning tools! Water droplets and salt can easily smudge your lens, so having a simple microfiber cloth will ensure your shots remain clear. I always pack extra cleaning supplies, as I’ve experienced how quickly they can get gritty underwater.

Budget-Friendly Photography Techniques

Using Natural Light Effectively

When diving, utilizing natural light can significantly improve your photography without additional costs. I learned to dive during the day when sunlight is strongest. I position myself to capture the light filtering through the water, creating beautiful effects in my images. It’s amazing how the interplay of light and water can transform an ordinary shot into something magical. Always remember to adjust your settings if your camera allows it, to account for the varying light conditions.

Mastering Composition Underwater

Composition is just as important underwater as it is on land. I’ve found that following the rule of thirds can create more dynamic images. Placing the subject off-center often leads to more engaging photos. Additionally, try to get close to your subjects. Water can distort images, so filling the frame with your subject can make a huge difference in clarity and impact. I often take a deep breath and slowly approach my subjects to ensure I don’t startle them, allowing for more natural behavior that results in better photographs.

Utilizing Simple Editing Software for Enhancements

Editing is a vital part of the photography process, especially for underwater images that may need some adjustments. Fortunately, there are many free or affordable editing software options available. I use a simple program that allows me to enhance colors, adjust brightness, and crop images easily. I’ve found that a little tweaking can turn a good photo into a great one. Sharing my final edits with friends and family has made me appreciate the beauty of my underwater adventures even more. Read Interesting article: Explore Wildlife Photography Tours: Budget-Friendly Guide

Best Locations for Underwater Wildlife Photography

Top Affordable Destinations for Backpackers

When it comes to underwater wildlife photography, choosing the right location can make all the difference. I’ve traveled to several affordable destinations that offer incredible underwater scenes without breaking the bank. One of my favorites is the Philippines, particularly places like Apo Reef and Tubbataha. The vibrant coral reefs and diverse marine life left me in awe. The best part? There are budget-friendly accommodations and dive shops that cater to backpackers like us. I remember finding a cozy guesthouse where I could meet fellow travelers, share stories, and even team up for dives.

Another great destination is Thailand, specifically the islands of Koh Tao and Koh Lanta. The waters here are teeming with colorful fish and stunning underwater landscapes. I found that joining group dives not only reduced costs but also allowed me to bond with other enthusiasts who shared my passion. If you’re looking for a more off-the-beaten-path experience, consider heading to Honduras and exploring the Bay Islands. The vibrant marine ecosystems are simply breathtaking, and the prices were reasonable, making it a perfect spot for backpackers.

National Parks and Marine Reserves

National parks and marine reserves are fantastic places to explore underwater wildlife photography. They often offer protected environments where marine life thrives, making for stunning captures. One place that stands out for me is Biscayne National Park in Florida. The clear waters and thriving reefs provide excellent opportunities for shooting everything from colorful fish to majestic sea turtles. I highly recommend taking a guided tour, as park rangers often share insights about the unique wildlife and ecosystems.

Another gem is the Great Barrier Reef in Australia. While it can be a bit pricier, by planning ahead and staying in budget accommodations, I’ve found ways to experience its beauty without overspending. The coral formations and the sheer variety of marine life were like stepping into a different world. Plus, many parks offer educational programs that highlight the importance of conservation, which aligns perfectly with the message I aim to convey through my photography.

Local Dive Spots (e.g., lakes, rivers, coastal areas)

Don’t overlook local dive spots! Sometimes, the best underwater photography opportunities are right in our backyards. I remember visiting a nearby freshwater lake that I had completely underestimated. It turned out to be a hidden treasure filled with unique fish species and fascinating underwater plant life. I took my time exploring every nook and cranny, and I was pleasantly surprised by the stunning shots I could achieve.

Coastal areas also offer incredible opportunities. For instance, I’ve had great experiences diving along the Pacific Northwest coast of the U.S. The kelp forests and vibrant marine ecosystems provided a completely different atmosphere than tropical locations. I found that exploring these local spots not only saved me money but also gave me a newfound appreciation for the beauty in my own region.

Planning Your Underwater Photography Trip

When to Visit (Seasons and Weather Conditions)

Timing can significantly impact your underwater photography experience. I’ve learned that different seasons can bring about changes in marine life behavior, visibility, and water temperature. For instance, I often plan my trips during the dry season when the weather is more stable and visibility is at its best. I remember visiting the Caribbean in the winter months; the water was crystal clear, allowing me to capture stunning shots of schools of fish swimming through the coral.

Additionally, researching specific wildlife patterns can lead to rewarding photography experiences. Certain species, like turtles or whale sharks, have migration patterns that are predictable. I once timed a trip perfectly to coincide with the arrival of a whale shark population in Mexico, and it was one of the highlights of my photography journey. I recommend checking local dive shop websites and forums to gather insights on when to visit.

How to Research Wildlife Patterns

Researching wildlife patterns can greatly enhance your underwater photography experience. I always spend time looking into the best times to see specific marine creatures or unique underwater phenomena. Websites, social media groups, and forums dedicated to diving and underwater photography can be invaluable resources. I’ve found that connecting with local photographers or divers can provide insider tips on the best locations and times to dive.

For instance, I once joined an online group focused on diving in Indonesia, where members regularly shared their experiences and findings. This was a game changer for my photography trips! Their recommendations helped me plan my dives around the best times to witness certain species, ensuring I got those stunning shots I was after.

Permits and Regulations for Photography

It’s essential to be aware of permits and regulations when planning your underwater photography trip. Different locations may have specific rules regarding photography, especially in protected marine areas. I’ve encountered places where I needed to obtain a permit for underwater photography, and it’s always better to check ahead of time to avoid any surprises. I recall a situation where I almost missed an incredible dive because I didn’t have the required documentation. However, once I learned about the necessary permits, I made sure to plan accordingly for future trips.

Additionally, respecting wildlife and adhering to ethical photography practices is crucial. I take the time to educate myself about the dos and don’ts of underwater photography, ensuring that I’m not disturbing marine life or their habitats. This respect not only helps protect the environment but also leads to more rewarding photography experiences.

Safety Tips for Underwater Photography

Basic Diving Safety Practices

Safety should always be our top priority when diving for underwater photography. Over the years, I’ve picked up some essential safety practices that help ensure a smooth experience. First and foremost, always dive with a buddy. I can’t stress enough how much safer it is to have someone with you. There have been moments when I’ve ventured deeper into a reef, and having a friend nearby provided comfort and support. It’s also wise to communicate your plans before diving, including your entry and exit points, so that both of you are on the same page.

Another crucial aspect is to always check your gear before entering the water. I’ve learned this the hard way during a dive when I realized my tank wasn’t properly secured. A quick equipment check can save a lot of trouble later. Additionally, make sure to equalize your ears properly as you descend and ascend. I remember my first experience of not doing this—what a painful mistake! Maintaining a slow, controlled ascent is also vital to avoid decompression sickness. Following these basic practices makes your underwater adventures enjoyable and safer.

Staying Aware of Your Surroundings

Being aware of your surroundings is something I’ve come to value during my dives. The underwater world is full of surprises! I’ve had encounters with curious sea turtles and even encountered unexpected currents. Before diving, I usually take a moment to scout the area and identify potential hazards, such as rocks or strong currents. I also pay attention to the marine life around me, understanding which creatures might be more skittish or aggressive. This awareness not only helps in capturing better photos but also keeps me safe.

One of my favorite tips is to keep an eye on the surface. If you’re diving deeper, it’s easy to lose track of where you came from. I always make mental notes of landmarks or bubbles rising to the surface, which helps me navigate back easily. Additionally, I find it helpful to keep my dive computer handy to monitor my depth and remaining air supply. This way, I can focus on photography without worrying about getting lost or running low on air.

Protecting Your Gear

As much as I love capturing the wonders of the ocean, I also know that my gear is a significant investment. Protecting it is crucial. I always ensure that my camera housing is properly sealed before entering the water. I’ve had a close call where a small piece of sand got lodged in the housing seal, causing a leak. Thankfully, I caught it in time! Regularly cleaning the seals and checking for any damage can make a huge difference.

When I’m not actively shooting, I make sure to keep my camera secured with a lanyard or in a sturdy dive bag. There’s nothing worse than losing your gear to an unexpected wave or current. I also recommend keeping a silica gel pack in your camera bag to absorb any moisture that might accumulate. It’s a small addition that has saved me from dealing with foggy lenses during dives.

Lastly, after a dive, I always rinse my equipment with fresh water to remove any salt or sand. I learned that saltwater can corrode the electronics and other parts of my camera if left unattended. Taking the time to care for my gear has not only extended its life but has also given me peace of mind knowing I’m ready for the next adventure.

Post-Trip: Editing and Sharing Your Photos

Basic Editing Techniques for Underwater Images

Editing is where the magic happens after my underwater adventures. I love diving into my photos and enhancing them to reflect what I experienced. I usually start with basic adjustments like cropping and straightening the images, especially if I wasn’t able to capture them perfectly in-camera. I find that cropping helps to eliminate any distracting elements on the edges, allowing the subject to stand out more.

Color correction is another essential step. Many of my underwater shots initially have a blue or green tint due to the water. I often play with the color balance and saturation to bring back the vibrant hues of marine life. I’ve discovered that adjusting the vibrancy can make a significant difference without making the colors look unnatural. A little bit of contrast can also help in making the subjects pop against the background.

Best Platforms for Sharing Your Work

Once I’ve polished my photos, I get excited to share them with friends, family, and the photography community. Social media platforms like Instagram and Facebook have become my go-to places for showcasing my underwater photography. I enjoy connecting with other enthusiasts and sharing our experiences. The underwater photography community is incredibly supportive, and I often receive valuable feedback and encouragement on my work.

I also recommend exploring photography-specific platforms like 500px or Flickr. They allow for a more focused audience that appreciates the art of photography. Sharing my images on these platforms has opened up opportunities for networking with other photographers, and I’ve even been able to collaborate on projects. It’s a fantastic way to grow and learn from one another.

Engaging with the Photography Community

Engagement is key to building connections and improving my skills. I make an effort to comment on other photographers’ work and participate in discussions. I’ve found that sharing tips, tricks, and experiences not only enriches my knowledge but also fosters friendships within the community. Participating in photo challenges or contests has pushed me to step out of my comfort zone and try new techniques.

Additionally, attending local photography meetups or workshops has been a game changer. I’ve learned so much from hands-on experiences and from experts in the field. These gatherings are a great way to exchange ideas and to motivate one another. I believe that the more we share and connect with others, the more we grow as photographers—and that’s a beautiful journey in itself.

Frequently Asked Questions

What is underwater wildlife photography?

Underwater wildlife photography is an art form that captures images of marine life in their natural habitats, showcasing the beauty of the underwater world and telling a story through photographs.

Why is underwater photography important for conservation?

Underwater photography plays a crucial role in conservation by raising awareness about the fragility of marine ecosystems and inspiring people to take action for their protection. It encourages appreciation for the oceans and promotes conservation efforts.

What type of camera is recommended for backpackers interested in underwater photography?

Backpackers are encouraged to invest in a waterproof camera. For those who already own a non-waterproof camera, purchasing a waterproof housing can be a good alternative to protect it during dives.

What lighting equipment is useful for underwater photography?

Good lighting is essential for underwater photography. A small, affordable dive light, such as an LED dive light, can enhance images by illuminating subjects without creating harsh shadows.

What are some budget-friendly techniques for underwater photography?

Utilizing natural light effectively, mastering composition by following the rule of thirds, and using simple editing software for enhancements are all budget-friendly techniques that can improve underwater photography.

What are some recommended locations for affordable underwater wildlife photography?

Affordable destinations for underwater photography include the Philippines, Thailand, and Honduras. National parks and marine reserves, like Biscayne National Park and the Great Barrier Reef, also offer stunning opportunities, though some may be pricier.

How can I research wildlife patterns for underwater photography?

Researching wildlife patterns involves looking into the best times to see specific marine creatures or phenomena. Resources like websites, social media groups, and forums dedicated to diving can offer valuable insights and recommendations.

What basic safety practices should I follow when diving for photography?

Essential safety practices include diving with a buddy, checking gear before entering the water, properly equalizing ears during descent and ascent, and maintaining a slow, controlled ascent to avoid decompression sickness.

What basic editing techniques are recommended for underwater images?

Basic editing techniques include cropping to eliminate distracting elements, color correction to address blue or green tints, and adjusting vibrancy and contrast to enhance the subjects in the images.

What platforms are good for sharing underwater photography?

Social media platforms like Instagram and Facebook are popular for sharing underwater photography. Photography-specific platforms like 500px and Flickr are also recommended for connecting with a focused audience that appreciates the art of photography.